length MINI Countryman 2015 Owner's Manual (Mini Connected)
[x] Cancel search | Manufacturer: MINI, Model Year: 2015, Model line: Countryman, Model: MINI Countryman 2015Pages: 283, PDF Size: 6.76 MB
Page 60 of 283
Ignition onAll electrical consumers can operate. Most indi‐
cator and warning lights light up for different
lengths of time.
To save battery power when the engine is off,
switch off the ignition and any unnecessary electronic systems/power consumers.
Radio ready state and ignition off All indicator and warning lights in the displays
go out.
The ignition switches off automatically when
the driver's door is opened. Pressing the Start/
Stop button again switches the ignition back
on.
For example, the ignition is not switched off in
the following situations:▷Depress the clutch or brake pedal.▷The low beams are switched on.
Starting the engine
General information Enclosed areas
Do not let the engine run in enclosed
areas; otherwise, breathing of exhaust fumes
may lead to loss of consciousness and death.
The exhaust gases contain carbon monoxide,
an odorless and colorless but highly toxic gas. ◀
Unattended vehicle
Do not leave the car unattended with the
engine running; otherwise, it presents a poten‐
tial source of danger.
Before leaving the car with the engine running,
shift to neutral or engage transmission posi‐
tion P and set the parking brake firmly; other‐ wise, the vehicle may begin to roll. ◀
Frequent starting in quick succession
Avoid repeated futile attempts at starting
the car and avoid starting the car frequently in
quick succession. Otherwise, the fuel is not
burned or is inadequately burned, and there is
the danger of overheating and damaging the
catalytic converter. ◀
Do not wait for the engine to warm-up while
the vehicle remains stationary; start driving
right away, but at moderate engine speeds.
Do not depress the accelerator when starting
the engine.
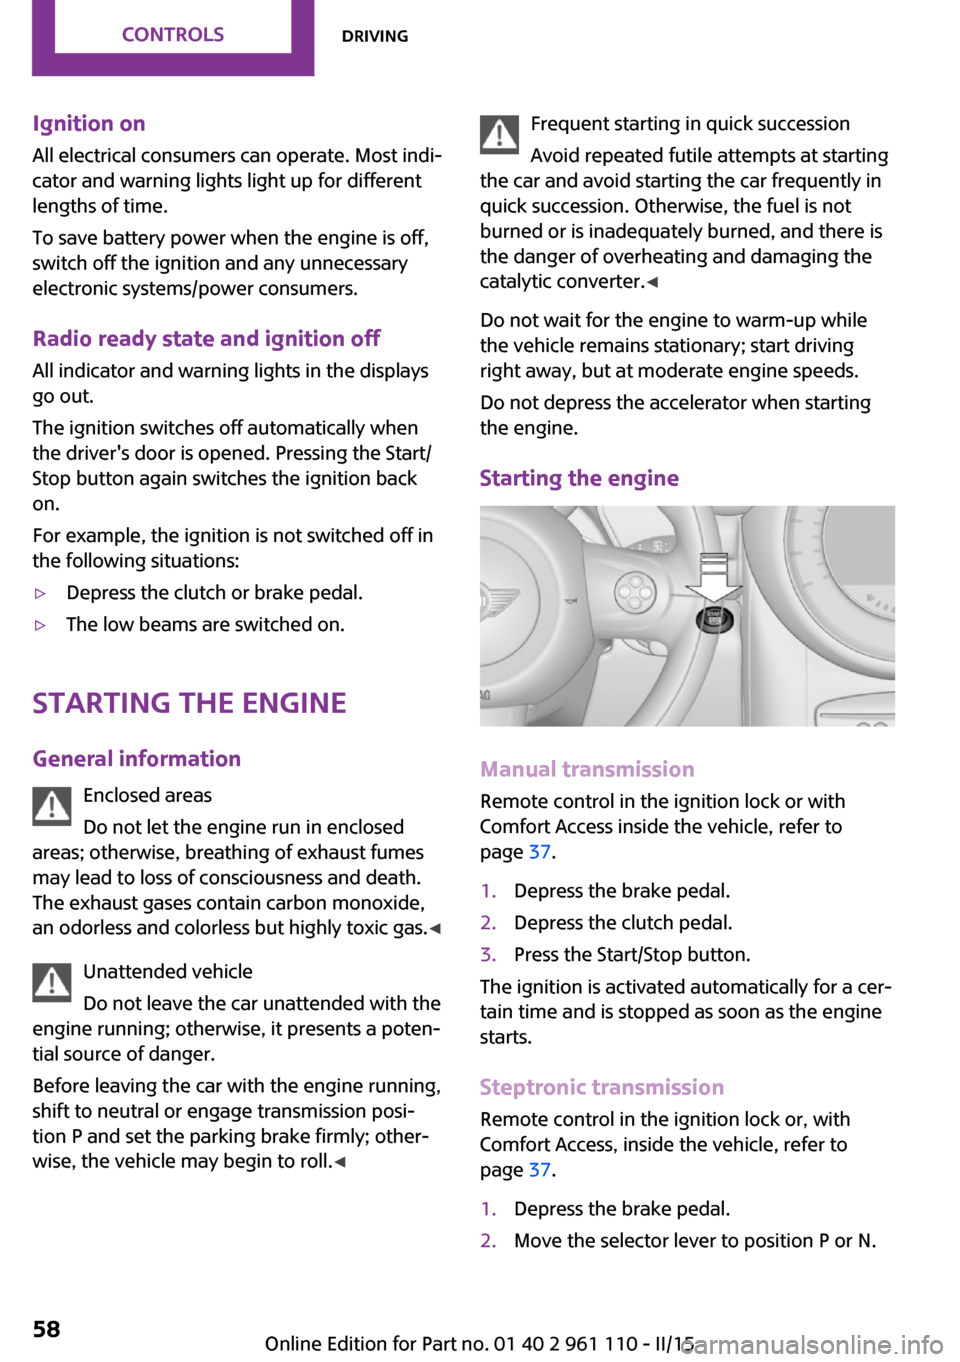
Starting the engine
Manual transmission
Remote control in the ignition lock or with
Comfort Access inside the vehicle, refer to
page 37.
1.Depress the brake pedal.2.Depress the clutch pedal.3.Press the Start/Stop button.
The ignition is activated automatically for a cer‐
tain time and is stopped as soon as the engine
starts.
Steptronic transmission
Remote control in the ignition lock or, with
Comfort Access, inside the vehicle, refer to
page 37.
1.Depress the brake pedal.2.Move the selector lever to position P or N.Seite 58CONTROLSDriving58
Online Edition for Part no. 01 40 2 961 110 - II/15
Page 143 of 283

Example: to enter a town/city in a US states
as a whole word, the language of the sys‐
tem must be English.▷Spell the entry if the spoken language and
the language of the system differ.▷Say the letters smoothly, and avoid exag‐
gerating the pronunciation and inserting
lengthy pauses between the letters.▷The methods of entry depend on the navi‐
gation data in use and the country and lan‐
guage settings.
Entering a town/city separately
The town/city can be said as a complete word.
1. Press the button on the steering
wheel.2.›City‹ or ›Spell city‹3.Wait for the system to prompt you for the
town/city.4.Say the name of the town/city, or name at
least the first three letters.5.Select a location:▷Select a recommended town/city: ›Yes‹.▷Select a different town/city: ›New
entry‹.▷Select an entry: ›Entry ...‹, for instance,
entry 2.▷Spell an entry: ›Spell city‹.6.Continue making the entry as prompted by
the system.
If there are several towns/cities with the same
name:
Towns/cities of the same name are grouped in
a list and displayed as one location followed by
an ellipsis.
1.Select an entry: ›Yes‹ or ›Entry ...‹, e. g., En‐
try 2.2.Select the desired town/city.
The town/city can also be selected from the
list on the onboard monitor:Turn the MINI joystick until the destination
town/city is selected and press the
MINI joystick.
Entering a street or intersection
separately
Enter a street and intersection in the same way
as you would enter a town/city.
Entering a house number separately Depending on the data in the navigation sys‐
tem, house numbers up to number 2,000 can
be entered.
1.›House number‹2.Say the house number.3.›Yes‹ to confirm the house number.4.›Accept destination‹
Starting destination guidance
›Start guidance‹
Adding further intermediate
destinations
›Add as another destination‹
Further intermediate destinations can be
added.
Storing a destination The destination is automatically added to the
list of last destinations.
Planning a trip with in‐termediate destinations
New trip
Various intermediate destinations can be en‐
tered for a trip. The trip destination needs to be
entered first, destination entry, refer to
page 134.
Seite 141Destination entryNAVIGATION141
Online Edition for Part no. 01 40 2 961 110 - II/15
Page 151 of 283
The Control Display changes to a black and
white display. This enables a better view of the
traffic bulletins. The day/night mode is disre‐
garded in this setting. Symbols and Points of In‐
terest are not displayed.1."Navigation"2."Map"3.Open "Options".4."Settings"5."Traffic conditions/gray map"
Symbols in the map view
Depending on the scale of the map and the lo‐
cation of the traffic obstruction along the route,
the symbols for the traffic obstructions are dis‐
played.
Additional information in the map view
Depending on the map scale, a traffic obstruc‐
tion's length, direction, and impact are dis‐
played in the map using triangles or gray bars
along the calculated route.
▷Red: traffic congestion.▷Orange: stop-and-go traffic.▷Yellow: heavy traffic.▷Green: clear roads.▷Gray: general traffic bulletins such as road
construction.
The displayed information depends on the par‐
ticular traffic information service.
Filtering traffic bulletins You can set which traffic bulletins appear on
the map.
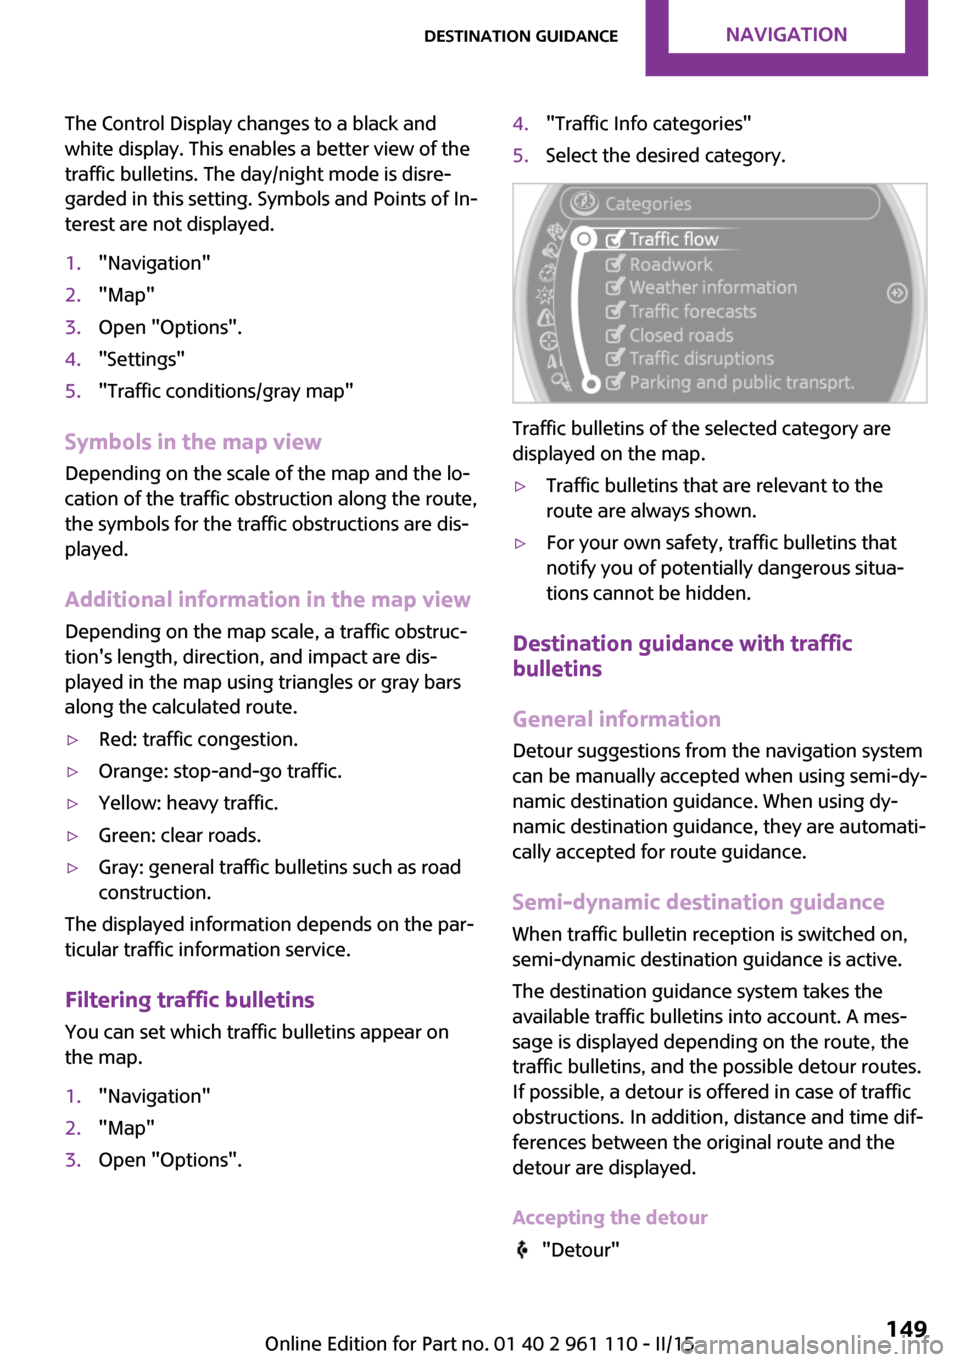
1."Navigation"2."Map"3.Open "Options".4."Traffic Info categories"5.Select the desired category.
Traffic bulletins of the selected category are
displayed on the map.
▷Traffic bulletins that are relevant to the
route are always shown.▷For your own safety, traffic bulletins that
notify you of potentially dangerous situa‐
tions cannot be hidden.
Destination guidance with traffic
bulletins
General information
Detour suggestions from the navigation system
can be manually accepted when using semi-dy‐
namic destination guidance. When using dy‐
namic destination guidance, they are automati‐
cally accepted for route guidance.
Semi-dynamic destination guidance When traffic bulletin reception is switched on,
semi-dynamic destination guidance is active.
The destination guidance system takes the
available traffic bulletins into account. A mes‐
sage is displayed depending on the route, the
traffic bulletins, and the possible detour routes.
If possible, a detour is offered in case of traffic
obstructions. In addition, distance and time dif‐
ferences between the original route and the
detour are displayed.
Accepting the detour
"Detour"
Seite 149Destination guidanceNAVIGATION149
Online Edition for Part no. 01 40 2 961 110 - II/15
Page 201 of 283
OfficeVehicle equipmentThis chapter describes all series equipment as
well as country-specific and special equipment
offered for this model series. Therefore, it also
describes equipment that may not be found in
your vehicle, for instance due to the selected
special equipment or the country version. This
also applies to safety-related functions and sys‐
tems.
When using the features and systems described
here, adhere to local regulations.
At a glance
General information
Contacts, appointments, tasks, notes, text mes‐
sages, and e-mails from the mobile phone can
be displayed on the Control Display if the mo‐
bile phone provides compatible support of
these functions and the necessary Bluetooth
standards.
Information about which mobile phones and
functions are available can be found at
www.mini.com/connectivity.
Contents are only displayed in full length when
the vehicle is stationary.
The mobile phone has read-access only.
Do not use Office while driving
To avoid becoming distracted and posing
an unnecessary hazard to your vehicle's occu‐
pants and to other road users, never attempt to
use the controls or enter information unless
traffic and road conditions allow this. ◀
Requirements▷A suitable mobile phone is paired with the
vehicle and connected. In some mobilephones, data access must be confirmed on
the mobile phone.▷The time, time zone, and date, refer to
page 71, are correctly set on the Control
Display and on the mobile phone, for in‐
stance to correctly display appointments.
Updating
Data are updated every time the mobile phone
is connected to the vehicle. Appointment en‐
tries, tasks, notes and reminders can be up‐ dated separately.
1."Office"2."Current office", "Calendar", "Tasks",
"Notes" or "Reminders"3.Open "Options".4."Update data"
Mobile phone data are transmitted again to
the vehicle.
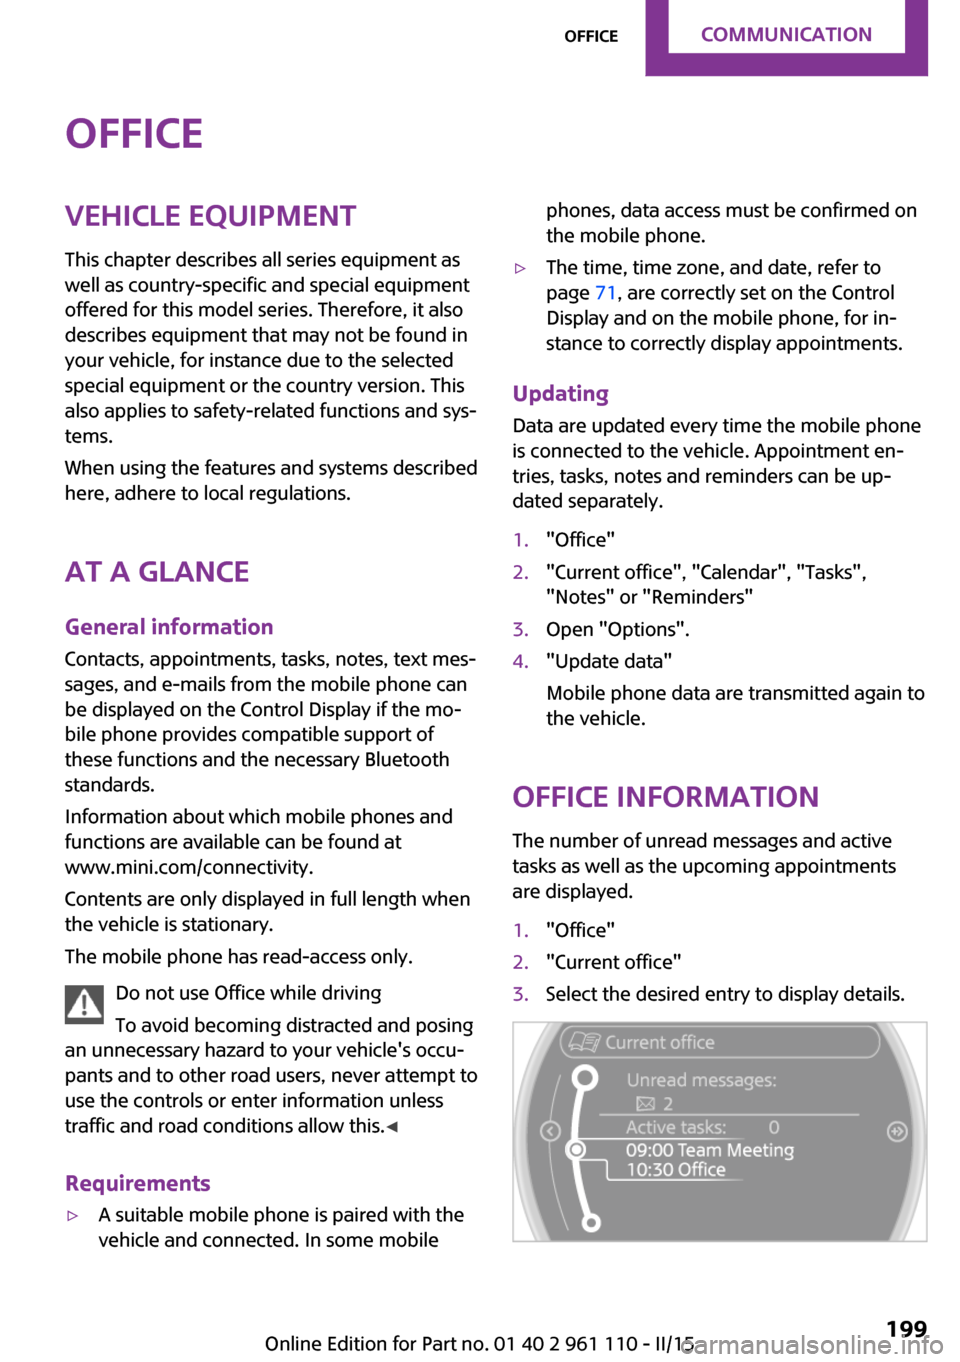
Office information
The number of unread messages and active
tasks as well as the upcoming appointments
are displayed.
1."Office"2."Current office"3.Select the desired entry to display details.Seite 199OfficeCOMMUNICATION199
Online Edition for Part no. 01 40 2 961 110 - II/15
Page 204 of 283
names may differ from the selected sorting or‐
der.
Show contact pictures
Pictures stored with the contacts are stored in
the vehicle when the mobile phone is con‐
nected to the vehicle. The number of transmit‐
ted pictures depends on the mobile phone. The
mobile phone must support this function.1."Office"2."Contacts"3.Open "Options".4."Configure Bluetooth®"5."Show images"
Display of all contact pictures is activated or de‐
activated.
Deleting contacts
Only contacts that are stored in the vehicle are
deleted. The contacts on the mobile phone
cannot be deleted.
1."Office"2."Contacts"3.Highlight the contact.4.Open "Options".5."Delete contact" or "Delete all contacts"
Messages
General information Whether or not text messages and e-mails from
the mobile phone are displayed depends on
whether transmission from the mobile phone
to the vehicle is supported. Text messages and
e-mails may not be supported by the service
provider, or the function may need to be ena‐
bled separately. After the mobile phone is first
paired, transmission may take several minutes.
Messages are only displayed in full length when
the vehicle is stationary. Messages from the ad‐
ditional telephone are not transmitted.
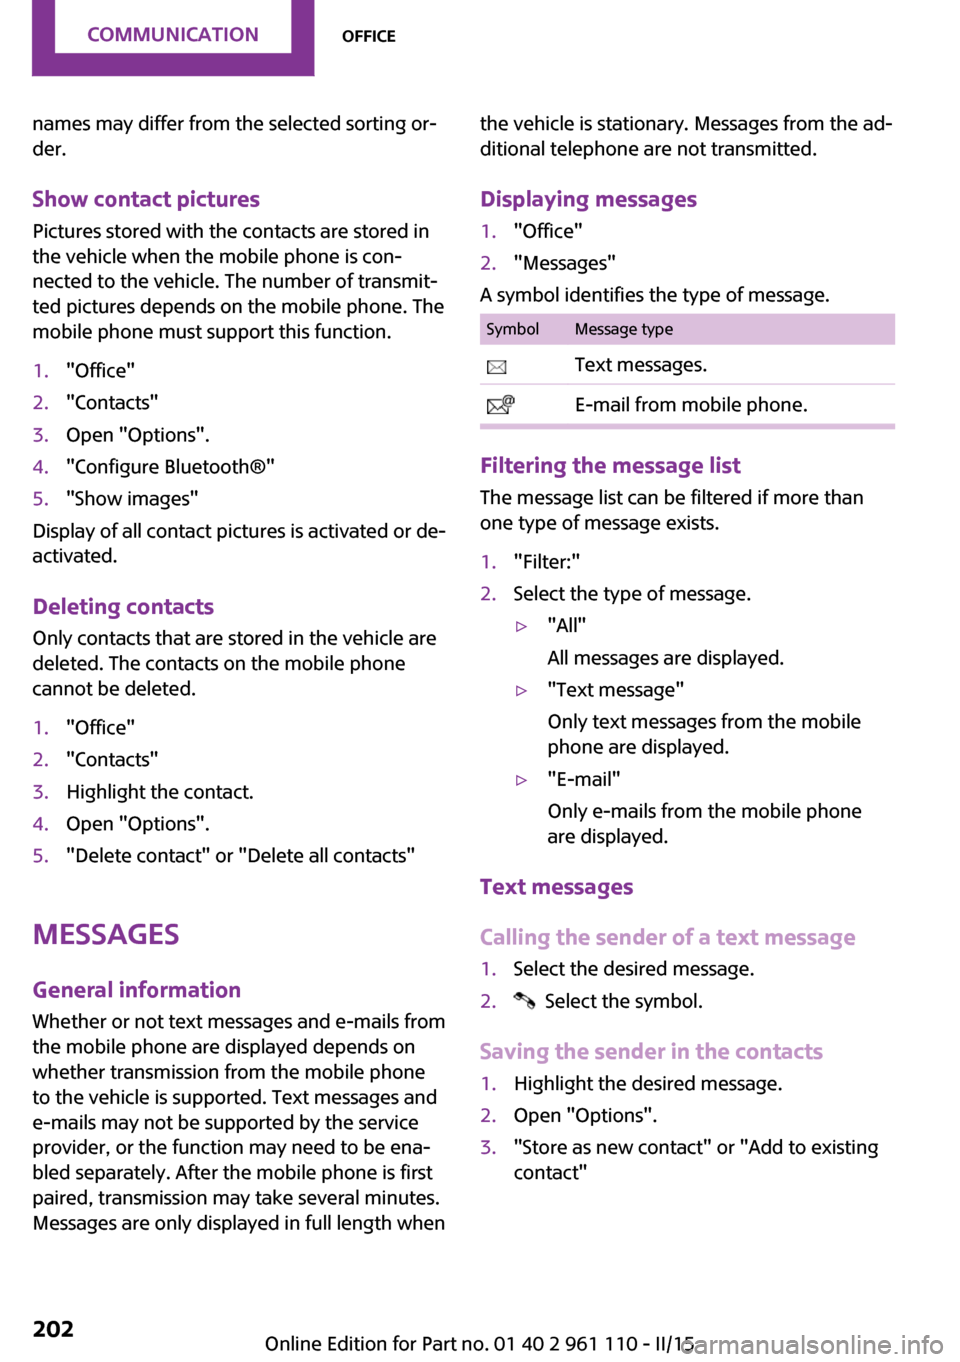
Displaying messages1."Office"2."Messages"
A symbol identifies the type of message.
SymbolMessage type Text messages. E-mail from mobile phone.
Filtering the message list
The message list can be filtered if more than
one type of message exists.
1."Filter:"2.Select the type of message.▷"All"
All messages are displayed.▷"Text message"
Only text messages from the mobile
phone are displayed.▷"E-mail"
Only e-mails from the mobile phone
are displayed.
Text messages
Calling the sender of a text message
1.Select the desired message.2. Select the symbol.
Saving the sender in the contacts
1.Highlight the desired message.2.Open "Options".3."Store as new contact" or "Add to existing
contact"Seite 202COMMUNICATIONOffice202
Online Edition for Part no. 01 40 2 961 110 - II/15
Page 208 of 283

▷The mobile phone is not capable of the
missing function or is not connected cor‐
rectly.▷The Office function is deactivated.▷The mobile phone is connected as an addi‐
tional phone.▷Appointments are older than 20 days or are
more than 50 days in the future.▷The tasks have been marked as completed
or have a due date that lies more than
90 days in the future.▷Depending on the number of stored ap‐
pointments, task notes, and messages in
the mobile phone, not all are displayed in
the vehicle.
Not all appointments and tasks from the mobile
phone are displayed at the right time?
▷The time zone, time, or date is incorrectly
set on the Control Display and mobile
phone.
Entries are not displayed in full length.
▷Text were already transmitted from the
mobile phone in a shortened form.▷Synchronization between the mobile phone
and vehicle may take several minutes.
The contact pictures are not being displayed?
▷Up to 200 contact pictures can be stored in
the vehicle.
If all points in this list have been checked and
the required function is still not available,
please contact the hotline or service center.
Seite 206COMMUNICATIONOffice206
Online Edition for Part no. 01 40 2 961 110 - II/15
Page 260 of 283
Technical dataVehicle equipment
This chapter describes all series equipment as
well as country-specific and special equipment
offered for this model series. Therefore, it also
describes equipment that may not be found in
your vehicle, for instance due to the selectedspecial equipment or the country version. This
also applies to safety-related functions and sys‐
tems.
When using the features and systems described
here, adhere to local regulations.
Note
The technical data and specifications in this
Owner's Manual are used as guidance values.
The vehicle-specific data can deviate from this,
for example, due to the selected special equip‐
ment, country version or country-specific
measurement method. Detailed values can befound in the approval documents, on informa‐
tion signs on the vehicle or can be obtained
from the service center.
The information in the vehicle documents al‐
ways has priority.
Dimensions
The dimensions can vary depending on the
model version, equipment or country-specific
measurement method.
The specified heights do not take into account
attached parts, for example, a roof antenna,roof racks or spoiler. The heights can deviate,
for example, due to the selected special equip‐
ment, tires, load and chassis version.
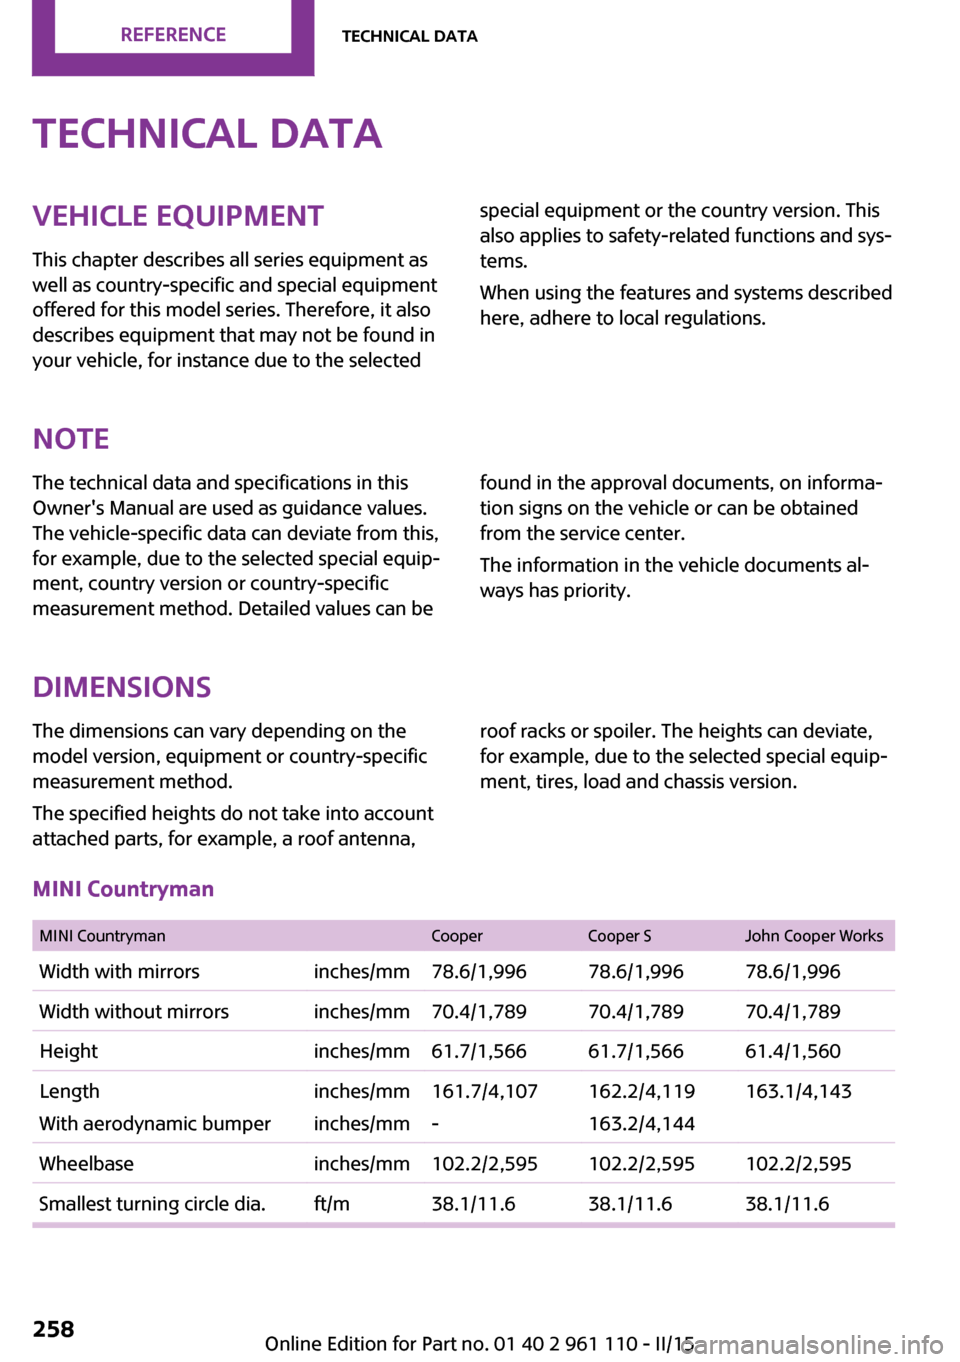
MINI Countryman
MINI CountrymanCooperCooper SJohn Cooper WorksWidth with mirrorsinches/mm78.6/1,99678.6/1,99678.6/1,996Width without mirrorsinches/mm70.4/1,78970.4/1,78970.4/1,789Heightinches/mm61.7/1,56661.7/1,56661.4/1,560Length
With aerodynamic bumperinches/mm
inches/mm161.7/4,107
-162.2/4,119
163.2/4,144163.1/4,143Wheelbaseinches/mm102.2/2,595102.2/2,595102.2/2,595Smallest turning circle dia.ft/m38.1/11.638.1/11.638.1/11.6Seite 258REFERENCETechnical data258
Online Edition for Part no. 01 40 2 961 110 - II/15
Page 261 of 283
MINI Paceman
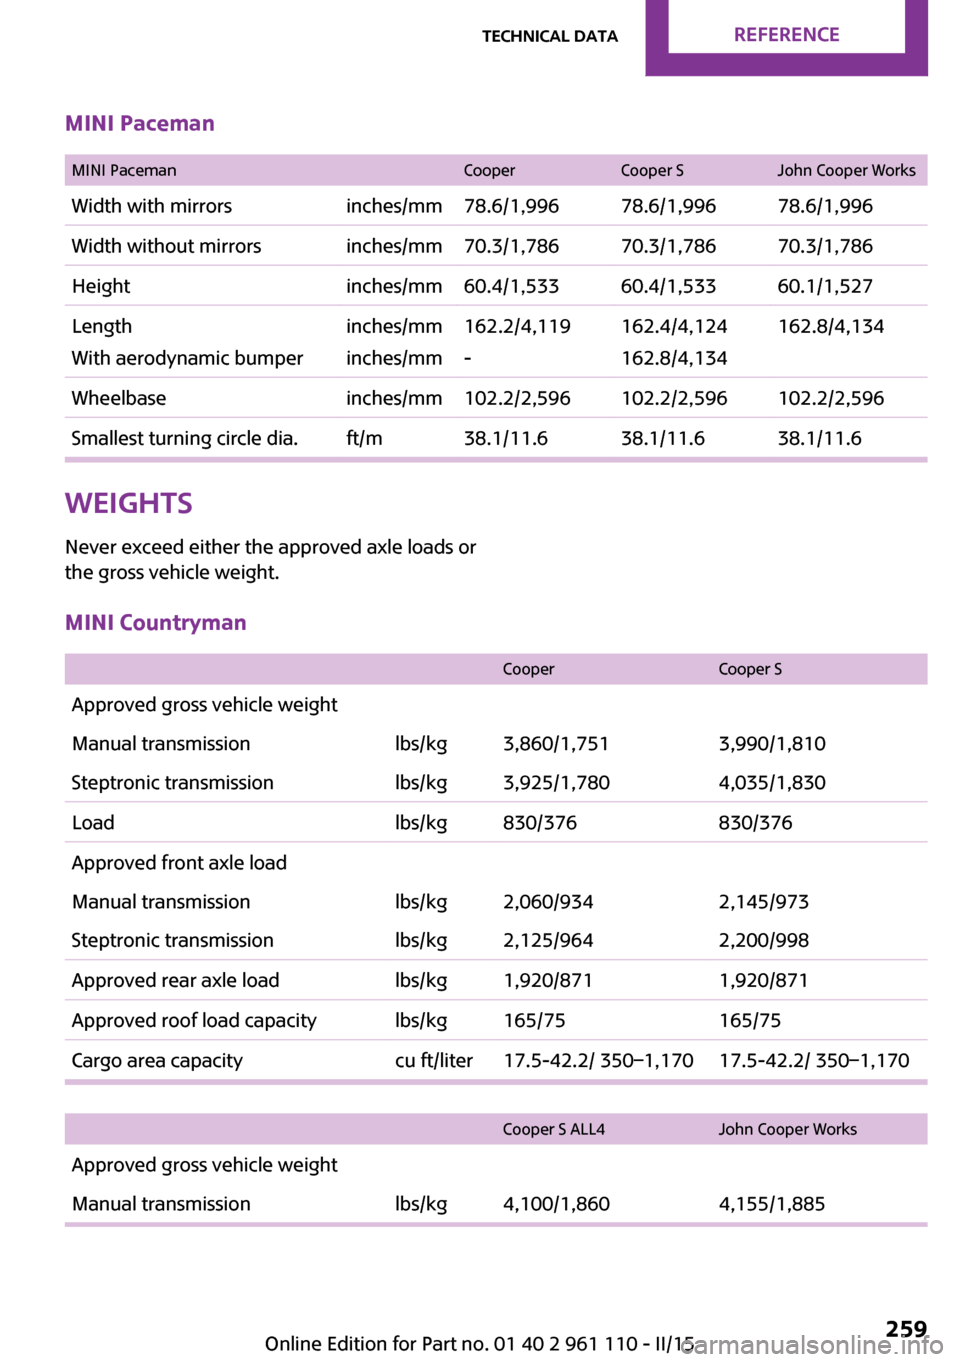
MINI PacemanCooperCooper SJohn Cooper WorksWidth with mirrorsinches/mm78.6/1,99678.6/1,99678.6/1,996Width without mirrorsinches/mm70.3/1,78670.3/1,78670.3/1,786Heightinches/mm60.4/1,53360.4/1,53360.1/1,527Length
With aerodynamic bumperinches/mm
inches/mm162.2/4,119
-162.4/4,124
162.8/4,134162.8/4,134Wheelbaseinches/mm102.2/2,596102.2/2,596102.2/2,596Smallest turning circle dia.ft/m38.1/11.638.1/11.638.1/11.6Weights
Never exceed either the approved axle loads or
the gross vehicle weight.MINI Countryman
CooperCooper SApproved gross vehicle weightManual transmissionlbs/kg3,860/1,7513,990/1,810Steptronic transmissionlbs/kg3,925/1,7804,035/1,830Loadlbs/kg830/376830/376Approved front axle loadManual transmissionlbs/kg2,060/9342,145/973Steptronic transmissionlbs/kg2,125/9642,200/998Approved rear axle loadlbs/kg1,920/8711,920/871Approved roof load capacitylbs/kg165/75165/75Cargo area capacitycu ft/liter17.5-42.2/ 350–1,17017.5-42.2/ 350–1,170
Cooper S ALL4John Cooper WorksApproved gross vehicle weightManual transmissionlbs/kg4,100/1,8604,155/1,885Seite 259Technical dataREFERENCE259
Online Edition for Part no. 01 40 2 961 110 - II/15