child door lock MINI Countryman 2016 Owner's Manual
[x] Cancel search | Manufacturer: MINI, Model Year: 2016, Model line: Countryman, Model: MINI Countryman 2016Pages: 223, PDF Size: 5.52 MB
Page 32 of 223
Interior motion sensorFor the interior motion sensor to function prop‐
erly, the windows and the glass sunroof must be closed.
Avoiding unintentional alarms
The tilt alarm sensor and interior motion sensor
can be switched off together, such as in the fol‐
lowing situations:▷In duplex garages.▷During transport on car-carrying trains, at
sea or on a trailer.▷When animals are to remain in the vehicle.
Switching off the tilt alarm sensor and
interior motion sensor
▷ Press the button on the remote
control twice in succession.▷Lock the vehicle twice with the integrated
key.
The LEDs flash in short succession for approx.
2 seconds. The tilt alarm sensor and interior
motion sensor remain switched off until the ve‐
hicle is unlocked and locked again.
Glass sunroof, electrical
General information WARNING
Body parts can be jammed on operating
the glass sunroof. There is risk of injuries. Make
sure that the area of movement of the glass
sunroof is clear during opening and closing. ◀
WARNING
Unattended children or animals can move
the vehicle and endanger themselves and traf‐
fic, e.g. with the following actions:
▷Pressing the Start/Stop button.▷Releasing the parking brake.▷Opening and closing of doors or windows.▷Shifting the selector lever into neutral.▷Using vehicle equipment.
There is risk of accidents or injuries. Do not
leave children or animals unattended in the ve‐
hicle. Carry remote control along when exiting
and lock the vehicle. ◀
Convenient operation via:
▷Door lock, refer to page 25▷Comfort Access, refer to page 29
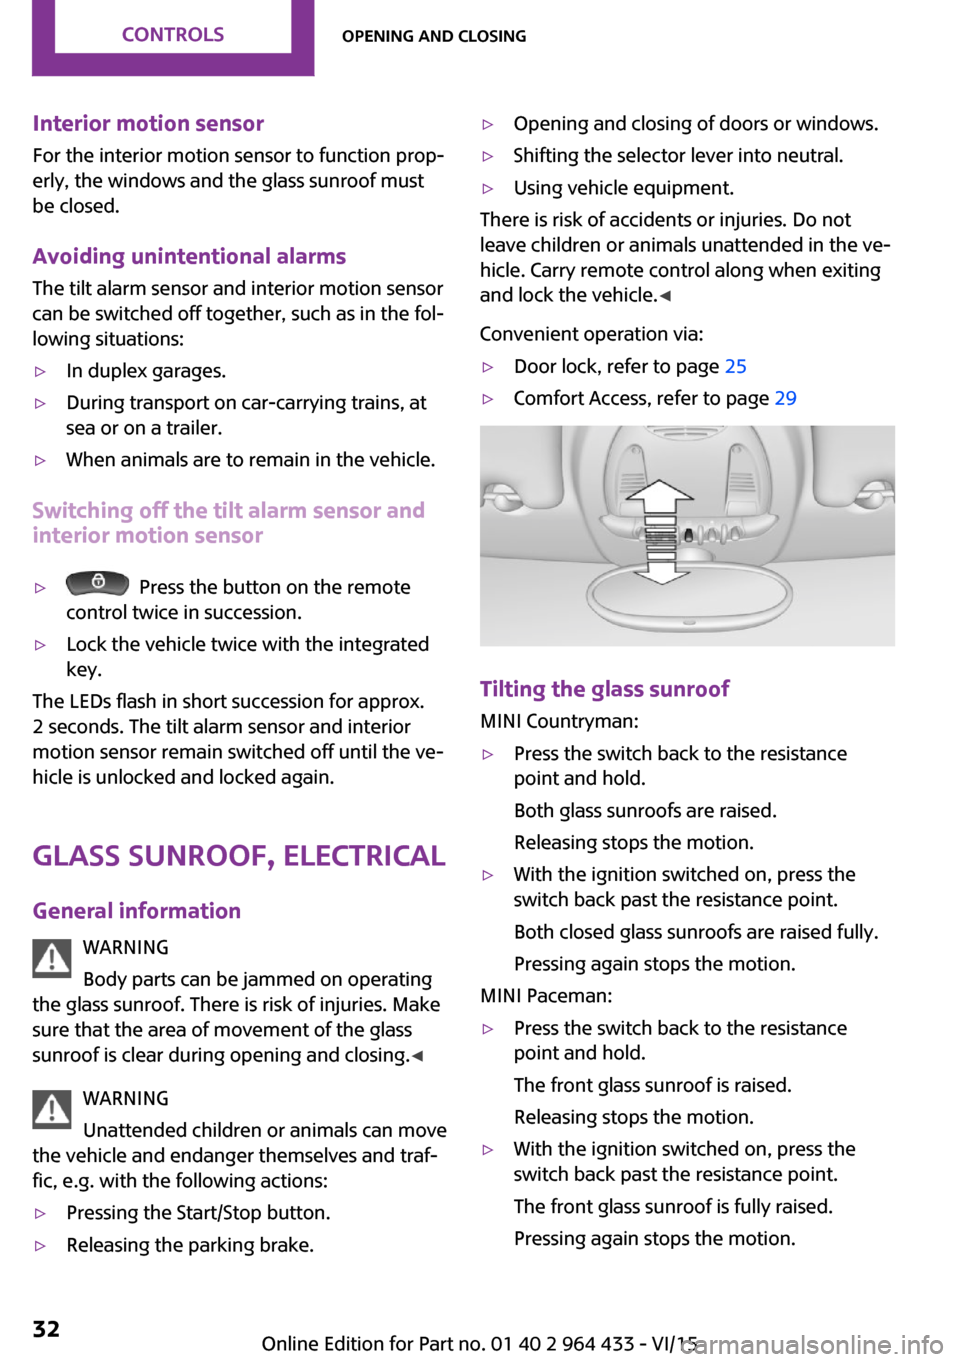
Tilting the glass sunroof
MINI Countryman:
▷Press the switch back to the resistance
point and hold.
Both glass sunroofs are raised.
Releasing stops the motion.▷With the ignition switched on, press the
switch back past the resistance point.
Both closed glass sunroofs are raised fully.
Pressing again stops the motion.
MINI Paceman:
▷Press the switch back to the resistance
point and hold.
The front glass sunroof is raised.
Releasing stops the motion.▷With the ignition switched on, press the
switch back past the resistance point.
The front glass sunroof is fully raised.
Pressing again stops the motion.Seite 32CONTROLSOpening and closing32
Online Edition for Part no. 01 40 2 964 433 - VI/15
Page 33 of 223
Opening, closingMINI Countryman:▷In the raised position with the ignition
switched on, press the switch back and
hold.
The front glass sunroof is opened. The rear
glass sunroof is closed.
Releasing stops the motion.
The same method is used to close the glass
sunroof, in this case by pressing the switch for‐
ward.
The front glass sunroof remains in the raised
position. The rear glass sunroof is raised. Press‐
ing again closes both sunroofs completely.
MINI Paceman:
▷In the raised position with the ignition
switched on, press the switch back and
hold.
The front glass sunroof is opened.
Releasing stops the motion.
The same method is used to close the glass
sunroof, in this case by pressing the switch for‐
ward.
The front glass sunroof remains in the raised
position. Pressing again closes the roof com‐
pletely.
Roller sunblind The roller sunblind can be opened and closed
separately from the glass sunroof.
After a power failure After a power failure, it could happen that the
sunroof can only be raised. In this case, have
the system initialized. The manufacturer of your
MINI recommends that this work be performed
by a dealer’s service center or another qualified
service center or repair shop.
Power windows
General information WARNING
When operating the windows, body parts
and objects can be jammed. There is risk of in‐
juries or risk of property damage. Make sure
that the area of movement of the windows is
clear during opening and closing. ◀
WARNING
Unattended children or animals can move
the vehicle and endanger themselves and traf‐
fic, e.g. with the following actions:▷Pressing the Start/Stop button.▷Releasing the parking brake.▷Opening and closing of doors or windows.▷Shifting the selector lever into neutral.▷Using vehicle equipment.
There is risk of accidents or injuries. Do not
leave children or animals unattended in the ve‐
hicle. Carry remote control along when exiting
and lock the vehicle. ◀
If, after having been opened and closed a num‐
ber of times in close succession, a window can
only be closed, the system is overheated. Let
the system cool down for several minutes with
the ignition switched on or the engine running.
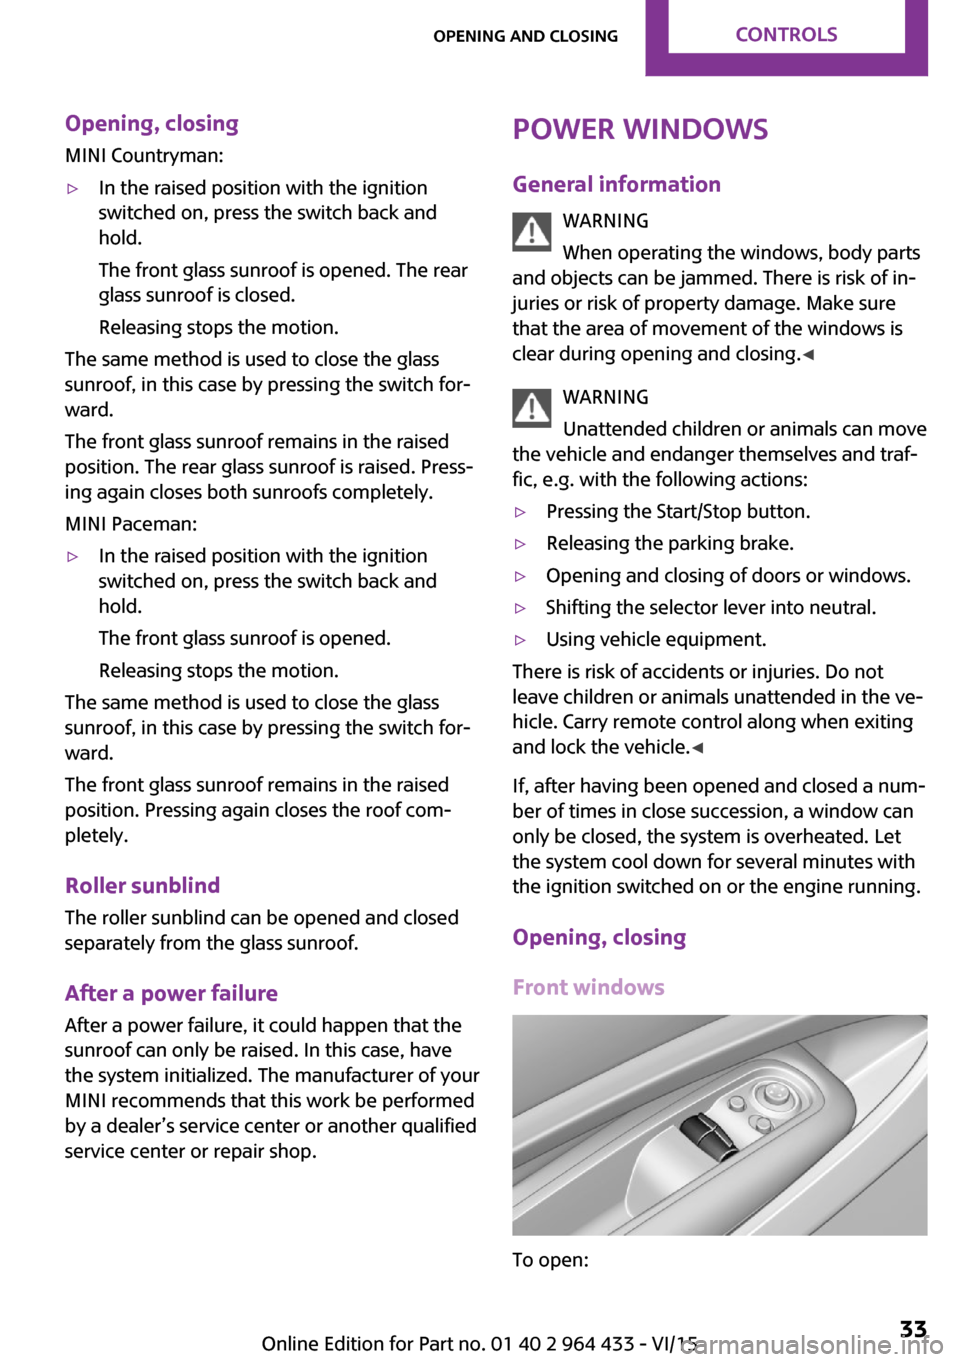
Opening, closing
Front windows
To open:
Seite 33Opening and closingCONTROLS33
Online Edition for Part no. 01 40 2 964 433 - VI/15
Page 45 of 223
Transporting children safelyVehicle features and op‐
tions
This chapter describes all standard, country-
specific and optional features offered with the
series. It also describes features that are not
necessarily available in your car, e. g., due to
the selected options or country versions. This
also applies to safety-related functions and sys‐
tems.
When using the features and systems described
here, adhere to local regulations.
The right place for chil‐
dren
Information WARNING
Unattended children or animals can move
the vehicle and endanger themselves and traf‐
fic, e.g. with the following actions:▷Pressing the Start/Stop button.▷Releasing the parking brake.▷Opening and closing of doors or windows.▷Shifting the selector lever into neutral.▷Using vehicle equipment.
There is risk of accidents or injuries. Do not
leave children or animals unattended in the ve‐
hicle. Carry remote control along when exiting
and lock the vehicle. ◀
Children should always be in the rear WARNING
Persons shorter than 5 ft, 150 cm cannot
correctly fasten the safety belt without suitable
additional restraint systems. The protective ef‐
fect of the safety belts can be limited or lost
when safety belts are fastened incorrectly. An
incorrectly fastened safety belt can cause addi‐
tional injuries, e.g. in the event of an accident
or during braking and evasive maneuvers.
There is risk of injuries or danger to life. Secure
persons shorter than 5 ft, 150 cm using suitable
restraint systems. ◀
Accident research shows that the safest place
for children is on the rear seat.
Only transport children younger than 12 years
of age (13 years of age) or shorter than 5 ft,
150 cm in the rear in child restraint systems
suitable for the age, weight and size of the
child.
Children 13 years of age or older must wear a
safety belt as soon as a suitable child restraint
system can no longer be used due to their age,
weight and size.
Children on the front passenger seat
Should it be necessary to use a child restraint
fixing system on the front passenger seat,
make sure that the front and side airbags on
the front passenger side are deactivated, refer
to page 75.
Information WARNING
Active front-seat passenger airbags can
injure a child in a child restraint system when
the airbags are activated. There is risk of inju‐
ries. Make sure that the front-seat passenger
airbags are deactivated and that the PASSEN‐
GER AIRBAG OFF indicator lamp lights up. ◀
WARNING
The stability of the child restraint system
is limited or compromised with incorrect seat
adjustment or improper installation of the child
seat. There is risk of injuries or danger to life.
Make sure that the child restraint system fitsSeite 45Transporting children safelyCONTROLS45
Online Edition for Part no. 01 40 2 964 433 - VI/15
Page 49 of 223
3Hook for upper retaining strap4Mounting point5Cargo area floor6Backrest7Upper retaining strap of child restraint fix‐
ing system
Attaching the upper retaining strap to
the mounting point
1.Slide the head restraint upward.2.Center seat: fold the cargo area floor for‐
ward.3.Guide the upper retaining strap between
the supports of the head restraint.4.Attach the upper retaining strap to the
mounting point with the hook.5.Slide the head restraint into the bottom po‐
sition.6.Pull the upper retaining strap taut.
WARNING
If the rear backrest is not locked, the pro‐
tective effect of the child restraint system is lim‐
ited or there is none. In particular situations,
e.g. braking maneuvers or in case of an acci‐
dent, the rear backrest can fold forward. There
is risk of injuries or danger to life. Make sure
that the rear backrests are locked. ◀
MINI Countryman: lock‐
ing doors and windows
Rear doors
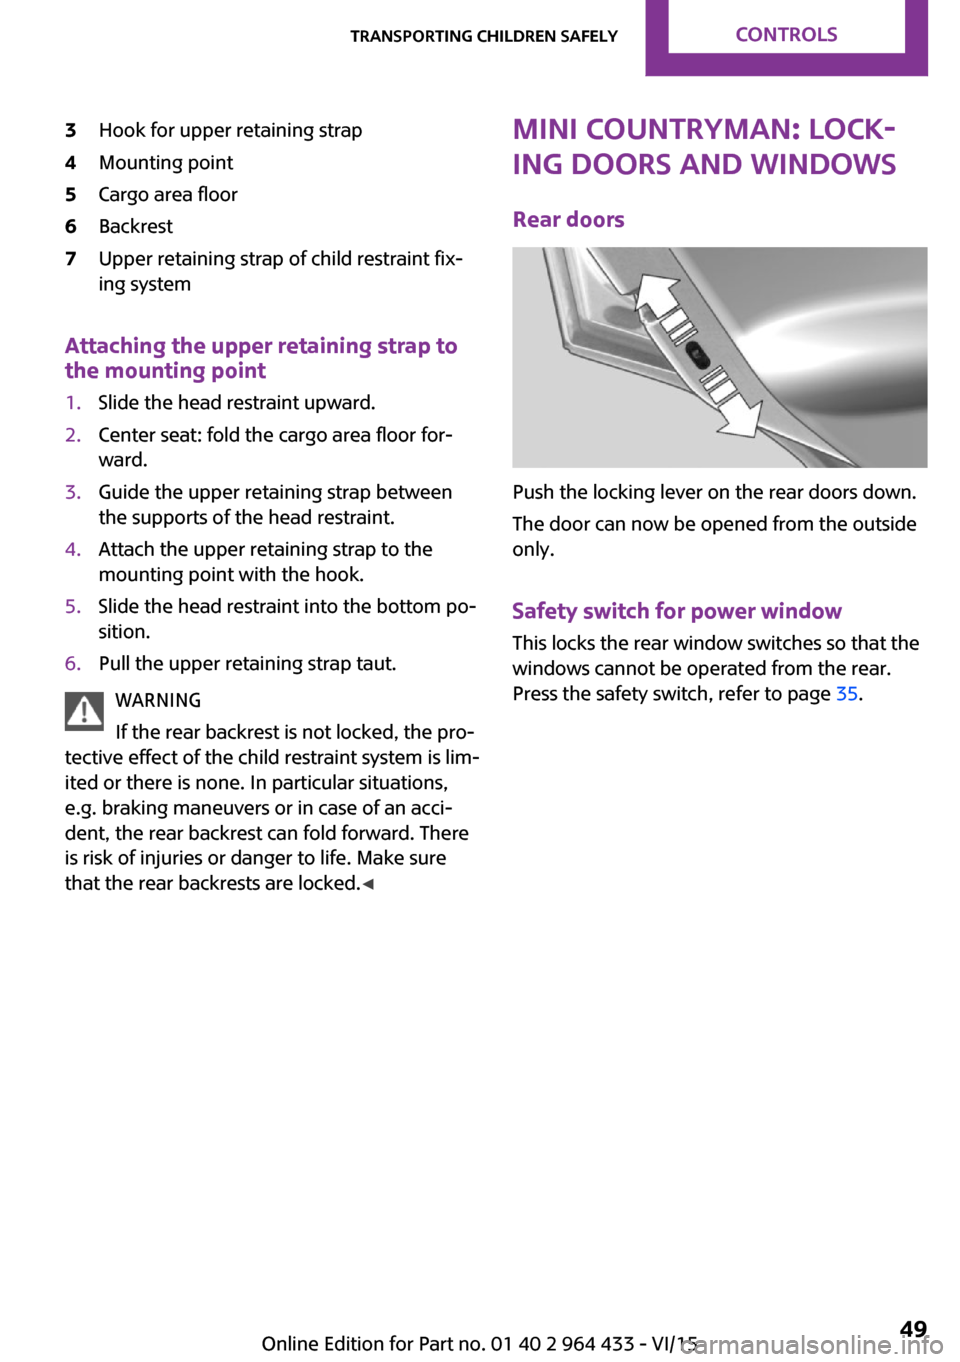
Push the locking lever on the rear doors down.
The door can now be opened from the outside
only.
Safety switch for power window This locks the rear window switches so that the
windows cannot be operated from the rear.
Press the safety switch, refer to page 35.
Seite 49Transporting children safelyCONTROLS49
Online Edition for Part no. 01 40 2 964 433 - VI/15
Page 52 of 223
Steptronic transmissionRemote control in the ignition lock or, with
Comfort Access, inside the vehicle, refer to
page 28.1.Depress the brake pedal.2.Move the selector lever to position P or N.3.Press the Start/Stop button.
The ignition is activated automatically for a cer‐
tain time and is stopped as soon as the engine
starts.
Engine stop
General information WARNING
Unattended children or animals can move
the vehicle and endanger themselves and traf‐
fic, e.g. with the following actions:
▷Pressing the Start/Stop button.▷Releasing the parking brake.▷Opening and closing of doors or windows.▷Shifting the selector lever into neutral.▷Using vehicle equipment.
There is risk of accidents or injuries. Do not
leave children or animals unattended in the ve‐
hicle. Carry remote control along when exiting
and lock the vehicle. ◀
WARNING
An unsecured vehicle can put itself into
motion and roll away. There is risk of an acci‐
dent. Before exiting, secure the vehicle against
rolling.
In order to ensure that the vehicle is secured
against rolling away, observe the following:
▷Set the parking brake.▷On uphill grades or on a slope, turn the
front wheels in the direction of the curb.▷On uphill grades or on a slope, additionally
secure the vehicle, e.g. with a wheel
chock. ◀
Before driving into a car wash
To make it possible for the vehicle to roll in an
automatic car wash, follow the information on
Washing in automatic car washes, refer to
page 190.
Switching off the engine
Manual transmission
1.With the vehicle at a standstill, press the
Start/Stop button.2.Shift into first gear or reverse.3.Set the parking brake firmly.4.Remove the remote control from the igni‐
tion lock.
Steptronic transmission
1.Engage transmission position P with the ve‐
hicle stopped.2.Press the Start/Stop button.3.Set the parking brake firmly.4.Remove the remote control from the igni‐
tion lock.
Parking brake
The concept
The parking brake is primarily intended to pre‐
vent the vehicle from rolling while parked; it
brakes the rear wheels.
Also follow the instructions under Switching off
the engine, refer to page 52.
Setting The lever engages automatically.
Seite 52CONTROLSDriving52
Online Edition for Part no. 01 40 2 964 433 - VI/15
Page 213 of 223
Brakes, MINI maintenancesystem 172
Brakes, service require‐ ments 66
Brake system, MINI mainte‐ nance system 172
Braking, notes 113
Braking, parking brake 52
Breakdown assistance, Road‐ side Assistance 184
Breaking in 112
Buckle tongues height adjust‐ ment 39
Button for starting the engine, refer to Start/Stop button 50
C
California Proposition 65 Warning 7
Car battery, refer to Vehicle battery 182
Car care products 191
Care, displays 193
Care, vehicle 191
Cargo area, Comfort Ac‐ cess 29
Cargo area door, refer to Tail‐ gate 27
Cargo area, enlarging, cargo cover 102
Cargo area, flat loading floor 104
Cargo area light, refer to Inte‐ rior lights 72
Cargo area, multi-function hook 105
Cargo area, opening from the outside 27
Cargo area, partition net 104
Car horn, refer to Horn 12
Carpet, care 193
Car phone, refer to Tele‐ phone 138
Car wash 190 CBC, Cornering Brake Con‐
trol 84
CBS Condition Based Serv‐ ice 172
CD/DVD drives, care 193
Center armrest 107
Center console, refer to Around the center con‐
sole 15
Center rail 107
Center rail, refer to Storage compartments 107
Central locking, Comfort Ac‐ cess 28
Central locking from the in‐ side 25
Central locking system, con‐ cept 21
Central locking system, from the outside 21
Changes, technical, refer to Own Safety 6
Changing wheels/tires 160
Check Control 67
Children, transporting 45
Child restraint fixing system LATCH 47
Child restraint fixing sys‐ tems 45
Child restraint fixing systems, mounting 46
Child seat, mounting 46
Child seats, refer to Transport‐ ing children safely 45
Chrome parts, care 192
Circulation of air, refer to Re‐ circulated air mode, air con‐
ditioner 92
Circulation of air, refer to Re‐ circulated air mode, auto‐
matic climate control 94
Cleaning, displays 193
Cleaning, refer to Care 190
Climate 91
Climate mode, ventilation 95
Clock 61 Clock, 12h/24h mode 64
Closing from the inside 25
Closing from the outside 22
Clutch, breaking in 112
Cockpit 12
Cold start, refer to Starting the engine 51
Combination instrument, refer to Displays 14
Combination switch, refer to Turn signal/high-beams/
headlight flasher 53
Combination switch, refer to Washer/wiper system 54
Comfort Access 28
Comfort Access, in the car wash 29
Comfort Access, replacing the battery 30
Comfort area, refer to Around the center console 15
Compartment for remote con‐ trol, refer to Ignition lock 50
Compass, digital 98
Computer 62
Computer, displaying informa‐ tion 62
Condition Based Service CBS 172
Confirmation signals for vehi‐ cle locking/unlocking 23
Consumption, refer to Aver‐ age fuel consumption 63
Control Display, care 193
Controls and displays 12
Control systems, driving stabil‐ ity 84
Convenient operation, win‐ dow 23
Coolant temperature 62
Cooling function, switching on and off 95
Cooling, maximum 94
Cornering Brake Control, CBC 84
Corrosion on brake discs 114 Seite 213Everything from A to ZREFERENCE213
Online Edition for Part no. 01 40 2 964 433 - VI/15
Page 217 of 223
LATCH child restraint fixingsystem 47
Leather care 192
LEDs, light-emitting di‐ odes 175
License plate light, bulb re‐ placement 179
Light-alloy wheels, care 192
Light-emitting diodes, LEDs 175
Lighter, socket 100
Lighting, instruments 72
Lighting, light and bulb re‐ placement 175
Lighting, vehicle, refer to Lamps 69
Lights, parking lamps/low beams 69
Light switch 69
Lock buttons on doors, refer to Locking 26
Locking from the inside 26
Locking, from the outside 23
Locking, setting the confirma‐ tion signal 23
Locking the vehicle from the inside 25
Locking the vehicle from the outside 22
Locking without remote con‐ trol, refer to Comfort Ac‐
cess 28
Longlife oils, alternative oil types 169
Longlife oils, refer to Ap‐ proved engine oils 169
Low beams 69
Low beams, automatic 69
Low beams, bulb replace‐ ment 176
Lower back support, refer to Lumbar support 37
Lumbar support 37 M
Main inspection, refer to Serv‐ ice requirements 66
Maintenance, refer to Service booklet
Maintenance, refer to Service requirements 66
Maintenance require‐ ments 172
Maintenance system MINI 172
Makeup mirror 98
Malfunction, door lock 25
Malfunction, fuel filler flap 150
Malfunction, Steptronic trans‐ mission 59
Malfunction warnings, refer to Check Control 67
Manual air distribution, air conditioner 92
Manual air distribution, auto‐ matic climate control 94
Manual mode, Steptronic transmission 58
Manual operation, door lock 25
Manual operation, fuel filler flap 150
Manual operation, selector lever lock, Steptronic trans‐
mission 59
Marking on approved tires 161
Maximum cooling 94
Maximum speed, winter tires 161
Microfilter 93
Microfilter, with automatic cli‐ mate control 95
MINI Homepage 6
MINI Internet page 6
MINI maintenance sys‐ tem 172
MINI Mobility System 162 Minimum tread, tires 160
Mirrors 42
Mirrors, folding in and out 43
Mirrors, interior mirror 43
Mobile communication devi‐ ces in the vehicle 113
Mobile phone, refer to Tele‐ phone 138
Mobility System 162
Modifications, technical, refer to Own Safety 6
Mounting of child restraint fix‐ ing systems 46
N Neck restraints, refer to Head restraints 41
New wheels and tires 160
Notes 6
Nozzles, refer to Ventila‐ tion 95
O
OBD Onboard Diagnos‐ tics 173
OBD socket, refer to Socket for OBD Onboard Diagno‐
sis 173
Octane number, refer to Fuel quality 152
Octane rating, refer to Recom‐ mended fuel grade 152
Odometer 61
Oil additives 169
Oil level 168
Oil types, alternative 169
Oil types, approved 169
Onboard Diagnostics OBD 173
Opening and closing, Comfort Access 28
Opening and closing from the inside 25 Seite 217Everything from A to ZREFERENCE217
Online Edition for Part no. 01 40 2 964 433 - VI/15