fuel MINI COUNTRYMAN PACEMAN 2014 User Guide
[x] Cancel search | Manufacturer: MINI, Model Year: 2014, Model line: COUNTRYMAN PACEMAN, Model: MINI COUNTRYMAN PACEMAN 2014Pages: 218, PDF Size: 5.45 MB
Page 62 of 218
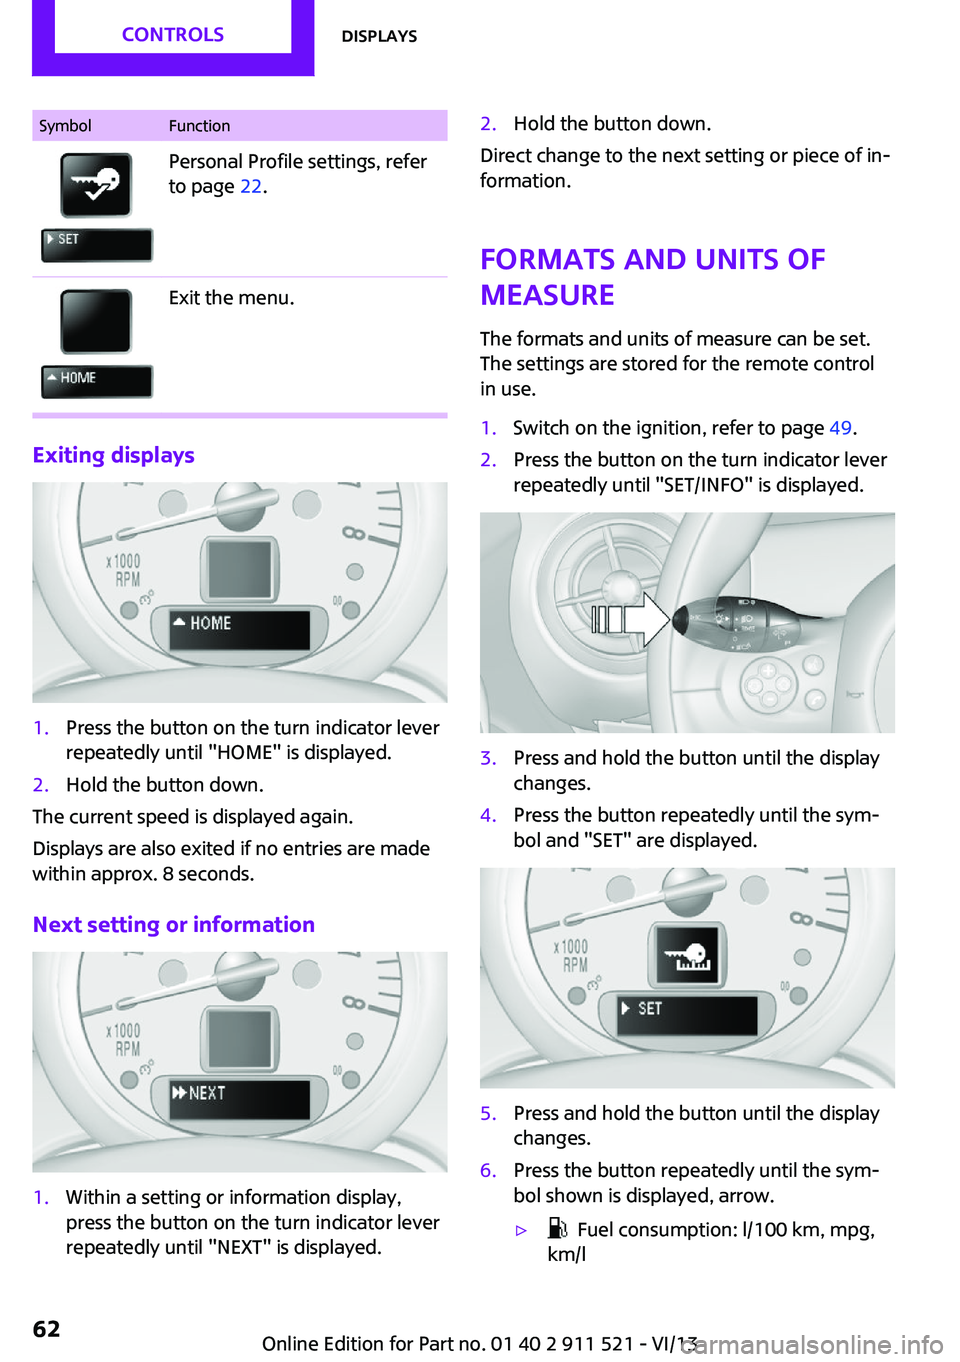
SymbolFunctionPersonal Profile settings, refer
to page 22.Exit the menu.
Exiting displays
1.Press the button on the turn indicator lever
repeatedly until "HOME" is displayed.2.Hold the button down.
The current speed is displayed again.
Displays are also exited if no entries are made
within approx. 8 seconds.
Next setting or information
1.Within a setting or information display,
press the button on the turn indicator lever
repeatedly until "NEXT" is displayed.2.Hold the button down.
Direct change to the next setting or piece of in‐
formation.
Formats and units of
measure
The formats and units of measure can be set.
The settings are stored for the remote control
in use.
1.Switch on the ignition, refer to page 49.2.Press the button on the turn indicator lever
repeatedly until "SET/INFO" is displayed.3.Press and hold the button until the display
changes.4.Press the button repeatedly until the sym‐
bol and "SET" are displayed.5.Press and hold the button until the display
changes.6.Press the button repeatedly until the sym‐
bol shown is displayed, arrow.▷ Fuel consumption: l/100 km, mpg,
km/lSeite 62ControlsDisplays62
Online Edition for Part no. 01 40 2 911 521 - VI/13
Page 80 of 218
Final tire failure
Vibrations or loud noises while driving
can indicate the final failure of the tire. Reduce
speed and stop; otherwise, pieces of the tire
could come loose and cause an accident. Do
not continue driving, and contact your service
center. ◀
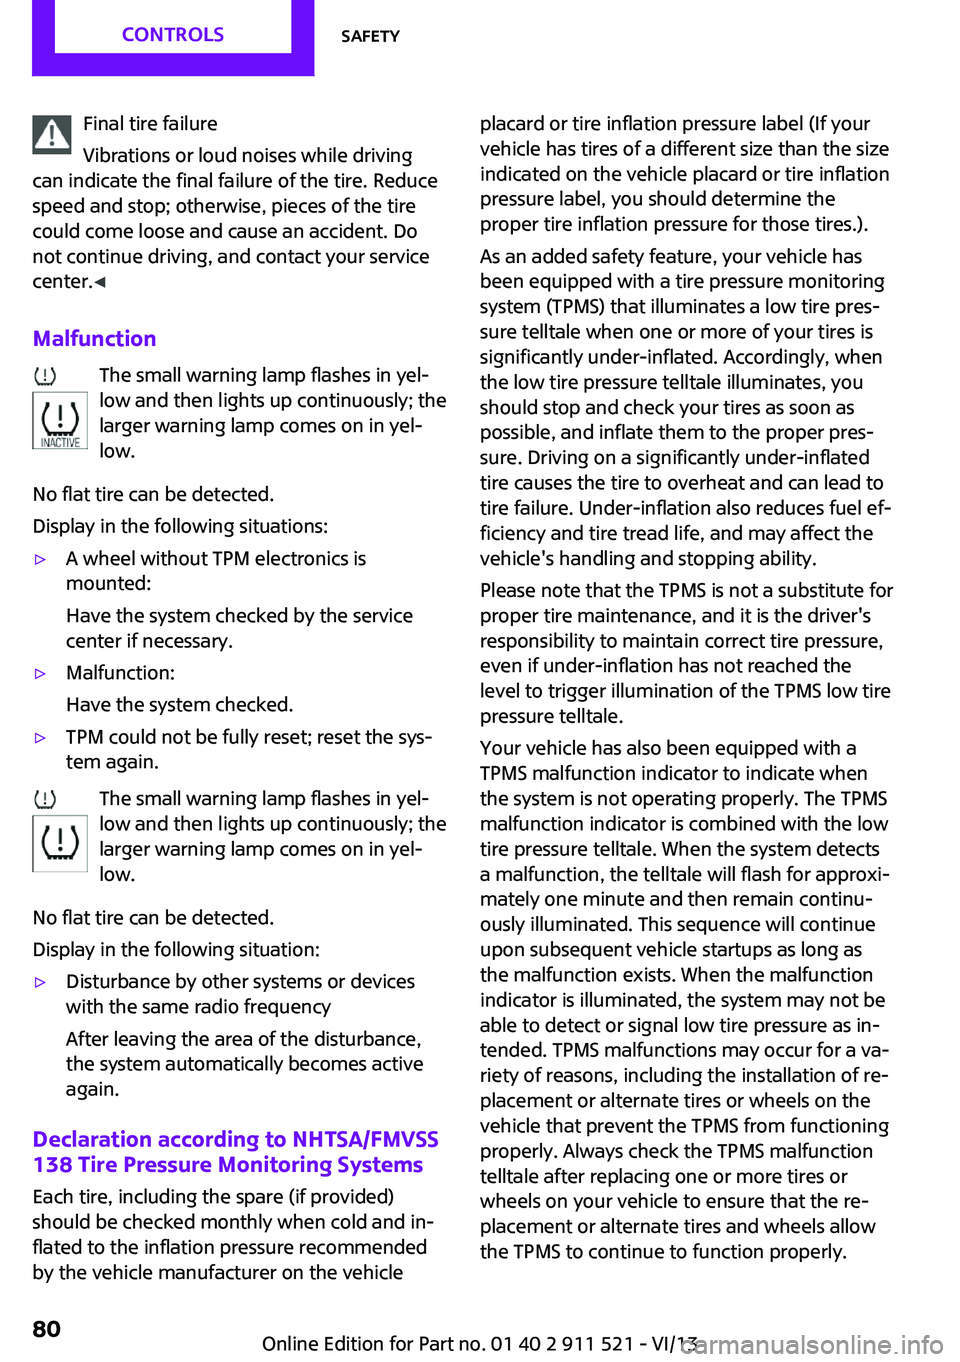
Malfunction The small warning lamp flashes in yel‐
low and then lights up continuously; the larger warning lamp comes on in yel‐
low.
No flat tire can be detected.
Display in the following situations:▷A wheel without TPM electronics is
mounted:
Have the system checked by the service
center if necessary.▷Malfunction:
Have the system checked.▷TPM could not be fully reset; reset the sys‐
tem again.
The small warning lamp flashes in yel‐
low and then lights up continuously; the
larger warning lamp comes on in yel‐
low.
No flat tire can be detected.
Display in the following situation:
▷Disturbance by other systems or devices
with the same radio frequency
After leaving the area of the disturbance,
the system automatically becomes active
again.
Declaration according to NHTSA/FMVSS
138 Tire Pressure Monitoring Systems
Each tire, including the spare (if provided)
should be checked monthly when cold and in‐
flated to the inflation pressure recommended
by the vehicle manufacturer on the vehicle
placard or tire inflation pressure label (If your
vehicle has tires of a different size than the size
indicated on the vehicle placard or tire inflation
pressure label, you should determine the
proper tire inflation pressure for those tires.).
As an added safety feature, your vehicle has
been equipped with a tire pressure monitoring
system (TPMS) that illuminates a low tire pres‐
sure telltale when one or more of your tires is
significantly under-inflated. Accordingly, when
the low tire pressure telltale illuminates, you
should stop and check your tires as soon as
possible, and inflate them to the proper pres‐
sure. Driving on a significantly under-inflated
tire causes the tire to overheat and can lead to
tire failure. Under-inflation also reduces fuel ef‐
ficiency and tire tread life, and may affect the
vehicle's handling and stopping ability.
Please note that the TPMS is not a substitute for
proper tire maintenance, and it is the driver's
responsibility to maintain correct tire pressure,
even if under-inflation has not reached the
level to trigger illumination of the TPMS low tire
pressure telltale.
Your vehicle has also been equipped with a
TPMS malfunction indicator to indicate when
the system is not operating properly. The TPMS
malfunction indicator is combined with the low
tire pressure telltale. When the system detects
a malfunction, the telltale will flash for approxi‐
mately one minute and then remain continu‐
ously illuminated. This sequence will continue
upon subsequent vehicle startups as long as
the malfunction exists. When the malfunction
indicator is illuminated, the system may not be
able to detect or signal low tire pressure as in‐
tended. TPMS malfunctions may occur for a va‐
riety of reasons, including the installation of re‐
placement or alternate tires or wheels on the
vehicle that prevent the TPMS from functioning
properly. Always check the TPMS malfunction
telltale after replacing one or more tires or
wheels on your vehicle to ensure that the re‐
placement or alternate tires and wheels allow
the TPMS to continue to function properly.Seite 80ControlsSafety80
Online Edition for Part no. 01 40 2 911 521 - VI/13
Page 118 of 218
Saving fuelVehicle equipment
This chapter describes all series equipment as
well as country-specific and special equipment
offered for this model series.Therefore, it also
describes equipment that may not be found in
your vehicle, for instance due to the selected
special equipment or the country version. This
also applies to safety-related functions and sys‐
tems.
General information Your vehicle contains advanced technology for
the reduction of fuel consumption and emis‐
sions.
Fuel consumption depends on a number of dif‐
ferent factors. The implementation of certain
measures, driving style and regular mainte‐ nance can have an influence on fuel consump‐
tion and on the environmental impact.
Remove unnecessary cargo Additional weight increases fuel consumption.
Remove attached parts following use Remove unneeded auxiliary mirrors, roof or
rear luggage racks after use.
Attached parts on the vehicle impair the aero‐
dynamics and increase the fuel consumption.
Close both windows Open windows causes higher air resistance and
thus increases fuel consumption.
Check the tire inflation pressure
regularly
Check and, if necessary, correct the tire infla‐
tion pressure, refer to page 152, at least twice
a month and before starting on a long trip.Low tire inflation pressure increases rolling re‐
sistance and thus raises fuel consumption and
tire wear.
Drive away without delayDo not wait for the engine to warm-up while
the vehicle remains stationary. Start driving
right away, but at moderate engine speeds.
This is the fastest way for the cold engine to
reach its operating temperature.
Look well ahead when driving Avoid unnecessary acceleration and braking. To
achieve this, maintain a suitable distance to the
vehicle driving ahead of you.
Driving smoothly and looking ahead reduces
fuel consumption.
Avoid high engine speeds Use 1st gear to get the vehicle in motion. Be‐
ginning with 2nd gear, accelerate rapidly. When
accelerating, shift up before reaching high en‐
gine speeds.
When you reach the desired speed, shift into
the highest applicable gear and drive with the
engine speed as low as possible and at a con‐
stant speed.
As a rule: driving at low engine speeds lowers
fuel consumption and reduces wear.
Use coasting conditions
When approaching a red light, take your foot
off the accelerator and coast to a halt in the
highest applicable gear.
On a downhill slope, take your foot off the ac‐
celerator and coast in a suitable gear.
The flow of fuel is interrupted while coasting.Seite 118Driving tipsSaving fuel118
Online Edition for Part no. 01 40 2 911 521 - VI/13
Page 119 of 218
Switch off the engine during longer
stops
Switch off the engine during longer stops, e.g.,
at traffic lights, railroad crossings or in traffic
congestion.
Fuel savings are already achieved after the en‐
gine is turned off for as little as 4 seconds.
Automatic Engine Start/Stop Function
The Automatic Engine Start/Stop Function auto‐
matically switches the engine off during a stop.
If the engine is stopped and then started again,
fuel consumption and emissions drop com‐
pared to an engine that runs permanently.
Stopping the engine even for just a few sec‐
onds can result in savings.
In addition, fuel consumption depends on other
factors as well, such as driving style, road con‐
ditions, maintenance, and environmental fac‐
tors.
Switch off any functions that are not currently needed
Functions such as seat heating and the rear
window defroster require a lot of energy and
consume additional fuel, especially in city and
stop-and-go traffic.
Therefore, switch off these functions if they are
not actually needed.
Have maintenance carried out
Have vehicles maintained regularly to achieve
optimal vehicle economy and operating life.
Have the maintenance carried out by the serv‐
ice center.
Please also note the MINI maintenance system,
refer to page 169.Seite 119Saving fuelDriving tips119
Online Edition for Part no. 01 40 2 911 521 - VI/13
Page 125 of 218
▷"LANG": select the language of the dis‐
play texts.▷"CONSMP": change the unit of measure
for the average fuel consumption.▷"TEMP": change the unit of measure for
the external temperature.5.Highlight the desired menu item and press
the button.6.Create the desired setting.
Computer
The following vehicle information can be call up
via the computer:
▷Average fuel consumption▷Average speed▷Range
Displaying information
1.Switch on the radio ready state or the igni‐
tion.2. Press the button.3."COMP"
Average fuel consumption
The average fuel consumption is calculated for
the time during which the engine is running.
To start calculation of the average fuel con‐
sumption:
1."CONSMP"2."RESET"
The previous display is set to zero and the sys‐
tem begins recalculating the average fuel con‐
sumption.
Average speed
The average speed is calculated for the time
during which the engine is running.
To start calculation of the average speed:
1."SPEED"2."RESET"
Estimated range
"RANGE"
The display shows the estimated distance that
can be still be driven on the remaining fuel,
taking into consideration the driving style over
the last 18 miles/30 km.
Radio
Listening to the radio
The radio is designed for reception in the FM
and AM wavebands.
1.Switch on the radio, refer to page 123.2. Press this button if necessary.3."TUNER"4."FM" or"AM"
Press the corresponding button repeatedly
until the desired waveband is displayed.▷FM: FM1, FM2, FMA▷AM: AM, AMA
Selecting a station
The setting is stored for the remote control cur‐
rently in use.
Next station
Press the button.
The next station with reception is selected.
Selecting the station manually by
frequency
1. Press the button.2.▷Press the respective function button to
set the desired frequency.▷Turn the right knob until the desired
frequency is set.Seite 125Radio MINI Boost CDEntertainment125
Online Edition for Part no. 01 40 2 911 521 - VI/13
Page 148 of 218
RefuelingVehicle equipmentThis chapter describes all series equipment as
well as country-specific and special equipment
offered for this model series.Therefore, it also
describes equipment that may not be found in
your vehicle, for instance due to the selected
special equipment or the country version. This
also applies to safety-related functions and sys‐
tems.
General information Refuel promptly
At the latest, refuel at a range below
30 miles/50 km; otherwise, the engine function
is not ensured and damage may occur. ◀
Notes Switch off the engine before refueling
Always switch off the engine before refu‐
eling; otherwise, fuel cannot be added to the
tank and a message will be displayed. ◀
Observe when handling fuel▷Take all precautionary measures and
observe all applicable regulations
when handling fuel.▷Do not carry any spare fuel containers in
your vehicle. They can develop a leak and
cause an explosion or cause a fire in the
event of an accident. ◀
Fuel cap
Opening
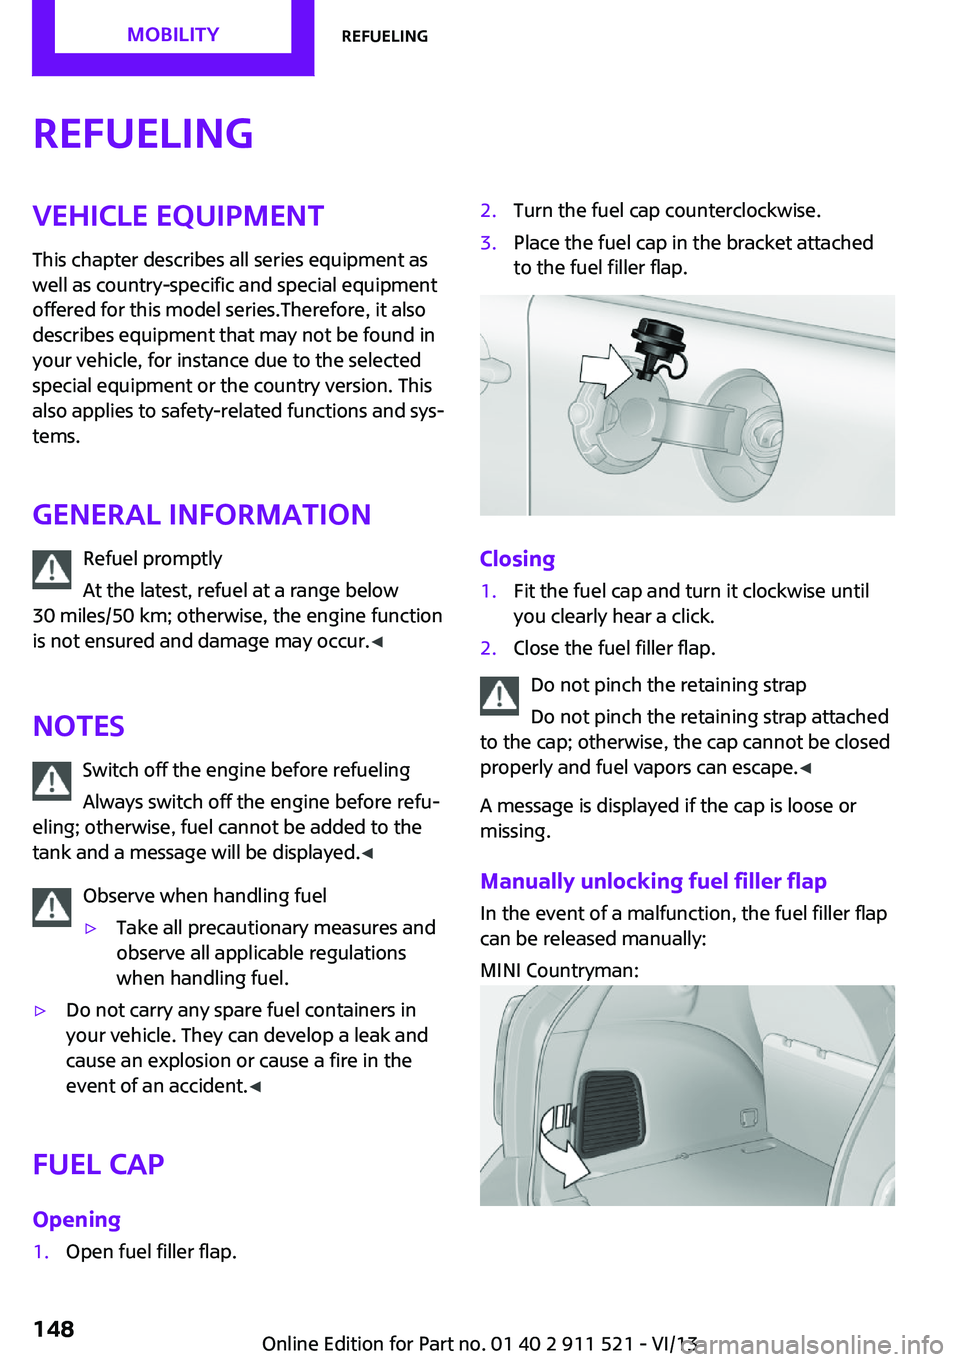
1.Open fuel filler flap.2.Turn the fuel cap counterclockwise.3.Place the fuel cap in the bracket attached
to the fuel filler flap.
Closing
1.Fit the fuel cap and turn it clockwise until
you clearly hear a click.2.Close the fuel filler flap.
Do not pinch the retaining strap
Do not pinch the retaining strap attached
to the cap; otherwise, the cap cannot be closed
properly and fuel vapors can escape. ◀
A message is displayed if the cap is loose or
missing.
Manually unlocking fuel filler flap In the event of a malfunction, the fuel filler flap
can be released manually:
MINI Countryman:
Seite 148MobilityRefueling148
Online Edition for Part no. 01 40 2 911 521 - VI/13
Page 149 of 218
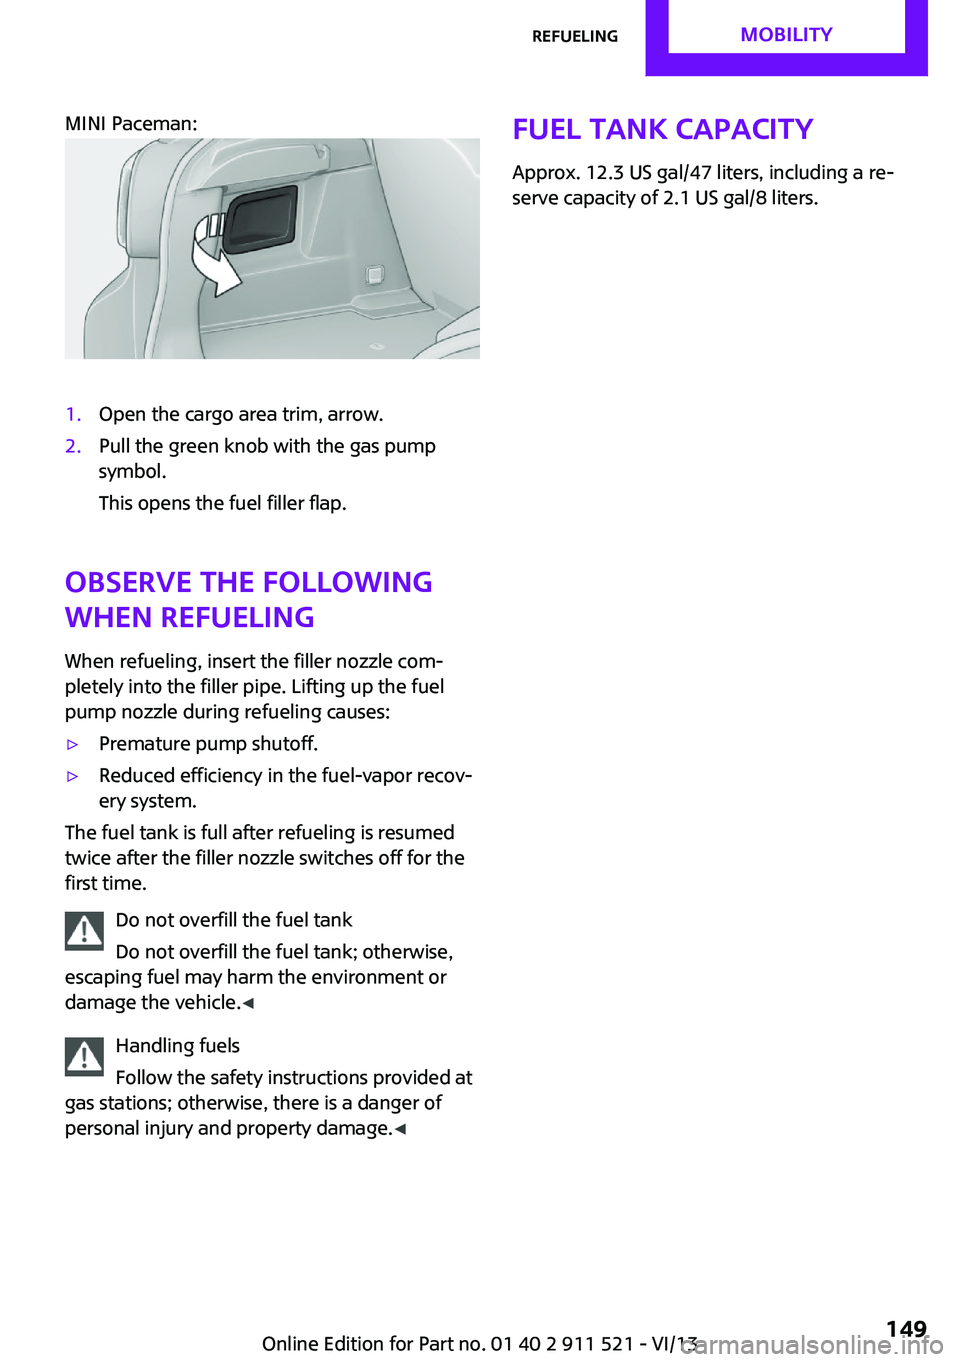
MINI Paceman:
1.Open the cargo area trim, arrow.2.Pull the green knob with the gas pump
symbol.
This opens the fuel filler flap.
Observe the following
when refueling
When refueling, insert the filler nozzle com‐
pletely into the filler pipe. Lifting up the fuel
pump nozzle during refueling causes:
▷Premature pump shutoff.▷Reduced efficiency in the fuel-vapor recov‐
ery system.
The fuel tank is full after refueling is resumed
twice after the filler nozzle switches off for the
first time.
Do not overfill the fuel tank
Do not overfill the fuel tank; otherwise,
escaping fuel may harm the environment or
damage the vehicle. ◀
Handling fuels
Follow the safety instructions provided at
gas stations; otherwise, there is a danger of
personal injury and property damage. ◀
Fuel tank capacity
Approx. 12.3 US gal/47 liters, including a re‐
serve capacity of 2.1 US gal/8 liters.Seite 149RefuelingMobility149
Online Edition for Part no. 01 40 2 911 521 - VI/13
Page 150 of 218
FuelVehicle equipmentThis chapter describes all series equipment as
well as country-specific and special equipment
offered for this model series.Therefore, it also
describes equipment that may not be found in
your vehicle, for instance due to the selected
special equipment or the country version. This
also applies to safety-related functions and sys‐
tems.
Fuel recommendation GasolineFor the best fuel economy, the gasoline should
be sulfur-free or very low in sulfur content.
Do not use fuels that are labeled at the fuel
pump as containing metals.
Only refuel with lead-free gasoline with‐
out metal additives
Do not refuel with leaded gasoline or gasoline
with metal additives, e. g., manganese or iron;
otherwise, the catalytic converter and other components will be permanently damaged. ◀
Fuels with a maximum ethanol content of
10 %, i.e., E10, may be used for refueling.
The ethanol should fulfill the following quality standards:
US: ASTM 4806–xx
CAN: CGSB-3.511–xx
xx: always adhere to the currently applicable
standard.
Do not refuel with ethanol E85
Do not refuel with E85, i.e., fuel with an
ethanol content of 85 %, or with Flex Fuel, as
this would damage the engine and fuel supply system. ◀The engine is knock controlled. Therefore, you
can refuel with different gasoline qualities.
Gasoline quality
The manufacturer of your MINI recommends:▷AKI 91.▷John Cooper Works AKI 93.
Minimum fuel grade
The manufacturer of your MINI recommends
AKI 89.
Minimum fuel grade
Do not fill up with fuel below the speci‐
fied minimum quality; otherwise, the engine
may not run properly. ◀
If you use gasoline with this minimum AKI rat‐
ing, the engine may produce knocking sounds
when starting at high outside temperatures.
This has no effect on the engine life.
Minimum fuel grade
The use of poor-quality fuels may result in
harmful engine deposits or damage. Addition‐
ally, problems relating to drivability, starting
and stalling, especially under certain environ‐
mental conditions such as high ambient tem‐
perature and high altitude, may occur.
If drivability problems are encountered, we rec‐
ommend switching to a high quality gasoline
brand and a higher octane grade — AKI num‐
ber — for a few tank fills. To avoid harmful en‐
gine deposits, it is highly recommended to pur‐
chase gasoline from BP or Top Tier retailers.
Failure to comply with these recommendations
may result in the need for unscheduled mainte‐
nance. ◀
Seite 150MobilityFuel150
Online Edition for Part no. 01 40 2 911 521 - VI/13
Page 151 of 218
Seite 151FuelMobility151
Online Edition for Part no. 01 40 2 911 521 - VI/13
Page 160 of 218
Maximum speed of winter tires
If the maximum speed of the vehicle is higher
than the permissible speed for the winter tires,
then display a corresponding sign in the field of
vision. You can obtain this sign from the tire
specialist or from your service center.
Maximum speed for winter tires
Do not exceed the maximum speed for
the winter tires; otherwise, tire damage and ac‐
cidents can occur. ◀
Run-flat tires When mounting new tires or changing fromsummer to winter tires or vice versa, use run-
flat tires for your own safety. Also, a compact
wheel is not available in case of a flat tire. Your
service center will be glad to advise you.
Rotating wheels between axles
Different wear patterns occur on the front and
rear axles, depending on the individual condi‐
tions of use.
To ensure even wear on the tires, the wheels
can be rotated between the axles. Your service
center will be glad to advise you.
After changing the tires, check the tire inflation
pressure and correct it if necessary.
Storage Store wheels and tires in a cool, dry place with
as little exposure to light as possible.
Always protect tires against all contact with oil,
grease and fuels.
Do not exceed the maximum tire inflation pres‐
sure indicated on the side wall of the tire.Run-flat tires
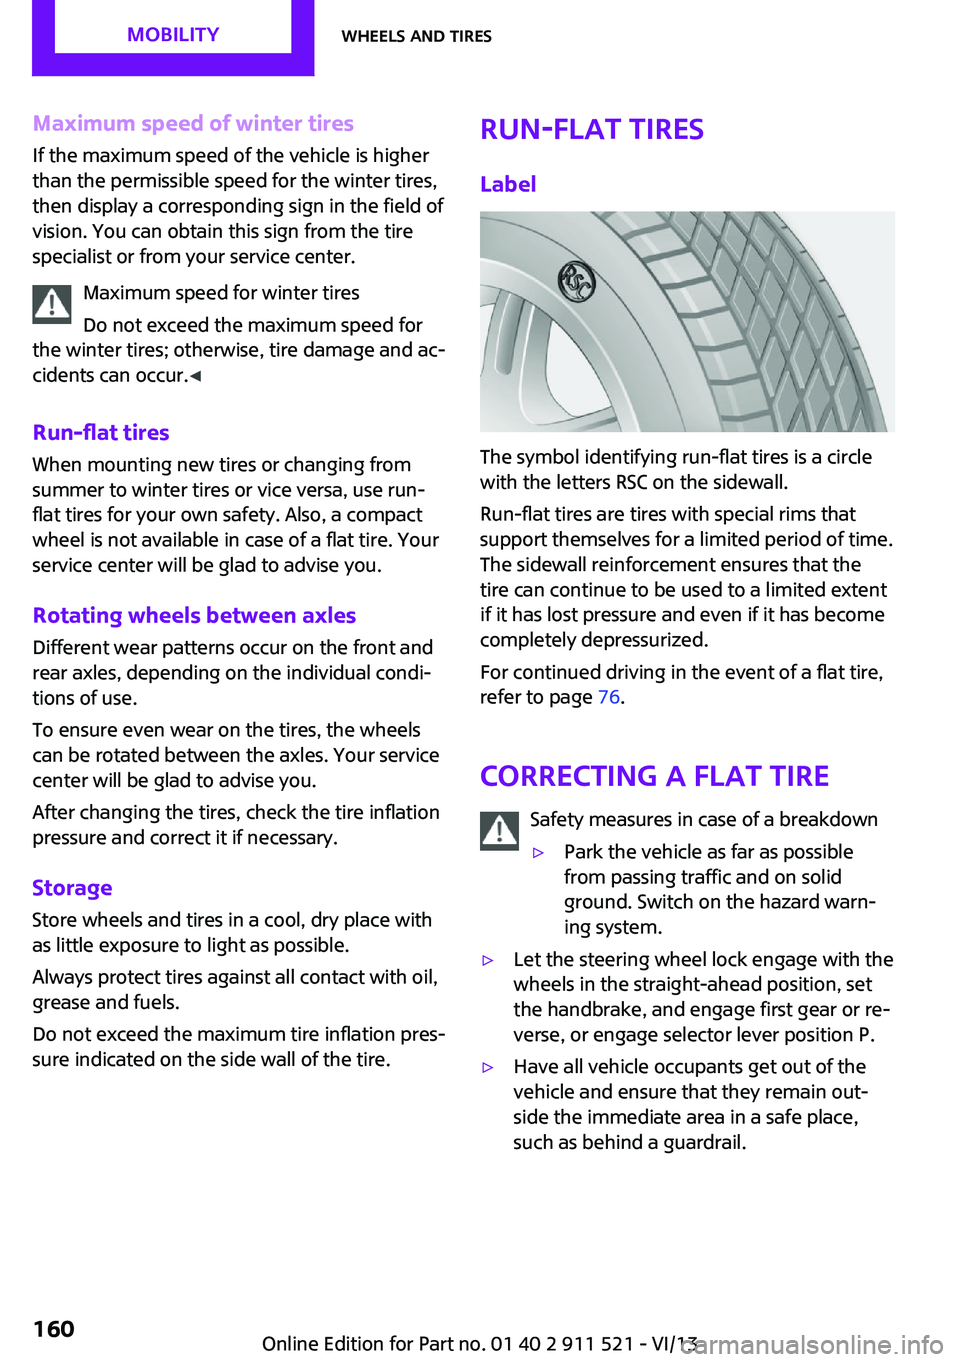
Label
The symbol identifying run-flat tires is a circle
with the letters RSC on the sidewall.
Run-flat tires are tires with special rims that
support themselves for a limited period of time.
The sidewall reinforcement ensures that the
tire can continue to be used to a limited extent
if it has lost pressure and even if it has become
completely depressurized.
For continued driving in the event of a flat tire,
refer to page 76.
Correcting a flat tire Safety measures in case of a breakdown
▷Park the vehicle as far as possible
from passing traffic and on solid
ground. Switch on the hazard warn‐
ing system.▷Let the steering wheel lock engage with the
wheels in the straight-ahead position, set
the handbrake, and engage first gear or re‐
verse, or engage selector lever position P.▷Have all vehicle occupants get out of the
vehicle and ensure that they remain out‐
side the immediate area in a safe place,
such as behind a guardrail.Seite 160MobilityWheels and tires160
Online Edition for Part no. 01 40 2 911 521 - VI/13