key MINI Coupe 2012 User Guide
[x] Cancel search | Manufacturer: MINI, Model Year: 2012, Model line: Coupe, Model: MINI Coupe 2012Pages: 218, PDF Size: 3.84 MB
Page 56 of 218
DrivingCONTROLS
55
Driving
Vehicle equipment
In this chapter, all production, country, and
optional equipment that is offered in the model
range is described. Equipment is also described
that is not available because of, for example,
selected options or count ry version. This also
applies to safety related functions and systems.
Ignition lock
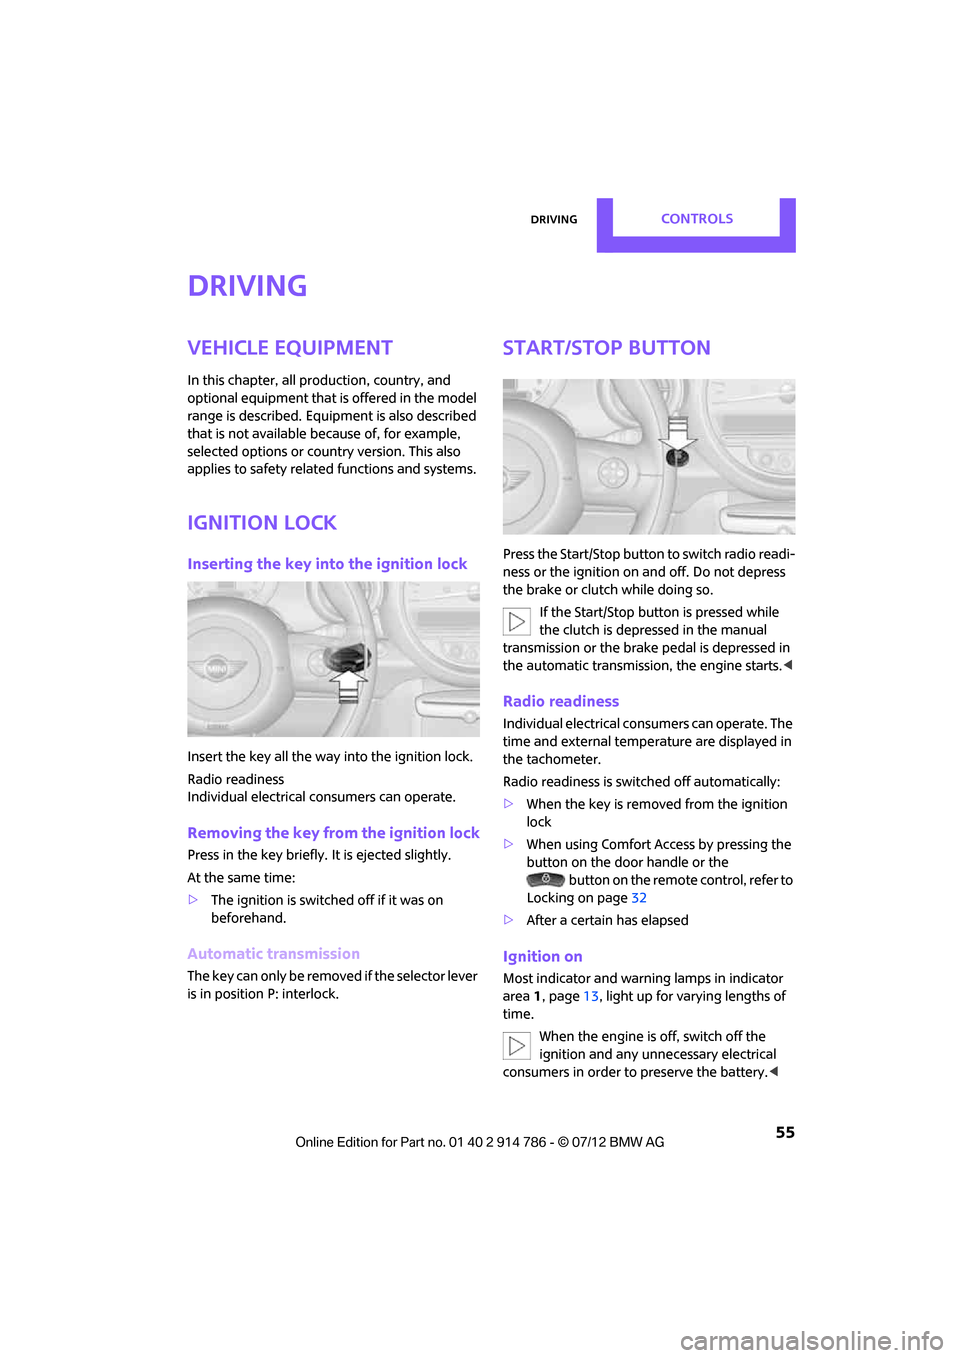
Inserting the key into the ignition lock
Insert the key all the way into the ignition lock.
Radio readiness
Individual electrical consumers can operate.
Removing the key from the ignition lock
Press in the key briefly. It is ejected slightly.
At the same time:
> The ignition is switched off if it was on
beforehand.
Automatic transmission
The key can only be removed if the selector lever
is in position P: interlock.
Start/Stop button
Press the Start/Stop button to switch radio readi-
ness or the ignition on and off. Do not depress
the brake or clutch while doing so.
If the Start/Stop button is pressed while
the clutch is depressed in the manual
transmission or the brak e pedal is depressed in
the automatic transmission, the engine starts. <
Radio readiness
Individual electrical consumers can operate. The
time and external temperature are displayed in
the tachometer.
Radio readiness is switched off automatically:
>When the key is removed from the ignition
lock
> When using Comfort Access by pressing the
button on the door handle or the
button on the remote control, refer to
Locking on page 32
> After a certain has elapsed
Ignition on
Most indicator and warning lamps in indicator
area 1, page 13, light up for va rying lengths of
time.
When the engine is off, switch off the
ignition and any unnecessary electrical
consumers in order to preserve the battery. <
Online Edition for Part no. 01 40 2 914 786 - \251 07/12 BMW AG
Page 57 of 218
CONTROLSDriving
56
Radio readiness and ignition off
All indicator and warning lamps in the displays
go out.
The ignition switches off automatically if the
driver's door is opened. Pressing the Start/Stop
button again switches the ignition back on.
The ignition is not switched off in situations such
as the following:
> The clutch or brake is depressed
> The low beams are switched on
Starting the engine
Do not allow the engine to run in enclosed
areas; otherwise, inha lation of the noxious
exhaust gases can lead to loss of consciousness
and death. Exhaust gases contain carbon
monoxide, an odorless and colorless, but highly
toxic gas. Never leave an unattended vehicle
with the engine running; otherwise, such a
vehicle represents a potential safety hazard.
Before leaving the car while the engine is run-
ning, place the transmission in neutral or move
the selector lever to position P and forcefully
apply the parking brake to prevent the car from
moving. <
Avoid frequent starting in quick succes-
sion or repeated start attempts in which
the engine does not start. Otherwise, the fuel is
not burned or inadequate ly burned and there is
a danger of overheating and damaging the
catalytic converter. <
Do not let the engine warm up with the vehicle
at a standstill. Move off immediately at a
moderate engine speed.
When starting the engi ne, do not depress the
accelerator pedal.
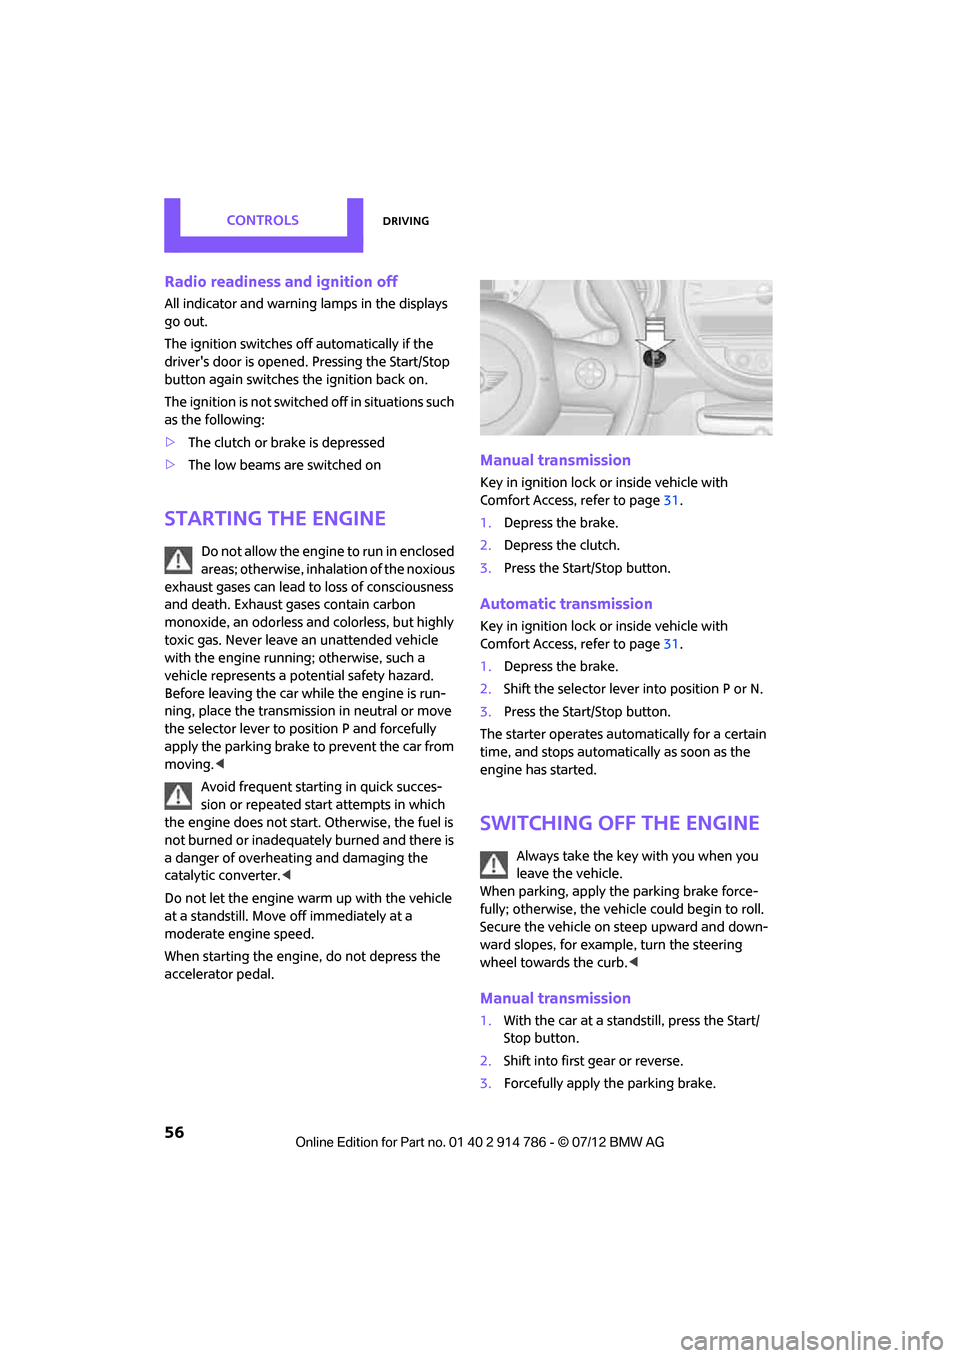
Manual transmission
Key in ignition lock or inside vehicle with
Comfort Access, refer to page 31.
1. Depress the brake.
2. Depress the clutch.
3. Press the Start/Stop button.
Automatic transmission
Key in ignition lock or inside vehicle with
Comfort Access, refer to page 31.
1. Depress the brake.
2. Shift the selector lever into position P or N.
3. Press the Start/Stop button.
The starter operates auto matically for a certain
time, and stops automati cally as soon as the
engine has started.
Switching off the engine
Always take the key with you when you
leave the vehicle.
When parking, apply the parking brake force-
fully; otherwise, the vehicle could begin to roll.
Secure the vehicle on steep upward and down-
ward slopes, for example, turn the steering
wheel towards the curb. <
Manual transmission
1.With the car at a standstill, press the Start/
Stop button.
2. Shift into first gear or reverse.
3. Forcefully apply the parking brake.
Online Edition for Part no. 01 40 2 914 786 - \251 07/12 BMW AG
Page 58 of 218
DrivingCONTROLS
57
Automatic transmission
1.With the car at a stop, move the selector
lever to position P.
2. Press the Start/Stop button.
3. Forcefully apply the parking brake.
Before driving into a car wash
By following these steps, the vehicle is able to
roll:
1.Place the remote control, even with Comfort
Access, in the ig nition lock.
2. Depress the brake.
3. Move the selector lever to position N.
4. Switch off the engine.
Parking brake
The parking brake is primarily intended to
prevent the vehicle from rolling while parked;
it brakes the rear wheels.
In addition, follow the instructions on page 56
under Switching off the engine.
Applying
The lever locks in position automatically.
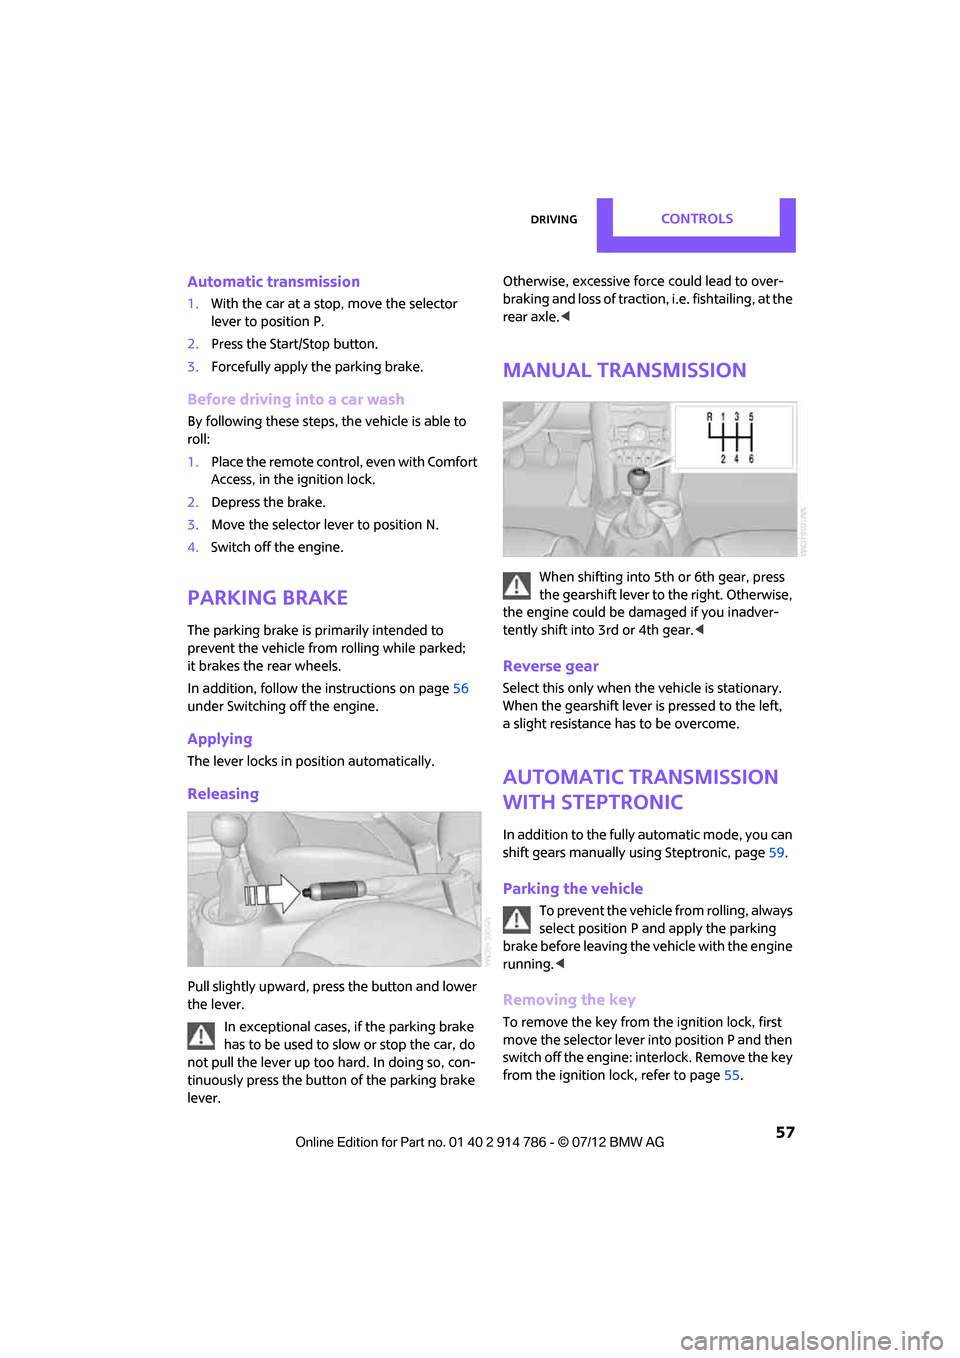
Releasing
Pull slightly upward, pre ss the button and lower
the lever.
In exceptional cases, if the parking brake
has to be used to slow or stop the car, do
not pull the lever up too hard. In doing so, con-
tinuously press the button of the parking brake
lever. Otherwise, excessive force could lead to over-
braking and loss of traction, i.e. fishtailing, at the
rear axle.
<
Manual transmission
When shifting into 5th or 6th gear, press
the gearshift lever to the right. Otherwise,
the engine could be damaged if you inadver-
tently shift into 3rd or 4th gear. <
Reverse gear
Select this only when the vehicle is stationary.
When the gearshift lever is pressed to the left,
a slight resistance has to be overcome.
Automatic transmission
with Steptronic
In addition to the fully automatic mode, you can
shift gears manually using Steptronic, page 59.
Parking the vehicle
To prevent the vehicle from rolling, always
select position P and apply the parking
brake before leaving the vehicle with the engine
running. <
Removing the key
To remove the key from the ignition lock, first
move the selector lever into position P and then
switch off the engine: interlock. Remove the key
from the ignition lock, refer to page 55.
Online Edition for Part no. 01 40 2 914 786 - \251 07/12 BMW AG
Page 100 of 218
Practical interior accessoriesCONTROLS
99
Practical interior accessories
Vehicle equipment
In this chapter, all production, country, and
optional equipment that is offered in the model
range is described. Equipment is also described
that is not available because of, for example,
selected options or count ry version. This also
applies to safety related functions and systems.
Glove compartment
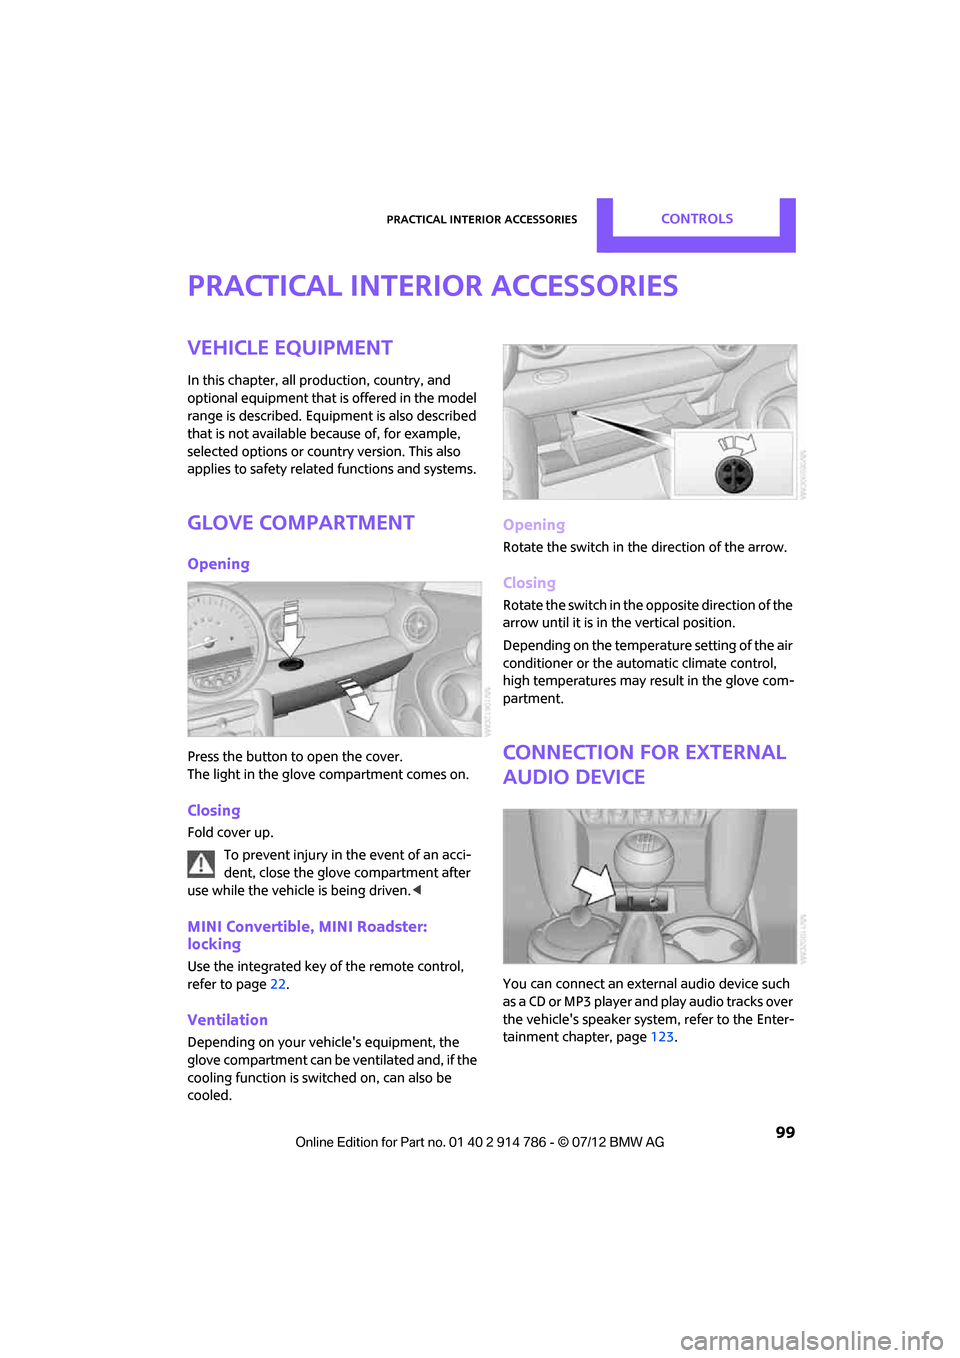
Opening
Press the button to open the cover.
The light in the glove compartment comes on.
Closing
Fold cover up.
To prevent injury in the event of an acci-
dent, close the glove compartment after
use while the vehicle is being driven. <
MINI Convertible, MINI Roadster:
locking
Use the integrated key of the remote control,
refer to page22.
Ventilation
Depending on your vehicle's equipment, the
glove compartment can be ventilated and, if the
cooling function is swit ched on, can also be
cooled.
Opening
Rotate the switch in the direction of the arrow.
Closing
Rotate the switch in the opposite direction of the
arrow until it is in the vertical position.
Depending on the temperature setting of the air
conditioner or the automatic climate control,
high temperatures may result in the glove com-
partment.
Connection for external
audio device
You can connect an external audio device such
as a CD or MP3 player an d play audio tracks over
the vehicle's speaker system, refer to the Enter-
tainment chapter, page 123.
Online Edition for Part no. 01 40 2 914 786 - \251 07/12 BMW AG
Page 102 of 218
Practical interior accessoriesCONTROLS
101
MINI Coupe, MINI Roadster: lateral
storage tray behind the seats
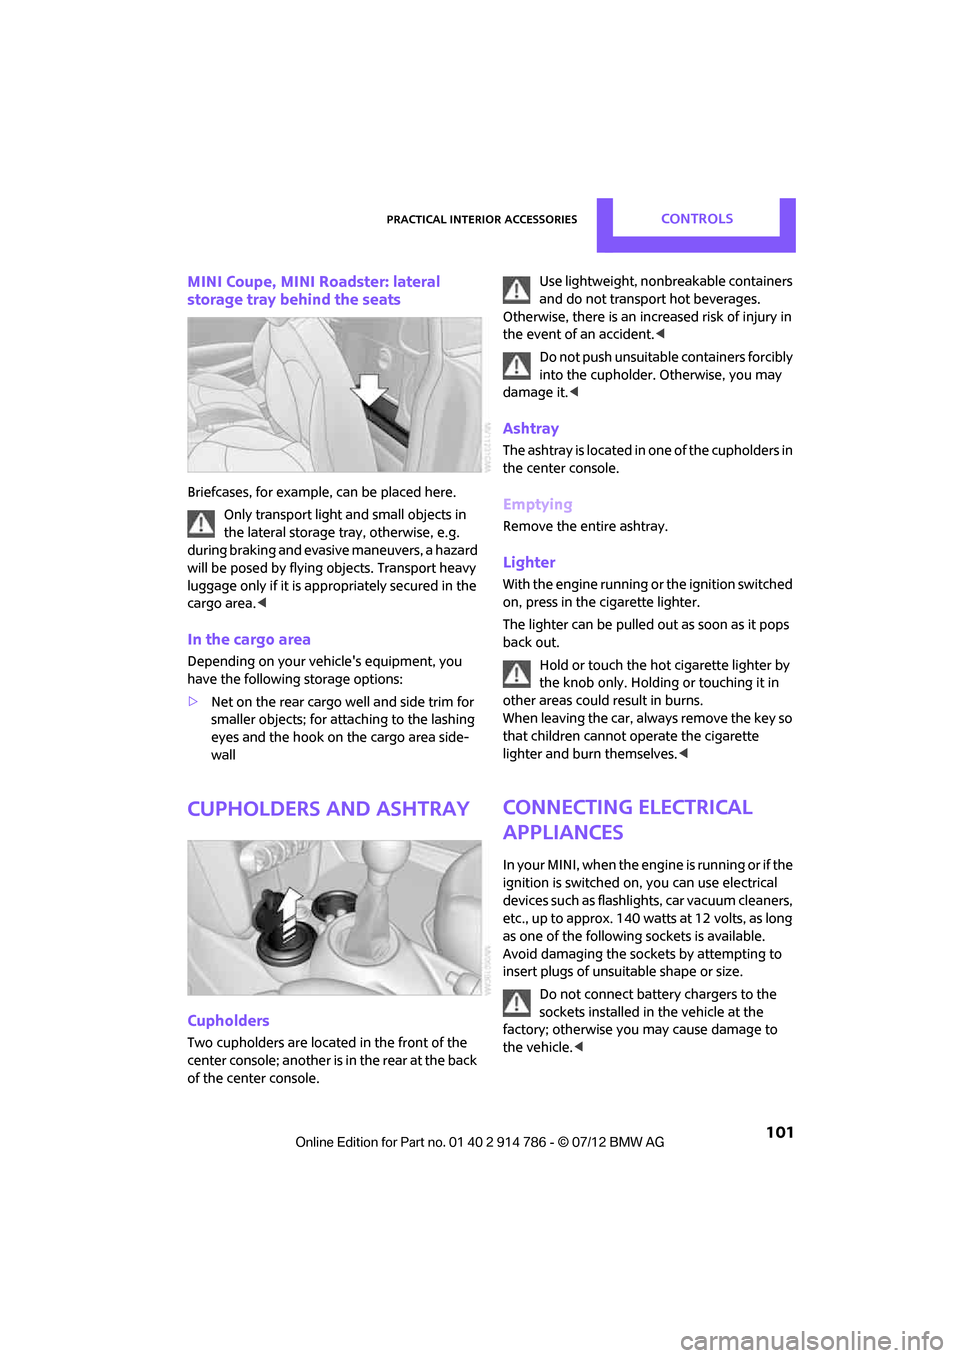
Briefcases, for example, can be placed here.
Only transport light and small objects in
the lateral storage tray, otherwise, e.g.
during braking and evasive maneuvers, a hazard
will be posed by flying objects. Transport heavy
luggage only if it is appropriately secured in the
cargo area. <
In the cargo area
Depending on your vehicle's equipment, you
have the following storage options:
>Net on the rear cargo well and side trim for
smaller objects; for attaching to the lashing
eyes and the hook on the cargo area side-
wall
Cupholders and ashtray
Cupholders
Two cupholders are located in the front of the
center console; another is in the rear at the back
of the center console. Use lightweight, nonbreakable containers
and do not transport hot beverages.
Otherwise, there is an increased risk of injury in
the event of an accident. <
Do not push unsuitable containers forcibly
into the cupholder. Otherwise, you may
damage it.<
Ashtray
The ashtray is located in one of the cupholders in
the center console.
Emptying
Remove the entire ashtray.
Lighter
With the engine running or the ignition switched
on, press in the cigarette lighter.
The lighter can be pulled out as soon as it pops
back out.
Hold or touch the hot cigarette lighter by
the knob only. Holding or touching it in
other areas could re sult in burns.
When leaving the car, always remove the key so
that children cannot operate the cigarette
lighter and burn themselves. <
Connecting electrical
appliances
In your MINI, when the engine is running or if the
ignition is switched on, you can use electrical
devices such as flashlights, car vacuum cleaners,
etc., up to approx. 140 watts at 12 volts, as long
as one of the following sockets is available.
Avoid damaging the sockets by attempting to
insert plugs of unsui table shape or size.
Do not connect battery chargers to the
sockets installed in the vehicle at the
factory; otherwise you may cause damage to
the vehicle. <
Online Edition for Part no. 01 40 2 914 786 - \251 07/12 BMW AG
Page 110 of 218

Things to remember when drivingDRIVING TIPS
109
MINI Coupe, MINI Roadster: opening for
loading
Always secure snowboards and similar
items; otherwise, these may pose a hazard
to occupants during braking or evasive maneu-
vers. <
1. If necessary, fold seat forward, see page 47.
2. Open lock with integrated key, see page 22.
3. Pull handle and fold lid down.
MINI Coupe, MINI Roadster: storage
compartment in luggage compartment
In the front of the luggage compartment, there
is a storage compartment under a cover.
By way of example, the illustration shows the
cargo area in the MINI Coupe.
1. Open load opening over the passenger
compartment.
2. Fold up cover, arrow 1.
MINI Convertible: luggage compartment
Do not place any objects on the luggage
compartment roller cover, as this may
damage the cover or the convertible top. <
Loading aid
When the convertible top is closed, you can load
the vehicle more easily by releasing the conver-
tible top and folding it up.
1.Release the convertible top using the
handles, refer to arrows 1.
2. Lift the convertible top, refer to arrow2.
3. Fold back the handles and place them on
holders 3.
Expanding the luggage compartment
volume
You can enlarge the luggage compartment
volume when the convertible top is closed.
1. Fold the convertible top upward, refer to
Loading aid.
2. Pull luggage compartment roller cover rear-
ward out of the lower brackets and pivot
upward, refer to arrows 1,
3. Push cover into the upper storage areas,
refer to arrows 2 and place down horizon-
tally.
To operate the convertible top, move the
cargo area cover back to its lower posi-
tion. <
Online Edition for Part no. 01 40 2 914 786 - \251 07/12 BMW AG
Page 111 of 218
DRIVING TIPSThings to remember when driving
110
Split-folding rear seats
To be able to transport larger objects, the rear
backrest can be folded down.
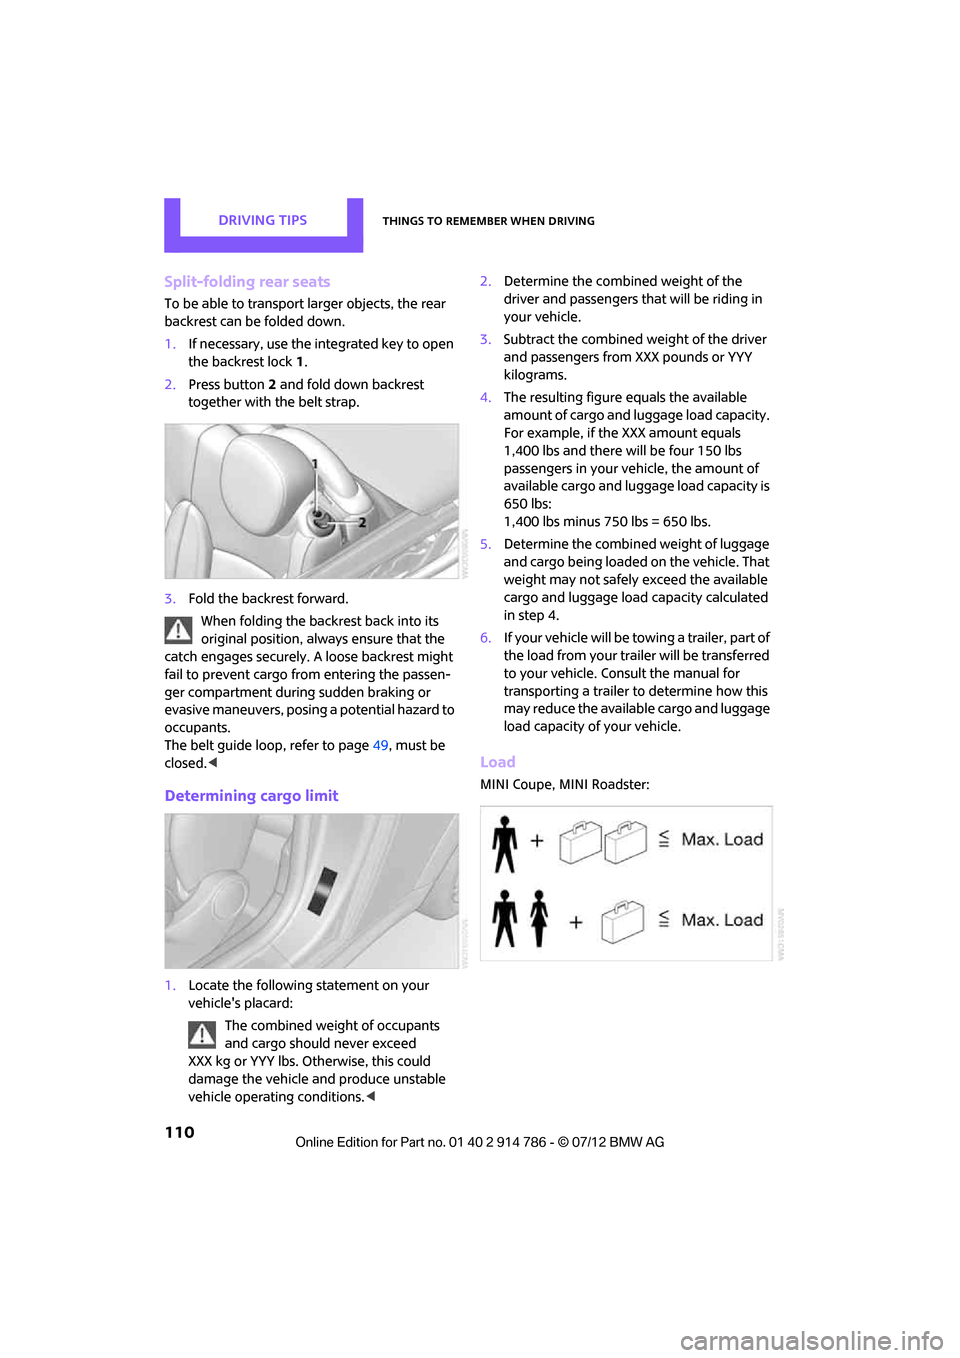
1.If necessary, use the integrated key to open
the backrest lock 1.
2. Press button 2 and fold down backrest
together with the belt strap.
3. Fold the backrest forward.
When folding the backrest back into its
original position, alwa ys ensure that the
catch engages securely. A loose backrest might
fail to prevent cargo from entering the passen-
ger compartment during sudden braking or
evasive maneuvers, posing a potential hazard to
occupants.
The belt guide loop, refer to page 49, must be
closed. <
Determining cargo limit
1.Locate the following statement on your
vehicle's placard:
The combined weight of occupants
and cargo should never exceed
XXX kg or YYY lbs. Otherwise, this could
damage the vehicle and produce unstable
vehicle operating conditions. <2.
Determine the combined weight of the
driver and passengers that will be riding in
your vehicle.
3. Subtract the combined weight of the driver
and passengers from XXX pounds or YYY
kilograms.
4. The resulting figure equals the available
amount of cargo and luggage load capacity.
For example, if the XXX amount equals
1,400 lbs and there will be four 150 lbs
passengers in your vehicle, the amount of
available cargo and luggage load capacity is
650 lbs:
1,400 lbs minus 750 lbs = 650 lbs.
5. Determine the combined weight of luggage
and cargo being loaded on the vehicle. That
weight may not safely exceed the available
cargo and luggage load capacity calculated
in step 4.
6. If your vehicle will be towing a trailer, part of
the load from your trailer will be transferred
to your vehicle. Consult the manual for
transporting a trailer to determine how this
may reduce the available cargo and luggage
load capacity of your vehicle.
Load
MINI Coupe, MINI Roadster:
Online Edition for Part no. 01 40 2 914 786 - \251 07/12 BMW AG
Page 129 of 218
COMMUNICATIONSTelephone
128
Telephone
Vehicle equipment
In this chapter, all production, country, and
optional equipment that is offered in the model
range is described. Equipment is also described
that is not available because of, for example,
selected options or coun try version. This also
applies to safety relate d functions and systems.
Overview
The concept
Mobile phones can be connected to the vehicle
through Bluetooth.
Bluetooth® is a registered trademark of
Bluetooth® SIG, Inc.
Your MINI is equipped with a mobile phone
preparation package. Af ter a suitable mobile
phone is paired with the vehicle once, the
mobile phone can be controlled via the radio,
the buttons on the steering wheel, and by voice.
It may be necessary for some functions to be
activated by the mobile phone provider.
Only make entries when traffic conditions
permit. Do not hold the mobile phone in
your hand while you are driving; use the hands-
free system instead. If you do not observe this
precaution, your being distracted can endanger
vehicle occupants and other road users. <
Snap-in adapter
The snap-in adapter, refer to page136, makes it
possible to:
> Accommodate the mobile phone.
> Recharge its battery.
> Connect it to an exte rnal antenna of the
vehicle.
This assures a better network connection
and constant sound quality. A mobile phone that is connected to the vehicle
should not be operated via the mobile phone
keypad; otherwise, ma
lfunctions may occur.
Suitable mobile phones
Precise information as to which mobile phones
are supported by the hands-free device can be
found at www.mini.com/connectivity.
Notes
Do not expose your mobile phone to extreme
ambient conditions, for example, very high tem-
peratures; otherwise, fu nctions on your mobile
phone may not work. Follow the operating
instructions for yo ur mobile phone.
Online Edition for Part no. 01 40 2 914 786 - \251 07/12 BMW AG
Page 131 of 218
COMMUNICATIONSTelephone
130
10Switching displays 134
> "PHONE": telephone
> "COMP": computer
> "CONFIG": adjusting
> "MINI": MINI contact
11 Radio on/off, volume
>Press: switchin g radio on/off
> Turn: adjusting volume 133
12 Ejecting CD
Pairing/unpairing mobile
phone
Overview
The pairing data of four mobile phones can be
stored simultaneously in the vehicle. When the
engine is running or the ignition is switched on,
each paired mobile phone is automatically
detected as soon as it is present in the passenger
compartment.
Requirements
>Suitable mobile ph one, refer to page128.
> Mobile phone operational.
> Bluetooth activated in vehicle, refer to
page 130, and in the mobile phone.
> Bluetooth presets in the mobile phone are
required, e.g. connection not confirmed or
visible, refer to Owner's Manual for the
mobile phone.
> A number with at least 4 and at most
16 digits has been established as the Bluetooth passkey. Only required once for
pairing.
> Ignition switched on.
Activating/deactivating Bluetooth link
Bluetooth is not permitted everywhere. Comply
with all safety guidelines and regulations.
To deactivate the Bluetooth connection:
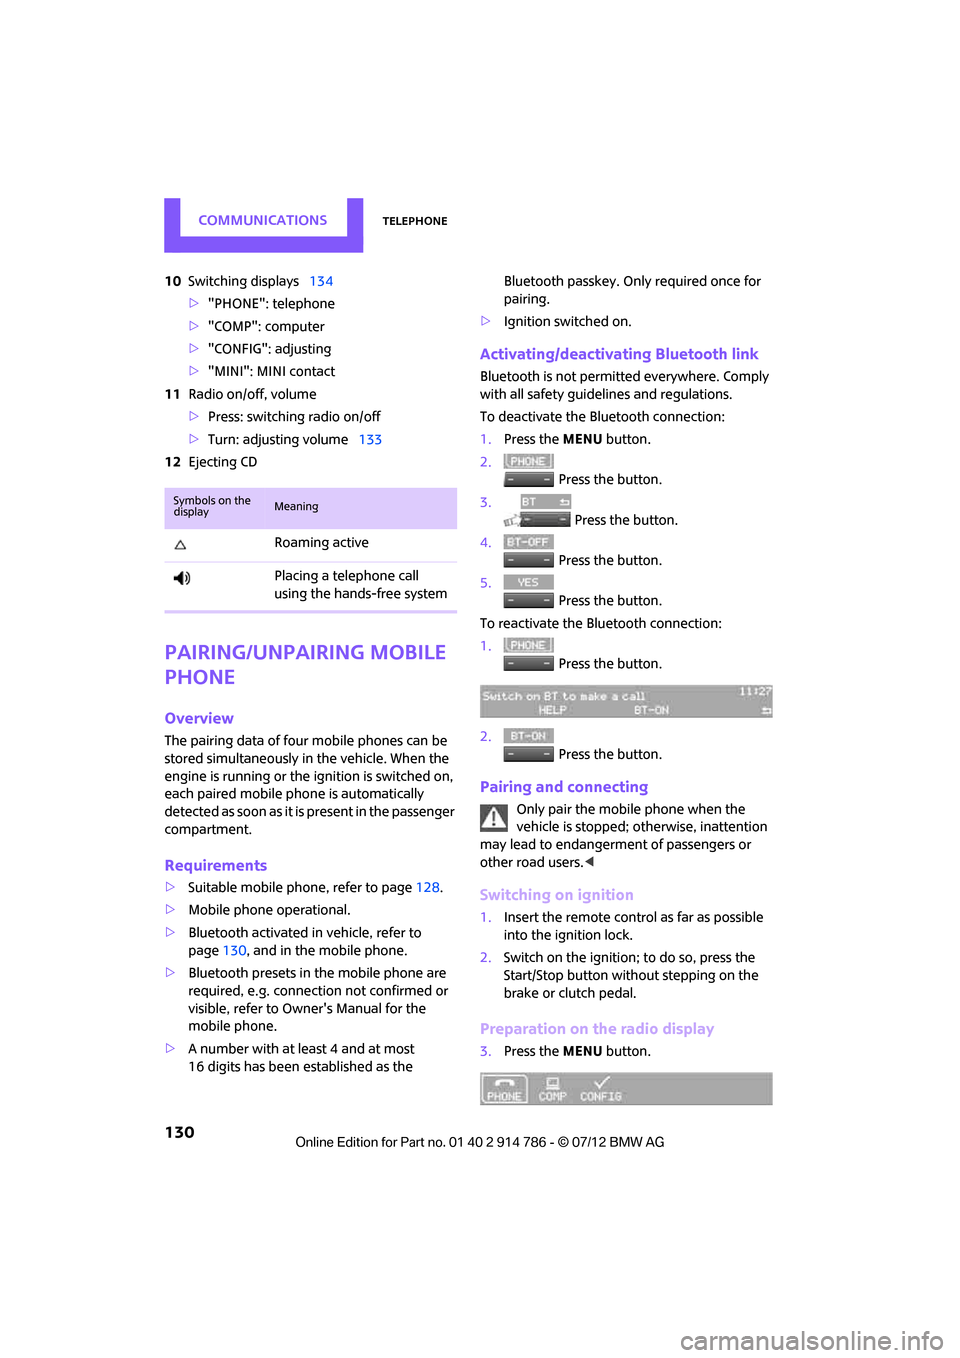
1.Press the MENU button.
2. Press the button.
3. Press the button.
4. Press the button.
5. Press the button.
To reactivate the Bluetooth connection:
1. Press the button.
2. Press the button.
Pairing and connecting
Only pair the mobile phone when the
vehicle is stopped; otherwise, inattention
may lead to endangerment of passengers or
other road users. <
Switching on ignition
1.Insert the remote control as far as possible
into the ignition lock.
2. Switch on the ignition; to do so, press the
Start/Stop button without stepping on the
brake or clutch pedal.
Preparation on the radio display
3.Press the MENU button.
Symbols on the
displayMeaning
Roaming active
Placing a telephone call
using the hands-free system
Online Edition for Part no. 01 40 2 914 786 - \251 07/12 BMW AG
Page 132 of 218
TelephoneCOMMUNICATIONS
131
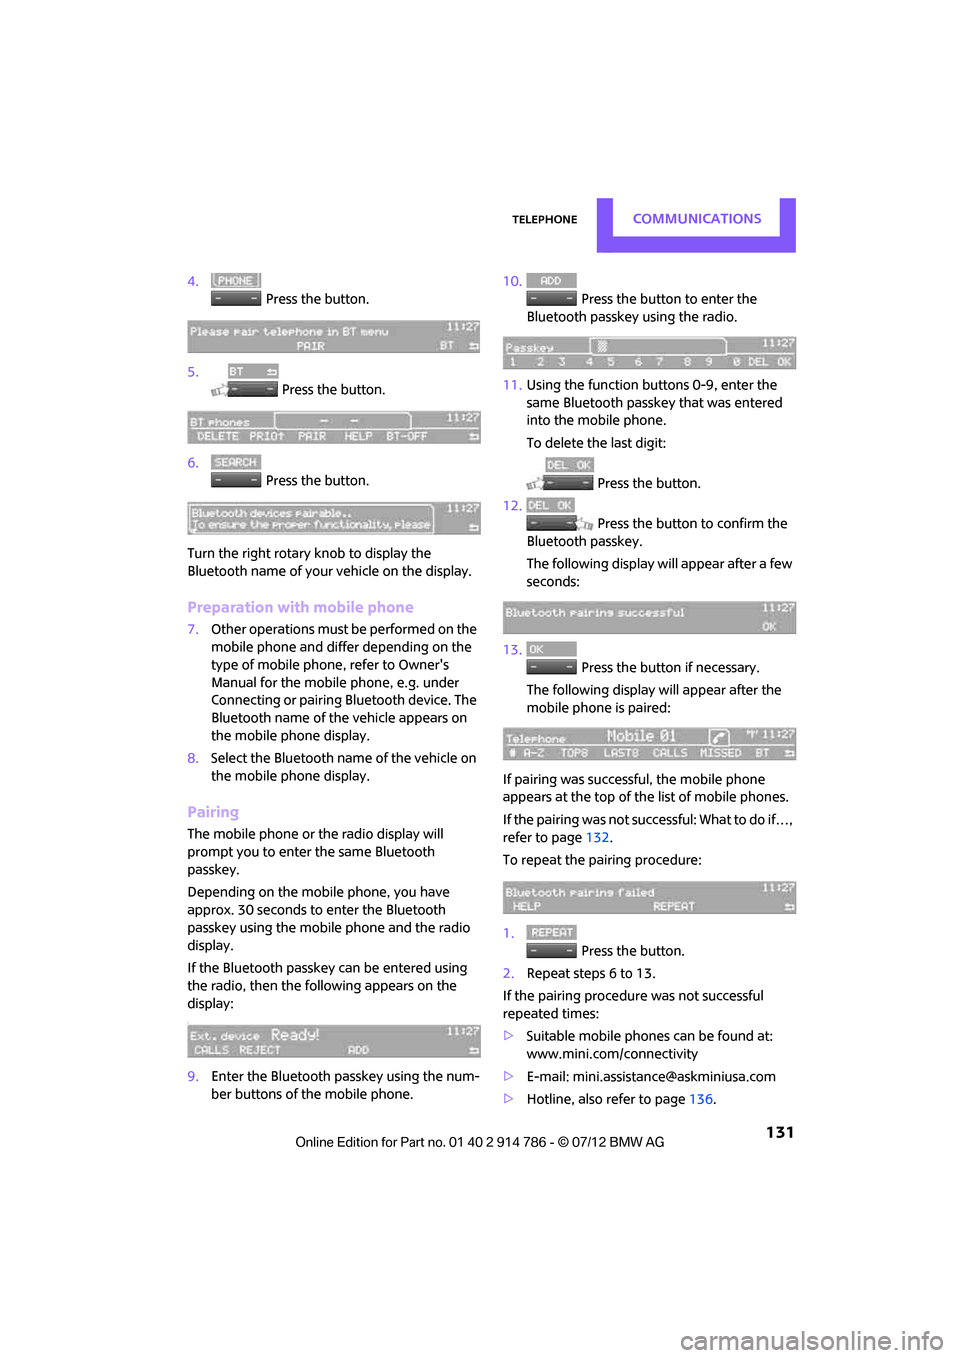
4. Press the button.
5. Press the button.
6. Press the button.
Turn the right rotary knob to display the
Bluetooth name of your vehicle on the display.
Preparation with mobile phone
7. Other operations must be performed on the
mobile phone and differ depending on the
type of mobile phone, refer to Owner's
Manual for the mobile phone, e.g. under
Connecting or pairing Bluetooth device. The
Bluetooth name of the vehicle appears on
the mobile phone display.
8. Select the Bluetooth name of the vehicle on
the mobile phone display.
Pairing
The mobile phone or the radio display will
prompt you to enter the same Bluetooth
passkey.
Depending on the mobile phone, you have
approx. 30 seconds to enter the Bluetooth
passkey using the mobile phone and the radio
display.
If the Bluetooth passkey can be entered using
the radio, then the following appears on the
display:
:
9.Enter the Bluetooth passkey using the num-
ber buttons of the mobile phone. 10.
Press the button to enter the
Bluetooth passkey using the radio.
11. Using the function buttons 0-9, enter the
same Bluetooth passke y that was entered
into the mobile phone.
To delete the last digit:
Press the button.
12. Press the button to confirm the
Bluetooth passkey.
The following display will appear after a few
seconds:
13. Press the button if necessary.
The following display will appear after the
mobile phone is paired:
If pairing was successful, the mobile phone
appears at the top of the list of mobile phones.
If the pairing was not successful: What to do if…,
refer to page 132.
To repeat the pairing procedure:
1. Press the button.
2. Repeat steps 6 to 13.
If the pairing procedur e was not successful
repeated times:
> Suitable mobile phones can be found at:
www.mini.com/connectivity
> E-mail: [email protected]
> Hotline, also refer to page 136.
Online Edition for Part no. 01 40 2 914 786 - \251 07/12 BMW AG