window MINI Coupe 2013 Owner's Guide
[x] Cancel search | Manufacturer: MINI, Model Year: 2013, Model line: Coupe, Model: MINI Coupe 2013Pages: 292, PDF Size: 7.02 MB
Page 111 of 292
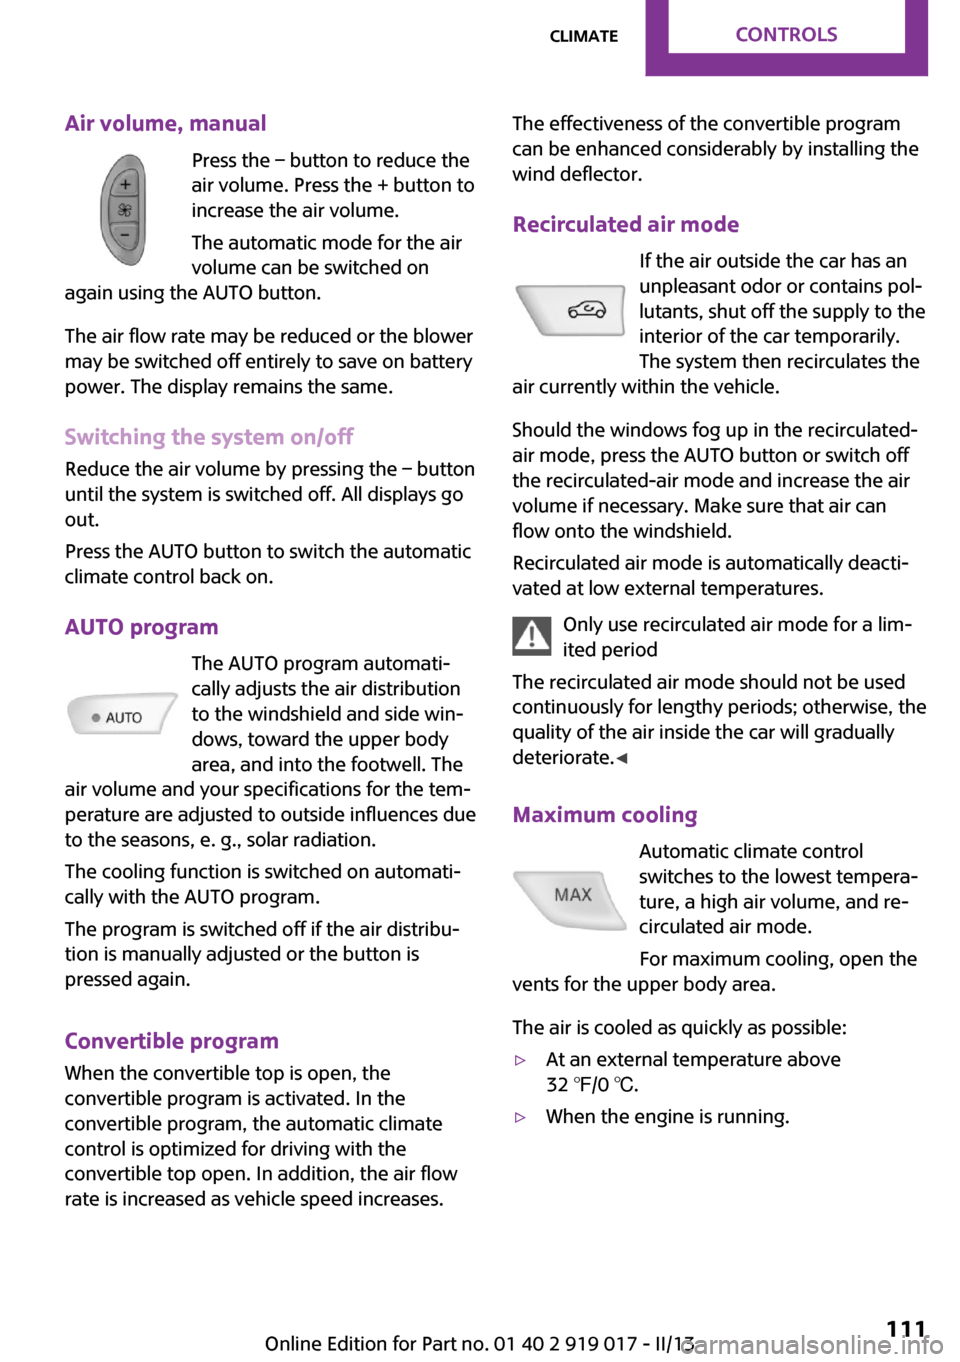
Air volume, manualPress the – button to reduce the
air volume. Press the + button to
increase the air volume.
The automatic mode for the air volume can be switched on
again using the AUTO button.
The air flow rate may be reduced or the blower
may be switched off entirely to save on battery
power. The display remains the same.
Switching the system on/off
Reduce the air volume by pressing the – button
until the system is switched off. All displays go
out.
Press the AUTO button to switch the automatic
climate control back on.
AUTO program The AUTO program automati‐
cally adjusts the air distribution
to the windshield and side win‐
dows, toward the upper body
area, and into the footwell. The
air volume and your specifications for the tem‐
perature are adjusted to outside influences due
to the seasons, e. g., solar radiation.
The cooling function is switched on automati‐
cally with the AUTO program.
The program is switched off if the air distribu‐
tion is manually adjusted or the button is
pressed again.
Convertible program When the convertible top is open, the
convertible program is activated. In the
convertible program, the automatic climate
control is optimized for driving with the
convertible top open. In addition, the air flow
rate is increased as vehicle speed increases.The effectiveness of the convertible program
can be enhanced considerably by installing the
wind deflector.
Recirculated air mode If the air outside the car has an
unpleasant odor or contains pol‐
lutants, shut off the supply to the
interior of the car temporarily.
The system then recirculates the
air currently within the vehicle.
Should the windows fog up in the recirculated-
air mode, press the AUTO button or switch off
the recirculated-air mode and increase the air
volume if necessary. Make sure that air can
flow onto the windshield.
Recirculated air mode is automatically deacti‐
vated at low external temperatures.
Only use recirculated air mode for a lim‐
ited period
The recirculated air mode should not be used continuously for lengthy periods; otherwise, the
quality of the air inside the car will gradually deteriorate. ◀
Maximum cooling Automatic climate control
switches to the lowest tempera‐
ture, a high air volume, and re‐
circulated air mode.
For maximum cooling, open the
vents for the upper body area.
The air is cooled as quickly as possible:▷At an external temperature above
32 ℉/0 ℃.▷When the engine is running.Seite 111ClimateControls111
Online Edition for Part no. 01 40 2 919 017 - II/13
Page 112 of 292
Manual air distributionThe flow of air is directed, as se‐
lected, to the windows, to the
upper body area, or to the foot‐
well.
The automatic mode for the air
distribution can be switched back on using the
AUTO button.
Temperature Set the desired temperature in‐
dividually.
The automatic climate control
achieves this temperature as
quickly as possible regardless of
the season, using maximum cooling or heating power if necessary, and then maintains it.
When switching between different temperature
settings in rapid succession, the automatic cli‐
mate control does not have sufficient time to
adjust the set temperature.
Rear window defroster The rear window defroster
switches off automatically after a
certain period of time.
Defrosting and defogging windows Quickly removes ice and con‐
densation from the windshield
and front side windows. For this
purpose, also switch on the cool‐
ing function.
The windshield heating switches on automati‐
cally.Windshield heating
The windshield heating switches
off automatically after some
time.
Cooling function The cooling function cools and
dehumidifies the incoming air
before reheating it as required,
according to the temperature
setting. The passenger compart‐
ment can only be cooled with the engine run‐
ning.
The cooling function helps to prevent conden‐
sation on the windows or to remove it quickly.
Depending on the weather, the windshield may
fog up briefly when the engine is started. Recir‐
culated air mode is switched on automatically if
necessary.
The cooling function is switched on automati‐
cally when the AUTO button is pressed.
Microfilter/activated-charcoal filterThe microfilter traps dust and pollen. The acti‐
vated-charcoal filter provides additional protec‐
tion by filtering gaseous pollutants from the
outside air. The service center replaces this
combined filter during routine maintenance.Seite 112ControlsClimate112
Online Edition for Part no. 01 40 2 919 017 - II/13
Page 125 of 292

Closing the tailgateDrive with the tailgate closed
Only drive with the tailgate closed; other‐
wise, passengers and other road users may be
endangered or the vehicle may be damaged if
an accident occurs or during braking or swerv‐
ing. In addition, exhaust fumes may enter the
passenger compartment. ◀
If, despite this, the vehicle must be driven with
the tailgate open:▷Drive moderately.▷Coupe: close all windows.▷Switch off recirculated air mode and greatly
increase the blower speed.
Hot exhaust system
Hot exhaust system
High temperatures are generated in the
exhaust system.
Do not remove the heat shields installed and
never apply undercoating to them. Make sure
that flammable materials, e. g. hay, leaves,
grass, etc. do not come in contact with the hot
exhaust system during driving, while in idle po‐
sition mode, or when parked. Such contact
could lead to a fire, and with it the risk of seri‐
ous personal injury as well as property damage.
Do not touch hot exhaust pipes; otherwise,
there is the danger of getting burned. ◀
Mobile communication devices in the
vehicle
Mobile communication devices in the ve‐
hicle
It is not recommended to use mobile phones,
such as mobile phones without a direct con‐
nection to an external aerial in the vehicle's
passenger compartment. Otherwise, the vehi‐
cle electronics and mobile communication de‐
vices can interfere with each other. In addition,
there is no assurance that the radiation gener‐
ated during transmission will be discharged
from the vehicle interior. ◀
Hydroplaning On wet or slushy roads, a wedge of water can
form between the tires and road surface.
This phenomenon is referred to as hydroplan‐
ing. It is characterized by a partial or complete
loss of contact between the tires and the road
surface, ultimately undermining your ability to
steer and brake the vehicle.
Hydroplaning
When driving on wet or slushy roads, re‐
duce your speed to prevent hydroplaning. ◀
The risk of hydroplaning increases as the tire
tread depth decreases. Minimum tread depth,
refer to page 230.
Driving through water Drive though calm water only if it is not deeper
than 12 inches/30 cm and at this height, no
faster than walking speed, up to
6 mph/10 km/h.
Adhere to water depth and speed limita‐
tions
Do not exceed this water depth and walking
speed; otherwise, the vehicle's engine, the
electrical systems and the transmission may be
damaged. ◀
Using the handbrake on inclines Using the handbrake
On inclines, do not hold the vehicle sta‐
tionary with a slipping clutch for extended pe‐
riod; use the handbrake instead. Otherwise, the
clutch will be subject to increased wear. ◀
Support from the hill drive-off assistant, refer to
page 103.Seite 125Things to remember when drivingDriving tips125
Online Edition for Part no. 01 40 2 919 017 - II/13
Page 129 of 292
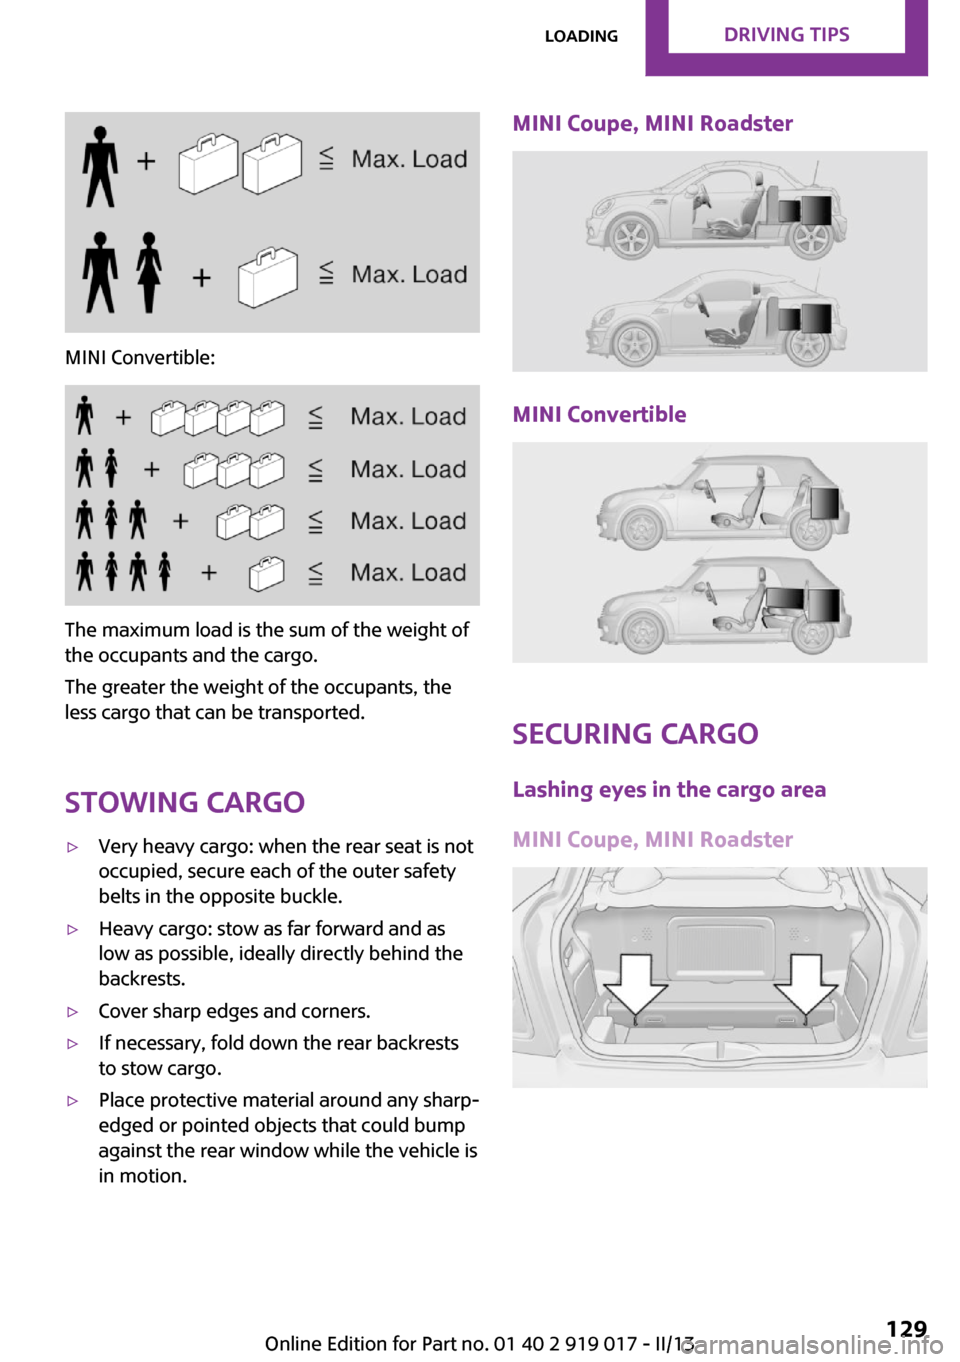
MINI Convertible:
The maximum load is the sum of the weight of
the occupants and the cargo.
The greater the weight of the occupants, the
less cargo that can be transported.
Stowing cargo
▷Very heavy cargo: when the rear seat is not
occupied, secure each of the outer safety
belts in the opposite buckle.▷Heavy cargo: stow as far forward and as
low as possible, ideally directly behind the
backrests.▷Cover sharp edges and corners.▷If necessary, fold down the rear backrests
to stow cargo.▷Place protective material around any sharp-
edged or pointed objects that could bump
against the rear window while the vehicle is
in motion.MINI Coupe, MINI Roadster
MINI Convertible
Securing cargo
Lashing eyes in the cargo area
MINI Coupe, MINI Roadster
Seite 129LoadingDriving tips129
Online Edition for Part no. 01 40 2 919 017 - II/13
Page 131 of 292
Saving fuelVehicle equipment
This chapter describes all series equipment as
well as country-specific and special equipment
offered for this model series.Therefore, it also
describes equipment that may not be found in
your vehicle, for instance due to the selected
special equipment or the country version. This
also applies to safety-related functions and sys‐
tems.
General information Your vehicle contains advanced technology for
the reduction of fuel consumption and emis‐
sions.
Fuel consumption depends on a number of dif‐
ferent factors. The implementation of certain
measures, driving style and regular mainte‐ nance can have an influence on fuel consump‐
tion and on the environmental impact.
Remove unnecessary cargo Additional weight increases fuel consumption.
Remove attached parts following use Remove rear-mounted luggage racks after use.
Attached parts on the vehicle impair the aero‐
dynamics and increase the fuel consumption.
Close both windows Open windows causes higher air resistance and
thus increases fuel consumption.
Check the tire inflation pressure
regularly
Check and, if necessary, correct the tire infla‐
tion pressure, refer to page 222, at least twice
a month and before starting on a long trip.Low tire inflation pressure increases rolling re‐
sistance and thus raises fuel consumption and
tire wear.
Drive away without delayDo not wait for the engine to warm-up while
the vehicle remains stationary. Start driving
right away, but at moderate engine speeds.
This is the fastest way for the cold engine to
reach its operating temperature.
Look well ahead when driving Avoid unnecessary acceleration and braking. To
achieve this, maintain a suitable distance to the
vehicle driving ahead of you.
Driving smoothly and looking ahead reduces
fuel consumption.
Avoid high engine speeds Use 1st gear to get the vehicle in motion. Be‐
ginning with 2nd gear, accelerate rapidly. When
accelerating, shift up before reaching high en‐
gine speeds.
When you reach the desired speed, shift into
the highest applicable gear and drive with the
engine speed as low as possible and at a con‐
stant speed.
As a rule: driving at low engine speeds lowers
fuel consumption and reduces wear.
Use coasting conditions
When approaching a red light, take your foot
off the accelerator and coast to a halt in the
highest applicable gear.
On a downhill slope, take your foot off the ac‐
celerator and coast in a suitable gear.
The flow of fuel is interrupted while coasting.Seite 131Saving fuelDriving tips131
Online Edition for Part no. 01 40 2 919 017 - II/13
Page 132 of 292
Switch off the engine during longer
stops
Switch off the engine during longer stops, e.g.,
at traffic lights, railroad crossings or in traffic
congestion.
Fuel savings are already achieved after the en‐
gine is turned off for as little as 4 seconds.
Automatic Engine Start/Stop Function
The Automatic Engine Start/Stop Function auto‐
matically switches the engine off during a stop.
If the engine is stopped and then started again,
fuel consumption and emissions drop com‐
pared to an engine that runs permanently.
Stopping the engine even for just a few sec‐
onds can result in savings.
In addition, fuel consumption depends on other
factors as well, such as driving style, road con‐
ditions, maintenance, and environmental fac‐
tors.
Switch off any functions that are not currently needed
Functions such as seat heating and the rear
window defroster require a lot of energy and
consume additional fuel, especially in city and
stop-and-go traffic.
Therefore, switch off these functions if they are
not actually needed.
Have maintenance carried out
Have vehicles maintained regularly to achieve
optimal vehicle economy and operating life.
Have the maintenance carried out by the serv‐
ice center.
Please also note the MINI maintenance system,
refer to page 241.Seite 132Driving tipsSaving fuel132
Online Edition for Part no. 01 40 2 919 017 - II/13
Page 236 of 292

Engine compartmentVehicle equipment
This chapter describes all series equipment as
well as country-specific and special equipment
offered for this model series.Therefore, it alsodescribes equipment that may not be found in
your vehicle, for instance due to the selected
special equipment or the country version. This
also applies to safety-related functions and sys‐
tems.
Important features in the engine compartment
1Vehicle identification number2Battery, under the cover 2523Dip stick for engine oil 2384Engine oil filler neck 2385Coolant expansion tank 2406Reservoir for washer fluid for the headlamp
and window washer system 697Engine compartment fuse box 253Hood
Notes Working in the engine compartment
Never attempt to perform any service or
repair operations on your vehicle without the
necessary professional technical training.If you are unfamiliar with the statutory guide‐
lines, have any work on the vehicle performed
only by a service center.
If this work is not carried out properly, there is
the danger of subsequent damage and related
safety hazards. ◀Seite 236MobilityEngine compartment236
Online Edition for Part no. 01 40 2 919 017 - II/13
Page 244 of 292

MINI Coupe, MINI Roadster: replacing
the wiper blades1.Fold up and hold the wiper arm.2.Squeeze the locking spring, arrows 1, and
fold out the wiper blade, arrow 2.3.Take the wiper blade out of the catch
mechanism toward the front.4.Press the new wiper blade into the fixation
until it engages audibly.5.Fold down the wiper arm.
Risk of damage
Before opening the hood, ensure that the
wiper arms with wiper blades are folded onto
the window; otherwise, damage may occur. ◀
MINI Convertible: replacing the wiper
blades
1.Fold up and hold the wiper arm.2.Squeeze the locking spring, arrows 1.3.While squeezing the locking spring, pull the
wiper blade off of the wiper arm, arrow 2.4.Slide the new wiper blade onto the wiper
arm until it engages audibly.5.Fold down the wiper arm.
Risk of damage
Before opening the hood, ensure that the
wiper arms with wiper blades are folded onto
the window; otherwise, damage may occur. ◀
Lamp and bulb replace‐
ment
Notes
Lamps and bulbs Lamps and bulbs make an essential contribu‐
tion to vehicle safety. Therefore, exercise cau‐
tion when handling lamps and bulbs.
The manufacturer of the vehicle recommends
that you entrust corresponding procedures to
the service center if you are unfamiliar with
them or they are not described here.
You can obtain a selection of replacement
bulbs at the service center.
Danger of burns
Only change bulbs when they are cool;
otherwise, there is the danger of getting
burned. ◀
Working on the lighting system
When working on the lighting system,
you should always switch off the lights affected
to prevent short circuits.
To avoid possible injury or equipment damage
when replacing bulbs, observe any instructions
provided by the bulb manufacturer. ◀
Do not touch the bulbs
Do not touch the glass of new bulbs with
your bare hands, as even minute amounts of
contamination will burn into the bulb's surface
and reduce its service life.
Seite 244MobilityReplacing components244
Online Edition for Part no. 01 40 2 919 017 - II/13
Page 259 of 292

CareVehicle equipmentThis chapter describes all series equipment as
well as country-specific and special equipment
offered for this model series.Therefore, it also
describes equipment that may not be found in
your vehicle, for instance due to the selected
special equipment or the country version. This
also applies to safety-related functions and sys‐
tems.
Car washes Notes Steam jets or high-pressure washers
When using steam jets or high-pressure
washers, hold them a sufficient distance away
and use a maximum temperature of
140 ℉/60 ℃.
Holding them too close or using excessively
high pressures or temperatures can cause dam‐
age or preliminary damage that may then lead
to long-term damage.
Follow the operating instructions for the high-
pressure washer. ◀
Cleaning sensors/cameras with high-pres‐
sure washers
When using high-pressure washers, do not
spray the seals of the retractable hardtop and
the exterior sensors and cameras, for Park Dis‐ tance Control, for instance, for extended peri‐ods of time and only from a distance of at least
12 in/30 cm. ◀
During the winter months
Ensure that the vehicle is washed more
frequently in winter. Intense soiling and road
salt can damage the vehicle. ◀After washing the vehicle, apply the brakes
briefly to dry them; otherwise, braking action
can be reduced and corrosion of the brake
discs can occur.
Regularly remove foreign bodies, such as
leaves, from the area of the windshield when
the hood is open.
Washing in automatic car washes Give preference to cloth car washes or those
that use soft brushes in order to avoid paint
damage.
Do not use automatic high-pressure washers;
otherwise, water may drip into the interior in
the area of the windows.
Before driving into the car wash, check whether
the system is suitable for your MINI. Note the
following points:▷Vehicle dimensions, refer to page 267.▷If necessary: fold in the exterior mirrors, re‐
fer to page 57.▷Maximum permissible tire width.
Guide rails in car washes
Avoid car washes with guide rails higher
than 4 in/10 cm; otherwise, the vehicle chassis
could be damaged. ◀
Preparations before driving into the car wash:
▷Unscrew the road antenna.▷MINI Coupe, MINI Roadster: retract the rear
spoiler.▷Deactivate the rain sensor to avoid unin‐
tentional wiper activation.▷Remove additional attachments, for in‐
stance a spoiler or telephone antenna, if
there is a risk that these may be damaged.▷Insert the remote control into the ignition
lock.Seite 259CareMobility259
Online Edition for Part no. 01 40 2 919 017 - II/13
Page 260 of 292

Automatic transmission
Before driving into the car wash, note the fol‐
lowing to ensure that the vehicle can roll:1.Insert the remote control into the ignition
lock, even with Comfort Access.2.Move the selector lever to position N.3.Release the handbrake.4.Switch the engine off.5.Leave the remote control in the ignition
lock so that the vehicle can roll.
Hand car wash
If washing the vehicle by hand, use copious
quantities of water and car shampoo if neces‐
sary. Clean the vehicle with a sponge or a
washing brush by applying gentle pressure.
Before cleaning the windshield, deactivate the
rain sensor to avoid unintentional wiper activa‐
tion or switch off the ignition.
Adhere to the local regulations regarding
washing cars by hand.
Headlamps
Do not rub dry and do not use abrasive or caus‐
tic cleansers. Soak areas that have been soiled,
e.g., due to insects, with shampoo and rinse off
with copious quantities of water.
Thaw ice with a window deicer; do not use an
ice scraper.
Windows Clean the outside and inside surfaces of the
windows and the mirror glasses with window
cleaner.
Do not clean mirror glass with cleaners contain‐
ing quartz.
Wiper blades
Clean with soapy water and replace regularly to
avoid streaking.
Wax and preservative residue and soiling on
the windows cause streaking during window
wiping and lead to premature wear on the
wiper blades and malfunctions of the rain sen‐
sor.
Vehicle care
Car care products
Regular cleaning and care contributes signifi‐
cantly to vehicle value retention.
The manufacturer recommends using cleaning
and care products from MINI, since these have
been tested and approved.
Original MINI CareProducts have been tested
on materials, in the laboratory, and in the field,
and offer optimum care and protection for MINI
vehicles.
Do not use cleansers that contain alcohol
or solvents
Do not use cleansers that contain alcohol or
solvents, such as lacquer thinners, heavy-duty
grease removers, fuel, or such; this could lead
to surface damage. ◀
Car care and cleaning products
Follow the instructions on the container.
When cleaning the interior, open the doors or
windows.
Only use products intended for cleaning vehi‐
cles.
Cleansers can contain substances that are dan‐
gerous and harmful to your health. ◀
Caring for the convertible top The appearance and life of the convertible top
depend on proper care and operation.
Adhere to the following instructions:▷Do not fold the convertible top and stow it
in the convertible top box while it is wet orSeite 260MobilityCare260
Online Edition for Part no. 01 40 2 919 017 - II/13