child lock MINI COUPE ROADSTER CONVERTIBLE 2012 Owners Manual
[x] Cancel search | Manufacturer: MINI, Model Year: 2012, Model line: COUPE ROADSTER CONVERTIBLE, Model: MINI COUPE ROADSTER CONVERTIBLE 2012Pages: 283, PDF Size: 9.38 MB
Page 39 of 283
CONTROLSOpening and closing
38
Warning lamps
The warning lamp lights up when an
attempt is made to start the engine: the
engine cannot be started. The remote
control is not inside the vehicle or is malfunc-
tioning. Take the remote control with you inside
the vehicle or have it checked. If necessary,
insert another remote co ntrol into the ignition
lock.
The warning lamp lights up when the
engine is running: the remote control is
no longer inside the vehicle. After the
engine is switched off, the engine can only be
restarted within approx. 10 seconds.
The indicator lamp comes on and a
message appears on the Control
Display: replace the battery in the
remote control.
Replacing the battery
The remote control for Comfort Access contains
a b a t t e r y t h a t w i l l n e e d t o b e r e p l a c e d f r o m t i m e
to time.
1. Remove the cover.
2. Insert the new battery with the plus side
facing up.
3. Press the cover on to close.
Take the old battery to a recycling center
or to your MINI dealer. <
Windows
To prevent injuries, exercise care when
closing the windows.
Take the remote control with you when you
leave the car; otherwise, children could operate
the electric windows and possibly injure
themselves. <
If, after a window is opened and closed
several times in close succession, the
window can only be closed and not opened, the
system is overheated. Le t the system cool for
several minutes with the ignition switched on or
the engine running. <
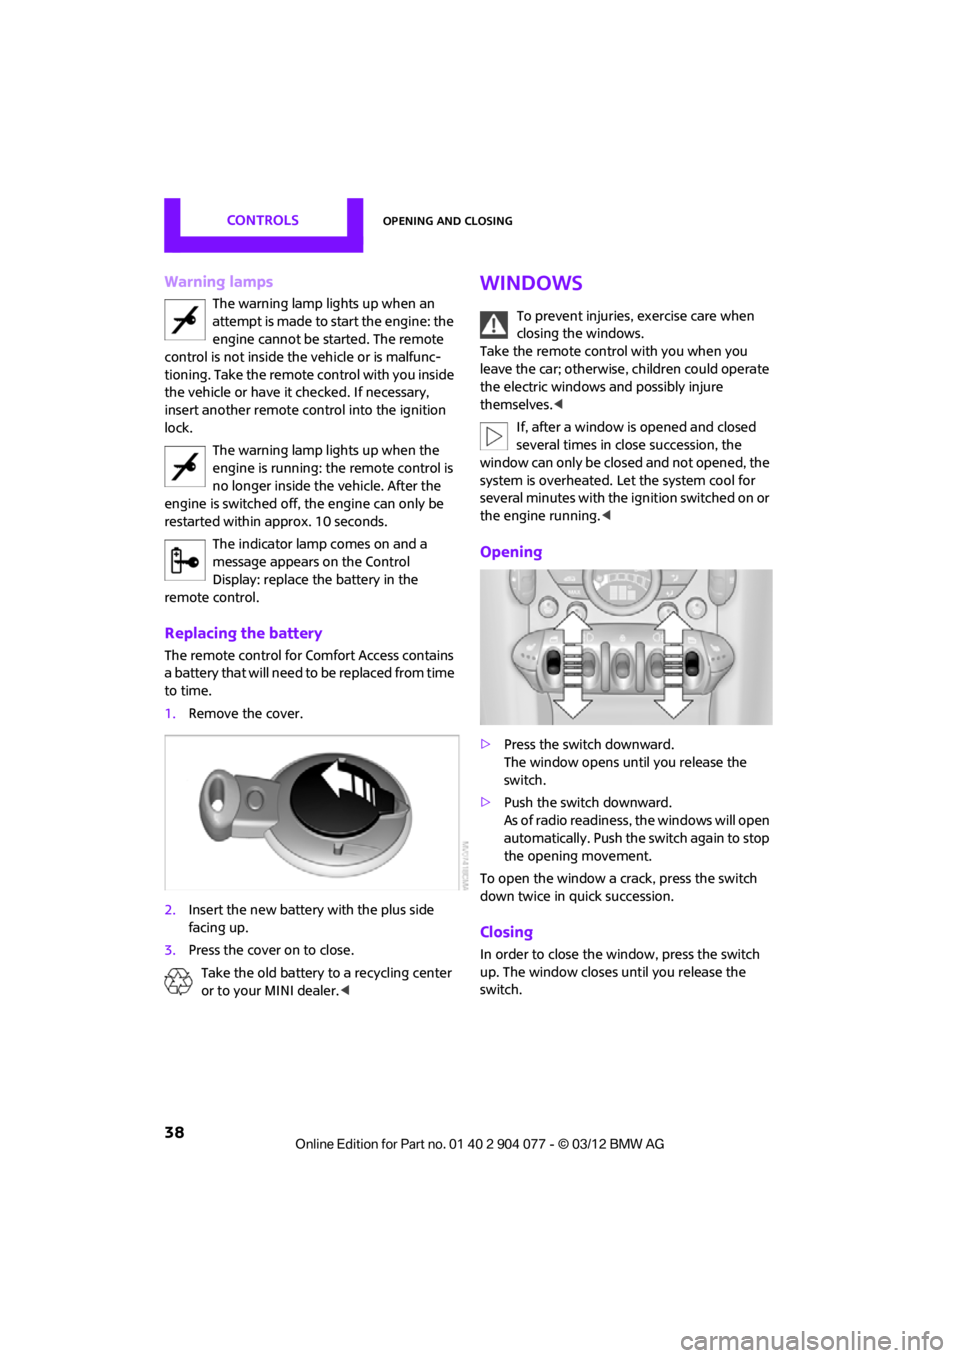
Opening
>Press the swit ch downward.
The window opens until you release the
switch.
> Push the switch downward.
As of radio readiness, the windows will open
automatically. Push the switch again to stop
the opening movement.
To open the window a crack, press the switch
down twice in quick succession.
Closing
In order to close the window, press the switch
up. The window closes until you release the
switch.
00320051004F004C00510048000300280047004C0057004C005200510003
Page 41 of 283
CONTROLSOpening and closing
40
Power convertible top
The fully automatic convertible top provides
protection from the weather, combined with
simple and easy operation.
Here are some helpful tips for getting the most
enjoyment out of your MINI Convertible:
>It is recommended th at you close the con-
vertible top whenever the vehicle is parked.
The closed convertible top not only protects
the vehicle interior from damage due to
unforeseen bad weather, but also provides a
certain degree of protection against theft.
Always keep your valuables inside the
locked luggage compartment, even if the
convertible top is closed.
> Do not mount any roof rack systems on the
convertible top.
> When opening the wet convertible top, e.g.,
after driving in the rain, water drops may
enter the luggage compartment. In order to
avoid water stains or soiling, remove all
objects from the luggage compartment, if
necessary.
If the temperature drops below +10 7/
–12 6, do not operate the convertible
top; otherwise, damage may occur.
Do not leave a wet convertible top open for
more than one day, since the humidity may
cause damages.
Do not place any objects on the convertible top,
as they could otherwise fall off while the con-
vertible top is being op erated and result in
property damage or personal injury.
If the rollover protective system is extended, do
not operate the convertible top.
Always completely finish the operation of the
convertible top. Driving of f before an opening or
closing procedure is completely finished can
lead to property damage or personal injury.
During the opening and closing operation,
ensure that no one is injured by the convertible
top linkage or other moving parts. Keep children
away from the pivoting range of the convertible
top. For safety reasons, only operate the convertible
top while the vehicle is standing.
<
While opening and clos ing, the convertible
top pivots upward. If operating the con-
vertible top inside a garage or under a bridge, or
similar low structure, ma ke sure that you have
the minimum clearance of 6 ft 7 in/2 m; other-
wise, the vehicle may be damaged. <
Before opening and closing
>Please observe the previous safety
instructions.
> Please ensure the luggage compartment
roller cover is in its lo west position, refer to
page 117; otherwise, the convertible top
cannot be opened.
> Ensure the cargo does not push against the
luggage compartment roller cover from
below.
> Make sure that the tailgate is closed.
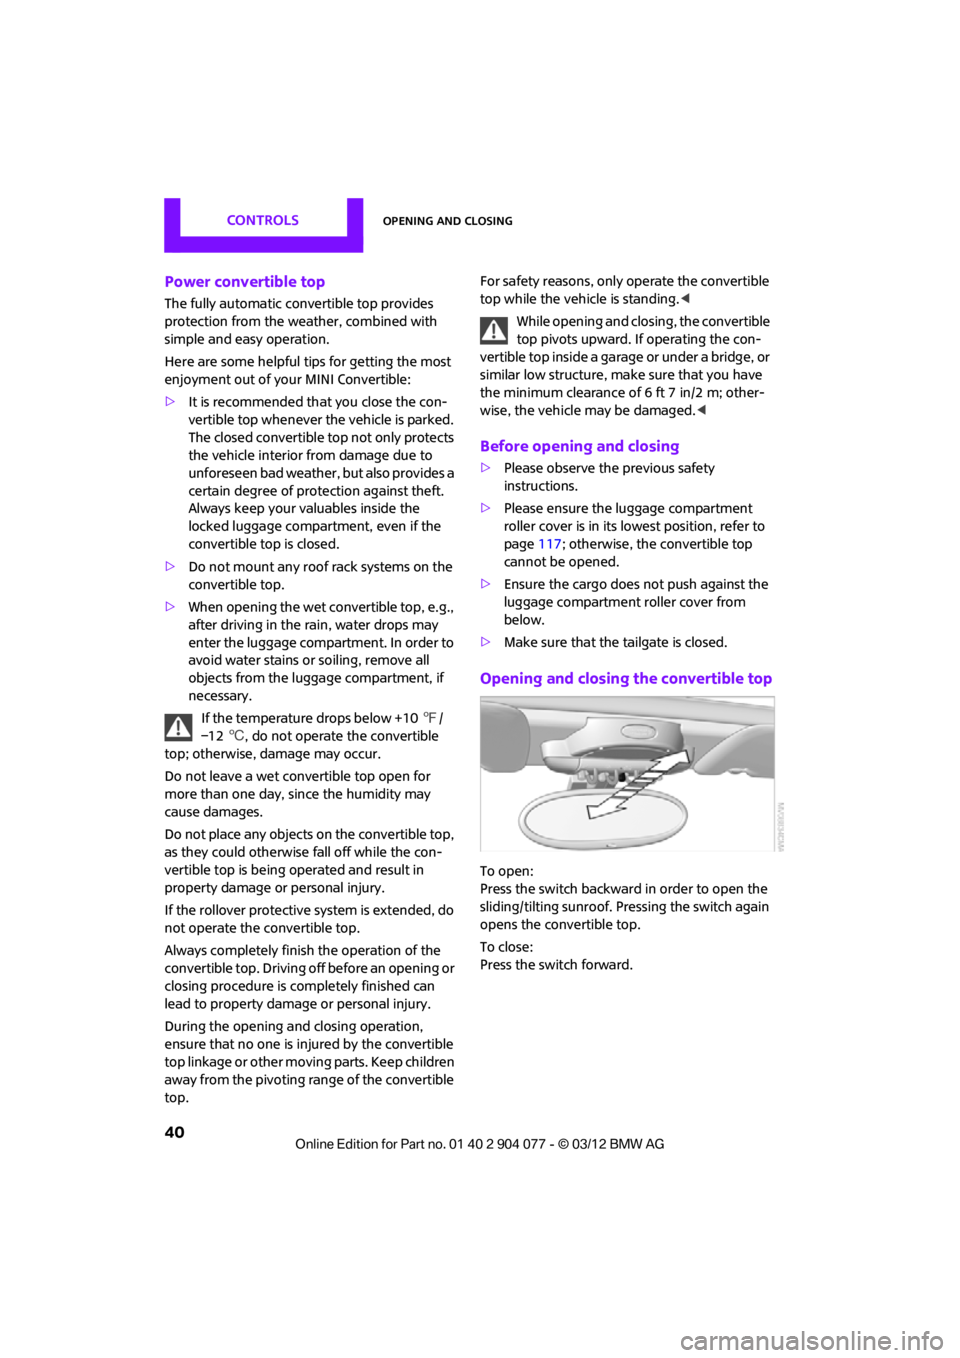
Opening and closing the convertible top
To open:
Press the switch backward in order to open the
sliding/tilting sunroof. Pr essing the switch again
opens the convertible top.
To close:
Press the switch forward.
00320051004F004C00510048000300280047004C0057004C005200510003
Page 46 of 283
Opening and closingCONTROLS
45
Do not place any objects on the convertible top,
as they could otherwise fall off while the con-
vertible top is being operated and result in
property damage or personal injury.
Always completely finish the operation of the
convertible top. Driving off before an opening or
closing procedure is completely finished can
lead to property damage or personal injury.
During the opening an d closing operation,
ensure that no one is in jured by the convertible
top linkage or other moving parts. Keep children
away from the pivoting range of the convertible
top.
Only open or close the convertible top when the
vehicle is stopped. <
While opening and closing, the convertible
top pivots upward. When opening or clos-
ing the convertible top in garages, under bridges
or similar locations, ensure that there is a mini-
mum clearance of 2 meters; otherwise damage
may occur to the vehicle. <
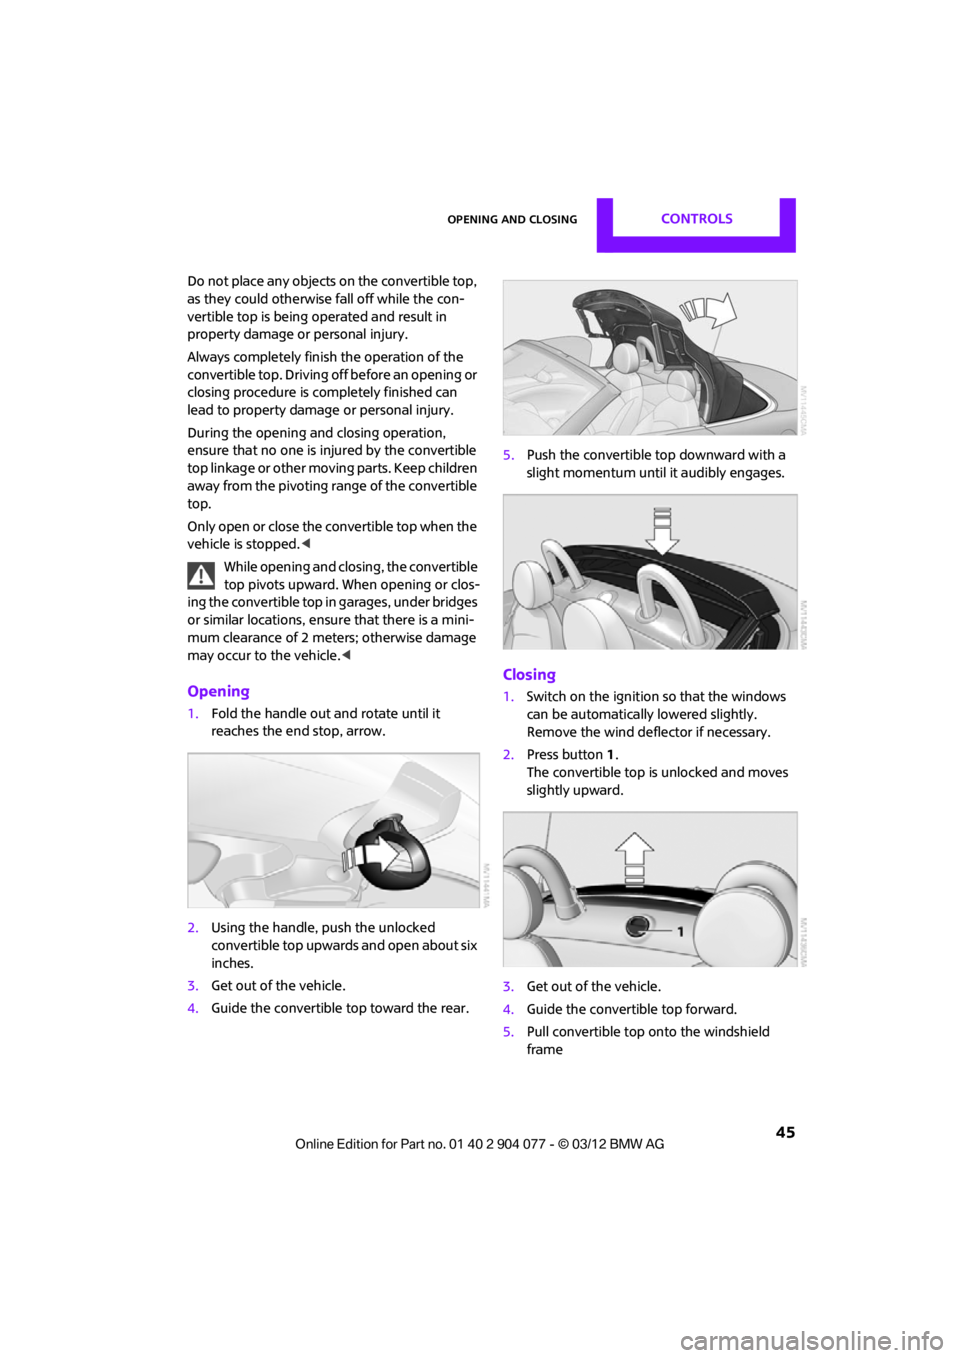
Opening
1.Fold the handle out and rotate until it
reaches the end stop, arrow.
2. Using the handle, push the unlocked
convertible top upwards and open about six
inches.
3. Get out of the vehicle.
4. Guide the convertible top toward the rear. 5.
Push the convertible top downward with a
slight momentum until it audibly engages.
Closing
1.Switch on the ignition so that the windows
can be automatically lowered slightly.
Remove the wind deflector if necessary.
2. Press button 1.
The convertible top is unlocked and moves
slightly upward.
3. Get out of the vehicle.
4. Guide the convertible top forward.
5. Pull convertible top onto the windshield
frame
00320051004F004C00510048000300280047004C0057004C005200510003
Page 47 of 283
CONTROLSOpening and closing
46
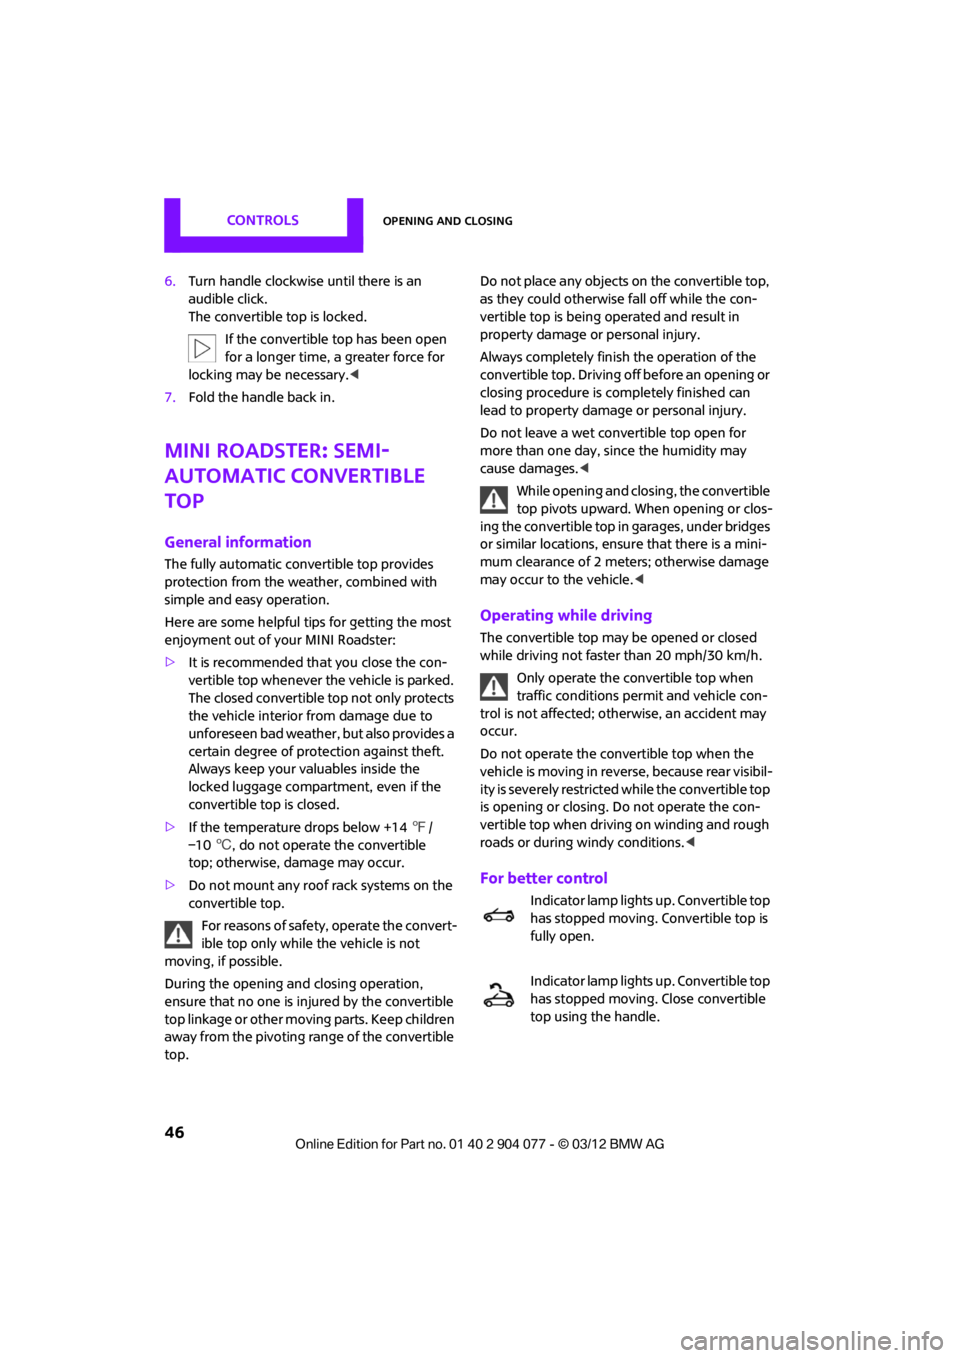
6.Turn handle clockwise until there is an
audible click.
The convertible top is locked.
If the convertible top has been open
for a longer time, a greater force for
locking may be necessary. <
7. Fold the handle back in.
MINI Roadster: Semi-
automatic convertible
top
General information
The fully automatic convertible top provides
protection from the weather, combined with
simple and easy operation.
Here are some helpful tips for getting the most
enjoyment out of your MINI Roadster:
>It is recommended th at you close the con-
vertible top whenever the vehicle is parked.
The closed convertible top not only protects
the vehicle interior from damage due to
unforeseen bad weather, but also provides a
certain degree of protection against theft.
Always keep your valuables inside the
locked luggage compartment, even if the
convertible top is closed.
> If the temperature drops below +14 7/
–10 6, do not operate the convertible
top; otherwise, damage may occur.
> Do not mount any roof rack systems on the
convertible top.
For reasons of safety, operate the convert-
ible top only while the vehicle is not
moving, if possible.
During the opening and closing operation,
ensure that no one is injured by the convertible
top linkage or other moving parts. Keep children
away from the pivoting range of the convertible
top. Do not place any objects on the convertible top,
as they could otherwise fall off while the con-
vertible top is being op
erated and result in
property damage or personal injury.
Always completely finish the operation of the
convertible top. Driving off before an opening or
closing procedure is completely finished can
lead to property damage or personal injury.
Do not leave a wet convertible top open for
more than one day, since the humidity may
cause damages. <
While opening and clos ing, the convertible
top pivots upward. When opening or clos-
ing the convertible top in garages, under bridges
or similar locations, ensure that there is a mini-
mum clearance of 2 meters; otherwise damage
may occur to the vehicle. <
Operating while driving
The convertible top may be opened or closed
while driving not faster than 20 mph/30 km/h.
Only operate the convertible top when
traffic conditions permit and vehicle con-
trol is not affected; otherwise, an accident may
occur.
Do not operate the convertible top when the
vehicle is moving in reve rse, because rear visibil-
ity is severely restricted while the convertible top
is opening or closing. Do not operate the con-
vertible top when drivin g on winding and rough
roads or during windy conditions. <
For better control
Indicator lamp lights up. Convertible top
has stopped moving. Convertible top is
fully open.
Indicator lamp lights up. Convertible top
has stopped moving. Close convertible
top using the handle.
00320051004F004C00510048000300280047004C0057004C005200510003
Page 51 of 283
CONTROLSAdjustments
50
Adjustments
Vehicle equipment
In this chapter, all production, country, and
optional equipment that is offered in the model
range is described. Equipment is also described
that is not available because of, for example,
selected options or coun try version. This also
applies to safety relate d functions and systems.
Sitting safely
The ideal sitting position can make a vital contri-
bution to relaxed, fatigu e-free driving. In con-
junction with the safety belts, the head restraints
and the airbags, the seated position has a major
influence on your safety in the event of an acci-
dent. To ensure that th e safety systems operate
with optimal efficiency, we strongly urge you to
observe the instructions contained in the follow-
ing section.
For additional information on transporting
children safely, refer to page 56.
Airbags
Always maintain an adequate distance
between yourself and the airbags. Always
grip the steering wheel on the rim, with your
hands in the 3 o'clock and 9 o'clock positions, to
minimize the risk of inju ry to the hands or arms
in the event of the airbag being deployed.
No one and nothing should come between the
airbags and the seat occupant.
Do not use the cover of the front airbag on the
front passenger side as a storage area. Ensure
that the front passenger is correctly seated, e.g.
that no feet or legs are propped against the
dashboard. Otherwise, leg injury could result if
the front airbag suddenly deployed.
Make sure that passeng ers keep their heads
away from the side/head airbag; otherwise inju-
ries can occur when airbags are deployed.
fully excluded, depending on the circumstances.
The ignition and inflation noise may provoke a
mild hearing loss in extremely sensitive individ-
uals. This effect is usually only temporary.
For airbag locations as well as additional infor-
mation, refer to page
93.
Head restraint
A correctly adjusted head restraint reduces the
risk of neck injury in the event of an accident.
Adjust the head restraint in such a way
that its center is at approx. ear level.
Otherwise, there is an increased risk of injury in
the event of an accident. <
Head restraints, refer to page 52.
Safety belt
Before every drive, make sure that all occupants
wear their safety belts. Airbags complement the
safety belt as an additional safety device, but
they do not represent a substitute.
Number of safety belts
Never allow more than one person to
wear a single safety belt. Never allow
infants or small children to ride in a passenger's
lap.
Make sure that the belt in the lap area sits low
across the hips and does not press against the
abdomen. The safety belt must not rest against
the throat, run across sh arp edges, pass over
hard or fragile objects or be pinched. Fasten the
safety belt so that it is pulled taut across the lap
and shoulder, fitting the body snugly without
any twists. Otherwise, the belt could slide over
the hips in the event of a frontal collision and
00320051004F004C00510048000300280047004C0057004C005200510003
Page 58 of 283
Transporting children safelyCONTROLS
57
Child seat security
MINI Coupe, MINI Roadster
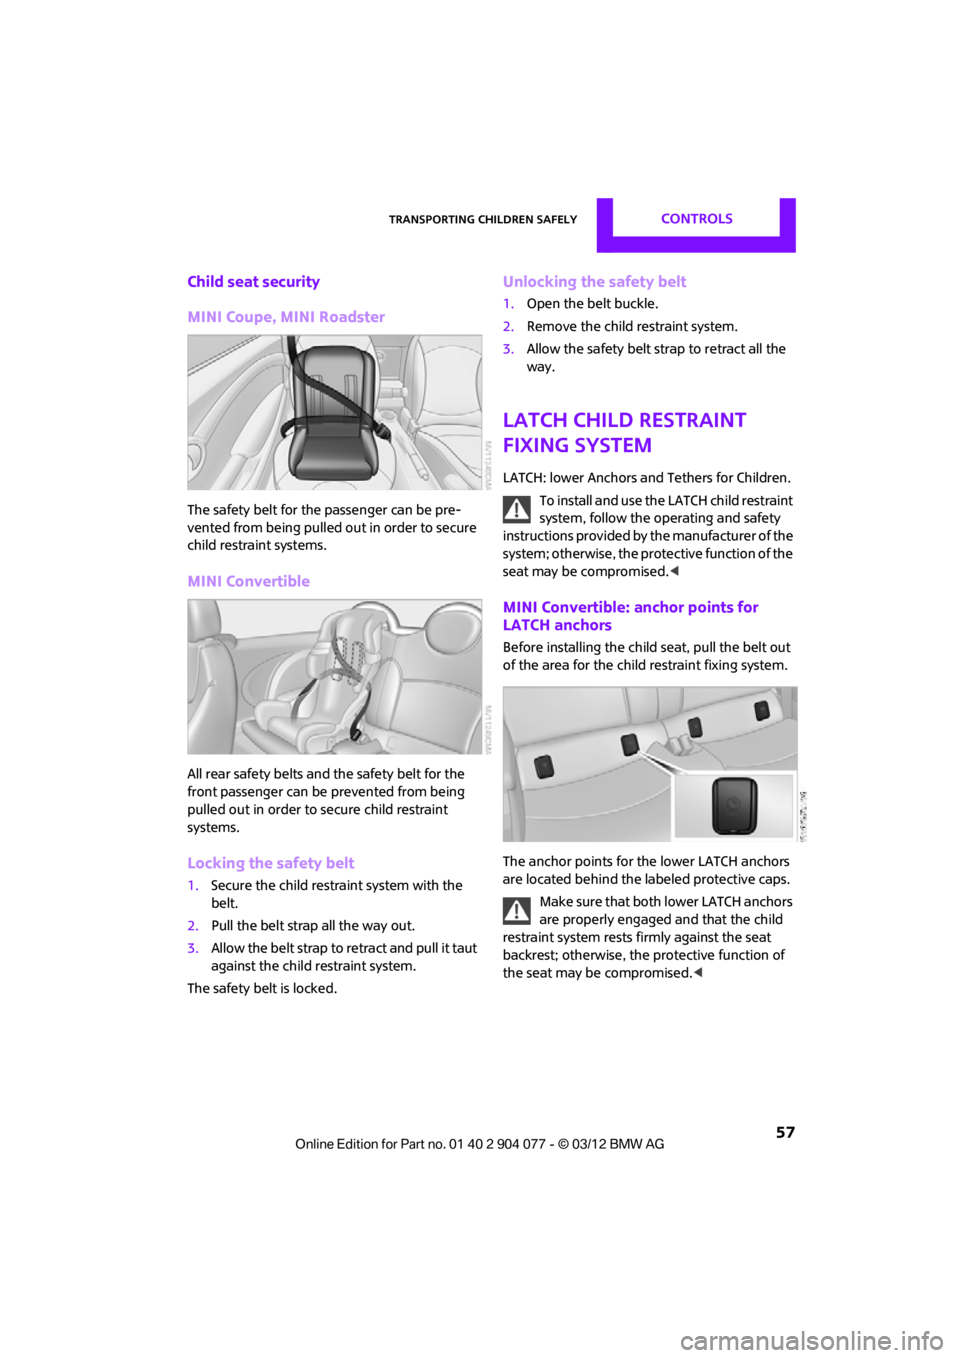
The safety belt for the passenger can be pre-
vented from being pulled out in order to secure
child restraint systems.
MINI Convertible
All rear safety belts and the safety belt for the
front passenger can be prevented from being
pulled out in order to secure child restraint
systems.
Locking the safety belt
1.Secure the child restraint system with the
belt.
2. Pull the belt strap all the way out.
3. Allow the belt strap to retract and pull it taut
against the child restraint system.
The safety belt is locked.
Unlocking the safety belt
1. Open the belt buckle.
2. Remove the child restraint system.
3. Allow the safety belt strap to retract all the
way.
LATCH child restraint
fixing system
LATCH: lower Anchors and Tethers for Children.
To install and use the LATCH child restraint
system, follow the operating and safety
instructions provided by the manufacturer of the
system; otherwise, the protective function of the
seat may be compromised. <
MINI Convertible: anchor points for
LATCH anchors
Before installing the child seat, pull the belt out
of the area for the child restraint fixing system.
The anchor points for the lower LATCH anchors
are located behind the labeled protective caps.
Make sure that both lower LATCH anchors
are properly engaged and that the child
restraint system rests fi rmly against the seat
backrest; otherwise, the protective function of
the seat may be compromised. <
00320051004F004C00510048000300280047004C0057004C005200510003
Page 60 of 283
Transporting children safelyCONTROLS
59
MINI Convertible
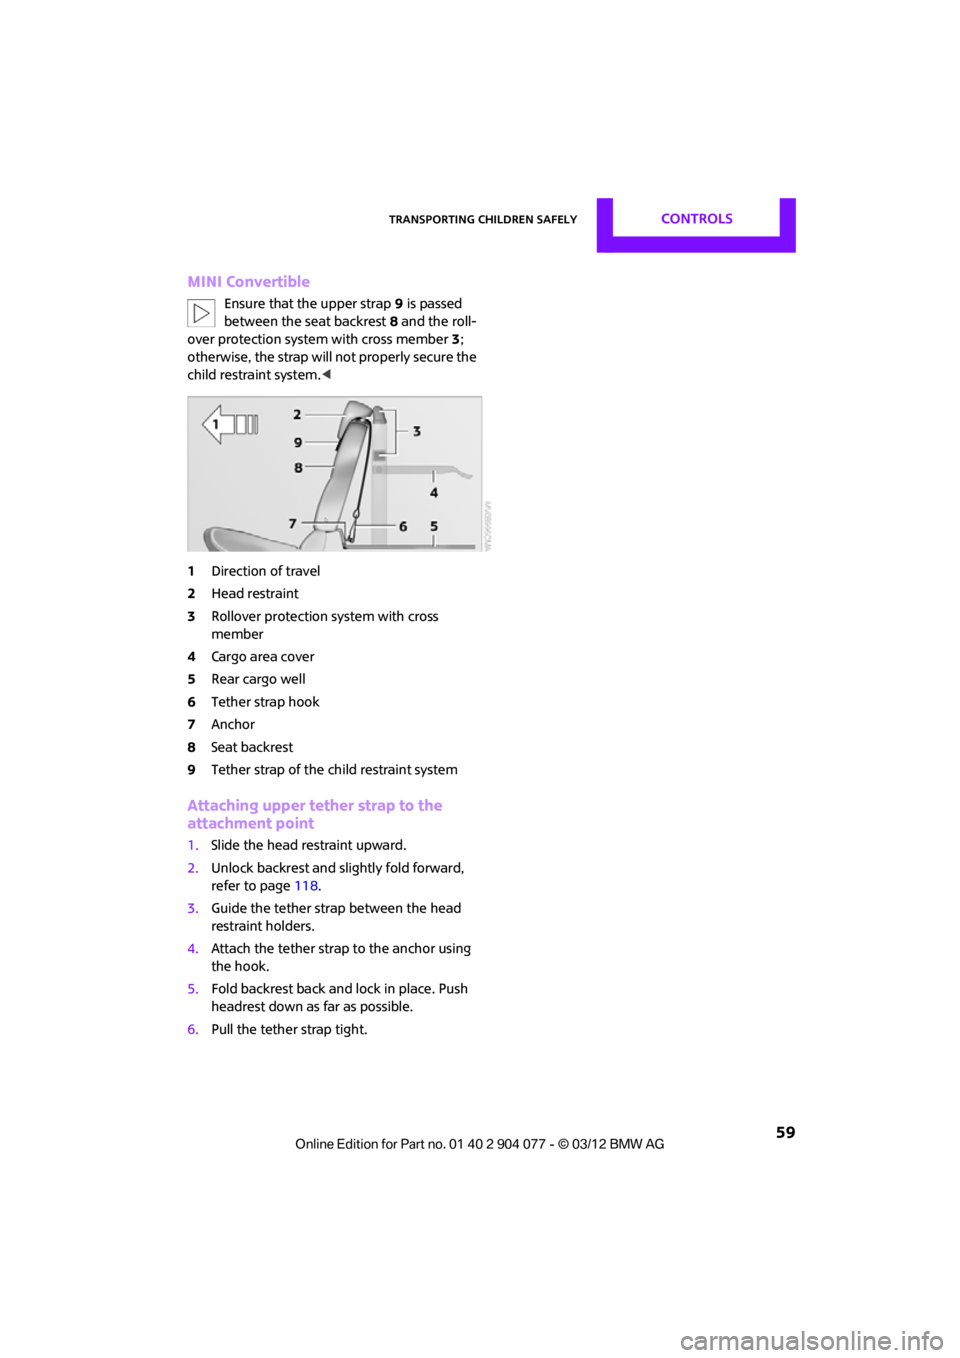
Ensure that the upper strap9 is passed
between the seat backrest 8 and the roll-
over protection syst em with cross member 3;
otherwise, the strap will not properly secure the
child restraint system.<
1 Direction of travel
2 Head restraint
3 Rollover protection system with cross
member
4 Cargo area cover
5 Rear cargo well
6 Tether strap hook
7 Anchor
8 Seat backrest
9 Tether strap of the child restraint system
Attaching upper tether strap to the
attachment point
1.Slide the head restraint upward.
2. Unlock backrest and slightly fold forward,
refer to page 118.
3. Guide the tether strap between the head
restraint holders.
4. Attach the tether strap to the anchor using
the hook.
5. Fold backrest back and lock in place. Push
headrest down as far as possible.
6. Pull the tether strap tight.
00320051004F004C00510048000300280047004C0057004C005200510003
Page 271 of 283

REFERENCEEverything from A to Z
270
Carpets, care230
Car phone
– installation location, refer to Center armrest 108
– refer to Telephone 108
Car phone, refer to Telephone 170,180
Car radio, refer to Radio 149
Car wash, care 227
Car washes 227
Catalytic conver ter, refer to
Hot exhaust system 115
CD, audio playback 157
CD player 157
– controls 146
– fast forward/reverse 158
– random order 158
– selecting a track 157
– switching on/off 146
– tone control 147
– volume 147
Center armrest 108
Center brake lamp 236
Center console, refer to Around the center
console 14
Central locking system 29
– Comfort Access 36
– from inside 32
– from outside 29
Changing bulbs 232
Changing the language on the Control Display 80
Changing the measurement units on the Control
Display 74
Changing wheels 239
Charging the battery 241
Chassis number, refer to
Engine compartment 221
Check Control 77
Child restraint fixing system
LATCH 57
Child restraint systems 56
Child seats 56 Chrome parts, care
229
Chrome parts, refer to Care 227
Cigarette lighter 109
Cleaning headlamps 67
– washer fluid 67
Clock
– setting time 76
– 12 h/24 h mode 76
Closing
– from inside 32
– from outside 29
Cl ot
hes hooks 108
Cockpit 10
Cold start, refer to Starting the engine 61
Comfort Access 36
– replacing the battery 38
– what to observe before
entering a car wash 37
Comfort area, refer to Around the center console 14
Compartment for remote control, refer to Ignition
lock 60
Computer 71
– displays on Control Display 73
Condensation, refer to When the vehicle is parked 116
Condition Based Service CBS 225
Configuring settings, refer to
Personal Profile 28
Connecting vacuum cleaner, refer to Connecting electrical
appliances 110
Consumption, refer to Average fuel consumption 72
Contact editing 178
Contacts 177,194
– new contact 195
Continuing route guidance 135
Control Display
– settings 73 Control Display, refer to iDrive
– switching on/off
17
Control Display, refer to Onboard computer 17
Controls and displays 10
Control stick, refer to Onboard computer 17
Control unit, refer to Onboard computer 17
Convenience operation
– convertible top 32
– windows 30
Convenient access, refer to
Comfort Access 36
Convenient star t, refer to
Starting the engine 61
Convertible top 39
– manual 44
– mechanical 44
Coolant 224
– checking level 224
– filling 224
Coolant temperature 224
Cooling, maximum 104
Cooling fluid, refer to
Coolant 224
Copyright 2
Corneri n
g li
ght, refer to
Adaptive Light Control 97
Criteria for route 135
Cruise control
– indicator lamp 13
Cruising range 71
Cupholders 109
Curb weight, refer to Weights 257
Current fuel consumption 72
Current playback
– external devices 162
D
Dashboard, refer to Cockpit 10
Dashboard instruments, refer to Displays 12
Dashboard lighting, refer to Instrument lighting 99
00320051004F004C00510048000300280047004C0057004C005200510003
Page 275 of 283

REFERENCEEverything from A to Z
274
Instrument panel, refer to Displays 12
Integrated key 28
Interactive map 132
Interesting destination for navigation 130
Interior lamps 99
– remote control 31
Interior rearview mirror 55
– automatic dimming
feature 55
Interlock 63
Intermittent mode of the
wipers 66
Internal care 229
Internet page 4
J
Jacking points 241
Jets, refer to Window washer nozzles 67
Joystick, refer to Onboard computer 17
Jumpering, refer to Jump-
starting 243
Jump-starting 243
K
Key, refer to Keys/remote
controls 28
Keyless-Go, refer to Comfort
Access 36
Keyless opening and closing, refer to Comfort Access 36
Key Memory, refer to Personal Profile 28
Keypad dialing 175,187
Kickdown 63
– automatic transmission with Steptronic 63
Knock control 207
L
Lamps, refer to Parking lamps/
Low beams 96
Lamps and bulbs, replacing bulbs 232
Lashing eyes, refe r to Securing
cargo 119
Last destinations 129
LATCH child restraint fixing
system 57
Leather care 230
LEDs light-emitting diodes 233
Length, refer to Dimensions 251
License plate lamp
– bulb replacement 236
Light alloy wheels, care 229
Light-emitting diodes
LEDs 233
Lighter 109
– socket 110
Lighting
– lamps and bulbs 232
– of the instruments 99
– of vehicle, refer to Lamps 96
Light switch 96
Limit, refer to Speed limit 79
Load 118
Load securing equipment,
refer to Securing cargo 119
Lock buttons of doors, refer to Locking 32
Locking
– adjusting confirmation signal 30
– from inside 32
– from outside 30
– without remote control, refer
to Comfort Access 36
Locking and unlocking doors
– confirmation signals 30
– from inside 32
– from outside 30 Longlife oils
– approved motor oils
223
Low beams 96
– automatic 96
– replacing bulb 233
Lower back support, refer to Lumbar support 51
Luggage compartment
– emergency operation, refer to Manual unlocking 33
– emergency unlocking 34
– increasing the capacity 117
– opening from the inside 33
Luggage compartment, refer to Cargo area 33
Luggage compartment lid,
refer to Tailgate 33
Lumbar support 51
M
M+S tires, refer to Winter
tires 220
Main menu 18
Maintenance, refer to Service
and Warranty Information
Booklet for US models and
Service Guide Booklet for
Canadian models
Maintenance system 225
Malfunction
– convertible top 41,48
– tailgate 33
Malfunction warnings, refer to Check Control 77
Manual air distribution 103
Manual convertible top 44
Manually operated convertible top 44
Manual mode
– automatic transmission with Steptronic 64
00320051004F004C00510048000300280047004C0057004C005200510003
Page 278 of 283

Everything from A to ZREFERENCE
277
Reserve warning, refer to Fuel gauge 70
Reservoir for washer systems 67
Reset, refer to Resetting tone settings 148
Restraint systems
– for children 56
– refer to Safety belts 53
Reverse
– CD player 158
Reverse gear
– automatic transmission with
Steptronic 63
– manual transmission 62
Road map 137
Roadside Assistance 243
Roadside parking lamps 98
– replacing bulb 234
Road worthiness test, refer to Service requirements 75
Roof load capacity 257
Rope, refer to Tow-starting, towing away 246
Route 135,136
– bypassing sections 136
– changing 135,136
– changing criteria 135
– displaying arrow view 136
– displaying map view 137
– displaying streets or towns/ cities 136
– selecting 135
Route guidance 135
– bypassing a route section 136
– changing specified route 135
– distance and arrival 135
– voice instructions 139
– volume of voice instructions 139
Route section, changing 136
Route selection 135
RSC Run-flat System Component, refer to Run-flat
tires 218 Rubber parts, care
229
Run-flat System Component RSC, refer to Run-flat
tires 218
Run-flat tires 218
– flat tire 88
– tire inflation pressure 209
– tire replacement 219
– winter tires 220
S
Safety belt
– number50
Safety Belt Reminder 54
Safety belts 53
– damage 54
– indicator lamp 54
– reminder 54
– sitting safely 50
Safety belts, care 230
Safety systems
– airbags 93
– Antilock Brake System ABS 83
– Dynamic Stability Control DSC 83
– safety belts 53
Safety tires, refer to Run-flat tires 218
Satellite radio 151
– channel, activating or deactivating 152
– channel, selecting 152
– channel, storing 153
– favorites 154
– time shift 153
– Traffic Jump 155
Screen, refer to Onboard
computer controls 17
Screw thread for tow fitting 245
SDARS, refer to Satellite radio 151
Seat adjustment
– mechanical 51 Seats
51
– adjusting the seats 51
– heating 53
– sitting safely 50
Securing the vehicle
– from inside 32
– from outside 29
Selecting navigation system 124
Selecting new scale for
navigation 138
Selector lever
– automatic transmission with
Steptronic 63
Selector lever lock
– automatic transmission with
Steptronic, refer to
Shiftlock 63
– overriding manually 64
Selector lever positions
– automatic transmission with Steptronic 63
Service, refer to Roadside Assistance 243
Service car, refer to Roadside
Assistance 243
Service data in the remote control 225
Service Interval Display, refer to Condition Based Service
CBS 225
Service requ irem
ent
display,
refer to Condition Based
Service CBS 225
Service requirements 75
Settings
– clock, 12 h/24 h mode 76
– date format 77
Setting time and date 77
Setting time zone, time, and date 77
Shifting gears
– automatic transmission with Steptronic 64
– manual transmission 62
00320051004F004C00510048000300280047004C0057004C005200510003