stop start MINI Hardtop 2 Door 2002 Owner's Manual
[x] Cancel search | Manufacturer: MINI, Model Year: 2002, Model line: Hardtop 2 Door, Model: MINI Hardtop 2 Door 2002Pages: 140, PDF Size: 1.63 MB
Page 17 of 140

15
OVERVIEW REPAIRS OPERATION CONTROLS DATA INDEX
INDICATOR AND WARNING LAMPS
Technology
that monitors itself
The system runs a check on the warning
and indicator lamps marked by "
l
" each
time you switch on the ignition. They each
light up once for different periods of time.
If a malfunction should occur in one of
these systems, the corresponding lamp
does not go out after the engine is started
or it lights up while the vehicle is moving.
You will see how to react correctly to this
below.
Red: stop immediately
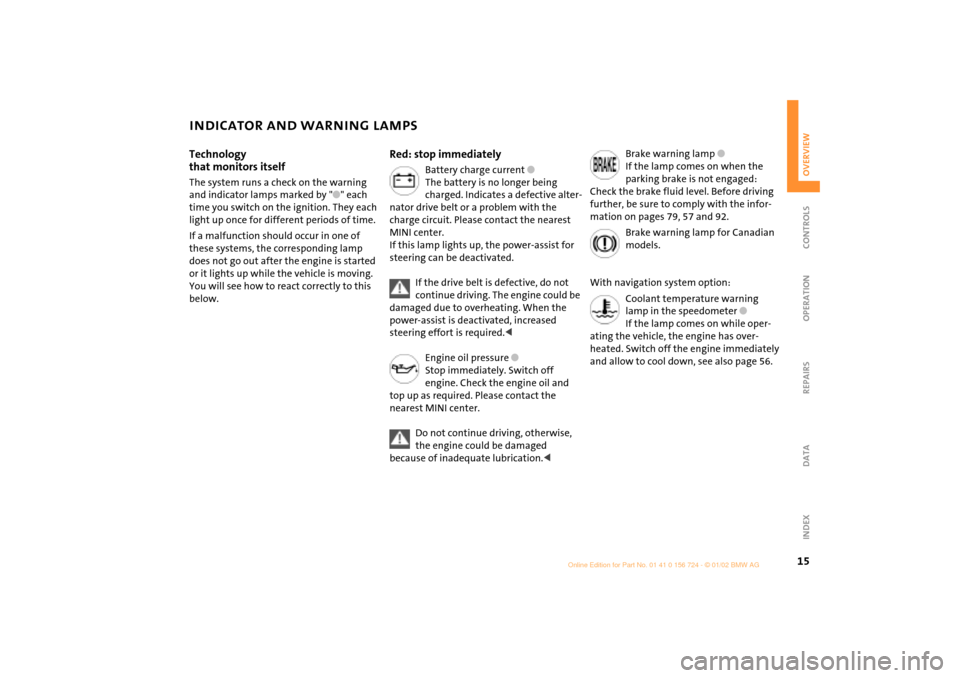
Battery charge current
l
The battery is no longer being
charged. Indicates a defective alter-
nator drive belt or a problem with the
charge circuit. Please contact the nearest
MINI center.
If this lamp lights up, the power-assist for
steering can be deactivated.
If the drive belt is defective, do not
continue driving. The engine could be
damaged due to overheating. When the
power-assist is deactivated, increased
steering effort is required.
<
Engine oil pressure
l
Stop immediately. Switch off
engine. Check the engine oil and
top up as required. Please contact the
nearest MINI center.
Do not continue driving, otherwise,
the engine could be damaged
because of inadequate lubrication.
<
Brake warning lamp
l
If the lamp comes on when the
parking brake is not engaged:
Check the brake fluid level. Before driving
further, be sure to comply with the infor-
mation on pages 79, 57 and 92.
Brake warning lamp for Canadian
models.
With navigation system option:
Coolant temperature warning
lamp in the speedometer
l
If the lamp comes on while oper-
ating the vehicle, the engine has over-
heated. Switch off the engine immediately
and allow to cool down, see also page 56.
Page 43 of 140

41
OVERVIEW REPAIRS OPERATIONCONTROLS DATA INDEX
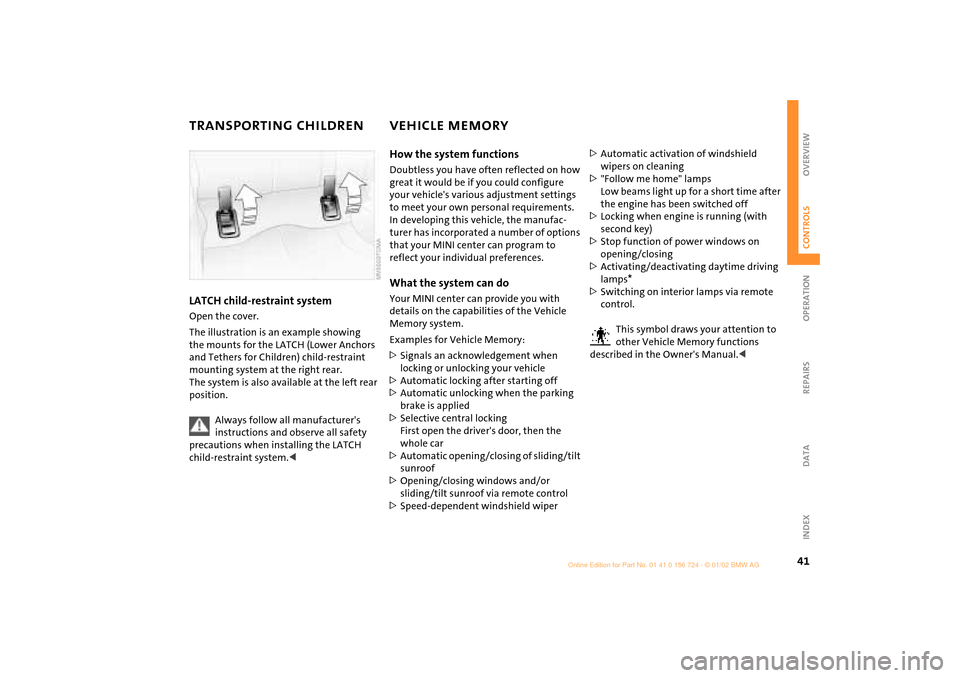
TRANSPORTING CHILDREN VEHICLE MEMORY LATCH child-restraint systemOpen the cover.
The illustration is an example showing
the mounts for the LATCH (Lower Anchors
and Tethers for Children) child-restraint
mounting system at the right rear.
The system is also available at the left rear
position.
Always follow all manufacturer's
instructions and observe all safety
precautions when installing the LATCH
child-restraint system.<
How the system functionsDoubtless you have often reflected on how
great it would be if you could configure
your vehicle's various adjustment settings
to meet your own personal requirements.
In developing this vehicle, the manufac-
turer has incorporated a number of options
that your MINI center can program to
reflect your individual preferences. What the system can doYour MINI center can provide you with
details on the capabilities of the Vehicle
Memory system.
Examples for Vehicle Memory:
>Signals an acknowledgement when
locking or unlocking your vehicle
>Automatic locking after starting off
>Automatic unlocking when the parking
brake is applied
>Selective central locking
First open the driver's door, then the
whole car
>Automatic opening/closing of sliding/tilt
sunroof
>Opening/closing windows and/or
sliding/tilt sunroof via remote control
>Speed-dependent windshield wiper>Automatic activation of windshield
wipers on cleaning
>"Follow me home" lamps
Low beams light up for a short time after
the engine has been switched off
>Locking when engine is running (with
second key)
>Stop function of power windows on
opening/closing
>Activating/deactivating daytime driving
lamps
*
>Switching on interior lamps via remote
control.
This symbol draws your attention to
other Vehicle Memory functions
described in the Owner's Manual.<
Page 63 of 140

61
OVERVIEW REPAIRS OPERATIONCONTROLS DATA INDEX
DYNAMIC STABILITY CONTROL (DSC)
*
The concept
This system maintains driving stability
even in critical driving situations.
The system optimizes vehicle stability
during acceleration and when starting
from a full stop, as well as optimizing trac-
tion. In addition, it recognizes unstable
vehicle conditions, such as under- or over-
steering, and, as far as is possible within
the laws of physics, helps keeping the
vehicle on a steady course by reducing the
rpms and brake applications to the indi-
vidual wheels.
The DSC is operational every time you start
the engine. DSC contains the functions
Antilock Brake System ABS/Electronic Brake
Force Distribution EBV/ASC+T.
The laws of physics cannot be
repealed, even with DSC. An appro-
priate driving style always remains the
responsibility of the driver. We therefore
urge you to avoid using the additional
safety margin of the system as an excuse
for taking risks.
Do not make any modifications to the DSC
system. Allow only authorized technicians
to perform service procedures on the
DSC.<
To switch off the DSCBriefly press the switch.
The indicator lamp stays lit.
When driving with snow chains, it may be
effective to switch off the DSC for a brief
period.
To maintain stability, always drive
with the DSC switched on whenever
possible.
Indicator lamp
The indicator lamp on the instru-
ment cluster will go out shortly
after the ignition has been
switched on, see pages 16, 17.
If the indicator lamp flashes:
DSC controls the drive and braking forces.
If the indicator lamp fails to go out
after the engine is started, or if it
comes on during normal driving and stays
on:
If the system is either defective or was
switched off with the button, then the
stabilizing applications described are no
longer available. The vehicle will remain
completely operational, however, without
DSC.
In the event of a malfunction, please see
your MINI center, see pages 16, 17.<
Page 108 of 140

106
REPAIRING A FLAT TIRE CHANGING TIRES Ð MINI WITH SPACE-SAVER SPARE TIRE
*
Safety measures in the event of a flat
tire:
Stop the vehicle as far as possible from
passing traffic. Switch on the hazard
warning flashers.
Turn the steering wheel to the straight-
ahead wheel position and engage the
steering lock. Engage the parking brake and
shift into 1st or reverse gear (selector lever
in P).
All passengers should be outside the
vehicle and well away from your imme-
diate working area (behind a guardrail, for
instance).
If a warning triangle or portable hazard
warning lamp is available, set it up on the
roadside at an appropriate distance from
the rear of the vehicle. Comply with all
safety guidelines and regulations.<
In the event of a flat tire, different proce-
dures should be followed depending on the
equipment included in your MINI:
>Vehicles with space-saver spare tire, see
next column
>Vehicles with safety tires, see page 110.
Additional safety measures in the
event of a wheel change: change the
wheel only on a level, firm surface which is
not slippery.
Avoid jacking the vehicle on a soft or slip-
pery support surface (snow, ice, loose
gravel, etc.), as either the vehicle or the jack
could slip sideways.
Do not use a wooden block or similar object
as a support base for the jack, as this would
prevent it from extending to its full support
height and reduce its load-carrying
capacity .
Do not lie under the vehicle or start the
engine when the vehicle is supported by
the jack Ð risk of fatal injury.<
To change a space-saver tire, proceed as
follows:
>Remove the space-saver spare tire, see
page 107
>Prepare the vehicle, see page 108
>Jack up the vehicle, see page 108
>Fit the space-saver spare tire, see
page 109
>Tighten the lug bolts, see page 109
>Drive with space-saver spare tire, see
page 109.
Tire change setOn vehicles with a space-saver spare tire,
the tire change set is stored in the luggage
compartment under the floor mat.
1 Chock, folding
2 Hubcap remover
3 Wheel stud wrench
4 Jack
5 Spanner
6 Tow fitting
7 Lifting handle