tires MINI Hardtop 2 Door 2002 Owner's Manual
[x] Cancel search | Manufacturer: MINI, Model Year: 2002, Model line: Hardtop 2 Door, Model: MINI Hardtop 2 Door 2002Pages: 140, PDF Size: 1.63 MB
Page 5 of 140
3
OVERVIEW REPAIRS OPERATION CONTROLS DATA INDEX
Driving:
Ignition lock 42
Starting the engine 42
Switching off the engine 43
Parking brake 44
Manual transmission 45
Continuously Variable automatic
Transmission (CVT) 46
Parking lamps/Low beams 49
Indicator/Headlamp flasher 49
Instrument lighting 50
Fog lamps 50
Interior lamps 50
Light-emitting diodes 51
Washer/Wiper system 51
Cruise control 53
Everything under control:
Odometer 55
Tachometer 55
Fuel gauge 55
Coolant temperature gauge 56
Service Interval Display 57
Clock 57
Computer 58
Technology for safety and driving
convenience:
Automatic Stability Control plus Traction
(ASC+T) 60
Dynamic Stability Control (DSC) 61
Flat Tire Monitor 62
Park Distance Control (PDC) 63
Controlling the climate for pleasant
driving:
Air conditioner system 64
Automatic climate control 67
Interior conveniences:
Glove compartment 70
Ashtray/Beverage holder 70
Cigarette lighter 70
Loading and transporting cargo:
Luggage compartment cover 71
Foldable rear backrest 71
Loading cargo 72
Roof-mounted luggage rack 73
Care and maintenance
Special operating instructions:
Break-in procedures 76
General driving notes 76
Refueling 77
Fuel specifications 78
Antilock Brake System (ABS) 78
Brake system 79
Wheels and tires:
Tire inflation pressure 80
Tire condition 82
Tire replacement 83
Wheel and tire combinations 84
Winter tires 85
Snow chains 85
Page 6 of 140
CONTENTS
4
In the engine compartment:
Hood 86
Engine compartment Ð
MINI COOPER 87
Engine compartment Ð
MINI COOPER S 88
Washer fluid 89
Engine oil 89
Coolant 91
Brake fluid 92
Maintenance and care:
MINI Maintenance System 93
Caring for your vehicle 94
Vehicle immobilization 96
Laws and regulations:
OBD interface socket 96
Technical modifications 96
California Proposition 65 Warning 97
Owner Service Procedures
Replacement procedures:
Onboard tool kit 100
Windshield wiper blades 100
Lamps and bulbs 101
Repairing a flat tire 106
Changing tires Ð MINI
with space-saver spare tire 106
Flat tire Ð safety tires 110
Battery 111
Fuses 112
Giving and receiving assistance:
Warning triangle 113
First-aid kit 113
Jump-starting 113
Tow-starting and towing 115
Technical data
Engine data 120
Dimensions 121
Weights 122
Capacities 123
Electrical system 124
Page 18 of 140

16
INDICATOR AND WARNING LAMPS
Yellow: stop immediately
Flat Tire Monitor
l
Flashes: tire failure.
Reduce speed immediately and
stop the vehicle.
With safety (run-flat) tires:
Reduce vehicle speed carefully to under
50 mph (80 km/h).
In both cases, avoid hard brake applications
and steering maneuvers. Check the tire
inflation pressures.
Conduct in the event of a flat tire, see
pages 106, 110.
General information on the system, see
page 62
Red and yellow: continue to drive;
drive cautiously
Brake warning lamp together with
yellow indicator lamps for ABS, EBV
and ASC+T/DSC:
The control system ABS, EBV and
ASC+T/DSC has failed. Drive
cautiously and defensively. Avoid
full brake applications. Please have
the system checked by your MINI
center as soon as possible.
More information on pages 60, 61
Brake warning lamp together with
the yellow indicator warning lamps
ABS, EBV and ASC+T/DSC for Cana-
dian models.
Red: an important reminder
Brake warning lamp
with parking brake applied.
More information on the parking
brake on page 44
Parking brake lamp for Canadian
models.
Fasten safety belts
l
Depending on model, with acoustic
signal
*
. Lights up either for several
seconds or until the belt is engaged, de-
pending on version.
More information on page 35
Depending on the level of equipment,
the indicator lamp is in the vicinity of
the navigation system.
<
Airbags
l
Please have the system inspected
at your MINI center.
More information on pages 31, 37
Depending on the level of equipment,
the indicator lamp is in the vicinity of
the navigation system.
<
Hood/tailgate
Lights up when the hood and/or
tailgate are open.
More information on pages 27, 86
Page 64 of 140
62
FLAT TIRE MONITORThe conceptThe tire inflation pressure is determined
from the signals of the ABS sensors.
The system provides an alert whenever the
tire inflation pressure drops below the
pressure in any other tire. RequirementSo that the system can "familiarize" itself
with the correct inflation pressure, please
do the following:
1. Check the tire inflation pressure in all
tires
2. Compare them with the inflation pres-
sure table, see page 81, and adjust the
pressures if necessary
3. Initialize the system.
Check the tire inflation pressure
regularly and correct it if necessary,
see page 80.<
Flat tire
The indicator lamp in the instru-
ment cluster informs you by
flashing when the tire inflation
pressure of a tire drops in relation to any
other tire. In addition, an acoustic signal is
sounded.
>Vehicles with safety (run-flat) tires, see
notes on pages 110, 80, 84
>Vehicles with normal tires, see notes on
pages 106, 80.
The Flat Tire Monitor cannot alert you
to severe and sudden tire damage
caused by external factors. Another factor
which the Flat Tire Monitor does not recog-
nize is the balanced and very gradual pres-
sure loss that takes place in all tires over an
extended period of time.<
MalfunctionsAs long as there is still a malfunction, the
yellow indicator lamp on the instrument
cluster will stay lit up.
The indicator lamp also lights up in the
event of a system malfunction.
Please contact your MINI center in these
cases.
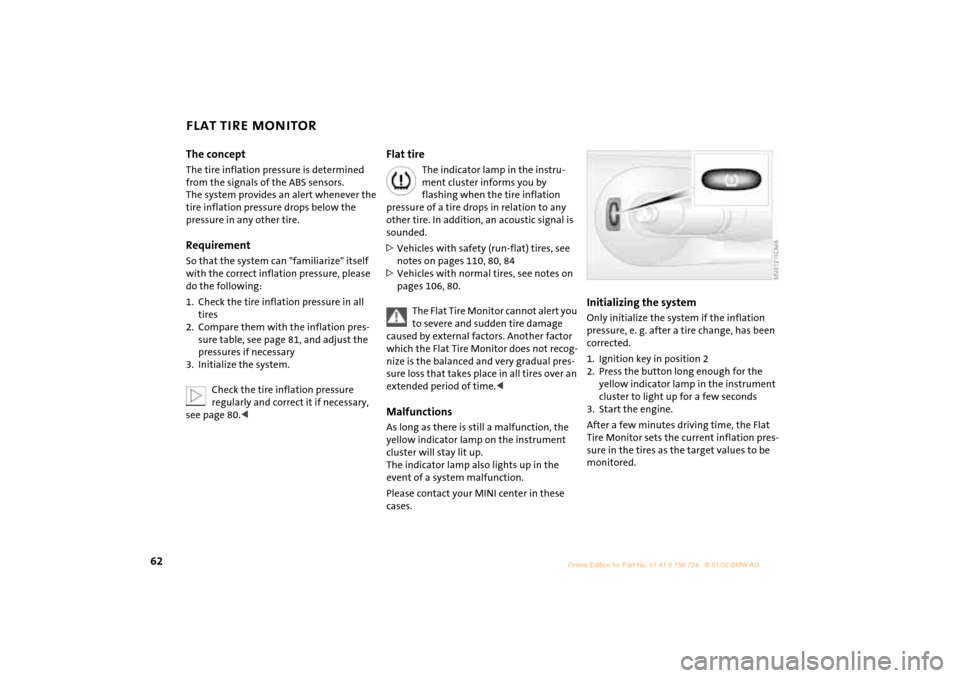
Initializing the systemOnly initialize the system if the inflation
pressure, e. g. after a tire change, has been
corrected.
1. Ignition key in position 2
2. Press the button long enough for the
yellow indicator lamp in the instrument
cluster to light up for a few seconds
3. Start the engine.
After a few minutes driving time, the Flat
Tire Monitor sets the current inflation pres-
sure in the tires as the target values to be
monitored.
Page 78 of 140
76
BREAK-IN PROCEDURES GENERAL DRIVING NOTES To ensure that your vehicle provides
maximum economy throughout a long
service life, we request that you comply
with the following information: EngineUp to 1,200 miles (2,000 km):
Attempt to constantly vary both vehicle
and engine speed during these initial miles
while remembering to avoid engine speeds
in excess of 4,500 rpm and/or vehicle
speeds of over 95 mph (150 km/h).
Absolutely avoid using the full-throttle or
kickdown position for the accelerator.
Once you have driven 1,200 miles
(2,000 km), both the engine and vehicle
speed can be gradually increased.
You should also comply with these break-in
procedures if the engine has to be replaced
at a later point.
TiresDue to technical factors associated with
their manufacture, tires do not achieve
their full traction potential until after an
initial break-in period. We therefore ask
you to drive with extra care during the first
200 miles (300 km).Brake systemApprox. 300 miles (500 km) must be driven
before the brake pads and rotors achieve
the optimum pad-surface and wear
patterns required for trouble-free opera-
tion and an extended service life.ClutchRoughly 300 miles (500 km) must be driven
before the clutch starts to operate at
optimum efficiency. Remember to engage
the clutch carefully during this initial
period.
Parking the vehicleCondensation forms in the air conditioner
system during operation, and then exits
under the vehicle. Traces of condensed
water under the vehicle are therefore
normal.Brakes
Do not rest your foot on the brake
pedal while driving. Even light but
consistent pedal pressure can lead to high
temperatures, brake wear and possibly
even brake failure.<
Hydroplaning
When driving on wet or slushy roads,
reduce road speed. If you do not, a
wedge of water can form between tires and
road surface. This phenomenon is charac-
terized by a partial or complete loss of
contact between the tires and the road
surface. The ultimate results are loss of
steering and braking control.<
Page 82 of 140

80
TIRE INFLATION PRESSUREInformation for your safetyThe factory-approved radial tires are
matched to the vehicle and have been
selected to provide optimum safety and
driving comfort if used properly.
It is not merely the tire's service life, but
also driving comfort and Ð above all else Ð
driving safety that depend on the condition
of the tires and the maintenance of the
specified tire pressure.
Incorrect inflation pressure is a frequent
cause of tire damage. It also significantly
influences the roadholding ability of your
MINI.
Check tire inflation pressures regularly
Ð at least every two weeks and before
beginning a longer trip. Failure to observe
these precautions can result in incorrect tire
pressures, which cause instable handling
response as well as tire damage, and can
ultimately lead to an accident.
Also check the inflation pressure on the
space-saver spare tire.
brands recommended by the manufacturer,
which your MINI center can provide for you.
Inflation pressures are on a sticker attached
to the B-pillar and visible with the driver's
door open.Checking tire inflation pressuresAll pressures are specified in the standard
units of pressure for your country (bar, psi,
kilopascal), and apply to cold tires (tires at
ambient temperature).
Vehicles with Flat Tire Monitor:
After correcting the tire inflation pressure,
reinitialize the Flat Tire Monitor, see
page 62.
Checking the inflation pressure on the
space-saver spare tire*There is a valve extension accessible from
the outside on the bumper for checking the
inflation pressure.Safety (run-flat) tires* Safety tires are an optional extra consisting
of self-contained tires and special rims. The
tire reinforcement ensures that the tire
retains residual safety in the event of pres-
sure drop and driving remains possible to a
restricted degree. The vehicle is equipped
with a Flat Tire Monitor which indicates a
flat-tire.
More information, see pages 62, 110.
Page 83 of 140

81
OVERVIEW REPAIRSOPERATIONCONTROLS DATA INDEX
TIRE INFLATION PRESSUREModel Tires
Pressures specified in bar (kPa/psi)
MINI COOPER175/65 R 15 2.1 (210/30) 2.1 (210/30) 2.4 (240/35) 2.4 (240/35)
195/55 R 16
205/45 R 172.1 (210/30) 2.1 (210/30) 2.4 (240/35 2.4 (240/35
175/60 R 16
All winter tires2.3 (230/33) 2.3 (230/33) 2.6 (260/38) 2.6 (260/38)
Space-saver spare tire 4.2 (420/61) 4.2 (420/61) 4.2 (420/61) 4.2 (420/61)
MINI COOPER S195/55 R 16 2.1 (210/30) 2.1 (210/30) 2.4 (240/35) 2.4 (240/35)
205/45 R 17
195/55 R 16 M+S
205/45 R 17 M+S2.3 (230/33) 2.3 (230/33) 2.6 (260/38) 2.6 (260/38)
175/60 R 16 M+S 2.5 (250/36) 2.5 (250/36) 2.8 (280/41) 2.8 (280/41)
In the case of all-season tires, the tire inflation pressure for summer tires applies.
This data only applies to tires approved and/or recommended by the manufacturer, about which your MINI center will be glad to
provide information.
Page 84 of 140

82
TIRE CONDITIONTire tread/tire damageInspect your tires frequently for tread wear,
signs of damage and for foreign objects
lodged in the tread. Check the tread depth.
The tread depth should not fall below
0.12 in (3 mm), although e. g. European
legislation only prescribes a minimum
tread depth of 0.063 in (1.6 mm).
Below 0.12 in (3 mm) tread pattern depth,
there is an increased risk of hydroplaning,
even at relatively moderate speeds and
with only small amounts of water on the
road.
Wear indicators in the tread-groove base,
see arrow, are spread around the circum-
ference of the tire and are marked on the
side wall of the tire with TWI Ð Tread Wear
Indicator.
The indicators in the tread indicate at
0.063 in (1.6 mm) tread depth that the
legally permitted wear limit has been
reached. Do not continue driving on depres-
surized (flat) tires, except with safety
tires. A flat tire greatly impairs steering and
braking response, and can lead to complete
loss of control over the vehicle.
Avoid overloading the vehicle so that the
permitted load on the tires is not exceeded.
Overloading can lead to overheating and
increases the rate at which damage
develops inside the tires. The ultimate
result can assume the form of a sudden air
loss.
Unusual vibrations while driving, e. g.
driving over a curb or similar, can indicate
tire damage or other damage to the
vehicle. This is also true for irregularities in
the vehicle's handling characteristics, such
as a pronounced tendency to pull to the left
or right. Should this occur, respond by
immediately reducing your speed. Proceed
carefully to the nearest MINI center or
professional tire center, or have the vehicle
towed in to have its wheels and tires
inspected.
Tire damage (up to and including blowouts)
can endanger the lives of both the vehicle
occupants and other road users.<
Page 85 of 140

83
OVERVIEW REPAIRSOPERATIONCONTROLS DATA INDEX
TIRE REPLACEMENT To maintain good handling and vehicle
response, use only tires of a single tread
configuration from a single manufacturer.
The manufacturer of your MINI tests and
approves wheel and tire combinations.
Do not use retreaded tires, since
driving safety may be impaired. This
is due to the possible variations in casing
structures and, in some cases, to their
extreme age, which can lead to a decrease
in their durability.
Temperature A B C
All passenger car tires must conform
to Federal Safety Requirements in
addition to these grades.< Tread wearThe tread wear grade is a comparative
rating based on the wear rate of the tire
when tested under controlled conditions
on a specified government test course.
For example, a tire graded 150 would wear
one and one-half (1 g) times as well on the
government course as a tire graded 100.
The relative performance of tires depends
upon the actual conditions of their use,
however, and may depart significantly
from the norm due to variations in driving
habits, service practices and differences in
road characteristics and climate.TractionThe traction grades, from highest to lowest,
are AA, A, B, and C.
Those grades represent the tire's ability to
stop on wet pavement as measured under
controlled conditions on specified govern-
ment test surfaces of asphalt and concrete.
A tire marked C may have poor traction
performance.
The traction grade assigned to this
tire is based on straight-ahead
braking traction tests, and does not include
acceleration, cornering, hydroplaning, or
peak traction characteristics.< TemperatureThe temperature grades are A (the highest),
B, and C, representing the tire's resistance
to the generation of heat and its ability to
dissipate heat when tested under
controlled conditions on a specified indoor
laboratory test wheel.
Sustained high temperature can cause the
material of the tire to degenerate and
reduce tire life, and excessive temperature
can lead to a sudden flat tire. The grade C
corresponds to a level of performance
which all passenger car tires must meet
under the Federal Motor Car Safety Stan-
dard No. 109. Grades B and A represent
higher levels of performance on the labora-
tory test wheel than the minimum required
by law.
The temperature grade for this tire is
established for a tire that is properly
inflated and not overloaded. Excessive
speed, underinflation, or excessive loading,
either separately or in combination, can
cause heat buildup and possible tire
failure.< Uniform Tire Quality Grading Quality grades can be found where appli-
cable on the tire sidewall between tread
shoulder and maximum section width. For
example:
Tread wear 200
Traction AA
Temperature A
Page 86 of 140
84
TIRE REPLACEMENT WHEEL AND TIRE COMBINATIONS Tire age The date on which the tire was manufac-
tured is indicated by the code on the side-
wall:
DOT ... 1202 indicates that the tire was
manufactured in Week 12 of the year 2002.
The manufacturer of your MINI recom-
mends replacement of all tires Ð including
the space-saver spare tire, after no more
than 6 years. Safety (run-flat) tires*
For replacement, use only safety tires,
as in the event of a flat tire there is no
space-saver spare tire.
You will recognize safety tires by a circular
symbol containing the letters RSC on the
side of the tire, see pages 110, 80.<
The right choiceThe factory-approved normal tires and
safety tires are matched to the vehicle and
have been selected to provide optimum
driving safety and the desired driving
comfort.
Never mount wheels and tires that
have not been specifically approved
by the manufacturer for use on your partic-
ular model. Although other wheels and
tires may theoretically have the same
dimensions, variations in factors such as
manufacturing tolerances can result in
contact between tire and bodywork, ulti-
mately leading to serious accidents. The
manufacturer cannot evaluate non-
approved wheels and tires to determine if
they are suited for use, and therefore
cannot ensure the operating safety of the
vehicle if they are fitted.<
The manufacturer has tested certain tire
brands in each size, categorized them as
safe for use on the road, and approved
them. Contact your MINI center for more
details.
The correct wheel and tire combina-
tion affects various systems that
would otherwise be impaired, e.g. ABS,
ASC+T and DSC.
For this reason, use only tires of the same
manufacture and tread configuration. In
the event of a flat tire, for example,
remount the approved wheel and tire
combination as soon as possible.<
StorageStore tires in a cool, dry place, protecting
them against light whenever possible.
Protect the tires against contact with oil,
grease and fuel.Tire changes between axlesDepending on individual operating condi-
tions, different wear patterns appear on
the front and rear axles. In the interests of
safety and optimized handling characteris-
tics, a change between the axles is not
recommended.