change time MINI Hardtop 2 Door 2004 Owner's Manual
[x] Cancel search | Manufacturer: MINI, Model Year: 2004, Model line: Hardtop 2 Door, Model: MINI Hardtop 2 Door 2004Pages: 152, PDF Size: 1.41 MB
Page 24 of 152
22
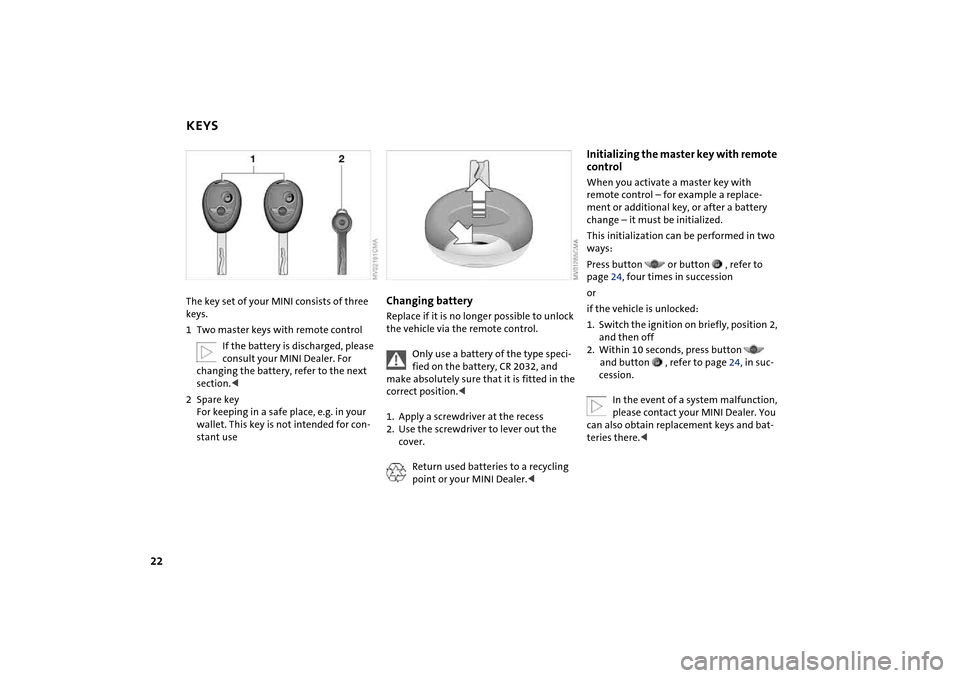
KEYSThe key set of your MINI consists of three
keys.
1Two master keys with remote control
If the battery is discharged, please
consult your MINI Dealer. For
changing the battery, refer to the next
section.<
2Spare key
For keeping in a safe place, e.g. in your
wallet. This key is not intended for con-
stant use
Changing batteryReplace if it is no longer possible to unlock
the vehicle via the remote control.
Only use a battery of the type speci-
fied on the battery, CR 2032, and
make absolutely sure that it is fitted in the
correct position.<
1. Apply a screwdriver at the recess
2. Use the screwdriver to lever out the
cover.
Return used batteries to a recycling
point or your MINI Dealer.<
Initializing the master key with remote
controlWhen you activate a master key with
remote control – for example a replace-
ment or additional key, or after a battery
change – it must be initialized.
This initialization can be performed in two
ways:
Press button or button , refer to
page 24, four times in succession
or
if the vehicle is unlocked:
1. Switch the ignition on briefly, position 2,
and then off
2. Within 10 seconds, press button
and button , refer to page 24, in suc-
cession.
In the event of a system malfunction,
please contact your MINI Dealer. You
can also obtain replacement keys and bat-
teries there.<
Page 25 of 152
23
OVERVIEW REPAIRS OPERATIONCONTROLS DATA INDEX
CENTRAL LOCKING SYSTEM OPENING AND CLOSING: FROM OUTSIDEThe conceptThe central locking system is ready for
operation whenever the driver's door is
closed. The doors, the tailgate and the fuel
filler door are unlocked or locked.
The central locking system secures your
MINI:
>When operated from the outside via the
remote control as well as via the door
lock
>When operated from the inside via a
switch.
If operated from outside, the anti-theft sys-
tem is activated at the same time. This pre-
vents the doors from being unlocked via
safety lock buttons or door handles.
In the event of an accident, the central lock-
ing system unlocks automatically. The haz-
ard warning system and interior lamps are
also switched on.
Via remote controlThe remote control gives you an exception-
ally convenient method for unlocking and
locking your vehicle. It also offers addi-
tional functions:
>To open the power windows and the
glass sunroof, refer to page 24.
Locking/unlocking the vehicle automati-
cally activates/deactivates the anti-theft
system and switches the interior lamps off/
on.
If the vehicle has been properly locked
using the remote control, the hazard warn-
ing system flashes once.
When the vehicle is unlocked, the hazard
warning system does not react.
Children might be able to lock the
doors from the inside. Always take
the vehicle keys with you so that the vehi-
cle can be opened again from the outside at
any time.<
For US owners only The transmitter and receiver units comply
with part 15 of the FCC, Federal Communi-
cations Commission, regulations. Opera-
tion is governed by the following:
FCC ID: LX8765S
LX8765E
LX8CAS
Compliance statement:
This device complies with part 15 of the
FCC Rules. Operation is subject to the fol-
lowing two conditions:
>This device may not cause harmful inter-
ference, and
>this device must accept any interference
received, including interference that may
cause undesired operation.
Any unauthorized modifications or
changes to these devices could void
the user's authority to operate this equip-
ment.<
Page 58 of 152
56
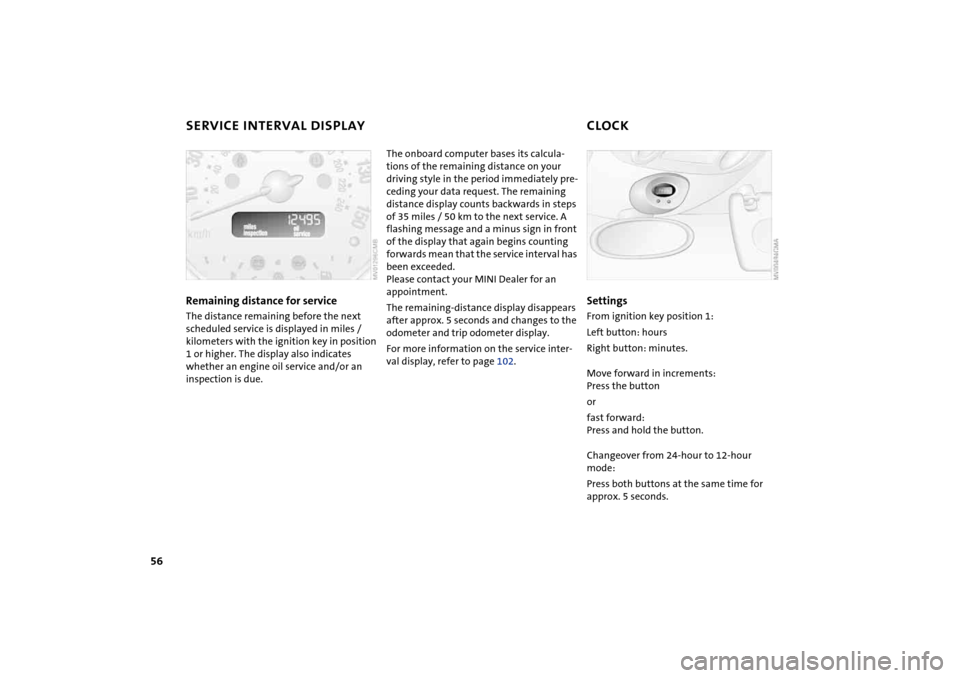
SERVICE INTERVAL DISPLAY CLOCKRemaining distance for serviceThe distance remaining before the next
scheduled service is displayed in miles /
kilometers with the ignition key in position
1 or higher. The display also indicates
whether an engine oil service and/or an
inspection is due.
The onboard computer bases its calcula-
tions of the remaining distance on your
driving style in the period immediately pre-
ceding your data request. The remaining
distance display counts backwards in steps
of 35 miles / 50 km to the next service. A
flashing message and a minus sign in front
of the display that again begins counting
forwards mean that the service interval has
been exceeded.
Please contact your MINI Dealer for an
appointment.
The remaining-distance display disappears
after approx. 5 seconds and changes to the
odometer and trip odometer display.
For more information on the service inter-
val display, refer to page 102.
SettingsFrom ignition key position 1:
Left button: hours
Right button: minutes.
Move forward in increments:
Press the button
or
fast forward:
Press and hold the button.
Changeover from 24-hour to 12-hour
mode:
Press both buttons at the same time for
approx. 5 seconds.
Page 73 of 152
71
OVERVIEW REPAIRS OPERATIONCONTROLS DATA INDEX
AUTOMATIC CLIMATE CONTROL
*
Automatic air distribution and supply
Automatic program (AUTO):
Indicator lamp lights up.
Automatic adjustment of the air distribu-
tion and supply, and adaptation of the
specified temperatures to external influ-
ences, i.e. outside temperature and sun-
light.
In the automatic program (AUTO), the air
conditioner is activated automatically.
You can change the unit from 6 to
7 by keeping extended pressure on
the button.<
Switching the automatic climate
control on/off
The blower, heating and air condi-
tioner are switched off.
To switch the automatic climate control on
again: Press any button of the automatic
climate control.
Air conditioning
Air conditioner switched on: indi-
cator lamp lights up.
The air is cooled and dehumidified and –
depending on the temperature setting –
rewarmed.
In the automatic program (AUTO), the air
conditioner is activated automatically.
Condensation on the windows is reduced
when the air conditioning is turned on.
Condensation forms in the air condi-
tioning system during operation, and
then exits under the vehicle. Traces of con-
densed water on the ground are therefore
normal.
cle is blocked: indicator lamp lights
up.
The air within the vehicle is recirculated.
In the automatic program (AUTO) in hot
weather conditions, the recirculated air
mode is activated temporarily to enable
faster cooling.
Do not run the recirculated air mode
over a longer period of time, as the air
quality in the vehicle's interior will other-
wise diminish.<
If the windows fog up in the recircu-
lated air mode, turn the recirculated
air mode off and if necessary increase the
air supply.<
Rear window defroster and windshield
heating*
Rear window defroster and wind-
shield heating switched on:
Indicator lamp lights up.
As long as the indicator lamp is lit, the
heating operates at high power output –
rapid defrosting.
Indicator lamp goes out.
The heating continues to run with reduced
power output and then switches itself off
automatically.
Temperature
Setting the temperature:
Move or turn the wheel in the
appropriate direction to increase
the temperature step by step.
The figures in the display provide a general
indication of interior temperature. When
you start the vehicle, the system ensures
that the selected temperature is achieved
as quickly as possible and then maintained.
Permanent heating with maximum
power output at temperature selec-
tion HI. Permanent cooling at LO.<
Page 103 of 152

101
OVERVIEW REPAIRSOPERATIONCONTROLS DATA INDEX
BRAKE FLUIDWarning lamp
If the brake warning lamp comes
on with the parking brake released:
The brake fluid level is too low,
refer to page 15.
Brake warning lamp for Canadian
models.
Adding brake fluid To add brake fluid or to determine and cor-
rect the cause of brake fluid loss, please
consult your MINI Dealer. Your MINI Dealer
is familiar with the specifications for fac-
tory-approved brake fluids, DOT 4.
Brake fluid loss may result in extended
brake pedal travel. If this occurs, refer to
the information on page 86.
Brake fluid is hygroscopic, that is, it
absorbs moisture from the air over
time.
In order to ensure the brake system's safety
and reliability, have the brake fluid
changed every two years by a MINI Dealer,
also refer to the Service and Warranty
Information Booklet for US models or the
Warranty and Service Guide Booklet for
Canadian models. Brake fluid is toxic and
also damages vehicle paintwork. Always
store brake fluid in tightly closed original
containers kept well away from the reach
of children.
Do not spill the brake fluid and do not fill
the brake fluid reservoir beyond the MAX
mark. The brake fluid could ignite upon
contact with hot engine parts and cause
serious burns.<
Comply with the applicable environ-
mental laws regulating the disposal
of brake fluid.<
Page 104 of 152
102
MINI MAINTENANCE SYSTEMThe MINI Maintenance System has been
designed as a reliable means of providing
maximum driving and operating safety,
and as cost-effective for you as possible.
Please bear in mind that regular mainte-
nance is not only necessary for the safety of
your vehicle, but also plays a significant
role in maintaining the resale value of the
vehicle.
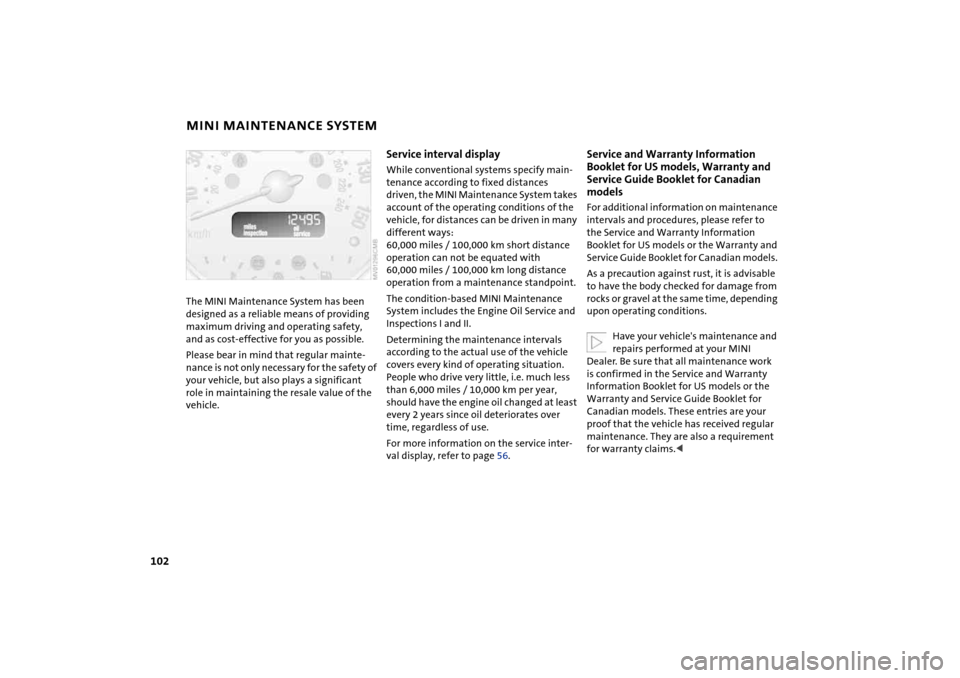
Service interval displayWhile conventional systems specify main-
tenance according to fixed distances
driven, the MINI Maintenance System takes
account of the operating conditions of the
vehicle, for distances can be driven in many
different ways:
60,000 miles / 100,000 km short distance
operation can not be equated with
60,000 miles / 100,000 km long distance
operation from a maintenance standpoint.
The condition-based MINI Maintenance
System includes the Engine Oil Service and
Inspections I and II.
Determining the maintenance intervals
according to the actual use of the vehicle
covers every kind of operating situation.
People who drive very little, i.e. much less
than 6,000 miles / 10,000 km per year,
should have the engine oil changed at least
every 2 years since oil deteriorates over
time, regardless of use.
For more information on the service inter-
val display, refer to page 56.
Service and Warranty Information
Booklet for US models, Warranty and
Service Guide Booklet for Canadian
models For additional information on maintenance
intervals and procedures, please refer to
the Service and Warranty Information
Booklet for US models or the Warranty and
Service Guide Booklet for Canadian models.
As a precaution against rust, it is advisable
to have the body checked for damage from
rocks or gravel at the same time, depending
upon operating conditions.
Have your vehicle's maintenance and
repairs performed at your MINI
Dealer. Be sure that all maintenance work
is confirmed in the Service and Warranty
Information Booklet for US models or the
Warranty and Service Guide Booklet for
Canadian models. These entries are your
proof that the vehicle has received regular
maintenance. They are also a requirement
for warranty claims.<
Page 122 of 152

120
CHANGING TIRES: MINI WITH SPACE-SAVER SPARE TIRE
*
Fitting the space-saver spare tire
1. Unscrew the lug bolts and remove the
wheel
2. Remove accumulations of mud or dirt
from the mounting surfaces of the
wheel and hub. Clean the lug bolts
3. Fit the space-saver spare tire
4. Screw at least two lug bolts finger-tight
into opposite bolt holes
5. Screw in the remaining bolts
6. Tighten all the lug bolts firmly in a diag-
onal pattern
7. Lower the vehicle
8. Remove the jack.Tightening the lug bolts Tighten the lug bolts in a diagonal pattern.
As soon as possible, have the secure
seating of the lug bolts, tightening
torque 88.5 lb ft / 120 Nm, checked using a
calibrated torque wrench. Otherwise, a
wheel coming loose can lead to a severe
accident.<
Replace the defective tire as soon as possi-
ble and have the new wheel/tire assembly
balanced.
Driving with the space-saver spare tireDrive cautiously. Do not exceed a speed of
50 mph / 80 km/h.
You must expect changes in vehicle han-
dling such as lower track stability during
braking, longer braking distances and
changes in self-steering properties when
close to the handling limit. These effects
are more pronounced when driving with
winter tires.
Only one space-saver spare tire may
be mounted at one time. Reinstall a
wheel and tire of the original size as soon
as possible.<
Check the tire inflation pressure at
the earliest opportunity and correct it
if necessary.<
Page 142 of 152
EVERYTHING FROM A TO Z
140
Control elements, refer to
Cockpit 12
Convenience operation
from outside 24, 25
glass sunroof, electric 29
window 28
Coolant 100
indicator lamp 15
level 100
temperature 55
Coolant temperature gauge 55
Cooling system, refer to
Capacities 135
Cooling, refer to Air
conditioning 68, 71
Copyright 2
Cornering Brake Control
(CBC) 61
warning lamp 16
Cosmetic mirror, refer to
Illuminated vanity mirror 36
Cruise control 52
indicator lamp 17
multifunction steering
wheel 18
sports steering wheel 18
Cup holders, refer to Beverage
holders 74
Curb weight, refer to
Weights 134 Current fuel consumption
setting units 58
Cylinders, refer to Engine
data 132
D
Daily odometer, refer to Trip
odometer 54
Dashboard lighting, refer to
Instrument lighting 49
Data, technical
dimensions 133
engine data 132
weights 134
Date of the Owner's Manual 7
Daytime driving lamps 48
Deep water, refer to Water on
roadways 83
Defrost setting, refer to
Defrosting and demisting
windows 69, 72
Defrosting and demisting
windows
air conditioning system 69
automatic climate control 72
Defrosting windows 69, 72
air conditioning system 68
automatic climate control 71
Defrosting windshield, refer to
Defrosting and demisting
windows 69, 72 Demisting windows 69, 72
Digital clock 56
Dimensions 133
Dimming interior rearview
mirror 37
Dipstick, engine oil 98
Directional turn signal,
refer to Turn signal
indicators 49
Disc brakes 86
Displacement, refer to Engine
data 132
Display elements 13
with navigation system 14
Display lighting, refer to
Instrument lighting 49
Disposal
oil 99
remote control battery 22
vehicle battery 124
Distance covered, refer to
Odometer 54
Door keys 24
Door lock 25
Doors, locking and unlocking
from inside 26
from outside 24
DOT quality grades 89
Draft-free ventilation 69, 72
Drink holders, refer to Beverage
holders 74 Driving lamps, refer to Parking
lamps/Low beams 48
Driving notes 83
break-in procedures 82
Driving stability control 59, 60
Dry air, refer to Air
conditioning 68, 71
DSC Dynamic Stability
Control 60
indicator lamp 16
DVD changer, refer to separate
Owner's Manual
Dynamic Stability Control
(DSC) 60
indicator lamp 16
Dynamic
Stability Control (DSC) 60
E
Easy entry to the rear 34
EBD Electronic Brake Force
Distribution 61
indicator lamp 16
Electric glass sunroof 29
Electric power windows 28
initializing 28