run flat MINI Hardtop 2 Door 2004 Owner's Manual
[x] Cancel search | Manufacturer: MINI, Model Year: 2004, Model line: Hardtop 2 Door, Model: MINI Hardtop 2 Door 2004Pages: 152, PDF Size: 1.41 MB
Page 5 of 152

3
OVERVIEW REPAIRS OPERATION CONTROLS DATA INDEX
Driving:
Ignition lock41
Starting the engine41
Switching off the engine43
Parking brake43
Manual transmission44
Continuously Variable automatic
Transmission (CVT)45
Parking lamps/Low beams48
Turn signal indicator/Headlamp
flasher49
Instrument lighting49
Fog lamps49
Interior lamps50
Washer/wiper system50
Cruise control52
Everything under control:
Odometer54
Tachometer54
Fuel gauge54
Coolant temperature gauge55
Service interval display56
Clock56
Onboard computer57
Technology for safety and driving
convenience:
All Season traction Control (ASC)59
Dynamic Stability Control (DSC)60
Antilock Brake System (ABS)61
Flat Tire Monitor62
Park Distance Control (PDC)64
Airbags65
Controlling the climate for pleasant
driving:
Air conditioning system67
Automatic climate control70
Interior conveniences:
Glove compartment73
Ashtray, beverage holders74
Cigarette lighter, 12 V power supply74
Loading and transporting cargo:
Cargo area75
Loading cargo76
Roof-mounted luggage rack78
OPERATION, CARE, MAINTENANCE
Special operating instructions:
Break-in procedures82
General driving notes83
Refueling84
Fuel specifications85
Brake system86
Wheels and tires:
Tire inflation pressure87
Tire coding89
Tire condition91
Wheel and tire replacement92
Run Flat tires93
Snow chains94
Page 18 of 152

16
INDICATOR AND WARNING LAMPS
Yellow: stop immediately
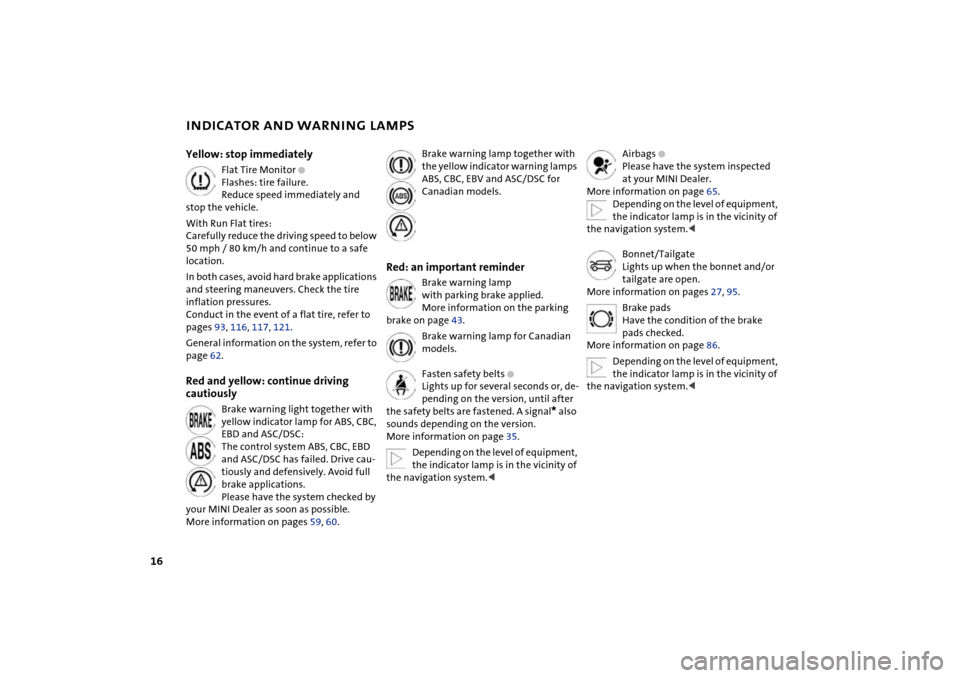
Flat Tire Monitor
+
Flashes: tire failure.
Reduce speed immediately and
stop the vehicle.
With Run Flat tires:
Carefully reduce the driving speed to below
50 mph / 80 km/h and continue to a safe
location.
In both cases, avoid hard brake applications
and steering maneuvers. Check the tire
inflation pressures.
Conduct in the event of a flat tire, refer to
pages 93, 116, 117, 121.
General information on the system, refer to
page 62.
Red and yellow: continue driving
cautiously
Brake warning light together with
yellow indicator lamp for ABS, CBC,
EBD and ASC/DSC:
The control system ABS, CBC, EBD
and ASC/DSC has failed. Drive cau-
tiously and defensively. Avoid full
brake applications.
Please have the system checked by
your MINI Dealer as soon as possible.
More information on pages 59, 60.
Brake warning lamp together with
the yellow indicator warning lamps
ABS, CBC, EBV and ASC/DSC for
Canadian models.
Red: an important reminder
Brake warning lamp
with parking brake applied.
More information on the parking
brake on page 43.
Brake warning lamp for Canadian
models.
Fasten safety belts
+
Lights up for several seconds or, de-
pending on the version, until after
the safety belts are fastened. A signal
*
also
sounds depending on the version.
More information on page 35.
Depending on the level of equipment,
the indicator lamp is in the vicinity of
the navigation system.
<
Airbags
+
Please have the system inspected
at your MINI Dealer.
More information on page 65.
Depending on the level of equipment,
the indicator lamp is in the vicinity of
the navigation system.
<
Bonnet/Tailgate
Lights up when the bonnet and/or
tailgate are open.
More information on pages 27, 95.
Brake pads
Have the condition of the brake
pads checked.
More information on page 86.
Depending on the level of equipment,
the indicator lamp is in the vicinity of
the navigation system.
<
Page 33 of 152

31
OVERVIEW REPAIRS OPERATIONCONTROLS DATA INDEX
SAFE SEATING POSITIONThe ideal seating position can make a vital
contribution to relaxed, relatively fatigue-
free driving. Together with the safety belts
and airbags, the seating position also plays
an important role in providing occupants
with maximum levels of passive safety in
an accident. To ensure that the safety sys-
tems operate with optimal efficiency, we
strongly urge you to observe the instruc-
tions contained in the following section.
For additional information about trans-
porting children safely, refer to page 38.Sitting safely with airbags
Always maintain an adequate dis-
tance between yourself and all of the
airbags. Always hold the steering wheel by
the rim with the hands at the 9 and
3 o'clock positions to keep any chance of
injury to hands or arms to an absolute min-
imum, should the airbag be deployed.
No one and nothing is to come between
the airbags and the seat occupant. Do not
use the front passenger airbag cover as a
storage surface for objects of any kind.
Ensure that the front passenger is correctly
seated, i.e. that no feet or legs are propped
against the dashboad. Otherwise, leg injury
could result if the front passenger airbag
suddenly deployed. Never let an occupant's
head rest near or on a side airbag because
the inflating airbag could cause a serious or
fatal injury.<
Even if all these instructions are followed, it
cannot entirely be ruled out that in some
circumstances injury may result from con-
tact with the airbags. In sensitive individu-
als, the ignition and inflation noise may
induce a mild hearing loss that is usually
temporary.
For airbag locations and additional infor-
mation on airbags, refer to page 65.Safe seating position with safety belt Fasten your safety belt before each drive.
Airbags are an additional safety device and
work in conjunction with the safety belts,
but do not replace them.
Your vehicle is equipped with four seats,
each of which is provided with a safety belt.
At all times, occupants should sit
upright and be properly restrained –
infants and small children in appropriate
child-restraint systems; larger children and
adults using the safety belts.
Expectant mothers should always wear
their safety belts, taking care to position
the lap belt against the lower hips, where it
will not exert pressure against the abdomi-
nal area.
Never allow more than one person to wear
a single safety belt. Never allow infants or
small children to ride in a passenger's lap.
Do not route the belt across your neck, or
run it across sharp edges. Be sure that the
belt does not become caught or jammed.
Avoid twisting the belt while routing it
firmly across the hips and shoulder; wear it
as snugly against your body as possible and
do not allow it to rest against sharp or frag-
ile objects. Otherwise, the belt could slide
over your hips in the event of a frontal
impact and cause abdominal injury. Avoid
wearing bulky clothing and pull on the lap
belt periodically to retension it over your
shoulder. Otherwise, the safety belt's
restraint effectiveness could be reduced.<
For information on using the safety belts,
refer to page 35.
Page 65 of 152

63
OVERVIEW REPAIRS OPERATIONCONTROLS DATA INDEX
FLAT TIRE MONITORFlat tireIndicator lamp:
The indicator lamp in the display
elements flashes. In addition, an
acoustic signal sounds.
1. Reduce speed and stop the vehicle with
caution. Avoid hard brake applications
and steering maneuvers
2. Determine which tire is damaged
If this cannot be determined, con-
tact your MINI Dealer.<
3. Replace the damaged tire, refer to
Changing tires on page 117, or repair the
flat tire using the MINI Moblity System,
refer to page 121.
Vehicles with Run Flat tires:
1. Reduce vehicle speed carefully to under
50 mph / 80 km/h. Avoid hard brake
applications and steering maneuvers.
Do not exceed a speed of 50 mph /
80 km/h
Since Run Flat tires are reinforced
on the flanks, it is usually not pos-
sible to detect a loss of pressure from
the outside, refer to Run Flat tires on
page 93.<
2. To continue driving, follow the instruc-
tions on driving with damaged tires on
page 93.System malfunctionIndicator lamp:
The symbol in the instrument clus-
ter lights up. The Flat Tire Monitor
is malfunctioning or out of order.
Please contact your MINI Dealer.
Page 89 of 152

87
OVERVIEW REPAIRSOPERATIONCONTROLS DATA INDEX
TIRE INFLATION PRESSURE Information for your safetyIt is not merely the tire's service life, but
also driving safety and driving comfort that
depend on the condition of the tires and
the maintenance of the specified tire pres-
sure.
Check tire inflation pressures regu-
larly, including the space-saver spare
tire: at least twice a month and before long
journeys. Failure to observe this precaution
can result in incorrect tire pressures, which
cause unstable handling response as well
as tire damage, and can ultimately lead to
an accident. Do not drive with deflated, i.e.
flat, tires except if Run Flat tires are fitted.
A flat tire greatly impairs steering and brak-
ing response, and can lead to complete loss
of control over the vehicle.
mum of 1.25 miles / 2 km or when the vehi-
cle has been parked for at least 2 hours.
Warm tires have higher pressures.
After correcting the tire inflation
pressure, reinitialize the Flat Tire
Monitor, refer to page 62.<
Tire inflation pressures for original
tiresThe tire inflation pressures in psi and kilo-
pascal are given on the placard on the B-pil-
lar that is visible when the driver's door is
open.Inflation pressures for other tiresIn the following tire pressure table, all pres-
sures are specified in the psi / kilopascal
units of pressure and apply to tires at ambi-
ent temperature.
In order to determine the correct
inflation pressures for your tires,
refer to the values for the tire size in ques-
tion.<
Checking the inflation pressure on the
space-saver spare tireBehind the bumper there is a valve exten-
sion accessible from the outside for check-
ing the inflation pressure.Run Flat tiresRun Flat tires consist of self-contained tires
and special rims. The tire reinforcement
ensures that the tire offers some residual
safety in the event of pressure drop and
driving remains possible to a restricted
degree, refer to page 93. The vehicle is
equipped with Flat Tire Monitor, refer to
page 62.
Page 92 of 152

90
TIRE CODINGTraction The traction grades, from highest to lowest,
are AA, A, B, and C.
Those grades represent the tire's ability to
stop on wet pavement as measured under
controlled conditions on specified govern-
ment test surfaces of asphalt and concrete.
A tire marked C may have poor traction per-
formance.
The traction grade assigned to this
tire is based on straight-ahead brak-
ing traction tests, and does not include
acceleration, cornering, hydroplaning, or
peak traction characteristics.
to the generation of heat and its ability to
dissipate heat when tested under con-
trolled conditions on a specified indoor lab-
oratory test wheel.
Sustained high temperature can cause the
material of the tire to degenerate and
reduce tire life, and excessive temperature
can lead to a sudden flat tire. The grade C
corresponds to a level of performance
which all passenger car tires must meet
under the Federal Motor Vehicle Safety
Standard No. 109. Grades B and A represent
higher levels of performance on the labora-
tory test wheel than the minimum required
by law.
The temperature grade for this tire is
established for a tire that is properly
inflated and not overloaded. Excessive
speed, underinflation, or excessive loading,
either separately or in combination, can
cause heat buildup and possible tire fail-
ure.
the side of the tire, refer to page 93.M+SWinter and all-season tires.
These have better winter performance
properties than summer tires.
Page 94 of 152

92
WHEEL AND TIRE REPLACEMENT
Unprofessional attempts by laymen
to service tires can lead to damage
and accidents.
Have this work performed by skilled profes-
sionals only. Your MINI Dealer will be glad
to assist you with both their expertise and
the proper equipment for your vehicle.<
The correct wheel and tire combination
also affects various systems that would
otherwise be impaired, e.g. ABS or DSC.
Have the wheels balanced after each tire or
wheel replacement.
The manufacturer of your MINI rec-
ommends that you avoid using
retread tires, as this could impair driving
safety. This is due to the possible variations
in casing structures and, in some cases, to
their extreme age, which can lead to a
decrease in their durability.<
The correct wheels and tires
The manufacturer of your MINI rec-
ommends never mounting wheels
and tires that have not been specifically
approved by the manufacturer for use on
your particular model. Although other
wheels and tires may theoretically have the
same dimensions, variations in factors such
as manufacturing tolerances can result in
contact between tire and bodywork, ulti-
mately leading to serious accidents. The
manufacturer of your MINI cannot evaluate
non-approved wheels and tires to deter-
mine if they are suited for use, and there-
fore cannot ensure the operating safety of
the vehicle if they are fitted.<
Recommended tire makes:
To maintain good handling and vehicle
response, use only tires of a single tread
configuration from a single manufacturer.
In the event of a flat tire, remount the pre-
vious wheel and tire combination as soon
as possible.
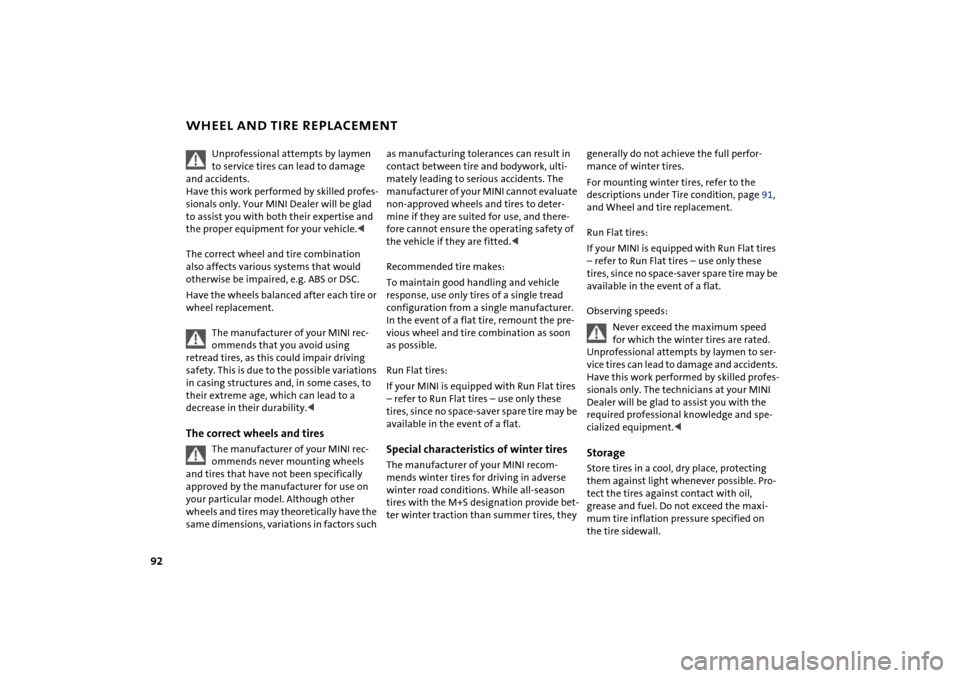
Run Flat tires:
If your MINI is equipped with Run Flat tires
– refer to Run Flat tires – use only these
tires, since no space-saver spare tire may be
available in the event of a flat. Special characteristics of winter tires The manufacturer of your MINI recom-
mends winter tires for driving in adverse
winter road conditions. While all-season
tires with the M+S designation provide bet-
ter winter traction than summer tires, they generally do not achieve the full perfor-
mance of winter tires.
For mounting winter tires, refer to the
descriptions under Tire condition, page 91,
and Wheel and tire replacement.
Run Flat tires:
If your MINI is equipped with Run Flat tires
– refer to Run Flat tires – use only these
tires, since no space-saver spare tire may be
available in the event of a flat.
Observing speeds:
Never exceed the maximum speed
for which the winter tires are rated.
Unprofessional attempts by laymen to ser-
vice tires can lead to damage and accidents.
Have this work performed by skilled profes-
sionals only. The technicians at your MINI
Dealer will be glad to assist you with the
required professional knowledge and spe-
cialized equipment.<
StorageStore tires in a cool, dry place, protecting
them against light whenever possible. Pro-
tect the tires against contact with oil,
grease and fuel. Do not exceed the maxi-
mum tire inflation pressure specified on
the tire sidewall.
Page 95 of 152

93
OVERVIEW REPAIRSOPERATIONCONTROLS DATA INDEX
RUN FLAT TIRES
*
You will recognize Run Flat tires by a circu-
lar symbol containing the letters RSC on
the side of the tire. Run Flat tires consist of
self-contained tires and special rims. The
tire reinforcement ensures that driving
remains possible to a restricted degree in
the event of a pressure drop or even a flat
tire.
When mounting or replacing summer
Run Flat tires with winter tires, or vice
versa, use Run Flat tires again since no
space-saver spare tire is available in the
event of a flat. In this event, the manufac-
turer of your MINI recommends consulting
your MINI Dealer. Your MINI Dealer has the
necessary special equipment and expertise
for handling Run Flat tires.<
Continuing driving with a damaged
tire Depending on the load, you can continue
driving with Run Flat tires at a maximum
speed of 50 mph / 80 km/h.
If there is a total loss of tire inflation pres-
sure, 0 psi / 0 kPa, or obvious tire damage,
you can gauge the mileage for continued
driving on the basis of the following indica-
tions:
>With a light load:
1 to 2 persons without luggage:
approx. 155 miles / 250 km
>With a medium load:
2 persons, full cargo area, or
4 persons without luggage:
approx. 95 miles / 150 km
>With a full load:
4 persons or more, full cargo:
approx. 30 miles / 50 km.Drive cautiously. Do not exceed a
speed of 50 mph / 80 km/h. In case of
tire pressure loss you must expect changes
in vehicle handling such as lower track sta-
bility during braking, longer braking dis-
tances and changes in self-steering proper-
ties when close to the handling limit.
For safety reasons, the manufacturer of
your MINI recommends not having dam-
aged Run Flat tires repaired. In this case,
consult your MINI dealer.<
Tire change setYour MINI is additionally equipped with a
tire change set. This is located in the MINI
COOPER in the cargo area under the floor
mat.
In the MINI COOPER S the tire change set is
located in a separate bag which is attached
to the eyelets on the cargo area floor by
means of tie-down straps.
When changing a tire, always observe the
safety measures on page 116, and follow
the procedure described on page 117 ff.
In case of a flat tire, the tire change
set is not needed, since your MINI has
Run Flat tires.<
Page 112 of 152

110
ONBOARD TOOL KIT WINDSHIELD WIPER BLADES The picture shows as an example the tire
change set with onboard tools for vehicles
with the space-saver spare tire.
Depending on the level of equipment
options, your MINI is fitted with a special
onboard tool kit stored at the locations
described below:
Storage locationMINI Mobility System with tire change set
and onboard tools:
>In the cargo area under the floor mat.
Tire change set and onboard tools for Run
Flat tires:
>Tire change set:
In the cargo area in a separate pouch,
refer to page 123
>Onboard tool kit:
on the left-hand side of the cargo area
behind the side trim panel.
Tire change set with space-saver spare tire:
>In the cargo area under the floor mat.
Windshield wiper1. Rotate the wiper arm completely out
from the windshield
2. Set the wiper blade at an angle
3. Press the securing spring, arrow
4. Unhook the wiper blade towards the
windshield
5. Pull the wiper blade past the wiper arm
toward the top
6. Insert the new wiper blade
7. Press into position until you hear it
engage.
Page 118 of 152

116
LAMPS AND BULBS REPAIRING A FLAT TIRE Cargo area lamps 5 Watt bulb
1. Press the lamp cover to the left and out
with a screwdriver.
2. Remove and replace the bulb.
Footwell lamps5 Watt bulb
1. Press out the lamp cover with a screw-
driver
2. Remove and replace the bulb.Glove compartment lamp5 Watt bulb
1. Press out the lamp cover with a screw-
driver
2. Remove and replace the bulb.Safety measures in the event of a flat
tire:
Stop the vehicle as far as possible from
passing traffic. Switch on the hazard warn-
ing flashers.
Turn the steering wheel to the straight-
ahead wheel position and engage the
steering lock. Engage the parking brake and
shift into 1st or reverse gear – selector lever
in P.
All passengers should be outside the vehi-
cle and well away from your immediate
working area – behind a guardrail, for
instance.
If a portable hazard warning lamp is avail-
able, set it up on the roadside at an appro-
priate distance from the rear of the vehicle.
Comply with all safety guidelines and regu-
lations.<
In the event of a flat tire, different proce-
dures should be followed depending on the
equipment included in your MINI:
>Vehicles with Run Flat tires, refer to
page 93
>Vehicles with a space-saver spare tire,
refer to the following section
>Vehicles with MINI Mobility System,
refer to page 121.