tires MINI Hardtop 2 Door 2004 Owner's Manual
[x] Cancel search | Manufacturer: MINI, Model Year: 2004, Model line: Hardtop 2 Door, Model: MINI Hardtop 2 Door 2004Pages: 152, PDF Size: 1.41 MB
Page 5 of 152
3
OVERVIEW REPAIRS OPERATION CONTROLS DATA INDEX
Driving:
Ignition lock41
Starting the engine41
Switching off the engine43
Parking brake43
Manual transmission44
Continuously Variable automatic
Transmission (CVT)45
Parking lamps/Low beams48
Turn signal indicator/Headlamp
flasher49
Instrument lighting49
Fog lamps49
Interior lamps50
Washer/wiper system50
Cruise control52
Everything under control:
Odometer54
Tachometer54
Fuel gauge54
Coolant temperature gauge55
Service interval display56
Clock56
Onboard computer57
Technology for safety and driving
convenience:
All Season traction Control (ASC)59
Dynamic Stability Control (DSC)60
Antilock Brake System (ABS)61
Flat Tire Monitor62
Park Distance Control (PDC)64
Airbags65
Controlling the climate for pleasant
driving:
Air conditioning system67
Automatic climate control70
Interior conveniences:
Glove compartment73
Ashtray, beverage holders74
Cigarette lighter, 12 V power supply74
Loading and transporting cargo:
Cargo area75
Loading cargo76
Roof-mounted luggage rack78
OPERATION, CARE, MAINTENANCE
Special operating instructions:
Break-in procedures82
General driving notes83
Refueling84
Fuel specifications85
Brake system86
Wheels and tires:
Tire inflation pressure87
Tire coding89
Tire condition91
Wheel and tire replacement92
Run Flat tires93
Snow chains94
Page 6 of 152
CONTENTS
4
In the engine compartment:
Bonnet95
Engine compartment: MINI COOPER96
Engine compartment: MINI COOPER S97
Washer fluid98
Engine oil98
Coolant100
Brake fluid101
Maintenance and care:
MINI Maintenance System102
Caring for your vehicle103
Vehicle storage105
Laws and regulations:
OBD socket106
California Proposition 65 warning107
OWNER SERVICE PROCEDURES
Replacement procedures:
Onboard tool kit110
Windshield wiper blades110
Lamps and bulbs111
Repairing a flat tire116
Changing tires: MINI with space-saver
spare tire117
MINI Mobility System121
Battery124
Fuses125
Giving and receiving assistance:
Jump-starting126
Towing128
TECHNICAL DATA
Engine data132
Dimensions133
Weights134
Capacities135
Page 18 of 152
16
INDICATOR AND WARNING LAMPS
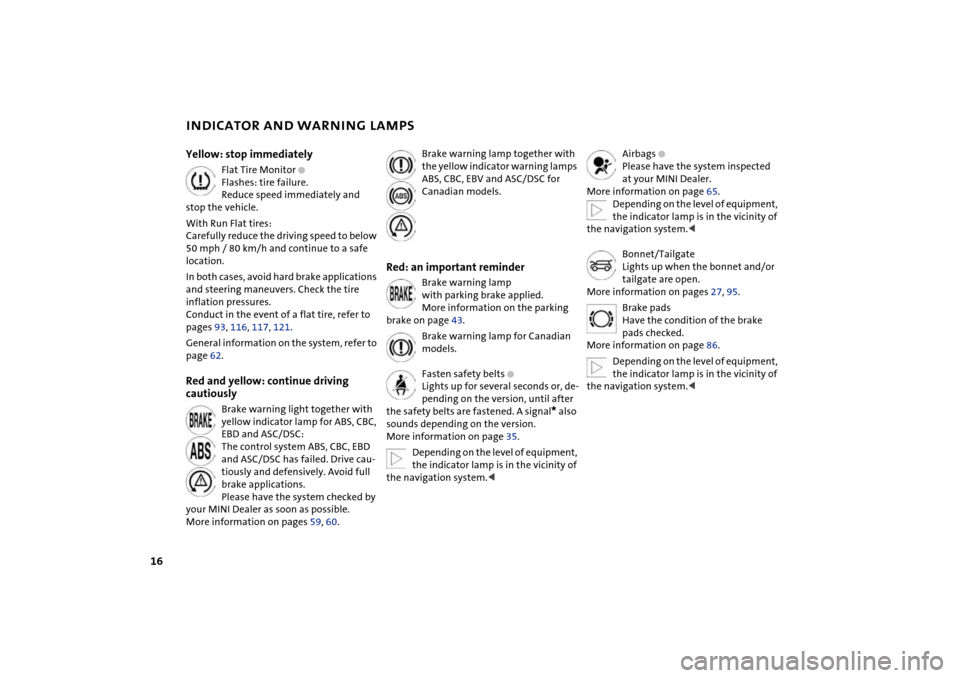
Yellow: stop immediately
Flat Tire Monitor
+
Flashes: tire failure.
Reduce speed immediately and
stop the vehicle.
With Run Flat tires:
Carefully reduce the driving speed to below
50 mph / 80 km/h and continue to a safe
location.
In both cases, avoid hard brake applications
and steering maneuvers. Check the tire
inflation pressures.
Conduct in the event of a flat tire, refer to
pages 93, 116, 117, 121.
General information on the system, refer to
page 62.
Red and yellow: continue driving
cautiously
Brake warning light together with
yellow indicator lamp for ABS, CBC,
EBD and ASC/DSC:
The control system ABS, CBC, EBD
and ASC/DSC has failed. Drive cau-
tiously and defensively. Avoid full
brake applications.
Please have the system checked by
your MINI Dealer as soon as possible.
More information on pages 59, 60.
Brake warning lamp together with
the yellow indicator warning lamps
ABS, CBC, EBV and ASC/DSC for
Canadian models.
Red: an important reminder
Brake warning lamp
with parking brake applied.
More information on the parking
brake on page 43.
Brake warning lamp for Canadian
models.
Fasten safety belts
+
Lights up for several seconds or, de-
pending on the version, until after
the safety belts are fastened. A signal
*
also
sounds depending on the version.
More information on page 35.
Depending on the level of equipment,
the indicator lamp is in the vicinity of
the navigation system.
<
Airbags
+
Please have the system inspected
at your MINI Dealer.
More information on page 65.
Depending on the level of equipment,
the indicator lamp is in the vicinity of
the navigation system.
<
Bonnet/Tailgate
Lights up when the bonnet and/or
tailgate are open.
More information on pages 27, 95.
Brake pads
Have the condition of the brake
pads checked.
More information on page 86.
Depending on the level of equipment,
the indicator lamp is in the vicinity of
the navigation system.
<
Page 64 of 152

62
FLAT TIRE MONITOR The conceptAs you drive, the Flat Tire Monitor keeps
track of the tire inflation pressure in all four
tires. The system alerts you when there is a
substantial pressure loss in one of the tires
relative to another.
The tire inflation pressures are monitored
based on the speeds of the four wheels in
relation to one another. A flat tire is
detected as the result of differences in cer-
tain speed ratios, and a warning is gener-
ated.System requirementsSo that the system can 'familiarize' itself
with the correct inflation pressure, please
do the following:
1. Check the tire inflation pressure in all
tires
2. Compare them with the inflation pres-
sure table, refer to page 88, and adjust
the pressures if necessary
3. Initializing the system.
System limitations
The Flat Tire Monitor cannot alert you
to severe and sudden tire damage
caused by external factors, nor does it
detect the gradual and minor loss of pres-
sure in all four tires.<
On the other hand, the following situations
could lead to a delayed detection of pres-
sure loss or to the system not functioning:
>Driving on snow-covered or slippery
roads
>Performance-oriented driving: slip at the
drive wheels, high rates of lateral accel-
eration
>When driving with snow chains, false
warnings and undetected pressure loss
may occur
>When driving with a space-saver spare
tire, the Flat Tire Monitor cannot func-
tion.
Initializing the system
The system must be re-initialized
immediately after changing a tire
and wheel, or after correcting the pressure
in any tire. This requires a bit of driving.<
1. Before a journey, start the engine, but do
not start driving
2. Press the button long enough for the
indicator lamp in the display elements to
light up for a few seconds
3. Drive off.
It takes a few minutes before the Flat Tire
Monitor can detect a flat tire and issue an
alert.
Do not initialize the system if you are
driving with snow chains or a space-
saver spare tire.<
Page 65 of 152

63
OVERVIEW REPAIRS OPERATIONCONTROLS DATA INDEX
FLAT TIRE MONITORFlat tireIndicator lamp:
The indicator lamp in the display
elements flashes. In addition, an
acoustic signal sounds.
1. Reduce speed and stop the vehicle with
caution. Avoid hard brake applications
and steering maneuvers
2. Determine which tire is damaged
If this cannot be determined, con-
tact your MINI Dealer.<
3. Replace the damaged tire, refer to
Changing tires on page 117, or repair the
flat tire using the MINI Moblity System,
refer to page 121.
Vehicles with Run Flat tires:
1. Reduce vehicle speed carefully to under
50 mph / 80 km/h. Avoid hard brake
applications and steering maneuvers.
Do not exceed a speed of 50 mph /
80 km/h
Since Run Flat tires are reinforced
on the flanks, it is usually not pos-
sible to detect a loss of pressure from
the outside, refer to Run Flat tires on
page 93.<
2. To continue driving, follow the instruc-
tions on driving with damaged tires on
page 93.System malfunctionIndicator lamp:
The symbol in the instrument clus-
ter lights up. The Flat Tire Monitor
is malfunctioning or out of order.
Please contact your MINI Dealer.
Page 78 of 152

76
LOADING CARGO
Avoid overloading the vehicle so that
the permitted load on the tires is not
exceeded. Overloading can lead to over-
heating and damage inside the tires.
Depending on the circumstances, this can
result in sudden air loss.<
Determining cargo limit1. Locate the following statement on your
vehicle's placard:
The combined weight of occu-
pants and cargo should never
exceed XXX kg or YYY lbs, as this could
otherwise result in damage to the vehi-
cle and unstable driving conditions.<
2. Determine the combined weight of the
driver and passengers that will be riding
in your vehicle
3. Substract the combined weight of the
driver and passengers from XXX kilo-
grams or YYY pounds
4. The resulting figure equals the available
amount of cargo and luggage load
capacity.
For example, if the XXX amount equals
1,400 lbs. and there will be four 150 lbs.
passengers in your vehicle, the amount
of available cargo and luggage load
capacity is 800 lbs.:
1,400 lbs. minus 600 lbs. = 800 lbs.
5. Determine the combined weight of lug-
gage and cargo being loaded on the
vehicle. That weight may not safely
exceed the available cargo and luggage
load capacity calculated in Step 4
6. If your vehicle will be towing a trailer,
load from your trailer will be transferred
to your vehicle. Consult the manual for
transporting a trailer to determine how
this may reduce the available cargo and
luggage load capacity of your vehicle.
Page 84 of 152
82
BREAK-IN PROCEDURES To ensure that your vehicle provides maxi-
mum economy throughout a long service
life, we request that you comply with the
following information: EngineUp to 1,250 miles / 2,000 km:
>Drive at various vehicle and engine
speeds
>Do not exceed an engine speed of
4,500 rpm or a vehicle speed of 95 mph /
150 km/h.
>Absolutely avoid using the full-throttle
or kickdown position for the accelerator.
Up to 1,250 miles / 2,000 km:
Engine and road speeds can be gradually
increased.
You should also comply with these break-in
procedures if the engine has to be replaced
at a later point.
TiresDue to technical factors associated with
their manufacture, tires do not achieve
their full traction potential until after an
initial break-in period. Therefore drive care-
fully during the first 200 miles / 300 km.Brake systemApprox. 300 miles / 500 km must be driven
before the brake pads and rotors achieve
the optimum pad-surface and wear pat-
terns required for trouble-free operation
and an extended service life.ClutchRoughly 300 miles / 500 km must be driven
before the clutch starts to operate at opti-
mum efficiency. Remember to engage the
clutch carefully during this initial period.
Page 85 of 152
83
OVERVIEW REPAIRSOPERATIONCONTROLS DATA INDEX
GENERAL DRIVING NOTESParking the vehicle Condensation forms in the air conditioner
system during operation, and then exits
under the vehicle. Traces of condensed
water on the ground are therefore normal.Brakes
Do not rest your foot on the brake
pedal while driving. Even light but
consistent pedal pressure can lead to high
temperatures, brake wear and possibly
even brake failure.<
Hydroplaning
When driving on wet or slushy roads,
reduce road speed. If you do not, a
wedge of water can form between tires and
road surface. This phenomenon is charac-
terized by a partial or complete loss of con-
tact between the tires and the road surface.
The ultimate results are loss of steering and
braking control.<
Driving through water
Do not drive through water on the
road if it is deeper than 1 ft / 30 cm,
and then only at walking speed at the
most. Otherwise, the vehicle's engine, the
electrical systems and the transmission
may be damaged.<
Clothes hooks
When suspending clothing from the
hooks, ensure that they will not
obstruct the driver's vision. Do not hang
heavy objects on the hooks. If you do so,
they could cause personal injury during
braking or evasive maneuvers.<
High temperatures
High temperatures occur in any vehi-
cle equipped with a catalytic con-
verter. Do not remove the heat protection
plates fitted in the area of the exhaust sys-
tem and do not apply body-cavity pro-
tectant to this area. When driving, standing
at idle, and parking the vehicle, take care to
avoid contact between the hot exhaust sys-
tem and flammable materials, e.g. hay,
grass, leaves, etc. Such contact could lead
to a fire resulting in serious personal injury
and property damage.<
Page 89 of 152

87
OVERVIEW REPAIRSOPERATIONCONTROLS DATA INDEX
TIRE INFLATION PRESSURE Information for your safetyIt is not merely the tire's service life, but
also driving safety and driving comfort that
depend on the condition of the tires and
the maintenance of the specified tire pres-
sure.
Check tire inflation pressures regu-
larly, including the space-saver spare
tire: at least twice a month and before long
journeys. Failure to observe this precaution
can result in incorrect tire pressures, which
cause unstable handling response as well
as tire damage, and can ultimately lead to
an accident. Do not drive with deflated, i.e.
flat, tires except if Run Flat tires are fitted.
A flat tire greatly impairs steering and brak-
ing response, and can lead to complete loss
of control over the vehicle.
mum of 1.25 miles / 2 km or when the vehi-
cle has been parked for at least 2 hours.
Warm tires have higher pressures.
After correcting the tire inflation
pressure, reinitialize the Flat Tire
Monitor, refer to page 62.<
Tire inflation pressures for original
tiresThe tire inflation pressures in psi and kilo-
pascal are given on the placard on the B-pil-
lar that is visible when the driver's door is
open.Inflation pressures for other tiresIn the following tire pressure table, all pres-
sures are specified in the psi / kilopascal
units of pressure and apply to tires at ambi-
ent temperature.
In order to determine the correct
inflation pressures for your tires,
refer to the values for the tire size in ques-
tion.<
Checking the inflation pressure on the
space-saver spare tireBehind the bumper there is a valve exten-
sion accessible from the outside for check-
ing the inflation pressure.Run Flat tiresRun Flat tires consist of self-contained tires
and special rims. The tire reinforcement
ensures that the tire offers some residual
safety in the event of pressure drop and
driving remains possible to a restricted
degree, refer to page 93. The vehicle is
equipped with Flat Tire Monitor, refer to
page 62.
Page 90 of 152

88
TIRE INFLATION PRESSUREModel Tires
Pressures specified in psi / kilopascal
MINI COOPER175/65 R 15 84 H
175/65 R 15 84 Q M+S30 / 210 35 / 240 35 / 240 35 / 240
195/55 R 16 87 H
195/55 R 16 87 H M+S
205/45 R 17 84 V
205/45 R 17 84 V M+S30 / 210 30 / 210 35 / 240 35 / 240
175/65 R 15 84 Q M+S
175/60 R 15 82 Q M+S
195/55 R 16 87 Q M+S
205/45 R 17 84 Q M+S33 / 230 33 / 230 38 / 260 38 / 260
Space-saver spare tire T 115/70 R 15 90 M 61 / 420 61 / 420 61 / 420 61 / 420
MINI COOPER S195/55 R 16 87 V
195/55 R 16 87 V M+S30 / 210 30 / 210 35 / 240 35 / 240
205/45 R 17 84 V
205/45 R 17 84 Q M+S
205/45 R 17 84 V M+S
195/55 R 16 87 Q M+S33 / 230 33 / 230 38 / 260 38 / 260
175/60 R 16 82 Q M+S 36 / 250 36 / 250 41 / 280 41 / 280
All-season tires, M+S, should be inflated to the same pressures as summer tires. Figures as stated here apply to the manufacturer's
approved or recommended tires; your MINI Dealer will be happy to provide information on request.