window MINI Hardtop 2 Door 2005 User Guide
[x] Cancel search | Manufacturer: MINI, Model Year: 2005, Model line: Hardtop 2 Door, Model: MINI Hardtop 2 Door 2005Pages: 165, PDF Size: 2.32 MB
Page 62 of 165
60
WASHER/WIPER SYSTEMwindshield wipers are automatically con
-
trolled depending on the amount of mois
-
ture, including snow, on the windshield. To activate the rain sensor:From ignition key position
1:
Lever in position 1.
The wipers move over the windshield once.To deactivate the rain sensor:Put lever in position
0.
Switch the rain sensor off when pass
-
ing through an automatic car wash.
Failure to do so could result in damage
caused by undesired wiper activation. <
Normal wiper speedWhen the vehicle is stationary, the wipers
switch automatically to intermittent wip
-
ing.
You can have this function activated/deactivated.<
Fast wiper speedWhen the vehicle is stationary, the wipers
switch automatically to normal wiper
speed.
You can have this function activated/deactivated. <
Cleaning windshield and headlamps * The system sprays washer fluid against the
windshield. The wipers are automatically
activated for a brief period.When the vehicle lighting is on, the head
-
lamps are also cleaned at appropriate inter
-
vals.
Do not use the washers if there is any danger that the fluid will freeze on
the windshield. For this reason, use an anti
-
freeze agent, refer to page
108
.
Do not use the washers when the reservoir
is empty, since this could cause damage to
the washing pump.
position
2.
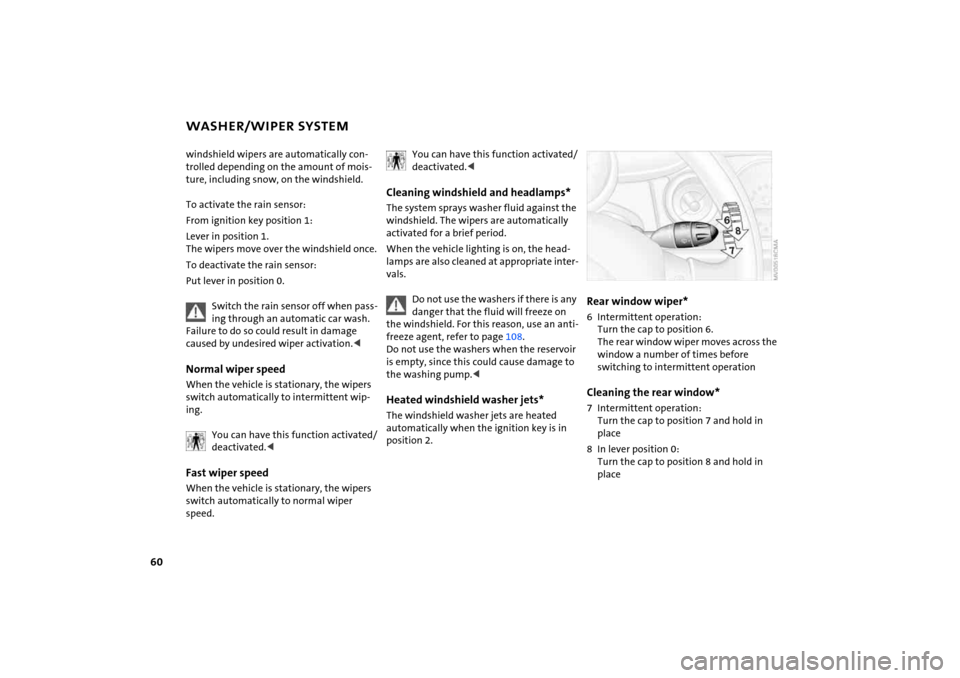
Rear window wiper * 6 Intermittent operation:
Turn the cap to position
6.
The rear window wiper moves across the
window a number of times before
switching to interm ittent operationCleaning the rear window * 7 Intermittent operation:
Turn the cap to position
7 and hold in
place
8 In lever position
0:
Turn the cap to position
8 and hold in
place
Page 77 of 165
75
OVERVIEW REPAIRS OPERATIONCONTROLS DATA INDEX
AIR CONDITIONING SYSTEM
*
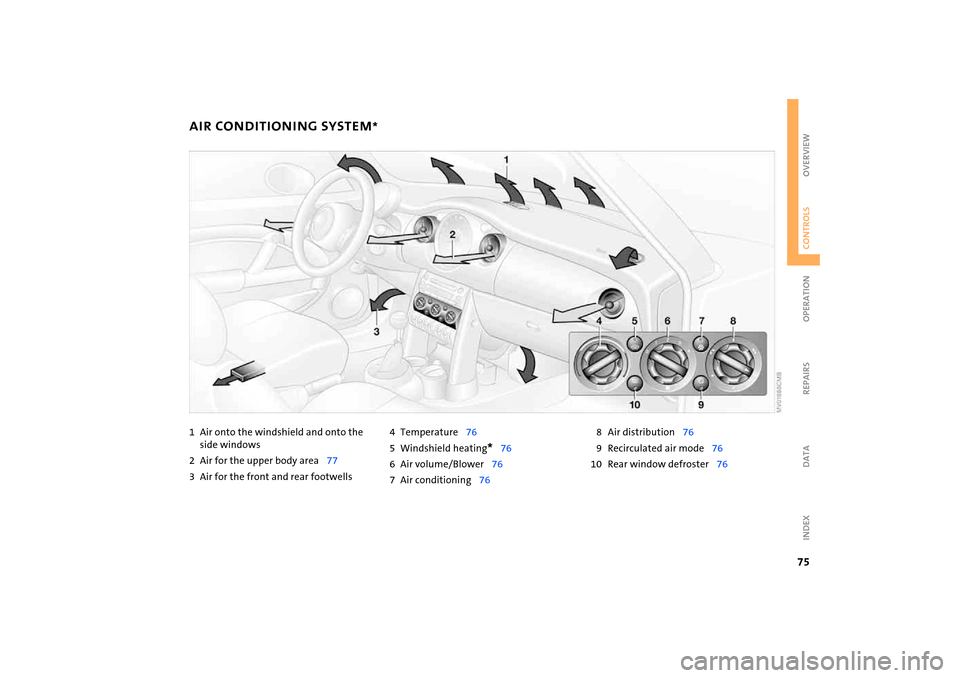
1Air onto the windshield and onto the
side windows 2 Air for the upper body area
77
3 Air for the front and rear footwells
4 Temperature
76
5 Windshield heating
* 76
6 Air volume/Blower
76
7 Air conditioning
76
8 Air distribution
76
9 Recirculated air mode
76
10 Rear window defroster
76
Page 78 of 165
76
AIR CONDITIONING SYSTEM
*
Air volume/Blower
You can select blower speeds from 1 to 4. Position
0: fan is
turned off. The button for recir
-
culated air mode fully blocks the
supply of air from outside.
The heating, ventilation and air condition
-
ing operate in position 1 or higher.Temperature
Turn to the right, red, to increase the temperature of the passen
-
ger compartment.Rapid heating: turn to the
extreme right. Then select a pleasant inte
-
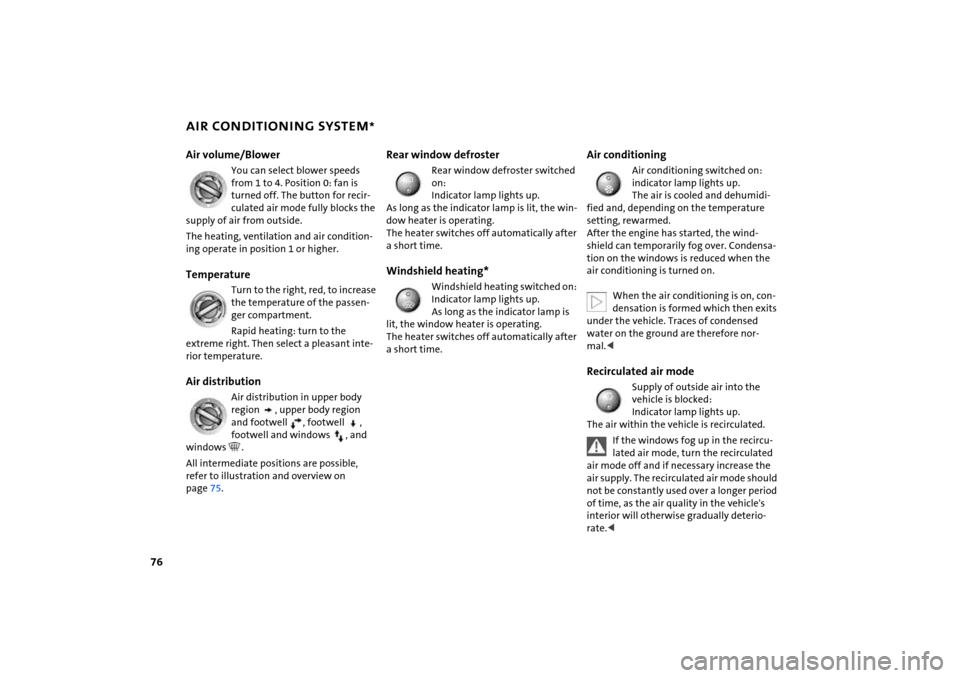
rior temperature.Air distribution
Air distribution in upper body region
, upper body region
and footwell
, footwell
,
footwell and windows
, and
windows
.
All intermediate positions are possible,
refer to illustration and overview on
page
75.
Rear window defroster
Rear window defroster switched on:
Indicator lamp lights up.
As long as the indicator lamp is lit, the win
-
dow heater is operating.
The heater switches off automatically after
a short time.Windshield heating*
Windshield heating switched on:
Indicator lamp lights up.
As long as the indicator lamp is
lit, the window heater is operating.
The heater switches off automatically after
a short time.
Air conditioning
Air conditioning switched on: indicator lamp lights up.
The air is cooled and dehumidi
-
fied and, depending on the temperature
setting, rewarmed.
After the engine has started, the wind
-
shield can temporarily fog over. Condensa
-
tion on the windows is reduced when the
air conditioning is turned on.
When the air conditioning is on, con
-
densation is formed which then exits
under the vehicle. Traces of condensed
water on the ground are therefore nor
-
mal.
Indicator lamp lights up.
The air within the vehicle is recirculated.
If the windows fog up in the recircu
-
lated air mode, turn the recirculated
air mode off and if necessary increase the
air supply. The recirculated air mode should
not be constantly used over a longer period
of time, as the air quality in the vehicle's
interior will otherwise gradually deterio
-
rate.<
Page 79 of 165
77
OVERVIEW REPAIRS OPERATIONCONTROLS DATA INDEX
AIR CONDITIONING SYSTEM
*
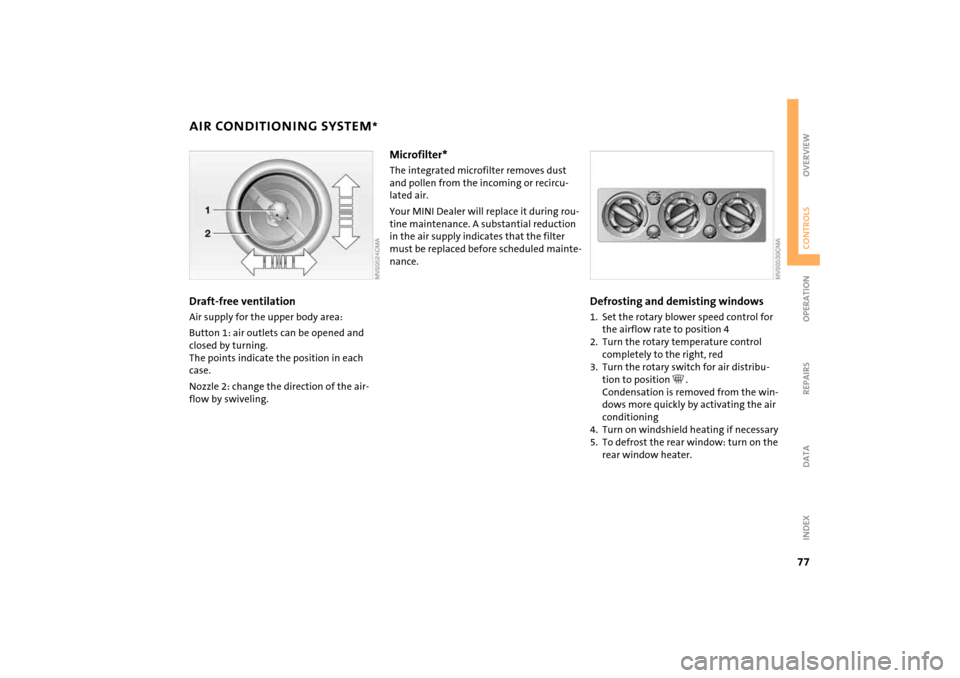
Draft-free ventilation Air supply for the upper body area:Button
1: air outlets can be opened and
closed by turning.
The points indicate the position in each
case.Nozzle
2: change the direction of the air
-
flow by swiveling.
Microfilter* The integrated microfilter removes dust
and pollen from the incoming or recircu
-
lated air.Your MINI Dealer will replace it during rou
-
tine maintenance. A substantial reduction
in the air supply indicates that the filter
must be replaced before scheduled mainte
-
nance.
Defrosting and demisting windows1. Set the rotary blower speed control for
the airflow rate to position
4
2. Turn the rotary temperature control
completely to the right, red3. Turn the rotary switch for air distribu
-
tion to position
.
Condensation is removed from the win
-
dows more quickly by activating the air
conditioning
4. Turn on windshield heating if necessary5. To defrost the rear window: turn on the
rear window heater.
Page 80 of 165

78
1 Air onto the windshield and onto the
side windows2 Air for the upper body area
80
3 Air for the front and rear footwells4 Rear window defroster and windshield
heating
* 79
5 Interior temperature sensor, please keep
clear and unobstructed6 Recirculated air mode
79
7 Air conditioning
76
8 Automatic air distribution and
volume
79
9 Defrosting and demisting the windshield
and side windows
80
10 Temperature
79
11 Display for air temperature and air
volume
79
12 Air volume/Blower, switching air con
-
ditioner on/off
79
13 Individual air distribution
80
AUTOMATIC CLIMATE CONTROL
*
Page 81 of 165
79
OVERVIEW REPAIRS OPERATIONCONTROLS DATA INDEX
AUTOMATIC CLIMATE CONTROL
*
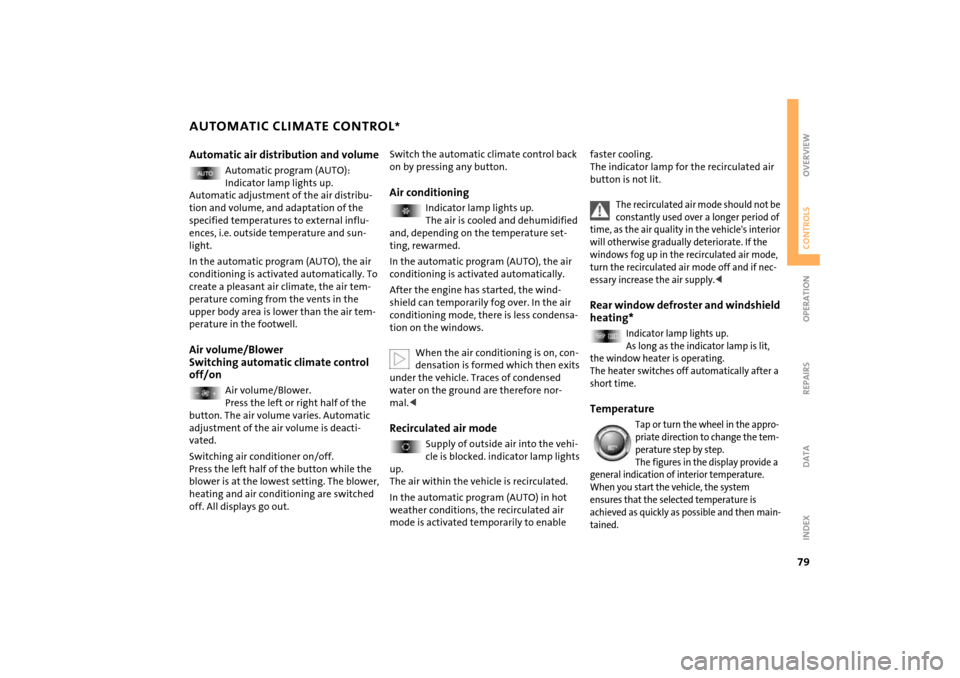
Automatic air distribution and volume
Automatic program (AUTO):
Indicator lamp lights up.
Automatic adjustment of the air distribu
-
tion and volume, and adaptation of the
specified temperatures to external influ
-
ences, i.e. outside temperature and sun
-
light.In the automatic program (AUTO), the air
conditioning is activated automatically. To
create a pleasant air climate, the air tem
-
perature coming from the vents in the
upper body area is lower than the air tem
-
perature in the footwell.Air volume/Blower
Switching automatic climate control
off/on
Air volume/Blower.
Press the left or right half of the
button. The air volume varies. Automatic
adjustment of the air volume is deacti
-
vated.Switching air conditioner on/off.
Press the left half of the button while the
blower is at the lowest setting. The blower,
heating and air conditioning are switched
off. All displays go out.
Switch the automatic climate control back
on by pressing any button.Air conditioning
Indicator lamp lights up.
The air is cooled and dehumidified
and, depending on the temperature set
-
ting, rewarmed.In the automatic program (AUTO), the air
conditioning is activated automatically. After the engine has started, the wind
-
shield can temporarily fog over. In the air
conditioning mode, there is less condensa
-
tion on the windows.
When the air conditioning is on, con
-
densation is formed which then exits
under the vehicle. Traces of condensed
water on the ground are therefore nor
-
mal.
-
cle is blocked. indicator lamp lights
up.
The air within the vehicle is recirculated.In the automatic program (AUTO) in hot
weather conditions, the recirculated air
mode is activated temporarily to enable
faster cooling.
The indicator lamp for the recirculated air
button is not lit.
The recirculated air mode should not be constantly used over a longer period of
time, as the air quality in the vehicle's interior
will otherwise gradually deteriorate. If the
windows fog up in the recirculated air mode,
turn the recirculated air mode off and if nec
-
essary increase the air supply.
<
Rear window defroster and windshield
heating*
Indicator lamp lights up.
As long as the indicator lamp is lit,
the window heater is operating.
The heater switches off automatically after a
short time. Temperature
Tap or turn the wheel in the appro
-
priate direction to change the tem
-
perature step by step.The figures in the display provide a
general indication of interior temperature.
When you start the vehicle, the system
ensures that the selected temperature is
achieved as quickly as possible and then main
-
tained.
Page 82 of 165
80
AUTOMATIC CLIMATE CONTROL
*
Permanent heating with maximum power output at temperature selec
-
tion HI. Permanent cooling at LO. With the
setting at HI, the recirculated air mode can
-
not be switched on.
Indicator lamp lights up.
Ice and condensation are rapidly removed
from the rear window, windshield and side
windows.Condensation is removed from the win
-
dows more quickly when the air condition
-
ing is also activated.
The rear window defroster/windshield
heating are switched on automatically.
They can be switched off again via the
respective button.Individual air distribution
Combine the air distribution your
-
self. Automatic adjustment of the
air distribution is deactivated.
It is not possible to distribute air
simultaneously toward the win
-
dows and toward the upper body area.
You can switch the unit from 7 to 6 by pressing the buttons for air
conditioning and air distribution toward
the footwell at the same time.<
Microfilter/Activated-charcoal filterThe microfilter removes dust and pollen
from the incoming or recirculated air. The
activated-charcoal filter provides addi
-
tional protection by filtering gaseous pol
-
lutants from the outside air.
Your MINI Dealer replaces this combined
filter as a standard part of your scheduled
maintenance. A substantial reduction in
the air supply indicates that the filter must
be replaced before scheduled maintenance.
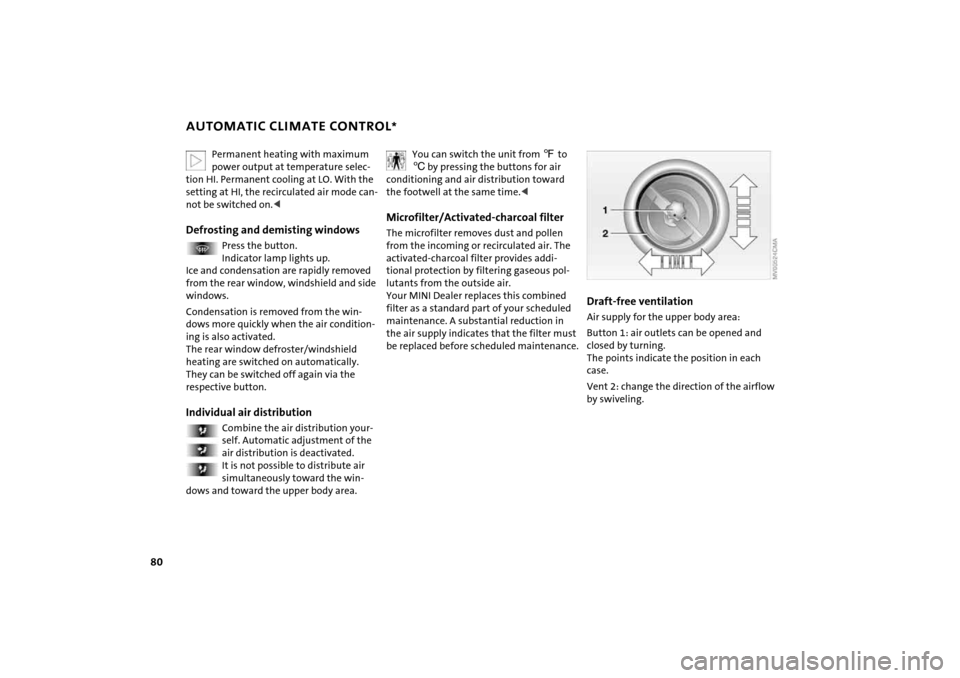
Draft-free ventilation Air supply for the upper body area:Button
1: air outlets can be opened and
closed by turning.
The points indicate the position in each
case.Vent
2: change the direction of the airflow
by swiveling.
Page 108 of 165
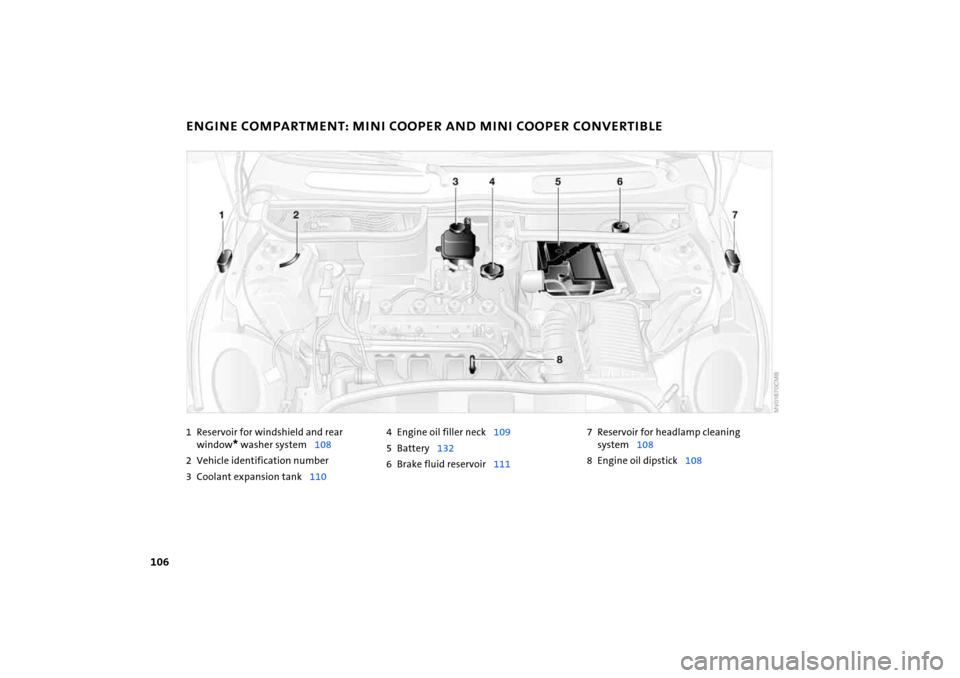
106
1 Reservoir for windshield and rear
window
* washer system
108
2 Vehicle identification number3 Coolant expansion tank
110
4 Engine oil filler neck
109
5Battery
132
6 Brake fluid reservoir
111
7 Reservoir for headlamp cleaning system
108
8 Engine oil dipstick
108
ENGINE COMPARTMENT: MINI COOPER AND MINI COOPER CONVERTIBLE
Page 109 of 165
107
OVERVIEW
REPAIRS OPERATIONCONTROLS
DATA
INDEX
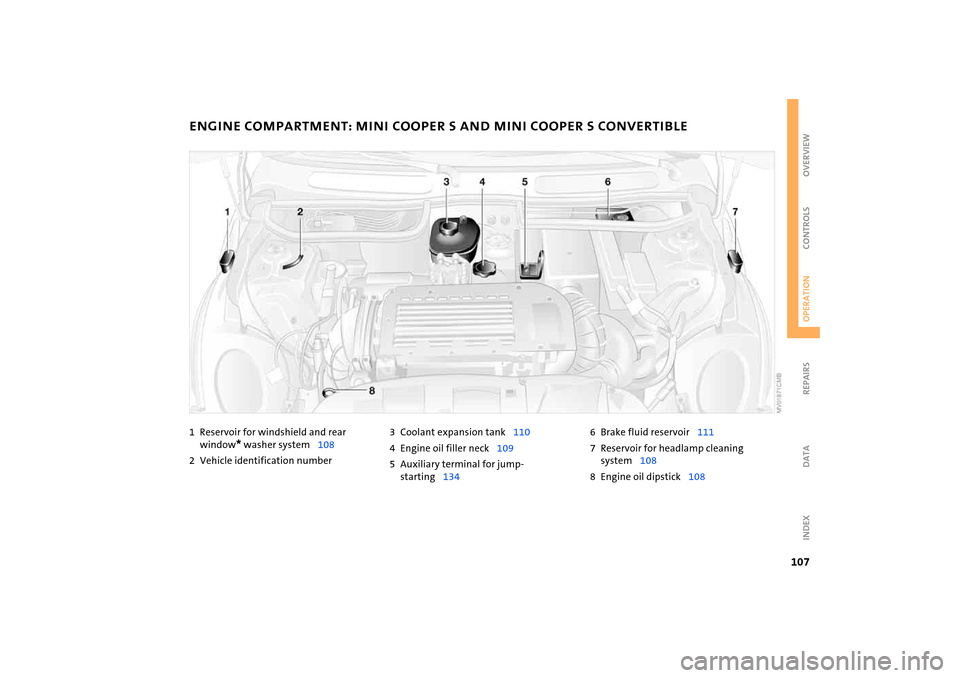
1 Reservoir for windshield and rear
window
* washer system
108
2 Vehicle identification number
3 Coolant expansion tank
110
4 Engine oil filler neck
109
5 Auxiliary termin al for jump-
starting
134
6 Brake fluid reservoir
111
7 Reservoir for headlamp cleaning system
108
8 Engine oil dipstick
108
ENGINE COMPARTMENT: MINI COOPER S AND MINI COOPER S CONVERTIBLE
Page 110 of 165
108
WASHER FLUID
ENGINE OIL
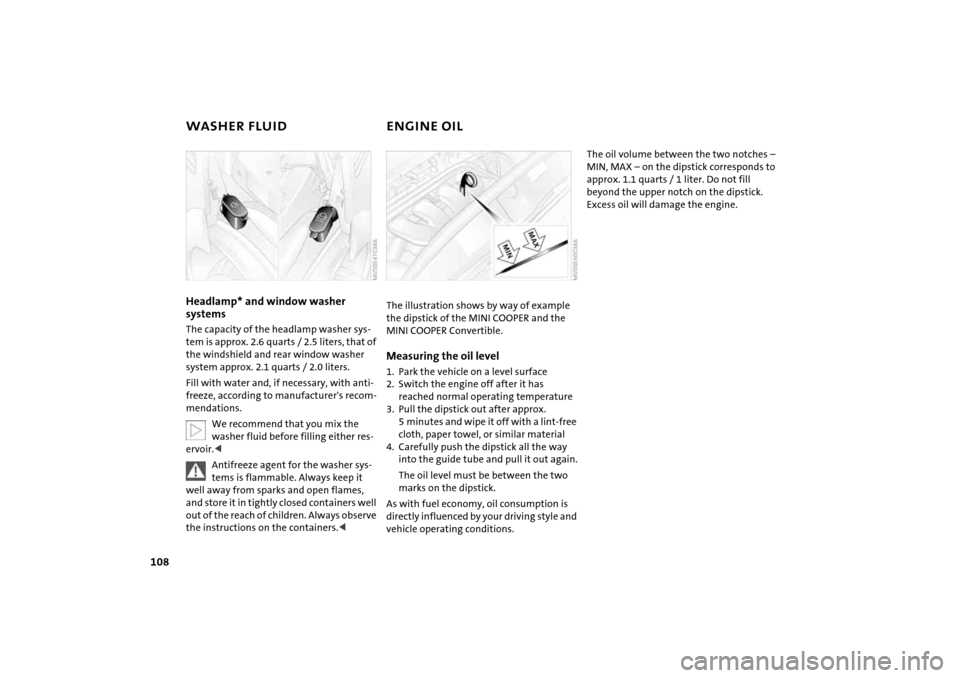
Headlamp* and window washer systems The capacity of the headlamp washer sys
-
tem is approx. 2.6
quarts
/ 2.5
liters, that of
the windshield and rear window washer
system approx. 2.1
quarts
/ 2.0
liters.
Fill with water and, if necessary, with anti
-
freeze, according to manufacturer's recom
-
mendations.
We recommend that you mix the washer fluid before filling either res
-
ervoir.<
Antifreeze agent for the washer sys
-
tems is flammable. Always keep it
well away from sparks and open flames,
and store it in tightly closed containers well
out of the reach of children. Always observe
the instructions on the containers.<
The illustration shows by way of example the dipstick of the MINI
COOPER and the
MINI
COOPER Convertible.
Measuring the oil level1. Park the vehicle on a level surface2. Switch the engine off after it has
reached normal operating temperature3. Pull the dipstick out after approx.
5
minutes and wipe it off with a lint-free
cloth, paper towel, or similar material
4. Carefully push the dipstick all the way
into the guide tube and pull it out again.
The oil level must be between the two
marks on the dipstick.
As with fuel economy, oil consumption is
directly influenced by your driving style and
vehicle operating conditions.
The oil volume between the two notches –
MIN, MAX – on the dipstick corresponds to
approx. 1.1
quarts
/ 1
liter. Do not fill
beyond the upper notch on the dipstick.
Excess oil will damage the engine.