lights MINI Hardtop 2 Door 2005 Owner's Manual
[x] Cancel search | Manufacturer: MINI, Model Year: 2005, Model line: Hardtop 2 Door, Model: MINI Hardtop 2 Door 2005Pages: 165, PDF Size: 2.32 MB
Page 18 of 165
16
INDICATOR AND WARNING LAMPS Technology that monitors itselfThe system runs a check on the indicator
and warning lamps marked by
+ each time
you switch on the ignition. They each light
up once for different periods of time.
If a malfunction should occur in one of
these systems, the corresponding lamp
does not go out after the engine is started
or it lights up while the vehicle is moving.
You will see below the correct way to react
to this.
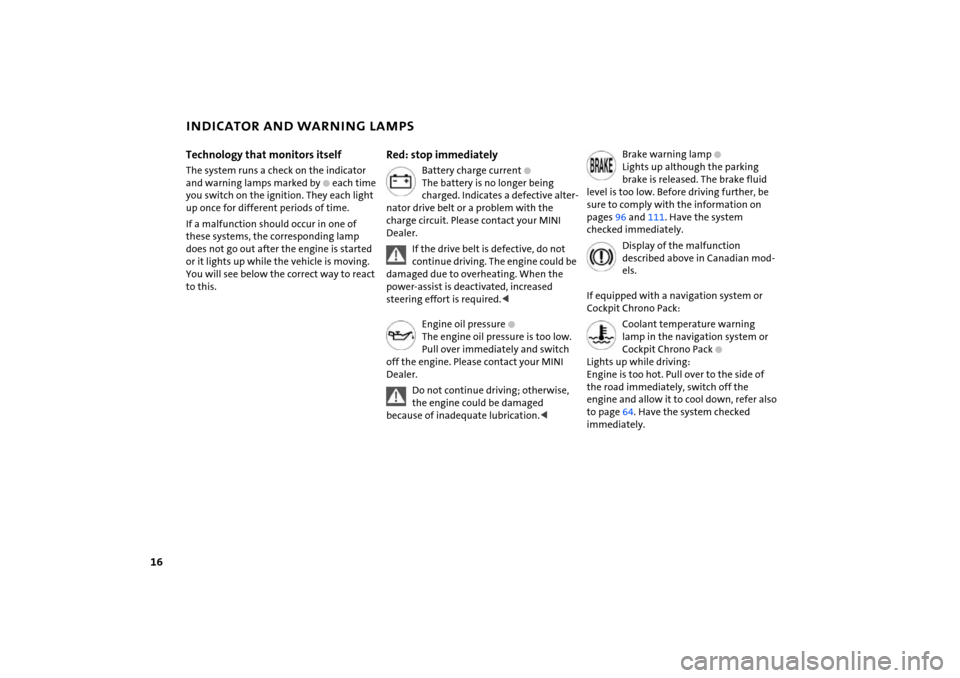
Red: stop immediately
Battery charge current
+
The battery is no longer being
charged. Indicates a defective alter
-
nator drive belt or a problem with the
charge circuit. Please contact your MINI
Dealer.
If the drive belt is defective, do not continue driving. The engine could be
damaged due to overheating. When the
power-assist is deactivated, increased
steering effort is required.
The engine oil pressure is too low.
Pull over immediately and switch
off the engine. Please contact your MINI
Dealer.Do not continue driving; otherwise, the engine could be damaged
because of inadequate lubrication.<
Brake warning lamp
+
Lights up although the parking
brake is released. The brake fluid
level is too low. Before driving further, be
sure to comply with the information on
pages 96 and
111
. Have the system
checked immediately.
Display of the malfunction described above in Canadian mod
-
els.
If equipped with a navigation system or
Cockpit Chrono Pack:
Coolant temperature warning lamp in the navigation system or
Cockpit Chrono Pack
+
Lights up while driving:
Engine is too hot. Pull over to the side of
the road immediately, switch off the
engine and allow it to cool down, refer also
to page
64. Have the system checked
immediately.
Page 19 of 165
17
OVERVIEW REPAIRS OPERATION CONTROLS DATA INDEX
INDICATOR AND WARNING LAMPSYellow: stop immediately
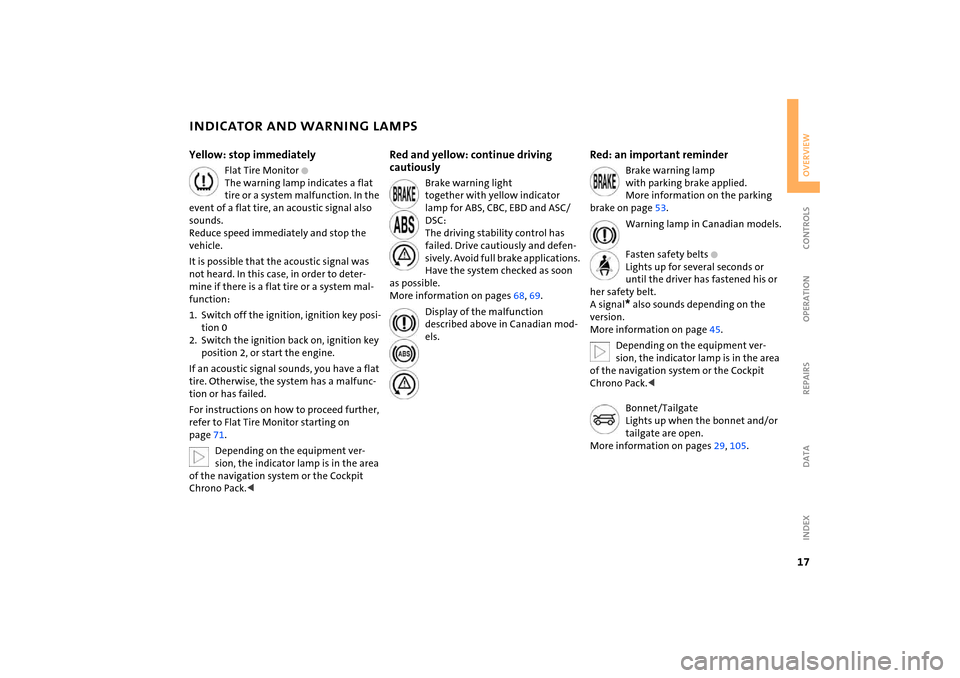
Flat Tire Monitor
+
The warning lamp indicates a flat
tire or a system malfunction. In the
event of a flat tire, an acoustic signal also
sounds.
Reduce speed immediately and stop the
vehicle.It is possible that the acoustic signal was
not heard. In this case, in order to deter
-
mine if there is a flat tire or a system mal
-
function:1. Switch off the ignition, ignition key posi
-
tion 0
2. Switch the ignition back on, ignition key
position 2, or start the engine.If an acoustic signal sounds, you have a flat
tire. Otherwise, the system has a malfunc
-
tion or has failed.For instructions on how to proceed further,
refer to Flat Tire Monitor starting on
page
71.Depending on the equipment ver
-
sion, the indicator lamp is in the area
of the navigation system or the Cockpit
Chrono Pack.<
Red and yellow: continue driving
cautiously
Brake warning light
together with yellow indicator
lamp for ABS, CBC, EBD and ASC/
DSC:
The driving stability control has
failed. Drive cautiously and defen
-
sively. Avoid full brake applications.
Have the system checked as soon
as possible.
More information on pages
68, 69
.
Display of the malfunction described above in Canadian mod
-
els.
Red: an important reminder
Brake warning lamp
with parking brake applied.
More information on the parking
brake on page
53.
Warning lamp in Canadian models.
Fasten safety belts
+
Lights up for several seconds or
until the driver has fastened his or
her safety belt.
A signal
* also sounds depending on the
version.
More information on page
45.
Depending on the equipment ver
-
sion, the indicator lamp is in the area
of the navigation system or the Cockpit
Chrono Pack.
Lights up when the bonnet and/or
tailgate are open.
More information on pages
29, 105
.
Page 21 of 165
19
OVERVIEW REPAIRS OPERATION CONTROLS DATA INDEX
INDICATOR AND WARNING LAMPSYellow: for your information
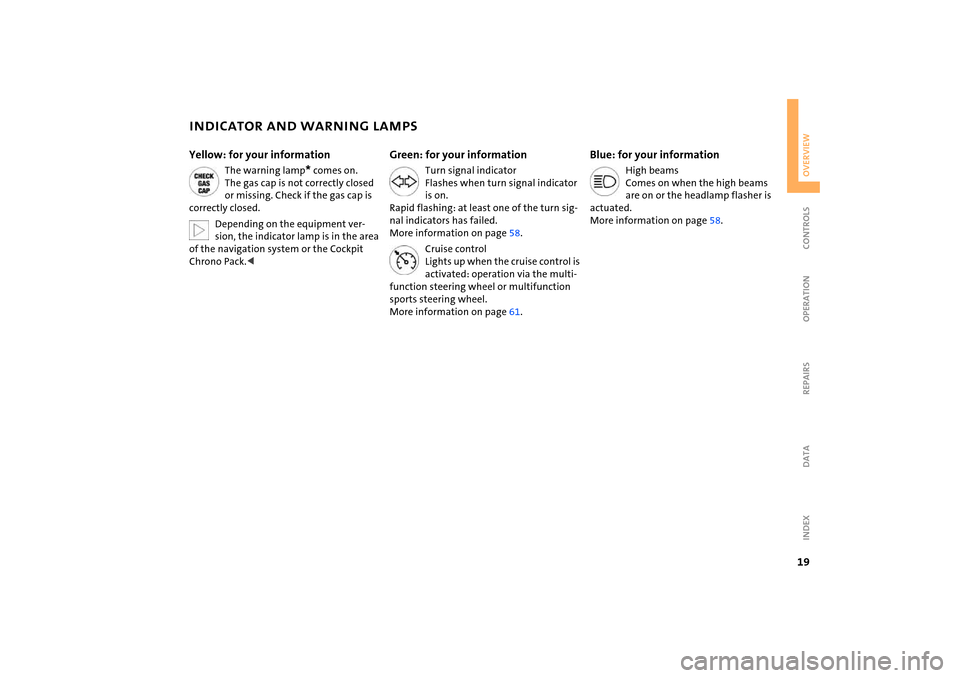
The warning lamp
* comes on.
The gas cap is not correctly closed
or missing. Check if the gas cap is
correctly closed.Depending on the equipment ver
-
sion, the indicator lamp is in the area
of the navigation system or the Cockpit
Chrono Pack.<
Green: for your information
Turn signal indicator
Flashes when turn signal indicator
is on.
Rapid flashing: at least one of the turn sig
-
nal indicators has failed.
More information on page
58.
Cruise control
Lights up when the cruise control is
activated: operation via the multi
-
function steering wheel or multifunction
sports steering wheel.
More information on page
61.
Blue: for your information
High beams
Comes on when the high beams
are on or the headlamp flasher is
actuated.
More information on page
58.
Page 38 of 165
36
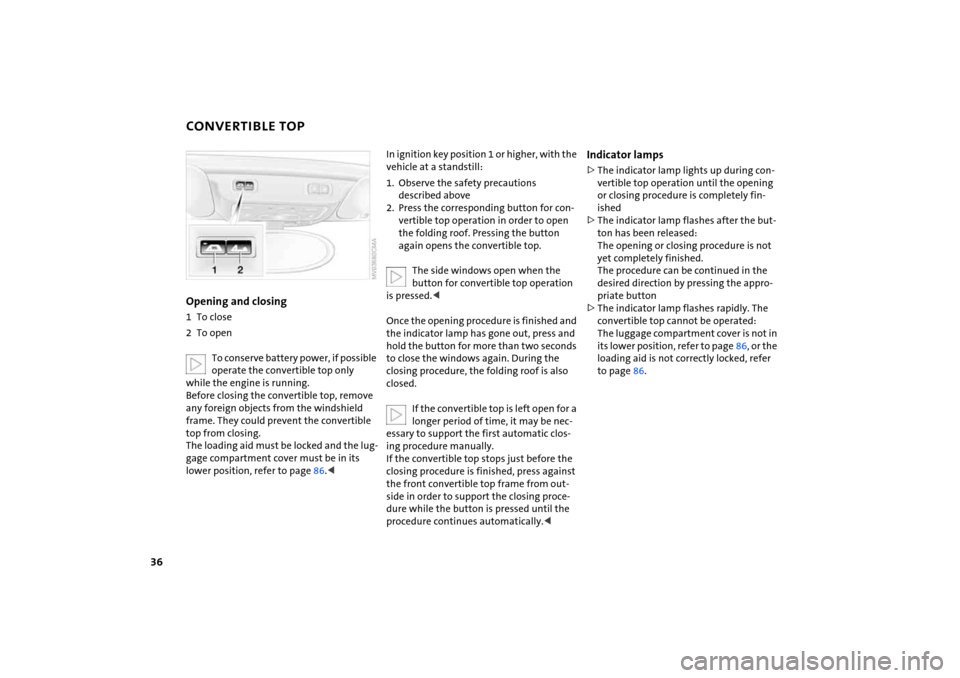
CONVERTIBLE TOPOpening and closing1To close2To open
To conserve battery power, if possible operate the convertible top only
while the engine is running.
Before closing the convertible top, remove
any foreign objects from the windshield
frame. They could prevent the convertible
top from closing.
The loading aid must be locked and the lug
-
gage compartment cover must be in its
lower position, refer to page
86.<
In ignition key position 1 or higher, with the
vehicle at a standstill:1. Observe the safety precautions
described above2. Press the corresponding button for con
-
vertible top operation in order to open
the folding roof. Pressing the button
again opens the convertible top.
The side windows open when the button for convertible top operation
is pressed.<
Once the opening procedure is finished and
the indicator lamp has gone out, press and
hold the button for more than two seconds
to close the windows again. During the
closing procedure, the folding roof is also
closed.
If the convertible top is left open for a longer period of time, it may be nec
-
essary to support the first automatic clos
-
ing procedure manually.
If the convertible top stops just before the
closing procedure is finished, press against
the front convertible top frame from out
-
side in order to support the closing proce
-
dure while the button is pressed until the
procedure continues automatically.<
Indicator lamps>The indicator lamp lights up during con
-
vertible top operation until the opening
or closing procedure is completely fin
-
ished>The indicator lamp flashes after the but
-
ton has been released:
The opening or closing procedure is not
yet completely finished.
The procedure can be continued in the
desired direction by pressing the appro
-
priate button>The indicator lamp flashes rapidly. The
convertible top cannot be operated:
The luggage compartment cover is not in
its lower position, refer to page
86, or the
loading aid is not correctly locked, refer
to page
86.
Page 47 of 165
45
OVERVIEW REPAIRS OPERATIONCONTROLS DATA INDEX
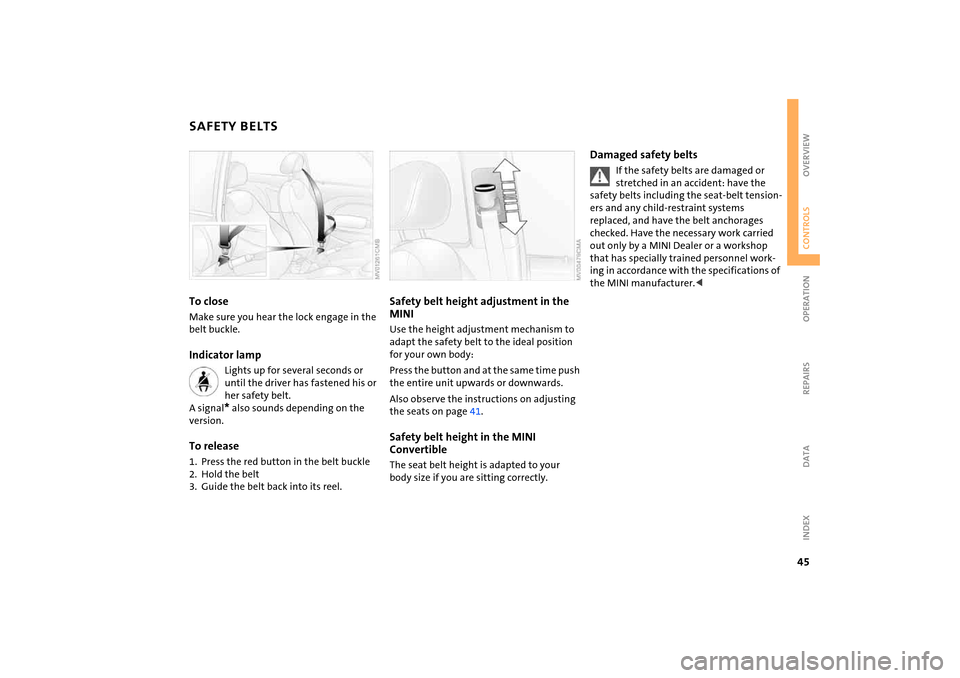
SAFETY BELTS To closeMake sure you hear the lock engage in the
belt buckle.Indicator lamp
Lights up for several seconds or until the driver has fastened his or
her safety belt.
A signal
* also sounds depending on the
version.
To release1. Press the red button in the belt buckle2. Hold the belt3. Guide the belt back into its reel.
Safety belt height adjustment in the MINI Use the height adjustment mechanism to
adapt the safety belt to the ideal position
for your own body:Press the button and at the same time push
the entire unit upwards or downwards.Also observe the instructions on adjusting
the seats on page
41.
Safety belt height in the MINI
Convertible The seat belt height is adapted to your
body size if you are sitting correctly.
Damaged safety belts
If the safety belts are damaged or stretched in an accident: have the
safety belts including the seat-belt tension
-
ers and any child-restraint systems
replaced, and have the belt anchorages
checked. Have the necessary work carried
out only by a MINI Dealer or a workshop
that has specially trained personnel work
-
ing in accordance with the specifications of
the MINI manufacturer.<
Page 55 of 165
53
OVERVIEW REPAIRS OPERATIONCONTROLS DATA INDEX
PARKING BRAKE
MANUAL TRANSMISSION
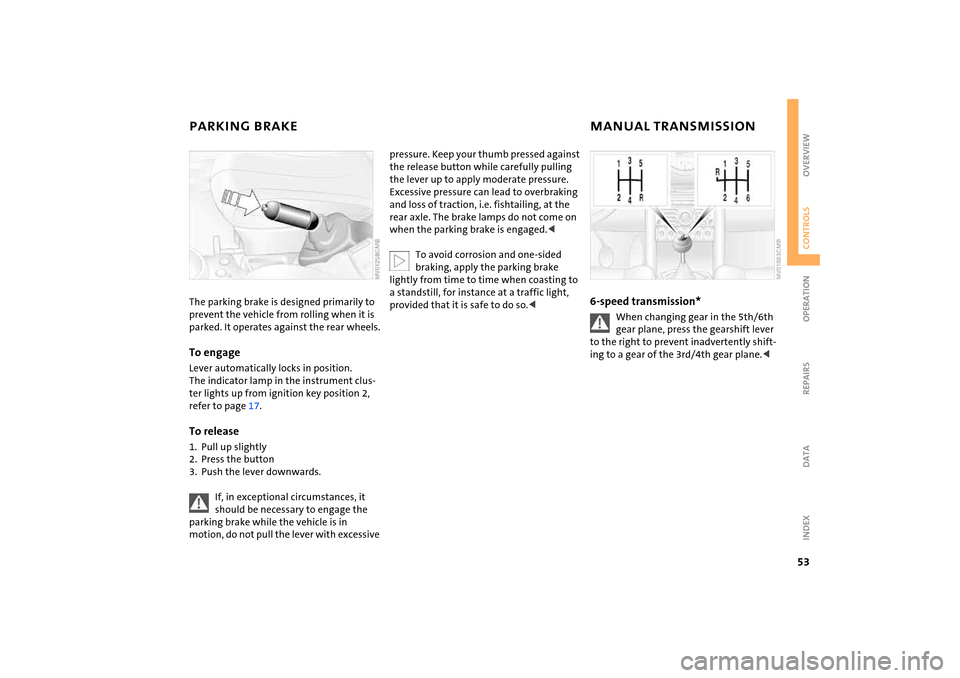
The parking brake is designed primarily to prevent the vehicle from rolling when it is
parked. It operates against the rear wheels.To engageLever automatically locks in position.
The indicator lamp in the instrument clus
-
ter lights up from ignition key position
2,
refer to page
17.
To release1. Pull up slightly2. Press the button3. Push the lever downwards.
If, in exceptional circumstances, it should be necessary to engage the
parking brake while the vehicle is in
motion, do not pull the lever with excessive
pressure. Keep your thumb pressed against
the release button while carefully pulling
the lever up to apply moderate pressure.
Excessive pressure can lead to overbraking
and loss of traction, i.e. fishtailing, at the
rear axle. The brake lamps do not come on
when the parking brake is engaged.<
To avoid corrosion and one-sided braking, apply the parking brake
lightly from time to time when coasting to
a standstill, for instance at a traffic light,
provided that it is safe to do so.<
6-speed transmission*
When changing gear in the 5th/6th gear plane, press the gearshift lever
to the right to prevent inadvertently shift
-
ing to a gear of the
3rd/4th gear plane.<
Page 59 of 165

57
OVERVIEW REPAIRS OPERATIONCONTROLS DATA INDEX
PARKING LAMPS/LOW BEAMS Switching on the parking lamps Turn to the first position.
The front, rear and side vehicle lighting is
switched on.
Standing lamps on one side, refer to next
column.Switching on the low beamsTurn to the second position.
With the low beams on and with the igni
-
tion switched off, only the parking lamps
will remain on.
'Follow me home' lampsIf you activate the headlamp flasher after
having switched off the engine and the
lights, the low beams will stay lit for a pre
-
set period of time.
You can have this function pro
-
grammed.<
Switching on the standing lamps For parking, you can activate lights on one
side of the vehicle. Observe local laws.In ignition key position
0:
Move the lever to the adequate turn signal
indicator position.
The standing lamps discharge the battery. Avoid using them for longer
periods of time; otherwise, you may not be
able to start the engine.<
'Lights on' warning If the lights have not been switched off and
the ignition key is in position
0, an acoustic
signal sounds for a few seconds when you
open the driver's door to remind you that
the lights have not been switched off.
Daytime driving lamps* If convenient, the light switch can be left in
position
0 or 1.
The low beams switch on automatically in
ignition key position 2 or higher.
The exterior lamps go out when the igni
-
tion is switched off and the light switch is
set to position 0. In position 1, the parking
lamps are automatically switched on.
The dynamic headlamp range con
-
trol for xenon lamps only operates
with the light switch in position
1 or 2.<
You can have the daytime driving lamp function activated/deacti
-
vated.<
Page 60 of 165

58
SIGNAL/HEADLAMP FLASHER
INSTRUMENT LIGHTING
FOG LAMPS
1Turn signal indicators 2 High beams/Headlamp flasher To signal brieflyGently push the lever up to the point of
resistance and hold it there, if necessary.
The lever returns to its center position once
it is released.
The indicator lamp flashes and the relay clicks faster than normal: a turn
signal indicator has failed.<
To control the instrument lighting, press the button.To increase the illumination intensityKeep the button pressed until the desired
brightness is reached.To decrease the illumination intensityPress the button briefly.
With each brief pressing of the button, the
illumination intensity is reduced in steps.
When the parking lamps/low beams are switched on:
Briefly press the switch upwards or down
-
wards.Briefly press once again to switch off.Fog lamps*
The parking lamps or low beams must be switched on. The green
indicator lamp lights up.
The fog lamps are switched on.Rear fog lamp*
The low beams must be switched on. The yellow indicator lamp
lights up. The rear fog lamp is
switched on.
Observe all legal regulations concerning
the use of fog lamps.
Page 63 of 165

61
OVERVIEW REPAIRS OPERATIONCONTROLS DATA INDEX
CRUISE CONTROL
*
On the multifunction steering wheel
and sports steering wheelAbove approx. 20
mph
/ 30
km/h the cruise
control maintains and stores any desired
speed.
Do not use cruise control on twisting roads, when high traffic density pre
-
vents driving at a constant speed, or when
the road surface does not permit driving at
a constant speed, e.g. due to snow, rain, ice,
or loose surfaces.<
To activate via the multifunction steering wheelFrom ignition key position
1:
Press button
2.
The indicator lamp in the instrument clus
-
ter lights up.
Cruise control is active.To activate via the sports steering
wheel1. Start the engine2. Press button
2.
The indicator lamp in the instrument clus
-
ter lights up.
Cruise control is active.
To deactivate Press button
2 repeatedly until the indica
-
tor lamp goes out.The cruise control is deactivated when the
ignition key is turned to position
0.
The stored speed is cleared.To maintain and store speed or to
acceleratePress button
3.
The system maintains and stores the cur
-
rent vehicle speed. Every time you tap the
button, the speed increases by approx.
1 mph
/ 2
km/h.
Page 65 of 165
63
OVERVIEW REPAIRS OPERATIONCONTROLS DATA INDEX
ODOMETER
CLOCK
FUEL GAUGE
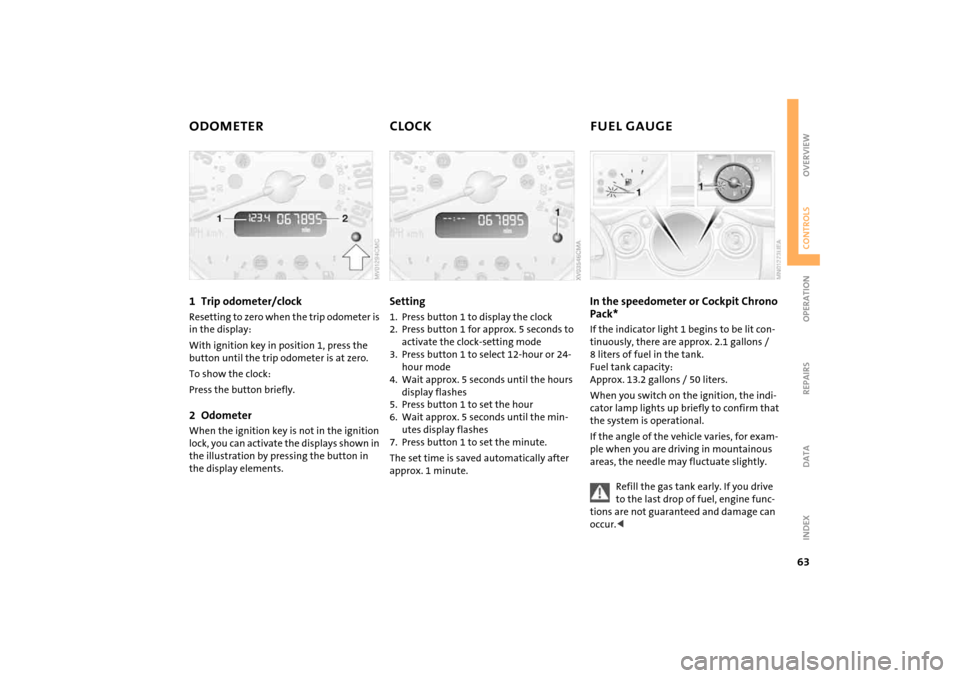
1 Trip odometer/clock
Resetting to zero when the trip odometer is
in the display:With ignition key in position
1, press the
button until the trip odometer is at zero.
To show the clock:Press the button briefly.2 Odometer
When the ignition key is not in the ignition
lock, you can activate the displays shown in
the illustration by pressing the button in
the display elements.
Setting 1. Press button
1 to display the clock
2. Press button
1 for approx. 5
seconds to
activate the clock-setting mode
3. Press button
1 to select 12-hour or 24-
hour mode
4. Wait approx. 5
seconds until the hours
display flashes
5. Press button
1 to set the hour
6. Wait approx. 5
seconds until the min
-
utes display flashes
7. Press button
1 to set the minute.
The set time is saved automatically after
approx. 1
minute.
In the speedometer or Cockpit Chrono Pack* If the indicator light
1 begins to be lit con
-
tinuously, there are approx. 2.1
gallons
/
8
liters of fuel in the tank.
Fuel tank capacity:
Approx. 13.2
gallons
/ 50
liters.
When you switch on the ignition, the indi
-
cator lamp lights up briefly to confirm that
the system is operational. If the angle of the vehicle varies, for exam
-
ple when you are driving in mountainous
areas, the needle may fluctuate slightly.
Refill the gas tank early. If you drive to the last drop of fuel, engine func
-
tions are not guaranteed and damage can
occur.<