steering MINI Hardtop 2 Door 2006 User Guide
[x] Cancel search | Manufacturer: MINI, Model Year: 2006, Model line: Hardtop 2 Door, Model: MINI Hardtop 2 Door 2006Pages: 168, PDF Size: 2.22 MB
Page 66 of 168

64
WASHER FLUID CRUISE CONTROL*
Washer fluid level
The yellow LED in the wiper control lever
lights up when the washer fluid level is too
low.
In the following situations, the LED flashes
for approx. 10 seconds when the washer
fluid level has dropped to a minimum:
>When cleaning the windshield and head-
lamps by pulling the wiper control lever
>When the ignition is switched on
>When starting the engine
On the multifunction sports steering
wheel
Above approx. 20 mph / 30 km/h the cruise
control maintains and stores any desired
speed.
Do not use cruise control when unfa-
vorable conditions make it inadvis-
able to drive at a constant speed. Other-
wise, the vehicle could go out of control
and an accident could be caused. Unfavor-
able conditions include, for example, twist-
ing roads, high traffic density, or adverse
road conditions such as snow, rain, ice, or
loose surfaces.<
To activate via the multifunction
sports steering wheel
1. Starting the engine
2. Press button 2.
The indicator lamp in the instrument clus-
ter lights up.
Cruise control is active.
Page 67 of 168

65
OVERVIEW REPAIRS OPERATIONCONTROLS DATA INDEX
CRUISE CONTROL*
To deactivate
Press button 2 repeatedly until the indica-
tor lamp goes out.
The cruise control is deactivated when the
ignition key is turned to position 0.
The stored speed is cleared.
To maintain, store and increase speed
Press button 3.
The system maintains and stores the cur-
rent vehicle speed. Every time you tap the
button, the speed increases by approx.
1mph/ 2km/h.
Press and hold button 3.
The vehicle accelerates without pressure
on the accelerator pedal. When you release
the button, the system maintains and
stores the current speed.
If, on a downhill grade, the engine
braking effect is not sufficient, the
controlled speed can be exceeded. Speed
can drop on uphill grades if the engine out-
put is insufficient.<
To maintain, store and decrease speed
Press button 4.
If you are already driving with active cruise
control, the speed is decreased by approx.
1 mph / 2 km/h every time you tap the but-
ton.
Press and hold button 4.
With the cruise control active, the system
automatically reduces the throttle opening
to slow the vehicle. When you release the
button, the system maintains and stores
the current speed.
To cancel the cruise control
The cruise control is automatically can-
celed:
>When the brakes are applied
>When the clutch is depressed
>If the cruising speed is either exceeded or
not met for an extended length of time,
for example if you press the accelerator
pedal and exceed the stored speed
>When ASC or DSC is in action.
The indicator lamp stays lit.
You can use the cruise control again as
required.
On the multifunction steering wheel, the
cruise control can be interrupted manually:
When the system is activated, press
button 2.
To continue cruise control
Press button 1.
The vehicle accelerates to and maintains
the last speed stored.
Page 73 of 168

71
OVERVIEW REPAIRS OPERATIONCONTROLS DATA INDEX
DRIVING STABILITY CONTROL SYSTEMS
Your MINI or MINI Convertible is equipped
with a series of systems that help maintain
driving stability even in adverse driving sit-
uations.
Antilock Brake System (ABS)
ABS keeps the wheels from locking during
braking. Steering stability is maintained
even during full brake applications. In this
way, active safety is enhanced.
ABS is operational each time the engine is
started. Braking safely, refer to page97.
Electronic Brake Force Distribution
(EBD)
The system controls brake-force applica-
tion at the rear wheels in order to obtain
increased stability in the vehicle's braking
response.
All Season traction Control (ASC)*
ASC prevents slip at the drive wheels while
starting off and accelerating the vehicle.
ASC also recognizes unstable vehicle condi-
tions, such as fishtailing or nose-diving. In
these cases, and subject to physical limits,
ASC helps to keep the vehicle on a steady
course by reducing engine speed and by
applying brakes at individual wheels. This
system optimizes driving stability and trac-tion, especially when just starting off,
when accelerating or when cornering.
The ASC is operational each time you start
the engine. It integrates the Antilock Brake
System (ABS) and Electronic Brake Force
Distribution (EBD).
The laws of physics cannot be
repealed, even with ASC. An appropri-
ate driving style always remains the
responsibility of the driver. Avoid using the
additional safety margin provided by the
system as an excuse for taking unnecessary
risks.
Do not make any modifications to the ASC
system. Allow only authorized technicians
to perform service procedures on the
ASC.<
Dynamic Stability Control (DSC)*
DSC prevents slip at the drive wheels while
starting off and accelerating the vehicle.
DSC also recognizes unstable vehicle condi-
tions, such as fishtailing or nose-diving. In
these cases, and subject to physical limits,
DSC helps to keep the vehicle on a steady
course by reducing engine speed and by
applying brakes at individual wheels.
The DSC is operational every time you start
the engine. It integrates All Season traction
Control (ASC).
The laws of physics cannot be
repealed, even with DSC. An appro-
priate driving style always remains the
responsibility of the driver. Avoid using the
additional safety margin provided by the
system as an excuse for taking unnecessary
risks.
Do not make any modifications to the DSC
system. Allow only authorized technicians
to perform service procedures on the
DSC.<
Page 76 of 168
74
FLAT TIRE MONITOR
Flat tire warning
The warning lamp lights up in yel-
low. An acoustic signal also sounds.
There is a flat tire or a significant
loss of pressure in a tire.
1. Reduce speed and stop the vehicle with
caution. Avoid hard brake applications
and steering maneuvers.
2. Determine which tire is damaged.
If this cannot be determined, con-
tact your MINI Dealer.<
3. Repair the flat tire, refer to page131.
Vehicles with Run Flat tires:
1. Reduce vehicle speed carefully to under
50 mph / 80 km/h. Avoid hard brake
applications and steering maneuvers. Do
not exceed a speed of 50 mph /
80 km/h.
Do not continue driving if the vehi-
cle is not equipped with Run Flat
tires, refer to page108. If you continue
to drive with a flat tire, a serious acci-
dent could result.<
2. Check the tire inflation pressure in all
four tires at the earliest opportunity.
If the tire inflation pressure is cor-
rect in all four tires, it is possible
that the Flat Tire Monitor was not initial-
ized. In this case, initialize the system.<
3. If there is a total loss of tire inflation
pressure, 0 psi/0 kPa, or obvious tire
damage, you can gauge the mileage for
continued driving on the basis of the fol-
lowing indications:
>With a light load:
1 to 2 persons without luggage:
approx. 155 miles/250 km
>With a medium load:
2 persons, full luggage compartment, or
4 persons without luggage:
approx. 90 miles/150 km
>With a full load:
4 persons or more, full luggage compart-
ment:
approx. 30 miles/50 km.
Drive cautiously. Do not exceed a
speed of 50 mph / 80 km/h. In case of
tire pressure loss you must expect changes
in vehicle handling such as lower track sta-
bility during braking, longer braking dis-
tances and changes in self-steering proper-
ties when close to the handling limit.
For safety reasons, the manufacturer of
your MINI recommends not having dam-
aged Run Flat tires repaired, but to consult
a MINI Dealer in such cases.
low. There is a malfunction in the
Flat Tire Monitor or the system has
failed. Have the system checked as soon as
possible.
Page 99 of 168
97
OVERVIEW REPAIRSOPERATIONCONTROLS DATA INDEX
GENERAL DRIVING NOTES
Safe braking
Your vehicle is equipped with ABS as a stan-
dard feature. If you are in a situation which
requires full braking, it is best to brake
using maximum brake pressure. Since the
vehicle remains maneuverable, you can still
go around any obstacles with the smallest
possible steering movements.
The pulsation of the brake pedal, together
with the sound of hydraulic regulation,
indicates to you that ABS is actively taking
effect.
Wet roads:
It is a good idea to periodically dry the
brakes with a gentle application when driv-
ing in rain and on wet roads. Monitor traffic
conditions to ensure that this maneuver
does not hinder other road users. The
resulting heat dries brake rotors and pads.
Then if the braking force is needed, it is
immediately available.
Driving downhill:
To prevent overheating and the
resulting reduced efficiency of the
brake system, drive down extended or
steep mountain gradients in the gear
which requires the least brake applications.
Otherwise, even light but consistent pres-
sure on the brake can lead to high tempera-
tures, brake wear and possibly even brake
failure.<
The braking effect of the engine can be
increased by downshifting in the manual
mode of the automatic transmission, to
first gear if necessary, refer to page58. This
protects the brakes from excessive loads.
Do not coast with the clutch
depressed, the transmission in idle or
the engine switched off. Otherwise, the
engine provides no braking effect, and
there is no power-assist for braking or
steering.
Make sure that there are no floor mats,
floor carpets or other objects in the vicinity
of the pedals; otherwise pedal function
could be impeded.<
Corrosion on the brake rotors:
When the vehicle is driven only occasion-
ally, during extended periods when the
vehicle is not used at all, and in operating
conditions where brake applications are
less frequent, there is an increased ten-
dency for corrosion of the brake rotors and
accumulation of contamination on the
brake pads. This occurs because the mini-
mal pressure that must be exerted by the pads to clean the rotors by brake applica-
tions is not reached.
Corrosion on brake rotors is signaled by a
running or pulsation during braking; even
extended subsequent braking will not cure
this phenomenon.
Hydroplaning
When driving on wet or slushy roads,
reduce road speed. If you do not, a
wedge of water can form between tires
and road surface. This phenomenon is char-
acterized by a partial or complete loss of
contact between the tires and the road sur-
face. The ultimate results are loss of steer-
ing and braking control.<
Page 103 of 168
101
OVERVIEW REPAIRSOPERATIONCONTROLS DATA INDEX
TIRE INFLATION PRESSURE
Information for your safety
It is not merely the tire's service life, but
also driving safety and driving comfort that
depend on the condition of the tires and
the maintenance of the specified tire pres-
sure.
Checking tire inflation pressures
Check the tire inflation pressures only on
cold tires. This means after driving a maxi-
mum of 1.25 miles/2 km or when the vehi-
cle has been parked for at least 2 hours.
Warm tires have higher pressures.
Check tire inflation pressures regu-
larly and correct them if necessary,
including the space-saver spare tire: at
least twice a month and before long jour-
neys. Otherwise, incorrect tire pressures
can cause driving instability or tire damage,
ultimately resulting in accidents. Do not
drive with deflated, i.e. flat, tires except if
Run Flat tires are fitted. A flat tire greatly
impairs steering and braking response, and
can lead to complete loss of control over
the vehicle.<
After correcting the tire inflation
pressure, reinitialize the Flat Tire
Monitor, refer to page73.<
Tire inflation pressures for original
tires
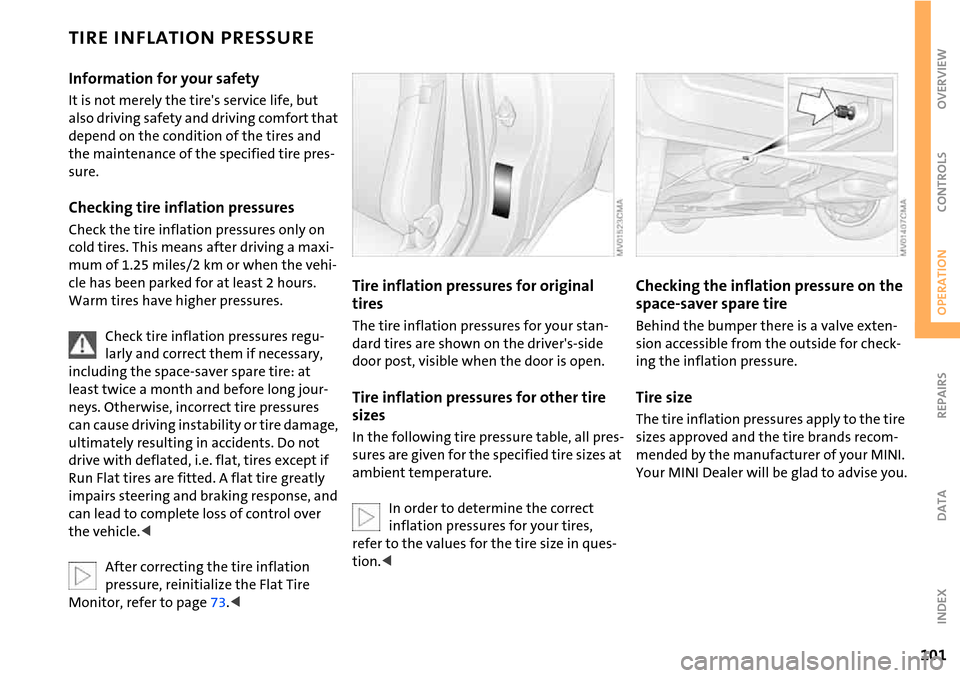
The tire inflation pressures for your stan-
dard tires are shown on the driver's-side
door post, visible when the door is open.
Tire inflation pressures for other tire
sizes
In the following tire pressure table, all pres-
sures are given for the specified tire sizes at
ambient temperature.
In order to determine the correct
inflation pressures for your tires,
refer to the values for the tire size in ques-
tion.<
Checking the inflation pressure on the
space-saver spare tire
Behind the bumper there is a valve exten-
sion accessible from the outside for check-
ing the inflation pressure.
Tire size
The tire inflation pressures apply to the tire
sizes approved and the tire brands recom-
mended by the manufacturer of your MINI.
Your MINI Dealer will be glad to advise you.
Page 133 of 168

131
OVERVIEW REPAIRSOPERATION CONTROLS DATA INDEX
REPAIRING A FLAT TIRE SPACE-SAVER SPARE TIRE*
Safety measures in the event of a flat
tire:
Stop the vehicle as far as possible from
passing traffic. Switch on the hazard warn-
ing flashers.
Turn the steering wheel to the straight-
ahead wheel position and engage the
steering lock. Engage the parking brake and
shift into 1st or reverse gear – selector lever
in P.
All passengers should be outside the vehi-
cle and well away from your immediate
working area – behind a guardrail, for
instance.
If a portable hazard warning lamp is avail-
able, set it up on the roadside at an appro-
priate distance from the rear of the vehicle.
Comply with all safety guidelines and regu-
lations.<
In the event of a flat tire, different proce-
dures should be followed depending on the
equipment included in your vehicle:
>Vehicles with Run Flat tires, refer to
page108
>Vehicles with a space-saver spare tire,
refer to the following section
>Vehicles with MINI Mobility System,
refer to page135.To change a space-saver spare tire, proceed
as follows:
>Remove space-saver spare tire, refer to
the section after the next one
>Prepare for tire change, refer to page133
>Jack up the vehicle, refer to page134
>Mount the space-saver spare tire, refer
to page134
>Tighten the lug bolts, refer to page134
>Drive with space-saver spare tire, refer to
page133.
Tire change set
On vehicles with a space-saver spare tire,
the tire change set with onboard tools is
stored in the luggage compartment under
the floor mat.
1 Chock, folding
2 Hubcap remover
3 Wheel stud wrench
4Jack
5 Special wrench for removing the space-
saver spare tire
6 Towing eyelet
7 Lifting handle
The onboard tool kit includes a pouch with
a plastic bag in which you can place the
damaged wheel.
Page 135 of 168
133
OVERVIEW REPAIRSOPERATION CONTROLS DATA INDEX
SPACE-SAVER SPARE TIRE*CHANGING TIRES
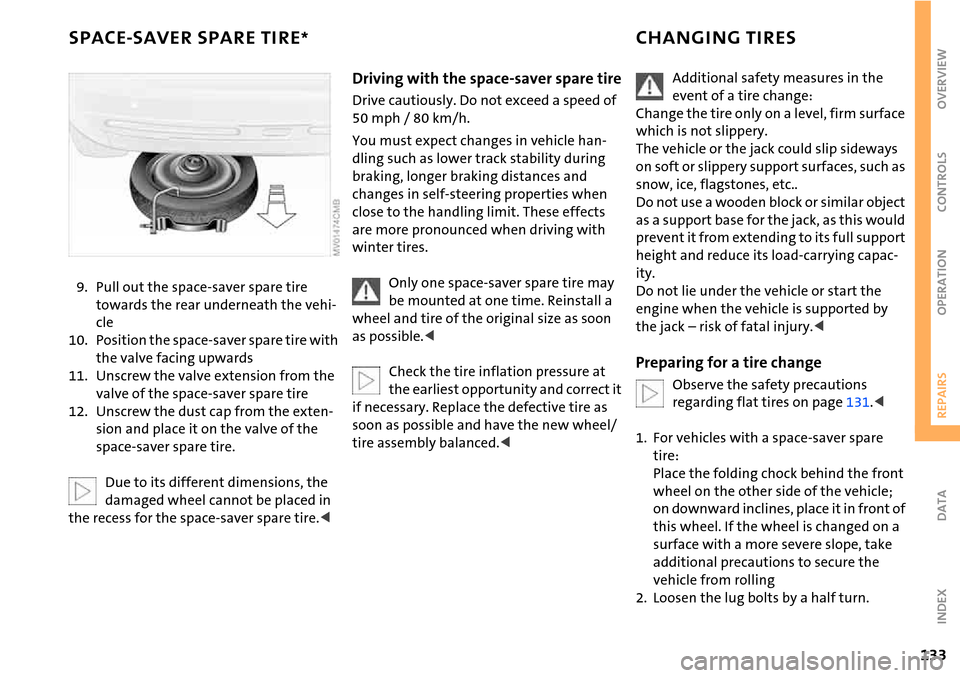
9. Pull out the space-saver spare tire
towards the rear underneath the vehi-
cle
10. Position the space-saver spare tire with
the valve facing upwards
11. Unscrew the valve extension from the
valve of the space-saver spare tire
12. Unscrew the dust cap from the exten-
sion and place it on the valve of the
space-saver spare tire.
Due to its different dimensions, the
damaged wheel cannot be placed in
the recess for the space-saver spare tire.<
Driving with the space-saver spare tire
Drive cautiously. Do not exceed a speed of
50 mph / 80 km/h.
You must expect changes in vehicle han-
dling such as lower track stability during
braking, longer braking distances and
changes in self-steering properties when
close to the handling limit. These effects
are more pronounced when driving with
winter tires.
Only one space-saver spare tire may
be mounted at one time. Reinstall a
wheel and tire of the original size as soon
as possible.<
Check the tire inflation pressure at
the earliest opportunity and correct it
if necessary. Replace the defective tire as
soon as possible and have the new wheel/
tire assembly balanced.<
Additional safety measures in the
event of a tire change:
Change the tire only on a level, firm surface
which is not slippery.
The vehicle or the jack could slip sideways
on soft or slippery support surfaces, such as
snow, ice, flagstones, etc..
Do not use a wooden block or similar object
as a support base for the jack, as this would
prevent it from extending to its full support
height and reduce its load-carrying capac-
ity.
Do not lie under the vehicle or start the
engine when the vehicle is supported by
the jack – risk of fatal injury.<
Preparing for a tire change
Observe the safety precautions
regarding flat tires on page131.<
1. For vehicles with a space-saver spare
tire:
Place the folding chock behind the front
wheel on the other side of the vehicle;
on downward inclines, place it in front of
this wheel. If the wheel is changed on a
surface with a more severe slope, take
additional precautions to secure the
vehicle from rolling
2. Loosen the lug bolts by a half turn.
Page 137 of 168
135
OVERVIEW REPAIRSOPERATION CONTROLS DATA INDEX
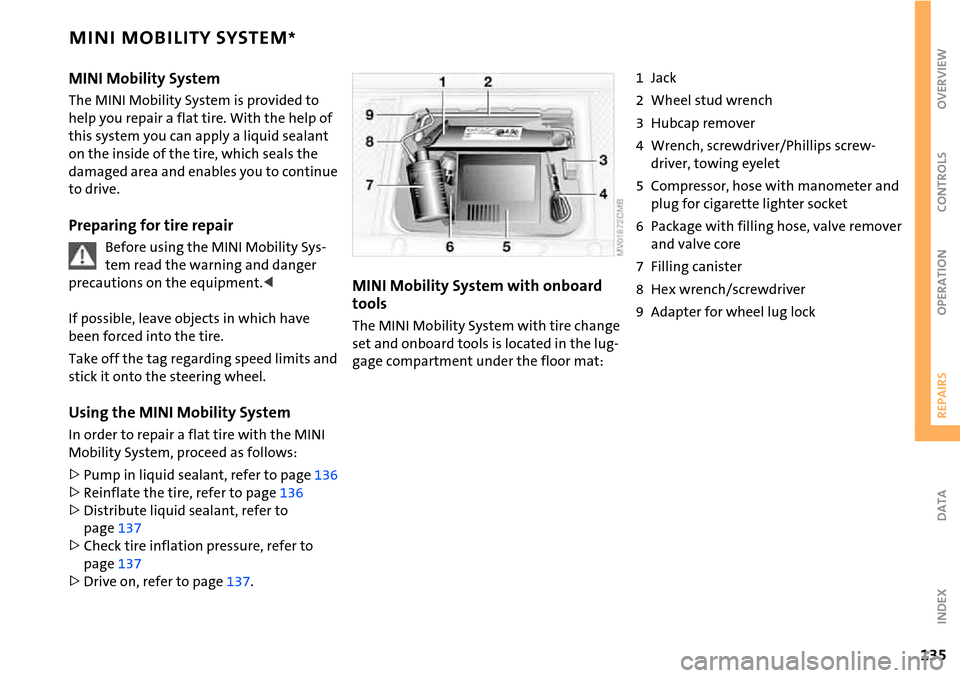
MINI MOBILITY SYSTEM*
MINI Mobility System
The MINI Mobility System is provided to
help you repair a flat tire. With the help of
this system you can apply a liquid sealant
on the inside of the tire, which seals the
damaged area and enables you to continue
to drive.
Preparing for tire repair
Before using the MINI Mobility Sys-
tem read the warning and danger
precautions on the equipment.<
If possible, leave objects in which have
been forced into the tire.
Take off the tag regarding speed limits and
stick it onto the steering wheel.
Using the MINI Mobility System
In order to repair a flat tire with the MINI
Mobility System, proceed as follows:
>Pump in liquid sealant, refer to page136
>Reinflate the tire, refer to page136
>Distribute liquid sealant, refer to
page137
>Check tire inflation pressure, refer to
page137
>Drive on, refer to page137.
MINI Mobility System with onboard
tools
The MINI Mobility System with tire change
set and onboard tools is located in the lug-
gage compartment under the floor mat:
1Jack
2 Wheel stud wrench
3 Hubcap remover
4 Wrench, screwdriver/Phillips screw-
driver, towing eyelet
5 Compressor, hose with manometer and
plug for cigarette lighter socket
6 Package with filling hose, valve remover
and valve core
7 Filling canister
8 Hex wrench/screwdriver
9 Adapter for wheel lug lock
Page 144 of 168
142
TOWING AND TOW-STARTING
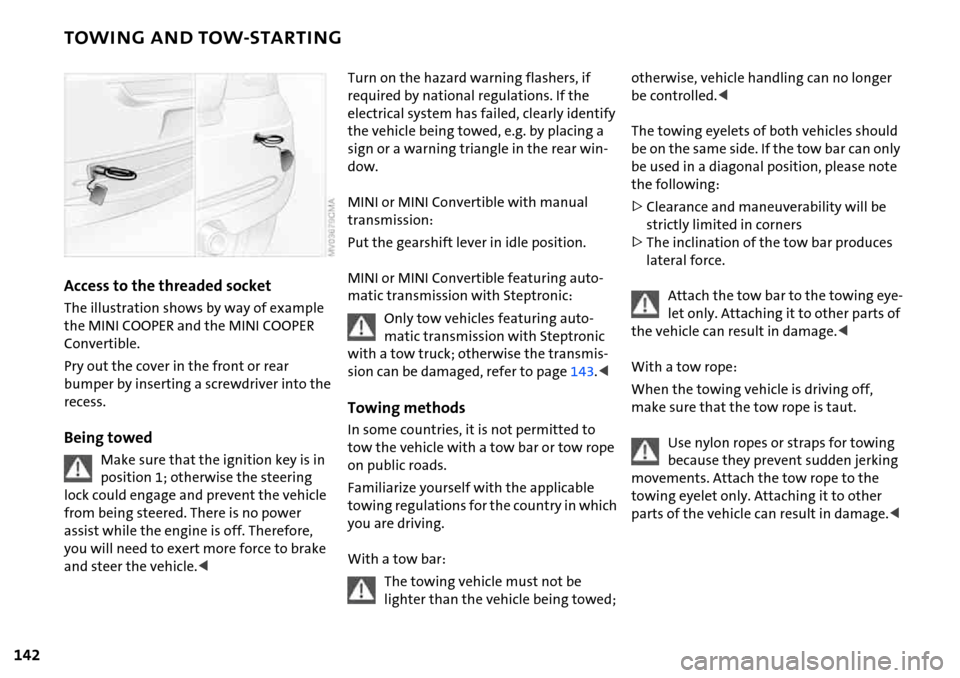
Access to the threaded socket
The illustration shows by way of example
the MINI COOPER and the MINI COOPER
Convertible.
Pry out the cover in the front or rear
bumper by inserting a screwdriver into the
recess.
Being towed
Make sure that the ignition key is in
position 1; otherwise the steering
lock could engage and prevent the vehicle
from being steered. There is no power
assist while the engine is off. Therefore,
you will need to exert more force to brake
and steer the vehicle.<
Turn on the hazard warning flashers, if
required by national regulations. If the
electrical system has failed, clearly identify
the vehicle being towed, e.g. by placing a
sign or a warning triangle in the rear win-
dow.
MINI or MINI Convertible with manual
transmission:
Put the gearshift lever in idle position.
MINI or MINI Convertible featuring auto-
matic transmission with Steptronic:
Only tow vehicles featuring auto-
matic transmission with Steptronic
with a tow truck; otherwise the transmis-
sion can be damaged, refer to page143.<
Towing methods
In some countries, it is not permitted to
tow the vehicle with a tow bar or tow rope
on public roads.
Familiarize yourself with the applicable
towing regulations for the country in which
you are driving.
With a tow bar:
The towing vehicle must not be
lighter than the vehicle being towed;
otherwise, vehicle handling can no longer
be controlled.<
The towing eyelets of both vehicles should
be on the same side. If the tow bar can only
be used in a diagonal position, please note
the following:
>Clearance and maneuverability will be
strictly limited in corners
>The inclination of the tow bar produces
lateral force.
Attach the tow bar to the towing eye-
let only. Attaching it to other parts of
the vehicle can result in damage.<
With a tow rope:
When the towing vehicle is driving off,
make sure that the tow rope is taut.
Use nylon ropes or straps for towing
because they prevent sudden jerking
movements. Attach the tow rope to the
towing eyelet only. Attaching it to other
parts of the vehicle can result in damage.<