warning light MINI Hardtop 2 Door 2006 Owner's Manual
[x] Cancel search | Manufacturer: MINI, Model Year: 2006, Model line: Hardtop 2 Door, Model: MINI Hardtop 2 Door 2006Pages: 168, PDF Size: 2.22 MB
Page 14 of 168

12
1>Parking lamps/Low beams59
>Turn signal indicators60
>Standing lamps59
>High beams60
>Headlamp flasher60
>Onboard computer692 Washer/wiper system62
3 Instrument lighting61
4 Outside mirror adjustment48
5 Hazard warning flashers6 Bonnet release111
7 Adjusting steering wheel47
8Horn
9 Socket for Onboard Diagnostics
OBD119
COCKPIT
Page 18 of 168
16
INDICATOR AND WARNING LAMPS
Technology that monitors itself
The system runs a check on the indicator
and warning lamps marked by
+ when you
turn the key in the ignition lock. They each
light up once for different periods of time.
If a malfunction should occur in one of
these systems, the corresponding lamp
does not go out after the engine is started
or it lights up while the vehicle is moving.
You will see below the correct way to react
to this.
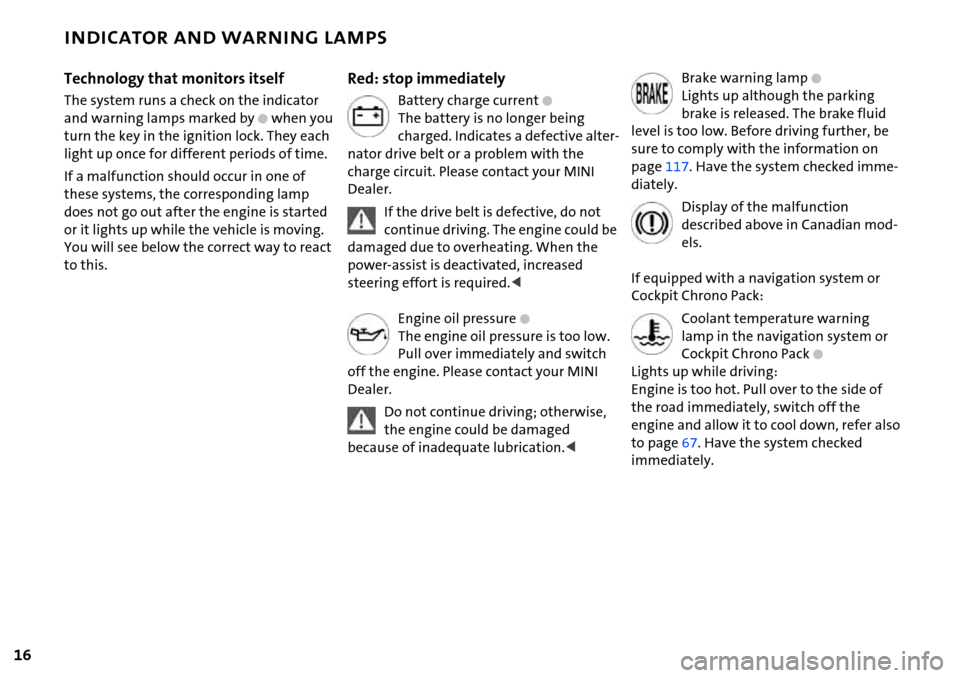
Red: stop immediately
Battery charge current+
The battery is no longer being
charged. Indicates a defective alter-
nator drive belt or a problem with the
charge circuit. Please contact your MINI
Dealer.
If the drive belt is defective, do not
continue driving. The engine could be
damaged due to overheating. When the
power-assist is deactivated, increased
steering effort is required.<
Engine oil pressure
+
The engine oil pressure is too low.
Pull over immediately and switch
off the engine. Please contact your MINI
Dealer.
Do not continue driving; otherwise,
the engine could be damaged
because of inadequate lubrication.<
Brake warning lamp+
Lights up although the parking
brake is released. The brake fluid
level is too low. Before driving further, be
sure to comply with the information on
page117. Have the system checked imme-
diately.
Display of the malfunction
described above in Canadian mod-
els.
If equipped with a navigation system or
Cockpit Chrono Pack:
Coolant temperature warning
lamp in the navigation system or
Cockpit Chrono Pack
+
Lights up while driving:
Engine is too hot. Pull over to the side of
the road immediately, switch off the
engine and allow it to cool down, refer also
to page67. Have the system checked
immediately.
Page 19 of 168
17
OVERVIEW REPAIRS OPERATION CONTROLS DATA INDEX
INDICATOR AND WARNING LAMPS
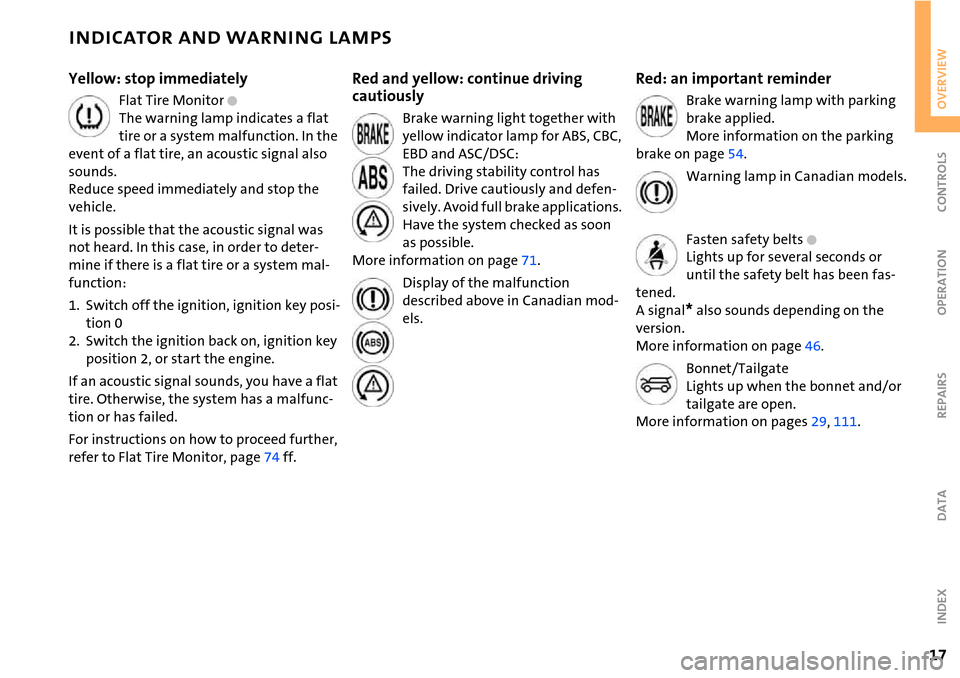
Yellow: stop immediately
Flat Tire Monitor +
The warning lamp indicates a flat
tire or a system malfunction. In the
event of a flat tire, an acoustic signal also
sounds.
Reduce speed immediately and stop the
vehicle.
It is possible that the acoustic signal was
not heard. In this case, in order to deter-
mine if there is a flat tire or a system mal-
function:
1. Switch off the ignition, ignition key posi-
tion 0
2. Switch the ignition back on, ignition key
position 2, or start the engine.
If an acoustic signal sounds, you have a flat
tire. Otherwise, the system has a malfunc-
tion or has failed.
For instructions on how to proceed further,
refer to Flat Tire Monitor, page74 ff.
Red and yellow: continue driving
cautiously
Brake warning light together with
yellow indicator lamp for ABS, CBC,
EBD and ASC/DSC:
The driving stability control has
failed. Drive cautiously and defen-
sively. Avoid full brake applications.
Have the system checked as soon
as possible.
More information on page71.
Display of the malfunction
described above in Canadian mod-
els.
Red: an important reminder
Brake warning lamp with parking
brake applied.
More information on the parking
brake on page54.
Warning lamp in Canadian models.
Fasten safety belts
+
Lights up for several seconds or
until the safety belt has been fas-
tened.
A signal
* also sounds depending on the
version.
More information on page46.
Bonnet/Tailgate
Lights up when the bonnet and/or
tailgate are open.
More information on pages29, 111.
Page 21 of 168

19
OVERVIEW REPAIRS OPERATION CONTROLS DATA INDEX
INDICATOR AND WARNING LAMPS
Yellow: for your information
The warning lamp* comes on.
The gas cap is not correctly closed
or missing. Check if the gas cap is
correctly closed.
Green: for your information
Turn signal indicator
Flashes when turn signal indicator
is on.
Rapid flashing: at least one of the turn sig-
nal indicators has failed.
More information on page60.
Cruise control
Lights up when the cruise control is
activated: operation via the multi-
function steering wheel or multifunction
sports steering wheel.
More information on page64.
Blue: for your information
High beams
Comes on when the high beams
are on or the headlamp flasher is
actuated.
More information on page60.
Page 62 of 168

60
PARKING LAMPS/LOW BEAMS TURN SIGNAL INDICATOR/HEADLAMP FLASHER
'Lights on' warning
If the lights have not been switched off and
the ignition key is in position 0, an acoustic
signal sounds for a few seconds when you
open the driver's door to remind you that
the lights have not been switched off.
Daytime driving lamps*
If convenient, the light switch can be left in
position 2.
When the ignition is switched off, the
external lights go out.
You can have this function activated/
deactivated.<
1 Turn signal indicators
2 High beams/Headlamp flasher
To signal briefly
Gently push the lever up to the point of
resistance and hold it there, if necessary.
The indicator lamp flashes and the
relay clicks faster than normal: a turn
signal indicator has failed.<
Page 69 of 168

67
OVERVIEW REPAIRS OPERATIONCONTROLS DATA INDEX
FUEL GAUGE COOLANT TEMPERATURE GAUGE
In the navigation system*
Please also comply with the instruc-
tions in the previous section.<
If the LED changes from orange to red,
there are approx. 2.1 gallons/8 liters of fuel
left in the tank.
Coolant temperature gauge
Depending on the equipment version, a
coolant temperature gauge is located in
the speedometer or the Cockpit Chrono
Pack.
Low temperature:
The engine is still cold. Drive at moderate
engine and vehicle speeds.
Center position:
Normal operating temperature of the
engine.
High temperature:
As soon as there is a deviation from the
center position upwards or to the left:
Drive with moderation and at low engine
speeds. If necessary, switch off the engine
and allow it to cool down.
Checking coolant level, refer to page115.
Temperature warning
LED 1 lights up while driving:
Engine is too hot. Switch off the engine
immediately and allow it to cool down.
When you switch on the ignition, the LED 1
lights up briefly to confirm that the system
is operational.
Equipment with navigation system* or
Cockpit Chrono Pack*
Coolant-temperature warning
lamp 2 lights up while driving:
Engine is too hot. Switch off the
engine immediately and allow it to cool
down.
Page 75 of 168
73
OVERVIEW REPAIRS OPERATIONCONTROLS DATA INDEX
FLAT TIRE MONITOR
The concept
As you drive, the Flat Tire Monitor keeps
track of the tire inflation pressure in all four
tires. The system alerts you when there is a
substantial pressure loss in one of the tires
relative to another.
In the event of tire pressure loss, the rolling
radius of the tire changes, thereby affect-
ing the rotational speed of the wheels. This
change is detected, and a flat tire warning
is issued to the driver.
System requirements
To ensure the reliability of flat tire warn-
ings, the system must be initialized with
the correct tire inflation pressures.
Each time you correct the pressure in
a tire, or change a wheel or tire, the
system must be reinitialized.<
System limitations
The Flat Tire Monitor cannot alert you
to severe and sudden tire damage
caused by external factors, nor does it
detect the gradual and minor loss of pres-
sure in all four tires.<
The system could issue a false warning or
function in a delayed manner in the follow-
ing situations:
>System was not initialized
>You are driving on a snow-covered or
slippery road surface
>Performance-oriented driving: slip at the
drive wheels, high rates of lateral accel-
eration
>You are driving with snow chains.
When driving with a space-saver spare tire,
the Flat Tire Monitor cannot function.
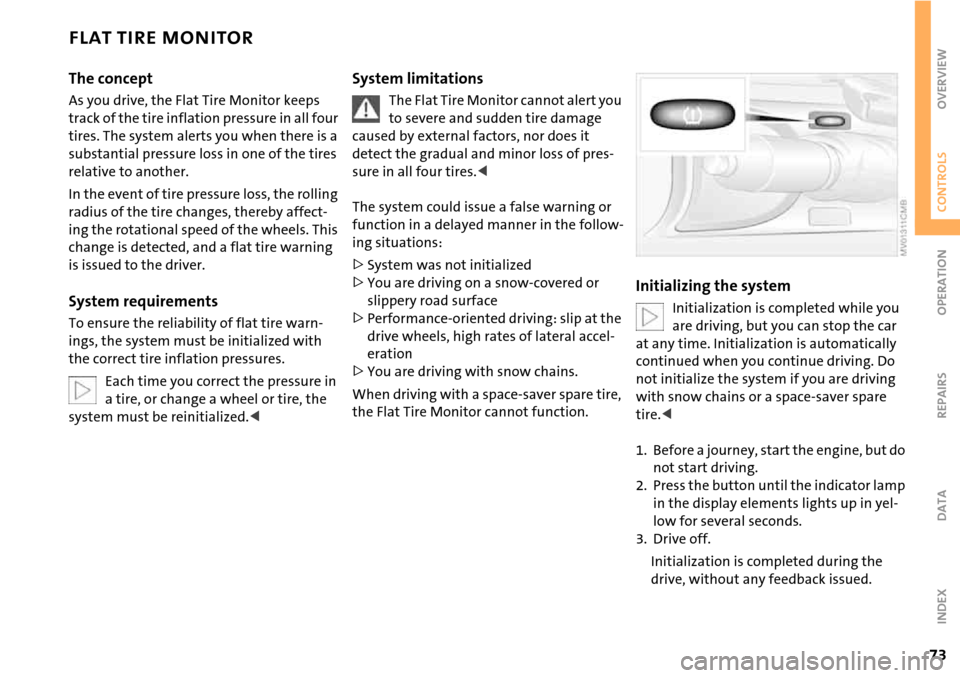
Initializing the system
Initialization is completed while you
are driving, but you can stop the car
at any time. Initialization is automatically
continued when you continue driving. Do
not initialize the system if you are driving
with snow chains or a space-saver spare
tire.<
1. Before a journey, start the engine, but do
not start driving.
2. Press the button until the indicator lamp
in the display elements lights up in yel-
low for several seconds.
3. Drive off.
Initialization is completed during the
drive, without any feedback issued.
Page 76 of 168
74
FLAT TIRE MONITOR
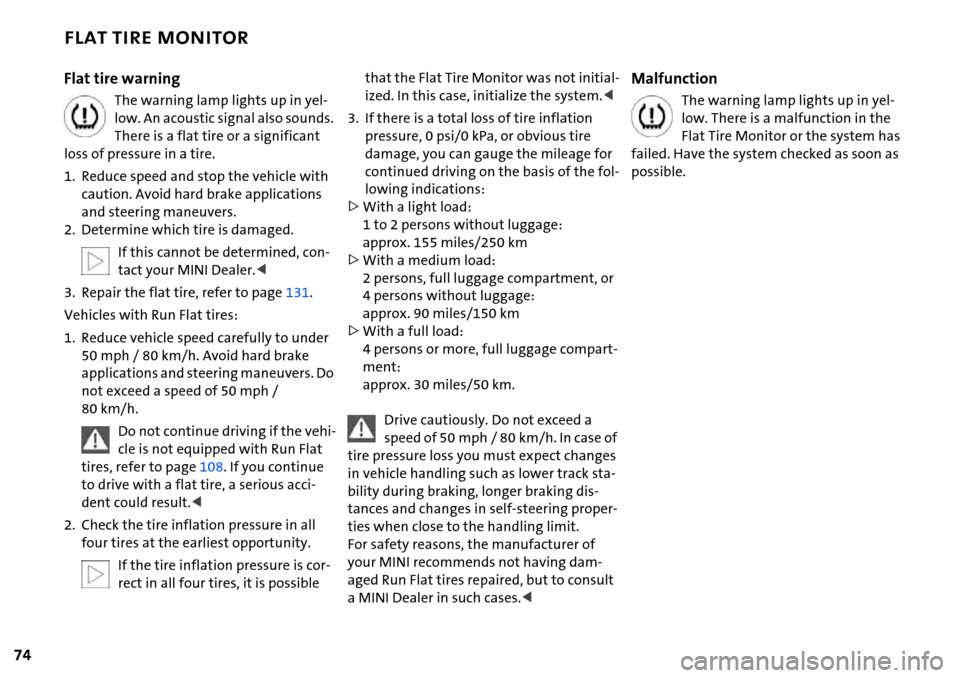
Flat tire warning
The warning lamp lights up in yel-
low. An acoustic signal also sounds.
There is a flat tire or a significant
loss of pressure in a tire.
1. Reduce speed and stop the vehicle with
caution. Avoid hard brake applications
and steering maneuvers.
2. Determine which tire is damaged.
If this cannot be determined, con-
tact your MINI Dealer.<
3. Repair the flat tire, refer to page131.
Vehicles with Run Flat tires:
1. Reduce vehicle speed carefully to under
50 mph / 80 km/h. Avoid hard brake
applications and steering maneuvers. Do
not exceed a speed of 50 mph /
80 km/h.
Do not continue driving if the vehi-
cle is not equipped with Run Flat
tires, refer to page108. If you continue
to drive with a flat tire, a serious acci-
dent could result.<
2. Check the tire inflation pressure in all
four tires at the earliest opportunity.
If the tire inflation pressure is cor-
rect in all four tires, it is possible
that the Flat Tire Monitor was not initial-
ized. In this case, initialize the system.<
3. If there is a total loss of tire inflation
pressure, 0 psi/0 kPa, or obvious tire
damage, you can gauge the mileage for
continued driving on the basis of the fol-
lowing indications:
>With a light load:
1 to 2 persons without luggage:
approx. 155 miles/250 km
>With a medium load:
2 persons, full luggage compartment, or
4 persons without luggage:
approx. 90 miles/150 km
>With a full load:
4 persons or more, full luggage compart-
ment:
approx. 30 miles/50 km.
Drive cautiously. Do not exceed a
speed of 50 mph / 80 km/h. In case of
tire pressure loss you must expect changes
in vehicle handling such as lower track sta-
bility during braking, longer braking dis-
tances and changes in self-steering proper-
ties when close to the handling limit.
For safety reasons, the manufacturer of
your MINI recommends not having dam-
aged Run Flat tires repaired, but to consult
a MINI Dealer in such cases.
low. There is a malfunction in the
Flat Tire Monitor or the system has
failed. Have the system checked as soon as
possible.
Page 78 of 168
76
AIRBAGS
tivated or activated, refer to Functional sta-
tus of the front passenger airbags below. <
Before transporting a child on the
front passenger seat, read the safety
notes and instructions under Transporting
children safely, refer to page50.
Adolescents and adults sitting in certain
positions could also deactivate the front
and side airbags for the front passenger;
the indicator lamp for the front passenger
airbags comes on. In such cases, the occu-
pant should change his or her sitting posi-
tion so that the front passenger airbags are
activated and the indicator lamp goes out.
If the airbags are not activated although
the seat occupant has changed his or her
position, have the occupant sit on a rear
seat. Do not attach covers, cushions, ball
mats or other items to the front passenger
seat unless they are specifically recom-
mended by the manufacturer of your MINI.
Do not place any objects under the seat
which could press against the seat from
below. Otherwise, a correct analysis of the
seat cushion is not ensured.<
Functional status of the front
passenger airbags
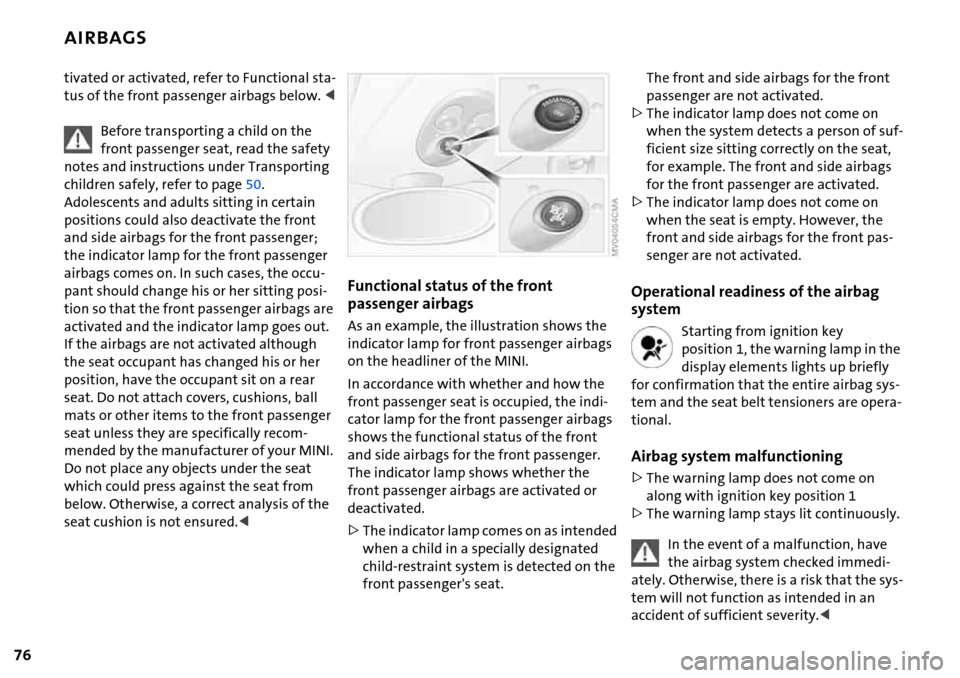
As an example, the illustration shows the
indicator lamp for front passenger airbags
on the headliner of the MINI.
In accordance with whether and how the
front passenger seat is occupied, the indi-
cator lamp for the front passenger airbags
shows the functional status of the front
and side airbags for the front passenger.
The indicator lamp shows whether the
front passenger airbags are activated or
deactivated.
>The indicator lamp comes on as intended
when a child in a specially designated
child-restraint system is detected on the
front passenger's seat.
The front and side airbags for the front
passenger are not activated.
>The indicator lamp does not come on
when the system detects a person of suf-
ficient size sitting correctly on the seat,
for example. The front and side airbags
for the front passenger are activated.
>The indicator lamp does not come on
when the seat is empty. However, the
front and side airbags for the front pas-
senger are not activated.
Operational readiness of the airbag
system
Starting from ignition key
position 1, the warning lamp in the
display elements lights up briefly
for confirmation that the entire airbag sys-
tem and the seat belt tensioners are opera-
tional.
Airbag system malfunctioning
>The warning lamp does not come on
along with ignition key position 1
>The warning lamp stays lit continuously.
In the event of a malfunction, have
the airbag system checked immedi-
ately. Otherwise, there is a risk that the sys-
tem will not function as intended in an
accident of sufficient severity.<
Page 119 of 168
117
OVERVIEW REPAIRSOPERATIONCONTROLS DATA INDEX
BRAKE SYSTEM
Brake fluid level
The warning lamp comes on
although the parking brake is
released:
The brake fluid level in the reservoir is too
low, refer to page16. At the same time,
brake pedal travel may become signifi-
cantly longer.
Have the system checked immediately.
If the brake fluid level is too low and brake
pedal travel has become longer, there may
be a defect in one of the brake system's
hydraulic circuits.
Display of the malfunction
described above in Canadian mod-
els.
If you continue driving, higher brake
application pressure may be neces-
sary, and there may be a slight pull to one
side. Brake pedal travel may also be longer.
Please remember to adapt your driving
style accordingly.<
Brake pads
Brake pad sensors in the left brake pads of
the front axle and in the right brake pads of
the rear axle monitor the brake pad condi-
tion. When the brake pads reach the wear
limit, the brake wear warning lights up,
refer to page18.
Use brake pads which the manufac-
turer of your MINI has approved for
your particular vehicle model. The manu-
facturer of your MINI cannot evaluate non-
approved brake pads to determine if they
are suitable for use, and therefore cannot
ensure the operating safety of the vehicle
in the event of their use.<