climate control MINI Hardtop 2 Door 2007 Owner's Manual
[x] Cancel search | Manufacturer: MINI, Model Year: 2007, Model line: Hardtop 2 Door, Model: MINI Hardtop 2 Door 2007Pages: 148, PDF Size: 2.43 MB
Page 5 of 148
ReferenceAt a glance Controls Driving tips Mobility
3
Contents
The fastest way to find information on a particu-
lar topic or item is by using the index, refer to
page134.
Using this Owner's Manual
4Notes
6Reporting safety defects
At a glance
10Cockpit
Controls
18Opening and closing
28Adjustments
33Transporting children safely
35Driving
44Everything under control
53Technology for driving comfort and safety
59Lamps
64Climate
69Practical interior accessories
Driving tips
76Things to remember when driving
Mobility
84Refueling
86Wheels and tires
94Under the bonnet
98Maintenance
100Care
102Replacing components
112Giving and receiving assistance
116Indicator and warning lamps
Reference
130Technical data
134From A to Z
Page 20 of 148

Opening and closing
18
Opening and closing
Keys/remote controls
Remote control with integrated key
Each remote control contains a rechargeable
battery that is automatically recharged when it
is in the ignition lock while the car is being
driven. You should therefore use each remote
control at least twice a year to maintain the
charge status. In vehicles equipped with conve-
nient access
*, the remote control contains a
replaceable battery, page25.
If more than one remote control is used, the set-
tings called up and implemented depend on
which remote control is recognized when the
car is unlocked, refer to Personal Profile,
page18.
In addition, information about service require-
ments is stored in the remote control, refer to
Service data in the remote control, page98.
Integrated key
Press button1 to release the key.
The integrated key fits the following locks:
>Driver's door, page21
New remote controls
Your MINI Dealer can supply new remote con-
trols with integrated keys as additional units or
as replacements in the event of loss.
Personal Profile
The concept
The functions of your MINI can be set individu-
ally. By means of Personal Profiles, most of these
settings are stored for the remote control cur-
rently in use. When you unlock the car, the
remote control is recognized and the settings
stored for it are called up and implemented.
This means that your settings will be activated
for you, even if in the meantime your car was
used by someone else with another remote con-
trol and the corresponding settings.
At most three remote controls can be set for
three different people. A prerequisite is that
each person uses a separate remote control.
Personal Profile settings
For more information on specific settings, refer
to the specified pages.
>Response of the central locking system
when the car is being unlocked19
>Automatic locking of the vehicle22
>12h/24h mode of the clock, refer to Formats
and units of measure47
>Date format, refer to Formats and units of
measure47
>Units of measure for fuel consumption, dis-
tance covered/remaining distances and
temperature, refer to Formats and units of
measure47
>Automatic climate control
*: AUTO program,
activating/deactivating cooling function and
automatic recirculated-air control, setting
temperature, air flow rate and
distribution66
Page 66 of 148

Climate
64
Climate
Equipment versions
Depending on your vehicle's equipment, your
MINI may contain an air conditioner
or an auto-
matic climate control
*.
1Air conditioner
2Automatic climate control
*
Air vents
3Airflow directed toward the windshield and
side windows
4Air to the upper body area
5Air to the footwell
Page 68 of 148

Climate
66
Windshield heating*
The windshield heating is switched
off automatically after a short time.
Defrosting windows and removing
condensation
1.Set air flow rate to the maximum level.
2.Set air distribution to position .
Condensation is removed from the windows more quickly when the cooling function
* is
also activated.
3.Set to the highest temperature, red.
4.Deactivate recirculated-air mode.
5.Turn on windshield heating if necessary.
6.Turn on rear window defroster if necessary.
Microfilter
The microfilter captures dust and pollen. The
microfilter is changed by your MINI Dealer dur-
ing routine maintenance work.
Automatic climate control*
1Air flow rate, manual
2AUTO program
3AUC Automatic recirculated-air control/
Recirculated-air mode
4Maximum cooling
5Air distribution, manual6Temperature
7Defrosting windows and removing conden-
sation
8Cooling function
9Rear window defroster
10Windshield heating
*
Comfortable interior climate
AUTO program2 offers the ideal air distribution
and air flow rate for almost all conditions, refer
to AUTO program below. All you need to do is
select an interior temperature which is comfort-
able for you.
The following sections inform you in detail about
how to adjust the settings.
Most settings are stored for the remote control
currently in use, refer also to Personal Profile set-
tings on page18.
Air flow rate, manual
Press the – button to reduce air flow. Press
the + button to increase it.
You can reactivate the automatic mode
for the air flow rate with the AUTO button.
Switching the system on/off
Reduce the air flow by pressing the – button
repeatedly until the system is switched off. All
indicators go out.
Press the AUTO button to switch the automatic
climate control back on.
Page 69 of 148

ReferenceAt a glance Controls Driving tips Mobility
67
AUTO program
The AUTO program adjusts the air
distribution to the windshield and
side windows, towards the upper body area and
into the footwell for you. The air flow rate and
your temperature specifications will be adapted
to outside influences in accordance with sea-
sonal changes, e.g. sunlight.
The cooling function is automatically switched
on along with the AUTO program.
AUC Automatic recirculated-air control/
Recirculated-air mode
Switch on the desired operating
mode by pressing the button
repeatedly.
Display of operating modes
No display: outside air flows in continuously.
AUC mode: a sensor detects pollutants in
the outside air. If necessary, the system
blocks the supply of outside air and recir-
culates the inside air. As soon as the concentra-
tion of pollutants in the outside air has
decreased sufficiently, the system automatically
switches back to outside air supply.
At outside temperatures below approx. 417/
+56, the AUC mode may be restricted due to
the increased risk of window condensation.
Recirculated-air mode: the supply of out-
side air is permanently shut off. The sys-
tem then recirculates the air currently
within the vehicle.
If condensation starts to form on the
inside window surfaces, switch off the
recirculated-air mode and, if necessary, switch
on the cooling function or increase the air flow
rate. <
To prevent the air quality inside the vehi-
cle from deteriorating during extended
use of the recirculated-air mode, fresh air is
added briefly at regular intervals.<
Maximum cooling
At outside temperatures above
327/06 and when the engine is
running, you obtain a maximum
cooling effect as soon as possible.
The automatic climate control switches to the
lowest temperature and operates in recircu-
lated-air mode. Air flows at maximum rate only
from the vents for the upper body area. You
should therefore open them for maximum cool-
ing.
Air distribution, manual
The flow of air is directed to the
windows, to the upper body area or
to the footwell.
You can switch the automatic air
distribution back on by pressing the AUTO but-
ton.
Temperature
Set the desired temperature individually.
The automatic climate control achieves
this temperature as quickly as possible
regardless of the season, using maximum
cooling or heating power if necessary, and then
maintains it.
If you switch between different tempera-
ture settings in quick succession, the auto-
matic climate control does not have enough
time to achieve the set temperature.<
Rear window defroster
The defroster is switched off auto-
matically after a certain time.
Defrosting windows and removing
condensation
Quickly removes ice and condensa-
tion from the windshield and front
side windows. The windshield heat-
ing
* is switched on automatically.
Page 73 of 148

ReferenceAt a glance Controls Driving tips Mobility
71
Opening
Turn the switch to the horizontal position, see
arrow.
Closing
Turn the switch to the vertical position.
Depending on the temperature setting of the air
conditioning or the automatic climate control,
high temperatures may result in the glove com-
partment.
Center armrest*
Storage compartment
The center armrest between the front seats con-
tains either a compartment or the cover for the
mobile phone base plate
* or the snap-in
adapter
*.
Opening
The cover slides along guide rails and can be
opened fully by pushing it back and lifting it.
Closing
Push the cover forwards.
Connection for external
audio device
You can connect an external audio device such
as a CD or MP3 player and play audio recordings
over the vehicle loudspeakers. The volume and
tone settings can be adjusted via the car radio,
refer to the Owner's Manual for Radio.
>Connection for audio playback:
3.5 mm jack
>Power supply for the additional device via
the cigarette lighter socket or the socket in
the center console, page72
Storage compartments
inside the vehicle
Depending on your vehicle's equipment, you
will find storage compartments in the doors,
next to the rear seats and in the center console
*.
Nets
* are located in the passenger footwell and
on the backs of the front seat backrests.
Page 78 of 148
Things to remember when driving
76
Things to remember when driving
Break-in period
Moving parts need breaking-in time to adjust to
each other. Please follow the instructions below
in order to achieve the optimal service life and
economy of operation for your vehicle.
Engine and differential
Always obey all official speed limits.
Up to 1,200 miles/2,000 km
Drive at varying engine and road speeds, but do
not exceed the following:
>4,500/min or 100 mph/160 km/h
Avoid full-throttle operation and use of the
transmission's kick-down mode.
After driving 1,200 miles/2,000 km
Engine and vehicle speeds can be gradually
increased.
Tires
Due to technical factors associated with their
manufacture, tires do not achieve their full trac-
tion potential until after an initial break-in
period. Therefore, drive cautiously during the
first 200 miles/300 km.
Brake system
Brakes require an initial break-in period of
approx. 300 miles/500 km to achieve optimized
contact and wear patterns between brake pads
and rotors. Drive cautiously during this break-in
period.
Clutch
The function of the clutch reaches its optimal
level only after a distance driven of approx.
300 miles/500 km. During this break-in period,
engage the clutch gently.
Following part replacement
The same break-in procedures should be
observed if any of the components mentioned
above have to be renewed in the course of the
vehicle's operating life.
General driving notes
Close the tailgate
Drive the vehicle only when the tailgate is
closed. Otherwise, exhaust fumes could
penetrate the interior of the vehicle.<
If special circumstances make it absolutely nec-
essary to drive with the tailgate open:
1.Close all windows and the glass sunroof.
2.Increase the air flow rate of the air condi-
tioner or automatic climate control consid-
erably, page65 or66.
Hot exhaust system
In all vehicles, extremely high tempera-
tures are generated in the exhaust sys-
tem. Do not remove the heat shields installed
adjacent to various sections of the exhaust sys-
tem, and never apply undercoating to them.
When driving, standing at idle and while park-
ing, take care to avoid possible contact between
the hot exhaust system and any highly flamma-
ble materials such as hay, leaves, grass, etc. Such
contact could lead to a fire, with the risk of seri-
ous personal injuries and property damage. Do
not touch hot exhaust tail pipes. Otherwise
there is a risk of burns.<
Mobile phones in the vehicle
The manufacturer of your MINI recom-
mends that you do not use mobile
devices, e.g. mobile phones, inside the vehicle
without directly connecting them to an outside
antenna. Otherwise, the vehicle electronics and
mobile communications device can influence
one another. In addition, there is no assurance
Page 79 of 148
ReferenceAt a glance Controls Driving tips Mobility
77
that the radiation which results from transmis-
sion will be dissipated from the vehicle inte-
rior.<
Hydroplaning
When driving on wet or slushy roads,
reduce road speed. If you do not, a wedge
of water can form between tires and road sur-
face. This situation, known as hydroplaning, can
cause partial or complete loss of tire contact
with the road surface, so that the car cannot be
steered or braked properly.<
The risk of hydroplaning increases with declining
tread depth on the tires, refer also to Tread
depth on page91.
Driving through water
Drive through water on the road only if it is
not deeper than 1 ft/30 cm, and then only
at walking speed at the most. Otherwise, the
vehicle's engine, the electrical systems and the
transmission may be damaged.<
Parking brake on inclines
On inclines, do not hold the vehicle with
the clutch; use the parking brake. Other-
wise greater clutch wear will result.<
For information on driving off using Hill Start
Assist
*, refer to page55.
Braking safely
Your MINI is equipped with ABS. If you are in a
situation which requires full braking, it is best to
brake using maximum brake pressure. Since the
vehicle maintains steering responsiveness, you
can still avoid possible obstacles with a mini-
mum of steering effort.
The pulsation of the brake pedal, together with
the sound of hydraulic regulation, indicates that
ABS is actively taking effect.
Driving in wet conditions
When roads are wet or there is heavy rain, briefly
exert gentle pressure on the brake pedal every
few miles. Monitor traffic conditions to ensure
that this maneuver does not endanger other
road users. The heat generated in this process helps dry the pads and rotors to ensure that
Then full braking force will be immediately avail-
able when it is needed.
Hills
To prevent overheating and the resulting
reduced efficiency of the brake system,
drive long or steep downhill gradients in the
gear in which the least braking is required. Even
light but consistent brake pressure can lead to
high temperatures, brake wear and possibly
even brake failure.<
You can increase the engine's braking effect by
shifting down, all the way to first gear if neces-
sary. This strategy helps you avoid placing
excessive loads on the brake system. Downshift-
ing in manual mode of the automatic transmis-
sion, page38.
Never drive with the clutch held down,
with the transmission in idle or with the
engine switched off; otherwise, engine braking
action will not be present or there will be no
power assistance to the brakes or steering.
Never allow floor mats, carpets or any other
objects to protrude into the area around the
pedals, otherwise pedal function could be
impaired.<
Corrosion on brake rotors
When the vehicle is driven only occasionally,
during extended periods when the vehicle is not
used at all, and in operating conditions where
brake applications are less frequent, there is an
increased tendency for corrosion to form on
rotors, while contaminants accumulate on the
brake pads. This occurs because the minimum
pressure which must be exerted by the pads
during brake applications to clean the rotors is
not reached.
Should corrosion form on the brake rotors, the
brakes will tend to respond with a pulsating
effect that even extended application will fail to
cure.
When the vehicle is parked
Condensation forms while the automatic climate
control is in operation, and then exits under the
Page 92 of 148
Wheels and tires
90
Tire coding
Knowledge of the labeling on the side of the tire
makes it easier to identify and choose the right
tires.
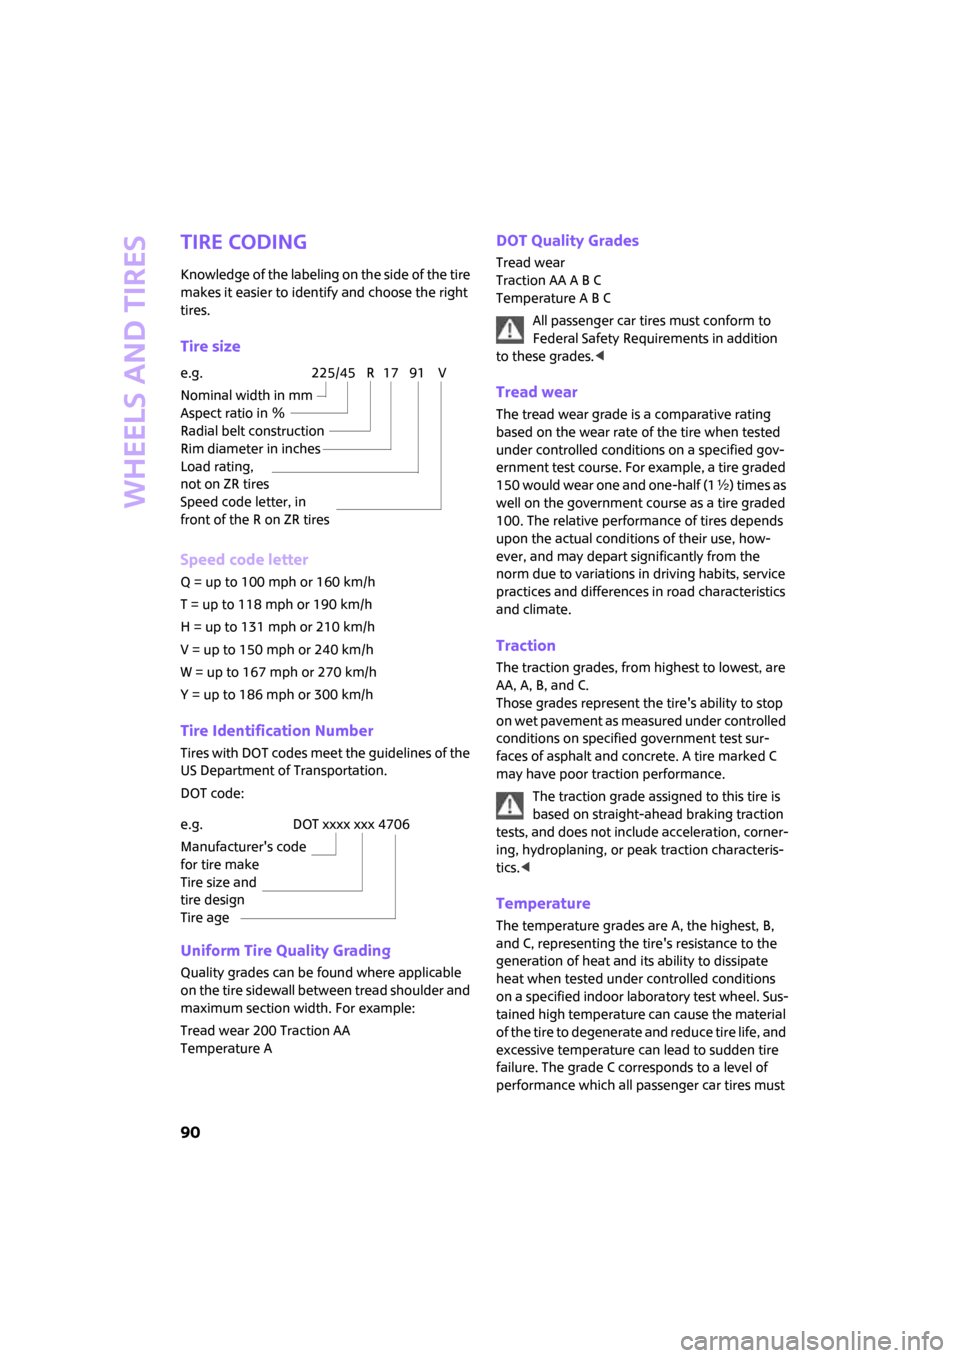
Tire size
Speed code letter
Q = up to 100 mph or 160 km/h
T = up to 118 mph or 190 km/h
H = up to 131 mph or 210 km/h
V = up to 150 mph or 240 km/h
W = up to 167 mph or 270 km/h
Y = up to 186 mph or 300 km/h
Tire Identification Number
Tires with DOT codes meet the guidelines of the
US Department of Transportation.
DOT code:
Uniform Tire Quality Grading
Quality grades can be found where applicable
on the tire sidewall between tread shoulder and
maximum section width. For example:
Tread wear 200 Traction AA
Temperature A
DOT Quality Grades
Tread wear
Traction AA A B C
Temperature A B C
All passenger car tires must conform to
Federal Safety Requirements in addition
to these grades.<
Tread wear
The tread wear grade is a comparative rating
based on the wear rate of the tire when tested
under controlled conditions on a specified gov-
ernment test course. For example, a tire graded
150 would wear one and one-half (1γ) times as
well on the government course as a tire graded
100. The relative performance of tires depends
upon the actual conditions of their use, how-
ever, and may depart significantly from the
norm due to variations in driving habits, service
practices and differences in road characteristics
and climate.
Traction
The traction grades, from highest to lowest, are
AA, A, B, and C.
Those grades represent the tire's ability to stop
on wet pavement as measured under controlled
conditions on specified government test sur-
faces of asphalt and concrete. A tire marked C
may have poor traction performance.
The traction grade assigned to this tire is
based on straight-ahead braking traction
tests, and does not include acceleration, corner-
ing, hydroplaning, or peak traction characteris-
tics.<
Temperature
The temperature grades are A, the highest, B,
and C, representing the tire's resistance to the
generation of heat and its ability to dissipate
heat when tested under controlled conditions
on a specified indoor laboratory test wheel. Sus-
tained high temperature can cause the material
of the tire to degenerate and reduce tire life, and
excessive temperature can lead to sudden tire
failure. The grade C corresponds to a level of
performance which all passenger car tires must e.g.
Nominal width in mm
Aspect ratio in Ξ
Radial belt construction
Rim diameter in inches
Load rating,
not on ZR tires
Speed code letter, in
front of the R on ZR tires
225/45 R 17 91 V
e.g.
Manufacturer's code
for tire make
Tire size and
tire design
Tire ageDOT xxxx xxx 4706
Page 136 of 148
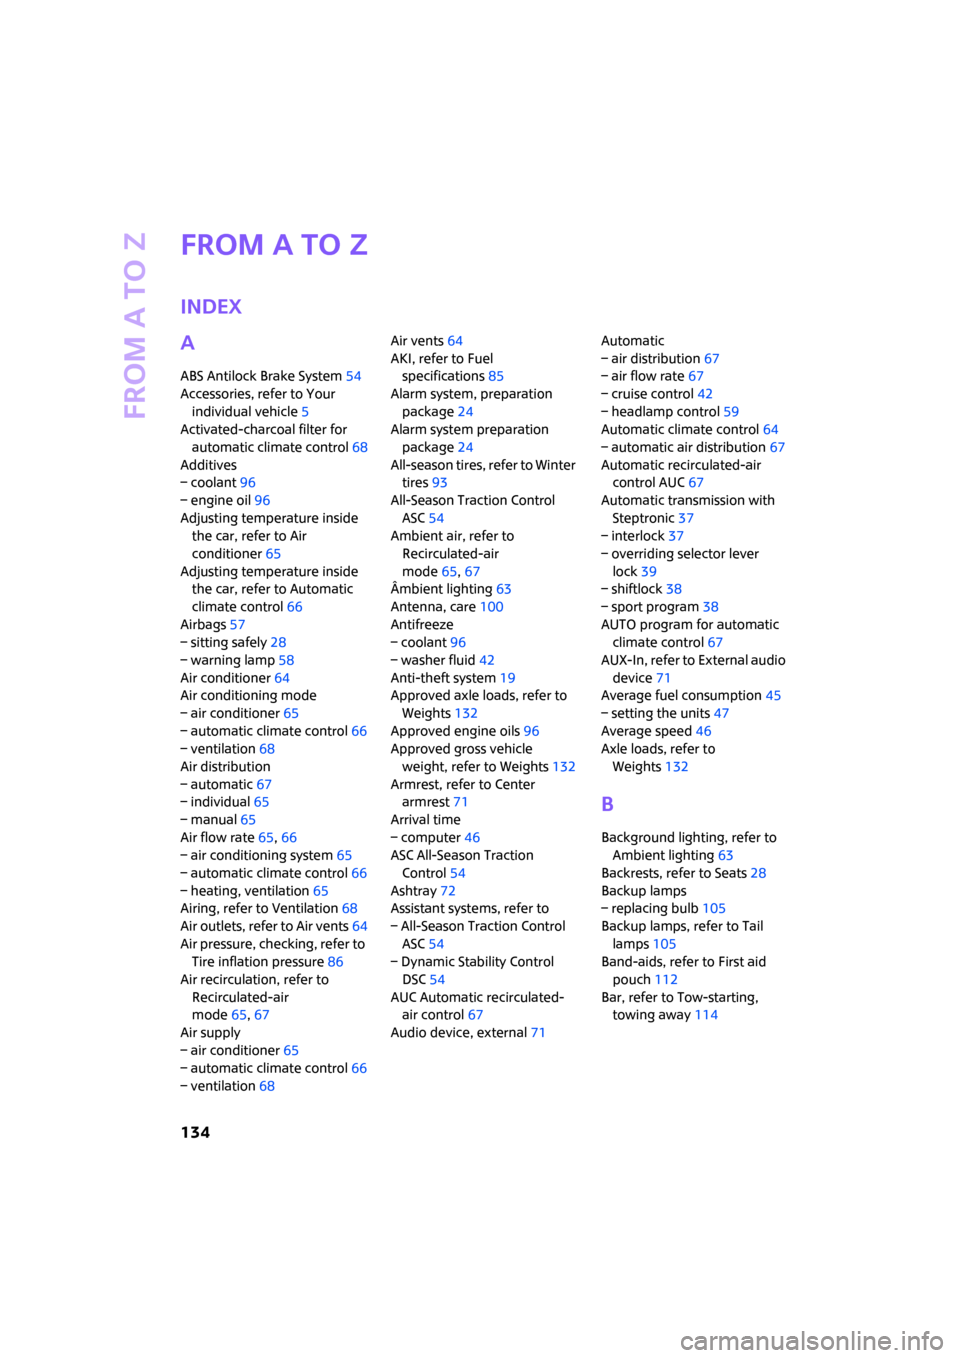
From A to Z
134
From A to Z
Index
A
ABS Antilock Brake System54
Accessories, refer to Your
individual vehicle5
Activated-charcoal filter for
automatic climate control68
Additives
– coolant96
– engine oil96
Adjusting temperature inside
the car, refer to Air
conditioner65
Adjusting temperature inside
the car, refer to Automatic
climate control66
Airbags57
– sitting safely28
– warning lamp58
Air conditioner64
Air conditioning mode
– air conditioner65
– automatic climate control66
– ventilation68
Air distribution
– automatic67
– individual65
– manual65
Air flow rate65,66
– air conditioning system65
– automatic climate control66
– heating, ventilation65
Airing, refer to Ventilation68
Air outlets, refer to Air vents64
Air pressure, checking, refer to
Tire inflation pressure86
Air recirculation, refer to
Recirculated-air
mode65,67
Air supply
– air conditioner65
– automatic climate control66
– ventilation68Air vents64
AKI, refer to Fuel
specifications85
Alarm system, preparation
package24
Alarm system preparation
package24
All-season tires, refer to Winter
tires93
All-Season Traction Control
ASC54
Ambient air, refer to
Recirculated-air
mode65,67
Âmbient lighting63
Antenna, care100
Antifreeze
– coolant96
– washer fluid
42
Anti-theft system19
Approved axle loads, refer to
Weights132
Approved engine oils96
Approved gross vehicle
weight, refer to Weights132
Armrest, refer to Center
armrest71
Arrival time
– computer46
ASC All-Season Traction
Control54
Ashtray72
Assistant systems, refer to
– All-Season Traction Control
ASC54
– Dynamic Stability Control
DSC54
AUC Automatic recirculated-
air control67
Audio device, external71Automatic
– air distribution67
– air flow rate67
– cruise control42
– headlamp control59
Automatic climate control64
– automatic air distribution67
Automatic recirculated-air
control AUC67
Automatic transmission with
Steptronic37
– interlock37
– overriding selector lever
lock39
– shiftlock38
– sport program38
AUTO program for automatic
climate control67
AUX-In, refer to External audio
device71
Average fuel consumption45
– setting the units47
Average speed46
Axle loads, refer to
Weights132
B
Background lighting, refer to
Ambient lighting63
Backrests, refer to Seats28
Backup lamps
– replacing bulb105
Backup lamps, refer to Tail
lamps105
Band-aids, refer to First aid
pouch112
Bar, refer to Tow-starting,
towing away114