tailgate MINI Hardtop 2 Door 2007 Owner's Manual
[x] Cancel search | Manufacturer: MINI, Model Year: 2007, Model line: Hardtop 2 Door, Model: MINI Hardtop 2 Door 2007Pages: 148, PDF Size: 2.43 MB
Page 21 of 148

ReferenceAt a glance Controls Driving tips Mobility
19
>Pathway lighting59
>Daytime running lamps60
>Triple turn signal activation40
>Audio volume, refer to separate Owner's
Manual
>Speed-dependent volume, refer to separate
Owner's Manual
Central locking system
The concept
The central locking system is ready for operation
whenever the driver's door is closed.
The system simultaneously engages and
releases the locks on the following:
>Doors
>Tailgate
>Fuel filler door
Operating from outside
>Via the remote control
>Via the door lock
>In cars with convenient access
*, via the door
handles on the driver's and passenger's
sides
The anti-theft system is also operated at the
same time. It prevents the doors from being
unlocked using the lock buttons or door han-
dles. The remote control can also be used to
switch on/off the welcome lamps and interior
lamps.
Operating from inside
Button for central locking system, page22.
In the event of a sufficiently severe accident, the
central locking system unlocks automatically. In
addition, the hazard warning flashers and inte-
rior lamps come on.
Opening and closing:
from outside
Using the remote control
Persons or animals in a parked vehicle
could lock the doors from the inside. Take
the key with you when you leave the vehicle so
that the vehicle can be opened from the out-
side.<
Unlocking
Press the button.
The welcome lamps and interior lamps come on.
Unlocking mode
You can also set which parts of the car are
unlocked. The setting is stored for the remote
control in use.
1.Switch on the ignition, refer to page35.
2.Briefly press the button in the turn indicator
lever repeatedly until "SET/INFO" is dis-
played.
3.Press and hold the button until the display
changes.
4.Briefly press the button repeatedly until the
symbol and "SET" are displayed.
Page 23 of 148

ReferenceAt a glance Controls Driving tips Mobility
21
8.Briefly press the button to select:
>
The hazard warning flashers light up dur-
ing unlocking/locking.
>
An acoustic signal sounds during unlock-
ing/locking.
>
The hazard warning flashers light up and
an acoustic signal sounds during unlock-
ing/locking.
>
The function is deactivated.
9.Press and hold the button until the display
changes. The setting is stored.
Switching on interior lamps
While the car is locked:
Press the button.
You can also use this function to locate your
vehicle in parking garages, etc.
Unlocking the tailgate
Press the button.
In order to avoid damage, make sure
there is sufficient clearance before open-
ing the tailgate.
A previously locked tailgate is locked again after
closing.
Before and after each trip, check that the tail-
gate has not been inadvertently unlocked.<
Malfunctions
The remote control may malfunction due to
local radio waves. If this occurs, unlock and lock
the car at the door lock with the integrated key.
If the car can no longer be locked with a remote
control, the battery in the remote control is dis-
charged. Use this remote control during an
extended drive; this will recharge the battery,
page18.
For US owners only
The transmitter and receiver units comply with
part 15 of the FCC/Federal Communications Commission regulations. Operation is governed
by the following:
FCC ID:
LX8766S
LX8766E
LX8CAS
Compliance statement:
This device complies with part 15 of the FCC
Rules. Operation is subject to the following two
conditions:
>This device must not cause harmful interfer-
ence, and
>This device must accept any interference
received, including interference that may
cause undesired operation.
Any unauthorized modifications or
changes to these devices could void the
user's authority to operate this equipment.<
Using the door lock
You can set which parts of the car are unlocked,
page19.
Convenient operation
You can operate the windows and glass sun-
roof
* via the door lock.
Hold the key in the position for unlocking or
locking.
Watch during the closing process to be
sure that no one is injured. Releasing the
key stops the operation.<
Manual operation
In the event of an electrical malfunction, the
driver's door can be unlocked or locked by turn-
Page 25 of 148

ReferenceAt a glance Controls Driving tips Mobility
23
locks the vehicle after some time if no
door has been opened.
>
The central locking system automatically
locks the vehicle as soon as you drive off.
>
The central locking system automatically
locks the vehicle after some time if no
door has been opened, or as soon as you
drive off.
>
The central locking system remains
unlocked.
9.Press and hold the button until the display
changes. The setting is stored.
Tailgate
In order to avoid damage, make sure
there is sufficient clearance before open-
ing the tailgate.<
Opening
Press the button in the handle, arrow, or the
button of the remote control, for an
extended period. The tailgate is unlocked and
can be opened.
In some national-market versions, the tail-
gate cannot be unlocked using the remote
control unless the vehicle is unlocked first.<
Opening manually
In the event of an electrical malfunction.1.Fold the rear seat bench upward.
2.Pull the ring.
The tailgate is released.
The tailgate is locked as soon as it is pressed
shut.
Closing
The handle recesses on the interior trim panel of
the tailgate make it easier to pull it down.
Make sure that the closing path of the tail-
gate is clear, otherwise injuries may
result.<
Page 26 of 148
Opening and closing
24
Alarm system prepara-
tion package*
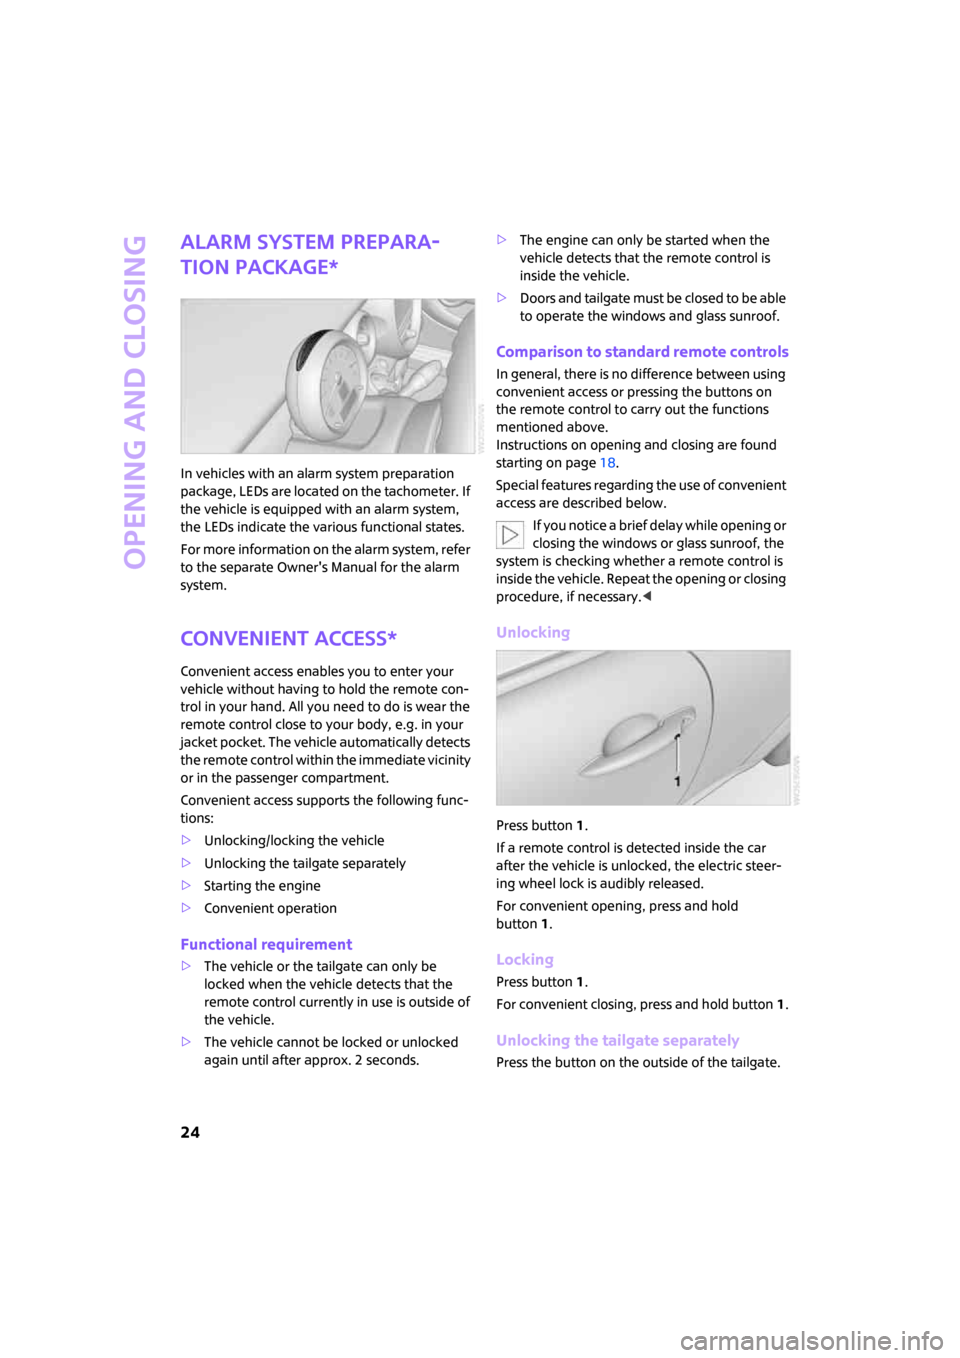
In vehicles with an alarm system preparation
package, LEDs are located on the tachometer. If
the vehicle is equipped with an alarm system,
the LEDs indicate the various functional states.
For more information on the alarm system, refer
to the separate Owner's Manual for the alarm
system.
Convenient access*
Convenient access enables you to enter your
vehicle without having to hold the remote con-
trol in your hand. All you need to do is wear the
remote control close to your body, e.g. in your
jacket pocket. The vehicle automatically detects
the remote control within the immediate vicinity
or in the passenger compartment.
Convenient access supports the following func-
tions:
>Unlocking/locking the vehicle
>Unlocking the tailgate separately
>Starting the engine
>Convenient operation
Functional requirement
>The vehicle or the tailgate can only be
locked when the vehicle detects that the
remote control currently in use is outside of
the vehicle.
>The vehicle cannot be locked or unlocked
again until after approx. 2 seconds.>The engine can only be started when the
vehicle detects that the remote control is
inside the vehicle.
>Doors and tailgate must be closed to be able
to operate the windows and glass sunroof.
Comparison to standard remote controls
In general, there is no difference between using
convenient access or pressing the buttons on
the remote control to carry out the functions
mentioned above.
Instructions on opening and closing are found
starting on page18.
Special features regarding the use of convenient
access are described below.
If you notice a brief delay while opening or
closing the windows or glass sunroof, the
system is checking whether a remote control is
inside the vehicle. Repeat the opening or closing
procedure, if necessary.<
Unlocking
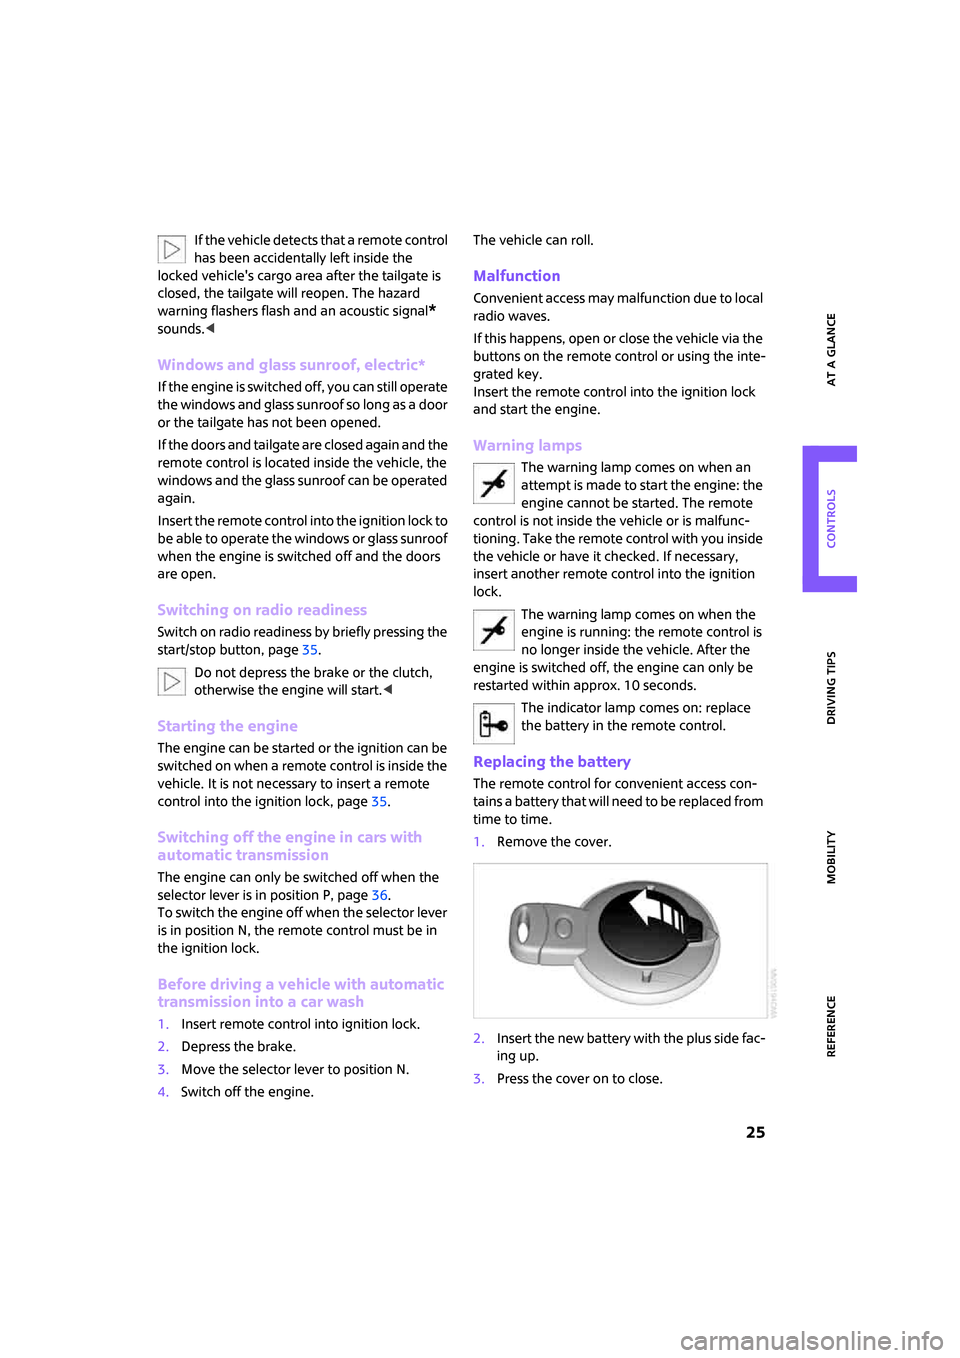
Press button 1.
If a remote control is detected inside the car
after the vehicle is unlocked, the electric steer-
ing wheel lock is audibly released.
For convenient opening, press and hold
button1.
Locking
Press button 1.
For convenient closing, press and hold button 1.
Unlocking the tailgate separately
Press the button on the outside of the tailgate.
Page 27 of 148
ReferenceAt a glance Controls Driving tips Mobility
25
If the vehicle detects that a remote control
has been accidentally left inside the
locked vehicle's cargo area after the tailgate is
closed, the tailgate will reopen. The hazard
warning flashers flash and an acoustic signal
*
sounds.<
Windows and glass sunroof, electric*
If the engine is switched off, you can still operate
the windows and glass sunroof so long as a door
or the tailgate has not been opened.
If the doors and tailgate are closed again and the
remote control is located inside the vehicle, the
windows and the glass sunroof can be operated
again.
Insert the remote control into the ignition lock to
be able to operate the windows or glass sunroof
when the engine is switched off and the doors
are open.
Switching on radio readiness
Switch on radio readiness by briefly pressing the
start/stop button, page35.
Do not depress the brake or the clutch,
otherwise the engine will start.<
Starting the engine
The engine can be started or the ignition can be
switched on when a remote control is inside the
vehicle. It is not necessary to insert a remote
control into the ignition lock, page35.
Switching off the engine in cars with
automatic transmission
The engine can only be switched off when the
selector lever is in position P, page36.
To switch the engine off when the selector lever
is in position N, the remote control must be in
the ignition lock.
Before driving a vehicle with automatic
transmission into a car wash
1.Insert remote control into ignition lock.
2.Depress the brake.
3.Move the selector lever to position N.
4.Switch off the engine.The vehicle can roll.
Malfunction
Convenient access may malfunction due to local
radio waves.
If this happens, open or close the vehicle via the
buttons on the remote control or using the inte-
grated key.
Insert the remote control into the ignition lock
and start the engine.
Warning lamps
The warning lamp comes on when an
attempt is made to start the engine: the
engine cannot be started. The remote
control is not inside the vehicle or is malfunc-
tioning. Take the remote control with you inside
the vehicle or have it checked. If necessary,
insert another remote control into the ignition
lock.
The warning lamp comes on when the
engine is running: the remote control is
no longer inside the vehicle. After the
engine is switched off, the engine can only be
restarted within approx. 10 seconds.
The indicator lamp comes on: replace
the battery in the remote control.
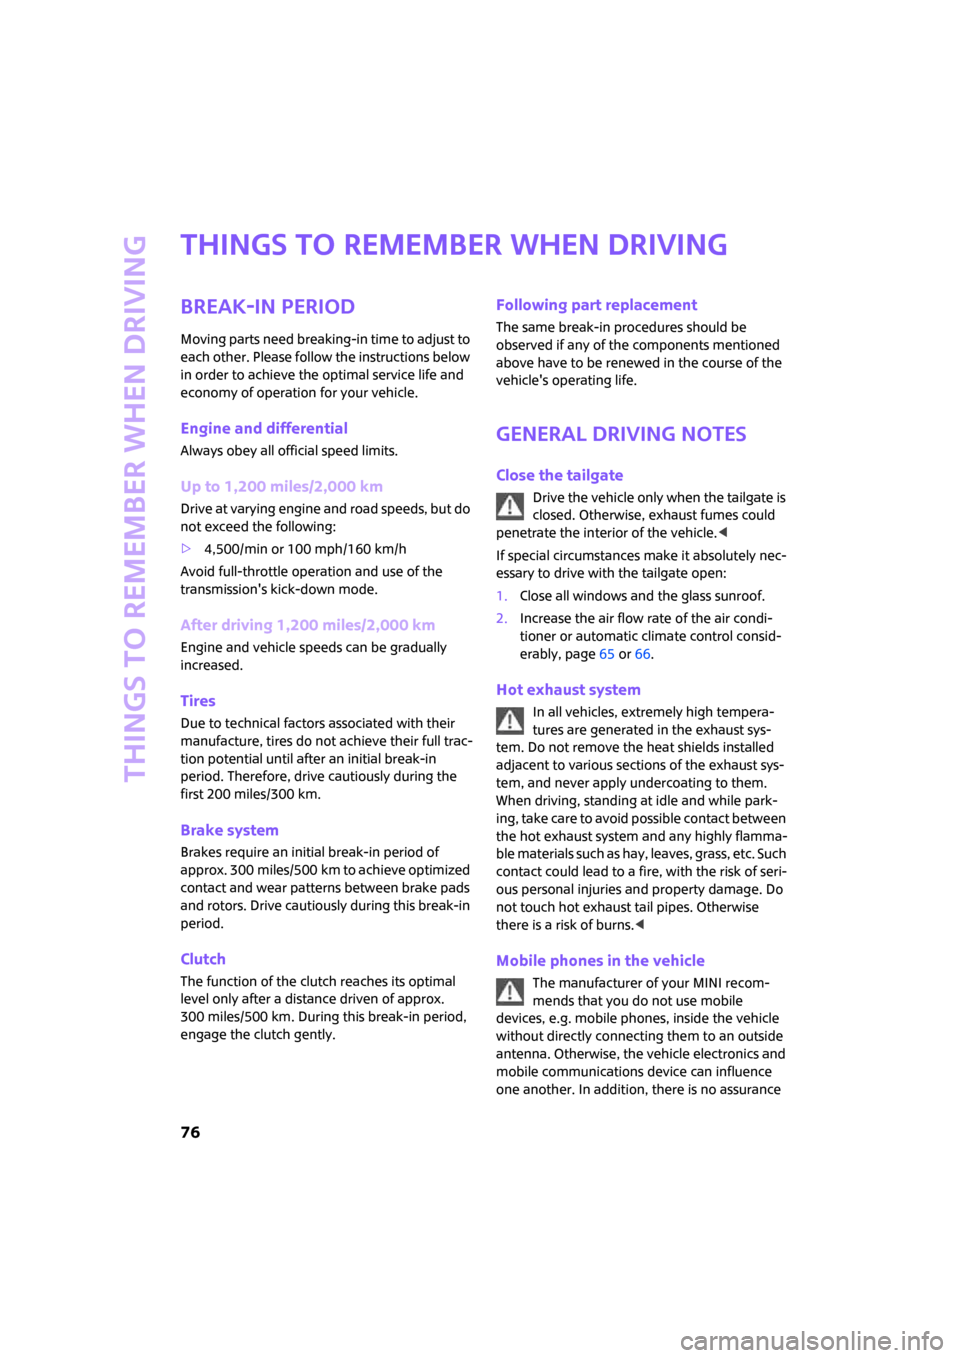
Replacing the battery
The remote control for convenient access con-
tains a battery that will need to be replaced from
time to time.
1.Remove the cover.
2.Insert the new battery with the plus side fac-
ing up.
3.Press the cover on to close.
Page 78 of 148
Things to remember when driving
76
Things to remember when driving
Break-in period
Moving parts need breaking-in time to adjust to
each other. Please follow the instructions below
in order to achieve the optimal service life and
economy of operation for your vehicle.
Engine and differential
Always obey all official speed limits.
Up to 1,200 miles/2,000 km
Drive at varying engine and road speeds, but do
not exceed the following:
>4,500/min or 100 mph/160 km/h
Avoid full-throttle operation and use of the
transmission's kick-down mode.
After driving 1,200 miles/2,000 km
Engine and vehicle speeds can be gradually
increased.
Tires
Due to technical factors associated with their
manufacture, tires do not achieve their full trac-
tion potential until after an initial break-in
period. Therefore, drive cautiously during the
first 200 miles/300 km.
Brake system
Brakes require an initial break-in period of
approx. 300 miles/500 km to achieve optimized
contact and wear patterns between brake pads
and rotors. Drive cautiously during this break-in
period.
Clutch
The function of the clutch reaches its optimal
level only after a distance driven of approx.
300 miles/500 km. During this break-in period,
engage the clutch gently.
Following part replacement
The same break-in procedures should be
observed if any of the components mentioned
above have to be renewed in the course of the
vehicle's operating life.
General driving notes
Close the tailgate
Drive the vehicle only when the tailgate is
closed. Otherwise, exhaust fumes could
penetrate the interior of the vehicle.<
If special circumstances make it absolutely nec-
essary to drive with the tailgate open:
1.Close all windows and the glass sunroof.
2.Increase the air flow rate of the air condi-
tioner or automatic climate control consid-
erably, page65 or66.
Hot exhaust system
In all vehicles, extremely high tempera-
tures are generated in the exhaust sys-
tem. Do not remove the heat shields installed
adjacent to various sections of the exhaust sys-
tem, and never apply undercoating to them.
When driving, standing at idle and while park-
ing, take care to avoid possible contact between
the hot exhaust system and any highly flamma-
ble materials such as hay, leaves, grass, etc. Such
contact could lead to a fire, with the risk of seri-
ous personal injuries and property damage. Do
not touch hot exhaust tail pipes. Otherwise
there is a risk of burns.<
Mobile phones in the vehicle
The manufacturer of your MINI recom-
mends that you do not use mobile
devices, e.g. mobile phones, inside the vehicle
without directly connecting them to an outside
antenna. Otherwise, the vehicle electronics and
mobile communications device can influence
one another. In addition, there is no assurance
Page 80 of 148
Things to remember when driving
78
vehicle. Traces of condensed water under the
vehicle are therefore normal.
In the Cooper S, the coolant pump may continue
to run for some time after the engine is switched
off. This will generate noise in the engine com-
partment.
Before driving into a car wash
For general information about vehicle care for
your MINI, refer to the chapter beginning on
page100.
With convenient access and automatic
transmission
Insert the key into the ignition lock.
The engine can be switched off when the selec-
tor lever is in position N. Refer also to page25.
Cargo loading
To avoid loading the tires beyond their
approved carrying capacity, never over-
load the vehicle. Overloading can lead to over-
heating and increases the rate at which damage
develops inside the tires. The ultimate result can
assume the form of a sudden blow-out.<
Cargo area cover
When the tailgate is opened, the cargo area
cover is raised.
Do not place any objects on the cover,
otherwise they could endanger the car's
occupants, e.g. in the case of braking or sudden
swerving.<
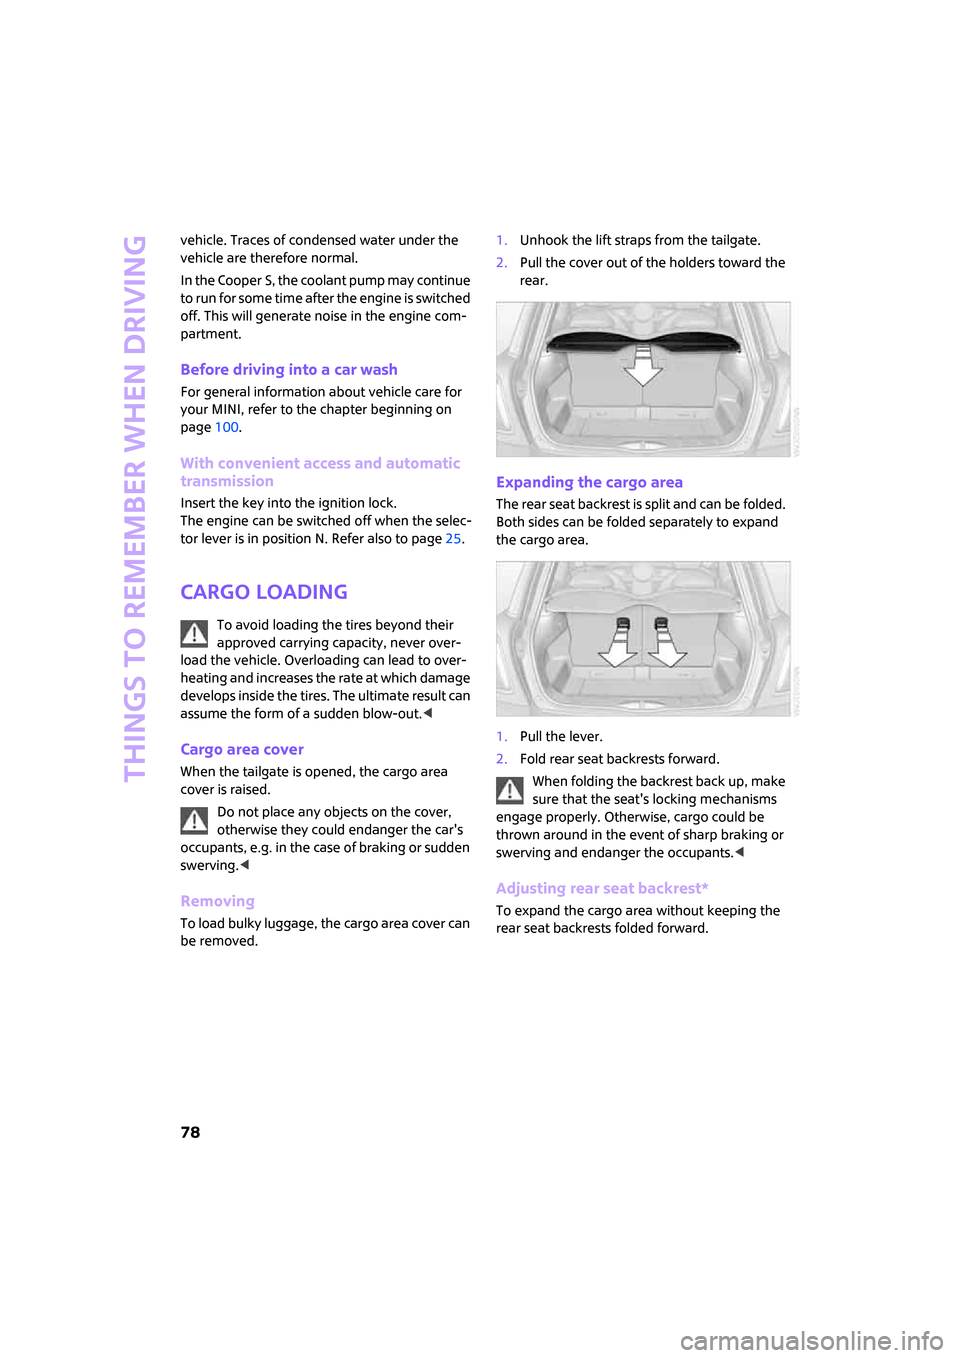
Removing
To load bulky luggage, the cargo area cover can
be removed.1.Unhook the lift straps from the tailgate.
2.Pull the cover out of the holders toward the
rear.
Expanding the cargo area
The rear seat backrest is split and can be folded.
Both sides can be folded separately to expand
the cargo area.
1.Pull the lever.
2.Fold rear seat backrests forward.
When folding the backrest back up, make
sure that the seat's locking mechanisms
engage properly. Otherwise, cargo could be
thrown around in the event of sharp braking or
swerving and endanger the occupants.<
Adjusting rear seat backrest*
To expand the cargo area without keeping the
rear seat backrests folded forward.
Page 82 of 148
Things to remember when driving
80
>For very heavy cargo when the rear seat is
not occupied, secure each safety belt in the
respective opposite buckle.
Securing cargo
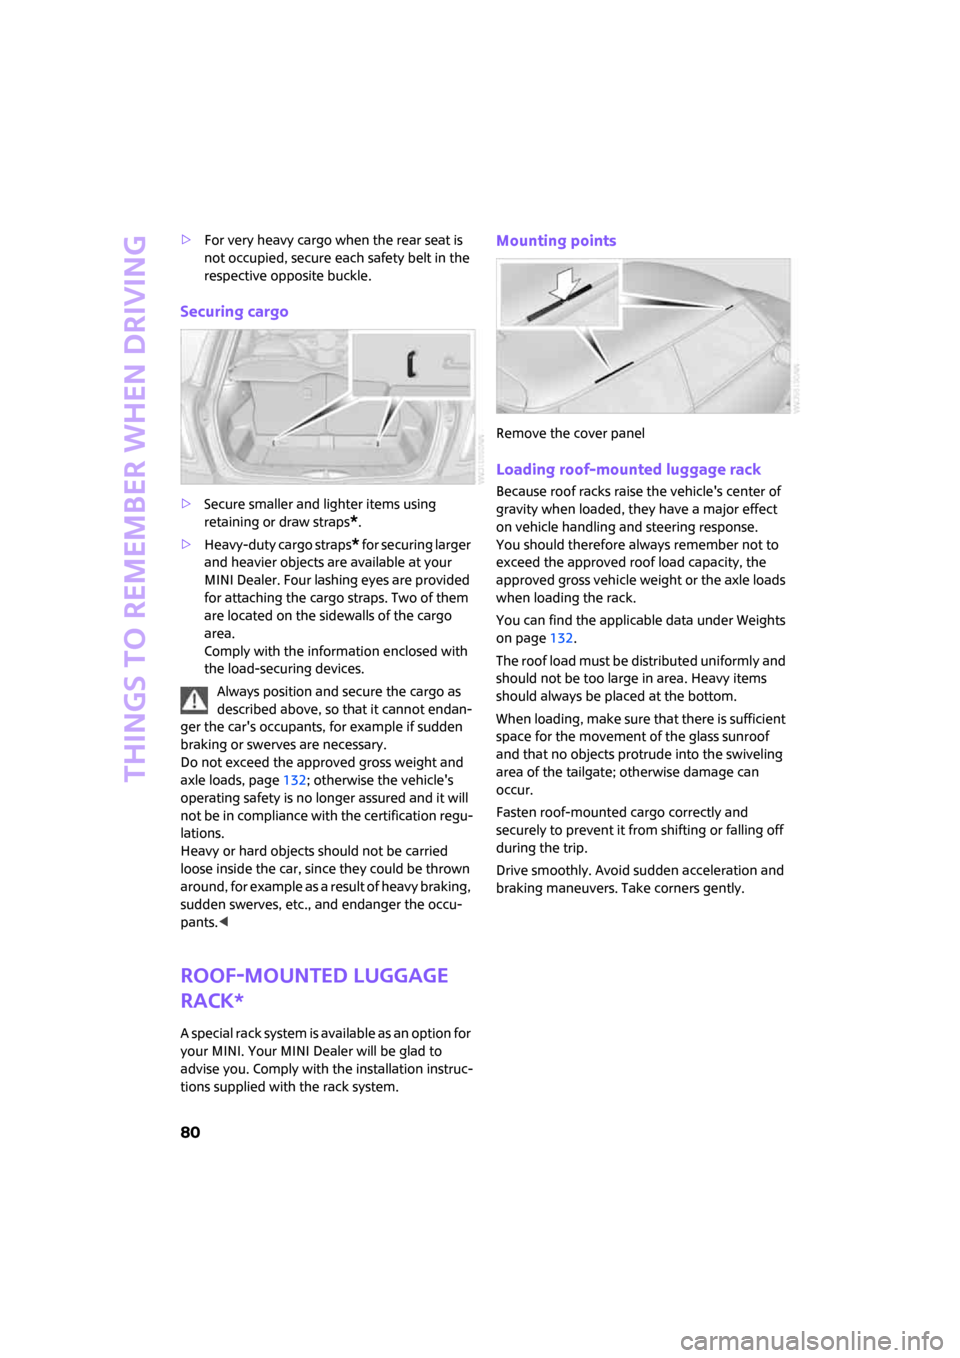
>Secure smaller and lighter items using
retaining or draw straps
*.
>Heavy-duty cargo straps
* for securing larger
and heavier objects are available at your
MINI Dealer. Four lashing eyes are provided
for attaching the cargo straps. Two of them
are located on the sidewalls of the cargo
area.
Comply with the information enclosed with
the load-securing devices.
Always position and secure the cargo as
described above, so that it cannot endan-
ger the car's occupants, for example if sudden
braking or swerves are necessary.
Do not exceed the approved gross weight and
axle loads, page132; otherwise the vehicle's
operating safety is no longer assured and it will
not be in compliance with the certification regu-
lations.
Heavy or hard objects should not be carried
loose inside the car, since they could be thrown
around, for example as a result of heavy braking,
sudden swerves, etc., and endanger the occu-
pants.<
Roof-mounted luggage
rack*
A special rack system is available as an option for
your MINI. Your MINI Dealer will be glad to
advise you. Comply with the installation instruc-
tions supplied with the rack system.
Mounting points
Remove the cover panel
Loading roof-mounted luggage rack
Because roof racks raise the vehicle's center of
gravity when loaded, they have a major effect
on vehicle handling and steering response.
You should therefore always remember not to
exceed the approved roof load capacity, the
approved gross vehicle weight or the axle loads
when loading the rack.
You can find the applicable data under Weights
on page132.
The roof load must be distributed uniformly and
should not be too large in area. Heavy items
should always be placed at the bottom.
When loading, make sure that there is sufficient
space for the movement of the glass sunroof
and that no objects protrude into the swiveling
area of the tailgate; otherwise damage can
occur.
Fasten roof-mounted cargo correctly and
securely to prevent it from shifting or falling off
during the trip.
Drive smoothly. Avoid sudden acceleration and
braking maneuvers. Take corners gently.
Page 114 of 148
Giving and receiving assistance
112
Giving and receiving assistance
Roadside Assistance
The Roadside Assistance service is there to assist
you around the clock in the event of a break-
down, including on weekends and public holi-
days.
The phone numbers of the Roadside Assistance
in your home country can be found in the Con-
tact brochure.
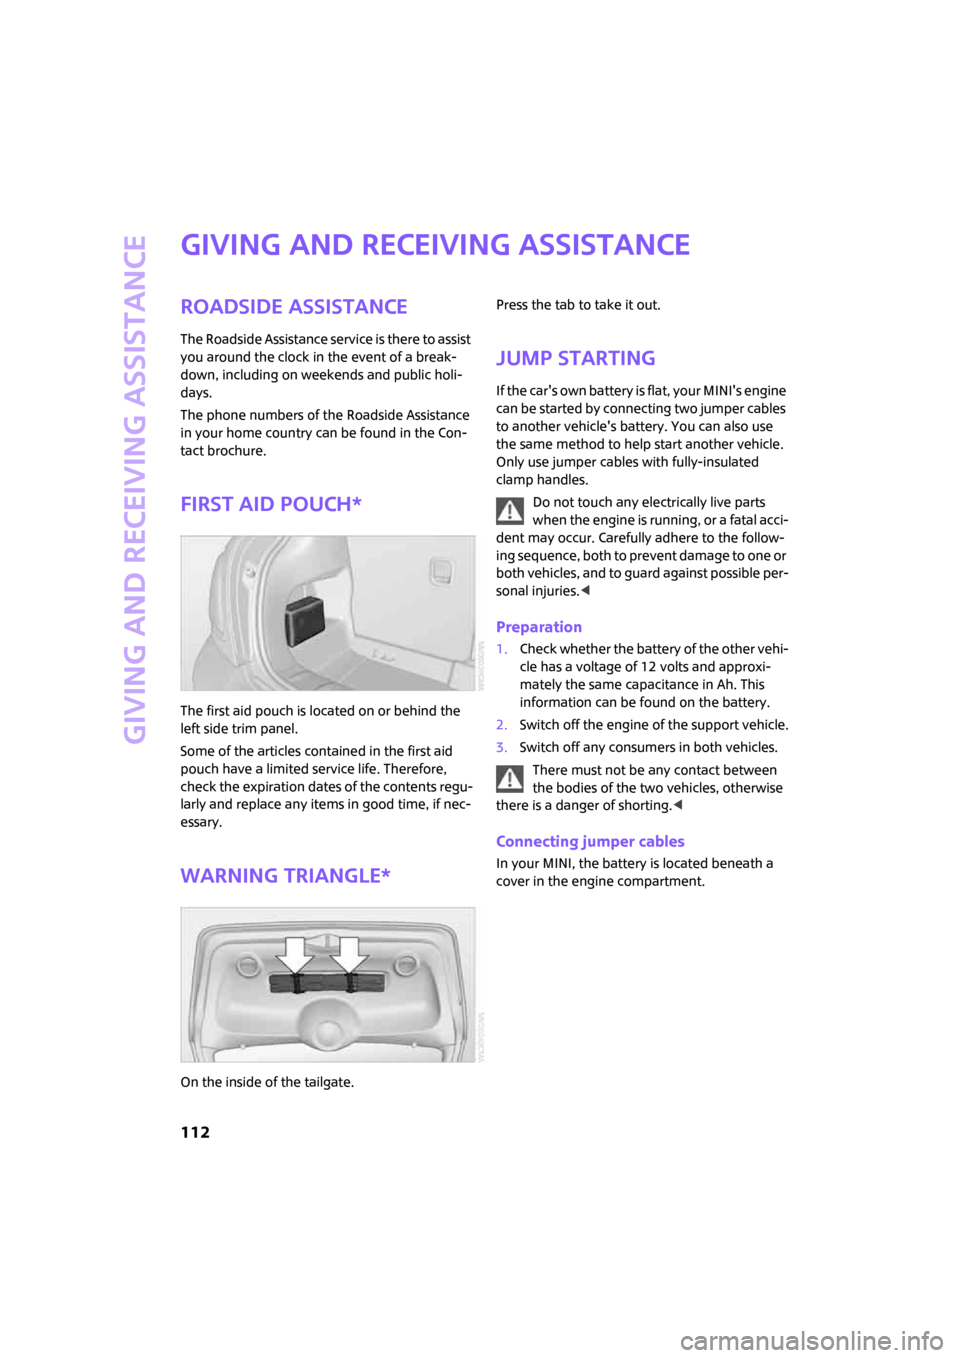
First aid pouch*
The first aid pouch is located on or behind the
left side trim panel.
Some of the articles contained in the first aid
pouch have a limited service life. Therefore,
check the expiration dates of the contents regu-
larly and replace any items in good time, if nec-
essary.
Warning triangle*
On the inside of the tailgate.Press the tab to take it out.
Jump starting
If the car's own battery is flat, your MINI's engine
can be started by connecting two jumper cables
to another vehicle's battery. You can also use
the same method to help start another vehicle.
Only use jumper cables with fully-insulated
clamp handles.
Do not touch any electrically live parts
when the engine is running, or a fatal acci-
dent may occur. Carefully adhere to the follow-
ing sequence, both to prevent damage to one or
both vehicles, and to guard against possible per-
sonal injuries.<
Preparation
1.Check whether the battery of the other vehi-
cle has a voltage of 12 volts and approxi-
mately the same capacitance in Ah. This
information can be found on the battery.
2.Switch off the engine of the support vehicle.
3.Switch off any consumers in both vehicles.
There must not be any contact between
the bodies of the two vehicles, otherwise
there is a danger of shorting.<
Connecting jumper cables
In your MINI, the battery is located beneath a
cover in the engine compartment.
Page 119 of 148
ReferenceAt a glance Controls Driving tips Mobility
117
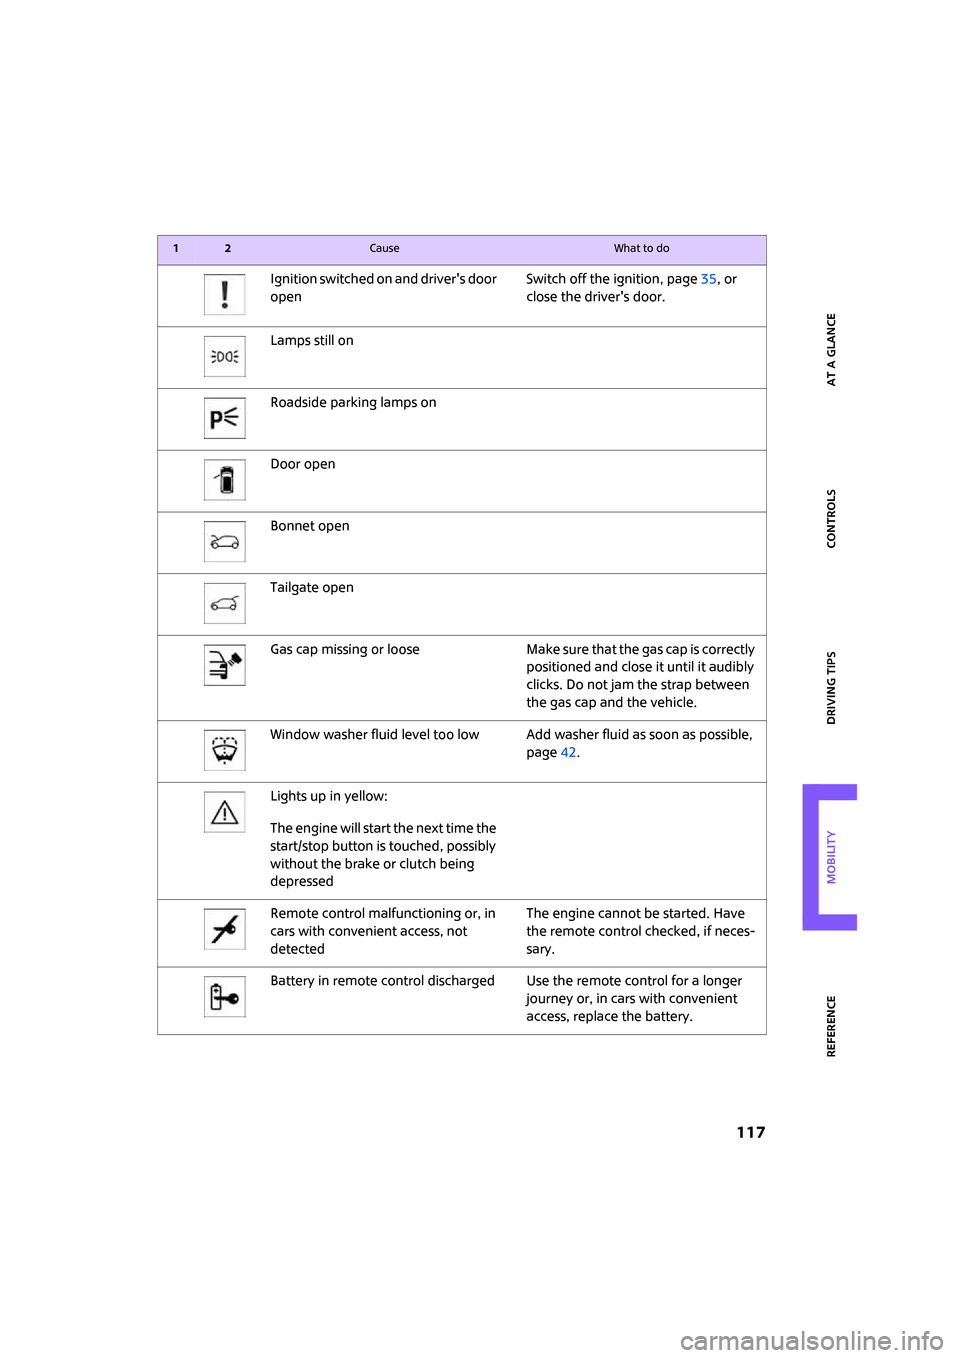
Ignition switched on and driver's door
openSwitch off the ignition, page35, or
close the driver's door.
Lamps still on
Roadside parking lamps on
Door open
Bonnet open
Tailgate open
Gas cap missing or loose Make sure that the gas cap is correctly
positioned and close it until it audibly
clicks. Do not jam the strap between
the gas cap and the vehicle.
Window washer fluid level too low Add washer fluid as soon as possible,
page42.
Lights up in yellow:
The engine will start the next time the
start/stop button is touched, possibly
without the brake or clutch being
depressed
Remote control malfunctioning or, in
cars with convenient access, not
detectedThe engine cannot be started. Have
the remote control checked, if neces-
sary.
Battery in remote control discharged Use the remote control for a longer
journey or, in cars with convenient
access, replace the battery.
12Cause What to do