length MINI Hardtop 2 Door 2010 Owner's Manual (Mini Connected)
[x] Cancel search | Manufacturer: MINI, Model Year: 2010, Model line: Hardtop 2 Door, Model: MINI Hardtop 2 Door 2010Pages: 230, PDF Size: 4.02 MB
Page 53 of 230

MOBILITYAT A GLANCE CONTROLS DRIVING TIPS ENTERTAINMENT
51
NAVIGATION REFERENCE
Driving
Ignition lock
Inserting the key into the ignition lock
Insert the key all the way into the ignition lock.
Radio readiness
Individual electrical consumers can operate.
Removing the key from the ignition lock
Press in the key briefly. It is ejected slightly.
At the same time:
>The ignition is switched off if it was on
beforehand.
Automatic transmission
You cannot take out the key unless the selector
lever is in the P position: interlock.
Start/stop button
Press the start/stop button to switch radio readi-
ness or the ignition on and off. Do not depress
the brake or clutch while doing so.When you press the start/stop button and
depress the clutch if the car has manual
transmission or the brake if the car has auto-
matic transmission, the engine starts.<
Radio readiness
Individual electrical consumers can operate. The
time and outside temperature are displayed in
the tachometer.
Radio readiness is switched off automatically:
>When the key is removed from the
ignition lock
>When using Comfort Access
* by pushing the
button on the door handle or the but-
ton on the remote control, refer to Locking
on page34
>After a certain has elapsed
Ignition on
Most indicator and warning lamps in indicator
area 1, page13, light up for varying lengths
of time.
When the engine is off, switch off the igni-
tion and any unnecessary electrical con-
sumers in order to preserve the battery.<
Radio readiness and ignition off
All indicator and warning lamps in the displays
go out.
The ignition automatically turns off
* when the
driver's door is opened. Pressing the start/stop
button again switches the ignition back on.
The ignition is not switched off in situations such
as the following:
>The clutch or brake is depressed
>The low beams are switched on
Page 77 of 230
MOBILITYAT A GLANCE CONTROLS DRIVING TIPS ENTERTAINMENT
75
NAVIGATION REFERENCE
Technology for driving comfort and
safety
Park Distance
Control PDC*
The concept
PDC assists you with parking backwards. Acous-
tic signals and a visual indicator
warn you of the
presence of an object behind the vehicle. To
measure the distance, there are four ultrasonic
sensors in either bumper.
These sensors have a range of approx. 6.5 ft/
2 m. However, an acoustic warning does not
sound until an object is approx. 24 in/60 cm
from the rear corner sensors, or approx. 5 ft/
1.50 m from the rear center sensors.
PDC is a parking aid that can indicate
objects when they are approached slowly,
as is usually the case when parking. Avoid
approaching an object at high speed; otherwise,
physical circumstances may lead to the system
warning being issued too late.<
Automatic mode
With the engine running or the ignition switched
on, the system is activated automatically after
approx. 1 second when you engage reverse gear
or move the automatic transmission selector
lever to position R. Wait this short period before
driving.
Acoustic signals
As the distance between vehicle and object
decreases, the intervals between the tones
become shorter. If the distance to the nearest
object falls to below roughly 1 ft/30 cm, then a
continuous tone sounds.
If the distance remains constant, e.g. when driv-
ing parallel to a wall, the acoustic signal stops
after approx. 3 seconds.
Malfunction
Indicator lamp comes on: PDC is mal-
functioning. A message appears on the
Control Display. Have the system
checked.
To avoid this problem, keep the sensors clean
and free of ice or snow in order to ensure that
they will continue to operate effectively. When
using a high-pressure cleaner, do not direct the
jet toward the sensors for lengthy periods and
only spray from a distance of at least 4 in/10 cm.
PDC with visual warning
To have the system show distances to objects on
the Control Display. The contours of distant
objects are shown on the Control Display even
before the acoustic signal sounds.
Onboard monitor, for operating principle refer
to page16.
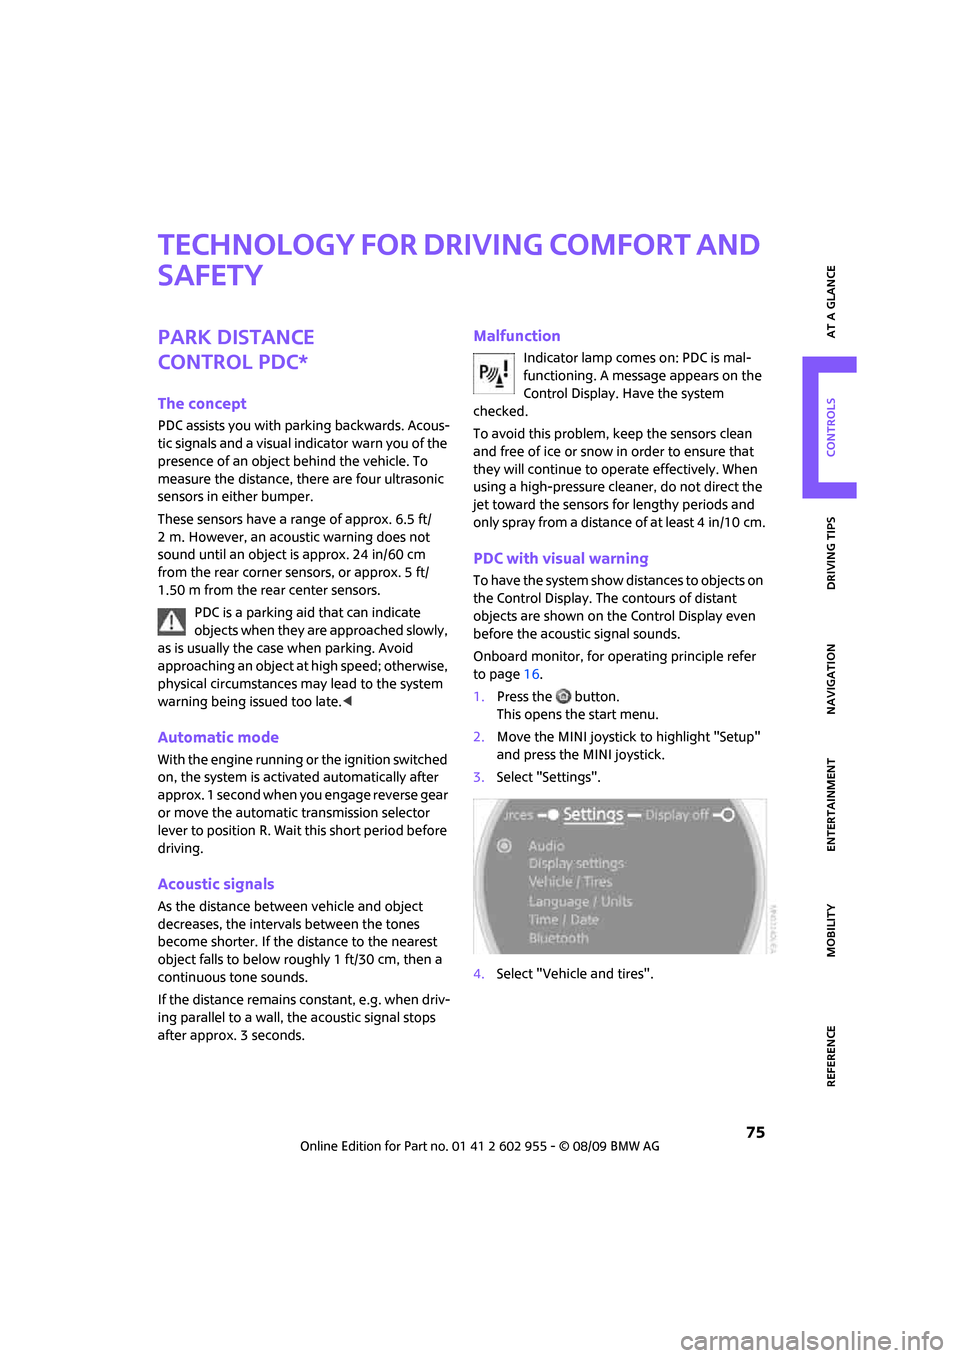
1.Press the button.
This opens the start menu.
2.Move the MINI joystick to highlight "Setup"
and press the MINI joystick.
3.Select "Settings".
4.Select "Vehicle and tires".
Page 81 of 230

MOBILITYAT A GLANCE CONTROLS DRIVING TIPS ENTERTAINMENT
79
NAVIGATION REFERENCE
System limitations
The Flat Tire Monitor is unable to warn the driver
of sudden, severe tire damage caused by exter-
nal factors, nor can it identify the gradual loss of
pressure that will inevitably occur in all four tires
over a lengthy period of time.
In the following situations, the system could be
delayed or malfunction:
>System has not been initialized
>Driving on snowy or slippery road surface
>Performance-oriented style of driving: slip in
the drive wheels, high lateral acceleration
>Snow chains are attached
When the vehicle is driven with a space-saver
spare tire
*, page193, the Flat Tire Monitor can-
not function.
Initializing the system
The initialization is completed during driv-
ing, which can be interrupted at any time.
When driving resumes, the initialization is con-
tinued automatically.
Do not initialize the system if you are driving
with snow chains or a space-saver spare tire
*.<
Using the onboard monitor
Onboard monitor, for operating principle refer
to page16.
1.Press the button.
This opens the start menu.
2.Move the MINI joystick to highlight "Setup"
and press the MINI joystick.
3.Select "Settings".
4.Select "Vehicle and tires".5.If necessary, move the highlight marker to
the uppermost field. Select "FTM".
6.Start the engine, but do not start driving.
7.Select "Reset".
8.Select "Yes".
9.Start driving.
The initialization is completed during
driving.
Indication of a flat tire
The warning lamps come on in yellow
and red. A message appears on the
Control Display. An acoustic signal also
sounds. There is a flat tire or substantial
loss of tire pressure.
1.Reduce speed and stop the vehicle with cau-
tion. Avoid sudden braking and steering
maneuvers.
2.Check whether your vehicle is equipped
with normal tires or run-flat tires.
The symbol identifying run-flat tires is
a circle with the letters RSC on the
sidewall, refer to run-flat tires, page174.<
Page 110 of 230
Things to remember when driving
108
You can find the applicable data under Weights
on page 205.
Saving fuel
Fuel consumption depends on a number of dif-
ferent factors. The implementation of certain
measures, your driving style and regular mainte-
nance can have an influence on fuel consump-
tion and on the environmental impact.
Remove unnecessary cargo
Additional weight increases fuel consumption.
Remove attached parts no longer in use
Remove auxiliary mirrors, roof- or rear-mounted
luggage racks whenever you are not using
them.
Attached parts on the vehicle affect its aerody-
namics and increase fuel consumption.
Check tire inflation pressure regularly
Check and, if necessary, correct tire inflation
pressure at least twice a month and before start-
ing on a long trip.
Low inflation pressure increases rolling resis-
tance and thus leads to greater fuel consump-
tion and tire wear.
Drive off immediately
Do no t wa it for t he eng ine to warm u p wh ile the
vehicle remains stationary. Start driving right
away, but at moderate engine speeds. This is the
fastest way for the cold engine to reach its oper-
ating temperature.
Think ahead while driving
Avoid unnecessary acceleration and braking by
maintaining a suitable distance to the vehicle
driving ahead.
Driving smoothly and anticipating impending
traffic situations reduces fuel consumption.
Avoid high engine speeds
Use first gear only for driving off. In second and
higher gears, accelerate smoothly to a suitable
engine and road speed. In doing so, avoid high
engine speeds and shift up early.
When you reach your desired traveling speed,
shift to the highest suitable gear and drive at
constant speed.
As a rule: driving at low engine speeds lowers
fuel consumption and reduces wear.
Coasting
When approaching a red traffic light, take your
foot off the accelerator and let the vehicle coast
to a halt in the highest suitable gear.
On a downhill gradient, take your foot off
the accelerator and let the vehicle coast in a
suitable gear.
Fuel supply is shut off automatically when the
vehicle is coasting.
Switch off the engine during lengthy
stops
Switch off the engine when stopping for lengthy
periods, e.g. at traffic lights, railroad crossings or
in traffic congestions.
Have the vehicle serviced
Have your vehicle serviced regularly to achieve
good economy and a long vehicle life. The man-
ufacturer of your MINI recommends having the
vehicle serviced by a MINI dealer. Also note the
MINI Maintenance System, page179.
Page 132 of 230
Destination guidance
130
This volume is independent of the volume of the
audio sources.
The setting is stored for the remote control cur-
rently in use.
Changing a route
Taking detours
During destination guidance, you can revise the
navigation system's route recommendations to
avoid particular stretches of road. Enter the
number of miles/kilometers that you want to
travel before returning to the original route.
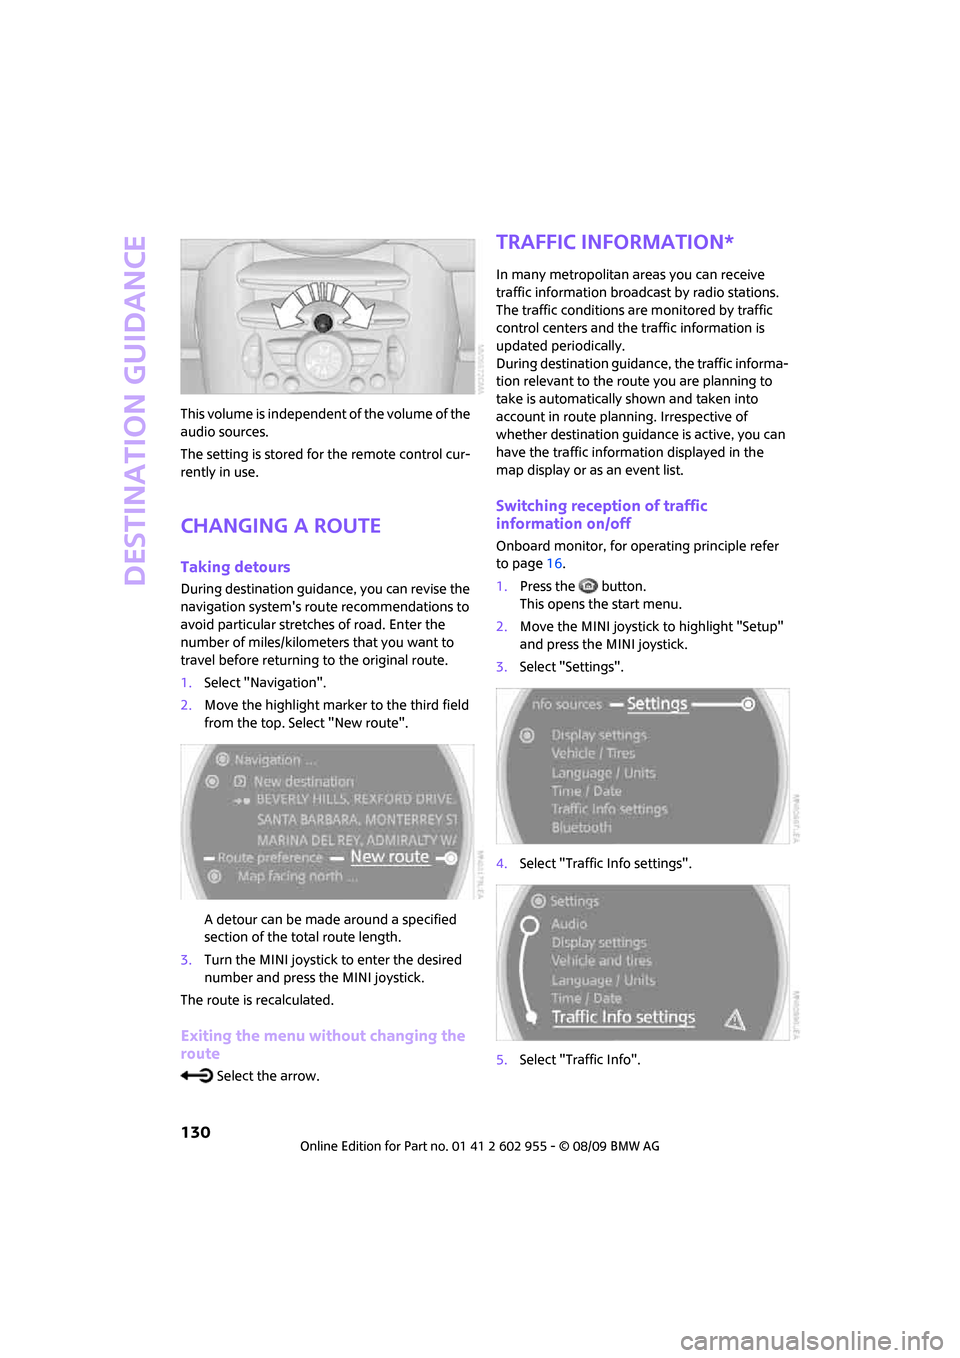
1.Select "Navigation".
2.Move the highlight marker to the third field
from the top. Select "New route".
A detour can be made around a specified
section of the total route length.
3.Turn the MINI joystick to enter the desired
number and press the MINI joystick.
The route is recalculated.
Exiting the menu without changing the
route
Select the arrow.
Traffic information*
In many metropolitan areas you can receive
traffic information broadcast by radio stations.
The traffic conditions are monitored by traffic
control centers and the traffic information is
updated periodically.
During destination guidance, the traffic informa-
tion relevant to the route you are planning to
take is automatically shown and taken into
account in route planning. Irrespective of
whether destination guidance is active, you can
have the traffic information displayed in the
map display or as an event list.
Switching reception of traffic
information on/off
Onboard monitor, for operating principle refer
to page16.
1.Press the button.
This opens the start menu.
2.Move the MINI joystick to highlight "Setup"
and press the MINI joystick.
3.Select "Settings".
4.Select "Traffic Info settings".
5.Select "Traffic Info".
Page 136 of 230
Destination guidance
134
Traffic information during destination
guidance
System response will vary depending on
whether or not "Dynamic route" is selected,
refer to page124.
Displaying traffic obstructions
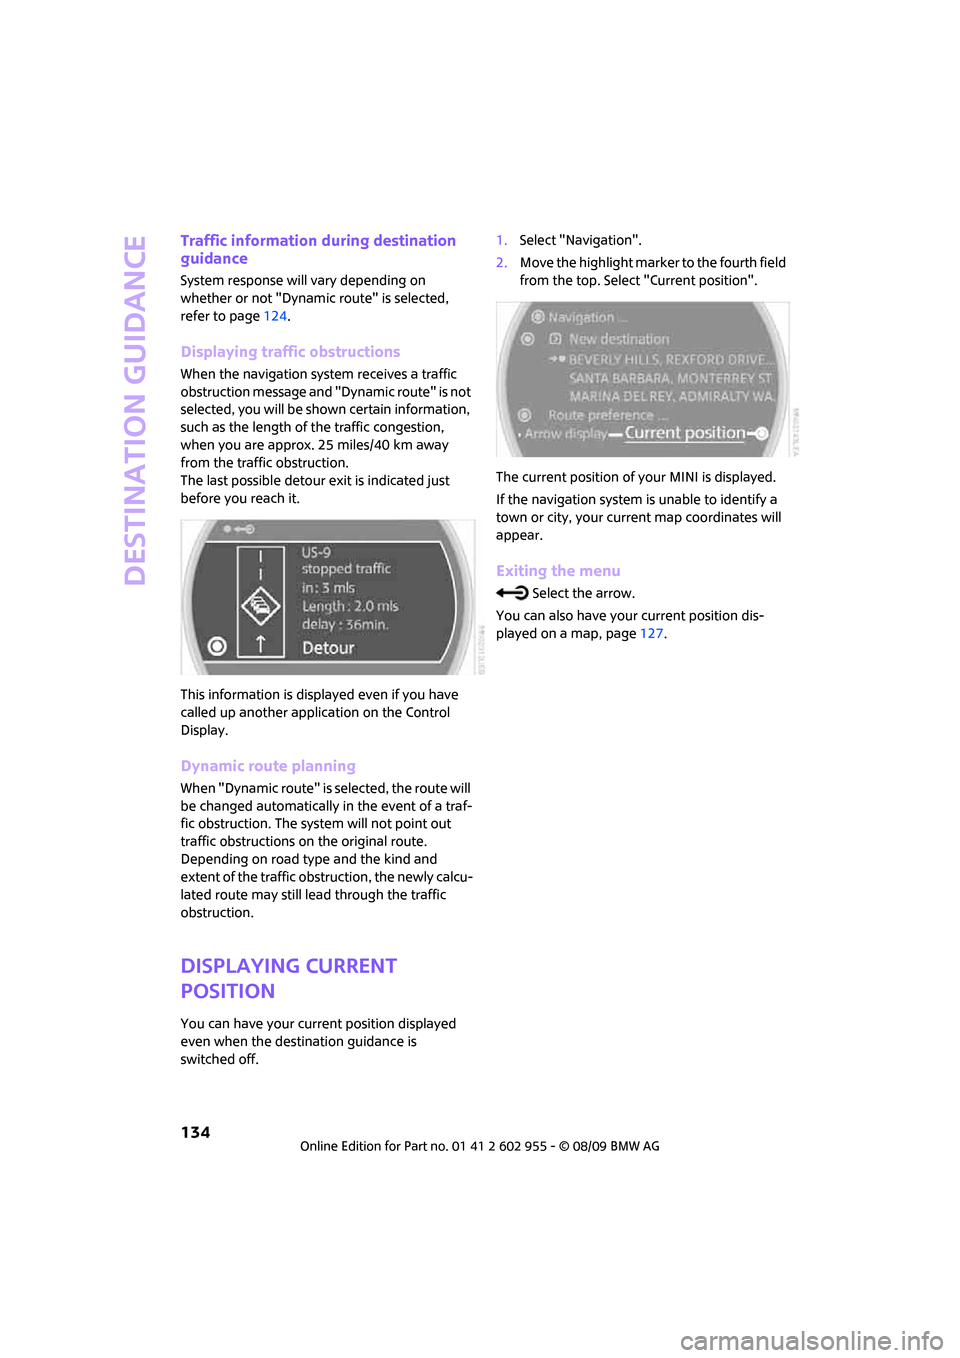
When the navigation system receives a traffic
obstruction message and "Dynamic route" is not
selected, you will be shown certain information,
such as the length of the traffic congestion,
when you are approx. 25 miles/40 km away
from the traffic obstruction.
The last possible detour exit is indicated just
before you reach it.
This information is displayed even if you have
called up another application on the Control
Display.
Dynamic route planning
When "Dynamic route" is selected, the route will
be changed automatically in the event of a traf-
fic obstruction. The system will not point out
traffic obstructions on the original route.
Depending on road type and the kind and
extent of the traffic obstruction, the newly calcu-
lated route may still lead through the traffic
obstruction.
Displaying current
position
You can have your current position displayed
even when the destination guidance is
switched off.1.Select "Navigation".
2.Move the highlight marker to the fourth field
from the top. Select "Current position".
The current position of your MINI is displayed.
If the navigation system is unable to identify a
town or city, your current map coordinates will
appear.
Exiting the menu
Select the arrow.
You can also have your current position dis-
played on a map, page127.
Page 220 of 230
From A to Z
218
Information
– on another location120
– on country120
– on current position120
– on destination location120
"Information" in
navigation120
"Information on
destination"121
Initializing
– Flat Tire Monitor FTM79
– glass sunroof, electric36
Installation location
– drive for navigation DVD and
audio CD112
Instructions for navigation
system, refer to Voice
instructions129
Instrument cluster, refer to
Displays12
Instrument lighting89
Instrument panel, refer to
Cockpit10
Instrument panel, refer to
Displays12
Integrated key26
Integrated universal remote
control94
Interesting destination for
navigation120
"Interim time"73
Interior lamps89
– remote control29
Interior rearview mirror46
– automatic dimming
feature47
Interlock53
Intermittent mode of the
wipers56
Internet page4
J
Jacking points194
Jets, refer to Window washer
nozzles57Joystick, refer to Onboard
monitor16
Jumpering, refer to Jump-
starting196
Jump-starting196
K
Key Memory, refer to Personal
Profile26
Key, refer to Keys/remote
controls26
Keyless go, refer to Comfort
Access33
Keyless opening and closing,
refer to Comfort Access33
Kickdown54
– automatic transmission with
Steptronic54
Knock control163
L
Lamps and bulbs, replacing
bulbs185
Lamps, refer to Parking lamps/
Low beams87
"Language" in navigation129
"Languages" in
navigation112
Lashing eyes, refer to Securing
cargo106
Last destinations, refer to
Destination list121
LATCH child-restraint fixing
system49
Leather care183
LEDs light-emitting diodes186
Length, refer to
Dimensions203
License plate lamp
– bulb replacement189
Light switch87
Light-alloy wheels, care183
Light-emitting diodes
LEDs186Lighter97
– socket98
"Lighting"88
Lighting
– lamps and bulbs185
– of the instruments89
– of vehicle, refer to Lamps87
"Limit"73
Limit, refer to Speed limit72
Load105
Load securing equipment,
refer to Securing cargo106
Lock buttons of doors, refer to
Locking30
Locking
– adjusting confirmation
signal28
– from inside30
– from outside28
– without remote control, refer
to Comfort Access33
Locking and unlocking doors
– confirmation signals28
– from inside30
– from outside27
Low beams87
– automatic87
– replacing bulb186
Lower back support, refer to
Lumbar support43
Luggage compartment
– emergency operation, refer
to Manual release31
– increasing the capacity105
– opening from the inside31
Luggage compartment lid
– emergency operation, refer
to Manual release31
Luggage compartment lid,
refer to Tailgate31
Luggage compartment, refer
to Cargo bay31
Luggage rack, refer to Roof-
mounted luggage rack107
Lumbar support43