ABS MINI Hardtop 2 Door 2010 Owner's Manual
[x] Cancel search | Manufacturer: MINI, Model Year: 2010, Model line: Hardtop 2 Door, Model: MINI Hardtop 2 Door 2010Pages: 174, PDF Size: 2.96 MB
Page 34 of 174
Opening and closing
32
Interruption
A convertible top which is not completely
open or closed is hazardous.<
The automatic movement is immediately inter-
rupted when the button for the convertible top
operation is released. The procedure can be
continued in the desired direction by pressing
the appropriate button.
If the opening or closing procedure is inter-
rupted by releasing the respective button, the
convertible top stays in its current position for
several seconds before it slowly moves into a
more stable position. The procedure can be con-
tinued by pressing the appropriate button.
The opening and closing procedure is also inter-
rupted in case of a mechanical blockage. In this
case, in order to operate the convertible top
again:
1.Turn off the ignition and then switch it on
again.
2.Press the button to continue the procedure
in the desired direction.
Opening and closing procedure
Do not interrupt and restart the closing
procedure several times one after
another, or the convertible top mechanism
could be damaged.<
If the convertible top can be moved in only
one direction after several consecutive
attempts to operate it, the convertible top sys-
tem has overheated. Allow the system to cool
down for approx. 4 minutes.<
If the battery was disconnected, e.g. for
changing batteries or vehicle storage,
reinitialize the power windows, refer to page29.
Otherwise, the windows cannot be lowered or
the convertible top cannot be opened.<
Convenient operation
For convenient operation using the remote con-
trol, refer to page19; for operation via the door
lock, refer to page22.
Manual closing in the event of an
electrical malfunction
Only close the convertible top manually if
it is absolutely necessary. Never open it
manually. Improper handling of the convertible
top can result in damage. The closing procedure
must be completely finished. Otherwise, dam-
age or injury could result.<
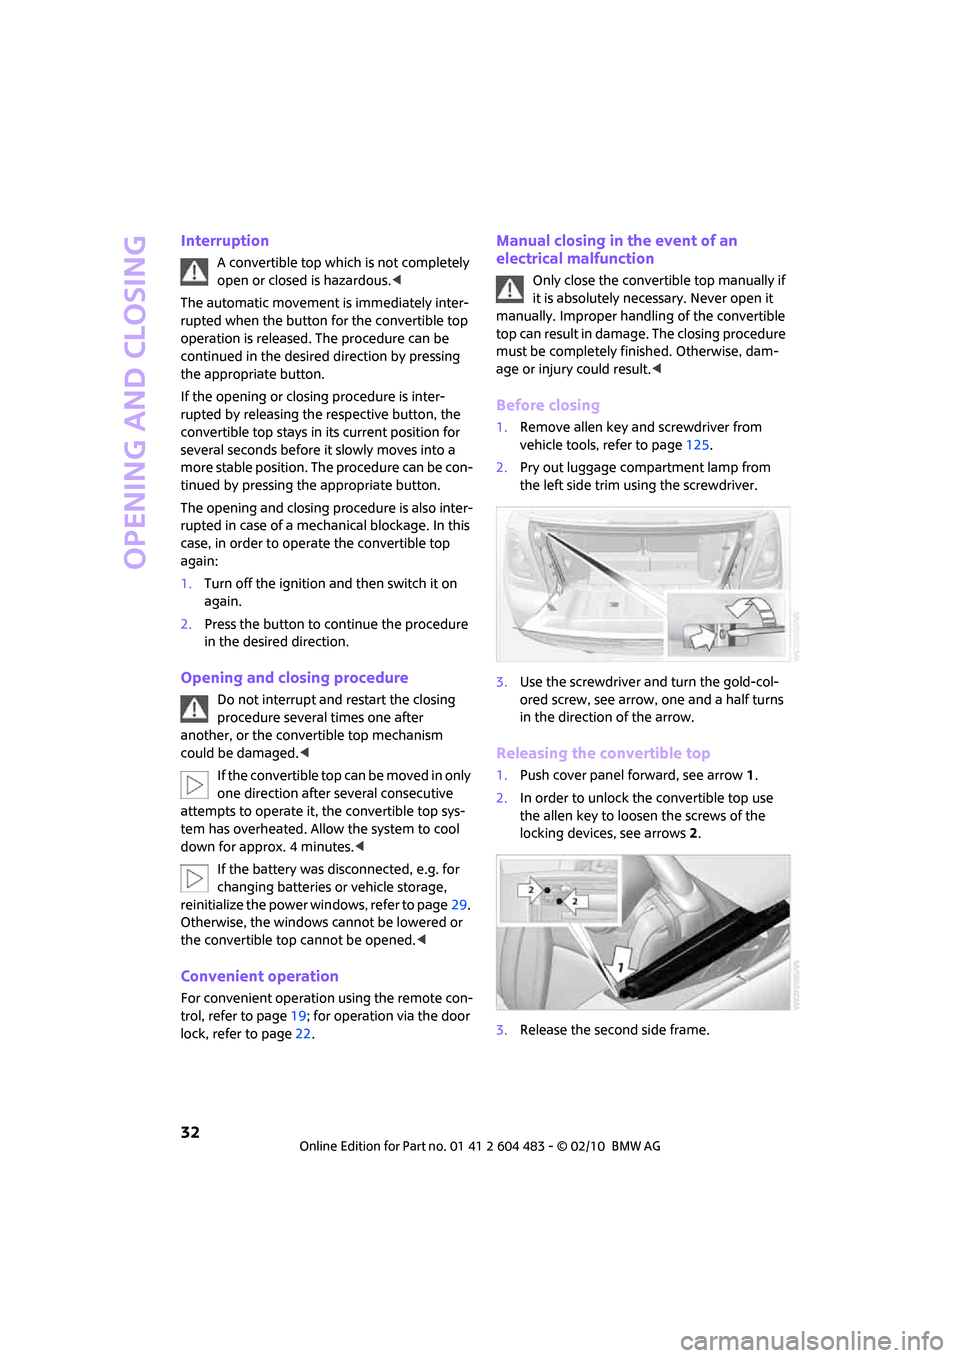
Before closing
1.Remove allen key and screwdriver from
vehicle tools, refer to page125.
2.Pry out luggage compartment lamp from
the left side trim using the screwdriver.
3.Use the screwdriver and turn the gold-col-
ored screw, see arrow, one and a half turns
in the direction of the arrow.
Releasing the convertible top
1.Push cover panel forward, see arrow1.
2.In order to unlock the convertible top use
the allen key to loosen the screws of the
locking devices, see arrows 2.
3.Release the second side frame.
Page 66 of 174
Technology for driving comfort and safety
64
Antilock Brake System ABS
ABS prevents locking of the wheels during brak-
ing. Safe steering response is maintained even
during full braking. Active safety is thus
increased.
Braking safely, refer to page93.
Among others, ABS includes the following func-
tions:
>Cornering Brake Control CBC
>Electronic brake-force distribution EBV
>Brake Assist
Cornering Brake Control CBC
Driving stability and steering characteristics are
further enhanced while braking in turns or dur-
ing a lane change.
Electronic brake-force distribution EBV
The system controls the brake pressure in the
rear wheels to ensure stable braking behavior.
Brake Assist
Rapidly depressing the brake causes this system
to automatically develop maximum braking
force. Thus, the system helps keep braking dis-
tance to a minimum. At the same time, all the
benefits provided by ABS are exploited.
Do not reduce the pressure on the brake for the
duration of the full braking application.
Dynamic Stability Control DSC
DSC prevents the driving wheels from losing
traction when you pull away from rest or accel-
erate. The system also recognizes unstable driv-
ing conditions, for example if the rear of the car
is about to swerve or if momentum is acting at
an angle past the front wheels. In these cases,
DSC helps the vehicle maintain a safe course
within physical limits by reducing engine output
and through braking actions at the individual
wheels.
DSC also encompasses the following functions:
>Antilock Brake System ABS
>Electronic brake-force distribution EBV
>Brake Assist>Cornering Brake Control CBC
>Hill Assist
Deactivating DSC
Press the button repeatedly until the DSC indica-
tor lamps come on. DSC is deactivated. Stabiliz-
ing and propulsion promoting actions are no
longer executed.
When driving with snow chains or to 'rock free'
in snow, it can be helpful to switch off DSC for a
brief period.
To increase vehicle stability, activate DSC again
as soon as possible.
Activating DSC
Press the button again: the DSC indicator lamps
go out.
For better control
If the indicator lamp flashes:
The DSC controls the driving and break-
ing forces.
If the indicator lamps are on:
DSC is deactivated.
Dynamic Traction Control DTC*
DTC is a type of DSC that is propulsion optimized
for special road conditions such as uncleared
snowy roads. The system ensures maximum
propulsion though with restricted driving stabil-
ity. You therefore need to drive with suitable
caution.
In the following exceptional situations, it can be
useful to briefly activate DTC:
Page 94 of 174

Things to remember when driving
92
Things to remember when driving
Break-in period
Moving parts need breaking-in time to adjust to
each other. Please follow the instructions below
in order to achieve the optimal service life and
economy of operation for your vehicle.
Engine and differential
Always obey all official speed limits.
Up to 1,200 miles/2,000 km
Drive at varying engine and road speeds, but do
not exceed the following:
>Gasoline engine
4,500 rpm or 100 mph/160 km/h
Avoid full-throttle operation and use of the
transmission's kickdown mode.
After driving 1,200 miles/2,000 km
Engine and vehicle speeds can be gradually
increased.
Tires
Due to technical factors associated with their
manufacture, tires do not achieve their full trac-
tion potential until after an initial break-in
period. Therefore, drive cautiously during the
first 200 miles/300 km.
Brake system
Brakes require an initial break-in period of
approx. 300 miles/500 km to achieve optimized
contact and wear patterns between brake pads
and rotors. Drive cautiously during this break-in
period.
Clutch
The function of the clutch reaches its optimal
level only after a distance driven of approx.
300 miles/500 km. During this break-in period,
engage the clutch gently.
Following part replacement
The same break-in procedures should be
observed if any of the components mentioned
above have to be renewed in the course of the
vehicle's operating life.
General driving notes
Close the liftgate
Drive the vehicle only when the liftgate is
closed. Otherwise, exhaust fumes could
penetrate the interior of the vehicle.<
If special circumstances make it absolutely nec-
essary to drive with the liftgate open:
1.Close all windows and the glass sunroof
*.
2.Switch off the recirculated-air mode and sig-
nificantly increase the air flow rate of the air
conditioner or automatic climate control,
page80 or82.
Hot exhaust system
In all vehicles, extremely high tempera-
tures are generated in the exhaust sys-
tem. Do not remove the heat shields installed
adjacent to various sections of the exhaust sys-
tem, and never apply undercoating to them.
When driving, standing at idle and while park-
ing, take care to avoid possible contact between
the hot exhaust system and any highly flamma-
ble materials such as hay, leaves, grass, etc. Such
contact could lead to a fire, with the risk of seri-
ous personal injuries and property damage. Do
not touch hot exhaust tail pipes. Otherwise,
there is a risk of burns.<
Hydroplaning
When driving on wet or slushy roads,
reduce road speed. If you do not, a wedge
of water can form between tires and road sur-
face. This situation, known as hydroplaning, can
cause partial or complete loss of tire contact
with the road surface, so that the car cannot be
steered or braked properly.<
Page 95 of 174

REFERENCEAT A GLANCE CONTROLS DRIVING TIPS MOBILITY
93
The risk of hydroplaning increases with declining
tread depth on the tires, refer also to Tread
depth on page113.
Driving through water
Drive through water on the road only if it is
not deeper than 1 ft/30 cm, and then only
at walking speed at the most. Otherwise, the
vehicle's engine, the electrical systems and the
transmission may be damaged.<
Parking brake on inclines
On inclines, do not hold the vehicle with
the clutch; use the parking brake. Other-
wise, greater clutch wear will result.<
For information on driving off using Hill Assist
*,
refer to page65.
Braking safely
Your MINI is equipped with ABS. If you are in a
situation which requires full braking, it is best to
brake using maximum brake pressure. Since the
vehicle maintains steering responsiveness, you
can still avoid possible obstacles with a mini-
mum of steering effort.
The pulsation of the brake pedal, together with
the sound of hydraulic regulation, indicates that
ABS is actively taking effect.
Driving in wet conditions
When roads are wet or there is heavy rain, briefly
exert gentle pressure on the brake pedal every
few miles. Monitor traffic conditions to ensure
that this maneuver does not endanger other
road users. The heat generated in this process
helps dry the pads and rotors to ensure that
Then full braking force will be immediately avail-
able when it is needed.
Hills
To prevent overheating and the resulting
reduced efficiency of the brake system,
drive long or steep downhill gradients in the
gear in which the least braking is required. Even
light but consistent brake pressure can lead to
high temperatures, brake wear and possibly
even brake failure.
sary. This strategy helps you avoid placing
excessive loads on the brake system. Downshift-
ing in manual mode of the automatic transmis-
sion, page47.
Never drive with the clutch held down,
with the transmission in neutral or with
the engine switched off; otherwise, engine brak-
ing action will not be present or there will be no
power assistance to the brakes or steering.
Never allow floor mats, carpets or any other
objects to protrude into the area around the
pedals; otherwise, pedal function could be
impaired.<
Corrosion on brake rotors
When the vehicle is driven only occasionally,
during extended periods when the vehicle is not
used at all, and in operating conditions where
brake applications are less frequent, there is an
increased tendency for corrosion to form on
rotors, while contaminants accumulate on the
brake pads. This occurs because the minimum
pressure which must be exerted by the pads
during brake applications to clean the rotors is
not reached.
Should corrosion form on the brake rotors, the
brakes will tend to respond with a pulsating
effect that even extended application will fail to
cure.
When the vehicle is parked
Condensation forms while the automatic climate
control is in operation, and then exits under the
vehicle. Traces of condensed water under the
vehicle are therefore normal.
In the MINI Cooper S, the coolant pump may
continue to run for some time after the engine is
switched off. This will generate noise in the
engine compartment.
Page 116 of 174

Wheels and tires
114
For various reasons, such as the development of
brittleness, the manufacturer of your MINI rec-
ommends tire replacement after no more than
6 years, regardless of the actual wear of the
tires.
Run-flat tires*
The symbol identifying run-flat tires is a circle
with the letters RSC on the sidewall.
Run-flat tires comprise a conditionally self-sup-
porting tire and a special rim. The reinforcement
in the sidewalls ensures that the tire can con-
tinue to be used subject to certain restrictions,
even if depressurized.
For information on continuing to drive with a flat
tire, refer to Indication of a flat tire, page67.
New wheels and tires
Have new wheels and tires mounted only
by your MINI dealer or a specialized tire
shop that has specially trained personnel work-
ing in accordance with the specifications of the
MINI manufacturer. If this work is not carried out
properly, there is a danger of subsequent dam-
age and related safety hazards. Make sure that
the new wheels are balanced.<
Retreaded tires
The manufacturer of your MINI recom-
mends that you avoid using retreaded
tires, as this could impair driving safety. The
causes for this include potentially different tire
casing structures and often wide variations in
tire age, which can result in a limited service
life.<
Correct wheels and tires
The manufacturer of your MINI recom-
mends mounting only wheels and tires
that it has specifically approved for use on your
particular model. Although other wheels and
tires may theoretically have the same dimen-
sions, variations in factors such as manufactur-
ing tolerances can result in contact between tire
and bodywork, ultimately leading to serious
accidents. The manufacturer of your MINI can-
not evaluate non-approved wheels and tires to
determine if they are suited for use, and there-
fore cannot ensure the operating safety of the
vehicle if they are mounted.<
Your MINI dealer will be glad to inform you
about the correct wheel and tire combination for
your vehicle.
The correct combination of wheels and tires is
also necessary to ensure reliable operation of
various vehicle systems such as ABS and DSC.
To maintain good handling and vehicle
response, use only tires of a single brand and
tread configuration. After a tire has been dam-
aged, mount the previous wheel and tire combi-
nation again as soon as possible.
Wheels with Tire Pressure Monitor TPM
electronics
When mounting new tires or changing over from
summer to winter tires, or vice versa, only use
wheels with TPM electronics; otherwise, the Tire
Pressure Monitor may not be able to detect a
puncture, refer to page69. Your MINI dealer will
be glad to advise you.
Page 139 of 174

REFERENCEAT A GLANCE CONTROLS DRIVING TIPS MOBILITY
137
There must not be any contact between
the bodies of the two vehicles; otherwise,
there is a danger of shorting.<
Connecting jumper cables
Connect the jumper cables in the correct
order, so that no sparks which could cause
injury occur.<
1.Open the battery cover in the engine com-
partment to access the positive terminal of
your MINI.
2.Release the tabs of the positive terminal
cover
* on the left and right, arrows1, and
lift the cover to open, arrow2.
3.Attach one terminal clamp of the plus/+
jumper cable to the positive terminal of the
battery or to a starting-aid terminal of the
vehicle providing assistance.
4.Attach the second terminal clamp of the
plus/+ jumper cable to the positive terminal
of the battery or a starting-aid terminal of
the vehicle to be started.
5.Attach one terminal clamp of the minus/–
jumper cable to the negative terminal of the
battery or to an engine or body ground of
the assisting vehicle.Body ground in MINI:
6.Attach the second terminal clamp of the
minus/– jumper cable to the negative termi-
nal of the battery or to the engine or body
ground of the vehicle to be started.
Starting the engine
1.Start the engine of the donor vehicle and
allow it to run for a few minutes at slightly
increased idle speed.
2.Start the engine of the other vehicle in the
usual manner.
If the first start attempt is not successful,
wait a few minutes before another attempt
in order to allow the discharged battery to
recharge.
3.Let the engines run for a few minutes.
4.Disconnect the jumper cables by reversing
the above connecting sequence.
If necessary, have the battery checked and
recharged.
Never use spray fluids to start the
engine.<
Tow-starting, towing
away
Observe the applicable laws and regula-
tions for tow-starting and towing vehi-
cles.<
Do not transport any passengers other
than the driver in a vehicle that is being
towed.<
Page 149 of 174

REFERENCEAT A GLANCE CONTROLS DRIVING TIPS MOBILITY
147
Dynamic Traction Control DTC is acti-
vated, refer also to page64
The Dynamic Stability Control DSC
and Dynamic Traction Control DTC
are deactivated, refer also to page63Driving stability limited during accel-
eration and cornering.
Driving style must be adjusted.
The Dynamic Stability Control DSC
and Dynamic Traction Control DTC
have failed.Driving stability limited during accel-
eration and cornering.
You can continue your journey, but
moderate your speed and exercise
due caution. Have the system
checked as soon as possible.
Indication in US models
The driving stability control systems,
including ABS and the Tire Pressure
Monitor, have failed, refer also to
page63Reduced braking and driving stability.
Drive cautiously and think well ahead.
Avoid braking with full force, driving
on rough tracks, and depressing the
accelerator pedal to full throttle or
kickdown position. Have the system
checked immediately.
Indication
* in Canadian models
The driving stability control systems,
including ABS and the Flat Tire Moni-
tor or the Tire Pressure Monitor
*,
have failed, refer also to page63Reduced braking and driving stability.
Drive cautiously and think well ahead.
Avoid braking with full force, driving
on rough tracks, and depressing the
accelerator pedal to full throttle or
kickdown position. Have the system
checked immediately.
Indication
* in Canadian models
The driving stability control systems,
including ABS and the Flat Tire Moni-
tor or the Tire Pressure Monitor
*,
have failed, refer also to page63Drive cautiously and think well ahead.
Avoid braking with full force, driving
on rough tracks, and depressing the
accelerator pedal to full throttle or
kickdown position. Have the system
checked immediately.
12Cause What to do
Page 162 of 174
Everything from A to Z
160
Everything from A to Z
INDEX
A
Accessories, refer to Your
individual vehicle4
Acknowledgment signals for
locking/unlocking vehicle21
Activated-charcoal filter for
automatic climate control83
Additives
– coolant118
– engine oil118
Adjusting temperature inside
the car, refer to Air
conditioner80
Adjusting temperature inside
the car, refer to Automatic
climate control81
Air conditioner79
Air conditioning mode
– air conditioner80
– automatic climate control81
– ventilation83
Air distribution
– automatic82
– individual81
– manual81
Air flow rate80,82
– air conditioning system80
– automatic climate control82
– heating, ventilation80
Air outlets, refer to Air vents79
Air pressure, checking, refer to
Tire inflation pressure104
Air recirculation, refer to
Recirculated-air
mode80,82
Air supply
– air conditioner80
– automatic climate control81
– ventilation83
Air vents79Airbags71
– sitting safely35
– warning lamp73
Airing, refer to Ventilation83
AKI, refer to Fuel grade103
Alarm system25
All-season tires, refer to Winter
tires115
Always Open Timer55
Ambient air, refer to
Recirculated-air
mode80,82
Ambient lighting78
Antenna, care121
Antifreeze
– coolant118
– washer fluid51
Antilock Brake System ABS64
Anti-theft alarm system, refer
to Alarm system25
Anti-theft system19
Approved axle loads, refer to
Weights157
Approved engine oils118
Approved gross vehicle
weight, refer to Weights157
Armrest, refer to Center
armrest86
Ashtray88
Assistant systems, refer to
– Dynamic Stability Control
DSC64
Audio device, external86
AUTO program for automatic
climate control82
Automatic
– air distribution82
– air flow rate82
– cruise control51
– headlamp control74
Automatic climate control79
– automatic air distribution82Automatic transmission with
Steptronic46
– interlock46
– overriding selector lever
lock48
– shiftlock46
– sport program47
AUX-IN, refer to External audio
device86
Average fuel consumption54
– setting the units57
Average speed55
Axle loads, refer to
Weights157
B
Background lighting, refer to
Ambient lighting78
Backrests, refer to Seats35
Backup lamps
– replacing bulb128,129
Band-aids, refer to First aid
pouch136
Bar, refer to Tow-starting,
towing away138
Battery134
– charging135
– disposal28,135
– jump-starting136
– temporary power failure135
Battery renewal
– remote control28
Being towed138
Belt tensioner, refer to Safety
belts38
Belts, refer to Safety belts38
Beverage holders, refer to
Cupholders88
Black ice, refer to Outside
temperature warning53
Blower, refer to Air flow
rate80,82
Page 163 of 174
REFERENCEAT A GLANCE CONTROLS DRIVING TIPS MOBILITY
161
Bottle holders, refer to
Cupholders88
Brake Assist64
Brake fluid, refer to Service
requirements58
Brake lamps
– replacing bulbs129
Brake pads, breaking in92
Brake rotors93
– brakes92
– breaking in92
Brake system92
– breaking in92
– disc brakes93
– MINI Maintenance
System119
Brakes
– ABS64
– breaking in92
– MINI Maintenance
System119
– parking brake45
– service requirements58
Brakes, refer to Braking
safely93
Breakdown service, refer to
Roadside Assistance136
Break-in period92
Breaking in the clutch92
Bulb changing, refer to Lamps
and bulbs125
Button for starting the
engine44
Buttons on the steering
wheel11
C
California Proposition 65
warning5
Can holders, refer to
Cupholders88
Capacities158
Car battery, refer to Vehicle
battery134
Car care121
Car key, refer to Keys/remote
controls18Car phone
– installation location, refer to
Center armrest86
– refer to separate Owner's
Manual
Car wash, care121
Car washes121
Care121
– car washes121
– car-care products121
– CD/DVD drives124
– external121
– high-pressure washers122
– internal123
– leather123
– manual washing122
– upholstery and fabrics123
– windows122
– wiper blades122
Cargo area
– capacity157
Cargo bay94
– Comfort Access27
– cover94
– lamp77
– opening from outside24
Cargo bay, expanding94
Cargo bay lamp77
Cargo bay lid, refer to
Liftgate24
Cargo loading95
– securing cargo96
– stowing cargo96
– vehicle94
Cargo, securing96
Carpets, care123
Catalytic converter, refer to
Hot exhaust system92
Center armrest86
Center brake lamp129
Center console, refer to
Around the center
console14
Central locking system19
– Comfort Access26
– from inside23
– from outside19
Changing bulbs
125
Changing wheels132Chassis number, refer to
Engine compartment117
Check Control61
Child restraint systems41
Child seats41
Child-restraint fixing system
LATCH42
Chock, folding
– space-saver spare tire132
Chrome parts, care123
Chrome parts, refer to
Care121
Cigarette lighter88
Cleaning headlamps50
– washer fluid51
Clock53
– 12h/24h mode57
– setting time60
Closing
– from inside23
– from outside19
Clothes hooks87
Cockpit10
Cold start, refer to Starting the
engine45
Comfort Access26
– replacing the battery28
– what to observe before
entering a car wash27
Comfort area, refer to Around
the center console14
Compartment for remote
control, refer to Ignition
lock44
Computer54
Condensation, refer to When
the vehicle is parked93
Condition Based Service
CBS119
Configuring settings, refer to
Personal Profile18
Connecting vacuum cleaner,
refer to Connecting electrical
appliances88
Consumption, refer to Average
fuel consumption54
Control Display
– settings56
Controls and displays10
Page 169 of 174
REFERENCEAT A GLANCE CONTROLS DRIVING TIPS MOBILITY
167
Rope, refer to Tow-starting,
towing away138
RSC Run-flat System
Component, refer to Run-flat
tires114
Rubber parts, care123
Run-flat System Component
RSC, refer to Run-flat
tires114
Run-flat tires114
– flat tire67
– tire inflation pressure104
– tire replacement114
– winter tires115
S
Safety belt
– number35
Safety Belt Reminder39
Safety belts38
– damage39
– indicator lamp39
– reminder39
– sitting safely35
Safety belts, care124
Safety systems
– airbags71
– Antilock Brake System
ABS64
– Dynamic Stability Control
DSC64
– safety belts38
Safety tires, refer to Run-flat
tires114
Screw thread for tow
fitting138
Seat adjustment
– mechanical36
Seats35
– adjusting the seats36
– heating38
– sitting safely35
Securing the vehicle
– from inside23
– from outside19Selector lever
– automatic transmission with
Steptronic46
Selector lever lock
– automatic transmission with
Steptronic, refer to
Shiftlock46
– overriding manually48
Selector lever positions
– automatic transmission with
Steptronic46
Service car, refer to Roadside
Assistance136
Service data in the remote
control119
Service Interval Display, refer
to Condition Based Service
CBS119
Service, refer to Roadside
Assistance136
Service requirement display,
refer to Condition Based
Service CBS119
Service requirements58
Settings
– clock, 12h/24h mode57
Shifting gears
– automatic transmission with
Steptronic47
– manual transmission46
Shiftlock
– automatic transmission, refer
to Changing selector lever
positions46
Side airbags71
Side turn signal indicator
– replacing bulb128
Side windows, refer to
Windows29
Signal horn, refer to Horn10
Sitting safely35
– airbags35
– safety belts35
– with head restraint35
Size, refer to Dimensions155
Sliding/tilt sunroof
– refer to Glass sunroof,
electric28Slipstream deflector, refer to
Wind deflector33
Slot for remote control44
Smokers' package, refer to
Ashtray88
Snap-in adapter, refer to
Center armrest storage
compartment86
Snow chains115
Socket for Onboard Diagnosis
OBD119
Socket, refer to Connecting
electrical appliances88
Space-saver spare tire
– changing tires132
– inflation pressure104
Spare wheel, refer to Space-
saver spare tire132
Special oils, refer to Approved
engine oils118
Speed154
– with winter tires115
Speedometer12
Split rear backrest, refer to
Through-loading system95
Split rear seat backrest, refer to
Expanding the cargo bay94
Sport button65
Stability control, refer to
Driving stability control
systems63
Start/stop button44
– starting the engine45
– switching off the engine45
Starting assistance, refer to
Jump-starting136
Starting, refer to Starting the
engine45
Starting the engine
– start/stop button44
Start-off assistance, refer to
– DSC64
– Hill Assist65
Status of this Owner's Manual
at time of printing4