window MINI Hardtop 2 Door 2015 Owner's Manual (Mini Connected)
[x] Cancel search | Manufacturer: MINI, Model Year: 2015, Model line: Hardtop 2 Door, Model: MINI Hardtop 2 Door 2015Pages: 244, PDF Size: 11.11 MB
Page 18 of 244
CockpitVehicle features and op‐
tions
This chapter describes all standard, country-
specific and optional features offered with the
series. It also describes features that are notnecessarily available in your car, e. g., due to
the selected options or country versions. This
also applies to safety-related functions and sys‐
tems. The respectively applicable country provi‐
sions must be observed when using the respec‐
tive features and systems.
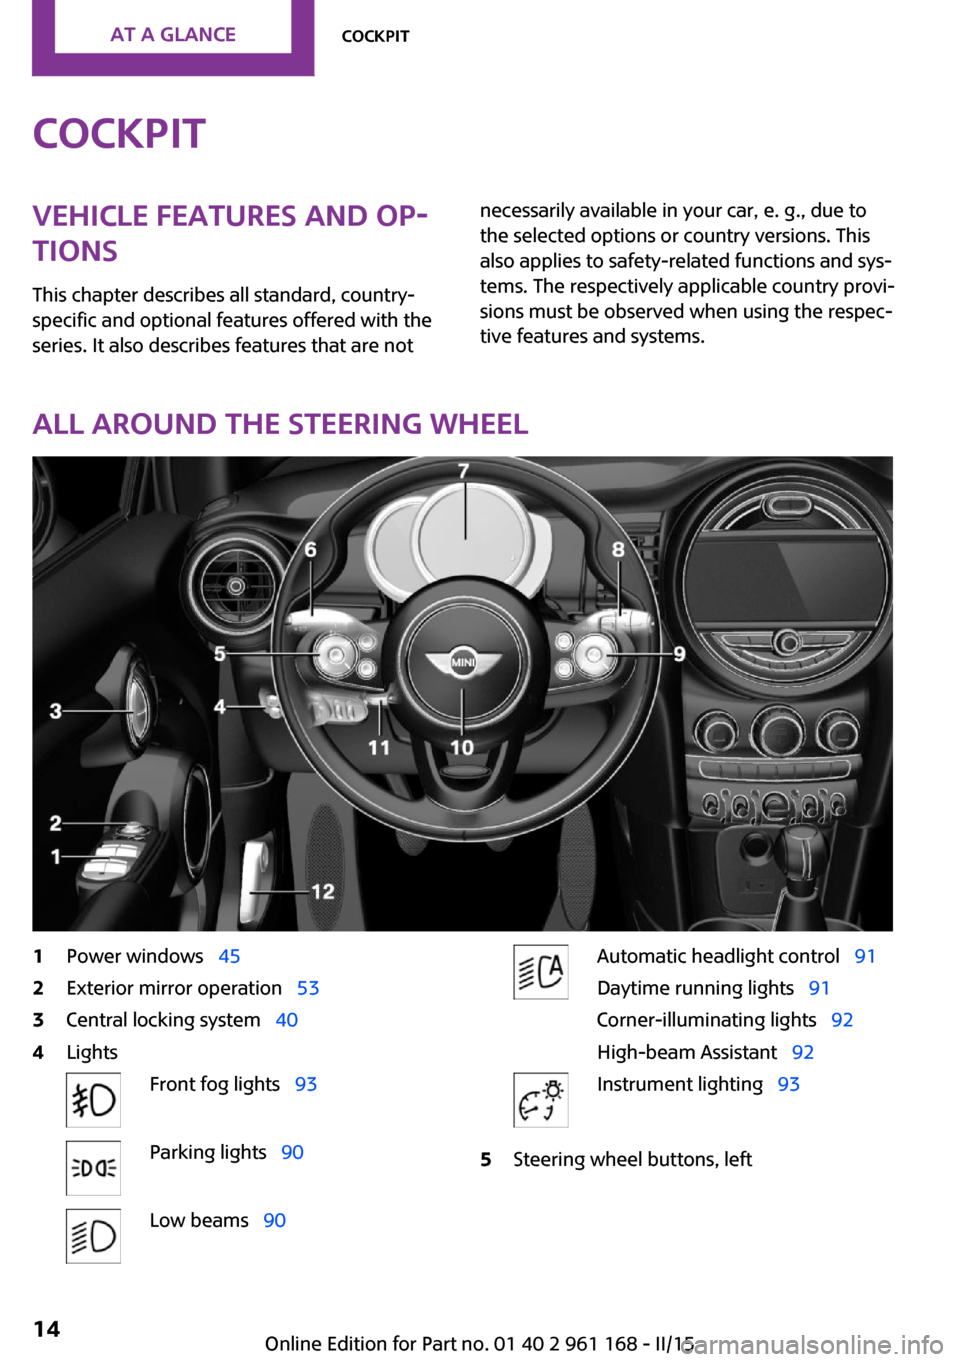
All around the steering wheel
1Power windows 452Exterior mirror operation 533Central locking system 404LightsFront fog lights 93Parking lights 90Low beams 90Automatic headlight control 91
Daytime running lights 91
Corner-illuminating lights 92
High-beam Assistant 92Instrument lighting 935Steering wheel buttons, leftSeite 14AT A GLANCECockpit14
Online Edition for Part no. 01 40 2 961 168 - II/15
Page 19 of 244
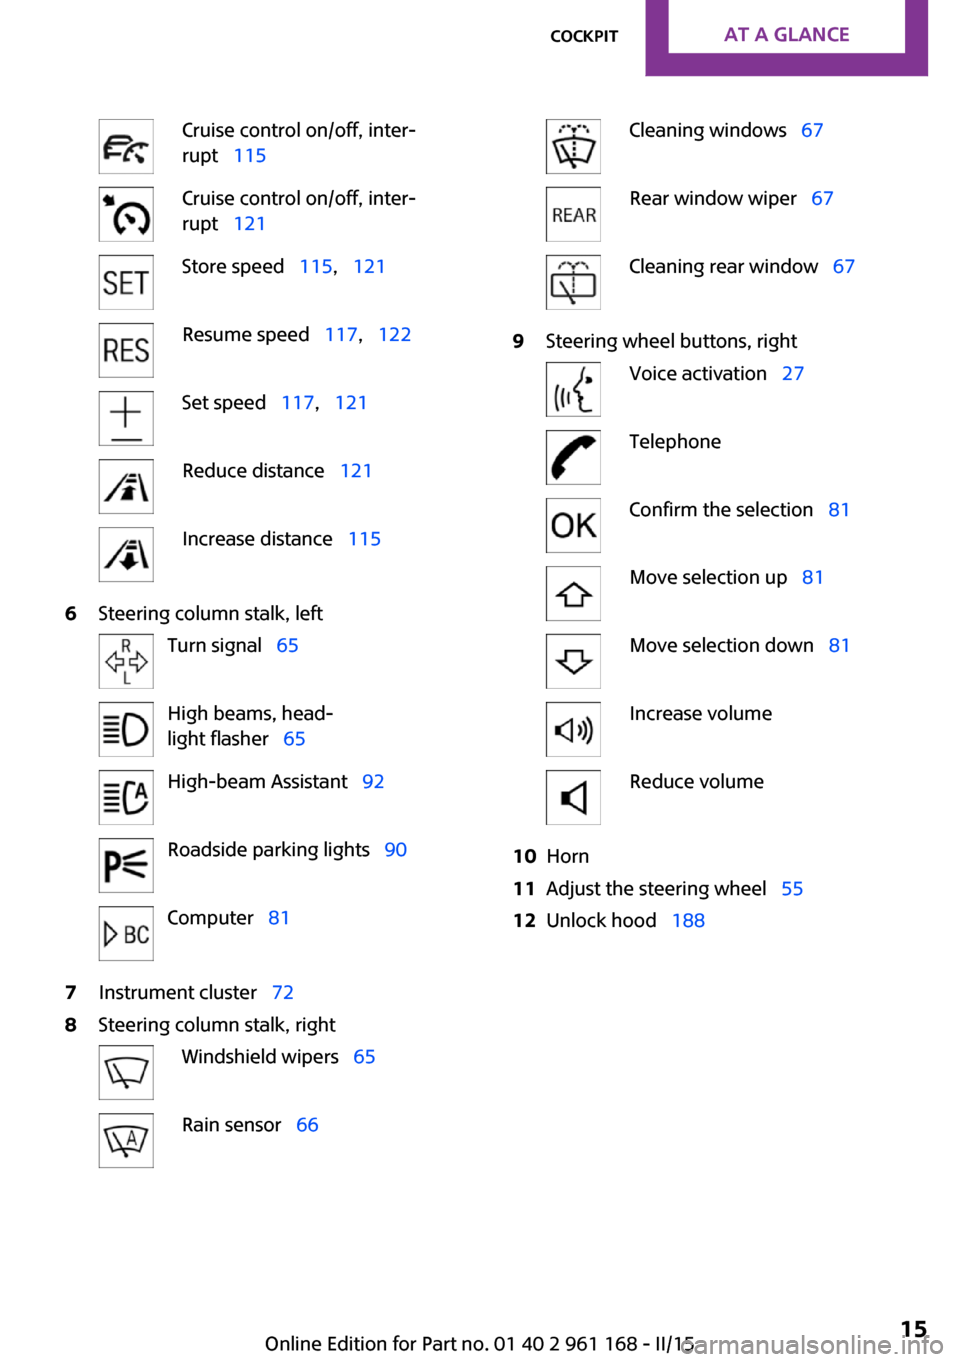
Cruise control on/off, inter‐
rupt 115Cruise control on/off, inter‐
rupt 121Store speed 115, 121Resume speed 117, 122Set speed 117, 121Reduce distance 121Increase distance 1156Steering column stalk, leftTurn signal 65High beams, head‐
light flasher 65High-beam Assistant 92Roadside parking lights 90Computer 817Instrument cluster 728Steering column stalk, rightWindshield wipers 65Rain sensor 66Cleaning windows 67Rear window wiper 67Cleaning rear window 679Steering wheel buttons, rightVoice activation 27TelephoneConfirm the selection 81Move selection up 81Move selection down 81Increase volumeReduce volume10Horn11Adjust the steering wheel 5512Unlock hood 188Seite 15CockpitAT A GLANCE15
Online Edition for Part no. 01 40 2 961 168 - II/15
Page 32 of 244
Executing functions using short
commands
Execute functions on the main menu via short
commands. It almost doesn't matter which
menu item is selected, e.g., ›Vehicle status‹.
Help dialog for the voice activation
system
Calling up help dialog: ›Help‹
Additional commands for the help dialog:▷›Help with examples‹: announces informa‐
tion about the current operating options
and the most important commands for
them.▷›Help with voice activation‹: information
about the principle of operation for the
voice activation system is announced.
One example: open the
tone settings
Via the main menu
The commands of the menu items are spoken
just as they are selected via the controller.
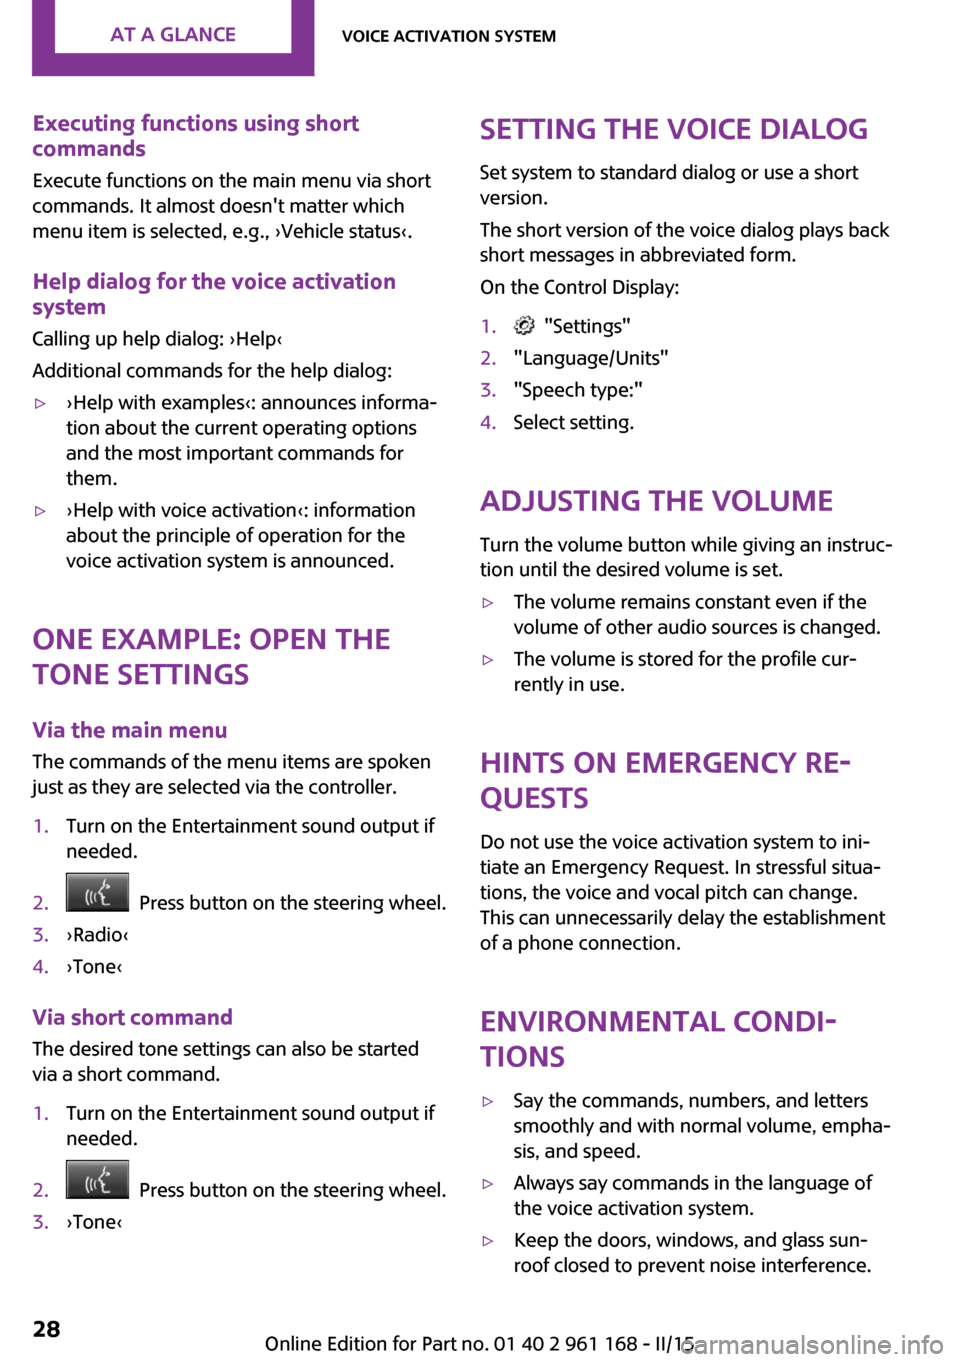
1.Turn on the Entertainment sound output if
needed.2. Press button on the steering wheel.3.›Radio‹4.›Tone‹
Via short command
The desired tone settings can also be started
via a short command.
1.Turn on the Entertainment sound output if
needed.2. Press button on the steering wheel.3.›Tone‹Setting the voice dialog
Set system to standard dialog or use a short
version.
The short version of the voice dialog plays back short messages in abbreviated form.
On the Control Display:1. "Settings"2."Language/Units"3."Speech type:"4.Select setting.
Adjusting the volume
Turn the volume button while giving an instruc‐
tion until the desired volume is set.
▷The volume remains constant even if the
volume of other audio sources is changed.▷The volume is stored for the profile cur‐
rently in use.
Hints on Emergency Re‐
quests
Do not use the voice activation system to ini‐
tiate an Emergency Request. In stressful situa‐
tions, the voice and vocal pitch can change.
This can unnecessarily delay the establishment
of a phone connection.
Environmental condi‐
tions
▷Say the commands, numbers, and letters
smoothly and with normal volume, empha‐
sis, and speed.▷Always say commands in the language of
the voice activation system.▷Keep the doors, windows, and glass sun‐
roof closed to prevent noise interference.Seite 28AT A GLANCEVoice activation system28
Online Edition for Part no. 01 40 2 961 168 - II/15
Page 41 of 244
This can be helpful for securing and retrieving
personal settings, before delivering the vehicle
to a workshop, e.g. Profiles can be taken to an‐
other vehicle equipped with the Personal Pro‐
file function.
Export is made via the USB port to a USB de‐
vice.
Popular file systems for USB devices are sup‐
ported. FAT32 and exFAT are the recom‐
mended formats for profile export. Other for‐
mats may not support the export.1. "Settings"2."Profiles"3."Export profile"4."USB device"
Importing profiles
Profiles stored on a USB device can be im‐
ported via the USB interface.
Existing settings are overwritten with the im‐
ported profile.
1. "Settings"2."Profiles"3."Import profile"4."USB device"
Using the guest profile
The guest profile is for individual settings that
are saved in none of the three personal profiles.
This can be useful for drivers who are using the
vehicle temporarily and do not have their own
profile.
1. "Settings"2."Profiles"3."Guest"4.Adjust the settings.
The guest profile cannot be renamed. It is not
assigned to the current remote control.
Display profile list during start
The profile list can be displayed during each
start to select the desired profile.1. "Settings"2."Profiles"3.Open "Options".4."Display user list at startup"
Using the remote con‐
trol
Note Take the remote control with you
People or animals left unattended in a
parked vehicle can lock the doors from the in‐
side. Always take the remote control with you
when leaving the vehicle so that the vehicle
can then be opened from the outside. ◀
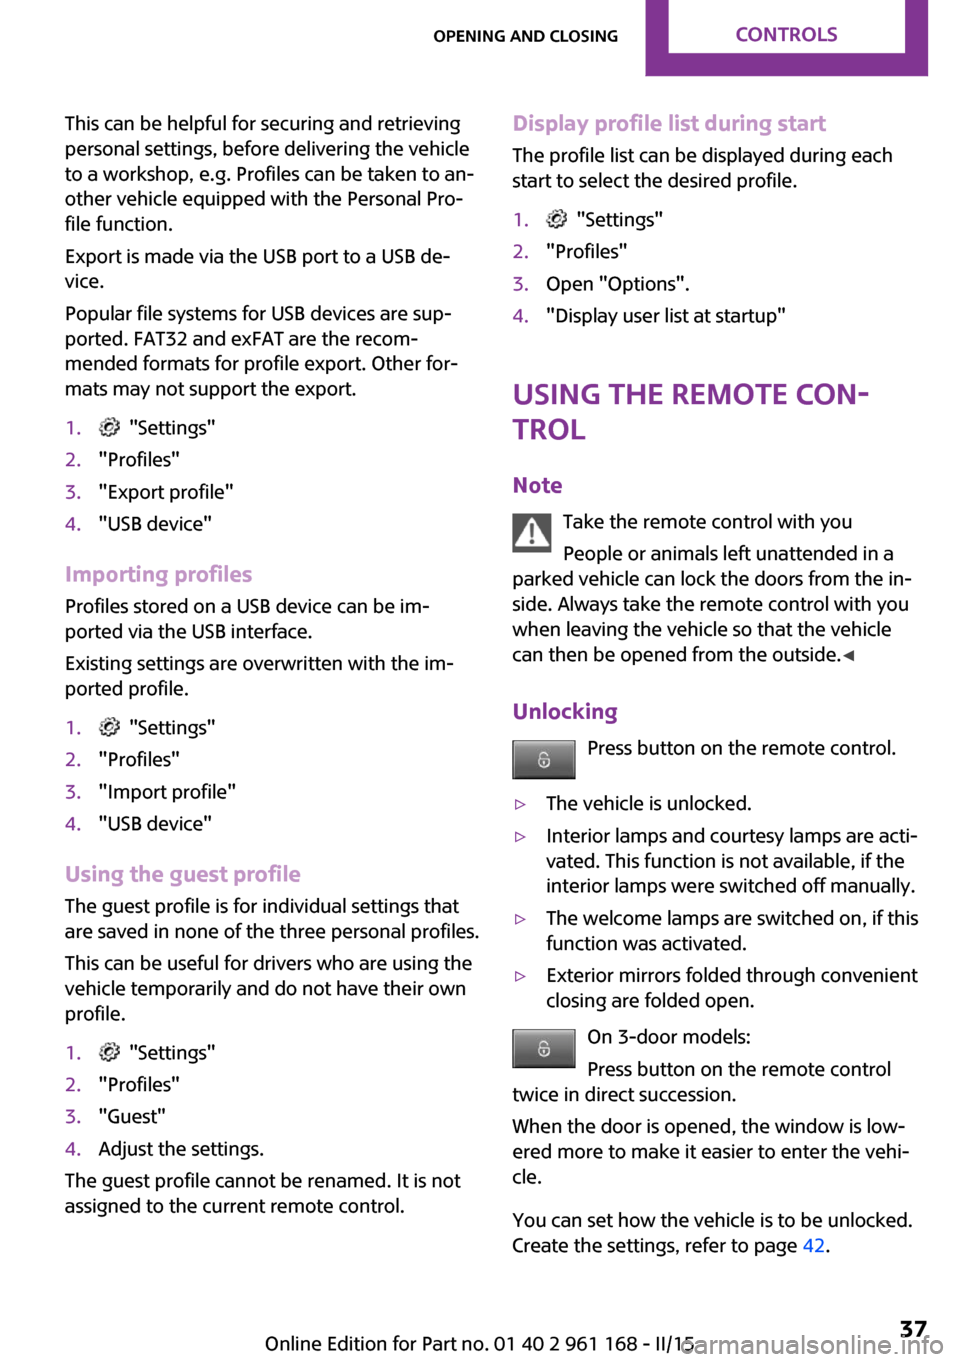
Unlocking Press button on the remote control.
▷The vehicle is unlocked.▷Interior lamps and courtesy lamps are acti‐
vated. This function is not available, if the
interior lamps were switched off manually.▷The welcome lamps are switched on, if this
function was activated.▷Exterior mirrors folded through convenient
closing are folded open.
On 3-door models:
Press button on the remote control
twice in direct succession.
When the door is opened, the window is low‐
ered more to make it easier to enter the vehi‐
cle.
You can set how the vehicle is to be unlocked.
Create the settings, refer to page 42.
Seite 37Opening and closingCONTROLS37
Online Edition for Part no. 01 40 2 961 168 - II/15
Page 42 of 244
The alarm system, refer to page 43, is dis‐
armed.
Convenient opening Press and hold this button on the re‐
mote control after unlocking.
The windows and the glass sunroof are opened,
as long as the button on the remote control is
pressed.
Locking Locking from the outside
Do not lock the vehicle from the outside
with people inside the car, as the vehicle can‐
not be unlocked from inside without special
knowledge. ◀
The driver's door must be closed. Press button on the remote control.
The alarm system, refer to page 43, is armed.
If the vehicle horn honks twice when you lock
the car, this means that the engine or ignition is
still switched on. In this case, the engine or ig‐
nition must be switched off by means of the
Start/Stop button.
Switching on interior lights and
courtesy lights
Press button on the remote control
with the vehicle locked.
This function is not available, if the interior
lamps were switched off manually.
If the button is pressed within 10 seconds of
when the vehicle was locked Interior motion
sensor and tilt alarm sensor of the anti-theft
warning system, refer to page 44, are turned
off. After locking, wait 10 seconds before press‐
ing the button again.Panic mode
You can trigger the alarm system if you find
yourself in a dangerous situation.
Press button on the remote control for
at least 3 seconds.
To switch off the alarm: press any button.
Unlock the tailgate Press button on the remote control for
approx. 1 second.
The tailgate opens slightly, regardless of whether the vehicle was previously locked or
unlocked.
Depending on the features and the country
version, it is also possible to have door un‐
locked. Create the settings, refer to page 42.
If the doors were not unlocked, the tailgate is
locked again as soon as it closes.
Do not place the remote control in the
cargo area
Take the remote control with you and do not
leave it in the cargo area; otherwise, the re‐
mote control is locked inside the vehicle when
the tailgate is closed. ◀
Provide edge protection
Sharp objects or those with edges can hit
the rear window while driving and damage the
heat conductors of the rear window. Provide edge protection. ◀
Malfunction Remote control detection by the vehicle can
among others be malfunctioning under the fol‐
lowing circumstances:▷The battery of the remote control is dis‐
charged. Replace the battery, refer to
page 34.▷Interference of the radio connection from
transmission towers or other equipment
with high transmit power.Seite 38CONTROLSOpening and closing38
Online Edition for Part no. 01 40 2 961 168 - II/15
Page 44 of 244

From the inside
Locking and unlocking
Press button.
Vehicle is locked.
Press button.
The vehicle is unlocked.
Pressing the buttons for the central locking sys‐
tem locks and unlocks the doors and the tail‐
gate when the front doors are closed, but they
are not secured against theft.
The fuel filler flap remains unlocked.
In the event of a severe accident, the vehicle is
automatically unlocked. The hazard warning
system and interior lights come on.
Unlocking and opening
Either unlock the doors together using the cen‐
tral locking system buttons and then pull the
door handle above the armrest or pull the door
handle on the door to open the door. The other
doors remain locked.
TailgateHints Keep the closing path clear
Make sure that the closing path of the
tailgate is clear; otherwise, injuries may result. ◀
Do not place the remote control in the
cargo area
Take the remote control with you and do not
leave it in the cargo area; otherwise, the re‐
mote control is locked inside the vehicle when
the tailgate is closed. ◀
Provide edge protection
Sharp objects or those with edges can hit
the rear window while driving and damage the
heat conductors of the rear window. Provide
edge protection. ◀
Opening
When the tailgate is opened, make sure there is
sufficient clearance to prevent damage.▷Unlock the vehicle and press the button on
the tailgate.▷Press button on the remote control
for approx. 1 second.
As the case may be, the doors are also un‐
locked. Unlocking with the remote control,
refer to page 38.
The tailgate is unlocked and can be swung up‐
ward.
Opening from the inside With the vehicle is stationary, press the
button in the driver's footwell.
Seite 40CONTROLSOpening and closing40
Online Edition for Part no. 01 40 2 961 168 - II/15
Page 46 of 244
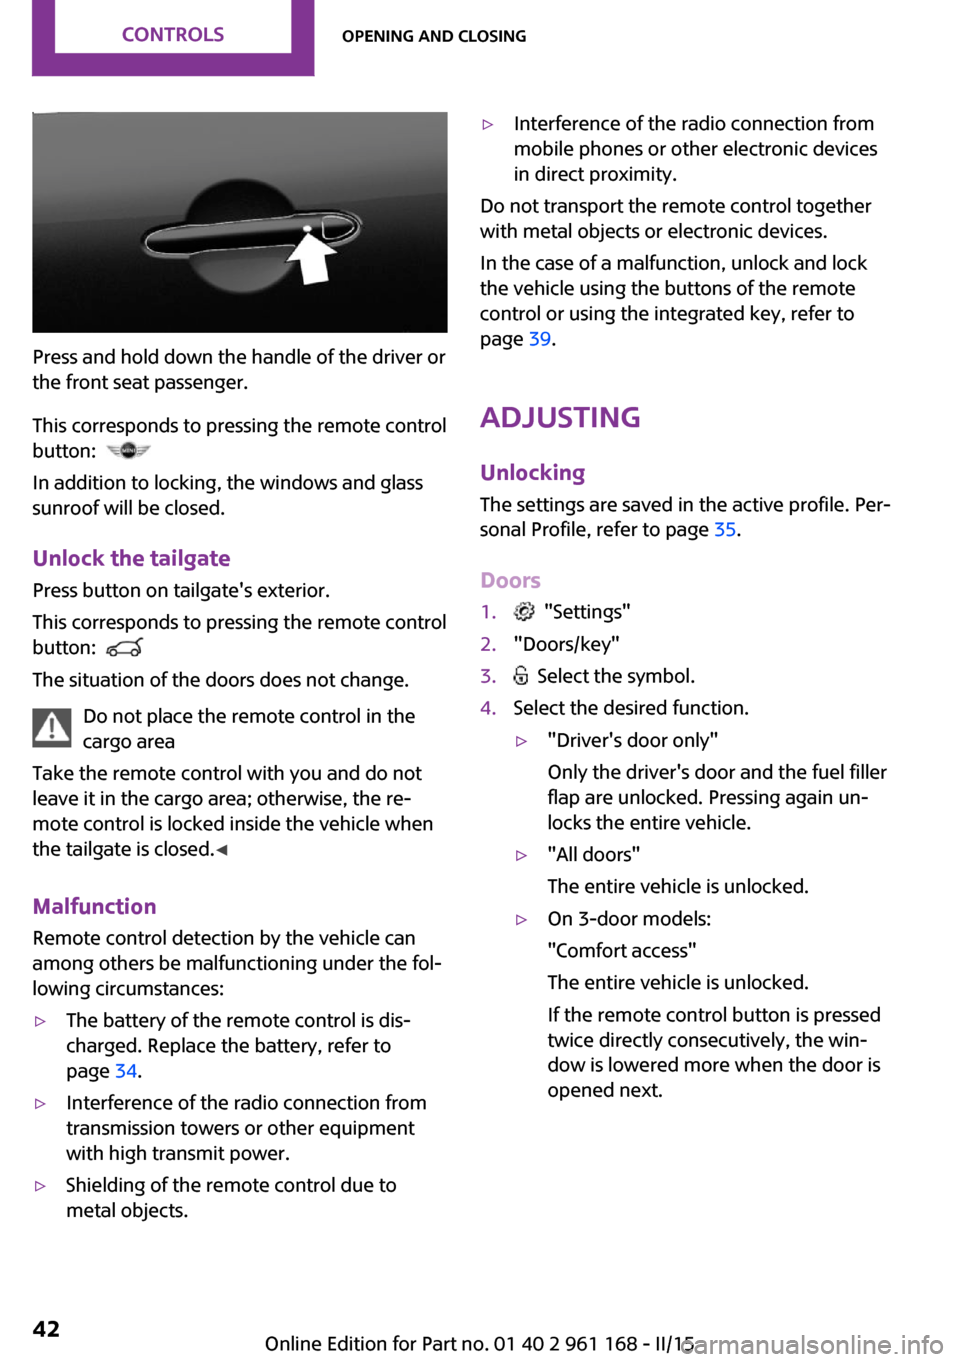
Press and hold down the handle of the driver or
the front seat passenger.
This corresponds to pressing the remote control
button:
In addition to locking, the windows and glass
sunroof will be closed.
Unlock the tailgate Press button on tailgate's exterior.
This corresponds to pressing the remote control
button:
The situation of the doors does not change.
Do not place the remote control in the
cargo area
Take the remote control with you and do not
leave it in the cargo area; otherwise, the re‐
mote control is locked inside the vehicle when
the tailgate is closed. ◀
Malfunction Remote control detection by the vehicle can
among others be malfunctioning under the fol‐
lowing circumstances:
▷The battery of the remote control is dis‐
charged. Replace the battery, refer to
page 34.▷Interference of the radio connection from
transmission towers or other equipment
with high transmit power.▷Shielding of the remote control due to
metal objects.▷Interference of the radio connection from
mobile phones or other electronic devices
in direct proximity.
Do not transport the remote control together
with metal objects or electronic devices.
In the case of a malfunction, unlock and lock
the vehicle using the buttons of the remote
control or using the integrated key, refer to
page 39.
Adjusting Unlocking The settings are saved in the active profile. Per‐
sonal Profile, refer to page 35.
Doors
1. "Settings"2."Doors/key"3. Select the symbol.4.Select the desired function.▷"Driver's door only"
Only the driver's door and the fuel filler
flap are unlocked. Pressing again un‐
locks the entire vehicle.▷"All doors"
The entire vehicle is unlocked.▷On 3-door models:
"Comfort access"
The entire vehicle is unlocked.
If the remote control button is pressed
twice directly consecutively, the win‐
dow is lowered more when the door is
opened next.Seite 42CONTROLSOpening and closing42
Online Edition for Part no. 01 40 2 961 168 - II/15
Page 48 of 244
To reel off the alarm: press any button.
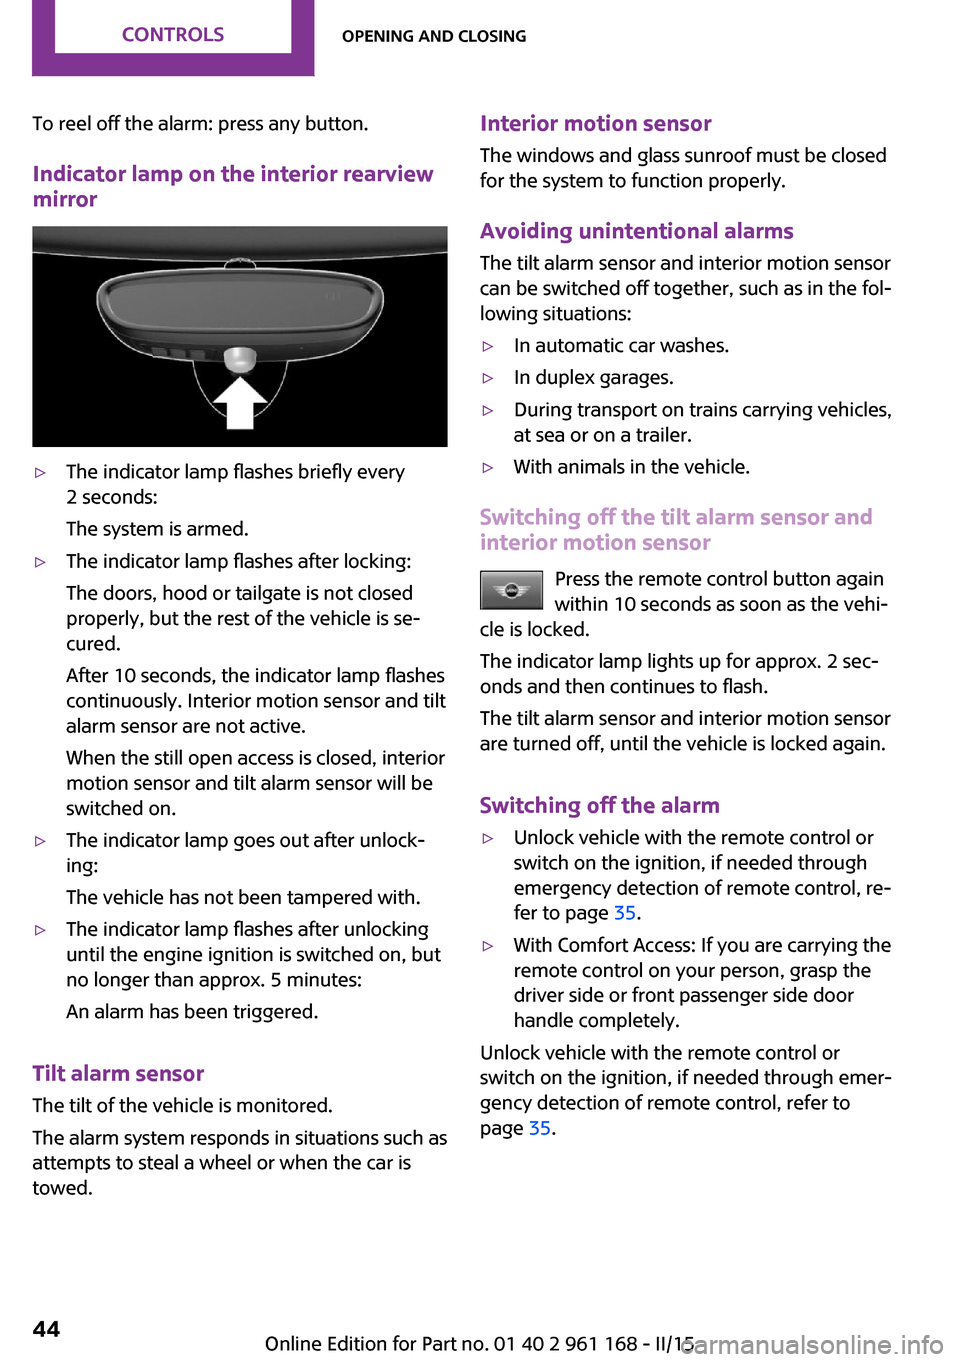
Indicator lamp on the interior rearview
mirror▷The indicator lamp flashes briefly every
2 seconds:
The system is armed.▷The indicator lamp flashes after locking:
The doors, hood or tailgate is not closed
properly, but the rest of the vehicle is se‐
cured.
After 10 seconds, the indicator lamp flashes
continuously. Interior motion sensor and tilt
alarm sensor are not active.
When the still open access is closed, interior
motion sensor and tilt alarm sensor will be
switched on.▷The indicator lamp goes out after unlock‐
ing:
The vehicle has not been tampered with.▷The indicator lamp flashes after unlocking
until the engine ignition is switched on, but
no longer than approx. 5 minutes:
An alarm has been triggered.
Tilt alarm sensor The tilt of the vehicle is monitored.
The alarm system responds in situations such as
attempts to steal a wheel or when the car is
towed.
Interior motion sensor
The windows and glass sunroof must be closed
for the system to function properly.
Avoiding unintentional alarms
The tilt alarm sensor and interior motion sensor
can be switched off together, such as in the fol‐
lowing situations:▷In automatic car washes.▷In duplex garages.▷During transport on trains carrying vehicles,
at sea or on a trailer.▷With animals in the vehicle.
Switching off the tilt alarm sensor and
interior motion sensor
Press the remote control button again
within 10 seconds as soon as the vehi‐
cle is locked.
The indicator lamp lights up for approx. 2 sec‐
onds and then continues to flash.
The tilt alarm sensor and interior motion sensor
are turned off, until the vehicle is locked again.
Switching off the alarm
▷Unlock vehicle with the remote control or
switch on the ignition, if needed through
emergency detection of remote control, re‐
fer to page 35.▷With Comfort Access: If you are carrying the
remote control on your person, grasp the
driver side or front passenger side door
handle completely.
Unlock vehicle with the remote control or
switch on the ignition, if needed through emer‐
gency detection of remote control, refer to
page 35.
Seite 44CONTROLSOpening and closing44
Online Edition for Part no. 01 40 2 961 168 - II/15
Page 49 of 244

Power windowsNote Take the remote control with you
Take the remote control with you when
leaving the vehicle so that children, e.g., cannot
operate the power windows and injure them‐
selves. ◀
On 5-door models
On 3-door models
Opening
▷ Press the button to the resistance
point.
The window opens while the switch is held.▷ Press the switch beyond the resist‐
ance point.
The window opens automatically. Pressing
again stops the motion.
See also: Convenient opening, refer to page 38,
via remote control.
Closing
Keep the closing path clear
Monitor closing and make sure that the
closing path of the window is clear; otherwise,
injuries may result. ◀
Pull switch up.
The window closes while the reel is held.
See also: closing by means of Comfort Access, refer to page 41.
Pinch protection system Danger of jamming even with pinch pro‐
tection
Even with the pinch protection system, check
that the window's closing path is clear; other‐
wise, the closing action may not stop in certain
situations, e.g., if thin objects are present. ◀
No window accessories
Do not install any accessories in the win‐
dow's range of movement; otherwise, the
pinch protection system will be impaired. ◀
If closing force exceeds a specific margin as a
window closes, closing is interrupted.
The window reopens slightly.
Closing without the pinch protection
system
Keep the closing path clear
Monitor closing and make sure that the
closing path of the window is clear; otherwise,
injuries may result. ◀
E. g. danger from the outside or ice might pre‐
vent window from closing properly - proceed as
follows:1.Pull the switch past the resistance point and
hold it there.
The pinch protection is limited and the win‐
dow reopens slightly if the closing force ex‐
ceeds a certain margin.Seite 45Opening and closingCONTROLS45
Online Edition for Part no. 01 40 2 961 168 - II/15
Page 50 of 244

2.Pull the switch past the resistance point
again within approx. 4 seconds and hold it
there.
The window closes without jam protection.
On 5-door models: safety switch The safety switch in the driver's door can be
used to prevent children, e.g., from opening
and closing the rear windows using the
switches in the rear.
Switching on and off Press button.
The LED lights up if the safety function
is switched on.
Safety switch for rear operation
Press the safety switch when transporting
children in the rear; otherwise, injury may result
if the windows are closed without supervi‐
sion. ◀
Panoramic glass sun‐
roof
Hints Keep the closing path clear
Monitor closing and make sure that the
closing path of the glass sunroof is clear; other‐
wise, injuries may result. ◀
Take the remote control with you
Take the remote control with you when
leaving the vehicle so that children, e.g., cannot
operate the glass sunroof and injure them‐
selves. ◀
At a glance
Tilting the glass sunroof
Press back the reel up to or be‐
yond the resistance point and re‐
lease it.
The glass sunroof is raised.
Opening glass sunroof
When the glass sunroof is closed Press the reel back beyond the
resistance point and release it
twice.
The glass sunroof is opened.
Pressing the reel again stops the
motion.
With the glass sunroof completely
raised
▷Slide reel back to the resist‐
ance point and hold.
The glass sunroof is opened
as long as the reel is pressed.▷Press the reel back beyond
the resistance point and re‐
lease it.
The glass sunroof is opened.
Pressing the reel again stops
the motion.Seite 46CONTROLSOpening and closing46
Online Edition for Part no. 01 40 2 961 168 - II/15