wheel MINI Hardtop 2 Door 2015 Service Manual
[x] Cancel search | Manufacturer: MINI, Model Year: 2015, Model line: Hardtop 2 Door, Model: MINI Hardtop 2 Door 2015Pages: 251, PDF Size: 11.4 MB
Page 117 of 251

NoteSufficient ventilation
When remaining in the vehicle for an ex‐
tended period of time, ensure sufficient exter‐
nal ventilation. Do not continuously use recircu‐
lated-air mode; otherwise the air quality in the
interior continuously deteriorates and window
condensation increases. ◀
Climate control functions in detail
Manual air distribution Turn the wheel to select the de‐
sired program or the desired in‐
termediate setting.▷ Windows.▷ Upper body region.▷ Footwell.▷ Windows, upper body region, and foot‐
well.
Defrosts windows and removes
condensation
Direct the air distribution toward windows, in‐
crease the air flow and temperature, and, if
needed, use the cooling function.
Air flow, manual Turn the ring to set the desired
air volume.
The higher the rate, the more ef‐
fective the heating or cooling will
be.
The air flow from the air conditioner may be re‐
duced automatically to save battery power.
Temperature
Turn the ring to set the desired
temperature.
Cooling function
The car's interior can only be cooled with the
engine running.
Press button.
The air will be cooled and dehumidi‐
fied and, depending on the temperature set‐
ting, warmed again.
Depending on the weather, the windshield may
fog up briefly when the engine is started.
The air conditioner produces condensation wa‐
ter, refer to page 136, that will exit from below
the car.
Recirculated-air mode
You may respond to unpleasant odors or pollu‐
tants in the immediate environment by tempo‐
rarily suspending the supply of outside air. The
system then recirculates the air currently within
the vehicle.
Press button repeatedly to select an
operating mode:▷LED off: outside air flows in continuously.▷LED on, recirculated-air mode: the supply
of outside air into the vehicle is perma‐
nently blocked.
To prevent window condensation, recirculated
air mode switches off automatically after a cer‐
tain amount of time, depending on the external
temperature.
If the windows fog over, switch off recirculated-
air mode and increase the air flow, if needed.
Seite 113Climate controlCONTROLS113
Online Edition for Part no. 01 40 2 961 140 - II/15
Page 118 of 251

Sufficient ventilation
When remaining in the vehicle for an ex‐
tended period of time, ensure sufficient exter‐
nal ventilation. Do not continuously use recircu‐
lated-air mode; otherwise the air quality in the
interior continuously deteriorates and window
condensation increases. ◀
Rear window defroster Press button.
The rear window defroster switches off
automatically after a certain period of time.
When Green mode, refer to page 142, is acti‐
vated, the heater output is reduced.
Windshield defroster Press button.
The front window defroster switches
off automatically after a certain period of time.Switching the system on/off
Switch off Turn wheel for air quantity to the
left until the control switches off.
Switching on
Set any air volume.
Microfilter
In external and recirculated air mode the mi‐ crofilter filters dust and pollen from the air.
This filter should be replaced during scheduled
maintenance, refer to page 197, of your vehi‐
cle.Seite 114CONTROLSClimate control114
Online Edition for Part no. 01 40 2 961 140 - II/15
Page 121 of 251

Depending on the weather, the windshield may
fog up briefly when the engine is started.
The cooling function is switched on automati‐
cally with the AUTO program.
When using the automatic climate control, con‐
densation water, refer to page 136, develops
that exits underneath the vehicle.
Automatic recirculated-air control/
recirculated-air mode
You may respond to unpleasant odors or pollu‐
tants in the immediate environment by tempo‐
rarily suspending the supply of outside air. The
system then recirculates the air currently within
the vehicle.
Press button repeatedly to select an
operating mode:▷LEDs off: outside air flows in continuously.▷Left LED on, automatic recirculated-air con‐
trol: a sensor detects pollutants in the out‐
side air and shuts off automatically.▷Right LED on, recirculated-air mode: the
supply of outside air into the vehicle is per‐
manently blocked.
To prevent window condensation, recirculated
air mode switches off automatically after a cer‐
tain amount of time, depending on the external
temperature.
If windows are fogged over, switch off the recir‐
culating mode and press the AUTO button.
Make sure that air can flow to the windshield.
Sufficient ventilation
When remaining in the vehicle for an ex‐
tended period of time, ensure sufficient exter‐
nal ventilation. Do not continuously use recircu‐
lated-air mode; otherwise the air quality in the
interior continuously deteriorates and window
condensation increases. ◀
Rear window defroster Press button.
The rear window defroster switches off auto‐
matically after a certain period of time.
When Green mode, refer to page 142, is acti‐
vated, the heater output is reduced.
Windshield defroster Press button.
The front window defroster switches
off automatically after a certain period of time.
Defrosts windows and removes
condensation
Press button.
Ice and condensation are quickly re‐
moved from the windshield and the front side
windows.
Adjust air flow with the program active.
If the windows fog over, also switch on the
cooling function or press the AUTO button.
Switching the system on/offSwitch off Turn wheel for air quantity to the
left until the control switches off.
Switching on
Set any air volume.
Microfilter/activated-charcoal filter In external and recirculated air mode the mi‐
crofilter/activated charcoal filter filters dust,
pollen, and gaseous pollutants out of the air.
This filter should be replaced during scheduled
maintenance, refer to page 197, of your vehi‐
cle.Seite 117Climate controlCONTROLS117
Online Edition for Part no. 01 40 2 961 140 - II/15
Page 154 of 251
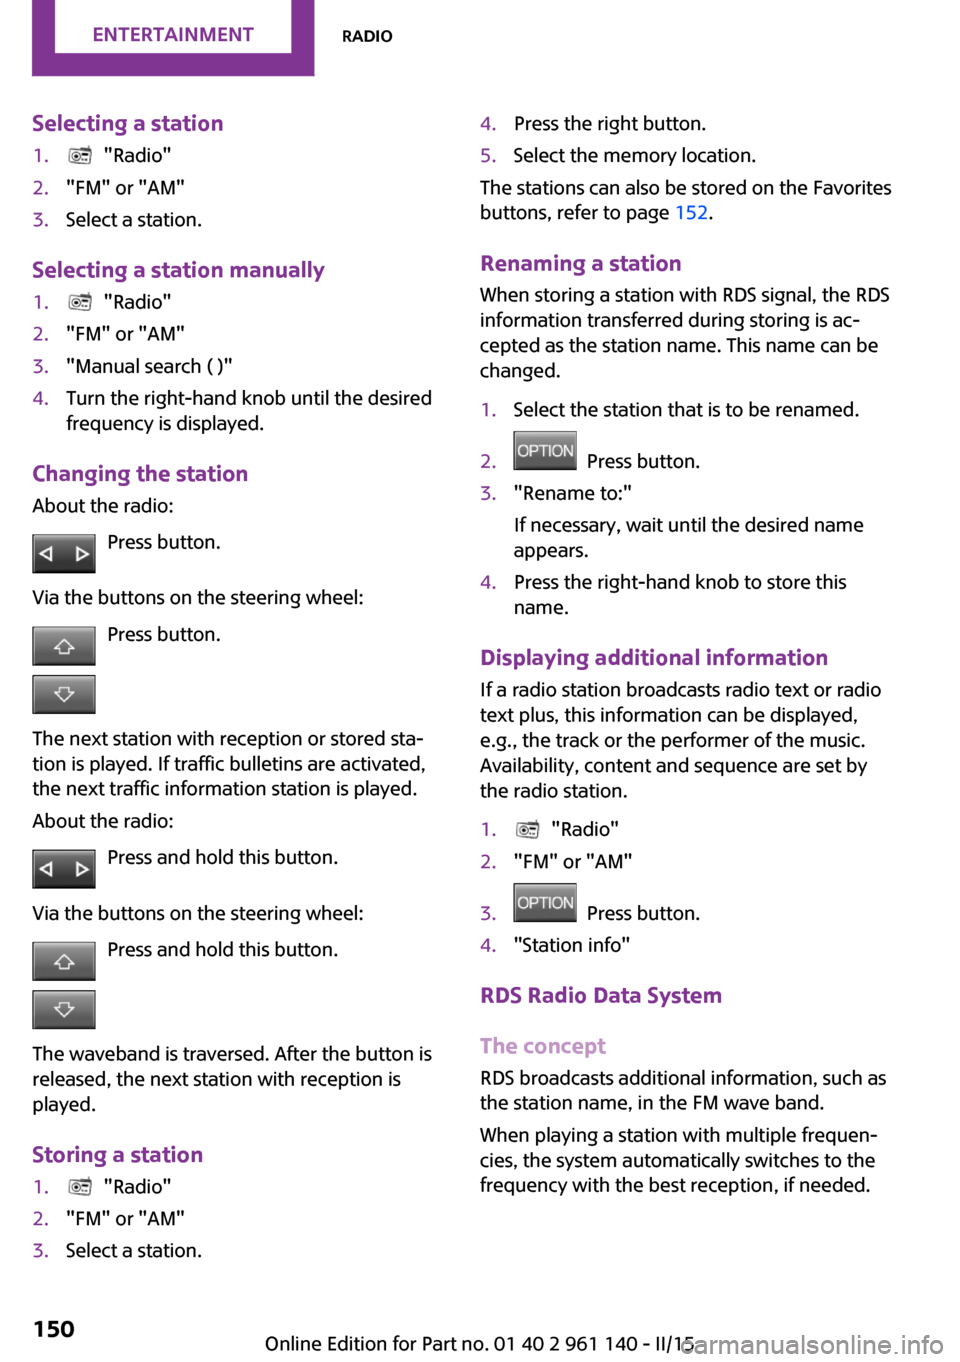
Selecting a station1. "Radio"2."FM" or "AM"3.Select a station.
Selecting a station manually
1. "Radio"2."FM" or "AM"3."Manual search ( )"4.Turn the right-hand knob until the desired
frequency is displayed.
Changing the station
About the radio:
Press button.
Via the buttons on the steering wheel: Press button.
The next station with reception or stored sta‐
tion is played. If traffic bulletins are activated,
the next traffic information station is played.
About the radio:
Press and hold this button.
Via the buttons on the steering wheel: Press and hold this button.
The waveband is traversed. After the button is
released, the next station with reception is
played.
Storing a station
1. "Radio"2."FM" or "AM"3.Select a station.4.Press the right button.5.Select the memory location.
The stations can also be stored on the Favorites
buttons, refer to page 152.
Renaming a station When storing a station with RDS signal, the RDS
information transferred during storing is ac‐
cepted as the station name. This name can be
changed.
1.Select the station that is to be renamed.2. Press button.3."Rename to:"
If necessary, wait until the desired name
appears.4.Press the right-hand knob to store this
name.
Displaying additional information
If a radio station broadcasts radio text or radio
text plus, this information can be displayed,
e.g., the track or the performer of the music.
Availability, content and sequence are set by
the radio station.
1. "Radio"2."FM" or "AM"3. Press button.4."Station info"
RDS Radio Data System
The concept
RDS broadcasts additional information, such as
the station name, in the FM wave band.
When playing a station with multiple frequen‐
cies, the system automatically switches to the
frequency with the best reception, if needed.
Seite 150ENTERTAINMENTRadio150
Online Edition for Part no. 01 40 2 961 140 - II/15
Page 161 of 251
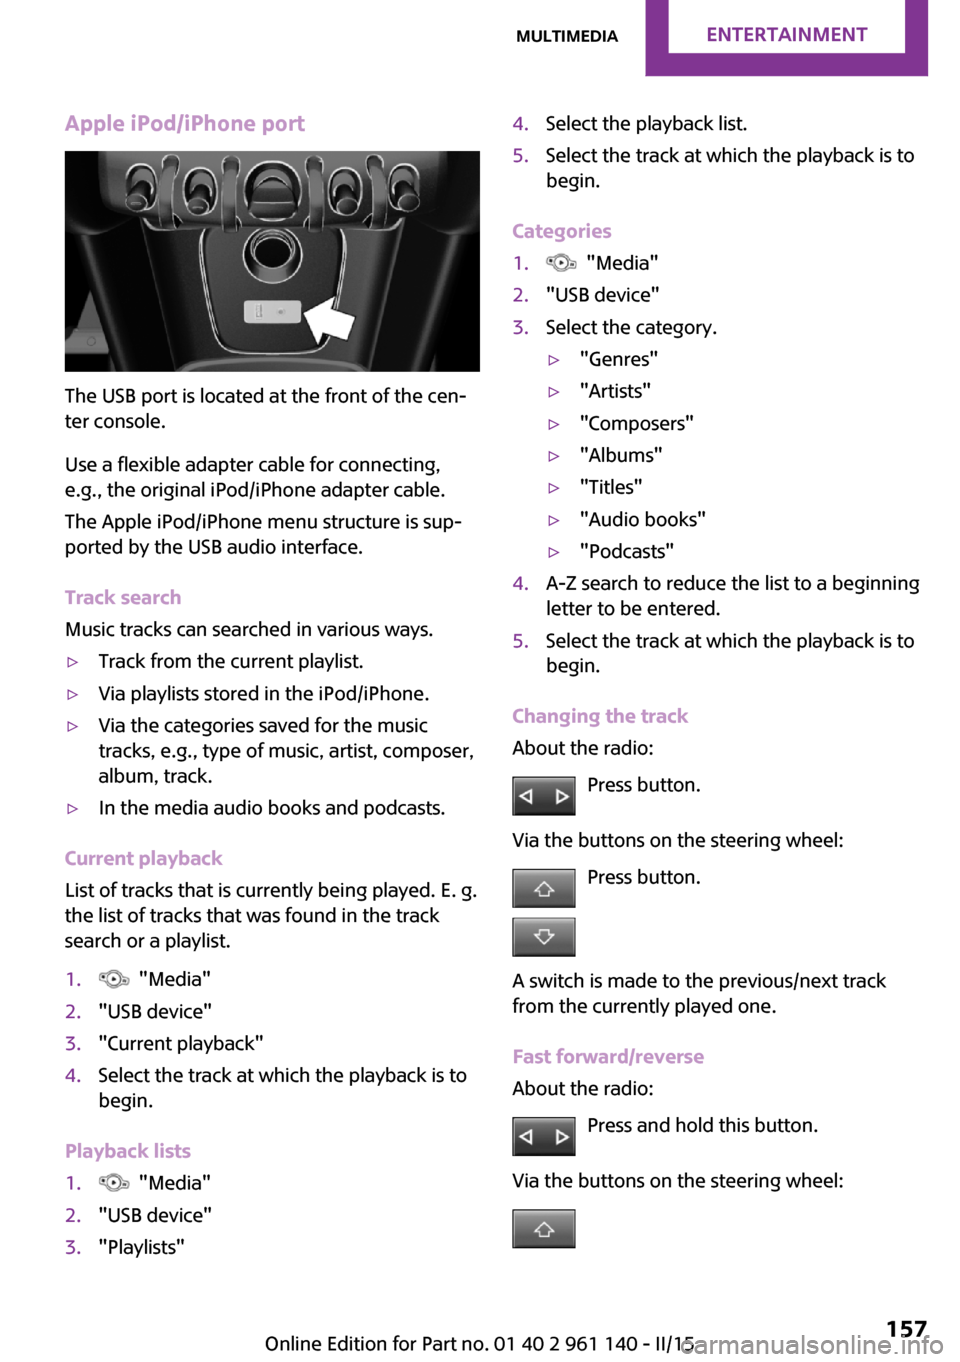
Apple iPod/iPhone port
The USB port is located at the front of the cen‐
ter console.
Use a flexible adapter cable for connecting,
e.g., the original iPod/iPhone adapter cable.
The Apple iPod/iPhone menu structure is sup‐
ported by the USB audio interface.
Track search
Music tracks can searched in various ways.
▷Track from the current playlist.▷Via playlists stored in the iPod/iPhone.▷Via the categories saved for the music
tracks, e.g., type of music, artist, composer,
album, track.▷In the media audio books and podcasts.
Current playback
List of tracks that is currently being played. E. g.
the list of tracks that was found in the track
search or a playlist.
1. "Media"2."USB device"3."Current playback"4.Select the track at which the playback is to
begin.
Playback lists
1. "Media"2."USB device"3."Playlists"4.Select the playback list.5.Select the track at which the playback is to
begin.
Categories
1. "Media"2."USB device"3.Select the category.▷"Genres"▷"Artists"▷"Composers"▷"Albums"▷"Titles"▷"Audio books"▷"Podcasts"4.A-Z search to reduce the list to a beginning
letter to be entered.5.Select the track at which the playback is to
begin.
Changing the track
About the radio:
Press button.
Via the buttons on the steering wheel: Press button.
A switch is made to the previous/next track
from the currently played one.
Fast forward/reverse
About the radio:
Press and hold this button.
Via the buttons on the steering wheel:
Seite 157MultimediaENTERTAINMENT157
Online Edition for Part no. 01 40 2 961 140 - II/15
Page 166 of 251
Bluetooth hands-free systemVehicle features and op‐
tions
This chapter describes all standard, country-
specific and optional features offered with the
series. It also describes features that are not
necessarily available in your car, e. g., due to
the selected options or country versions. This
also applies to safety-related functions and sys‐
tems. The respectively applicable country provi‐
sions must be observed when using the respec‐
tive features and systems.
The concept Mobile phones can be connected to the vehicle
via Bluetooth. After the mobile phones are
paired once, they are recognized automatically
when the ignition is switched on. As soon as
they are inside the vehicle they can be oper‐
ated via the radio and via the buttons on the
steering wheel.
Hints Using the mobile phone while driving
Make entries only when traffic and road
conditions allow. Do not hold the mobile phone
in your hand while you are driving; use the
hands-free system instead. If you do not ob‐
serve this precaution, you can endanger the ve‐
hicle's occupants and other traffic. ◀
Certain functions may need to be enabled by the mobile phone provider or service provider.
At high temperatures, the charge functions of
the mobile phone can be limited under certain
circumstances, and some functions are no lon‐
ger executed.Do not operate a mobile phone that is con‐
nected to the vehicle on the mobile phone key‐
pad, as this may lead to a malfunction.
When the mobile phone is used via the vehicle,
refer to the operating manual of the mobile
phone.
Approved mobile phones Accurate information about which mobile
phones are supported with a Bluetooth inter‐
face is available at www.mini.com/connectivity.
These approved mobile phones, with a certain
software version, support the vehicle functions
described below.
Malfunctions may occur with other mobile
phones or software versions.
Displaying the vehicle identification
number and software part number
The vehicle identification number and software
part number are needed to determine which
mobile phones are supported by the mobile
phone installation package. The software ver‐
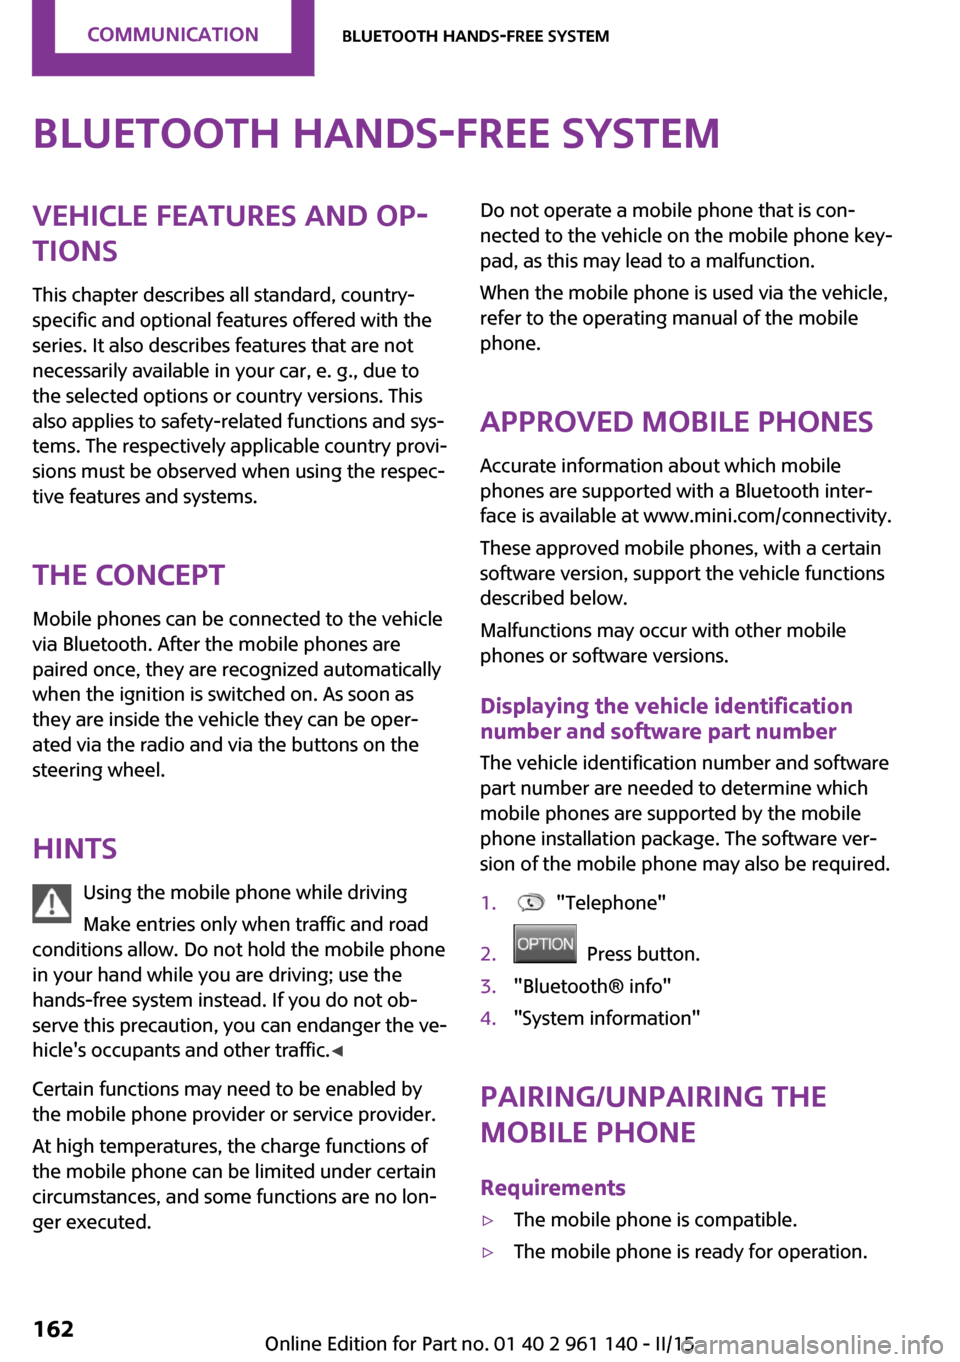
sion of the mobile phone may also be required.1. "Telephone"2. Press button.3."Bluetooth® info"4."System information"
Pairing/unpairing the
mobile phone
Requirements
▷The mobile phone is compatible.▷The mobile phone is ready for operation.Seite 162COMMUNICATIONBluetooth hands-free system162
Online Edition for Part no. 01 40 2 961 140 - II/15
Page 168 of 251
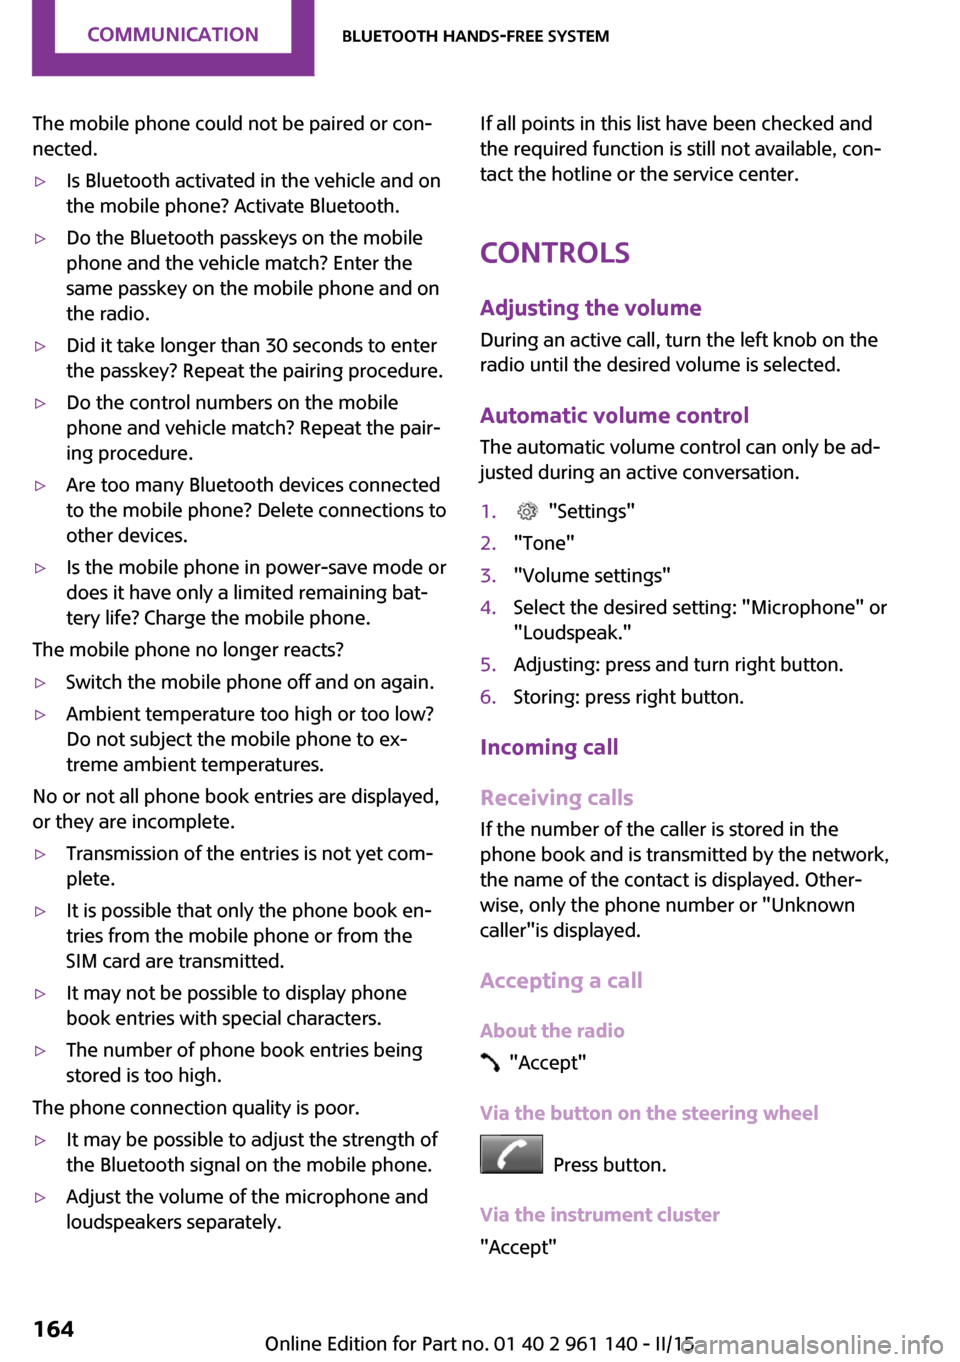
The mobile phone could not be paired or con‐
nected.▷Is Bluetooth activated in the vehicle and on
the mobile phone? Activate Bluetooth.▷Do the Bluetooth passkeys on the mobile
phone and the vehicle match? Enter the
same passkey on the mobile phone and on
the radio.▷Did it take longer than 30 seconds to enter
the passkey? Repeat the pairing procedure.▷Do the control numbers on the mobile
phone and vehicle match? Repeat the pair‐
ing procedure.▷Are too many Bluetooth devices connected
to the mobile phone? Delete connections to
other devices.▷Is the mobile phone in power-save mode or
does it have only a limited remaining bat‐
tery life? Charge the mobile phone.
The mobile phone no longer reacts?
▷Switch the mobile phone off and on again.▷Ambient temperature too high or too low?
Do not subject the mobile phone to ex‐
treme ambient temperatures.
No or not all phone book entries are displayed,
or they are incomplete.
▷Transmission of the entries is not yet com‐
plete.▷It is possible that only the phone book en‐
tries from the mobile phone or from the
SIM card are transmitted.▷It may not be possible to display phone
book entries with special characters.▷The number of phone book entries being
stored is too high.
The phone connection quality is poor.
▷It may be possible to adjust the strength of
the Bluetooth signal on the mobile phone.▷Adjust the volume of the microphone and
loudspeakers separately.If all points in this list have been checked and
the required function is still not available, con‐
tact the hotline or the service center.
Controls
Adjusting the volume During an active call, turn the left knob on the
radio until the desired volume is selected.
Automatic volume control
The automatic volume control can only be ad‐
justed during an active conversation.1. "Settings"2."Tone"3."Volume settings"4.Select the desired setting: "Microphone" or
"Loudspeak."5.Adjusting: press and turn right button.6.Storing: press right button.
Incoming call
Receiving calls If the number of the caller is stored in the
phone book and is transmitted by the network,
the name of the contact is displayed. Other‐
wise, only the phone number or "Unknown
caller"is displayed.
Accepting a call
About the radio
"Accept"
Via the button on the steering wheel
Press button.
Via the instrument cluster
"Accept"
Seite 164COMMUNICATIONBluetooth hands-free system164
Online Edition for Part no. 01 40 2 961 140 - II/15
Page 169 of 251
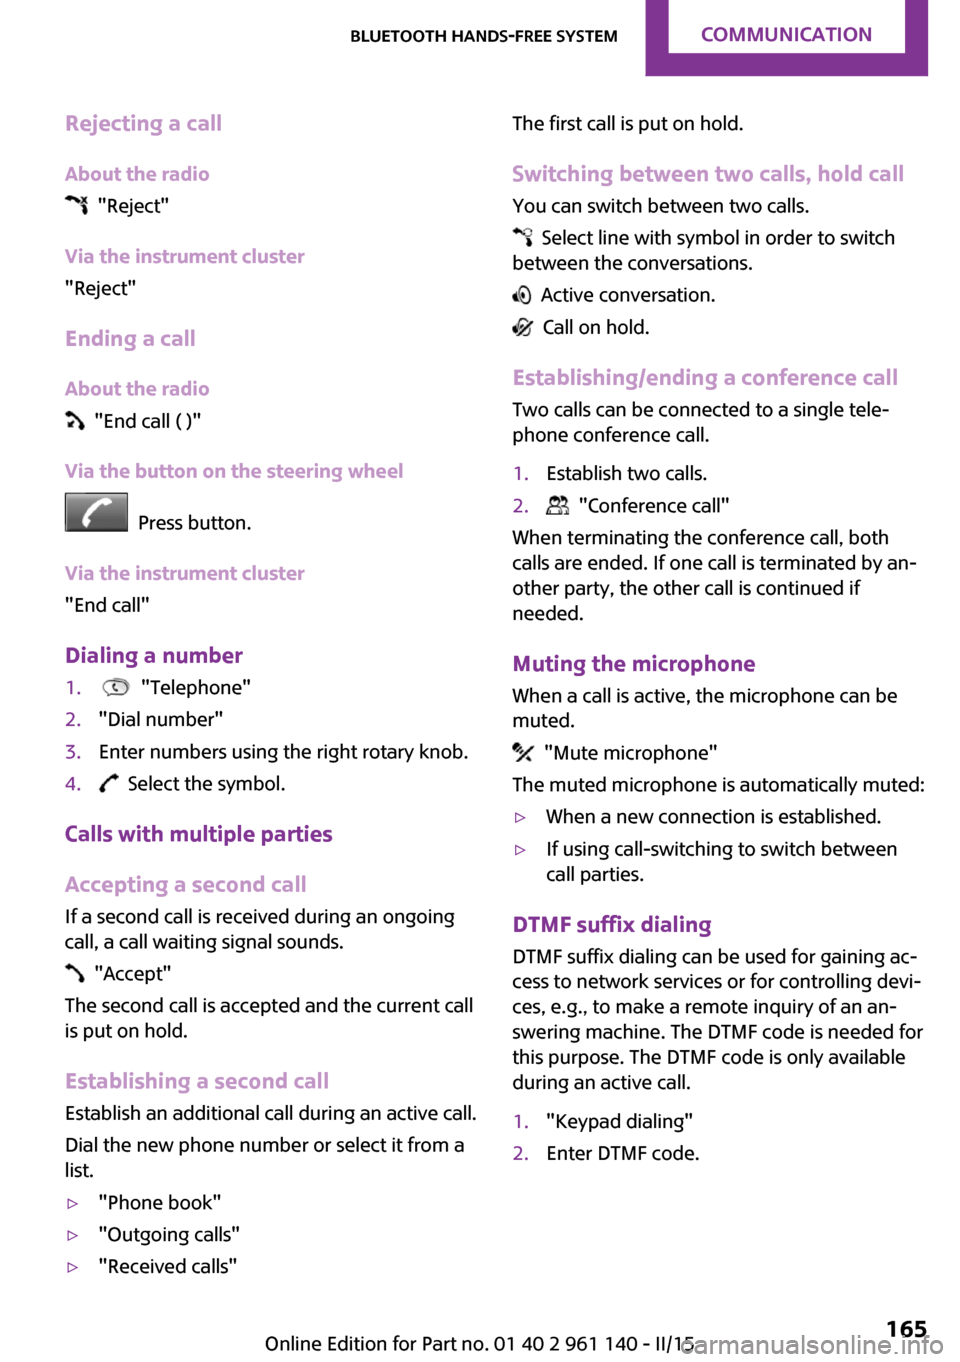
Rejecting a call
About the radio
"Reject"
Via the instrument cluster
"Reject"
Ending a call About the radio
"End call ( )"
Via the button on the steering wheel
Press button.
Via the instrument cluster
"End call"
Dialing a number
1. "Telephone"2."Dial number"3.Enter numbers using the right rotary knob.4. Select the symbol.
Calls with multiple parties
Accepting a second call
If a second call is received during an ongoing
call, a call waiting signal sounds.
"Accept"
The second call is accepted and the current call
is put on hold.
Establishing a second call Establish an additional call during an active call.
Dial the new phone number or select it from a
list.
▷"Phone book"▷"Outgoing calls"▷"Received calls"The first call is put on hold.
Switching between two calls, hold call You can switch between two calls.
Select line with symbol in order to switch
between the conversations.
Active conversation.
Call on hold.
Establishing/ending a conference call
Two calls can be connected to a single tele‐
phone conference call.
1.Establish two calls.2. "Conference call"
When terminating the conference call, both
calls are ended. If one call is terminated by an‐
other party, the other call is continued if
needed.
Muting the microphone When a call is active, the microphone can be
muted.
"Mute microphone"
The muted microphone is automatically muted:
▷When a new connection is established.▷If using call-switching to switch between
call parties.
DTMF suffix dialing
DTMF suffix dialing can be used for gaining ac‐
cess to network services or for controlling devi‐
ces, e.g., to make a remote inquiry of an an‐
swering machine. The DTMF code is needed for
this purpose. The DTMF code is only available
during an active call.
1."Keypad dialing"2.Enter DTMF code.Seite 165Bluetooth hands-free systemCOMMUNICATION165
Online Edition for Part no. 01 40 2 961 140 - II/15
Page 171 of 251
Add phone numbers to Favorites1.Mark the entry from the list.2. Press button and "Add to
favorites".
Or
Press the right button, and select the phone
number.3.Select the desired phone number as
needed.4.Insert and select the cursor at the desired
place in the Favorites.
Redialing
The list of the last 20 numbers of the mobile
phone selected are displayed.
1. "Telephone"2."Redial"
Add phone numbers to Favorites
1.Mark the entry from the list.2. Press button and "Add to
favorites".
Or
Press the right button, and select the phone
number.3.Select the desired phone number as
needed.4.Insert and select the cursor at the desired
place in the Favorites.
Dialing the number via the instrument
cluster
This is possible when there is no active call.
1. Press button on the steering wheel.
The last numbers selected are displayed in
the instrument cluster.2.If necessary, select another number.3. Press the key again to establish the
connection.
Received calls
The list of the 20 last received or missed calls of
the cell phone are displayed.
1. "Telephone"2."Received calls"
Add phone numbers to Favorites
1.Mark the entry from the list.2. Press button and "Add to
favorites".
Or
Press the right button, and select the phone
number.3.Select the desired phone number as
needed.4.Insert and select the cursor at the desired
place in the Favorites.
Hands-free system
General information
Calls that are being made on the hands-free
system can be continued on the mobile phone
and vice versa.
From the mobile phone to the hands-
free system
Calls that were begun outside of the Bluetooth
range of the vehicle can be continued on the
hands-free system with the ignition switched
on.
Depending on the mobile phone, the system
automatically switches to the hands-free sys‐
tem.
If the system does not switch over automati‐
cally, follow the instructions on the mobile
phone display; refer also to the mobile phone
operating instructions.
Seite 167Bluetooth hands-free systemCOMMUNICATION167
Online Edition for Part no. 01 40 2 961 140 - II/15
Page 180 of 251
Wheels and tiresVehicle features and op‐
tions
This chapter describes all standard, country-
specific and optional features offered with the
series. It also describes features that are not
necessarily available in your car, e. g., due to
the selected options or country versions. This
also applies to safety-related functions and sys‐
tems. The respectively applicable country provi‐
sions must be observed when using the respec‐
tive features and systems.
Tire inflation pressure Safety informationThe tire characteristics and tire inflation pres‐
sure influence the following:▷The service life of the tires.▷Road safety.▷Driving comfort.
Checking the tire inflation pressure
Check the tire inflation pressure regularly
Regularly check the tire inflation pressure,
and correct it as needed: at least twice a month
and before a long trip. If you fail to observe this
precaution, you may be driving on tires with in‐
correct tire pressures, a condition that may not
only compromise your vehicle's driving stabil‐
ity, but also lead to tire damage and the risk of
an accident. ◀
Tires have a natural, consistent loss of tire infla‐
tion pressure.
Tires heat up while driving, and the tire inflation
pressure increases along with the tire's temper‐
ature. The tire inflation pressure specifications
relate to cold tires or tires with the ambient
temperature.
Only check the tire inflation pressure when the
tires are cold. This means after driving no more
than 1.25 miles/2 km or when the vehicle has
been parked for at least 2 hours.
The displays of inflation devices may under-
read by up to 1.45 psi/0.1 bar.
For Flat Tire Monitor: after correcting the tire
inflation pressure, reinitialize the Flat Tire Moni‐
tor.
For Tire Pressure Monitor: after correcting the
tire inflation pressure, reset the Tire Pressure
Monitor.▷Reinitialize the Flat Tire Monitor.▷Reinitialize the Tire Pressure Monitor.
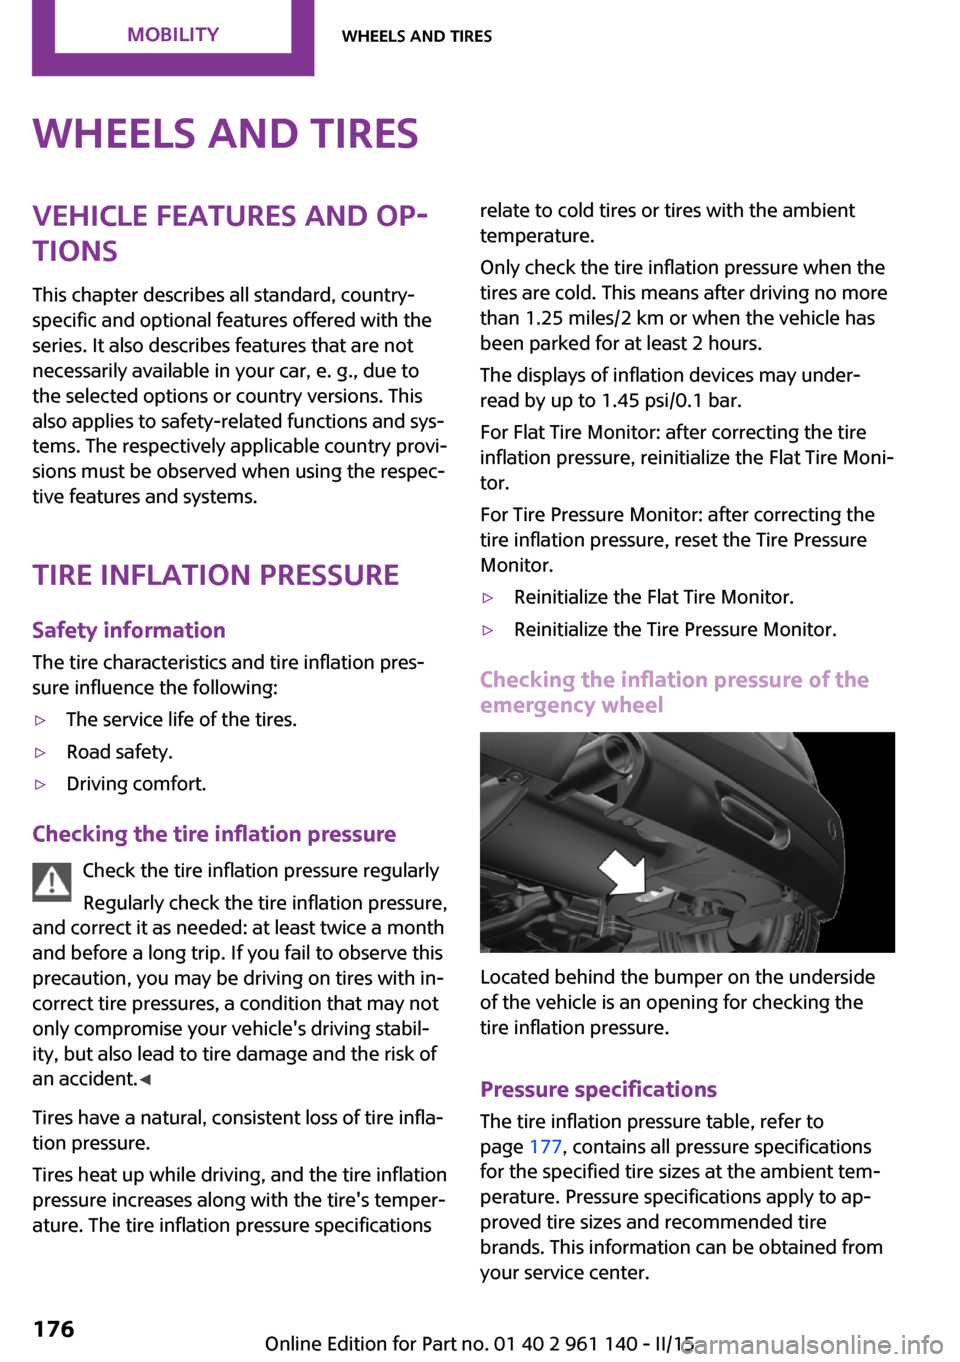
Checking the inflation pressure of the
emergency wheel
Located behind the bumper on the underside
of the vehicle is an opening for checking the
tire inflation pressure.
Pressure specifications
The tire inflation pressure table, refer to
page 177, contains all pressure specifications
for the specified tire sizes at the ambient tem‐
perature. Pressure specifications apply to ap‐
proved tire sizes and recommended tire
brands. This information can be obtained from
your service center.
Seite 176MOBILITYWheels and tires176
Online Edition for Part no. 01 40 2 961 140 - II/15