ECO mode MINI Paceman 2013 User Guide
[x] Cancel search | Manufacturer: MINI, Model Year: 2013, Model line: Paceman, Model: MINI Paceman 2013Pages: 275, PDF Size: 4.23 MB
Page 90 of 275

ClimateCONTROLS
89
Recirculated-air mode
If the air outside the car has an
unpleasant odor or contains pollut-
ants, shut off the supply to the inte-
rior of the car temporarily. The system then
recirculates the air curre ntly within the vehicle.
If the windows fog in recirculated-air mode,
switch off the recirculated-air mode and
increase the air volume if necessary. Ensure that
air can flow onto the windshield.
The recirculated-air mode is automatically deac-
tivated at low outside temperatures.
The recirculated-air mode should not be
used over an extended period of time;
otherwise, the air quali ty in the passenger com-
partment will deteriorate continuously. <
Temperature
Turn upward, red, to increase the temper-
ature.
Turn downward, blue, to decrease the
temperature.
Rear window defroster
The defroster is switched off auto-
matically after a certain time.
The rear window he ating is lowered
or switched off entirely to reduce the drain on
the battery.
Air distribution
Direct the flow of air to the
windows , to the upper body
area or to the footwell .
Intermediate settings are possible.
Windshield heating
The windshield heating is switched
off automatically after a short time.
The front window heating is low-
ered or switched off entirely to reduce the drain
on the battery.
Defrosting windows and removing
condensation
1. Set air flow rate to the maximum level.
2. Set air distributi on to position .
Condensation is removed from the windows
more quickly when the cooling function
is
also activated.
3. Set to the highest temperature, red.
4. Deactivate recirculated-air mode.
5. Turn on windshield heating if necessary.
6. Turn on rear window defroster if necessary.
Microfilter
The microfilter captures dust and pollen. The
microfilter is changed by your MINI dealer dur-
ing routine maintenance work.
00320051004F004C00510048000300280047004C0057004C005200510003
Page 92 of 275

ClimateCONTROLS
91
If condensation starts to form on the inside win-
dow surfaces, press the AUTO button or switch
off the recirculated-air mode and, if necessary,
increase the air flow ra te. Ensure that air can
flow onto the windshield.
The recirculated-air mode is automatically deac-
tivated at low outside temperatures.
The recirculated-air mode should not be
used over an extended period of time;
otherwise, the air quali ty in the passenger com-
partment will deteriorate continuously. <
Maximum cooling
The automatic climate control
switches to the lowest tempera-
ture, high airflow and the recircu-
lated-air mode.
For maximum cooling, open the air vents for the
upper body area.
The air is cooled as quickly as possible:
> For an outside temperature of more than
327 /06
> While the motor is running.
Air distribution, manual
The flow of air is directed to the
windows, to the upper body area or
to the footwell as selected.
You can switch the automatic air
distribution back on by pressing the AUTO but-
ton.
Temperature
Set the desired temperature individually.
The automatic climate control achieves
this temperature as quickly as possible
regardless of the season, using maximum
cooling or heating power if necessary, and then
maintains it.
If you switch between different tempera-
ture settings in quic k succession, the auto-
matic climate control do es not have enough
time to achieve the set temperature. <
Rear window defroster
The defroster is switched off auto-
matically after a certain time.
Depending on your vehicle's equip-
ment, the upper wires serve as an
antenna and are not part of the rear window
defroster.
Defrosting windows and removing
condensation
Quickly removes ice and condensa-
tion from the windshield and front
side windows.
For this purpose, also switch on the
cooling function.
The windshield heating
is switched on automat-
ically.
Windshield heating
The windshield heating is switched
off automatically after a certain
time.
Cooling function
When the cooling function is on,
the air is cooled, dried, then
reheated according to the temper-
ature setting. The passenger com-
partment can only be cooled while
the engine is running.
The cooling function helps prevent condensa-
tion on the windows or removes it quickly.
Depending on the weather, the windshield may
fog over briefly when the engine is started. The
recirculated-air mode may be switched on auto-
matically.
When the AUTO button is pressed, the cooling
function switches on automatically.
Microfilter/activated-charcoal filter
The microfilter captures dust and pollen. The
activated-charcoal filter provides additional pro-
tection by filtering gase ous pollutants from the
00320051004F004C00510048000300280047004C0057004C005200510003
Page 94 of 275
Practical interior accessoriesCONTROLS
93
Practical interior accessories
Vehicle equipment
In this chapter, all production, country, and
optional equipment that is offered in the model
range is described. Equipment is also described
that is not available because of, for example,
selected options or count ry version. This also
applies to safety related functions and systems.
Integrated universal
remote control
The concept
By using the Integrated universal remote con-
trol, up to 3 functions of remote controlled
devices, e.g., garage door openers or lighting
systems, can be operated . As a result, the uni-
versal remote control can replace up to 3 differ-
ent remote controls. To operate, the buttons on
the rearview mirror must be programmed with
the desired functions. For programming, the
remote control for each device is needed.
To prevent possible damage or injury,
before programming or using the inte-
grated universal remote control, always inspect
the immediate area to make certain that no
people, animals or objects are within the travel
range of the device.
Comply also with the safe ty instructions supplied
with the original hand-held transmitter. <
Before selling the vehicle, delete the stored
functions as a safety precaution, page.
Checking compatibility
Depending on your vehicle's equip-
ment, the glove compartment can be
ventilated and, if the cooling function is
switched on, can also be cooled.
For additional information, please contact your
MINI dealer or call: 1-800-355-3515. A list of compatible remo
te controls is available
on the Internet at www.homelink.com.
HomeLink is a registered trademark of Johnson
Controls, Inc.
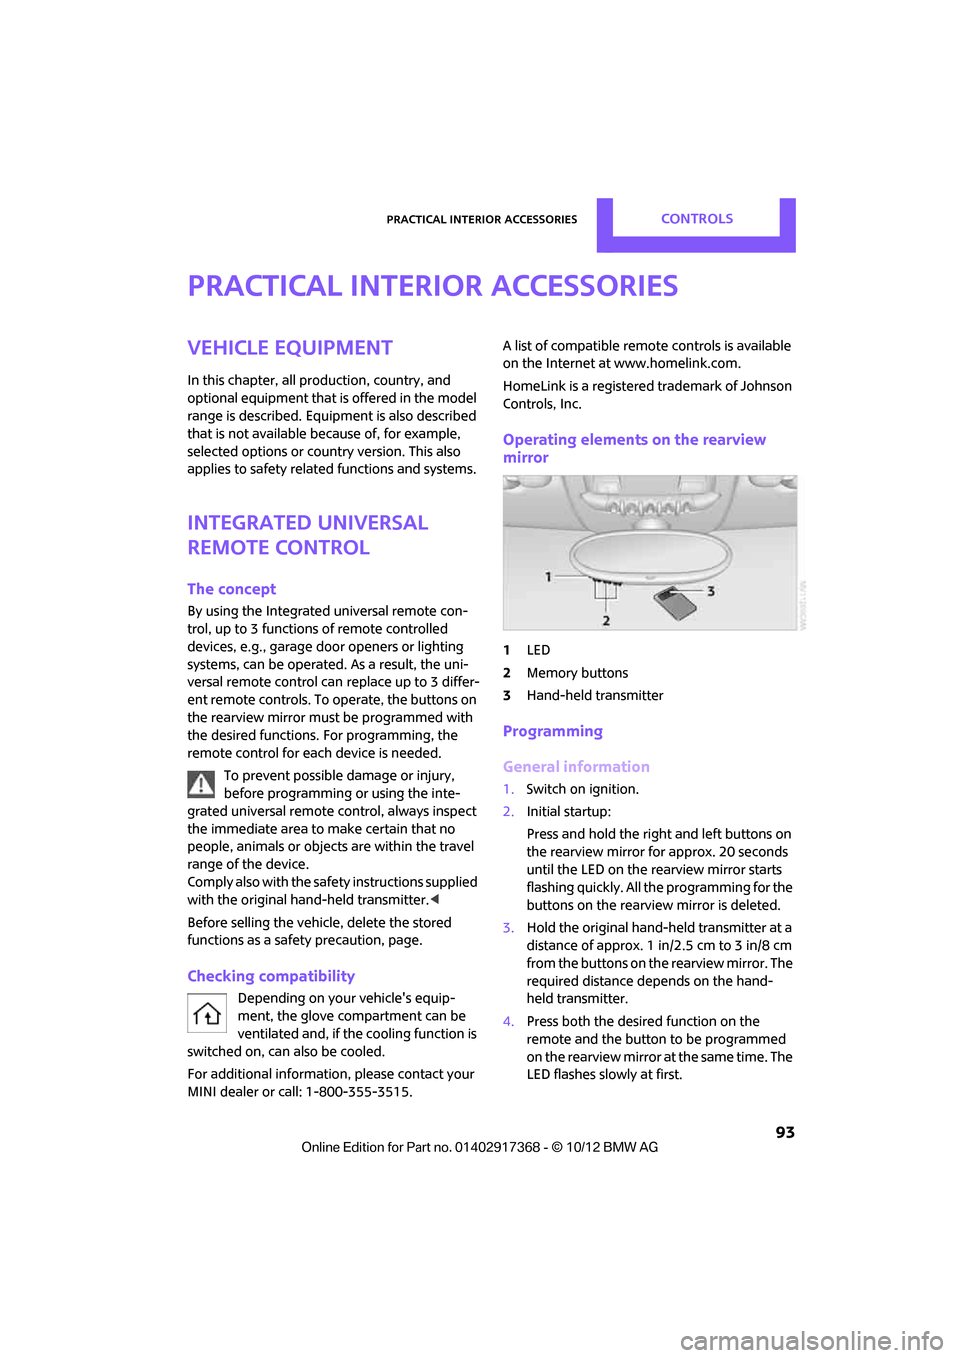
Operating elements on the rearview
mirror
1 LED
2 Memory buttons
3 Hand-held transmitter
Programming
General information
1.Switch on ignition.
2. Initial startup:
Press and hold the righ t and left buttons on
the rearview mirror for approx. 20 seconds
until the LED on the rearview mirror starts
flashing quickly. All the programming for the
buttons on the rearview mirror is deleted.
3. Hold the original hand-held transmitter at a
distance of approx. 1 in/2.5 cm to 3 in/8 cm
from the buttons on the rearview mirror. The
required distance depends on the hand-
held transmitter.
4. Press both the desire d function on the
remote and the button to be programmed
on the rearview mirror at the same time. The
LED flashes slowly at first.
00320051004F004C00510048000300280047004C0057004C005200510003
Page 105 of 275
DRIVING TIPSThings to remember when driving
104
Things to remember when driving
Vehicle equipment
In this chapter, all production, country, and
optional equipment that is offered in the model
range is described. Equipment is also described
that is not available because of, for example,
selected options or coun try version. This also
applies to safety relate d functions and systems.
Break-in period
Moving parts need breaking-in time to adjust to
each other. Please follow the instructions below
in order to achieve the optimal service life and
economy of operation for your vehicle.
Engine and differential
Always obey all official speed limits.
Up to 1,200 miles/2,000 km
Drive at varying engine and road speeds, but do
not exceed the following:
> Gasoline engine
4,500 rpm or 100 mph/160 km/h
Avoid full-throttle operation and use of the
transmission's kickdown mode.
After driving 1,200 miles/2,000 km
Engine and vehicle speeds can be gradually
increased.
Tires
Due to technical factors associated with their
manufacture, tires do not achieve their full trac-
tion potential until after an initial break-in
period. Therefore, drive cautiously during the
first 200 miles/300 km.
Brake system
Brakes require an initial break-in period of
approx. 300 miles/500 km to achieve optimized
contact and wear patterns between brake pads
and rotors. Drive cautiously during this break-in
period.
Clutch
The function of the clutch reaches its optimal
level only after a distan ce driven of approx.
300 miles/500 km. During this break-in period,
engage the clutch gently.
Following part replacement
The same break-in procedures should be
observed if any of the components mentioned
above have to be renewed in the course of the
vehicle's operating life.
General driving notes
Ground clearance
When driving, make sure that there is suf-
ficient ground clearance, such as when
entering underground parking garages, driving
over curbs or when driving in winter; otherwise
damage to the vehicle may result. <
Closing tailgate
Only drive with the tailgate closed. Failure
to do so may endanger passengers or
other road users or may damage the vehicle in
the event of an accident or a braking and eva-
sive maneuver. In addi tion, exhaust gas may
flow into the passenger compartment. <
00320051004F004C00510048000300280047004C0057004C005200510003
Page 146 of 275
RadioEntertainment
145
When setting a station with a digital signal, it
may be a few seconds until the station is repro-
duced in digital quality.
In areas in which the station is not continuously
received in digital mode, playback switches
between analog and digita l reception. In this
case, switch off digi tal radio reception.
Displaying additional information
Some stations broadcast additional information
on the current track, such as the name of the art-
ist.
1.Select the desired station.
2. Open "Options".
3. "Station info"
Selecting a substation
The symbol indicates that a main station also
broadcasts additional su bstations. The station
name of the main station ends in HD1. The sta-
tion names of the substations end in HD2, HD3,
etc.
1. Select the desired station.
2. Press the MINI joystick.
3. Select the substation.
When reception is poor, the substation is muted
for several seconds.
Stored stations
It is possible to store up to 40 stations.
Selecting a station
1. "Radio"
2. "Presets"
3. Select the desired station.
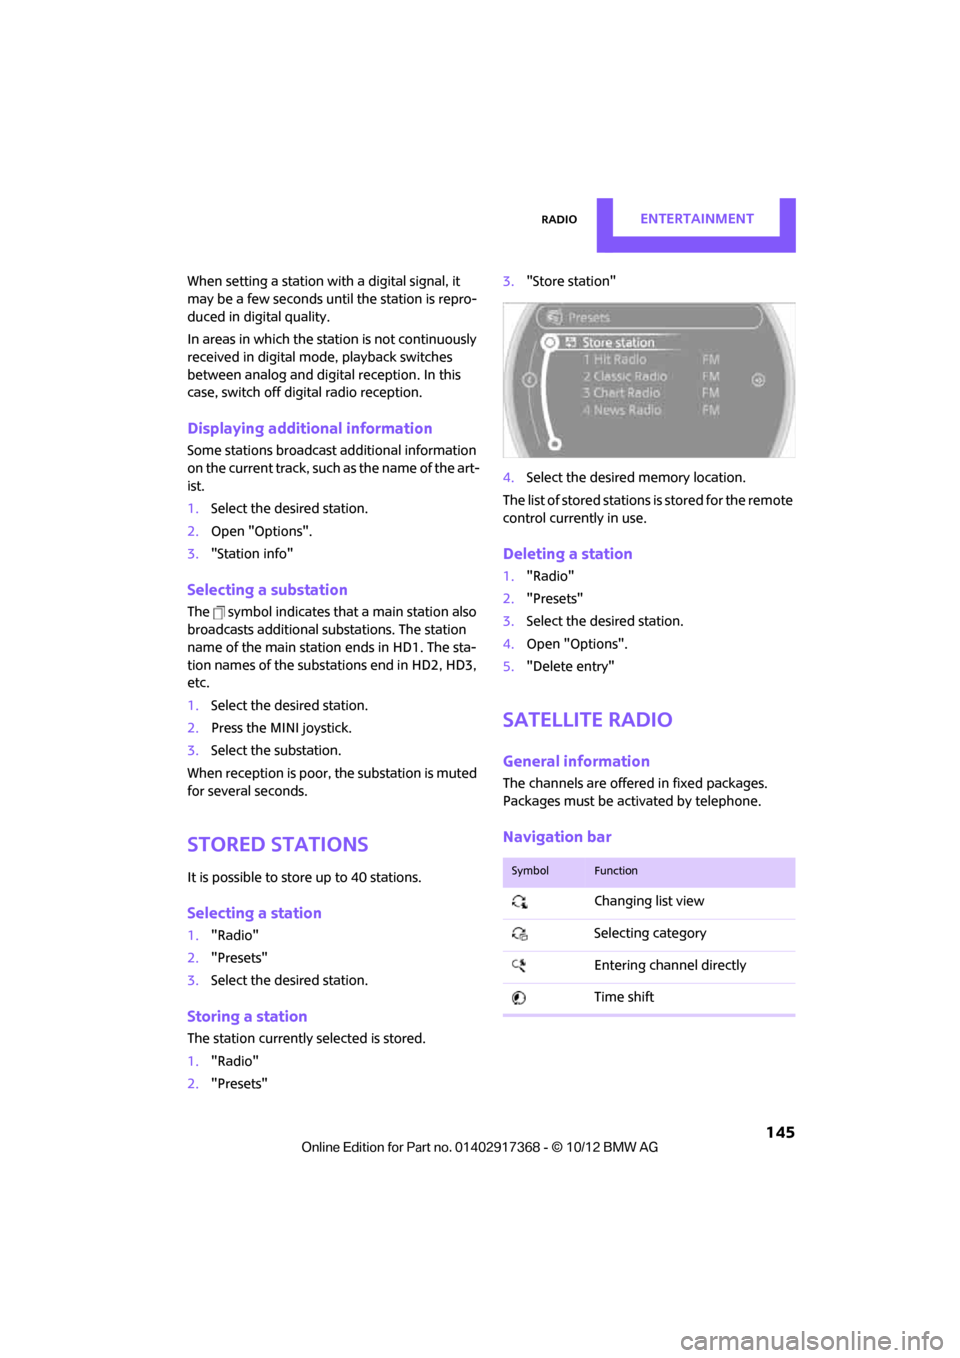
Storing a station
The station curre ntly selected is stored.
1. "Radio"
2. "Presets" 3.
"Store station"
4. Select the desired memory location.
The list of stored stations is stored for the remote
control current ly in use.
Deleting a station
1."Radio"
2. "Presets"
3. Select the desired station.
4. Open "Options".
5. "Delete entry"
Satellite radio
General information
The channels are offered in fixed packages.
Packages must be activated by telephone.
Navigation bar
SymbolFunction
Changing list view
Selecting category
Entering channel directly
Time shift
00320051004F004C00510048000300280047004C0057004C005200510003
Page 154 of 275
External devicesEntertainment
153
External devices
Vehicle equipment
In this chapter, all production, country, and
optional equipment that is offered in the model
range is described. Equipment is also described
that is not available because of, for example,
selected options or count ry version. This also
applies to safety related functions and systems.
Overview
Different external devices can be connected to
the vehicle. Sound is output over the vehicle
speakers. Depending upon how the external
device is connected to the vehicle, the device
may be operated using the MINI joystick.
AUX-In connection
Overview
> It is possible to connect audio devices, e.g.
MP3 players. Sound is output over the vehi-
cle speakers.
> Recommended settings: mid-level tone and
volume settings on th e audio device. Tone
may depend on the quality of the audio files.
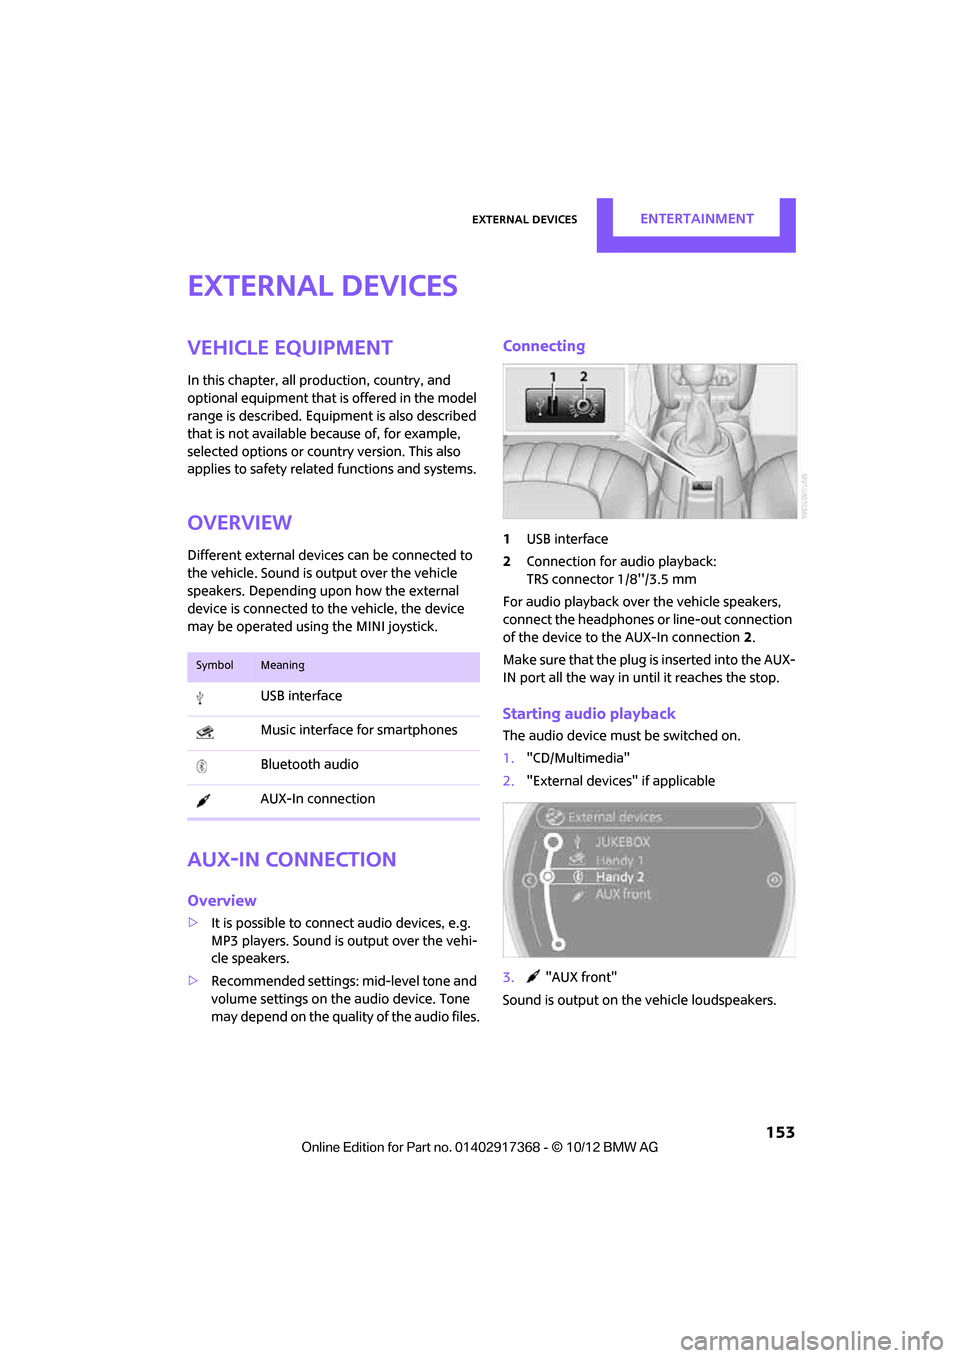
Connecting
1 USB interface
2 Connection for audio playback:
TRS connector 1/8''/3.5 mm
For audio playback over the vehicle speakers,
connect the headphones or line-out connection
of the device to the AUX-In connection 2.
Make sure that the plug is inserted into the AUX-
IN port all the way in un til it reaches the stop.
Starting audio playback
The audio device must be switched on.
1."CD/Multimedia"
2. "External devices" if applicable
3. "AUX front"
Sound is output on the vehicle loudspeakers.
SymbolMeaning
USB interface
Music interface for smartphones
Bluetooth audio
AUX-In connection
00320051004F004C00510048000300280047004C0057004C005200510003
Page 188 of 275
OfficeCOMMUNICATIONS
187
Office
Vehicle equipment
In this chapter, all production, country, and
optional equipment that is offered in the model
range is described. Equipment is also described
that is not available because of, for example,
selected options or count ry version. This also
applies to safety related functions and systems.
Overview
General information
Contacts, appointments, tasks, notes, text mes-
sages and mobile phone e-mails can be dis-
played using the Control Display if the mobile
phone compatibly supports these functions and
the required Bluetooth radio standards.
For information about which mobile phones and
functions are available, go to www.mini.com/
connectivity.
A limited number of compatible mobile phones
are available for Office.
Contents are only displayed completely when
the vehicle is stopped.
Only read access to the mobile phone is possi-
ble.
Do not use Office while driving. Make
entries only when traffic and road condi-
tions permit; otherwise, you may endanger
vehicle occupants and other road users by being
distracted. <
Requirements
>A suitable mobile phon e is paired with the
vehicle and connected . In some mobile
phones, the data access to the mobile
phone must be confirmed. >
Time zones, time, and date, refer to
page 66, are correctly adju sted on the Con-
trol Display and on the mobile phone in
order, for example, to correctly display
appointments.
Updating
Every time that the mobile phone is connected
to the vehicle, data ar e updated. Appointments,
tasks, notes and reminders can be updated sep-
arately.
1. "Office"
2. "Current office", "C alendar", "Tasks",
"Notes" or "Reminders"
3. Open "Options".
4. "Update data"
Data from the mobile phone are again trans-
ferred to the vehicle.
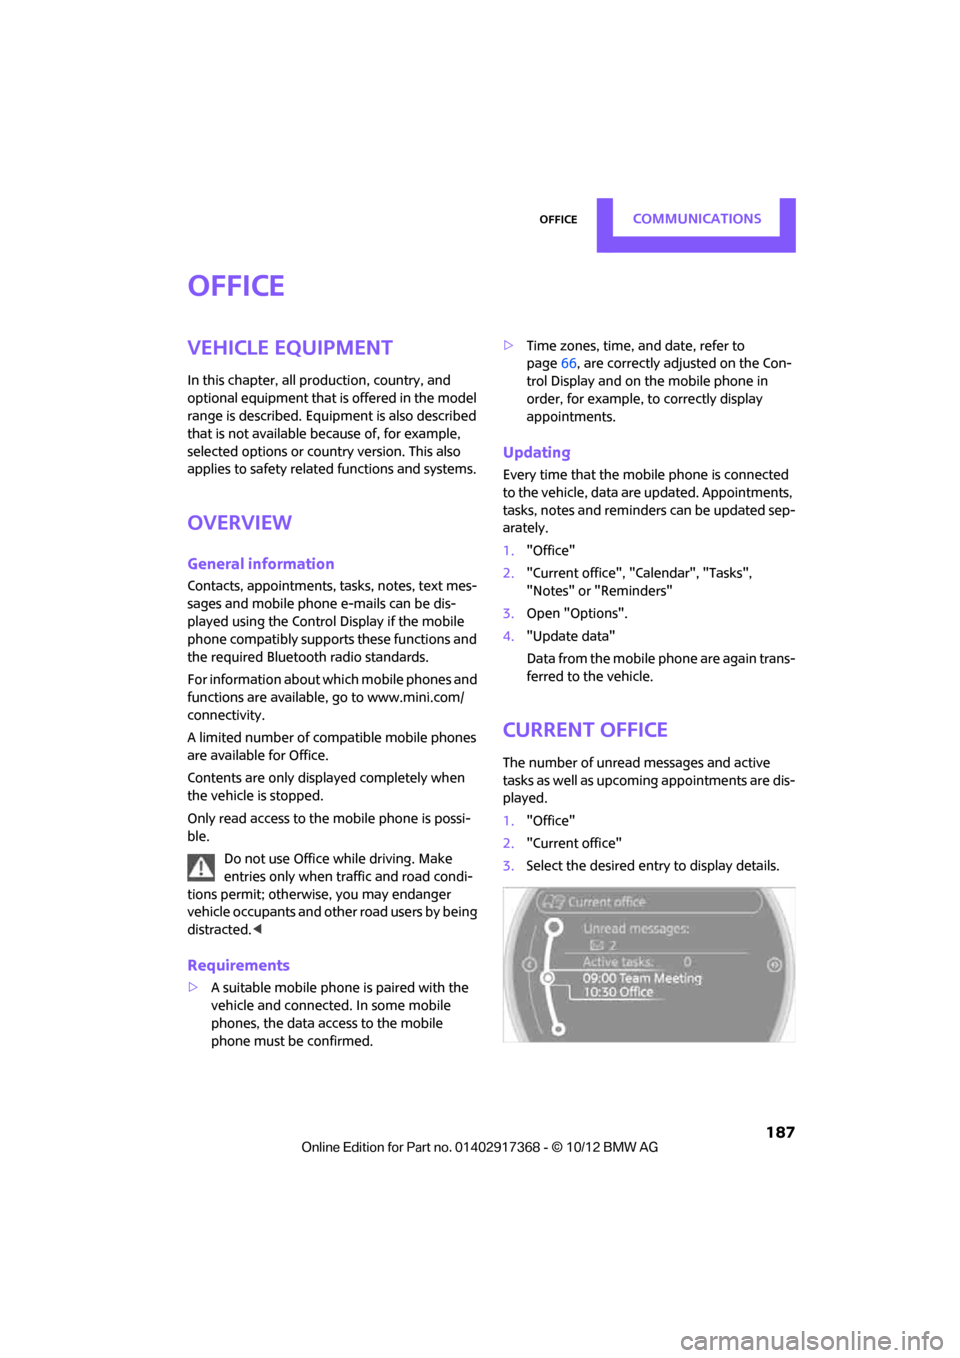
Current office
The number of unread messages and active
tasks as well as upcoming appointments are dis-
played.
1. "Office"
2. "Current office"
3. Select the desired entry to display details.
00320051004F004C00510048000300280047004C0057004C005200510003
Page 204 of 275

Wheels and tiresMOBILITY
203
Wheels and tires
Vehicle equipment
In this chapter, all production, country, and
optional equipment that is offered in the model
range is described. Equipment is also described
that is not available because of, for example,
selected options or count ry version. This also
applies to safety related functions and systems.
Tire inflation pressures
Information for your safety
It is not merely the tires' service life, but also
driving comfort and, to a great extent, driving
safety that depend on the condition of the tires
and the maintenance of the specified tire pres-
sure.
Checking pressure
Check the tire inflatio n pressure regularly
and correct it, if nece ssary: at least twice a
month and before starting long trips. If you fail
to observe this precaution you may be driving
on tires with incorrect tire pressures, a condition
that can not only compromise your vehicle's
driving stability, but also lead to tire damage and
the risk of an accident. Do not drive with
deflated, i.e. flat tires, except when using run-
flat tires. A flat tire will seriously impair your
vehicle's handling and braking response.
Attempts to drive on a flat tire can lead to loss of
control over the vehicle. <
Check the tire inflation pressures only on cold
tires. This means after a maximum of 1.25 miles/
2 km driving or when the vehicle has been
parked for at least 2 hours. When tires are warm,
the tire inflation pressure is higher. After adjusting the tire inflation pressure,
reinitialize the Flat Tire Monitor, page 75,
or reset the Tire Pressure Monitor, page 78.<
Pressure specifications
The tables below provide all the correct inflation
pressures for the specifie d tire sizes at ambient
temperature.
The tire inflation pressures apply to the
tire sizes approved and the tire brands
recommended by the manufacturer of your
MINI. Your MINI dealer will be glad to advise
you. <
For correct identification of the right tire infla-
tion pressures, observe the following:
> Tire sizes for your vehicle
> Maximum allowable driving speed
Tire inflation pressures for driving up to
100 mph or 160 km/h
For normal driving up to 100 mph or 160 km/h
and to achieve optimum dr iving comfort, adjust
pressures to the respective tire inflation pres-
sures listed on the foll owing pages in the col-
umns for traveling speeds up to a maximum of
100 mph or 160 km/h.
These tire inflation pre ssures can also be found
on the driver's side door pillar when the driver's
door is open.
MINI Countryman:
00320051004F004C00510048000300280047004C0057004C005200510003
Page 213 of 275

MOBILITYWheels and tires
212
Otherwise, tire damage can be extremely dan-
gerous for vehicle occupants and other road
users. <
Tire age
The manufacturing date of tires is contained in
the tire coding:
DOT ... 1012 means that the tire was manufac-
tured during the 10th week of 2012.
For various reasons, such as the development of
brittleness, the manufacturer of your MINI rec-
ommends tire replacemen t after no more than
6 years, regardless of the actual wear of the
tires.
Run-flat tires
The symbol identifying run-flat tires is a circle
with the letters RSC on the sidewall.
Run-flat tires comprise a conditionally self-sup-
porting tire and a special rim. The reinforcement
in the sidewalls ensures that the tire can con-
tinue to be used subject to certain restrictions,
even if depressurized.
For information on continui ng to drive with a flat
tire, refer to Indication of a flat tire, page 76.
New wheels and tires
Have new wheels and tires mounted only
by your MINI dealer or a specialized tire
shop that has specially trained personnel work-
ing in accordance with the specifications of the
MINI manufacturer. If this work is not carried out properly, there is a dang
er of subsequent dam-
age and related safety haza rds. Make sure that
the new wheels are balanced.<
Retreaded tires
The manufacturer of your MINI recom-
mends that you avoid using retreaded
tires, as this could impair driving safety. The
causes for this include potentially different tire
casing structures and often wide variations in
tire age, which can resu lt in a limited service
life. <
Correct wheels and tires
The manufacturer of your MINI recom-
mends mounting only wheels and tires
that it has specifically approved for use on your
particular model. Although other wheels and
tires may theoretically have the same dimen-
sions, variations in factors such as manufactur-
ing tolerances can result in contact between tire
and bodywork, ultimately leading to serious
accidents. The manufacturer of your MINI can-
not evaluate non-approved wheels and tires to
determine if they are suited for use, and there-
fore cannot ensure the operating safety of the
vehicle if they are mounted. <
Your MINI dealer will be glad to inform you
about the correct wheel an d tire combination for
your vehicle.
The correct combin ation of wheels and tires is
also necessary to ensure reliable operation of
various vehicle systems such as ABS and DSC.
To maintain good handling and vehicle
response, use only tires of a single brand and
tread configuration. Afte r a tire has been dam-
aged, mount the previous wheel and tire combi-
nation again as soon as possible.
Wheels with Tire Pr essure Monitor TPM
electronics
When mounting new tires or changing over from
summer to winter tires, or vice versa, only use
wheels with TPM electronics; otherwise, the Tire
Pressure Monitor may not be able to detect a
00320051004F004C00510048000300280047004C0057004C005200510003
Page 219 of 275

MOBILITYMaintenance
218
Maintenance
Vehicle equipment
In this chapter, all production, country, and
optional equipment that is offered in the model
range is described. Equipment is also described
that is not available because of, for example,
selected options or coun try version. This also
applies to safety relate d functions and systems.
MINI Maintenance System
The MINI Maintenance System supports the
preservation of the traffic and operating safety
of your MINI. The objectiv e is to optimize efforts
with respect to minimal vehicle maintenance
costs.
If and when you come to sell your MINI, a com-
prehensive record of serv icing will prove a signif-
icant benefit.
Condition Based Service CBS
Sensors and special algorithms take the different
driving conditions of your MINI into account.
Condition Based Service uses this to determine
the current and future se rvice requirements. By
letting you define a service and maintenance
regimen that reflects your own individual
requirements, the system builds the basis for
trouble-free driving. On the Control Display, you can have the
remaining times or distan
ces for selected main-
tenance tasks and any legally prescribed dates
displayed, page 64.
Service data in the remote control
Your vehicle continuously stores service-
requirement information in the remote control
while you are driving. Your MINI dealer can read
out this data from the remote control unit, and
propose an optimized maintenance approach.
Whenever you take your car in for servicing you
should therefore hand your MINI dealer the
remote control unit that you last used.
Make sure that the date is always set cor-
rectly, page 67; otherwise, the effective-
ness of Condition Based Service CBS is not
assured. <
Service and Warranty Information
Booklet for US mode ls and Warranty and
Service Guide Booklet for Canadian
models
Please consult your Service and Warranty Infor-
mation Booklet for US models and Warranty and
Service Guide Booklet for Canadian models for
additional information on service requirements.
The manufacturer of the MINI recom-
mends that you have service and repair
operations performed at your MINI dealer.
Take the time to ensure that these service pro-
cedures are confirmed by entries in your vehi-
cle's Service and Warran ty Information Booklet
for US models and Warranty and Service Guide
Booklet for Canadian models. These entries ver-
ify that your vehicle has received the specified
regular maintenance. <
00320051004F004C00510048000300280047004C0057004C005200510003