fold seats MINI Paceman 2013 Owner's Manual
[x] Cancel search | Manufacturer: MINI, Model Year: 2013, Model line: Paceman, Model: MINI Paceman 2013Pages: 275, PDF Size: 4.23 MB
Page 41 of 275

CONTROLSAdjustments
40
Lumbar support
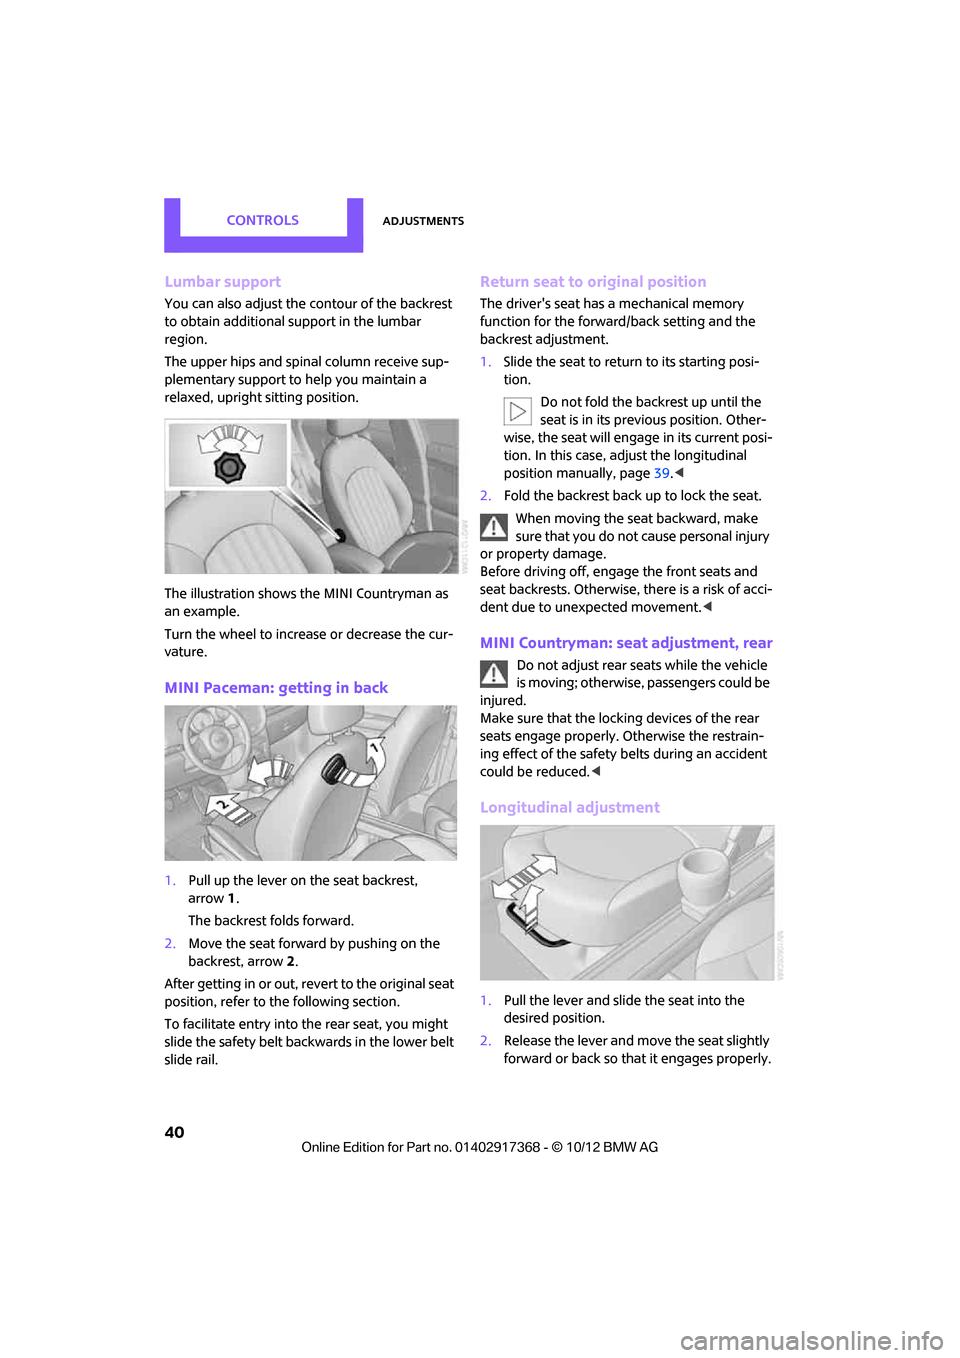
You can also adjust the contour of the backrest
to obtain additional support in the lumbar
region.
The upper hips and spinal column receive sup-
plementary support to help you maintain a
relaxed, upright sitting position.
The illustration shows the MINI Countryman as
an example.
Turn the wheel to increase or decrease the cur-
vature.
MINI Paceman: getting in back
1. Pull up the lever on the seat backrest,
arrow 1.
The backrest folds forward.
2. Move the seat forward by pushing on the
backrest, arrow 2.
After getting in or out, revert to the original seat
position, refer to the following section.
To facilitate entry into the rear seat, you might
slide the safety belt backwards in the lower belt
slide rail.
Return seat to original position
The driver's seat has a mechanical memory
function for the forward/back setting and the
backrest adjustment.
1. Slide the seat to return to its starting posi-
tion.
Do not fold the backrest up until the
seat is in its previous position. Other-
wise, the seat will engage in its current posi-
tion. In this case, ad just the longitudinal
position manually, page 39.<
2. Fold the backrest back up to lock the seat.
When moving the seat backward, make
sure that you do not cause personal injury
or property damage.
Before driving off, enga ge the front seats and
seat backrests. Otherwise, there is a risk of acci-
dent due to unexpected movement. <
MINI Countryman: seat adjustment, rear
Do not adjust rear seats while the vehicle
is moving; otherwise, passengers could be
injured.
Make sure that the locking devices of the rear
seats engage properly. Otherwise the restrain-
ing effect of the safety belts during an accident
could be reduced. <
Longitudinal adjustment
1.Pull the lever and slide the seat into the
desired position.
2. Release the lever and mo ve the seat slightly
forward or back so that it engages properly.
00320051004F004C00510048000300280047004C0057004C005200510003
Page 42 of 275

AdjustmentsCONTROLS
41
Backrest
Adjusting backrest angle, refer to page106.
Head restraints
Correctly adjusted head restraint
A correctly adjusted head restraint reduces the
risk of neck injury in the event of an accident.
Correctly adjust the he ad restraints of all
occupied seats; otherwise, there is an
increased risk of injury in an accident. <
Height
Adjust the head restraint so that its center is
approximately at ear level.
Height adjustment
To raise: pull up.
To lower: press the button, arrow 1, and slide
the head restraint down.
Removing
Only remove a head restraint if no one will be
sitting on the seat in question. Reinstall the head restraint before trans-
porting passengers, as otherwise the head
restraint cannot provide its protective func-
tion. <
Front
1.Pull up as far as it will go.
2. Fold the backrest back slightly.
3. Press button 1 and pull the head restraint
out as far as it will go.
4. MINI Countryman: press the additional
button 2 with a suitable tool.
5. Pull out the head restraint.
6. Fold back the backrest.
Rear
1.Pull up as far as it will go.
2. Fold the backrest forward slightly.
3. Press button 1 and pull the head restraint
out as far as it will go.
4. Press the additional button 2 with a suitable
tool.
5. Pull the head restraint all the way out.
6. Fold rear seat backrest back into position.
00320051004F004C00510048000300280047004C0057004C005200510003
Page 45 of 275

CONTROLSAdjustments
44
Stow away the center belt
If the center seat is not occupied, then insert the
belt buckles3 and 4 into the corresponding
holders, arrows.
Guide belt latches to the belt take-ups on the
headliner, refer to page 43, and insert them in
the provided take-ups.
Safety Belt Reminder
Front seats
The indicator lamps come on and an
acoustic signal sounds. A message also
appears on the Control Display. Check
whether the safety belt has been fas-
tened correctly. The Safety Belt Reminder is
issued when the driver's safety belt has not been
fastened. The Safety Belt Reminder is also acti-
vated at road speeds above approx. 5 mph or
8 km/h if the front passenger's safety belt has
not been fastened, if objects are placed on the
front passenger seat, or if driver or front passen-
ger unfasten their safety belts.
Damage to safety belts
If the safety belts ar e damaged or stressed
in an accident: have th e safety belt system
and its seat-belt tensioners replaced and the
belt anchors checked. Have this work carried out
only by a MINI dealer or by a workshop that has
specially trained personnel working in accor-
dance with the specifications of the MINI manu-
facturer; otherwise, correct operation of these
safety systems is not ensured.<
Mirrors
Exterior mirrors
The mirror on the passenger's side is more
curved than the driver's mirror. The
objects seen in the mirror are closer than they
appear. Do not gauge your distance from traffic
behind you on the basis of what you see in the
mirror; otherwise, there is an increased risk of an
accident. <
Adjusting electrically
1Adjustments
2 Select left/right mirror
3 Tilting mirrors in and out
Selecting the mirror: Switching to the othe r mirror: slide the
mirror switch.
To adjust: The same as the button movement.
Folding mirrors in and out:
Press button 3.
The mirrors can be folded in at road speeds up to
approx. 20 mph/30 km/h.
This can be beneficial in narrow streets, for
example, or for moving mi rrors that were folded
in by hand back out into their correct positions.
00320051004F004C00510048000300280047004C0057004C005200510003
Page 98 of 275

Practical interior accessoriesCONTROLS
97
Glove compartment
Opening
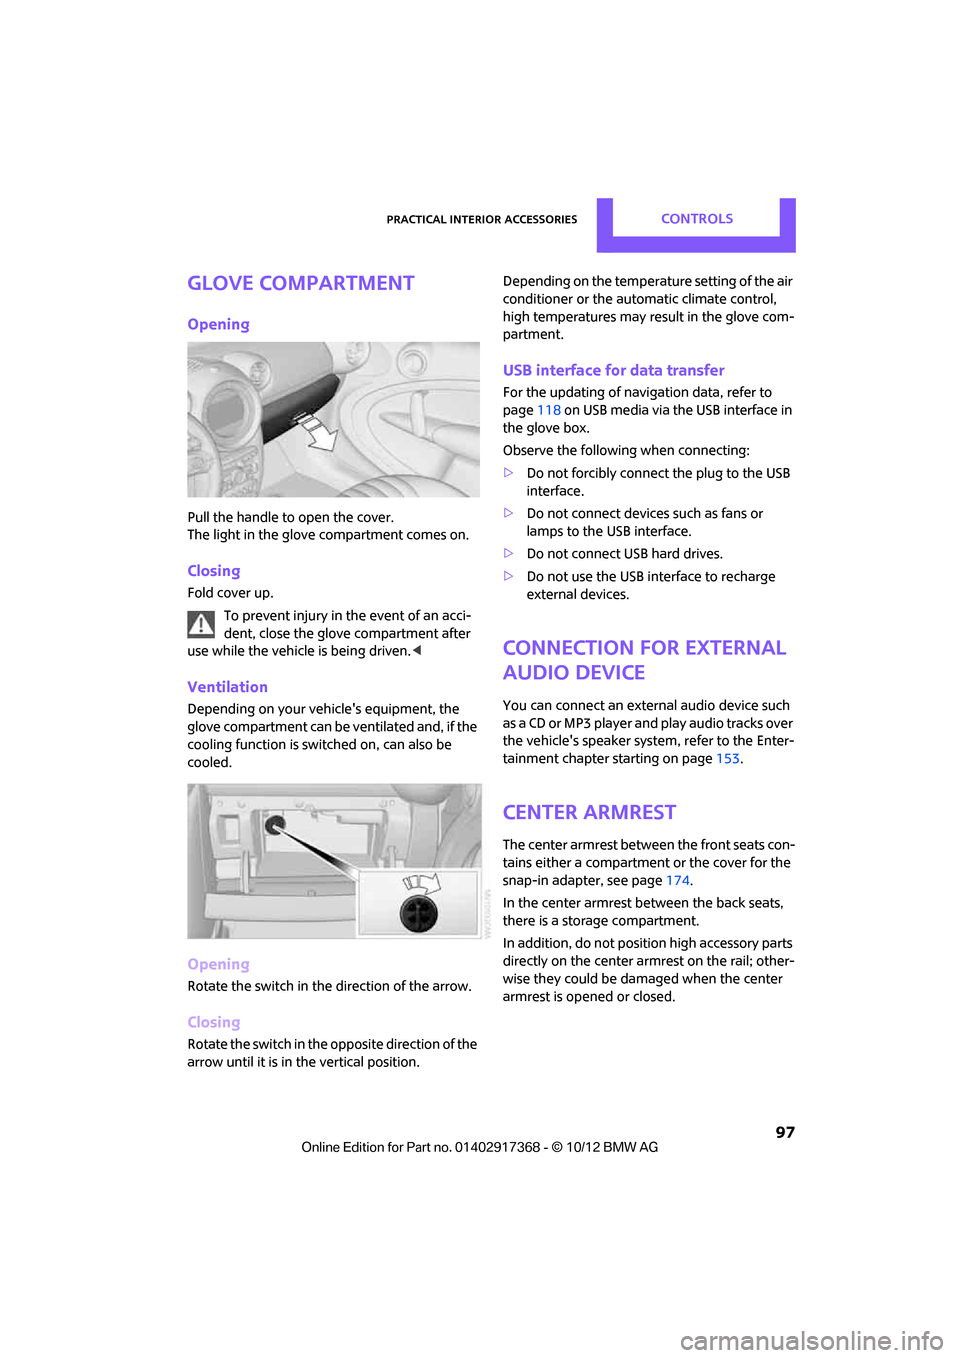
Pull the handle to open the cover.
The light in the glove compartment comes on.
Closing
Fold cover up.To prevent injury in the event of an acci-
dent, close the glove compartment after
use while the vehicle is being driven. <
Ventilation
Depending on your vehicle's equipment, the
glove compartment can be ventilated and, if the
cooling function is switched on, can also be
cooled.
Opening
Rotate the switch in the direction of the arrow.
Closing
Rotate the switch in the opposite direction of the
arrow until it is in the vertical position. Depending on the temperature setting of the air
conditioner or the automatic climate control,
high temperatures may result in the glove com-
partment.
USB interface for data transfer
For the updating of navi
gation data, refer to
page 118 on USB media via the USB interface in
the glove box.
Observe the following when connecting:
> Do not forcibly connect the plug to the USB
interface.
> Do not connect devices such as fans or
lamps to the USB interface.
> Do not connect USB hard drives.
> Do not use the USB interface to recharge
external devices.
Connection for external
audio device
You can connect an external audio device such
as a CD or MP3 player an d play audio tracks over
the vehicle's speaker system, refer to the Enter-
tainment chapter starting on page 153.
Center armrest
The center armrest between the front seats con-
tains either a compartment or the cover for the
snap-in adapter, see page 174.
In the center armrest between the back seats,
there is a storage compartment.
In addition, do not position high accessory parts
directly on the center armrest on the rail; other-
wise they could be damaged when the center
armrest is opened or closed.
00320051004F004C00510048000300280047004C0057004C005200510003
Page 111 of 275

DRIVING TIPSThings to remember when driving
110
Installing behind the front seats
1.If necessary, remove the cargo area cover.
2. Fold down the rear seat backrests, refer to
Expanding cargo area.
3. Insert each cargo net mounting pin all the
way into its respective front mount in the
headliner, arrow 1, and push it forward.
4. Attach the hook, arrow 2, at the bottom of
each retaining strap to the respective eye on
the vehicle floor.
5. Lash the cargo net se curely. To do so,
tighten the retaining straps at the tensioning
buckles.
Removing
When removing and stowing the cargo net, pro-
ceed in the reverse sequence.
To fold closed, press the release button, arrow.
MINI Countryman: bag holders
Holders on the left and right side of the support
for the cargo area cover, arrow, e.g. for hanging
shopping bags or storage bags.
Only hang light shopping bags or suitable
items on the holders. Otherwise, this may
create a hazard due to flying objects, for exam-
ple in the event of braking and evasive maneu-
vers.
Transport heavy luggage only if it is appropri-
ately secured in the cargo area. <
Determining cargo limit
1.Locate the following statement on your
vehicle's placard:
The combined weight of occupants
and cargo should never exceed
XXX kg or YYY lbs. Otherwise, this could
damage the vehicle and produce unstable
vehicle operating conditions. <
2. Determine the combined weight of the
driver and passengers that will be riding in
your vehicle.
3. Subtract the combined weight of the driver
and passengers from XXX pounds or YYY
kilograms.
00320051004F004C00510048000300280047004C0057004C005200510003
Page 269 of 275

REFERENCEEverything from A to Z
268
P
Paintwork, care221
Park Distance Control PDC 71
Parking
– vehicle 51
Parking aid, refer to Park
Distance Control PDC 71
Parking brake 52
– indicator lamp 13
Parking lamps, replacing bulb 226
Parking lamps/low beams 84
Parts and accessories, see Vehicle equipment 4
Pathway lighting 85
Personal Profile 26
Phone numbers
– dialing 168,180
Pinch protection system
– windows 37
Plastic parts, care 223
Pollen
– refer to Microfilter/activated- charcoal filter for automatic
climate control 91
– refer to Microfilter for air conditioner 89
Power failure 234
Power window
– safety switch 37
Power windows 36
Power windows, refer to
Windows 36
Pressure, tires 203
Pressure moni toring, tires75
– Flat Tire Monitor 75
Pressure monitoring of tires, refer to Tire Pressure Monitor
TPM 77
Protective function, refer to Pinch protection system
– windows 37
Puncture
– Flat Tire Monitor 75
R
Radio
– controls140
– HD Radio 144
– satellite radio 145
– storing stations 144
– tone control 141
– volume 141
– waveband, selecting 143
Radio key, refer to Integrated key/remote control 26
Radio position, refer to Radio
readiness 50
Radio readiness 50
– switched off 51
– switched on 50
Rain sensor 56
Random play sequence
– external devices 156
Range, refer to Cruising range 61
Reading aloud 193
Reading lamps 87
Rear lamps
– bulb replacement 228
Rear lamps, refer to Tail lamps 228
Rear-mounted luggage rack 113
Rear seat back rest, folding106
Rear seats
– adjusting 40
– folding down the backrests 106
Rearview mirror
– compass 95
Rearview mirror, refer to Mirrors 44
Rear window
– windshield wiper 57
Rear window defroster 89,91
Rear window safety switch 37
Reception
– quality 144
– radio station 144 Recirculated-air mode
89,90
Recirculation of air, refer to Recirculated-air
mode 89,90
Reclining seat , refer to
Backrest 39
Refueling 200
Rejecting a call 168,180
Releasing
– hood 215
Reminders 192
Remote control 26
– battery renewal 35
– Comfort Access
33
– garage
door opener 93
– malfunctions 29,34
– service data 218
– tailgate 28
Replacement remote
control 26
Replacing bulbs, refer to Lamps and bulbs 224
Replacing tires, refer to New
wheels and tires 212
Reporting safety defects 7
Reserve warning, refer to Fuel gauge 60
Reservoir for washer
systems 57
Reset, refer to Resetting tone
settings 142
Restraint systems
– for children 46
– refer to Safety belts 42
Reverse
– CD player 152
Reverse gear
– automatic transmission with Steptronic 53
– manual transmission 52
Road map 131
Roadside Assistance 236
Roadside parking lamps 86
– replacing bulb 226
Road worthiness test, refer to
Service requirements 64
00320051004F004C00510048000300280047004C0057004C005200510003