start stop button MINI Paceman 2013 Owner's Manual
[x] Cancel search | Manufacturer: MINI, Model Year: 2013, Model line: Paceman, Model: MINI Paceman 2013Pages: 275, PDF Size: 4.23 MB
Page 12 of 275
CockpitAT A GLANCE
11
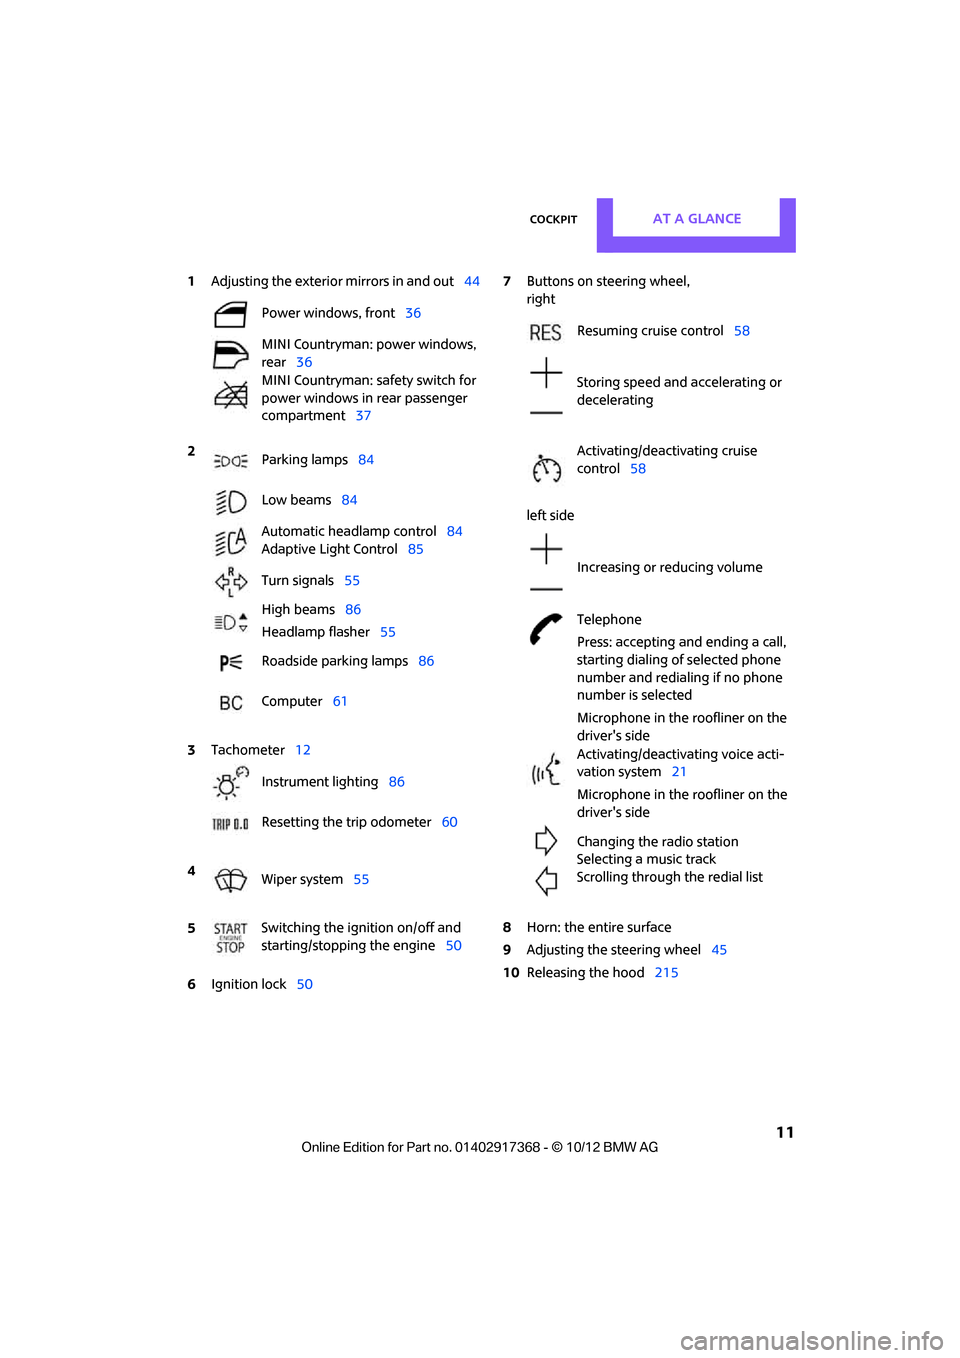
1Adjusting the exterior mirrors in and out44
6 Ignition lock 50 7
Buttons on steering wheel,
right
left side
8 Horn: the entire surface
9 Adjusting the steering wheel 45
10 Releasing the hood 215
Power windows, front
36
MINI Countryman: power windows,
rear 36
MINI Countryman: safety switch for
power windows in rear passenger
compartment 37
2 Parking lamps 84
Low beams 84
Automatic headlamp control 84
Adaptive Light Control 85
Turn signals 55
High beams 86
Headlamp flasher 55
Roadside parking lamps 86
Computer 61
3 Tachometer 12
Instrument lighting 86
Resetting the trip odometer 60
4 Wiper system 55
5 Switching the ignition on/off and
starting/stopping the engine
50
Resuming cruise control58
Storing speed and accelerating or
decelerating
Activating/deactivating cruise
control 58
Increasing or reducing volume
Telephone
Press: accepting and ending a call,
starting dialing of selected phone
number and redialing if no phone
number is selected
Microphone in the roofliner on the
driver's side
Activating/deactivating voice acti-
vation system 21
Microphone in the roofliner on the
driver's side
Changing the radio station
Selecting a music track
Scrolling through the redial list
00320051004F004C00510048000300280047004C0057004C005200510003
Page 35 of 275
CONTROLSOpening and closing
34
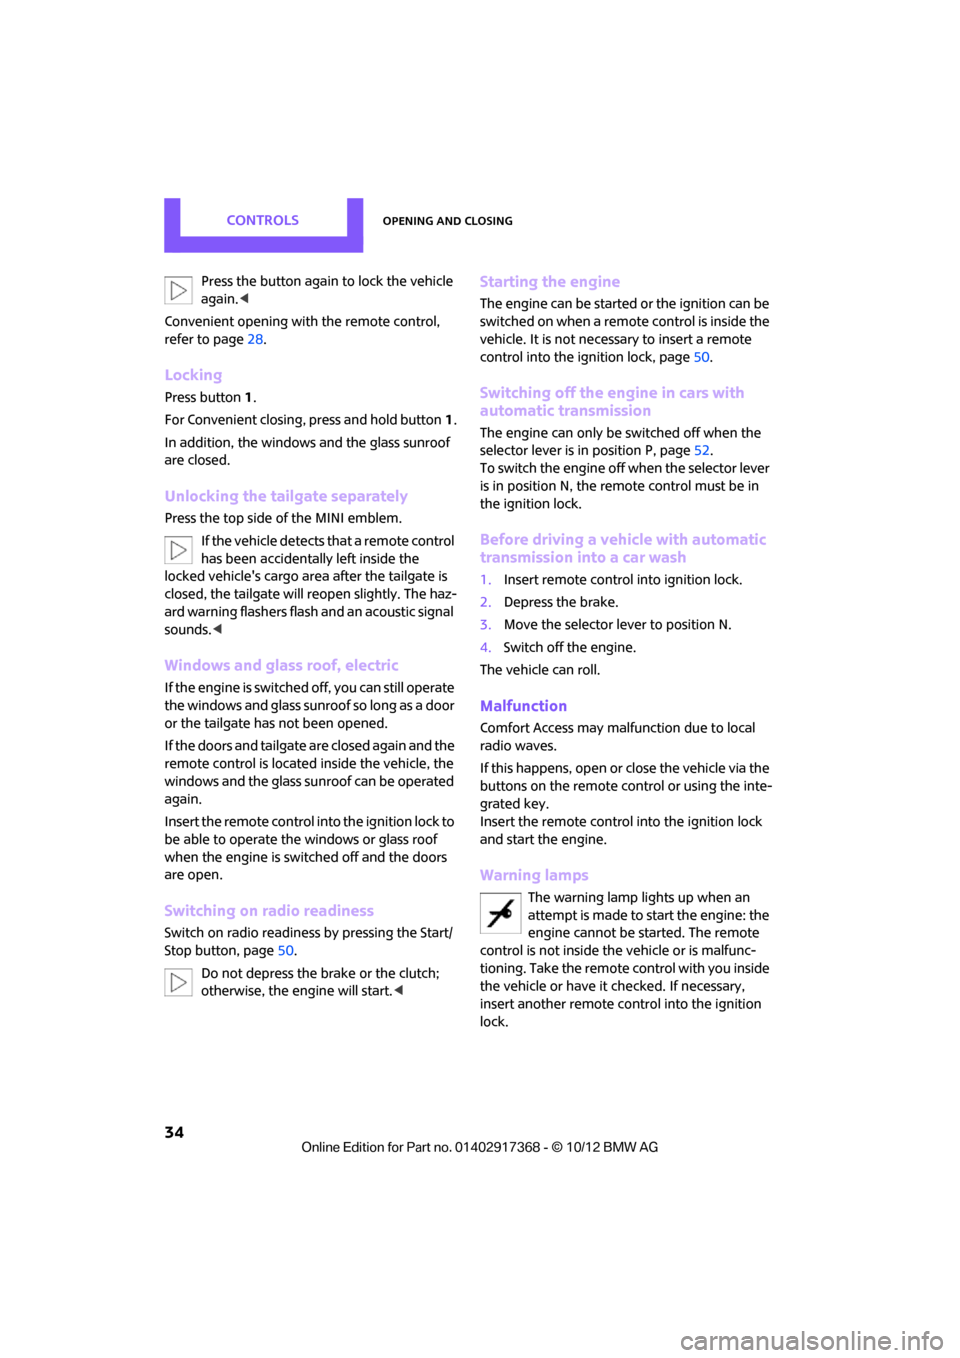
Press the button again to lock the vehicle
again.<
Convenient opening with the remote control,
refer to page 28.
Locking
Press button 1.
For Convenient closing, press and hold button1.
In addition, the windows and the glass sunroof
are closed.
Unlocking the tailgate separately
Press the top side of the MINI emblem.
If the vehicle detects that a remote control
has been accidentally left inside the
locked vehicle's cargo area after the tailgate is
closed, the tailgate will reopen slightly. The haz-
ard warning flashers flash and an acoustic signal
sounds. <
Windows and glass roof, electric
If the engine is switched off, you can still operate
the windows and glass sunr oof so long as a door
or the tailgate has not been opened.
If the doors and tailgate are closed again and the
remote control is located inside the vehicle, the
windows and the glass sunroof can be operated
again.
Insert the remote control into the ignition lock to
be able to operate the windows or glass roof
when the engine is switched off and the doors
are open.
Switching on radio readiness
Switch on radio readiness by pressing the Start/
Stop button, page 50.
Do not depress the brake or the clutch;
otherwise, the engine will start. <
Starting the engine
The engine can be started or the ignition can be
switched on when a remote control is inside the
vehicle. It is not necessary to insert a remote
control into the ignition lock, page 50.
Switching off the engine in cars with
automatic transmission
The engine can only be switched off when the
selector lever is in position P, page 52.
To switch the engine off when the selector lever
is in position N, the remote control must be in
the ignition lock.
Before driving a vehicle with automatic
transmission into a car wash
1. Insert remote control into ignition lock.
2. Depress the brake.
3. Move the selector le ver to position N.
4. Switch off the engine.
The vehicle can roll.
Malfunction
Comfort Access may malf unction due to local
radio waves.
If this happens, open or close the vehicle via the
buttons on the remote control or using the inte-
grated key.
Insert the remote control into the ignition lock
and start the engine.
Warning lamps
The warning lamp lights up when an
attempt is made to start the engine: the
engine cannot be started. The remote
control is not inside the vehicle or is malfunc-
tioning. Take the remote control with you inside
the vehicle or have it checked. If necessary,
insert another remote co ntrol into the ignition
lock.
00320051004F004C00510048000300280047004C0057004C005200510003
Page 51 of 275
CONTROLSDriving
50
Driving
Vehicle equipment
In this chapter, all production, country, and
optional equipment that is offered in the model
range is described. Equipment is also described
that is not available because of, for example,
selected options or coun try version. This also
applies to safety relate d functions and systems.
Ignition lock
Inserting the key into the ignition lock
Insert the key all the way into the ignition lock.
Radio readiness
Individual electrical consumers can operate.
Removing the key from the ignition lock
Press in the key briefly. It is ejected slightly.
At the same time:
>The ignition is switched off if it was on
beforehand.
Automatic transmission
The key can only be removed if the selector lever
is in position P: interlock.
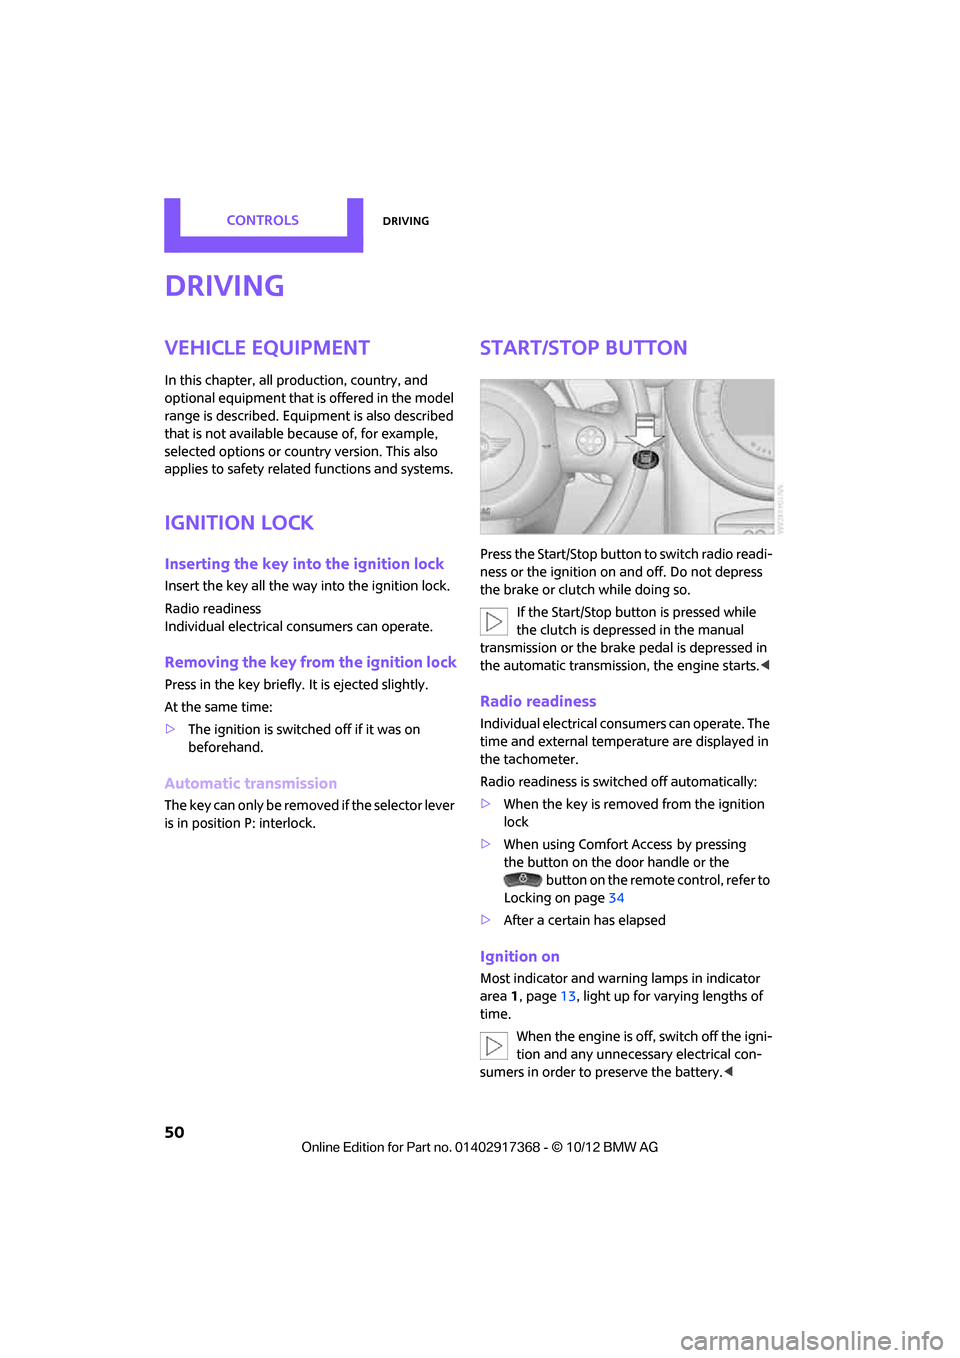
Start/Stop button
Press the Start/Stop button to switch radio readi-
ness or the ignition on and off. Do not depress
the brake or clutch while doing so.
If the Start/Stop button is pressed while
the clutch is depressed in the manual
transmission or the brake pedal is depressed in
the automatic transmission, the engine starts. <
Radio readiness
Individual electrical consumers can operate. The
time and external temperature are displayed in
the tachometer.
Radio readiness is switched off automatically:
>When the key is removed from the ignition
lock
> When using Comfort Access
by pressing
the button on the door handle or the
button on the remote control, refer to
Locking on page 34
> After a certain has elapsed
Ignition on
Most indicator and warn ing lamps in indicator
area 1, page 13, light up for varying lengths of
time.
When the engine is off, switch off the igni-
tion and any unnecessary electrical con-
sumers in order to preserve the battery. <
00320051004F004C00510048000300280047004C0057004C005200510003
Page 52 of 275
DrivingCONTROLS
51
Radio readiness and ignition off
All indicator and warning lamps in the displays
go out.
The ignition switches off automatically if the
driver's door is opened. Pressing the Start/Stop
button again switches the ignition back on.
The ignition is not switched off in situations such
as the following:
>The clutch or brake is depressed
> The low beams are switched on
Starting the engine
Do not allow the engine to run in enclosed
areas; otherwise, inhalation of the noxious
exhaust gases can lead to loss of consciousness
and death. Exhaust gases contain carbon mon-
oxide, an odorless and colorless, but highly toxic
gas. Never leave an unattended vehicle with the
engine running; otherwise, such a vehicle repre-
sents a potential safety hazard.
Before leaving the car while the engine is run-
ning, place the transmission in neutral or move
the selector lever to position P and forcefully
apply the parking brake to prevent the car from
moving. <
Avoid frequent starting in quick succes-
sion or repeated start attempts in which
the engine does not start. Otherwise, the fuel is
not burned or inadequately burned and there is
a danger of overheating and damaging the cat-
alytic converter. <
Do not let the engine warm up with the vehicle
at a standstill. Move of f immediately at a moder-
ate engine speed.
When starting the engine, do not depress the
accelerator pedal.
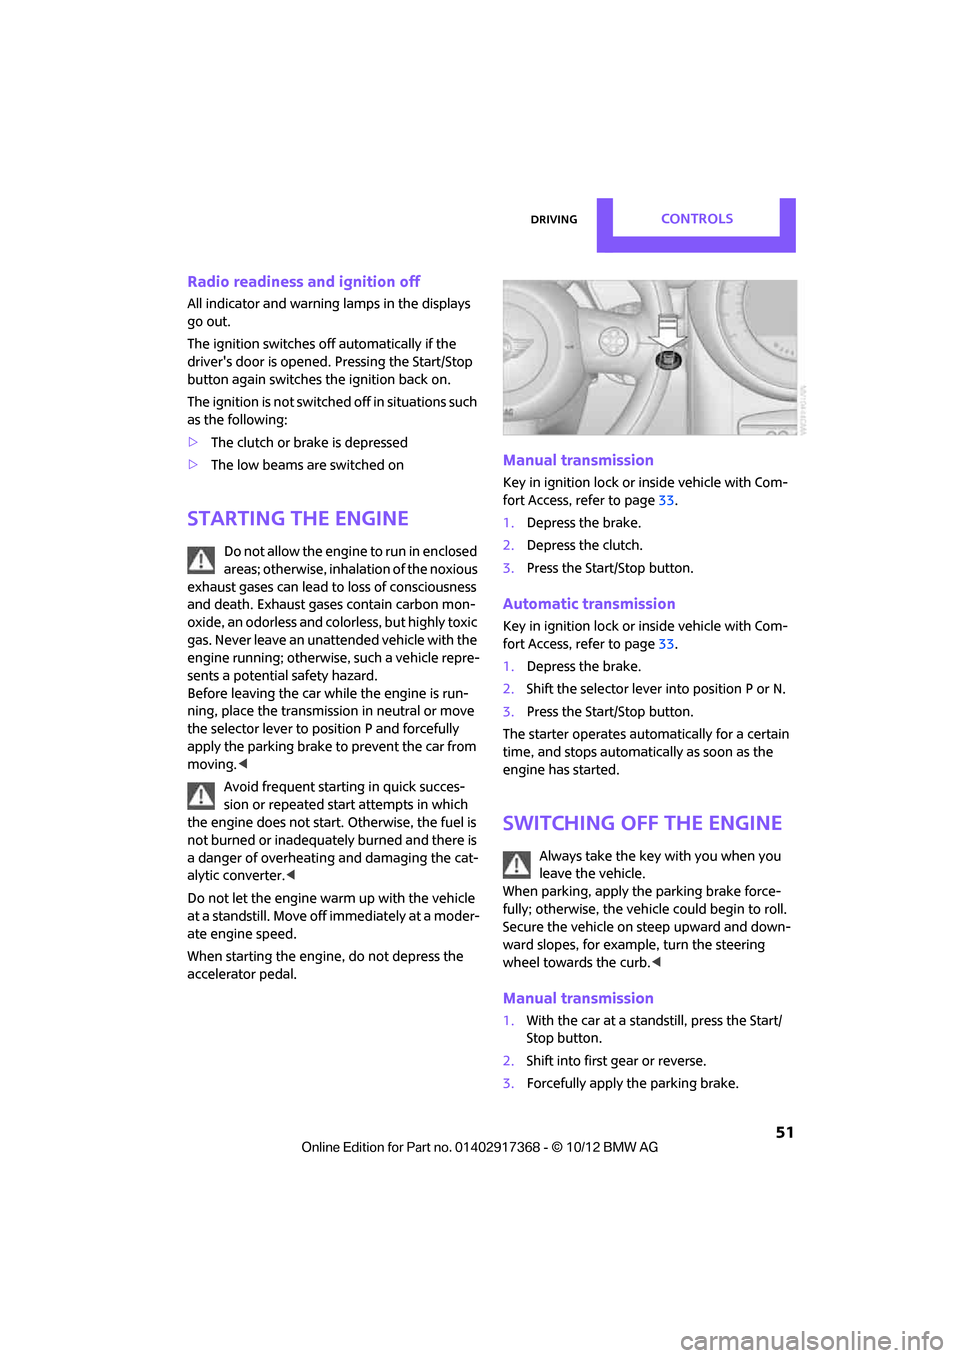
Manual transmission
Key in ignition lock or inside vehicle with Com-
fort Access, refer to page 33.
1. Depress the brake.
2. Depress the clutch.
3. Press the Start/Stop button.
Automatic transmission
Key in ignition lock or inside vehicle with Com-
fort Access, refer to page 33.
1. Depress the brake.
2. Shift the selector lever into position P or N.
3. Press the Start/Stop button.
The starter operates auto matically for a certain
time, and stops automatically as soon as the
engine has started.
Switching off the engine
Always take the key with you when you
leave the vehicle.
When parking, apply the parking brake force-
fully; otherwise, the vehicle could begin to roll.
Secure the vehicle on steep upward and down-
ward slopes, for example, turn the steering
wheel towards the curb. <
Manual transmission
1.With the car at a standstill, press the Start/
Stop button.
2. Shift into first gear or reverse.
3. Forcefully apply the parking brake.
00320051004F004C00510048000300280047004C0057004C005200510003
Page 53 of 275
CONTROLSDriving
52
Automatic transmission
1.With the car at a stop, move the selector
lever to position P.
2. Press the Start/Stop button.
3. Forcefully apply the parking brake.
Before driving into a car wash
By following these steps, the vehicle is able to
roll:
1.Place the remote control, even with Comfort
Access, in the ignition lock.
2. Depress the brake.
3. Move the selector lever to position N.
4. Switch off the engine.
Parking brake
The parking brake is primarily intended to pre-
vent the vehicle from rolling while parked; it
brakes the rear wheels.
In addition, follow the instructions on page 51
under Switching off the engine.
Applying
The lever locks in position automatically.
Releasing
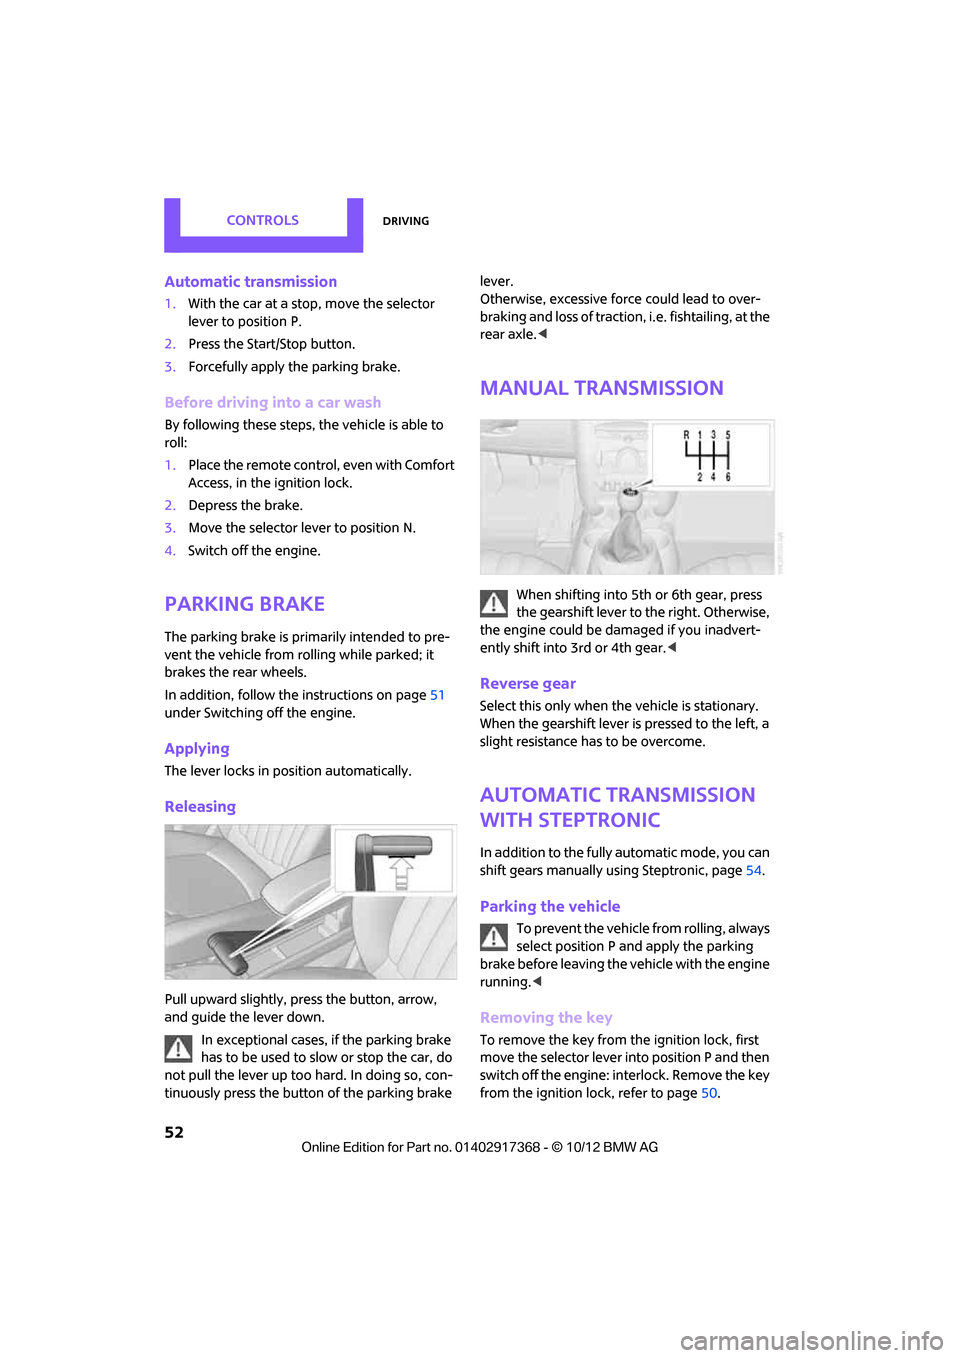
Pull upward slightly, pr ess the button, arrow,
and guide the lever down.
In exceptional cases, if the parking brake
has to be used to slow or stop the car, do
not pull the lever up too hard. In doing so, con-
tinuously press the button of the parking brake lever.
Otherwise, excessive force could lead to over-
braking and loss of traction
, i.e. fishtailing, at the
rear axle. <
Manual transmission
When shifting into 5t h or 6th gear, press
the gearshift lever to the right. Otherwise,
the engine could be damaged if you inadvert-
ently shift into 3rd or 4th gear. <
Reverse gear
Select this only when the vehicle is stationary.
When the gearshift lever is pressed to the left, a
slight resistance has to be overcome.
Automatic transmission
with Steptronic
In addition to the fully automatic mode, you can
shift gears manually using Steptronic, page 54.
Parking the vehicle
To prevent the vehicle from rolling, always
select position P and apply the parking
brake before leaving the vehicle with the engine
running. <
Removing the key
To remove the key from the ignition lock, first
move the selector lever into position P and then
switch off the engine: in terlock. Remove the key
from the ignition lock, refer to page 50.
00320051004F004C00510048000300280047004C0057004C005200510003
Page 88 of 275

LampsCONTROLS
87
Adjusting brightness
>Briefly press button: brightness changes in
stages.
> Press and hold the button. Brightness
changes in a continuous manner.
Interior lamps
The interior lamps, the footwell lamps, the entry
lamps, and the cargo area lamp are controlled
automatically.
To reduce the drain on the battery, a short
while after the ignition is switched off,
refer to Start/Stop button on page 50, all lights in
the vehicle's passenger compartment are
switched off. <
Switching interior lamps on/off manually
To switch the interior lamps on/off.
Press the switch.
To switch off the interior lamps permanently,
press the switch for about 3 seconds.
Reading lamps
Reading lamps are provided in the front and rear
adjacent to the interior lamps.
To switch the readin g lamps on and off.
In the front: press the switch.
In the rear: press the button.
Ambient lighting
The color and brightness of the ambient lighting
can be changed.
> Press the switch forward.
The color changes in stages.
> Press the switch toward the rear.
The brightness changes in stages.
Intermediate settings and colors are possible. For a continuous color change in the
ambient lighting, press and hold the
switch forward for lo nger than 10 seconds. <
00320051004F004C00510048000300280047004C0057004C005200510003
Page 162 of 275
External devicesEntertainment
161
Videos cannot be played or can only be played
with a delayed audio output.
> Check the device compatibility. Information
is available at www.mini.com/connectivity.
Playback is interrupted by the press of a button
or other messages on the device.
> Switch off key tones an d other acoustic sig-
nal on the device.
Playback is interrupted by a phone call or traffic
report and does not automatically continue.
> Activate and deactivate the radio mute on
the radio control panel.
Playback is not possible when the mobile phone
is connected via Bluetooth audio and at the
same time via the music interface for smart-
phones at the snap-in adapter.
> Disconnect one of the two connections, e.g.
the audio connection, refer to page 160,
and start playback again.
If you have gone through all items in the list and
still cannot activate the desired function please
contact the Hotline or your MINI dealer.
Software update
The vehicle supports various external devices,
depending on the software it is currently using.
A software update can enable the vehicle to
support, for example, new mobile phones or
new external devices.
Software updates and associated, up-to-date
instructions are availa ble on the web page
www.mini.com/connectivity.
Displaying current version
The currently installed software is displayed.
1. "Settings"
2. "Software update"
3. "Show current version"
Updating software
The software update can only be performed
when stopped.
1.Save the file for the software update in the
main directory of a USB data storage device.
2. Connect the USB data storage device to the
USB port in the center console, refer to
page 154. Updating using the USB port in
the glove compartment is not possible.
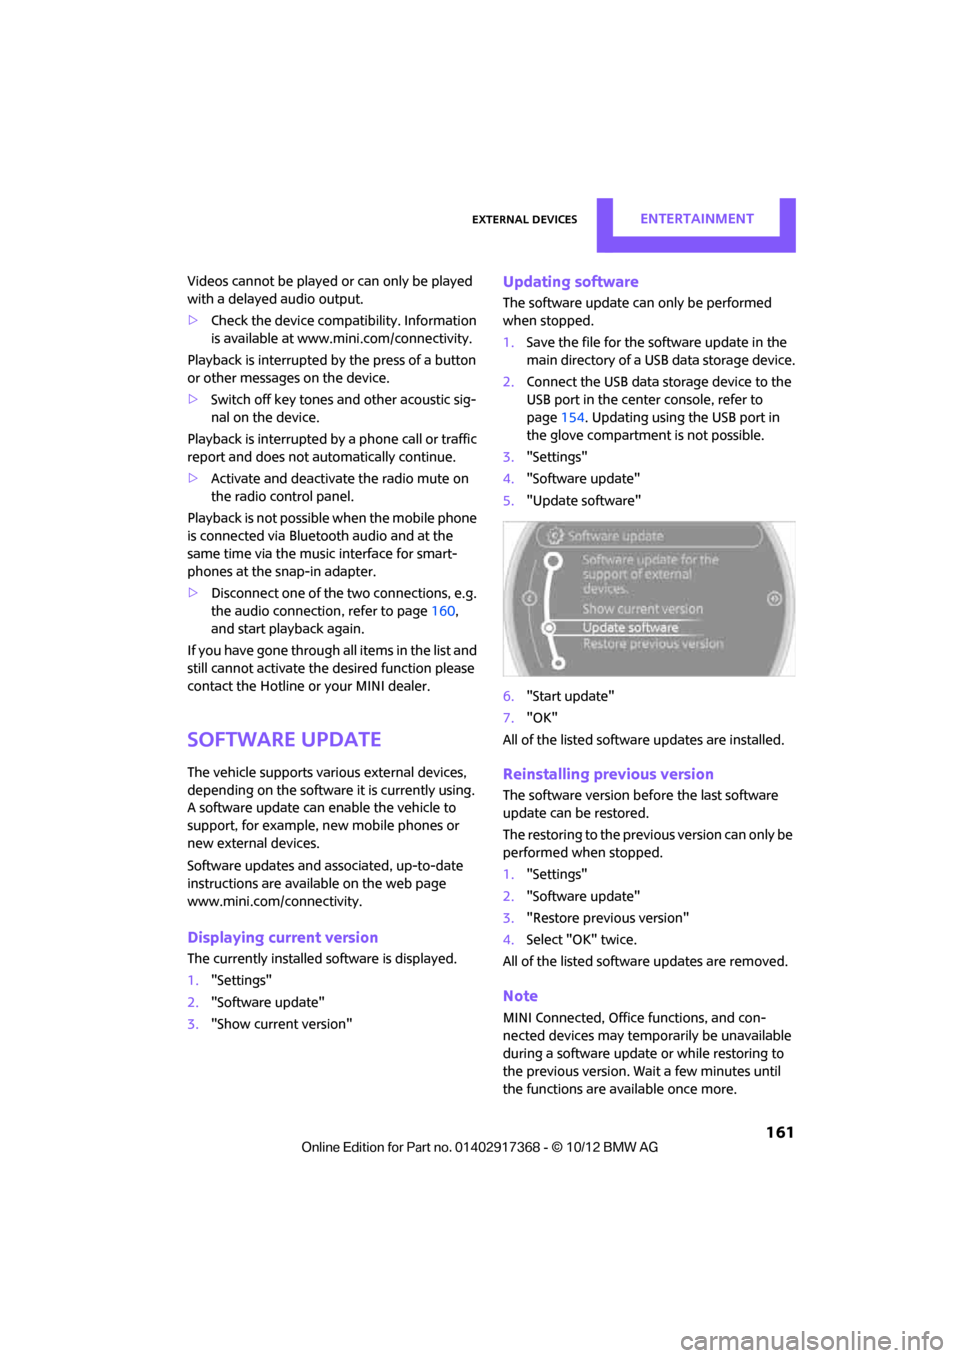
3. "Settings"
4. "Software update"
5. "Update software"
6. "Start update"
7. "OK"
All of the listed softwa re updates are installed.
Reinstalling previous version
The software version befo re the last software
update can be restored.
The restoring to the previous version can only be
performed when stopped.
1. "Settings"
2. "Software update"
3. "Restore previous version"
4. Select "OK" twice.
All of the listed softwa re updates are removed.
Note
MINI Connected, Office functions, and con-
nected devices may temporarily be unavailable
during a software update or while restoring to
the previous version. Wait a few minutes until
the functions are available once more.
00320051004F004C00510048000300280047004C0057004C005200510003
Page 233 of 275
MOBILITYReplacing components
232
Correct the tire inflation pressure
1.After driving approx. 3.1 miles/5 km or
ten minutes, stop at a suitable location.
2. Screw the connection hose 6 of the com-
pressor directly onto the tire valve.
3. Insert the plug 5 into the power socket in
the vehicle interior.
4. Adjust tire pressure to 1.8 bar/26 psi. With
the engine running:
> To increase the inflatio n pressure: switch on
the compressor. To ch eck the current infla-
tion pressure, switch off the compressor.
Do not run the comp ressor for longer
than 10 minutes; otherwise, the
device will overheat and possibly be dam-
aged.<
> To decrease the inflation pressure: press the
release button 9.
If the tire cannot m aintain the inflation
pressure, drive the vehicle again, refer to
Distributing the sealan t. Then repeat steps
1to4.
If an inflation pressure of 1.8 bar/26 psi still can-
not be reached, then the tire is too heavily dam-
aged. Contact your ne arest MINI dealer.<
Driving on
Do not exceed the permitted maximum
speed of 50 mph/80 km/h; doing so may
result in an accident. <
Replace the defective tire as soon as possible
and have the new wheel/tire assembly bal-
anced.
Have the Mobility Kit refilled.
Changing wheels
The tire change set is available from as an
optional accessory at your MINI dealer.
Preparing for a wheel change
Observe the safety precautions regarding
flat tires on page 230.<
Additional safety measures when chang-
ing tires:
Only change the tire wh en parked on a surface
that is level, firm and not slippery.
The vehicle or the jack could slip sideways on
soft or slippery support surfaces, such as snow,
ice, flagstones, etc.
Do not use a wooden block or similar object as a
support base for the jack, as this would prevent
it from extending to its full support height and
reduce its load-carrying capacity.
Do not lie under the vehicle or start the engine
when the vehicle is supported by the jack; other-
wise, there is a risk of fatal injury. <
1. Place the foldable chock
behind the front
wheel on the other side of the vehicle or in
front of the wheel if the vehicle is on an
incline. If the wheel is changed on a surface
with a more severe sl ope, take additional
precautions to secure the vehicle from roll-
ing.
2. Uncover the lug bolts if necessary.
3. Loosen the lug bolts by a half turn.
Jacking up the vehicle
The vehicle jack is designed for changing
wheels only. Do not attempt to raise
another vehicle model with it or to raise any load
of any kind. To do so could cause accidents and
personal injury. <
1. Place the jack at the jacking point closest to
the wheel.
The jack base must be perpendicular to the
surface beneath the jacking point.
00320051004F004C00510048000300280047004C0057004C005200510003
Page 271 of 275
REFERENCEEverything from A to Z
270
Shuffled, refer to Random
– CD player152
Side airbags 81
Side marker lamps, replacing
bulbs 227
Side turn signal
– replacing bulb 227
Side windows, refer to Windows 36
Signal horn, refer to Horn 10
Sitting safely 38
– airbags 38
– safety belts 38
– with head restraint 38
Size, refer to Dimensions 246
Sliding/tilt sunroof
– refer to Glass roof, electric 35
Slot for remote control 50
Smokers' package, refer to
Ashtray 100
Snap-in adapter
– inserting/removing 185
– use 174
Snap-in adapter, refer to Center armrest storage
compartment 97
Snow chains 213
Socket, refer to Connecting
electrical appliances 101
Socket for On-Board Diagnosis
OBD 219
Software update 161
Speaking, refer to Voice
instructions from navigation
system 133
Special destinations 124
Special oils, refer to Approved engine oils 216
Speed 244
– with winter tires 213
Speed limit 69
– setting 69
Speed limit warning, refer to Speed limit 69 Speedo, refer to
Speedometer 12
Speedometer 12
Speed volume 141
Split rear seat backrest, refer to Expanding the cargo
area 106
Sport button 74
Stability contro l, refer to
Driving stability control
systems 72
Start/Stop button 50
– starting the engine 51
– switching off the engine 51
Starting, refer to Starting the engine 51
Starting assistance, refer to Jump-starting 236
Starting route guidance 129
Sta rting th
e
engine 51
– Start/Stop button 50
Start-off assistance, refer to
– DSC 72
– Hill Assist 74
State/province, for
navigation 120
Station, selecting
– radio 143
Status information on the Control Display 19
Status of this Owner's Manual at time of printing 4
Steering wheel 45
– adjustment 45
– buttons on steering wheel 11
– lock 50
– shift paddles 54
Steptronic, refer to Automatic transmission with
Steptronic 52
Storage area
– cargo area 106
Storage compartments 98
Storage space
– storage compartments 98Storing a destination in the
address book 122
Storing the vehicle 223
Storing tires 213
Stowage, refer to Storage compartments 98
Summer tires, refer to Wheels
and tires 203
SW, waveband 143
Switches, refer to Cockpit 10
Switching off
– engine 51
Switching off the engine 51
– Start/Stop button 50
Switching on
– audio 140
– CD player 140
– radio 140
Switching radio on/off 140
Switching the cooling function on and off 91
Symbols 4
– status information 19
T
Tachometer60
Tailgate 31
– Comfort Access 34
– opening/closing 31
– opening from outside 31
– unlocking with remote control 28
Tail lamp, refer to Tail lamps 228
– replacing bulb 228
Tail lamps 228
Tank volume, refer to Capacities 251
Target cursor for navigation 125
Tasks 192
Technical data 244
Technical modifications 4
00320051004F004C00510048000300280047004C0057004C005200510003