change time MINI Paceman 2014 (Mini Connected) User Guide
[x] Cancel search | Manufacturer: MINI, Model Year: 2014, Model line: Paceman, Model: MINI Paceman 2014Pages: 282, PDF Size: 6.76 MB
Page 145 of 282
Destination guidanceVehicle equipmentThis chapter describes all series equipment as
well as country-specific and special equipment
offered for this model series.Therefore, it also
describes equipment that may not be found in
your vehicle, for instance due to the selected
special equipment or the country version. This
also applies to safety-related functions and sys‐
tems.
Starting destination
guidance1."Navigation"2.Make a destination entry, refer to
page 136.3."Accept destination"4."Start guidance"
The route is shown on the Control Display.
The distance to the destination/intermediate
destination and the estimated time of arrival
are displayed in the map view.
The arrow view may appear on the Control Dis‐
play.
Terminating destination
guidance
1."Navigation"2."Map"3. Select the symbol.4."Stop guidance"Continuing destination
guidance
If the destination was not reached during the
last trip, destination guidance can be resumed.
"Resume guidance"
Route criteria
General information▷The route calculated can be influenced by
selecting certain criteria.▷The route criteria can be changed when the
destination is entered and during destina‐
tion guidance.▷Road types are part of the navigation data
and are taken into consideration when
planning a route, e.g., avoid highways.▷The recommended route may differ from
the route you would take based on per‐
sonal experience.▷The settings are stored for the remote con‐
trol currently in use.▷Destination guidance with traffic bulletins,
refer to page 151.
Changing the route criteria
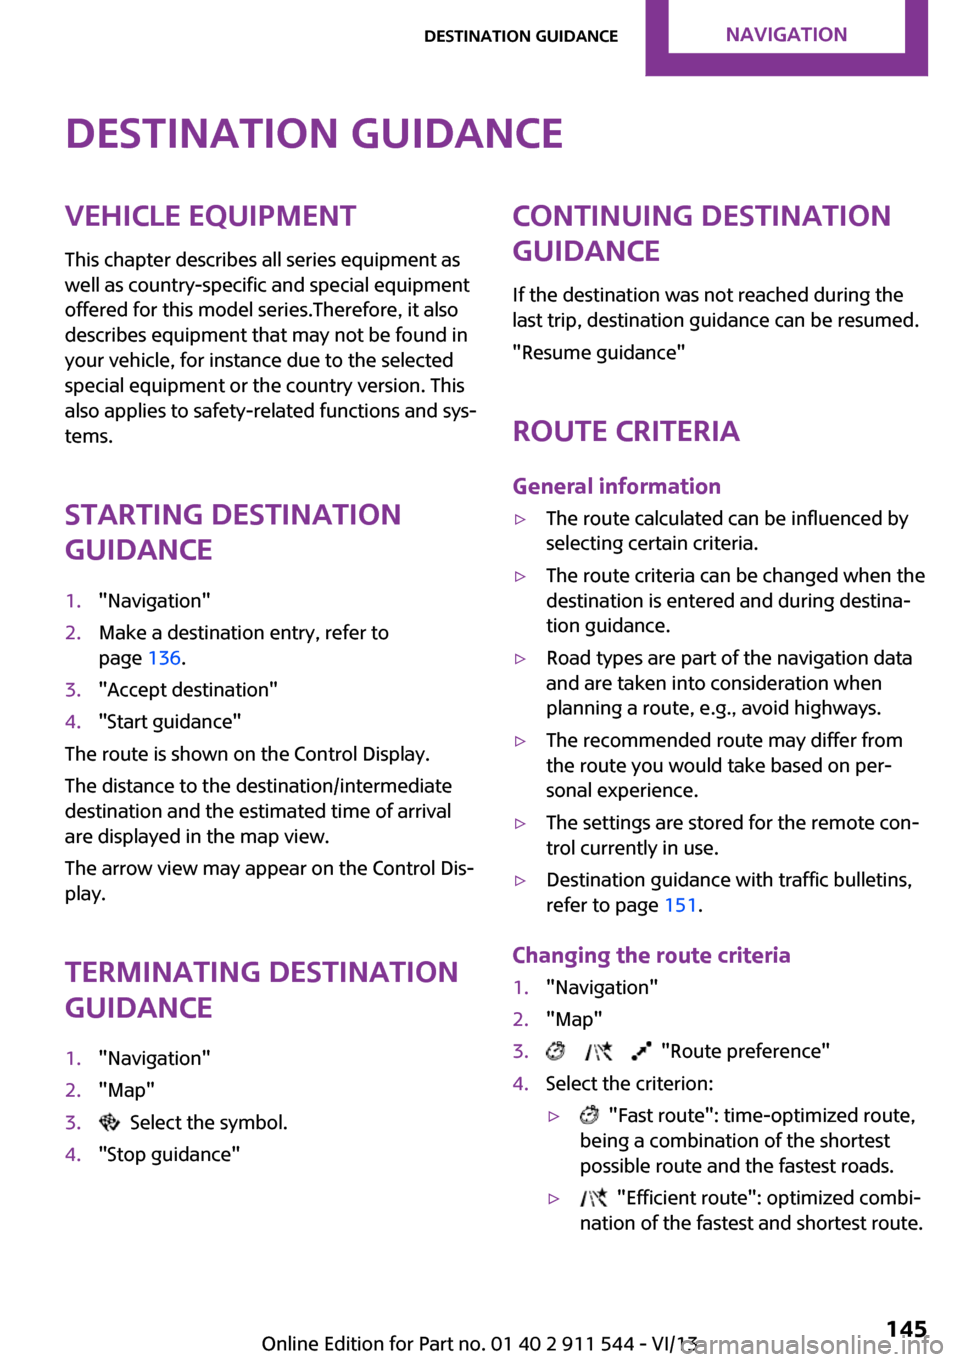
1."Navigation"2."Map"3. "Route preference"4.Select the criterion:▷ "Fast route": time-optimized route,
being a combination of the shortest
possible route and the fastest roads.▷ "Efficient route": optimized combi‐
nation of the fastest and shortest route.Seite 145Destination guidanceNavigation145
Online Edition for Part no. 01 40 2 911 544 - VI/13
Page 148 of 282
This volume is independent of the volume of
the audio sources.
The setting is stored for the remote control cur‐
rently in use.
Map view
Selecting the map view
1."Navigation"2."Map"
At a glance
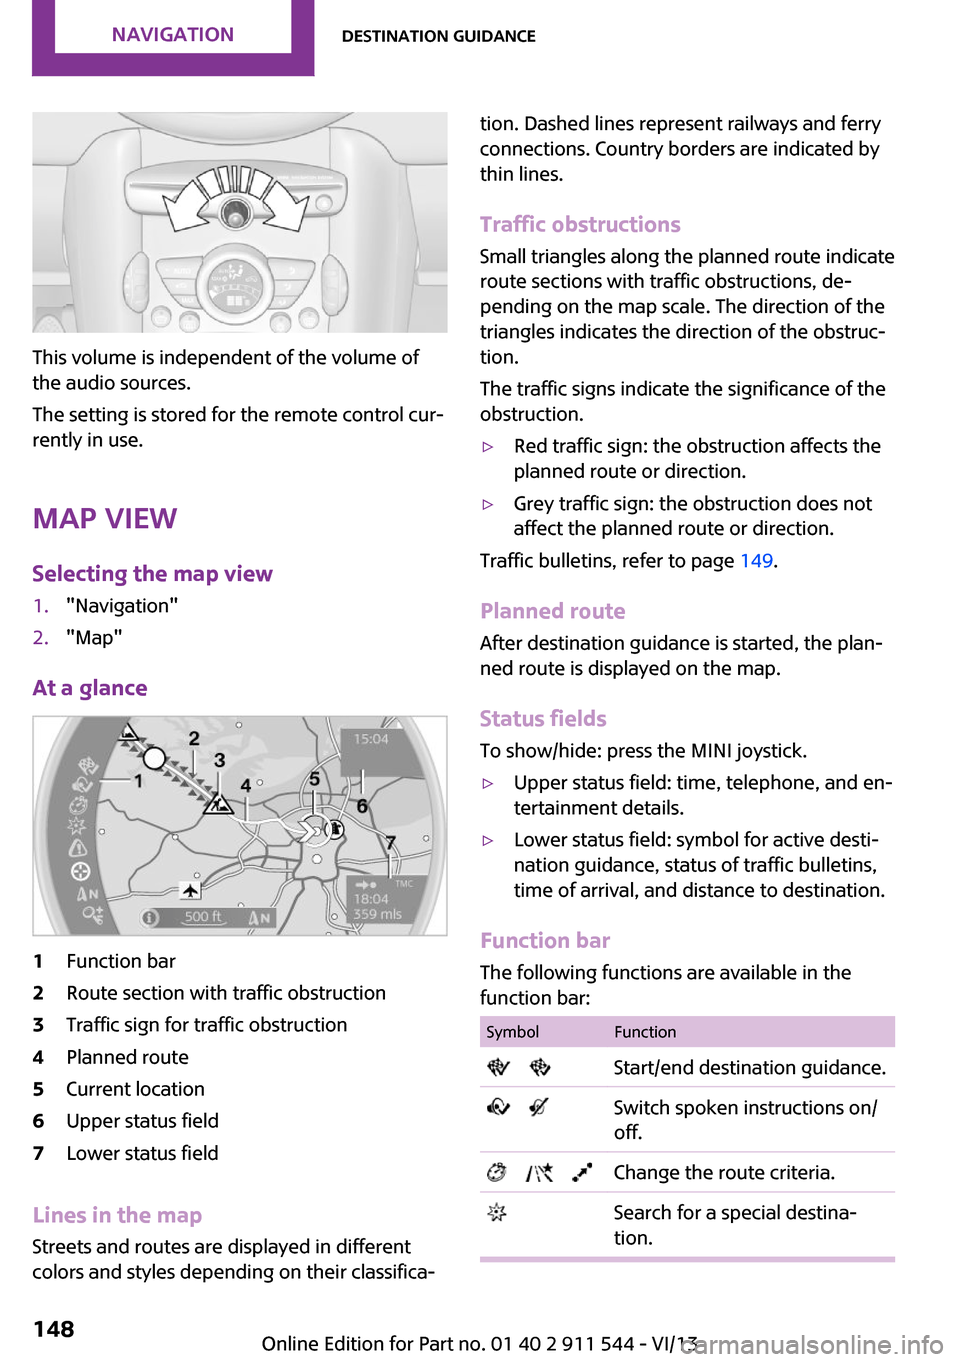
1Function bar2Route section with traffic obstruction3Traffic sign for traffic obstruction4Planned route5Current location6Upper status field7Lower status field
Lines in the map Streets and routes are displayed in different
colors and styles depending on their classifica‐
tion. Dashed lines represent railways and ferry
connections. Country borders are indicated by
thin lines.
Traffic obstructions
Small triangles along the planned route indicate
route sections with traffic obstructions, de‐
pending on the map scale. The direction of the
triangles indicates the direction of the obstruc‐
tion.
The traffic signs indicate the significance of the
obstruction.▷Red traffic sign: the obstruction affects the
planned route or direction.▷Grey traffic sign: the obstruction does not
affect the planned route or direction.
Traffic bulletins, refer to page 149.
Planned route After destination guidance is started, the plan‐
ned route is displayed on the map.
Status fields
To show/hide: press the MINI joystick.
▷Upper status field: time, telephone, and en‐
tertainment details.▷Lower status field: symbol for active desti‐
nation guidance, status of traffic bulletins,
time of arrival, and distance to destination.
Function bar
The following functions are available in the
function bar:
SymbolFunction Start/end destination guidance. Switch spoken instructions on/
off. Change the route criteria. Search for a special destina‐
tion.Seite 148NavigationDestination guidance148
Online Edition for Part no. 01 40 2 911 544 - VI/13
Page 151 of 282
The Control Display changes to a black and
white display. This enables a better view of the
traffic bulletins. The day/night mode is disre‐
garded in this setting. Symbols and special des‐
tinations are not displayed.1."Navigation"2."Map"3.Open "Options".4."Settings"5."Traffic conditions/gray map"
Symbols in the map view
Depending on the scale of the map and the lo‐
cation of the traffic obstruction along the route,
the symbols for the traffic obstructions are dis‐
played.
Additional information in the map view
Depending on the map scale, a traffic obstruc‐
tion's length, direction, and impact are dis‐
played in the map using triangles or gray bars
along the calculated route.
▷Red: traffic congestion.▷Orange: stop-and-go traffic.▷Yellow: heavy traffic.▷Green: clear roads.▷Gray: general traffic bulletins such as road
construction.
The displayed information depends on the par‐
ticular traffic information service.
Filtering traffic bulletins You can set which traffic bulletins appear on
the map.
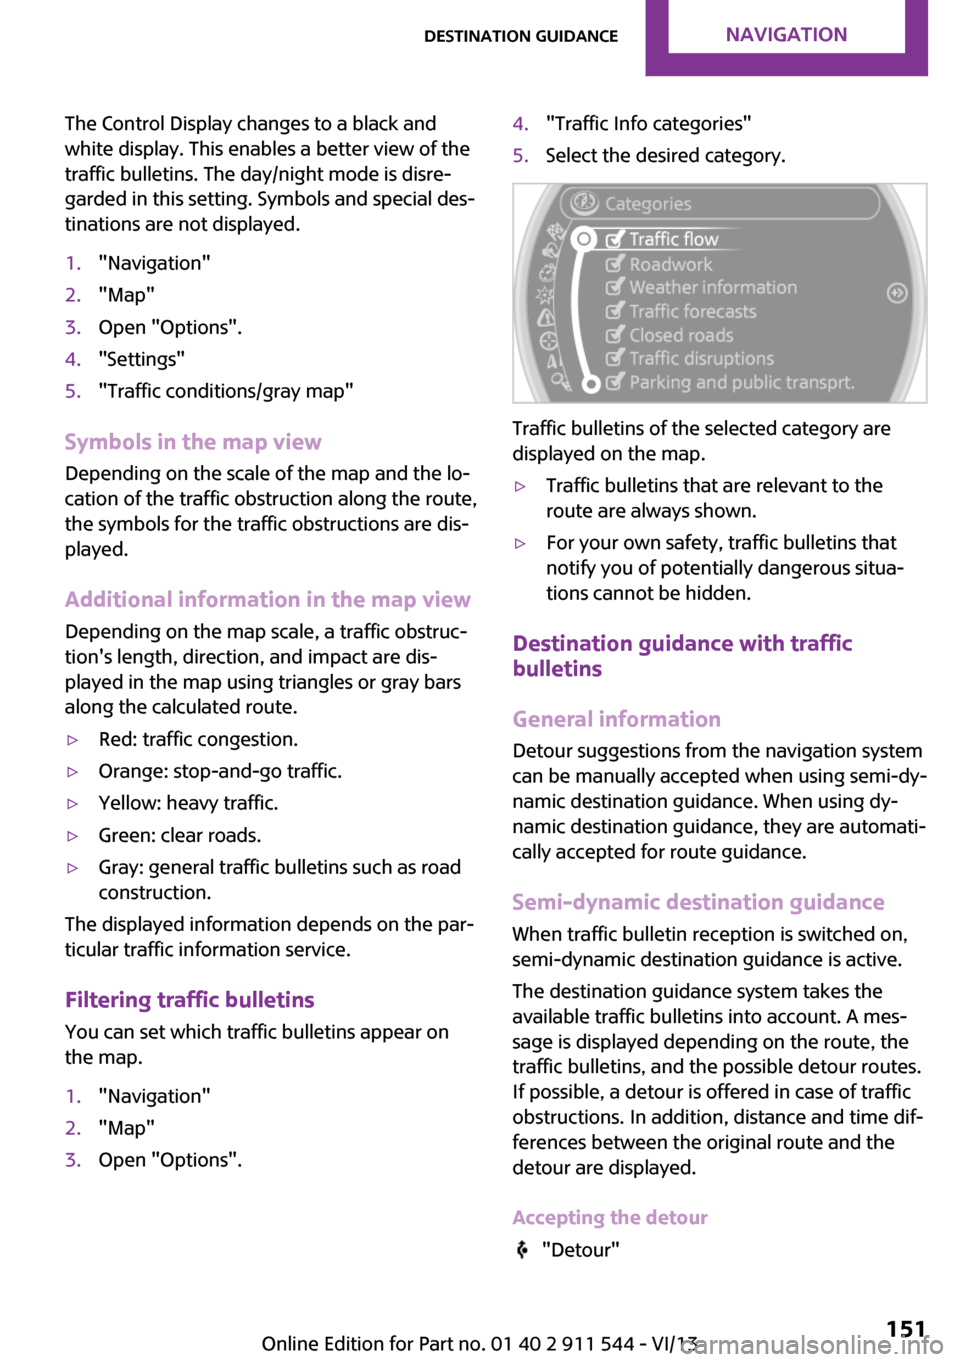
1."Navigation"2."Map"3.Open "Options".4."Traffic Info categories"5.Select the desired category.
Traffic bulletins of the selected category are
displayed on the map.
▷Traffic bulletins that are relevant to the
route are always shown.▷For your own safety, traffic bulletins that
notify you of potentially dangerous situa‐
tions cannot be hidden.
Destination guidance with traffic
bulletins
General information
Detour suggestions from the navigation system
can be manually accepted when using semi-dy‐
namic destination guidance. When using dy‐
namic destination guidance, they are automati‐
cally accepted for route guidance.
Semi-dynamic destination guidance When traffic bulletin reception is switched on,
semi-dynamic destination guidance is active.
The destination guidance system takes the
available traffic bulletins into account. A mes‐
sage is displayed depending on the route, the
traffic bulletins, and the possible detour routes.
If possible, a detour is offered in case of traffic
obstructions. In addition, distance and time dif‐
ferences between the original route and the
detour are displayed.
Accepting the detour
"Detour"
Seite 151Destination guidanceNavigation151
Online Edition for Part no. 01 40 2 911 544 - VI/13
Page 160 of 282
Activating/deactivating digital radio
reception1."Radio"2."FM" or "AM"3.Open "Options".4."HD Radio Reception"
The setting is stored for the remote control cur‐
rently in use.
This symbol is displayed in the status line
when the audio signal is digital.
When tuning to a station with a digital signal, it
may take several seconds for the station to be
played back in digital quality.
Note on HD stations whose station name ends
in ...HD or HD1:
In areas in which the station is not continuously
received in digital mode, the playback switches
between analog and digital reception. In this
case, switch off digital radio reception.
Note on HD multicast stations whose station
name ends in ...HD2, ...HD3, ...:
In areas in which the station is not continuously
received in digital mode, the audible signal
may be interrupted for several seconds. This is
reception related.
Displaying additional information
Some stations broadcast additional information
on the current track, such as the name of the
artist.
1.Select the desired station.2.Open "Options".3."Station info"
Selecting a substation
This symbol indicates that a main station
also broadcasts additional substations. The sta‐
tion name of the main station ends in HD1. Sta‐
tion names of the substations end in HD2, HD3,
etc.
1.Select the desired station.2.Press the controller.3.Select the substation.
When reception is poor, the substation is
muted.
Satellite radioGeneral information
The channels are offered in predefined pack‐
ages. The packages must be enabled by tele‐
phone.
Navigation bar overview
SymbolFunction Change the list view. Select the category. Direct channel entry Timeshift Open the My Favorites category/
open a favorite. Manage the favorites. Traffic Jump
Managing a subscription
To be able to enable or unsubscribe from the
channels, you must have reception. It is usually
at its best when you have an unobstructed view
of the sky. The channel name is displayed in the
status line.
Enabling channelsThe Unsubscribed Channels category contains
all disabled channels.
1."Radio"2."Satellite radio"Seite 160EntertainmentRadio160
Online Edition for Part no. 01 40 2 911 544 - VI/13
Page 162 of 282
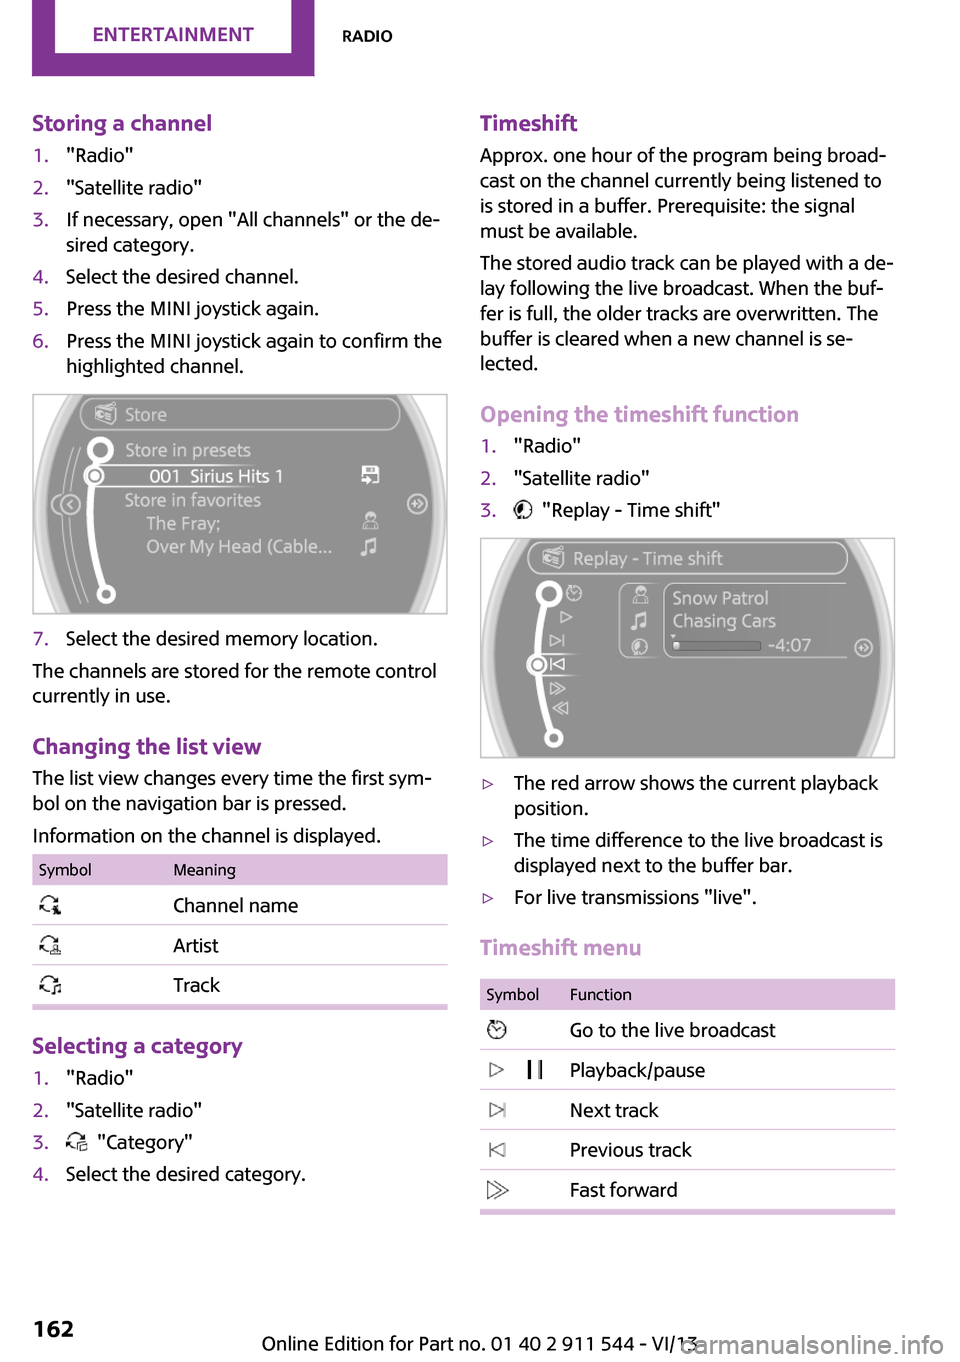
Storing a channel1."Radio"2."Satellite radio"3.If necessary, open "All channels" or the de‐
sired category.4.Select the desired channel.5.Press the MINI joystick again.6.Press the MINI joystick again to confirm the
highlighted channel.7.Select the desired memory location.
The channels are stored for the remote control
currently in use.
Changing the list view
The list view changes every time the first sym‐
bol on the navigation bar is pressed.
Information on the channel is displayed.
SymbolMeaning Channel name Artist Track
Selecting a category
1."Radio"2."Satellite radio"3. "Category"4.Select the desired category.Timeshift Approx. one hour of the program being broad‐
cast on the channel currently being listened to is stored in a buffer. Prerequisite: the signal
must be available.
The stored audio track can be played with a de‐
lay following the live broadcast. When the buf‐ fer is full, the older tracks are overwritten. The
buffer is cleared when a new channel is se‐
lected.
Opening the timeshift function1."Radio"2."Satellite radio"3. "Replay - Time shift"▷The red arrow shows the current playback
position.▷The time difference to the live broadcast is
displayed next to the buffer bar.▷For live transmissions "live".
Timeshift menu
SymbolFunction Go to the live broadcast Playback/pause Next track Previous track Fast forwardSeite 162EntertainmentRadio162
Online Edition for Part no. 01 40 2 911 544 - VI/13
Page 163 of 282
SymbolFunction Reverse Automatic timeshift deactivated/
activated
Automatic timeshift
When the function is activated, audio playback
is stopped automatically in the event of:
▷Incoming and outgoing telephone calls.▷Activation of the voice activation system.▷Muting.
The audio playback then continues with a time
delay.
Activating
1."Radio"2."Satellite radio"3. "Replay - Time shift"4. "Automatic time shift"
Deactivating
"Automatic time shift"
Storing favorites Up to 30 favorites can be stored in the favorites
list. Available favorites are artist, track, game,
league, and team.
Storing the artist, track, or game
It is only possible to store favorites that are cur‐
rently being broadcast. The channel informa‐
tion must be available.
1."Radio"2."Satellite radio"3.If necessary, open "All channels" or the de‐
sired category.4.Select the desired channel.5.Press the MINI joystick again.6.Select the artist, track, or game.Storing the league or team
Leagues or teams can be added to the favorites
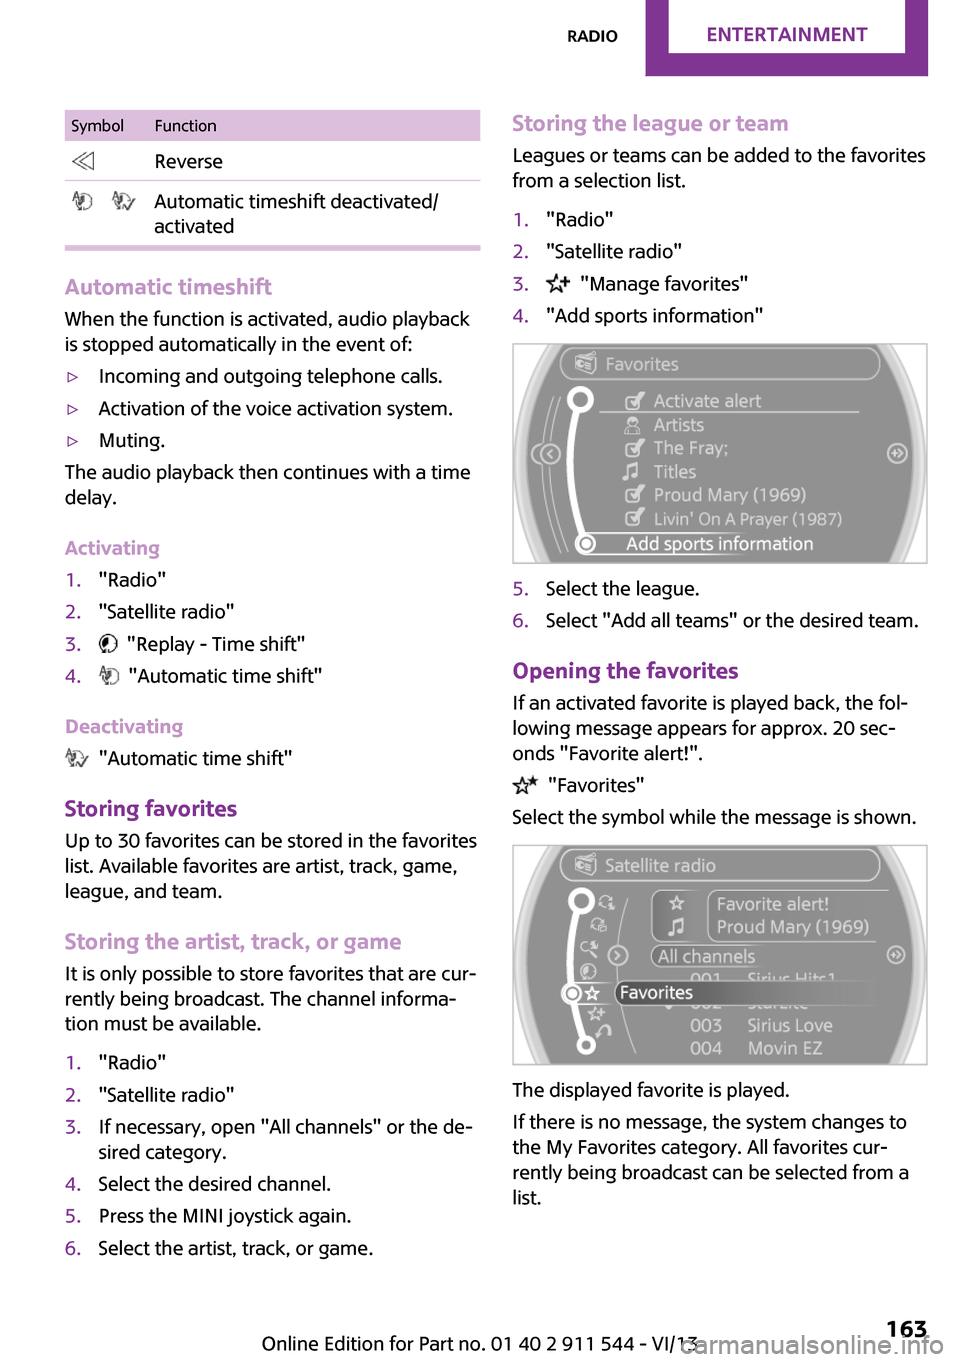
from a selection list.1."Radio"2."Satellite radio"3. "Manage favorites"4."Add sports information"5.Select the league.6.Select "Add all teams" or the desired team.
Opening the favorites
If an activated favorite is played back, the fol‐
lowing message appears for approx. 20 sec‐
onds "Favorite alert!".
"Favorites"
Select the symbol while the message is shown.
The displayed favorite is played.
If there is no message, the system changes to
the My Favorites category. All favorites cur‐
rently being broadcast can be selected from a
list.
Seite 163RadioEntertainment163
Online Edition for Part no. 01 40 2 911 544 - VI/13
Page 167 of 282
Audio playback
Selecting the track using the button
Press the button for the appropri‐
ate direction as often as necessary until the de‐
sired track is played back.
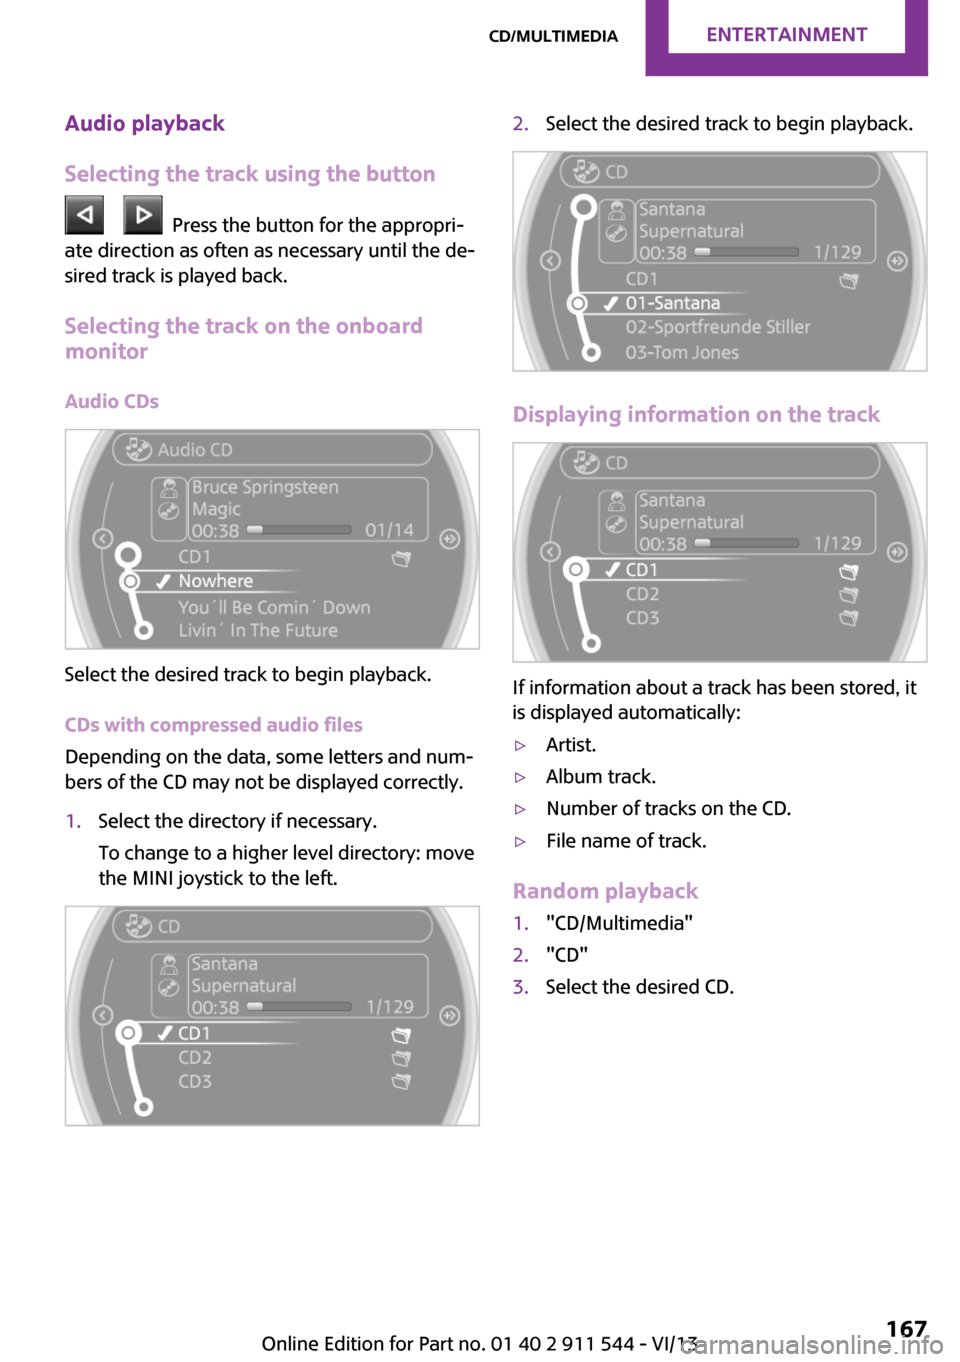
Selecting the track on the onboard
monitor
Audio CDs
Select the desired track to begin playback.
CDs with compressed audio files
Depending on the data, some letters and num‐
bers of the CD may not be displayed correctly.
1.Select the directory if necessary.
To change to a higher level directory: move
the MINI joystick to the left.2.Select the desired track to begin playback.
Displaying information on the track
If information about a track has been stored, it
is displayed automatically:
▷Artist.▷Album track.▷Number of tracks on the CD.▷File name of track.
Random playback
1."CD/Multimedia"2."CD"3.Select the desired CD.Seite 167CD/multimediaEntertainment167
Online Edition for Part no. 01 40 2 911 544 - VI/13
Page 174 of 282
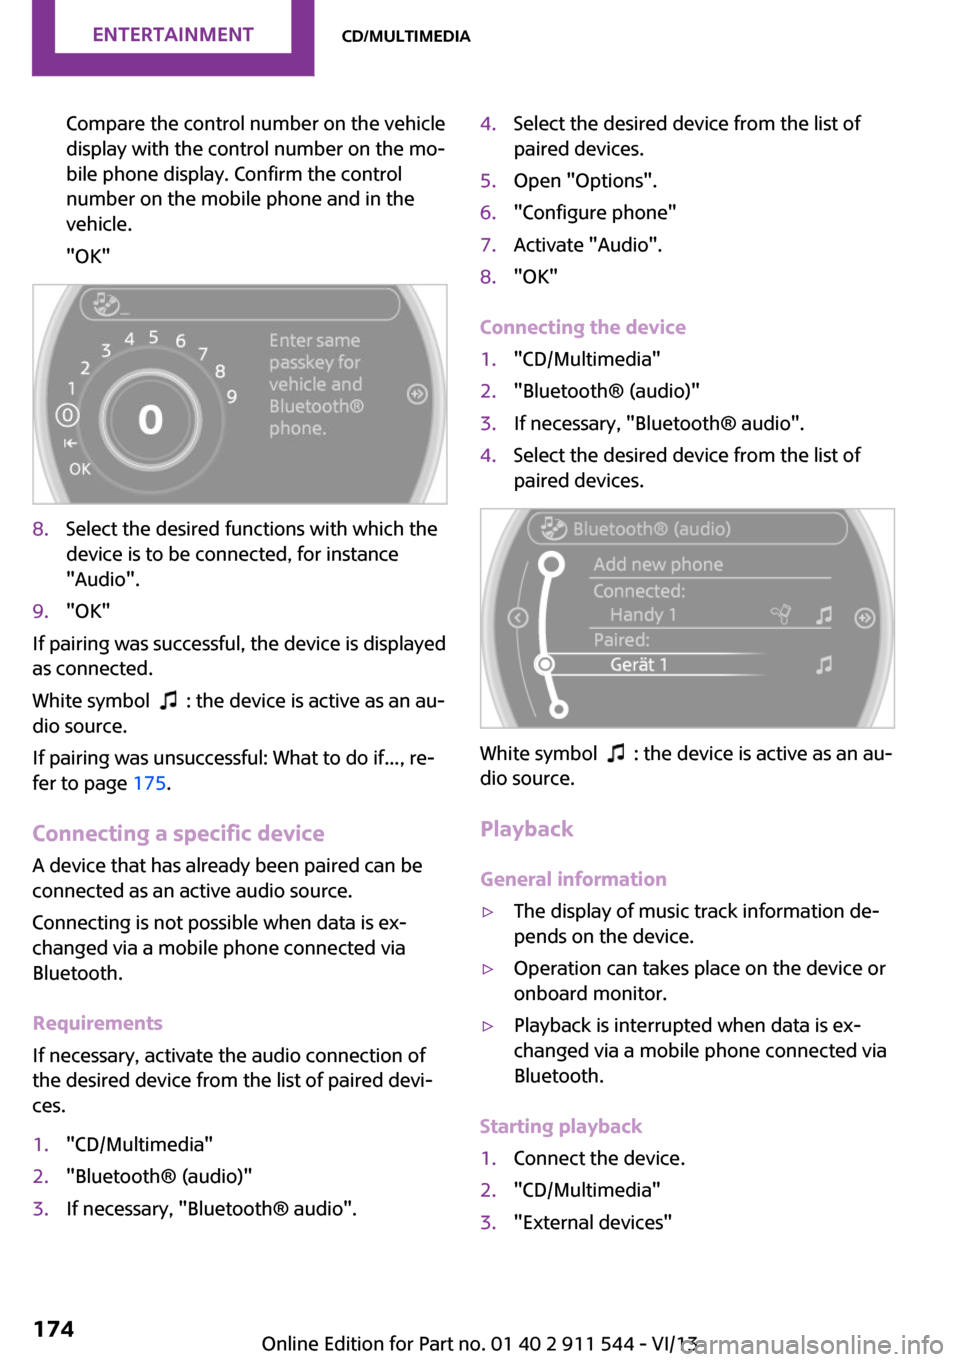
Compare the control number on the vehicle
display with the control number on the mo‐
bile phone display. Confirm the control
number on the mobile phone and in the
vehicle.
"OK"8.Select the desired functions with which the
device is to be connected, for instance
"Audio".9."OK"
If pairing was successful, the device is displayed
as connected.
White symbol
: the device is active as an au‐
dio source.
If pairing was unsuccessful: What to do if..., re‐
fer to page 175.
Connecting a specific device A device that has already been paired can be
connected as an active audio source.
Connecting is not possible when data is ex‐
changed via a mobile phone connected via
Bluetooth.
Requirements
If necessary, activate the audio connection of
the desired device from the list of paired devi‐
ces.
1."CD/Multimedia"2."Bluetooth® (audio)"3.If necessary, "Bluetooth® audio".4.Select the desired device from the list of
paired devices.5.Open "Options".6."Configure phone"7.Activate "Audio".8."OK"
Connecting the device
1."CD/Multimedia"2."Bluetooth® (audio)"3.If necessary, "Bluetooth® audio".4.Select the desired device from the list of
paired devices.
White symbol : the device is active as an au‐
dio source.
Playback
General information
▷The display of music track information de‐
pends on the device.▷Operation can takes place on the device or
onboard monitor.▷Playback is interrupted when data is ex‐
changed via a mobile phone connected via
Bluetooth.
Starting playback
1.Connect the device.2."CD/Multimedia"3."External devices"Seite 174EntertainmentCD/multimedia174
Online Edition for Part no. 01 40 2 911 544 - VI/13
Page 240 of 282
Lamp and bulb replace‐
ment
Notes
Lamps and bulbs Lamps and bulbs make an essential contribu‐
tion to vehicle safety. Therefore, exercise cau‐
tion when handling lamps and bulbs.
The manufacturer of the vehicle recommends
that you entrust corresponding procedures to
the service center if you are unfamiliar with
them or they are not described here.
You can obtain a selection of replacement
bulbs at the service center.
Danger of burns
Only change bulbs when they are cool;
otherwise, there is the danger of getting
burned. ◀
Working on the lighting system
When working on the lighting system,
you should always switch off the lights affected
to prevent short circuits.
To avoid possible injury or equipment damage
when replacing bulbs, observe any instructions
provided by the bulb manufacturer. ◀
Do not touch the bulbs
Do not touch the glass of new bulbs with
your bare hands, as even minute amounts of
contamination will burn into the bulb's surface
and reduce its service life.
Use a clean tissue, cloth or something similar,
or hold the bulb by its base. ◀
Caring for the headlamps, refer to page 255.
For bulb replacement that is not described
here, please contact the service center or a
workshop that works according to the repair
procedures of the manufacturer with corre‐
spondingly trained personnel.For checking and adjusting headlamp aim,
please contact your MINI dealer.
Light-emitting diodes LEDs Light-emitting diodes installed behind translu‐
cent lenses serve as the light source for many
of the controls and displays in the vehicle.
These light-emitting diodes, which operate us‐
ing a concept similar to that applied in conven‐
tional lasers, are officially designated as Class 1
light-emitting diodes.
Do not remove the covers
Do not remove the covers, and never
stare into the unfiltered light for several hours;
otherwise, irritation of the retina could result. ◀
Headlamp glass
Condensation can form on the inside of the
headlamps in cool or humid weather. When the
light is switched on, the condensation evapo‐ rates after a short time. The headlamps do notneed to be changed.
If the condensation in the headlamps does not
evaporate after trips with the lights switched
on, and the amount of moisture in the head‐
lamps increases, for example if water droplets
form, have them checked by your service cen‐
ter.
Bi-xenon headlamps These bulbs have a very long life and the likeli‐
hood of failure is very low, provided that they
are not switched on and off excessively. If a
bulb should nevertheless fail, you can continue
driving cautiously with the front fog lamps, pro‐
vided this is permitted by local laws.
Do not perform work/bulb replacement
on xenon headlamps
Have any work on the xenon lighting system,
including bulb replacement, performed only by
a service center.Seite 240MobilityReplacing components240
Online Edition for Part no. 01 40 2 911 544 - VI/13
Page 271 of 282
Bluetooth connection, activat‐ing/deactivating 181, 191
Bluetooth hands-free sys‐ tem 180
Brake assistant 93
Brake discs, breaking in 122
Brake fluid, refer to Service re‐ quirements 74
Brake force distribution, elec‐ tronic 93
Brake pads, breaking in 122
Brakes– Handbrake 60
Brakes, MINI maintenance
system 237
Brakes, service require‐ ments 74
Brake system, MINI mainte‐ nance system 237
Braking, notes 123
Breakdown assistance, Road‐ side Assistance 248
Breaking in 122
Brightness on the Control Dis‐ play 74
Buckle tongue, rear
– Height adjustment 48
Button for starting the engine,
refer to Start/Stop button 58
C
Calendar 206
California Proposition 65 Warning 7
Car battery, refer to Vehicle battery 246
Car care products 255
Care, displays 257
Care, vehicle 255
Cargo area
– Comfort Access 39– Flat loading floor 111– Multi-function hook 113– Opening from the out‐
side 37– Partition net 112Cargo area, enlarging– Cargo cover 110
Cargo area lamp, refer to Inte‐
rior lamps 81
Cargo area tailgate, refer to Tailgate 37
Car horn, refer to Horn 14
Carpet, care 257
Car phone, refer to Tele‐ phone 180, 190
Car wash 254
CBC, Cornering Brake Con‐
trol 93
CBS Condition Based Serv‐ ice 237
CD 166
CD/DVD drives, care 257
CD player 166
Center armrest 115
Center console, refer to Around the center con‐
sole 18
Center rail 116
Center rail, refer to Storage compartments 116
Central locking
– Comfort Access 38– From the inside 36– From the outside 34
Central locking system
– Concept 33– From the outside 33
Central screen, see Control
Display 20
Changes, technical, refer to Safety 7
Changing wheels/tires 227
Check Control 75
Children, transporting 53
Child restraint fixing system LATCH 54
Child restraint fixing sys‐ tems 53
Child restraint fixing systems, mounting 53
Child seat, mounting 53
Child seats, refer to Transport‐
ing children safely 53
Chrome parts, care 257
Circulation of air, refer to Re‐ circulated air
mode 100, 102
Cleaning, displays 257
Cleaning, refer to Care 254
Climate 99
Climate mode– Ventilation 103
Clock 68
Clock
– 12h/24h format 72– Setting the time and date 72
Closing
– From the inside 36– From the outside 34
Clutch, breaking in 122
Cockpit 14
Cold start, refer to Starting the engine 59
Combination instrument, refer to Displays 16
Combination switch, refer to Turn signal/high beams/
headlamp flasher 61
Combination switch, refer to Washer/wiper system 61
Comfort Access
– In the car wash 40– Replacing the battery 41
Comfort area, refer to Around
the center console 18
Compartment for remote con‐ trol, refer to Ignition lock 58
Compass, digital 106
Computer 69
Computer, displaying informa‐ tion 69
Condition Based Service CBS 237
Confirmation signals for vehi‐ cle locking/unlocking 35
Connecting, mobile phone, re‐ fer to Pairing the mobile
phone 180, 191
Seite 271Everything from A to ZReference271
Online Edition for Part no. 01 40 2 911 544 - VI/13