lock MINI Paceman 2014 (Mini Connected) User Guide
[x] Cancel search | Manufacturer: MINI, Model Year: 2014, Model line: Paceman, Model: MINI Paceman 2014Pages: 282, PDF Size: 6.76 MB
Page 39 of 282
jacket pocket. The vehicle automatically de‐
tects the remote control when it is nearby or in
the passenger compartment.
Comfort Access supports the following func‐
tions:▷Unlocking/locking of the vehicle.▷Unlocking of the tailgate separately.▷Starting the engine.
Functional requirements
▷There are no external sources of interfer‐
ence in the vicinity.▷To lock the vehicle, the remote control
must be located outside of the vehicle.▷The next unlocking and locking cycle is not
possible until after approx. 2 seconds.▷The engine can only be started if the re‐
mote control is inside the vehicle.▷The doors and tailgate must be closed to
operate the windows.
Comparison with ordinary remote
control
The functions can be controlled by pressing the
buttons or via Comfort Access.
Notes on opening and closing, refer to page 32.
If you notice a brief delay while opening or
closing the windows or glass sunroof, the sys‐
tem is checking whether a remote control is in‐
side the vehicle. Repeat the opening or closing
procedure, if necessary.
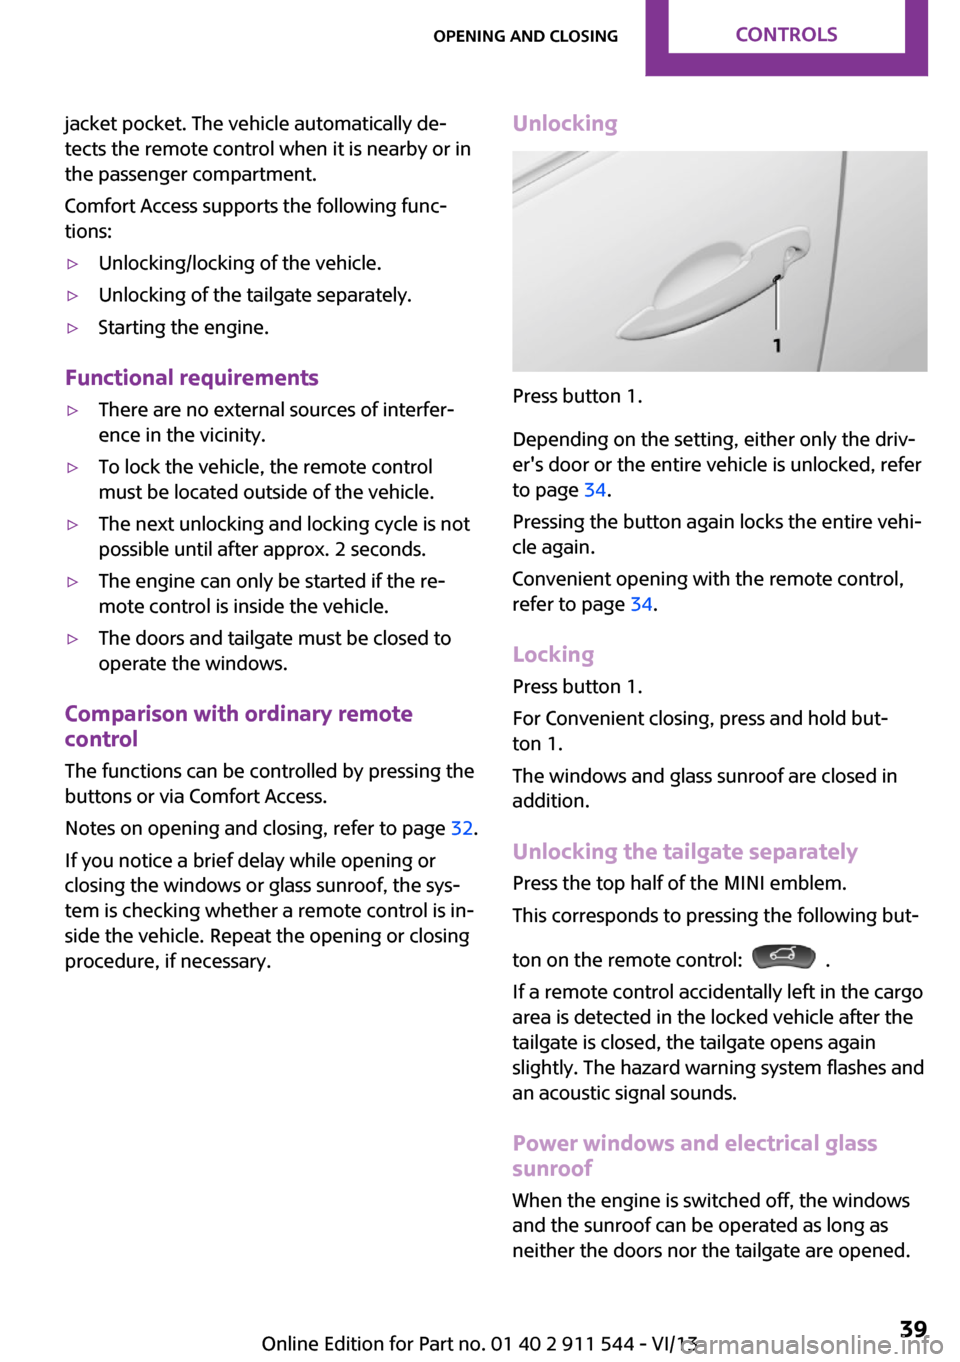
Unlocking
Press button 1.
Depending on the setting, either only the driv‐
er's door or the entire vehicle is unlocked, refer
to page 34.
Pressing the button again locks the entire vehi‐
cle again.
Convenient opening with the remote control,
refer to page 34.
Locking
Press button 1.
For Convenient closing, press and hold but‐
ton 1.
The windows and glass sunroof are closed in addition.
Unlocking the tailgate separately
Press the top half of the MINI emblem.
This corresponds to pressing the following but‐
ton on the remote control:
.
If a remote control accidentally left in the cargo
area is detected in the locked vehicle after the
tailgate is closed, the tailgate opens again
slightly. The hazard warning system flashes and
an acoustic signal sounds.
Power windows and electrical glass
sunroof
When the engine is switched off, the windows
and the sunroof can be operated as long as
neither the doors nor the tailgate are opened.
Seite 39Opening and closingControls39
Online Edition for Part no. 01 40 2 911 544 - VI/13
Page 40 of 282
When the door and tailgate are closed again
and the remote control is detected inside the
vehicle, the windows and the sunroof can be
operated again.
Insert the remote control into the ignition lock
to be able to operate the windows and the sun‐
roof while the engine is switched off and the
doors are open.
Switching on the radio ready state Press the Start/Stop button to switch on the
radio ready state, refer to page 58.
Do not depress the brake or the clutch; other‐
wise, the engine will start.
Starting the engine The engine can be started or the ignition can
be switched on, refer to page 58, when a re‐
mote control is inside the vehicle. It is not nec‐
essary to insert a remote control into the igni‐
tion lock.
Switching off the engine in cars with
automatic transmission
The engine can only be switched off with the
selector lever in position P, refer to page 65.
To switch off the engine with the selector lever
in position N, the remote control must be in‐
serted in the ignition lock.
Before driving a vehicle with automatic
transmission into a car wash1.Insert the remote control into the ignition
switch.2.Depress the brake pedal.3.Move the selector lever to position N.4.Switch the engine off.
The vehicle can roll.
Malfunction The Comfort Access functions can be disturbed
by local radio waves, such as by a mobile
phone in the immediate vicinity of the remote
control or when a mobile phone is being
charged in the vehicle.
If this occurs, open or close the vehicle using
the buttons on the remote control or use the
integrated key in the door lock.
To start the engine afterward, insert the remote
control into the ignition switch.
Warning lamps The warning lamp in the instrument
cluster lights up when you attempt to
start the engine: the engine cannot be
started.
The remote control is not in the vehicle or has a
malfunction. Take the remote control with you
inside the vehicle or have it checked. If neces‐
sary, insert another remote control into the ig‐
nition switch.
The warning lamp in the instrument
cluster lights up while the engine is run‐
ning: the remote control is no longer in‐
side the vehicle.
After switching off the engine, the engine can
only be started again within approx. 10 sec‐
onds if no door has been opened.
The indicator lamp lights up and a mes‐
sage appears on the Control Display: re‐
place the remote control battery.Seite 40ControlsOpening and closing40
Online Edition for Part no. 01 40 2 911 544 - VI/13
Page 41 of 282
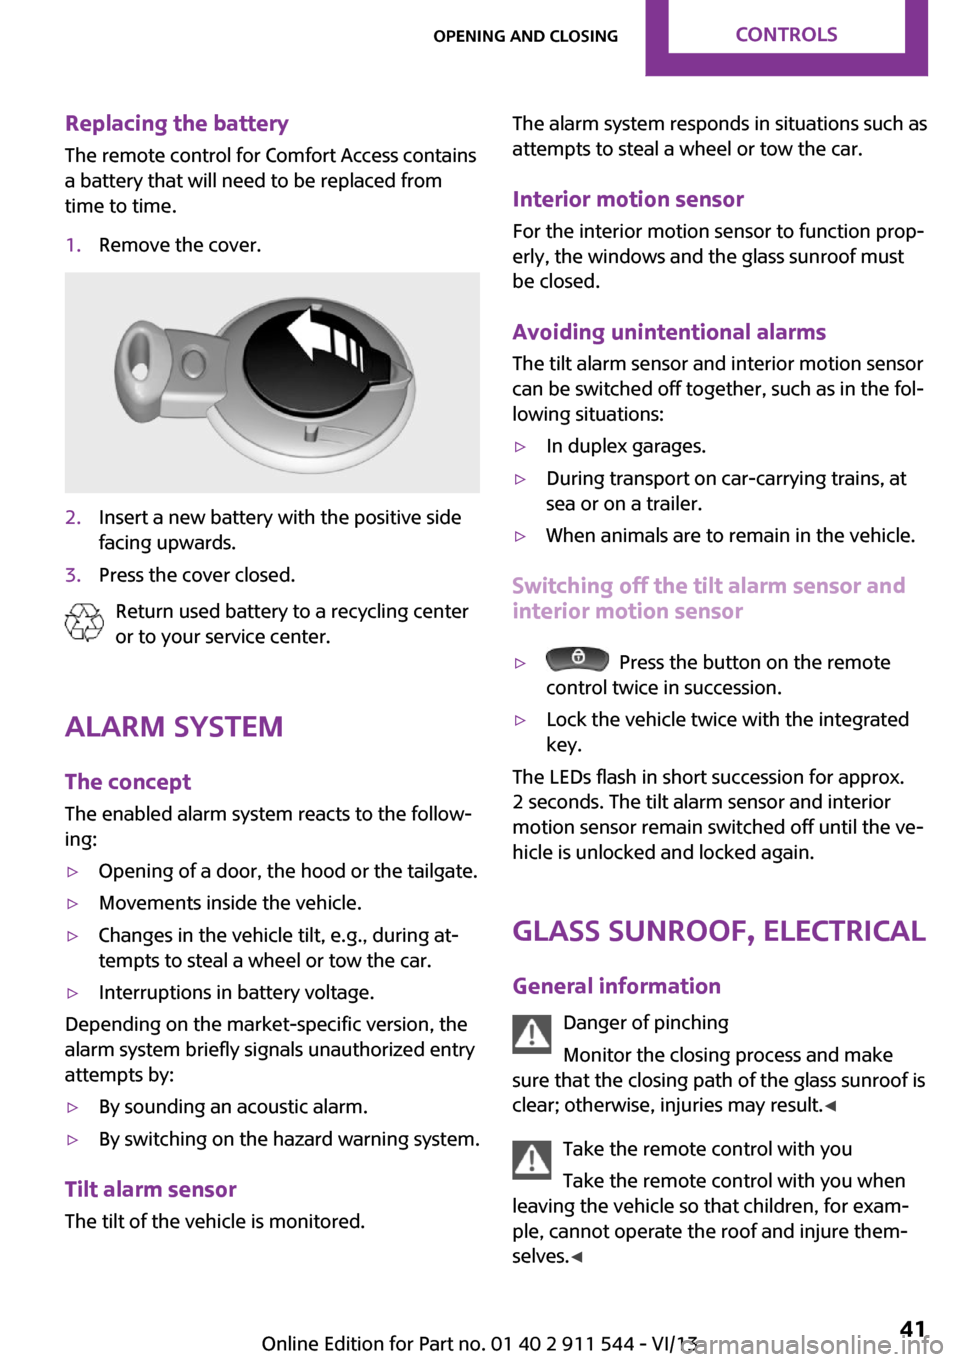
Replacing the battery
The remote control for Comfort Access contains
a battery that will need to be replaced from
time to time.1.Remove the cover.2.Insert a new battery with the positive side
facing upwards.3.Press the cover closed.
Return used battery to a recycling center
or to your service center.
Alarm system
The concept
The enabled alarm system reacts to the follow‐
ing:
▷Opening of a door, the hood or the tailgate.▷Movements inside the vehicle.▷Changes in the vehicle tilt, e.g., during at‐
tempts to steal a wheel or tow the car.▷Interruptions in battery voltage.
Depending on the market-specific version, the
alarm system briefly signals unauthorized entry
attempts by:
▷By sounding an acoustic alarm.▷By switching on the hazard warning system.
Tilt alarm sensor
The tilt of the vehicle is monitored.
The alarm system responds in situations such as
attempts to steal a wheel or tow the car.
Interior motion sensor For the interior motion sensor to function prop‐
erly, the windows and the glass sunroof must
be closed.
Avoiding unintentional alarms
The tilt alarm sensor and interior motion sensor
can be switched off together, such as in the fol‐
lowing situations:▷In duplex garages.▷During transport on car-carrying trains, at
sea or on a trailer.▷When animals are to remain in the vehicle.
Switching off the tilt alarm sensor and
interior motion sensor
▷ Press the button on the remote
control twice in succession.▷Lock the vehicle twice with the integrated
key.
The LEDs flash in short succession for approx.
2 seconds. The tilt alarm sensor and interior
motion sensor remain switched off until the ve‐
hicle is unlocked and locked again.
Glass sunroof, electrical
General information Danger of pinching
Monitor the closing process and make
sure that the closing path of the glass sunroof is
clear; otherwise, injuries may result. ◀
Take the remote control with you
Take the remote control with you when
leaving the vehicle so that children, for exam‐
ple, cannot operate the roof and injure them‐
selves. ◀
Seite 41Opening and closingControls41
Online Edition for Part no. 01 40 2 911 544 - VI/13
Page 42 of 282
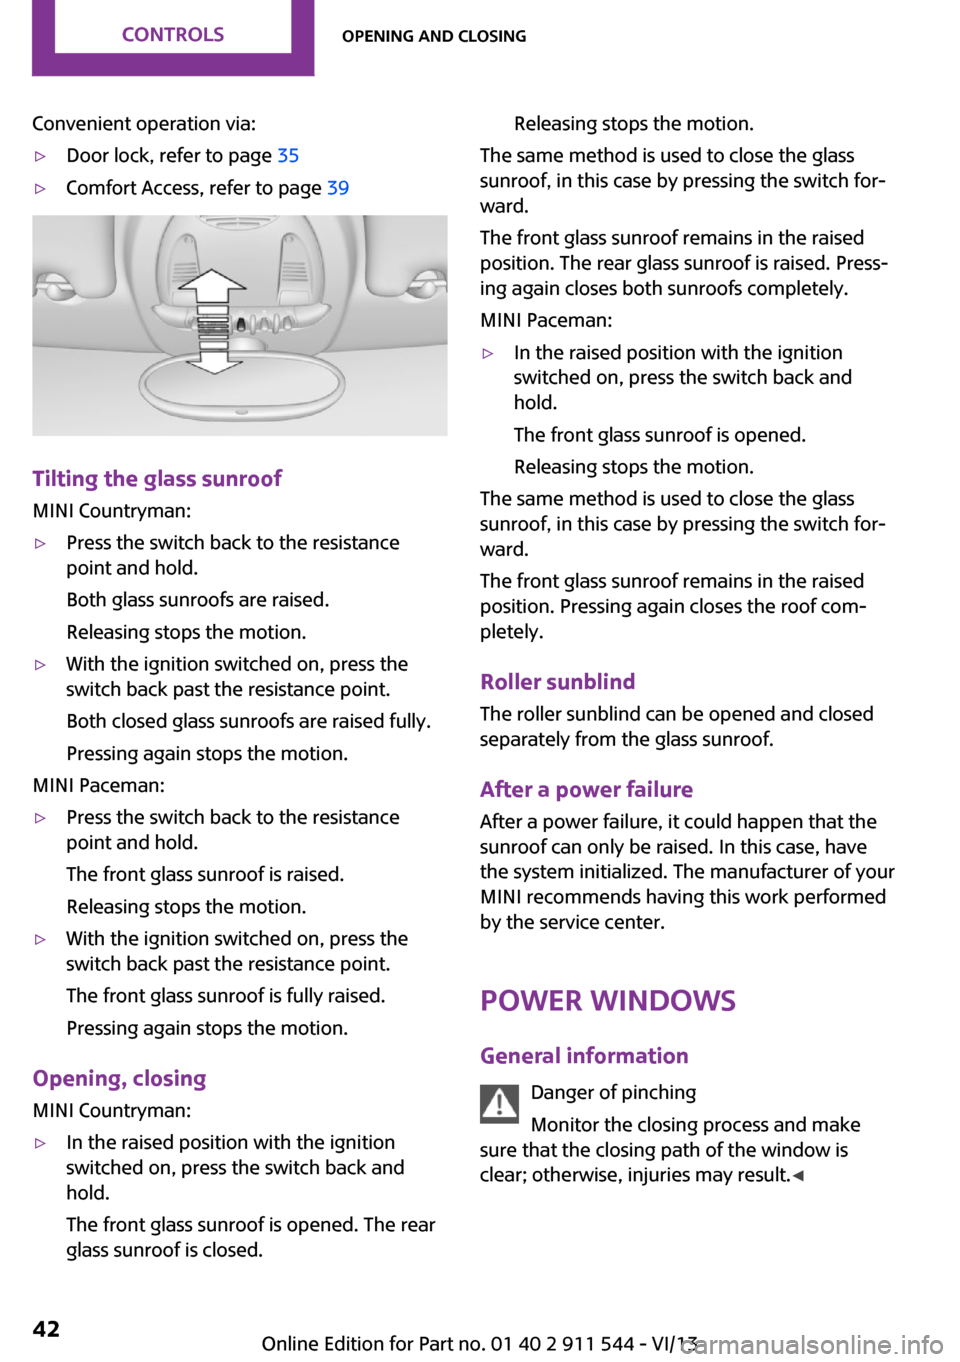
Convenient operation via:▷Door lock, refer to page 35▷Comfort Access, refer to page 39
Tilting the glass sunroof
MINI Countryman:
▷Press the switch back to the resistance
point and hold.
Both glass sunroofs are raised.
Releasing stops the motion.▷With the ignition switched on, press the
switch back past the resistance point.
Both closed glass sunroofs are raised fully.
Pressing again stops the motion.
MINI Paceman:
▷Press the switch back to the resistance
point and hold.
The front glass sunroof is raised.
Releasing stops the motion.▷With the ignition switched on, press the
switch back past the resistance point.
The front glass sunroof is fully raised.
Pressing again stops the motion.
Opening, closing MINI Countryman:
▷In the raised position with the ignition
switched on, press the switch back and
hold.
The front glass sunroof is opened. The rear
glass sunroof is closed.Releasing stops the motion.
The same method is used to close the glass
sunroof, in this case by pressing the switch for‐
ward.
The front glass sunroof remains in the raised
position. The rear glass sunroof is raised. Press‐
ing again closes both sunroofs completely.
MINI Paceman:
▷In the raised position with the ignition
switched on, press the switch back and
hold.
The front glass sunroof is opened.
Releasing stops the motion.
The same method is used to close the glass
sunroof, in this case by pressing the switch for‐
ward.
The front glass sunroof remains in the raised
position. Pressing again closes the roof com‐
pletely.
Roller sunblind The roller sunblind can be opened and closed
separately from the glass sunroof.
After a power failure After a power failure, it could happen that the
sunroof can only be raised. In this case, have
the system initialized. The manufacturer of your
MINI recommends having this work performed
by the service center.
Power windows General information Danger of pinching
Monitor the closing process and make
sure that the closing path of the window is
clear; otherwise, injuries may result. ◀
Seite 42ControlsOpening and closing42
Online Edition for Part no. 01 40 2 911 544 - VI/13
Page 46 of 282

Pull the lever, arrow 1, and apply your weight
to the backrest or lift it off, as necessary.
MINI Paceman
Pull the lever, arrow 1, and apply your weight
to the backrest or lift it off, as necessary, ar‐
rows 2.
Lumbar support
You can also adjust the contour of the backrest
to obtain additional support in the lumbar re‐
gion.
The upper hips and spinal column receive sup‐
plementary support to help you maintain a re‐
laxed, upright sitting position.
The graphic shows the MINI Countryman as an
example.
Turn the wheel to increase or decrease the cur‐
vature.
MINI Countryman: rear seat adjustment Observe the following when adjusting
Do not adjust the rear seats during a trip;
otherwise, there is a risk of passenger injury.
Make sure that the locking mechanisms of the
rear seats engage properly. Otherwise the re‐
straining effect of the safety belts during an ac‐
cident could be reduced. ◀
Forward/backward
Pull the lever and slide the seat into the desired
position.
Release the lever and move the seat slightly
forward or back so that it engages properly.
Backrest Adjust the backrest tilt, refer to page 110.
Seite 46ControlsAdjusting46
Online Edition for Part no. 01 40 2 911 544 - VI/13
Page 47 of 282
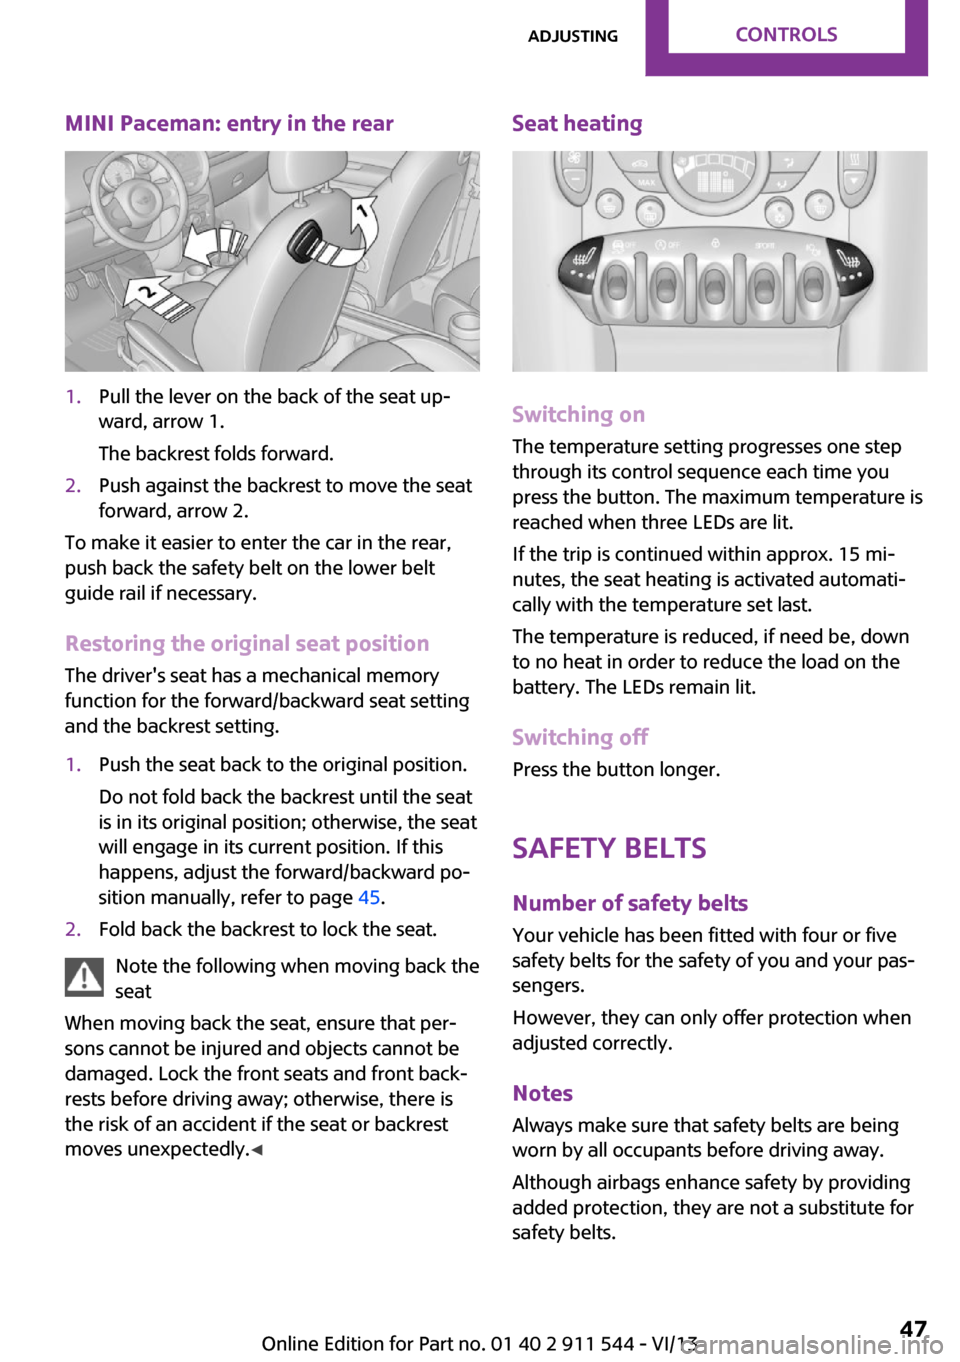
MINI Paceman: entry in the rear1.Pull the lever on the back of the seat up‐
ward, arrow 1.
The backrest folds forward.2.Push against the backrest to move the seat
forward, arrow 2.
To make it easier to enter the car in the rear,
push back the safety belt on the lower belt
guide rail if necessary.
Restoring the original seat position The driver's seat has a mechanical memory
function for the forward/backward seat setting
and the backrest setting.
1.Push the seat back to the original position.
Do not fold back the backrest until the seat
is in its original position; otherwise, the seat
will engage in its current position. If this
happens, adjust the forward/backward po‐
sition manually, refer to page 45.2.Fold back the backrest to lock the seat.
Note the following when moving back the
seat
When moving back the seat, ensure that per‐
sons cannot be injured and objects cannot be
damaged. Lock the front seats and front back‐
rests before driving away; otherwise, there is
the risk of an accident if the seat or backrest
moves unexpectedly. ◀
Seat heating
Switching on
The temperature setting progresses one step
through its control sequence each time you
press the button. The maximum temperature is
reached when three LEDs are lit.
If the trip is continued within approx. 15 mi‐
nutes, the seat heating is activated automati‐
cally with the temperature set last.
The temperature is reduced, if need be, down
to no heat in order to reduce the load on the
battery. The LEDs remain lit.
Switching off
Press the button longer.
Safety beltsNumber of safety belts
Your vehicle has been fitted with four or five
safety belts for the safety of you and your pas‐
sengers.
However, they can only offer protection when
adjusted correctly.
NotesAlways make sure that safety belts are beingworn by all occupants before driving away.
Although airbags enhance safety by providing
added protection, they are not a substitute for
safety belts.
Seite 47AdjustingControls47
Online Edition for Part no. 01 40 2 911 544 - VI/13
Page 48 of 282

The shoulder strap's anchorage point will be
correct for adult seat occupants of every build if
the seat is correctly adjusted.
One person per safety belt
Never allow more than one person to
wear a single safety belt. Never allow infants or
small children to ride on a passenger's lap. ◀
Putting on the belt
Lay the belt, without twisting, snugly
across the lap and shoulders, as close to the
body as possible. Make sure that the belt lies
low around the hips in the lap area and does
not press on the abdomen. Otherwise, the belt
can slip over the hips in the lap area in a frontal
impact and injure the abdomen.
The safety belt must not lie across the neck, rub
on sharp edges, be routed over solid or breaka‐
ble objects, or be pinched. ◀
Reduction of restraining effect
Avoid wearing clothing that prevents the
belt from fitting properly, and pull the shoulder
belt periodically to readjust the tension across
your lap; otherwise, the retention effect of the
safety belt may be reduced. ◀
Buckling the belt MINI Countryman:
MINI Paceman:
Make sure you hear the latch plate engage in
the belt buckle.
The shoulder strap's anchorage point will be
correct for adult seat occupants of every build if
the seat is correctly adjusted, refer to page 45.
Unbuckling the belt
1.Hold the belt firmly.2.Press the red button in the belt buckle.3.Guide the belt back into its reel.
Fastening the rear buckle tongues When the outer rear seats are not occupied, thebuckle tongues of the rear seats can be slid up
to the cargo area trim with the clip.
This helps avoid annoying noises when driving.
MINI Countryman: center safety belt of
rear seat
The belt buckle embossed with the word CEN‐
TER is intended exclusively for use by passen‐
gers riding in the center position.
If the center safety belt in the rear is used, the
backrests must be locked, refer to page 111.
The safety belt will not have a restraining effect
if the backrest is not locked.
Belt holder in the headliner The holder for the safety belt is located in the
headliner.
Seite 48ControlsAdjusting48
Online Edition for Part no. 01 40 2 911 544 - VI/13
Page 49 of 282

1Opening for the safety belt2Holder for the small buckle tongue
Take the small buckle tongue out of the holder.
Move both buckle tongues downward.
Closing
Insert the small buckle tongue 2 of the safety
belt into the small belt buckle 3.
Opening Press the red button on the small belt buckle 3
with buckle tongue 1.
When the center safety belt is locked:
Press the red button 3 with the buckle tongue
of the outer left safety belt.
Putting on the belt1Large buckle tongue2Small buckle tongue3Small belt buckle4Large belt buckle
Buckle tongue 1 must be inserted in belt
buckle 4. Make sure you hear the buckle
tongue engage in the belt buckle.
Insert the buckle tongue into the belt buckle in
such a way that the belt lies smoothly against
the body of the buckled person and is not
twisted.
Stowing the center safety belt
If the center seat is not occupied, insert the belt
buckles 3 and 4 into the respective holders, ar‐
rows.
Move the buckle tongues to the belt holder on
the headliner, refer to page 48, and insert them
into the provided holders.
Seite 49AdjustingControls49
Online Edition for Part no. 01 40 2 911 544 - VI/13
Page 54 of 282
NotesManufacturer's information for child re‐
straint fixing systems
To select, mount and use child restraint fixing
systems, observe the information provided by
the system manufacturer; otherwise, the pro‐
tective effect can be impaired. ◀
On the front passenger seat
Deactivating the airbags After installing a child restraint fixing system on
the front passenger seat, ensure that the front,
side, and knee airbags on the front passenger
side are deactivated.
Deactivating the front passenger airbags
If a child restraint fixing system is used in
the front passenger seat, the front passenger
airbags must be deactivated; otherwise, there
is an increased risk of injury to the child when
the airbags are triggered, even with a child re‐
straint fixing system. ◀
Seat position and height
Before installing a child restraint fixing system,
move the front passenger seat as far back as
possible and adjust its height to the highest po‐
sition to obtain the best possible position for
the belt and to offer optimal protection in the
event of an accident.
Do not change this seat position once it has
been set.Child seat security
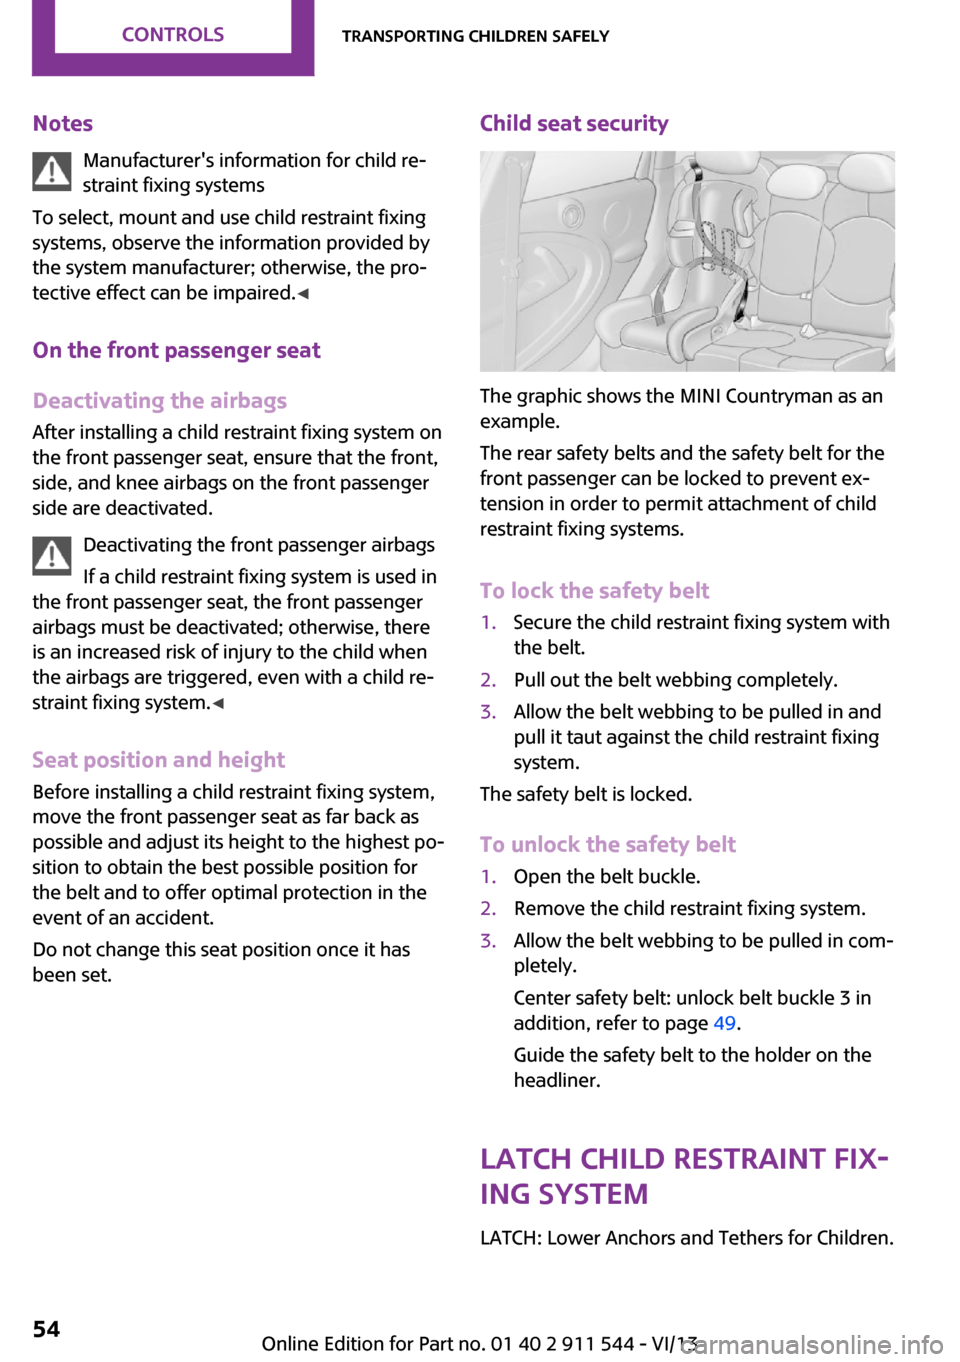
The graphic shows the MINI Countryman as an
example.
The rear safety belts and the safety belt for the
front passenger can be locked to prevent ex‐
tension in order to permit attachment of child
restraint fixing systems.
To lock the safety belt
1.Secure the child restraint fixing system with
the belt.2.Pull out the belt webbing completely.3.Allow the belt webbing to be pulled in and
pull it taut against the child restraint fixing
system.
The safety belt is locked.
To unlock the safety belt
1.Open the belt buckle.2.Remove the child restraint fixing system.3.Allow the belt webbing to be pulled in com‐
pletely.
Center safety belt: unlock belt buckle 3 in
addition, refer to page 49.
Guide the safety belt to the holder on the
headliner.
LATCH child restraint fix‐
ing system
LATCH: Lower Anchors and Tethers for Children.
Seite 54ControlsTransporting children safely54
Online Edition for Part no. 01 40 2 911 544 - VI/13
Page 57 of 282

Attaching the upper retaining strap to
the mounting point1.Slide the head restraint upward.2.Center seat: fold the cargo area floor for‐
ward.3.Guide the upper retaining strap between
the supports of the head restraint.4.Attach the upper retaining strap to the
mounting point with the hook.5.Slide the head restraint into the bottom po‐
sition.6.Pull the upper retaining strap taut.
MINI Countryman: lock‐
ing doors and windows
Rear doors
Push the locking lever on the rear doors down.
The door can now be opened from the outside
only.
Safety switch for power window This locks the rear window switches so that the
windows cannot be operated from the rear.
Press the safety switch, refer to page 44.
Seite 57Transporting children safelyControls57
Online Edition for Part no. 01 40 2 911 544 - VI/13