steering MINI Paceman 2015 Owner's Guide
[x] Cancel search | Manufacturer: MINI, Model Year: 2015, Model line: Paceman, Model: MINI Paceman 2015Pages: 223, PDF Size: 5.51 MB
Page 143 of 223
To delete the last digit: "DEL"6. Briefly press the button on the
steering wheel or radio.
or
Press the right knob to dial the phone num‐
ber.
Phone book
Dialed phone numbers, incoming calls and en‐
tries in the phone book are stored on lists if the
mobile phone is connected to the vehicle via
Bluetooth.
Five lists are available:
▷"A-Z"
Entries of the phone book of the SIM card
or of the mobile phone, which consist of a
name and phone number, are sorted in al‐
phabetical order.▷"TOP8"
The Top 8 list contains the eight phone
numbers that were dialed most frequently.▷"LAST8"
The last eight phone numbers that were di‐
aled are stored. The phone number dialed
last is at the top of the list.▷"CALLS"
The phone numbers of the last eight ac‐
cepted calls are stored. For this to be possi‐
ble, it must be possible to transmit the
phone number of the caller.▷"MISSED"
The phone numbers of the last eight calls
that were not accepted are stored. For this
to be possible, it must be possible to trans‐
mit the phone number of the caller.
Dialing a phone number from the phone
book
The list A-Z is available for phone book entries.
If entries with different names but the same
phone number are transferred to the vehicle
from the mobile phone, only one entry is dis‐
played.
The display of the phone book entries on the
radio may differ from the display on the mobile
phone, such as the order of the first and last
names.1.Switch on the radio ready state or the igni‐
tion.2. Press the button.3."PHONE"4."A-Z"5. The arrows indicate that additional
letters can be displayed.
Turn the right knob to display additional
letters if necessary.6.Turn the right knob to select the first letter
of the entry.7.Select the entry with the function button.
The phone number is dialed.
To display all entries:
1.Turn the right knob to select the first letter
of the entry and press the knob.2.Turn the right knob to select the desired
entry and press the knob.
or
Press the button on the steering
wheel or radio to dial the number.
The phone number is dialed.
Editing and dialing a phone number
from the phone book
You can edit the phone number of an entry be‐
fore making a call. This change is not stored in
the phone book.
1.Selecting an entry.2."EDIT"3.To delete a digit: "DEL"Seite 141TelephoneCOMMUNICATION141
Online Edition for Part no. 01 40 2 961 084 - II/15
Page 144 of 223
4.Enter additional digits on the buttons 0–9.5.Press the right knob to dial the phone num‐
ber.
Dialing a phone number from the phone
book using the buttons on the steering
wheel
1. Press and hold the button to dis‐
play the Telephone menu.2.Press the arrow buttons on the steering
wheel to leaf through the phone book.3. Press the button to dial the phone
number.
Dialing a phone number stored in a list
To select an entry and establish a connection:
1.Switch on the radio ready state or the igni‐
tion.2. Press the button.3."PHONE"4.Select a list, for instance "TOP8"5.Turn the right knob to select an entry and
press the knob to dial the phone number.
Deleting an individual entry
1.Select an entry from the list.2."DEL"
DTMF suffix dialing
DTMF suffix dialing can be used for gaining ac‐
cess to network services or for controlling devi‐
ces, e.g., to make a remote inquiry of an an‐
swering machine. The DTMF code is needed for
this purpose.
This function is only available if a connection
exists and if the hands-free system is being
used.
1."KEYPAD"2.Enter the DTMF code on the buttons 0–9.3.If necessary, press and hold the function
button on the right or left to enter special
characters.
Displaying the call duration
During a call:
"DURAT"
Hands-free system
General information
Calls that are being made on the hands-free
system can be continued on the mobile phone
and vice versa.
From the mobile phone to the hands-
free system
Calls that were begun outside of the Bluetoothrange of the vehicle can be continued on the
hands-free system with the ignition switched
on.
Depending on the mobile phone, the system
automatically switches to the hands-free sys‐
tem.
If the system does not switch over automati‐
cally, follow the instructions on the mobile
phone display; refer also to the mobile phone
operating instructions.
From the hands-free system to the
mobile phone
Calls that are made on the hands-free system
can in some cases be continued on the mobile
phone; this depends on the mobile phone.
Follow the instructions on the mobile phone
display; refer also to the mobile phone operat‐
ing instructions.
MINI phone numbers When the ignition is switched on, various serv‐ice phone numbers can be displayed.
Seite 142COMMUNICATIONTelephone142
Online Edition for Part no. 01 40 2 961 084 - II/15
Page 162 of 223
Maximum speed of winter tires
If the maximum speed of the vehicle is higher
than the permissible speed for the winter tires,
then display a corresponding sign in the field of
vision. You can obtain this sign from the tire
specialist or from your service center.
Maximum speed for winter tires
Do not exceed the maximum speed for
the winter tires; otherwise, tire damage and ac‐
cidents can occur. ◀
Run-flat tires When mounting new tires or changing fromsummer to winter tires or vice versa, use run-
flat tires for your own safety. Also, a compact
wheel is not available in case of a flat tire. Your
service center will be glad to advise you.
Rotating wheels between axles
Different wear patterns occur on the front and
rear axles, depending on the individual condi‐
tions of use.
To ensure even wear on the tires, the wheels
can be rotated between the axles. Your service
center will be glad to advise you.
After changing the tires, check the tire inflation
pressure and correct it if necessary.
Storage Store wheels and tires in a cool, dry place with
as little exposure to light as possible.
Always protect tires against all contact with oil,
grease and fuels.
Do not exceed the maximum tire inflation pres‐
sure indicated on the side wall of the tire.Run-flat tires
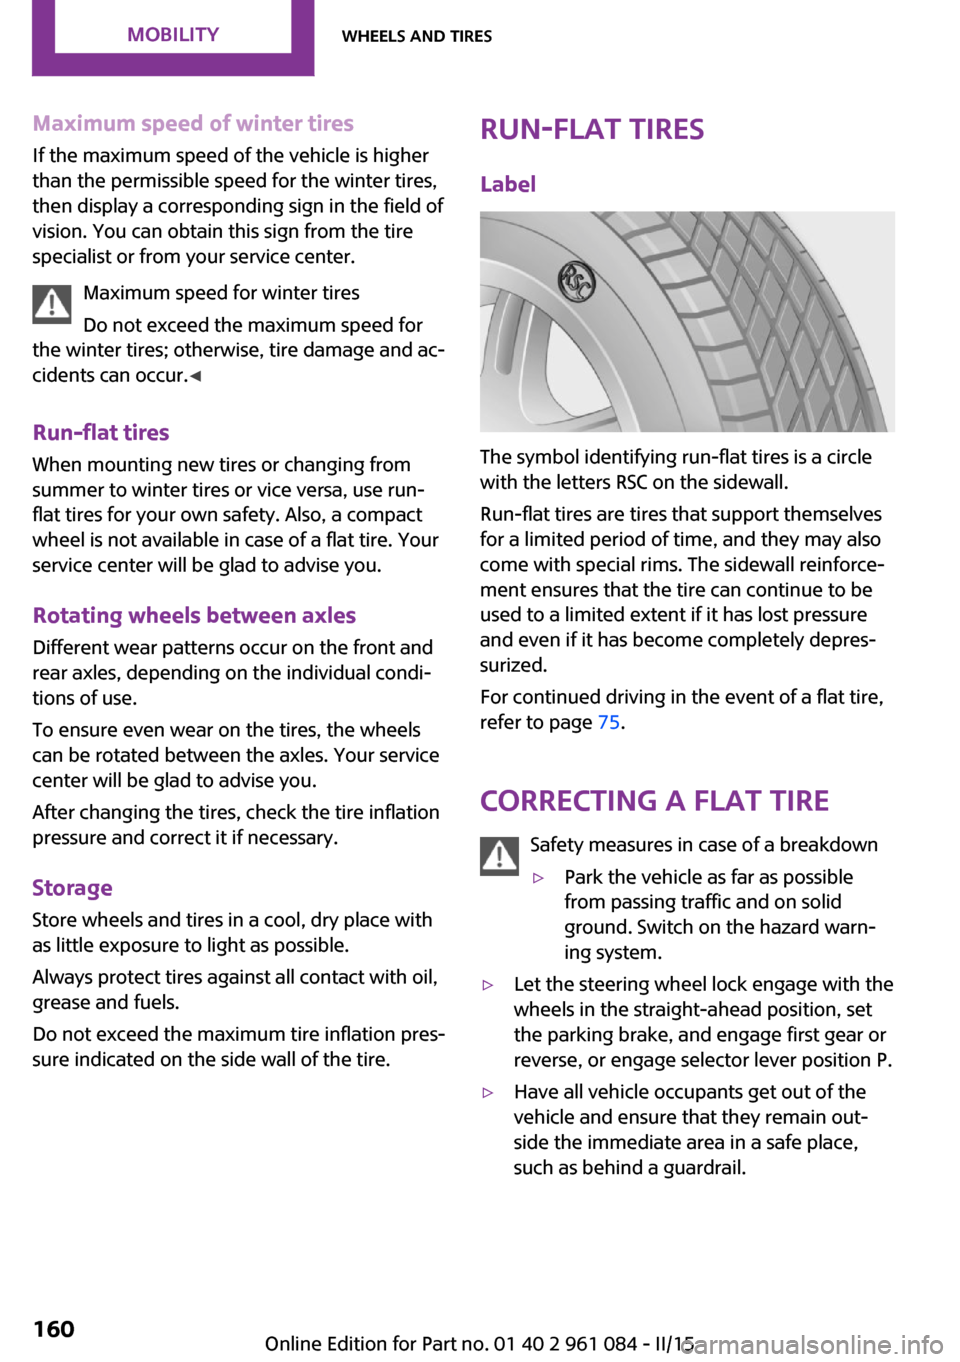
Label
The symbol identifying run-flat tires is a circle
with the letters RSC on the sidewall.
Run-flat tires are tires that support themselves
for a limited period of time, and they may also
come with special rims. The sidewall reinforce‐
ment ensures that the tire can continue to be
used to a limited extent if it has lost pressure
and even if it has become completely depres‐
surized.
For continued driving in the event of a flat tire,
refer to page 75.
Correcting a flat tire Safety measures in case of a breakdown
▷Park the vehicle as far as possible
from passing traffic and on solid
ground. Switch on the hazard warn‐
ing system.▷Let the steering wheel lock engage with the
wheels in the straight-ahead position, set
the parking brake, and engage first gear or
reverse, or engage selector lever position P.▷Have all vehicle occupants get out of the
vehicle and ensure that they remain out‐
side the immediate area in a safe place,
such as behind a guardrail.Seite 160MOBILITYWheels and tires160
Online Edition for Part no. 01 40 2 961 084 - II/15
Page 163 of 223
▷If a warning triangle or portable hazard
warning lamp is required, set it up on the
roadside at an appropriate distance from
the rear of the vehicle. Comply with all
safety guidelines and regulations. ◀
The procedure to correct a flat tire depends on
the equipment in the vehicle:
▷Run-flat tires, refer to page 160.▷MINI Mobility System, refer to page 161.
MINI Mobility System
Notes
▷Follow the instructions on using the Mobi‐
lity System found on the compressor and
sealant bottle.▷Use of the Mobility System may be ineffec‐
tive if tire damage is greater than approx.
1/8 in/4 mm in size.▷Contact the nearest service center if the tire
cannot be made drivable.▷If possible, do not remove foreign bodies
that have penetrated the tire.▷Pull the speed limit sticker off the sealant
bottle and apply it to the steering wheel.
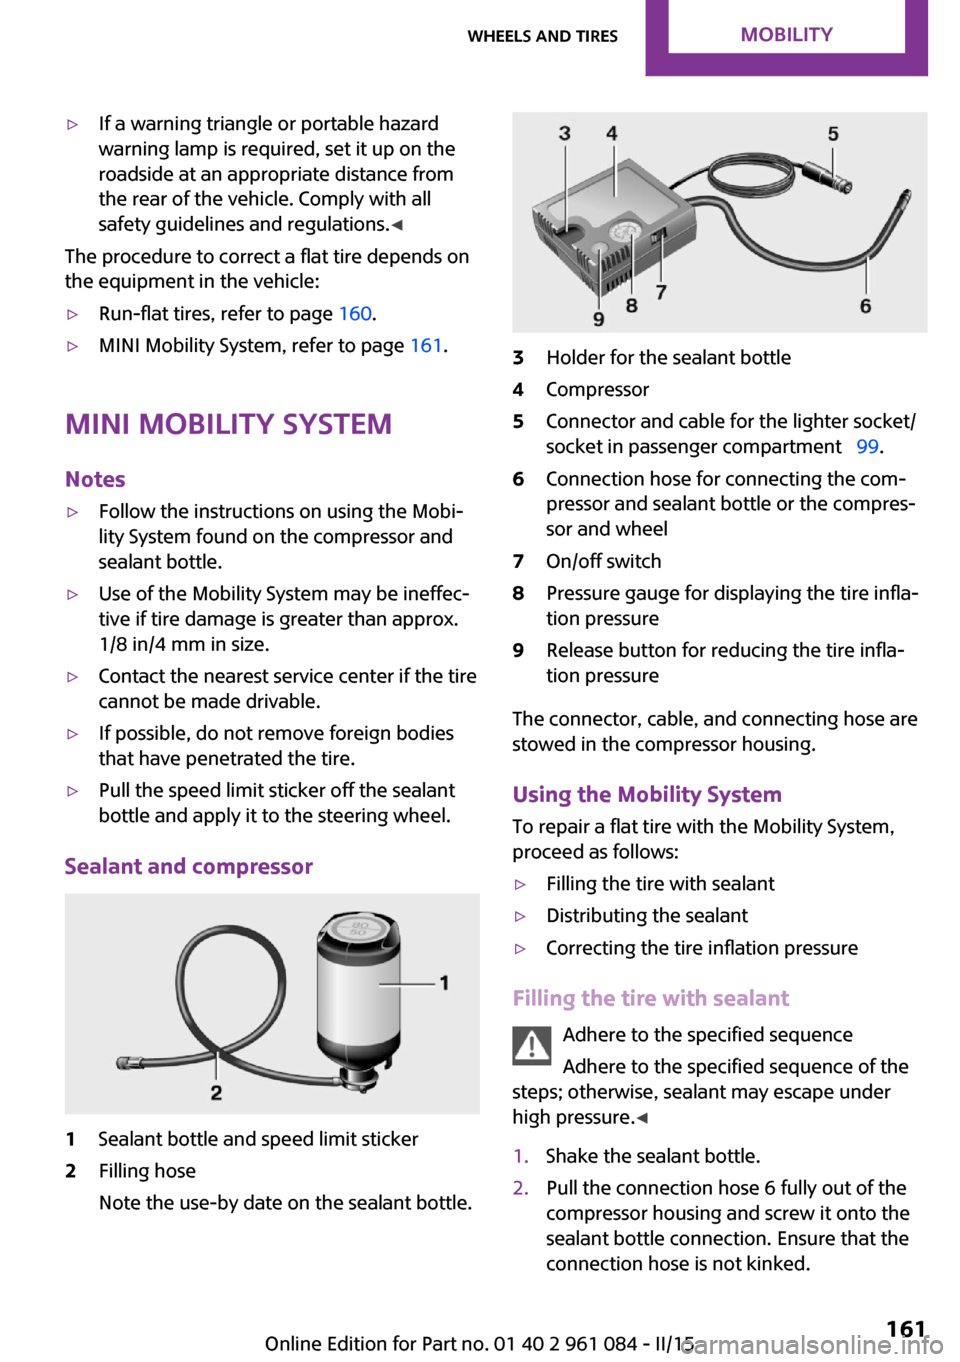
Sealant and compressor
1Sealant bottle and speed limit sticker2Filling hose
Note the use-by date on the sealant bottle.3Holder for the sealant bottle4Compressor5Connector and cable for the lighter socket/
socket in passenger compartment 99.6Connection hose for connecting the com‐
pressor and sealant bottle or the compres‐
sor and wheel7On/off switch8Pressure gauge for displaying the tire infla‐
tion pressure9Release button for reducing the tire infla‐
tion pressure
The connector, cable, and connecting hose are
stowed in the compressor housing.
Using the Mobility System
To repair a flat tire with the Mobility System,
proceed as follows:
▷Filling the tire with sealant▷Distributing the sealant▷Correcting the tire inflation pressure
Filling the tire with sealant
Adhere to the specified sequence
Adhere to the specified sequence of the
steps; otherwise, sealant may escape under
high pressure. ◀
1.Shake the sealant bottle.2.Pull the connection hose 6 fully out of the
compressor housing and screw it onto the
sealant bottle connection. Ensure that the
connection hose is not kinked.Seite 161Wheels and tiresMOBILITY161
Online Edition for Part no. 01 40 2 961 084 - II/15
Page 186 of 223
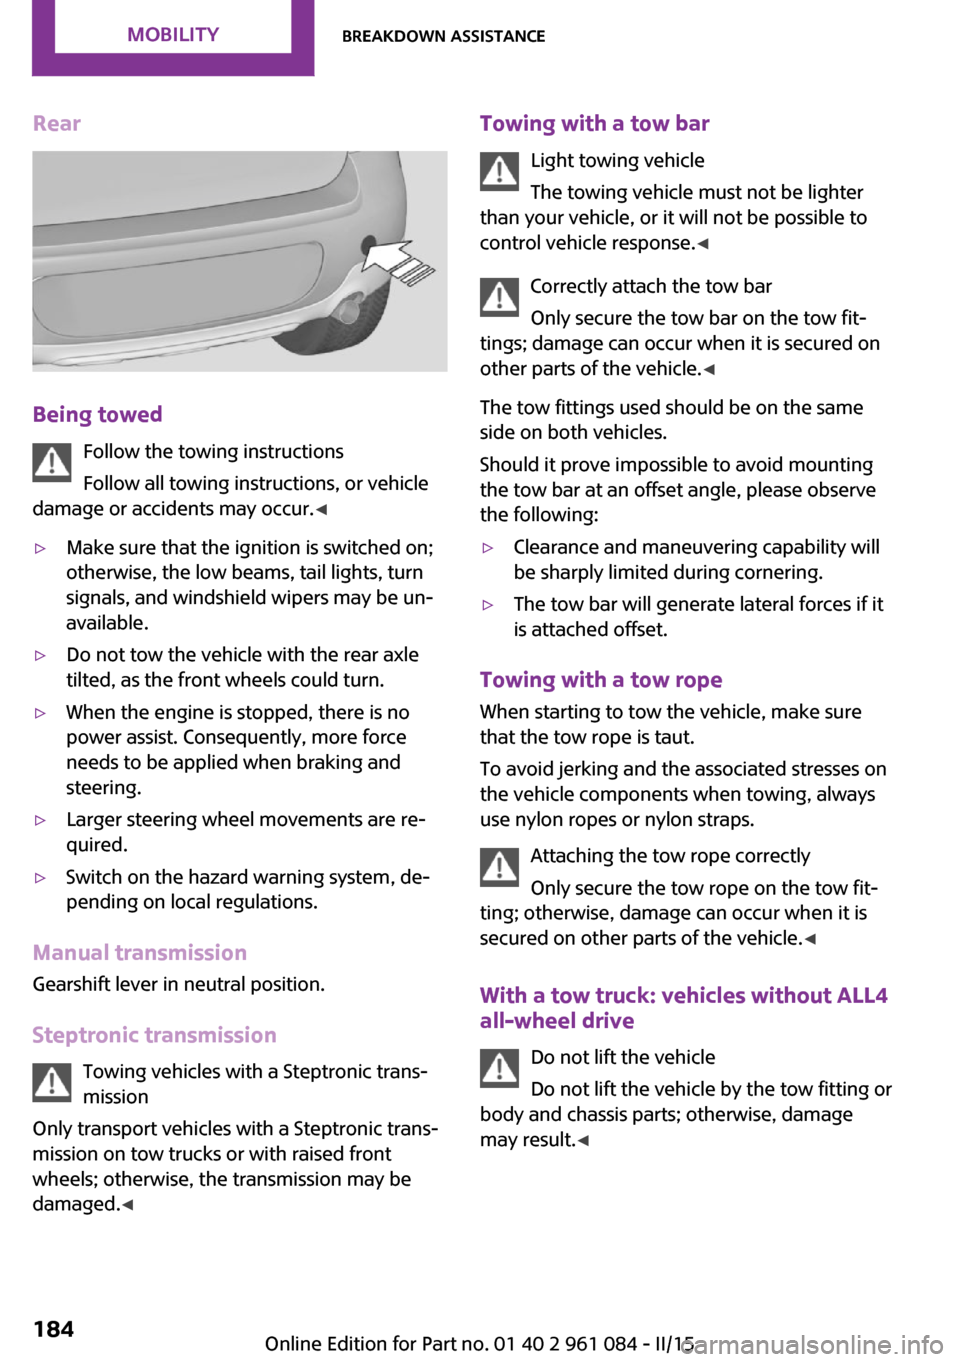
Rear
Being towedFollow the towing instructions
Follow all towing instructions, or vehicle
damage or accidents may occur. ◀
▷Make sure that the ignition is switched on;
otherwise, the low beams, tail lights, turn
signals, and windshield wipers may be un‐
available.▷Do not tow the vehicle with the rear axle
tilted, as the front wheels could turn.▷When the engine is stopped, there is no
power assist. Consequently, more force
needs to be applied when braking and
steering.▷Larger steering wheel movements are re‐
quired.▷Switch on the hazard warning system, de‐
pending on local regulations.
Manual transmission
Gearshift lever in neutral position.
Steptronic transmission Towing vehicles with a Steptronic trans‐
mission
Only transport vehicles with a Steptronic trans‐
mission on tow trucks or with raised front
wheels; otherwise, the transmission may be
damaged. ◀
Towing with a tow bar
Light towing vehicle
The towing vehicle must not be lighter
than your vehicle, or it will not be possible to
control vehicle response. ◀
Correctly attach the tow bar
Only secure the tow bar on the tow fit‐
tings; damage can occur when it is secured on
other parts of the vehicle. ◀
The tow fittings used should be on the same
side on both vehicles.
Should it prove impossible to avoid mounting
the tow bar at an offset angle, please observe
the following:▷Clearance and maneuvering capability will
be sharply limited during cornering.▷The tow bar will generate lateral forces if it
is attached offset.
Towing with a tow rope
When starting to tow the vehicle, make sure
that the tow rope is taut.
To avoid jerking and the associated stresses on
the vehicle components when towing, always
use nylon ropes or nylon straps.
Attaching the tow rope correctly
Only secure the tow rope on the tow fit‐
ting; otherwise, damage can occur when it is
secured on other parts of the vehicle. ◀
With a tow truck: vehicles without ALL4
all-wheel drive
Do not lift the vehicle
Do not lift the vehicle by the tow fitting or
body and chassis parts; otherwise, damage
may result. ◀
Seite 184MOBILITYBreakdown assistance184
Online Edition for Part no. 01 40 2 961 084 - II/15
Page 195 of 223
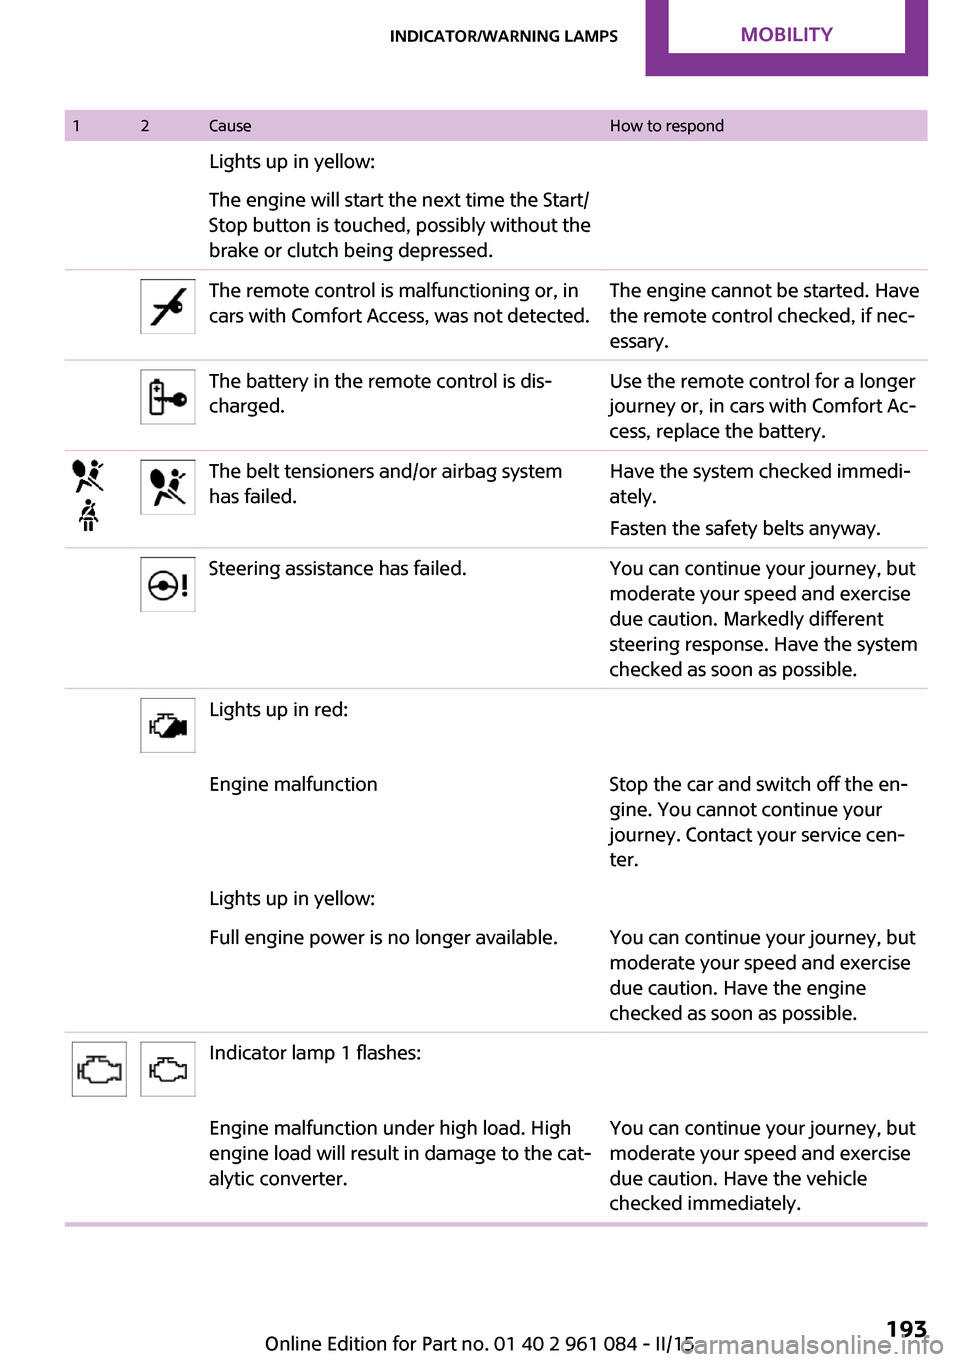
12CauseHow to respondLights up in yellow:The engine will start the next time the Start/
Stop button is touched, possibly without the
brake or clutch being depressed.The remote control is malfunctioning or, in
cars with Comfort Access, was not detected.The engine cannot be started. Have
the remote control checked, if nec‐
essary.The battery in the remote control is dis‐
charged.Use the remote control for a longer
journey or, in cars with Comfort Ac‐
cess, replace the battery.The belt tensioners and/or airbag system
has failed.Have the system checked immedi‐
ately.
Fasten the safety belts anyway.Steering assistance has failed.You can continue your journey, but
moderate your speed and exercise
due caution. Markedly different
steering response. Have the system
checked as soon as possible.Lights up in red:Engine malfunctionStop the car and switch off the en‐
gine. You cannot continue your
journey. Contact your service cen‐
ter.Lights up in yellow:Full engine power is no longer available.You can continue your journey, but
moderate your speed and exercise
due caution. Have the engine
checked as soon as possible.Indicator lamp 1 flashes:Engine malfunction under high load. High
engine load will result in damage to the cat‐
alytic converter.You can continue your journey, but
moderate your speed and exercise
due caution. Have the vehicle
checked immediately.Seite 193Indicator/warning lampsMOBILITY193
Online Edition for Part no. 01 40 2 961 084 - II/15
Page 219 of 223
Restraining systems, refer toSafety belts 37
Restraint systems for chil‐ dren 43
Retreaded tires 159
Reverse gear, manual trans‐ mission 55
Roadside Assistance 181
Roadside parking light, bulb replacement 174
Roadside parking lights 67
RON recommended fuel grade 150
RON, refer to Fuel quality 150
Rubber seals, care 189
Run-flat tires 160
Run-flat tires, flat tire 75
Run-flat tires, tire inflation pressure 152
S
Safe braking 111
Safety 6
Safety belts 37
Safety belts, care 189
Safety belts, damage 39
Safety belts, indicator/warning lamp 39
Safety belts, rear center safety belt 38
Safety belts, reminder 39
Safety systems, airbags 71
Safety systems, safety belts 37
Saving fuel 118
Seat adjustment 36
Seat adjustment, manual 35
Seat heating 37
Seats 35
Seats, adjusting 35
Seats, heating 37
Seats, sitting safely 35
Selector lever lock, overrid‐ ing 57 Selector lever lock, refer to Se‐
lector level positions, chang‐
ing, shiftlock 56
Selector lever positions, Step‐ tronic transmission 56
Selector lever, Steptronic transmission 56
Service and warranty 7
Service data in the remote control 169
Service interval display, refer to Condition Based Service
CBS 169
Service interval display, refer to Service requirements 63
Service requirements 63
Service requirements, CBS Condition Based Service 169
Settings and information 60
Settings, clock 61
Settings, configuring, refer to Personal Profile 20
Shifting, manual transmis‐ sion 55
Shifting, Steptronic transmis‐ sion 56
Shift lever, Steptronic trans‐ mission 56
Shift paddles on the steering wheel 57
Side airbags 71
Side windows, refer to Win‐ dows 32
Sitting safely 35
Sliding/tilting sunroof, refer to Glass sunroof, electrical 31
Slot for remote control 48
Snap-in adapter, mobile phone 143
Snow chains 163
Socket, OBD Onboard Diagno‐ sis 170
Special equipment, series equipment 6
Speed, average 60
Speedometer 14 Speed, with winter tires 160
Sport button 83
Sport program, Steptronic transmission 56
Stability control systems 81
Start/Stop button 48
Start/Stop button, starting the engine 49
Start/Stop button, switching off the engine 50
Starting the engine 49
Start problems, refer to Jump- starting 181
Steering wheel 42
Steering wheel, adjusting 42
Steering wheel lock 48
Steering wheel, shift pad‐ dles 57
Steptronic transmission 55
Steptronic transmission, kick‐ down 56
Steptronic transmission, over‐ riding the selector lever
lock 57
Stopping, engine 50
Storage, tires 160
Storing the vehicle 190
Summer tires, refer to Wheels and tires 152
Summer tires, tread 157
Sun visor 96
Switches, refer to Cockpit 12
Switching off, engine 50
Switching off, vehicle 50
Symbols 6
T Tachometer 59
Tailgate 26
Tailgate, Comfort Access 28
Tailgate, opening/closing 26
Tailgate, opening from the outside 26
Tail lights 176 Seite 217Everything from A to ZREFERENCE217
Online Edition for Part no. 01 40 2 961 084 - II/15