belt MINI Paceman 2016 (Mini Connected) User Guide
[x] Cancel search | Manufacturer: MINI, Model Year: 2016, Model line: Paceman, Model: MINI Paceman 2016Pages: 223, PDF Size: 5.52 MB
Page 77 of 223

Operational readiness of airbag system
Information WARNING
Individual components can be hot after
triggering of the airbag system. There is risk of
injuries. Do not touch individual components. ◀
WARNING
Improperly executed work can lead to
failure, malfunction or unintentional triggering of the airbag system. In the case of a malfunc‐
tion, the airbag system could not trigger as in‐ tended in the event of an accident despite re‐
spective accident severity. There is risk of
injuries or danger to life. Have the airbag sys‐
tem checked, repaired, dismantled and scrap‐
ped by a dealer’s service center or another
qualified service center or repair shop. ◀
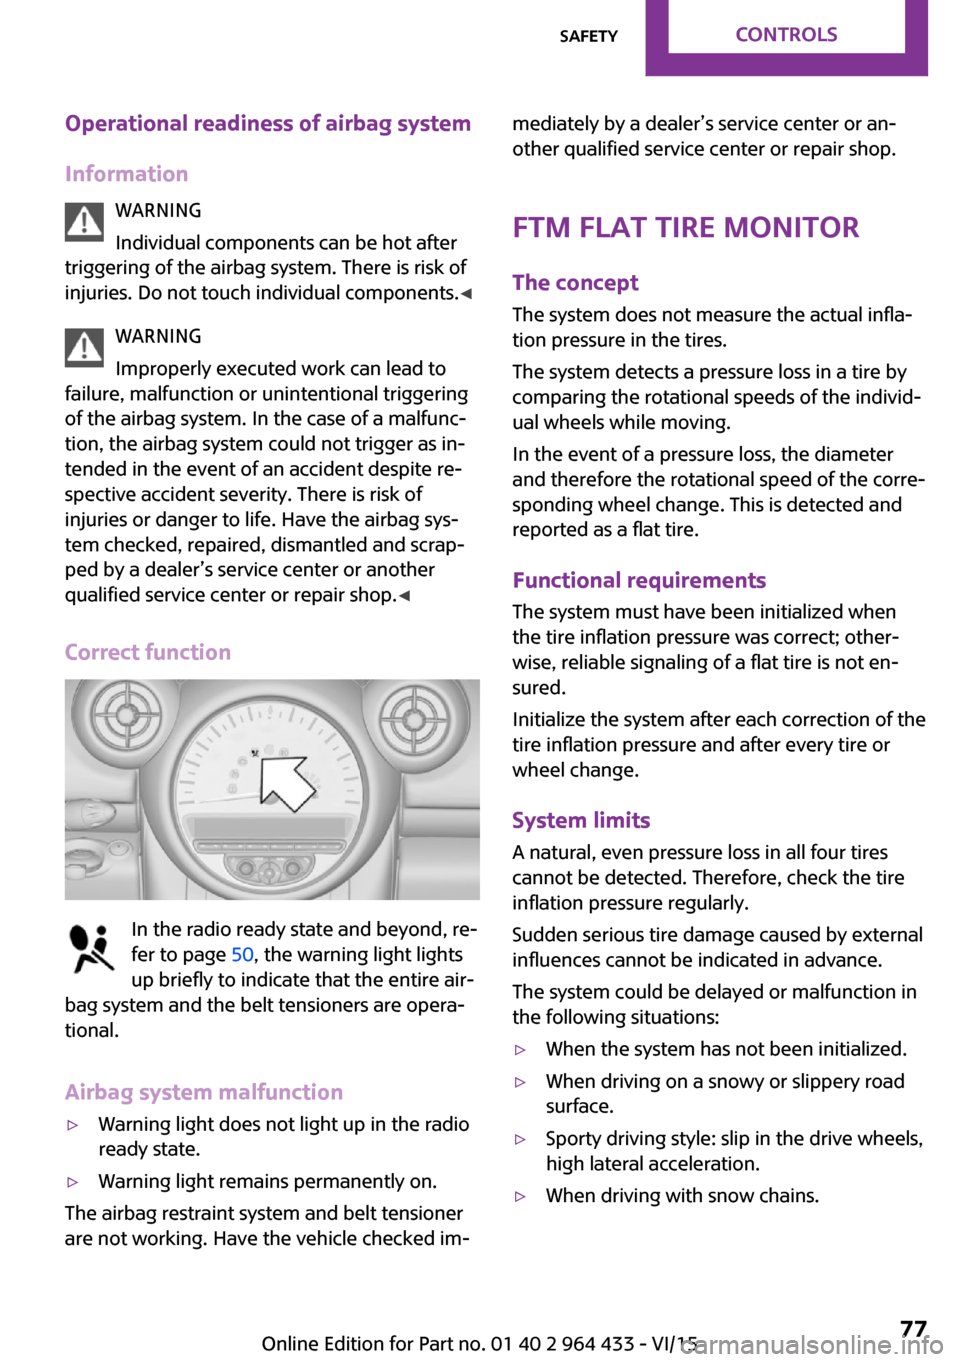
Correct function
In the radio ready state and beyond, re‐
fer to page 50, the warning light lights
up briefly to indicate that the entire air‐
bag system and the belt tensioners are opera‐
tional.
Airbag system malfunction
▷Warning light does not light up in the radio
ready state.▷Warning light remains permanently on.
The airbag restraint system and belt tensioner
are not working. Have the vehicle checked im‐
mediately by a dealer’s service center or an‐
other qualified service center or repair shop.
FTM Flat Tire Monitor
The concept
The system does not measure the actual infla‐
tion pressure in the tires.
The system detects a pressure loss in a tire by
comparing the rotational speeds of the individ‐
ual wheels while moving.
In the event of a pressure loss, the diameter
and therefore the rotational speed of the corre‐
sponding wheel change. This is detected and
reported as a flat tire.
Functional requirements
The system must have been initialized when
the tire inflation pressure was correct; other‐ wise, reliable signaling of a flat tire is not en‐
sured.
Initialize the system after each correction of the
tire inflation pressure and after every tire or
wheel change.
System limits
A natural, even pressure loss in all four tires
cannot be detected. Therefore, check the tire
inflation pressure regularly.
Sudden serious tire damage caused by external
influences cannot be indicated in advance.
The system could be delayed or malfunction in
the following situations:▷When the system has not been initialized.▷When driving on a snowy or slippery road
surface.▷Sporty driving style: slip in the drive wheels,
high lateral acceleration.▷When driving with snow chains.Seite 77SafetyCONTROLS77
Online Edition for Part no. 01 40 2 964 433 - VI/15
Page 102 of 223

MINI Paceman
Take out the cover.
Cargo area Cargo cover WARNING
Loose objects in the car's interior can be
thrown into the car's interior while driving, e.g.
in the event of an accident or during braking
and evasive maneuvers. There is risk of injuries.
Secure loose objects in the car's interior. ◀
When the tailgate is opened, the cargo cover is
raised.
When closing, ensure that the cargo cover is
resting on the rubber buffers of the securing
straps; otherwise, damage may occur when
closing the tailgate.
To load bulky luggage, the cover can be re‐
moved.
1.Detach the securing straps from the tail‐
gate.2.Lift the cover slightly, arrow 1, and pull it
back and out of the bracket, arrow 2.
MINI Countryman:
MINI Paceman:
MINI Countryman: rear seat backrests
Observe the instructions concerning the safety
belt, refer to page 38. Otherwise, personal pro‐
tection may be compromised.
WARNING
Danger of jamming with folding down the
backrests. There is risk of injuries or risk of property damage. Make sure that the area of
movement of the rear backrest is clear prior to
folding down. ◀
The rear seat backrest is divided at a ratio of
40-20-40.
When the outer rear seat backrests are folded down, it is not permissible for a person to travel
on the center seat.
Remove the third head restraint, refer to
page 42, if necessary.
Open the center safety belt and insert it in the
belt holder on the headliner, refer to page 40.
Enlarge the cargo area by adjusting the rear
seat backrests to a more upright position.
Seite 102CONTROLSInterior equipment102
Online Edition for Part no. 01 40 2 964 433 - VI/15
Page 103 of 223

The backrests can be adjusted to 10 different
positions between the comfort and transport
positions and they can be folded down.
In the comfort position, the backrests are tilted
back to the greatest possible angle and in the
transport position they are nearly vertical.
Before beginning with the mounting of a child
restraint fixing system, note the instructions,
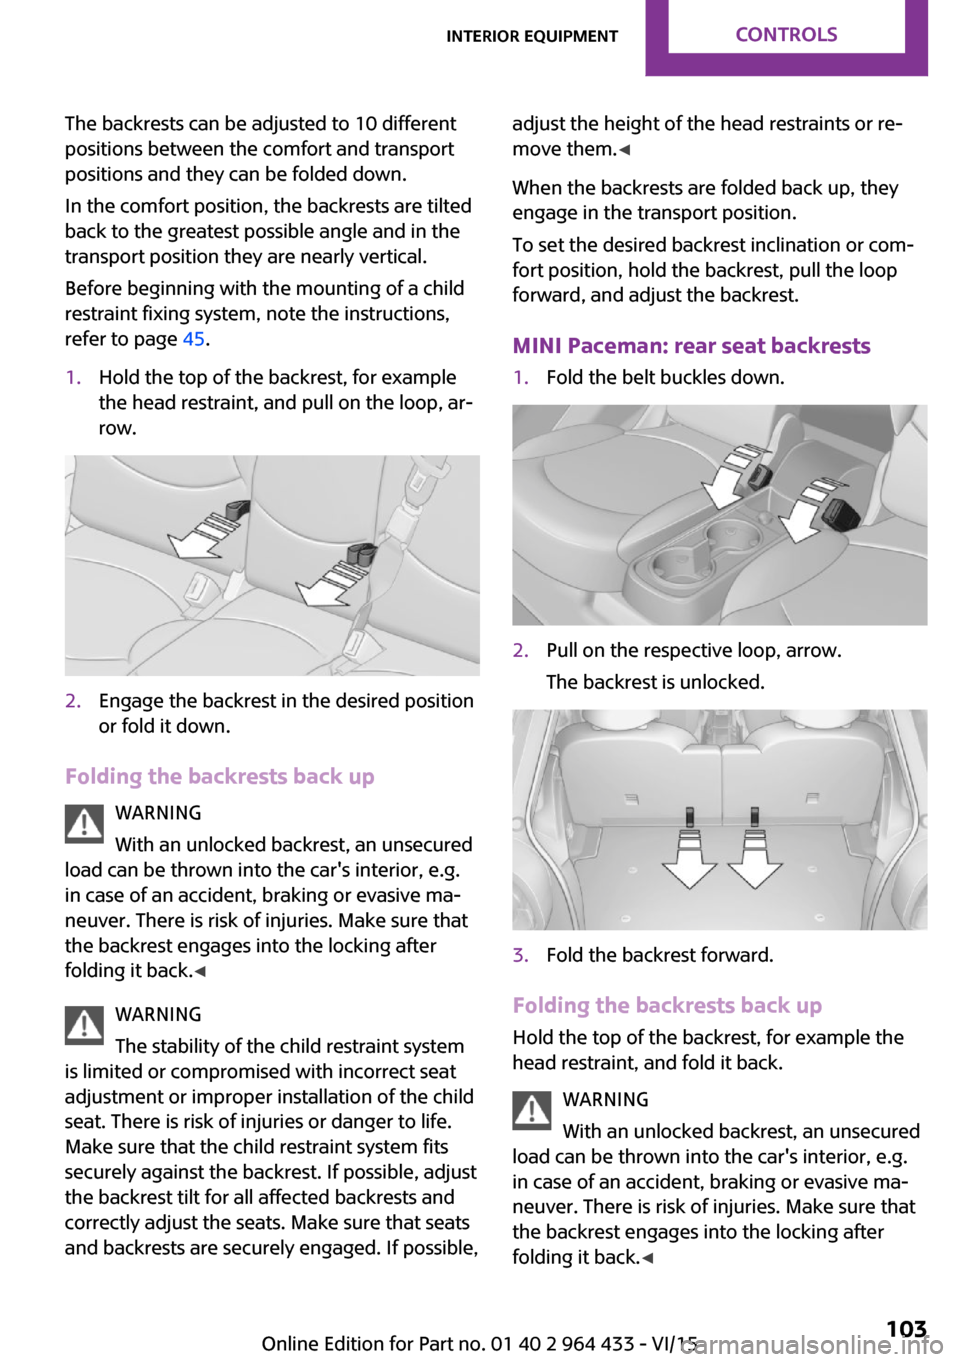
refer to page 45.1.Hold the top of the backrest, for example
the head restraint, and pull on the loop, ar‐
row.2.Engage the backrest in the desired position
or fold it down.
Folding the backrests back up
WARNING
With an unlocked backrest, an unsecured
load can be thrown into the car's interior, e.g.
in case of an accident, braking or evasive ma‐
neuver. There is risk of injuries. Make sure that
the backrest engages into the locking after
folding it back. ◀
WARNING
The stability of the child restraint system
is limited or compromised with incorrect seat
adjustment or improper installation of the child
seat. There is risk of injuries or danger to life.
Make sure that the child restraint system fits
securely against the backrest. If possible, adjust
the backrest tilt for all affected backrests and
correctly adjust the seats. Make sure that seats
and backrests are securely engaged. If possible,
adjust the height of the head restraints or re‐
move them. ◀
When the backrests are folded back up, they
engage in the transport position.
To set the desired backrest inclination or com‐
fort position, hold the backrest, pull the loop
forward, and adjust the backrest.
MINI Paceman: rear seat backrests1.Fold the belt buckles down.2.Pull on the respective loop, arrow.
The backrest is unlocked.3.Fold the backrest forward.
Folding the backrests back up Hold the top of the backrest, for example the
head restraint, and fold it back.
WARNING
With an unlocked backrest, an unsecured
load can be thrown into the car's interior, e.g.
in case of an accident, braking or evasive ma‐
neuver. There is risk of injuries. Make sure that
the backrest engages into the locking after
folding it back. ◀
Seite 103Interior equipmentCONTROLS103
Online Edition for Part no. 01 40 2 964 433 - VI/15
Page 117 of 223

available cargo and luggage load capacity
calculated in Step 4.6.If your vehicle will be towing a trailer, load
from your trailer will be transfered to your
vehicle. Consult the manual for transporting
a trailer to determine how this may reduce
the available cargo and luggage load ca‐
pacity of your vehicle.
Load
4-seater:
5-seater:
The maximum load is the sum of the weight of
the occupants and the cargo.
The greater the weight of the occupants, the
less cargo that can be transported.
Stowing cargo
▷Very heavy cargo: when the rear seat is not
occupied, secure each of the outer safety
belts in the opposite buckle.▷Heavy cargo: stow as far forward and as
low as possible, ideally directly behind the
backrests.▷Cover sharp edges and corners.▷Do not stack cargo above the top edge of
the backrests.▷If necessary, fold down the rear backrests
to stow cargo.▷Use the partition net, refer to page 104, to
protect passengers. Make sure that objects
cannot penetrate the partition net.▷Place protective material around any sharp-
edged or pointed objects that could bump
against the rear window while the vehicle is
in motion.
MINI Countryman
MINI Paceman
Seite 117LoadingDRIVING TIPS117
Online Edition for Part no. 01 40 2 964 433 - VI/15
Page 118 of 223

Securing cargoLashing eyes in the cargo area
MINI Countryman
MINI Paceman
Securing cargo
▷Secure smaller and lighter pieces with tight‐
ening belts or straps.▷Secure larger and heavier pieces with cargo
straps.
Adhere to the information included with
the cargo straps.▷Eight mounting eyes are available for fas‐
tening the cargo straps.
Two of them are located on the side wall of
the cargo area, arrows 1, and two are lo‐
cated on the rear wall of the cargo area, ar‐
rows 2.
WARNING
Improperly stowed objects can shift and
be thrown into the car's interior, e.g. in the
event of an accident or during braking and eva‐
sive maneuvers. Vehicle occupants can be hit
and injured. There is risk of injuries. Stow and
secure objects and cargo properly.
Do not secure cargo using the upper LATCH
mounting points, refer to page 48; otherwise,
these may become damaged. ◀
Roof-mounted luggage
rack
InformationA special rack system is available as an optional
accessory.
Securing
Follow the installation instructions of the roof
rack.
Ensure that adequate clearance is available for
the movement of the glass sunroof.
Loading Because roof racks raise the vehicle's center ofgravity when loaded, they have a major effect
on vehicle handling and steering response.
Therefore, note the following when loading and driving:▷Do not exceed the approved roof/axle
loads and the approved gross vehicle
weight.▷Distribute the roof load uniformly.▷The roof load should not extend past the
loading area.▷Always load the heaviest pieces on the bot‐
tom.▷Secure the roof luggage firmly, e.g., tie with
ratchet straps.▷Do not let objects project into the opening
path of the tailgate.▷Drive smoothly. Avoid sudden acceleration
and braking maneuvers. Take corners gen‐
tly.Seite 118DRIVING TIPSLoading118
Online Edition for Part no. 01 40 2 964 433 - VI/15
Page 193 of 223

Do not use abrasive cleaners or a steam jet hot‐
ter than 140 ℉/60 ℃; otherwise, damage may
result. Adhere to the manufacturer instructions.
Aggressive, acidic, or alkaline cleaners may de‐
stroy the protective coating of neighboring
components such as the brake disc.
Exterior sensors The sensors on the outside of the vehicle, such
as for Park Distance Control, must be kept clean
and free of ice to ensure that they remain fully
functional.
Decorative trim
Clean decorative trims and fine wood compo‐
nents with a moist cloth only. Then dry with a
soft cloth.
Safety belts Dirty belt straps impede the reeling action and
thus have a negative impact on safety.
WARNING
Chemical cleansers can destroy the safety
belt webbing. Missing protective effect of the
safety belts. There is risk of injuries or danger to
life. Use only a mild soapy solution for cleaning
the safety belts. ◀
Carpets/floor mats WARNING
Objects in the driver's floor area can limit
the pedal distance or block a depressed pedal.
There is risk of an accident. Stow objects in the
vehicle such that they are secured and cannot
enter into the driver's floor area. Use floor mats
that are suitable for the vehicle and can be
safely attached to the floor. Do not use loose
floor mats and do not layer several floor mats.
Make sure that there is sufficient clearance for
the pedals. Ensure that the floor mats are se‐
curely fastened again after they were removed,
e.g. for cleaning. ◀
Floor mats can be removed for cleaning.If they are very dirty, clean with a microfiber
cloth and water or an interior cleaner. To pre‐
vent matting of the carpet, rub back and forth
in the direction of travel only.
Displays
To clean the displays, such as the radio or dis‐
play elements, use an antistatic microfiber
cloth.
CAUTION
Chemical cleansers, moisture or fluids of
any kind can damage the surface of displays
and screens. There is risk of property damage.
Clean with a clean, antistatic microfiber cloth. ◀
CD/DVD drives CAUTION
The use of cleaning CDs may damage
parts of the drive. There is risk of property dam‐
age. Do not use cleaning CDs. ◀
Long-term vehicle storage
A dealer's service center or another qualified
service center or repair shop can advise you on
what to consider when storing the vehicle for
longer than three months.Seite 193CareMOBILITY193
Online Edition for Part no. 01 40 2 964 433 - VI/15
Page 194 of 223

Indicator/warning lampsVehicle features and op‐
tions
This chapter describes all standard, country-
specific and optional features offered with the
series. It also describes features that are notnecessarily available in your car, e. g., due to
the selected options or country versions. This
also applies to safety-related functions and sys‐
tems.
When using the features and systems described
here, adhere to local regulations.
Overview
The indicator and warning lights can light up in
a variety of combinations and colors in display
area 1 or 2. The table contains information on
causes and how to respond. Note whether a
lamp lights up alone or in combination with an‐
other. Some lights can light up in different col‐
ors. Corresponding distinctions are made in the
text. 12CauseHow to respondTurn signalThe high-beams/headlight flasher are
switched on.The front fog lamps are switched on.The rear fog lights are switched on.Fasten safety belts.Fasten safety belt, refer to page 41.External temperature warningDrive conservatively, refer to
page 61.Seite 194MOBILITYIndicator/warning lamps194
Online Edition for Part no. 01 40 2 964 433 - VI/15
Page 196 of 223

12CauseHow to respondLights up in yellow:The engine will start the next time the Start/
Stop button is touched, possibly without the
brake or clutch being depressed.The remote control is malfunctioning or, in
cars with Comfort Access, was not detected.The engine cannot be started. Have
the remote control checked, if nec‐
essary.The battery in the remote control is dis‐
charged.Use the remote control for a longer
journey or, in cars with Comfort Ac‐
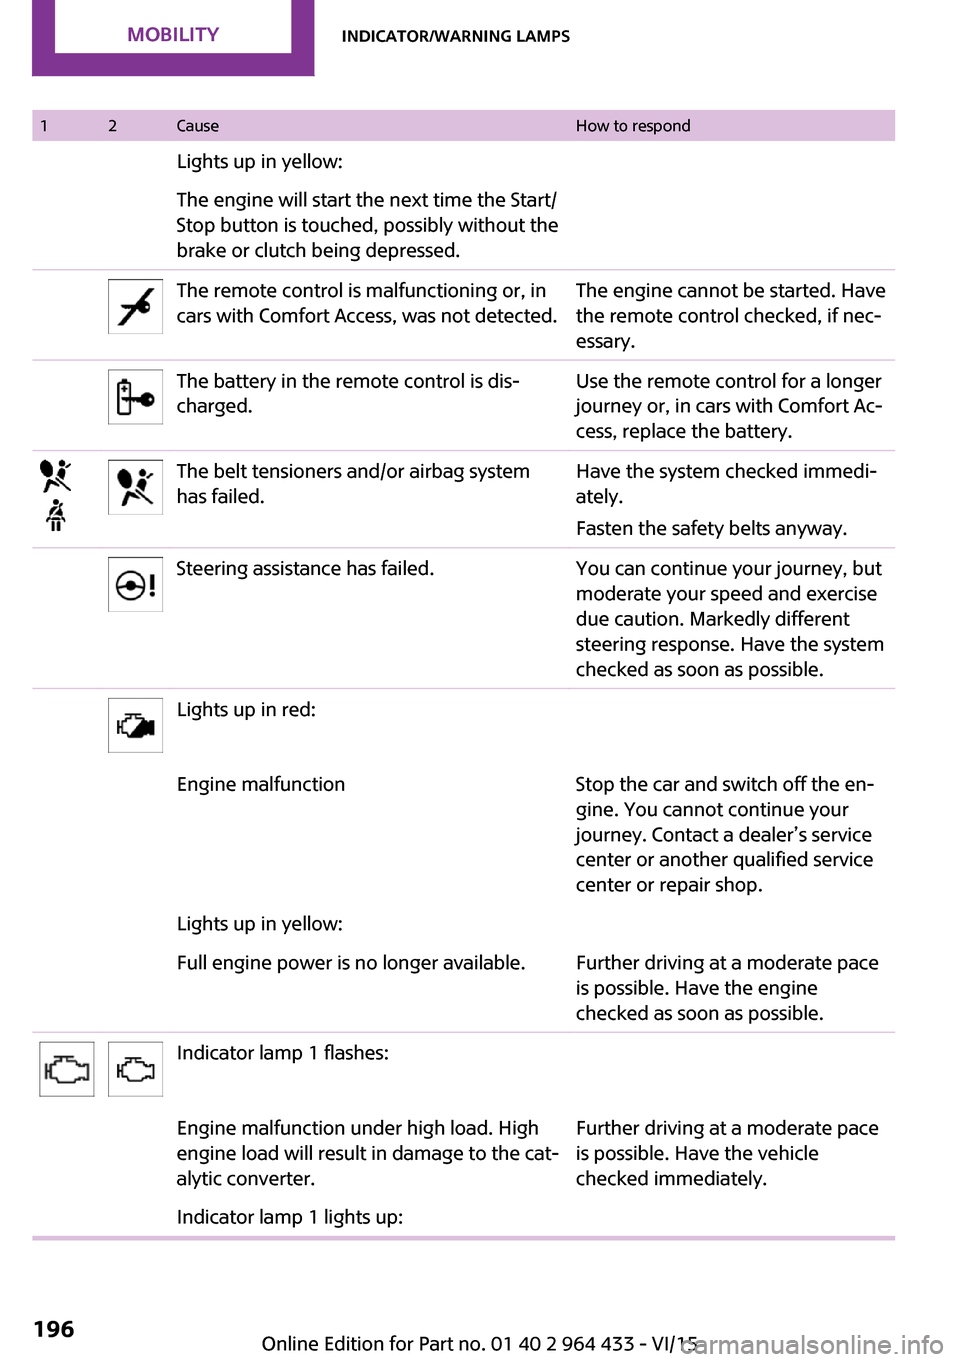
cess, replace the battery.The belt tensioners and/or airbag system
has failed.Have the system checked immedi‐
ately.
Fasten the safety belts anyway.Steering assistance has failed.You can continue your journey, but
moderate your speed and exercise
due caution. Markedly different
steering response. Have the system
checked as soon as possible.Lights up in red:Engine malfunctionStop the car and switch off the en‐
gine. You cannot continue your
journey. Contact a dealer’s service
center or another qualified service
center or repair shop.Lights up in yellow:Full engine power is no longer available.Further driving at a moderate pace
is possible. Have the engine
checked as soon as possible.Indicator lamp 1 flashes:Engine malfunction under high load. High
engine load will result in damage to the cat‐
alytic converter.Further driving at a moderate pace
is possible. Have the vehicle
checked immediately.Indicator lamp 1 lights up:Seite 196MOBILITYIndicator/warning lamps196
Online Edition for Part no. 01 40 2 964 433 - VI/15
Page 212 of 223

Everything from A to ZIndexA
ABS, Antilock Brake Sys‐ tem 84
Acoustic signal, refer to Check Control 67
Activated charcoal filter with automatic climate con‐
trol 95
Adaptive Light Control 71
Additives, engine oil 169
Airbags 74
Airbags, indicator/warning light 77
Air circulation, refer to Recir‐ culated air mode, air condi‐
tioner 92
Air circulation, refer to Recir‐ culated air mode, automatic
climate control 94
Air conditioning 91
Air conditioning mode, air conditioner 91
Air conditioning mode, auto‐ matic climate control 93
Air distribution, air condi‐ tioner, manual 92
Air distribution, automatic 94
Air distribution, automatic cli‐ mate control, manual 94
Air distribution, individual 92
Air drying, refer to Cooling function 95
Air flow rate for air condi‐ tioner 91
Air flow rate with automatic climate control 94
Air pressure, refer to Tire infla‐ tion pressure 154
Air supply, air conditioner 91 Air supply, automatic climate
control 93
Alarm system 30
Alarm system, avoiding unin‐ tentional alarms 32
Alarm system, ending an alarm 31
Alarm system, interior motion sensor 32
Alarm system, tilt alarm sen‐ sor 31
ALL4 all-wheel system 86
All-wheel drive, refer to ALL4 86
Alternating-code hand-held transmitter 97
Ambient lighting 73
Antifreeze, washer fluid 56
Antilock Brake System, ABS 84
Anti-slip control, refer to Dy‐ namic Stability Control
DSC 84
Anti-theft protection 21
Approved engine oils 169
Ashtray 100
Assistance, roadside 184
Assistance when driving off, refer to Hill drive-off assis‐
tant 86
Assistance with starting en‐ gine, refer to Jump-start‐
ing 184
Automatic air distribution 94
Automatic air flow 94
Automatic car wash 190
Automatic climate control 93
Automatic climate control, au‐ tomatic air distribution 94
Automatic, cruise control 88 Automatic headlight con‐
trol 69
Automatic transmission with Steptronic 57
AUTO program with auto‐ matic climate control 94
AUX-IN port 132
Average fuel consumption 63
Average fuel consumption, setting the unit 64
Average speed 63
Average speed, refer to Com‐ puter 62
B Backrest curvature, refer to Lumbar support 37
Backrests, refer to Seats 36
Backup lights, bulb replace‐ ment 179
Battery disposal 30
Battery, refer to Vehicle bat‐ tery 182
Battery, remote control 20
Battery replacement, remote control 30
Belts, refer to Safety belts 38
Belt tensioners, refer to Safety belts 38
Bi-xenon headlights 175
Brake assistant 84
Brake discs, breaking in 112
Brake fluid, refer to Service re‐ quirements 66
Brake force distribution, elec‐ tronic 84
Brake pads, breaking in 112
Brake, refer to Parking brake 52 Seite 212REFERENCEEverything from A to Z212
Online Edition for Part no. 01 40 2 964 433 - VI/15
Page 215 of 223

ESP Electronic Stability Pro‐gram, refer to Dynamic Sta‐
bility Control DSC 84
Exchanging wheels/tires 160
Exterior mirrors 42
Exterior mirrors, adjusting 42
Exterior mirrors, folding in and out 43
Exterior sensors, care 193
External temperature dis‐ play 61
External temperature display, changing the unit 64
External temperature warn‐ ing 61
F Failure messages, refer to Check Control 67
False alarm, refer to Avoiding unintentional alarms 32
Fan, refer to Air flow rate for air conditioner 91
Fan, refer to Air flow rate with automatic climate con‐
trol 94
Fastening safety belts, refer to Safety belts 38
Fault messages, refer to Check Control 67
Filling capacities 211
Filter, refer to Activated-char‐ coal filter 93
Filter, refer to Microfilter 93
Filter, refer to Microfilter/acti‐ vated-charcoal filter with au‐
tomatic climate control 95
First aid kit 184
First aid, refer to First aid kit 184
Flashing when locking/unlock‐ ing 23
Flat tire, Flat Tire Monitor 78
Flat tire, indicator/warning lamp 78 Flat Tire Monitor FTM 77
Flat Tire Monitor FTM, flat tire message 78
Flat Tire Monitor FTM, initializ‐ ing the system 78
Flat Tire Monitor FTM, snow chains 77
Flat Tire Monitor FTM, system limits 77
Flat tire, run-flat tire 79
Flat tire, Tire Pressure Moni‐ tor 79
Flat tire, Tire Pressure Monitor TPM 79
Flat tire, wheel change 181
Floor mats, care 193
Fog lights 72
Foot brake 113
Footwell lights, refer to Inte‐ rior lights 72
Four-wheel drive, refer to ALL4 86
Front airbags 74
Front fog light, bulb replace‐ ment 177
Front fog lights 72
Front lights, bulb replace‐ ment 176
Front passenger airbags, de‐ activating 75
FTM Flat Tire Monitor 77
Fuel 152
Fuel, additives 152
Fuel, average consump‐ tion 63
Fuel cap, closing 150
Fuel consumption display, average fuel consump‐
tion 63
Fuel filler flap, closing 150
Fuel filler flap, opening 150
Fuel filler flap, unlocking in case of an electrical malfunc‐
tion 150
Fuel gauge 62 Fuel, refer to Average fuel
consumption 63
Fuel, saving 120
Fuel tank capacity, refer to Filling capacities 211
Fuel tank contents, refer to Filling capacities 211
Fuel tank, refer to Filling ca‐ pacities 211
Fuse 183
G Garage door opener, refer to Integrated universal remote
control 96
Gasoline 152
Gasoline gauge, refer to Fuel gauge 62
Gear change, manual trans‐ mission 57
Gear change, Steptronic trans‐ mission 58
Gear display, Steptronic trans‐ mission 57
Glare protection 98
Glass sunroof, electrical 32
Glass sunroof, electrical, open‐ ing/closing 33
Glass sunroof, electrical, rais‐ ing 32
Glass sunroof, electric, con‐ venient operation 23
Glass sunroof, electric, remote control 23
H Halogen headlights, bulb re‐ placement 176
Handbrake, refer to Parking brake 52
Hand car wash, care 191
Hand-held transmitter, alter‐ nating code 97
Hands-free system 15 Seite 215Everything from A to ZREFERENCE215
Online Edition for Part no. 01 40 2 964 433 - VI/15