low beam MINI Paceman 2016 Owner's Manual (Mini Connected)
[x] Cancel search | Manufacturer: MINI, Model Year: 2016, Model line: Paceman, Model: MINI Paceman 2016Pages: 223, PDF Size: 5.52 MB
Page 12 of 223

CockpitVehicle features and op‐
tions
This chapter describes all standard, country-
specific and optional features offered with the
series. It also describes features that are notnecessarily available in your car, e. g., due to
the selected options or country versions. This
also applies to safety-related functions and sys‐
tems.
When using the features and systems described
here, adhere to local regulations.
All around the steering wheel
1Setting the exterior mirror, folding it in and
out 42Power windows, front 33MINI Countryman: power win‐
dows, rear 34MINI Countryman: safety switch
for rear power windows 352Parking lights 69Low beams 69Automatic headlamp con‐
trol 69
Adaptive Light Control 71Turn signal 53Seite 12AT A GLANCECockpit12
Online Edition for Part no. 01 40 2 964 433 - VI/15
Page 13 of 223

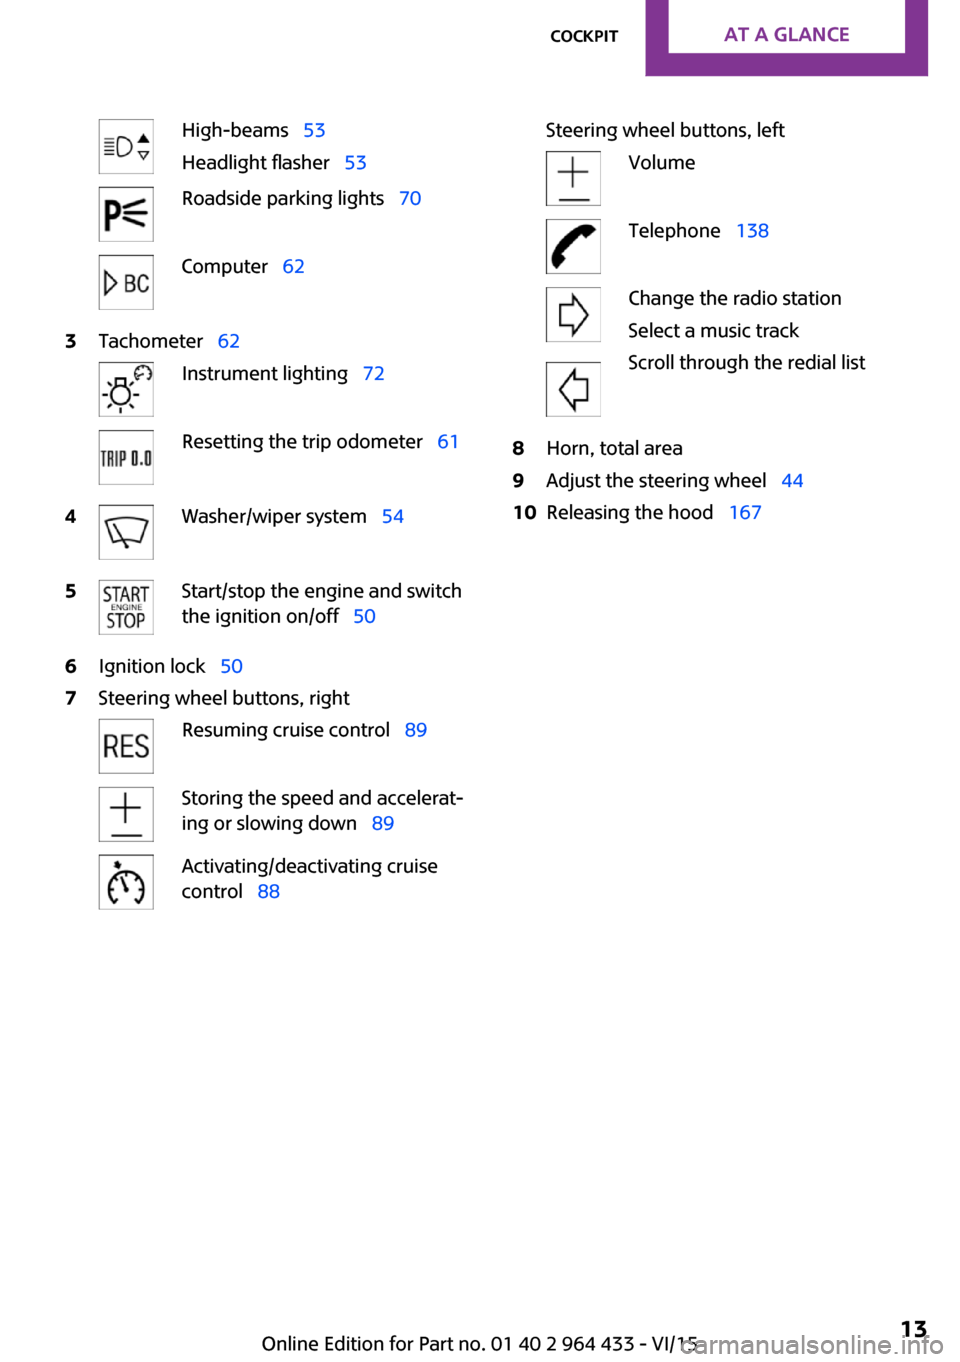
High-beams 53
Headlight flasher 53Roadside parking lights 70Computer 623Tachometer 62Instrument lighting 72Resetting the trip odometer 614Washer/wiper system 545Start/stop the engine and switch
the ignition on/off 506Ignition lock 507Steering wheel buttons, rightResuming cruise control 89Storing the speed and accelerat‐
ing or slowing down 89Activating/deactivating cruise
control 88Steering wheel buttons, leftVolumeTelephone 138Change the radio station
Select a music track
Scroll through the redial list8Horn, total area9Adjust the steering wheel 4410Releasing the hood 167Seite 13CockpitAT A GLANCE13
Online Edition for Part no. 01 40 2 964 433 - VI/15
Page 51 of 223

To save battery power when the engine is off,
switch off the ignition and any unnecessary
electronic systems/power consumers.
Radio ready state and ignition off All indicator and warning lights in the displays
go out.
The ignition switches off automatically when
the driver's door is opened. Pressing the Start/
Stop button again switches the ignition back
on.
For example, the ignition is not switched off in
the following situations:▷Depress the clutch or brake pedal.▷The low beams are switched on.
Starting the engine
General information DANGER
If the exhaust pipe is blocked or ventila‐
tion is insufficient, harmful exhaust gases can
enter into the vehicle. The exhaust gases con‐
tain carbon monoxide, an odorless and color‐
less but highly toxic gas. In enclosed areas, ex‐
haust gases can also accumulate outside of the
vehicle. There is danger to life. Keep the ex‐
haust pipe free and ensure sufficient ventila‐
tion. ◀
WARNING
An unsecured vehicle can put itself into
motion and roll away. There is risk of an acci‐
dent. Before exiting, secure the vehicle against
rolling.
In order to ensure that the vehicle is secured
against rolling away, observe the following:
▷Set the parking brake.▷On uphill grades or on a slope, turn the
front wheels in the direction of the curb.▷On uphill grades or on a slope, additionally
secure the vehicle, e.g. with a wheel
chock. ◀
CAUTION
In the case of repeated starting attempts
or repeated starting in quick succession, the
fuel is not burned or is inadequately burned.
The catalytic converter can overheat. There is
risk of property damage. Avoid repeated start‐
ing in quick succession. ◀
Do not wait for the engine to warm-up while
the vehicle remains stationary; start driving
right away, but at moderate engine speeds.
Do not depress the accelerator when starting
the engine.
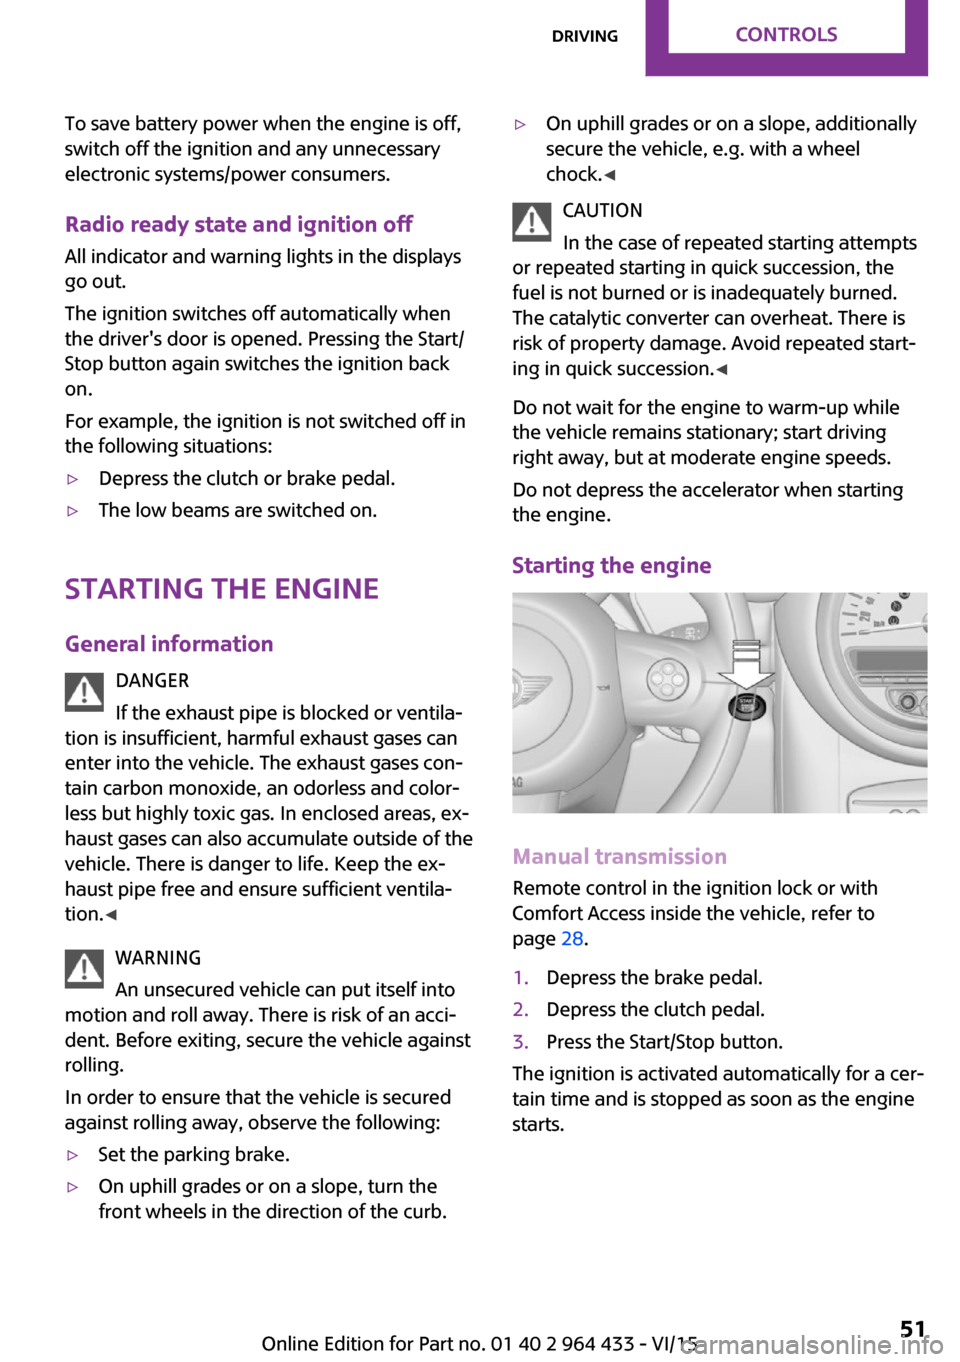
Starting the engine
Manual transmission
Remote control in the ignition lock or with
Comfort Access inside the vehicle, refer to
page 28.
1.Depress the brake pedal.2.Depress the clutch pedal.3.Press the Start/Stop button.
The ignition is activated automatically for a cer‐
tain time and is stopped as soon as the engine
starts.
Seite 51DrivingCONTROLS51
Online Edition for Part no. 01 40 2 964 433 - VI/15
Page 53 of 223

Releasing
Pull up slightly, press the button, and lower the
lever.
Information If for once use during driving is required, en‐
gage the parking brake slightly and hold the
button down.
The brake lights do not light up when the park‐
ing brake is pulled.
Turn signal, high-beams,
headlight flasher
1Turn signal2Switching on the high-beams3Switching off the high-beams/headlight
flasher
Turn signal
Press the lever beyond the resistance point.
To switch off manually, press the lever to the
resistance point.
Unusually rapid flashing of the indicator lamp
indicates that a turn signal bulb has failed.
Signaling a turn briefly Press the lever to the resistance point and hold
it there for as long as you want the turn signal
to flash.
Triple turn signal activation Press the lever to the resistance point.
The turn signal flashes three times.
This function can be activated or deactivated:1.Switch on the ignition, refer to page 50.2.Press the button on the turn indicator lever
repeatedly until "SET/INFO" is displayed.3.Press and hold the button until the display
changes.4.Press the button repeatedly until the sym‐
bol and "SET" are displayed.5.Press and hold the button until the display
changes.Seite 53DrivingCONTROLS53
Online Edition for Part no. 01 40 2 964 433 - VI/15
Page 69 of 223

LampsVehicle features and op‐
tions
This chapter describes all standard, country-
specific and optional features offered with the
series. It also describes features that are not
necessarily available in your car, e. g., due to
the selected options or country versions. This
also applies to safety-related functions and sys‐
tems.
When using the features and systems described
here, adhere to local regulations.
Overview0Lamps off / daytime running lights1Parking lights and daytime running lights2Low-beam headlights and welcome lights3Automatic headlight control, Adaptive Light
Control, daytime running lights, and wel‐
come lightsParking lights/low
beams, headlight con‐
trol
General information
When the driver's door is opened with the igni‐
tion switched off, the exterior lighting is auto‐
matically switched off when the light switch is
in position 0, 2, or 3.
Switch on the parking lights if necessary, switch
position 1.
Parking lights
Switch position 1: the vehicle lights light up on
all sides.
Do not use the parking lights for extended peri‐
ods; otherwise, the battery may become dis‐
charged and it would then be impossible to
start the engine.
When parking, it is preferable to switch on the
one-sided roadside parking lights, refer to
page 70.
Low beams Switch position 2: the low beams are lit when
the ignition is switched on.
Automatic headlight control
Switch position 3: the low beams are switched
on and off automatically depending on the am‐
bient light, e.g., in tunnels, in twilight, or if
there is precipitation. Adaptive Light Control is
active.
A blue sky with the sun low on the horizon can
cause the lights to be switched on.
The low beams remain switched on independ‐
ent of the ambient lighting conditions when
you switch on the front fog lights.Seite 69LampsCONTROLS69
Online Edition for Part no. 01 40 2 964 433 - VI/15
Page 71 of 223

6.Press the button repeatedly until the sym‐
bol shown is displayed, arrow.7.Press and hold the button until the display
changes.8.Press the button to select:▷
Daytime running lights are activated.▷
Daytime running lights are deactivated.9.Hold the button down.
Settings are stored for the remote control cur‐
rently in use.
Welcome lights If the light switch stays in switch position 2 or 3
after the vehicle is switched off, the parking
lights and the interior lights light up for a cer‐
tain period when the vehicle is unlocked.
Headlight courtesy delay feature The low beams stay lit for a short while after
the ignition is switched off, if the lights are
switched off and the headlight flasher is
switched on.
Setting the duration
1.Switch on the ignition.2.Press the button on the turn indicator lever
repeatedly until "SET/INFO" is displayed.3.Press and hold the button until the display
changes.4.Press the button repeatedly until the sym‐
bol and "SET" are displayed.5.Press and hold the button until the display
changes.6.Press the button repeatedly until the sym‐
bol shown is displayed, arrow.7.Press and hold the button until the display
changes.8.Press the button to select:▷
The function is deactivated.▷ ...
Select the duration, e.g. 40 seconds.9.Hold the button down.
Settings are stored for the remote control cur‐
rently in use.
Adaptive Light Control
The concept
Adaptive Light Control is a variable headlight
control system that enables dynamic illumina‐
tion of the road surface.
Seite 71LampsCONTROLS71
Online Edition for Part no. 01 40 2 964 433 - VI/15
Page 72 of 223

Depending on the steering angle and other pa‐
rameters, the light from the headlight follows
the course of the road.
Activating With the ignition switch on, turn the light switch
to position 3, refer to page 69.
To avoid blinding oncoming traffic, the Adap‐
tive Light Control does not swivel to the driver's
side when the vehicle is at a standstill.
When driving in reverse, Adaptive Light Control
is not active.
Malfunction The warning light lights up. Adaptive
Light Control is malfunctioning or has
failed. Have the system checked as
soon as possible.
More information, refer to page 194.
Fog lights
Overview
To switch on the front fog lights: press the
switch.
To switch off, press the respective switch up‐
ward or downward again.
Fog lights The parking lights or low beams must be
switched on. The green indicator lamp lights up
when the front fog lights are switched on.
Depending on the vehicle equipment, the front
fog lights are switched off when the headlight
flasher or the high-beams are activated.
If the automatic headlight control is activated,
refer to page 69, the low beams are switched
on automatically when the front fog lights are
switched on.
Instrument lighting
The parking lights or low beams must be
switched on to adjust the brightness. The
brightness is increased to a certain limit and is then reduced again.▷Press the button briefly: the brightness
changes in stages.▷Press and hold the button: the brightness
changes continuously.
Interior lights
The interior lights, the footwell lights and thecargo area light are controlled automatically.
To avoid draining the battery, all lights inside
the vehicle are switched off some time after the
ignition is switched off.
Seite 72CONTROLSLamps72
Online Edition for Part no. 01 40 2 964 433 - VI/15
Page 176 of 223

driving cautiously with the front fog lights, pro‐
vided this is permitted by local laws.
DANGER
There can be high voltage in the lighting
system. There is danger to life. The manufac‐
turer of your vehicle recommends that the
work on the lighting system including bulb re‐
placement be performed by a dealer’s service
center or another qualified service center or re‐
pair shop. ◀
Front lights, bulb replacement
Overview
Headlights1Low beams/high-beams2Turn signal
Lower front lights
1Parking lights2Daytime running lights or fog lightsLower LED front lights1Parking lights / daytime running lights2Fog lights
Halogen low beams and high-beams
H13 bulb, 60/55 watt
Access to the bulbs through the engine
compartment
Follow the general instructions on lamps and
bulbs, refer to page 175.
Low beam/high-beam bulbs can be changed
from the engine compartment.
To remove the cover:
1.Press the tab.2.Fold away the cover and take it out of the
holder.
Proceed in reverse order to attach the cover.
Seite 176MOBILITYReplacing components176
Online Edition for Part no. 01 40 2 964 433 - VI/15
Page 187 of 223

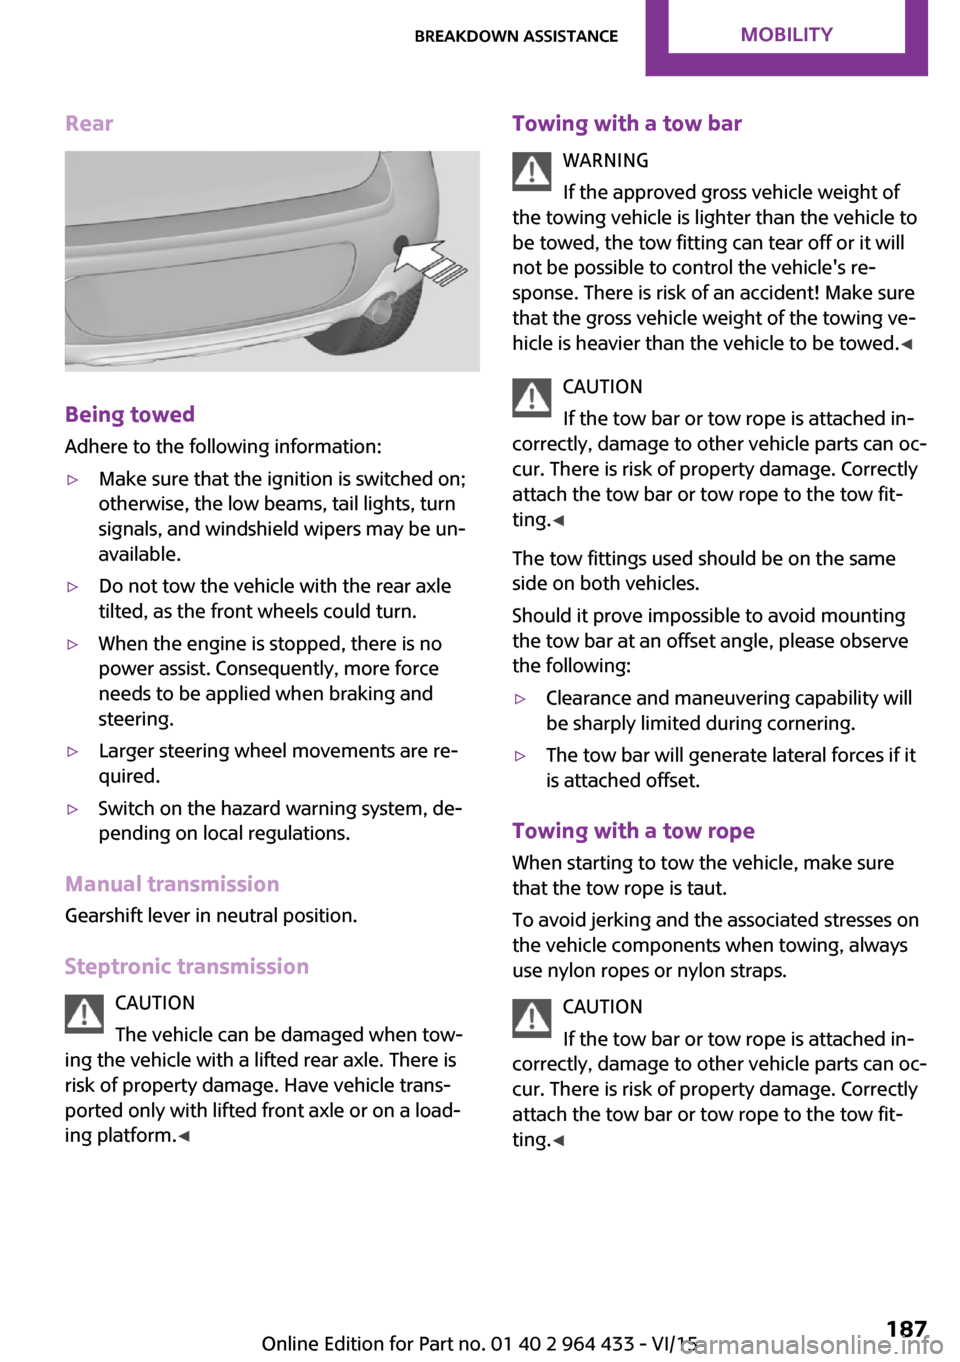
Rear
Being towed
Adhere to the following information:
▷Make sure that the ignition is switched on;
otherwise, the low beams, tail lights, turn
signals, and windshield wipers may be un‐
available.▷Do not tow the vehicle with the rear axle
tilted, as the front wheels could turn.▷When the engine is stopped, there is no
power assist. Consequently, more force
needs to be applied when braking and
steering.▷Larger steering wheel movements are re‐
quired.▷Switch on the hazard warning system, de‐
pending on local regulations.
Manual transmission
Gearshift lever in neutral position.
Steptronic transmission CAUTION
The vehicle can be damaged when tow‐
ing the vehicle with a lifted rear axle. There is
risk of property damage. Have vehicle trans‐
ported only with lifted front axle or on a load‐
ing platform. ◀
Towing with a tow bar
WARNING
If the approved gross vehicle weight of
the towing vehicle is lighter than the vehicle to
be towed, the tow fitting can tear off or it will
not be possible to control the vehicle's re‐
sponse. There is risk of an accident! Make sure
that the gross vehicle weight of the towing ve‐
hicle is heavier than the vehicle to be towed. ◀
CAUTION
If the tow bar or tow rope is attached in‐
correctly, damage to other vehicle parts can oc‐
cur. There is risk of property damage. Correctly
attach the tow bar or tow rope to the tow fit‐
ting. ◀
The tow fittings used should be on the same
side on both vehicles.
Should it prove impossible to avoid mounting
the tow bar at an offset angle, please observe
the following:▷Clearance and maneuvering capability will
be sharply limited during cornering.▷The tow bar will generate lateral forces if it
is attached offset.
Towing with a tow rope
When starting to tow the vehicle, make sure
that the tow rope is taut.
To avoid jerking and the associated stresses on
the vehicle components when towing, always
use nylon ropes or nylon straps.
CAUTION
If the tow bar or tow rope is attached in‐
correctly, damage to other vehicle parts can oc‐ cur. There is risk of property damage. Correctly
attach the tow bar or tow rope to the tow fit‐ ting. ◀
Seite 187Breakdown assistanceMOBILITY187
Online Edition for Part no. 01 40 2 964 433 - VI/15
Page 199 of 223

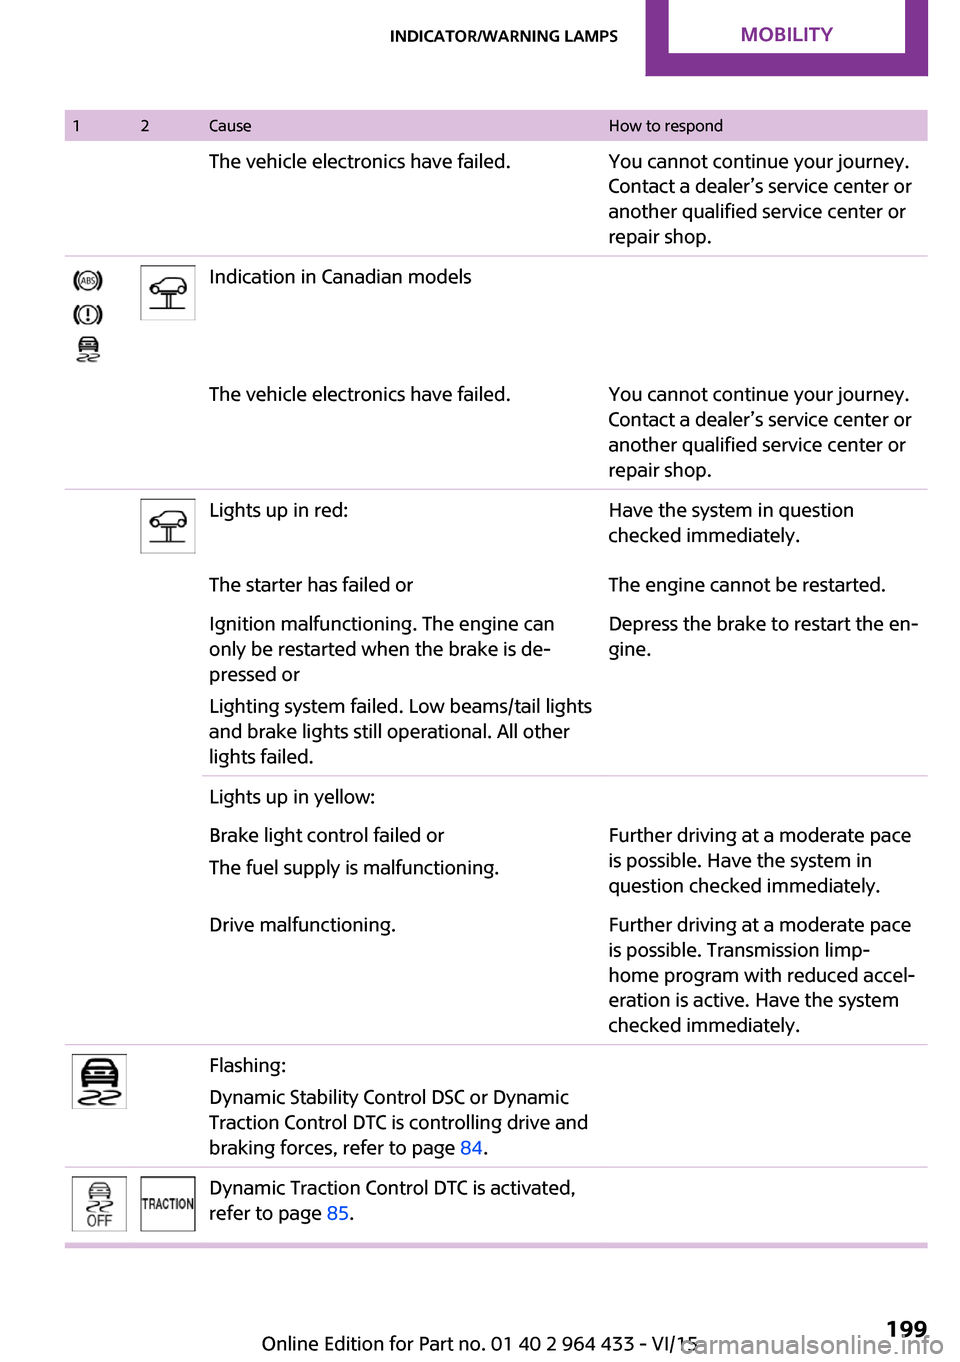
12CauseHow to respondThe vehicle electronics have failed.You cannot continue your journey.
Contact a dealer’s service center or
another qualified service center or
repair shop.Indication in Canadian modelsThe vehicle electronics have failed.You cannot continue your journey.
Contact a dealer’s service center or
another qualified service center or
repair shop.Lights up in red:Have the system in question
checked immediately.The starter has failed orThe engine cannot be restarted.Ignition malfunctioning. The engine can
only be restarted when the brake is de‐
pressed or
Lighting system failed. Low beams/tail lights
and brake lights still operational. All other
lights failed.Depress the brake to restart the en‐
gine.Lights up in yellow:Brake light control failed or
The fuel supply is malfunctioning.Further driving at a moderate pace
is possible. Have the system in
question checked immediately.Drive malfunctioning.Further driving at a moderate pace
is possible. Transmission limp-
home program with reduced accel‐
eration is active. Have the system
checked immediately.Flashing:
Dynamic Stability Control DSC or Dynamic
Traction Control DTC is controlling drive and
braking forces, refer to page 84.Dynamic Traction Control DTC is activated,
refer to page 85.Seite 199Indicator/warning lampsMOBILITY199
Online Edition for Part no. 01 40 2 964 433 - VI/15