warning MINI Paceman 2016 Owner's Manual (Mini Connected)
[x] Cancel search | Manufacturer: MINI, Model Year: 2016, Model line: Paceman, Model: MINI Paceman 2016Pages: 223, PDF Size: 5.52 MB
Page 5 of 223
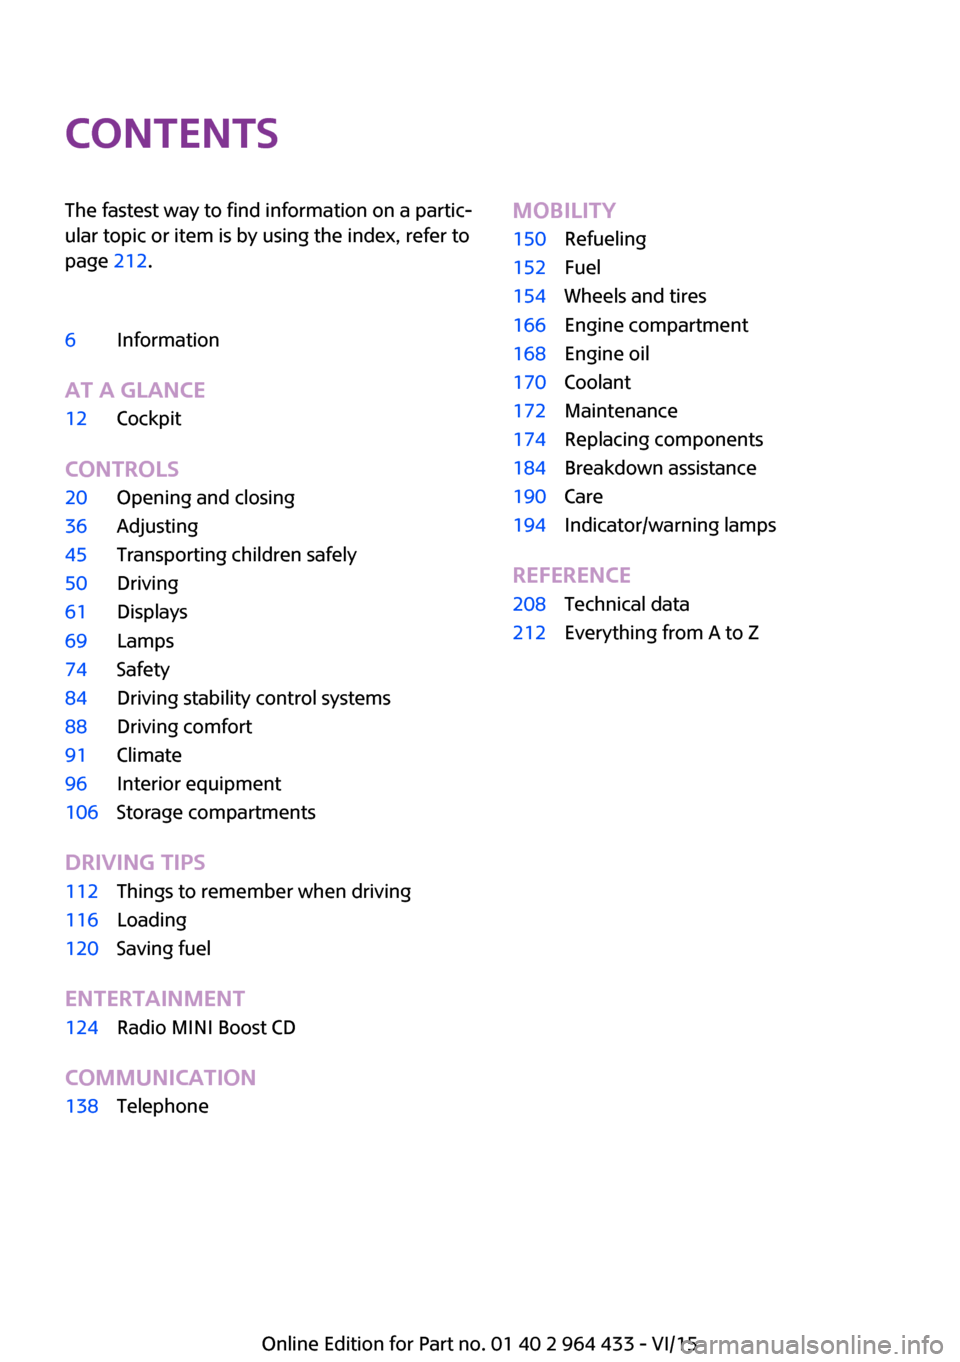
ContentsThe fastest way to find information on a partic‐
ular topic or item is by using the index, refer to
page 212.6Information
AT A GLANCE
12Cockpit
CONTROLS
20Opening and closing36Adjusting45Transporting children safely50Driving61Displays69Lamps74Safety84Driving stability control systems88Driving comfort91Climate96Interior equipment106Storage compartments
DRIVING TIPS
112Things to remember when driving116Loading120Saving fuel
ENTERTAINMENT
124Radio MINI Boost CD
COMMUNICATION
138TelephoneMOBILITY150Refueling152Fuel154Wheels and tires166Engine compartment168Engine oil170Coolant172Maintenance174Replacing components184Breakdown assistance190Care194Indicator/warning lamps
REFERENCE
208Technical data212Everything from A to Z
Online Edition for Part no. 01 40 2 964 433 - VI/15
Page 7 of 223
be necessary to adapt your vehicle to poten‐
tially differing operating conditions and permit
requirements. If your vehicle does not comply
with the homologation requirements in a cer‐
tain country you may not be able to lodge war‐
ranty claims for your vehicle there. Further in‐
formation on warranty is available from a
dealer’s service center.
Maintenance and repairs
Advanced technology, e.g., the use of modern
materials and high-performance electronics,
requires suitable maintenance and repair work.
The manufacturer of your vehicle recommends
that you entrust corresponding procedures to a
MINI dealer’s service center. If you choose to
use another service facility, the manufacturer of
your vehicle recommends use of a facility that
performs work, e.g. maintenance and repair,
according to MINI specifications with properly
trained personnel, referred to in this Owner's
Manual as "another qualified service center or
repair shop".
If work is performed improperly, e.g. mainte‐
nance and repair, there is a risk of subsequent
damage and related safety risks.
Parts and accessories The manufacturer of your vehicle recommends
the use of parts and accessory products ap‐ proved by the manufacturer of the MINI.
Approved parts and accessories, and advice on
their use and installation are available from a
MINI dealer's service center.
MINI parts and accessories were tested by the
manufacturer of the MINI for their safety and
suitability in MINI vehicles.
The manufacturer of your vehicle warrants gen‐
uine MINI parts and accessories.
The manufacturer of your vehicle does not
evaluate whether each individual product from
another manufacturer can be used with MINI
vehicles without presenting a safety hazard,
even if a country-specific official approval wasissued. The manufacturer of your vehicle does
not evaluate whether these products are suita‐
ble for MINI vehicles under all usage conditions.
California Proposition 65 Warning
California laws require us to state the following
warning:
Engine exhaust and a wide variety of automo‐
bile components and parts, including compo‐
nents found in the interior furnishings in a vehi‐
cle, contain or emit chemicals known to the
State of California to cause cancer and birth de‐
fects and reproductive harm. In addition, cer‐
tain fluids contained in vehicles and certain
products of component wear contain or emit
chemicals known to the State of California to
cause cancer and birth defects or other repro‐
ductive harm. Battery posts, terminals and re‐
lated accessories contain lead and lead com‐
pounds. Wash your hands after handling. Used
engine oil contains chemicals that have caused
cancer in laboratory animals. Always protect
your skin by washing thoroughly with soap and
water.
Service and warranty
We recommend that you read this publication
thoroughly. Your vehicle is covered by the fol‐
lowing warranties:▷New Vehicle Limited Warranty.▷Rust Perforation Limited Warranty.▷Federal Emissions System Defect Warranty.▷Federal Emissions Performance Warranty.▷California Emission Control System Limited
Warranty.
Detailed information about these warranties is
listed in the Service and Warranty Information
Booklet for US models or in the Warranty and
Service Guide Booklet for Canadian models.
Your vehicle has been specifically adapted and
designed to meet the particular operating con‐
ditions and homologation requirements in your
country and continental region in order to de‐
Seite 7Information7
Online Edition for Part no. 01 40 2 964 433 - VI/15
Page 14 of 223
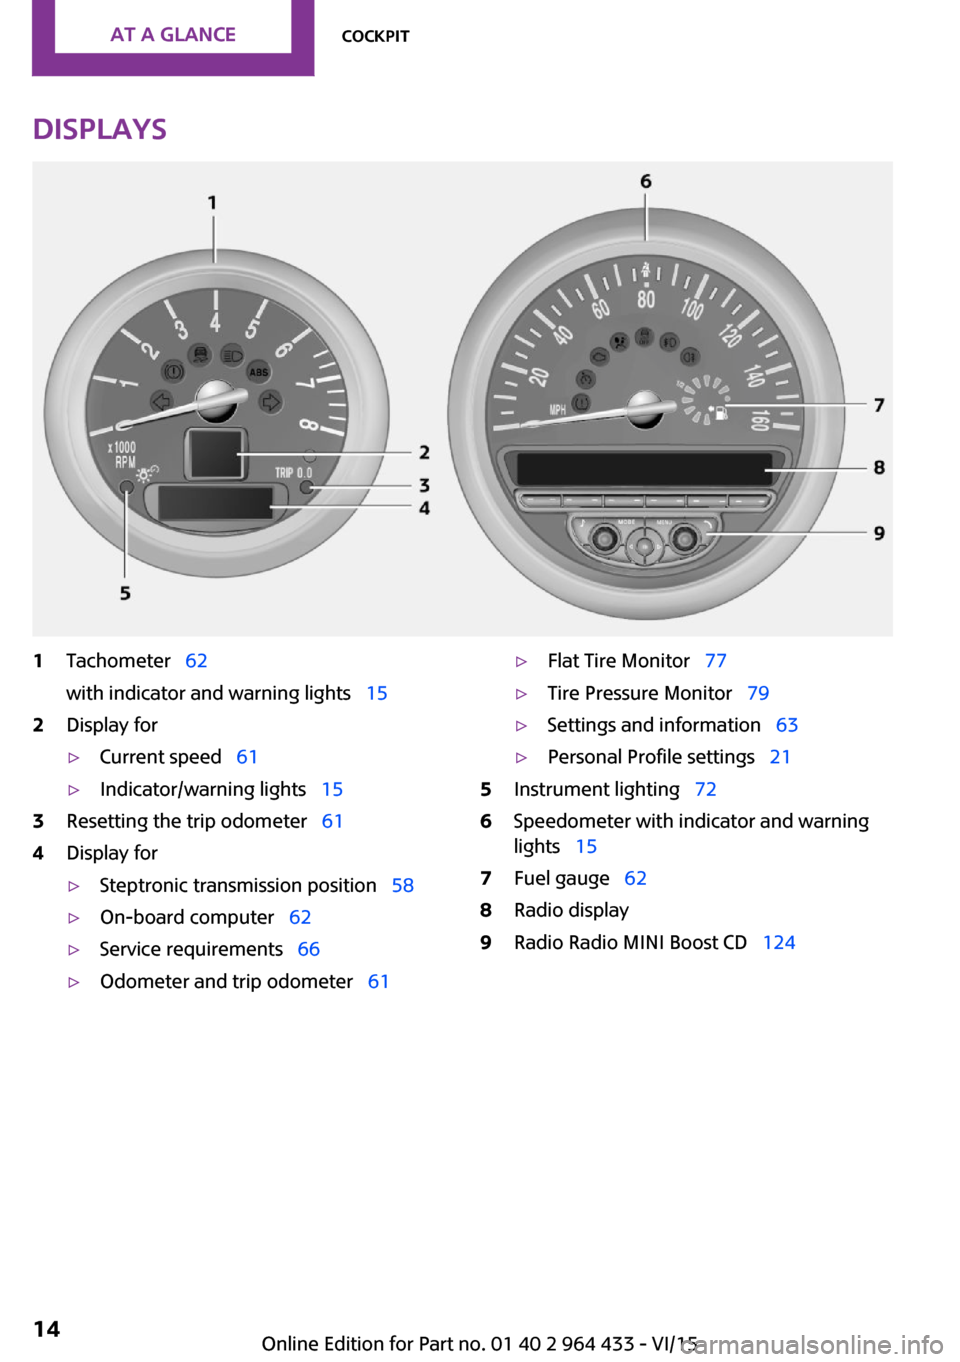
Displays1Tachometer 62
with indicator and warning lights 152Display for▷Current speed 61▷Indicator/warning lights 153Resetting the trip odometer 614Display for▷Steptronic transmission position 58▷On-board computer 62▷Service requirements 66▷Odometer and trip odometer 61▷Flat Tire Monitor 77▷Tire Pressure Monitor 79▷Settings and information 63▷Personal Profile settings 215Instrument lighting 726Speedometer with indicator and warning
lights 157Fuel gauge 628Radio display9Radio Radio MINI Boost CD 124Seite 14AT A GLANCECockpit14
Online Edition for Part no. 01 40 2 964 433 - VI/15
Page 15 of 223
Indicator/warning lights
The principle
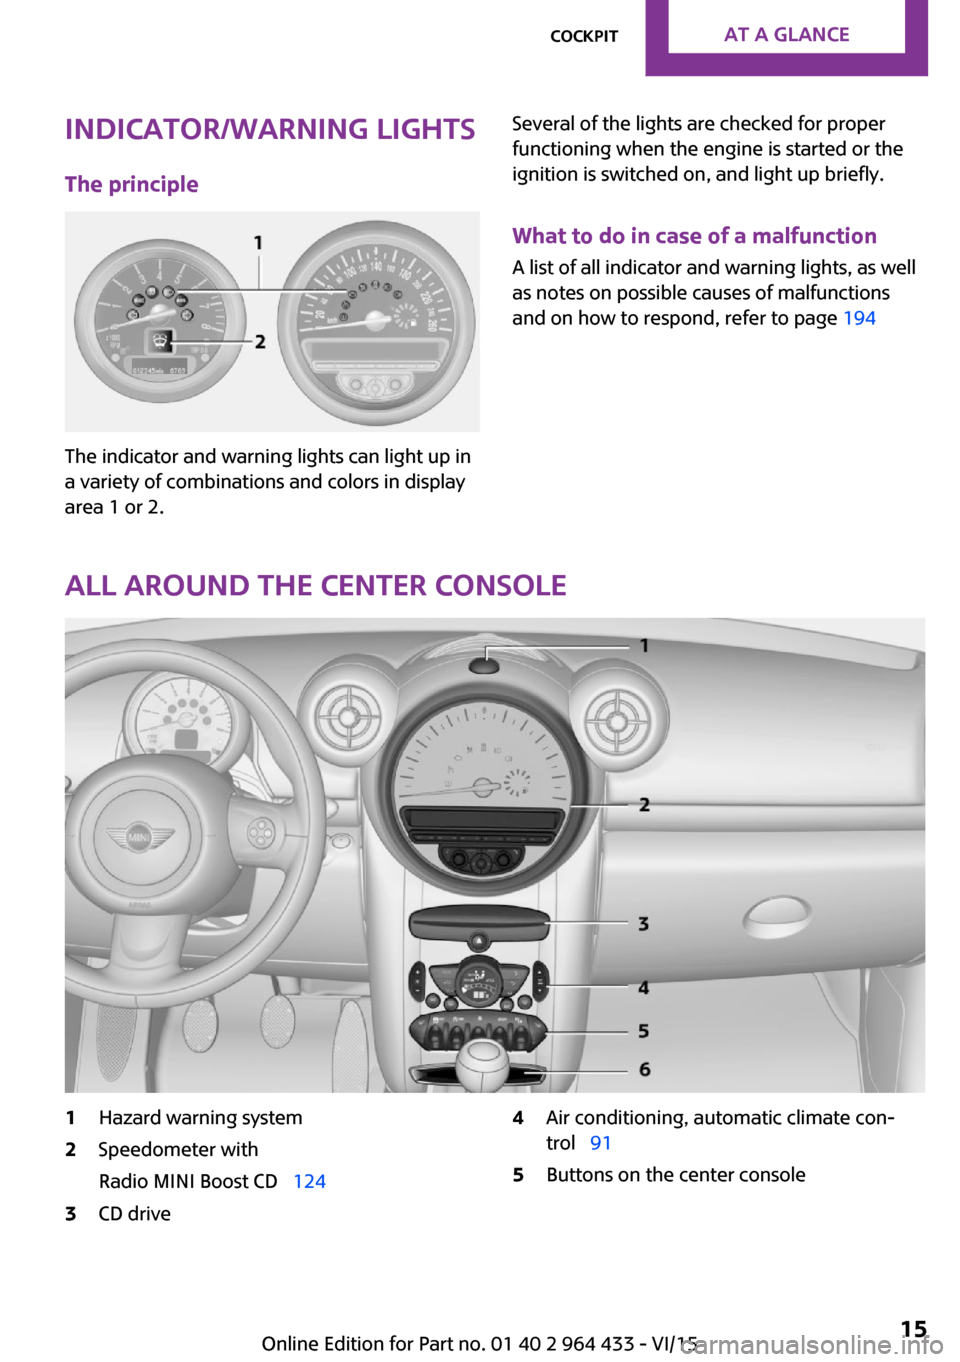
The indicator and warning lights can light up in
a variety of combinations and colors in display
area 1 or 2.
Several of the lights are checked for proper
functioning when the engine is started or the
ignition is switched on, and light up briefly.
What to do in case of a malfunction
A list of all indicator and warning lights, as well
as notes on possible causes of malfunctions
and on how to respond, refer to page 194
All around the center console
1Hazard warning system2Speedometer with
Radio MINI Boost CD 1243CD drive4Air conditioning, automatic climate con‐
trol 915Buttons on the center consoleSeite 15CockpitAT A GLANCE15
Online Edition for Part no. 01 40 2 964 433 - VI/15
Page 16 of 223
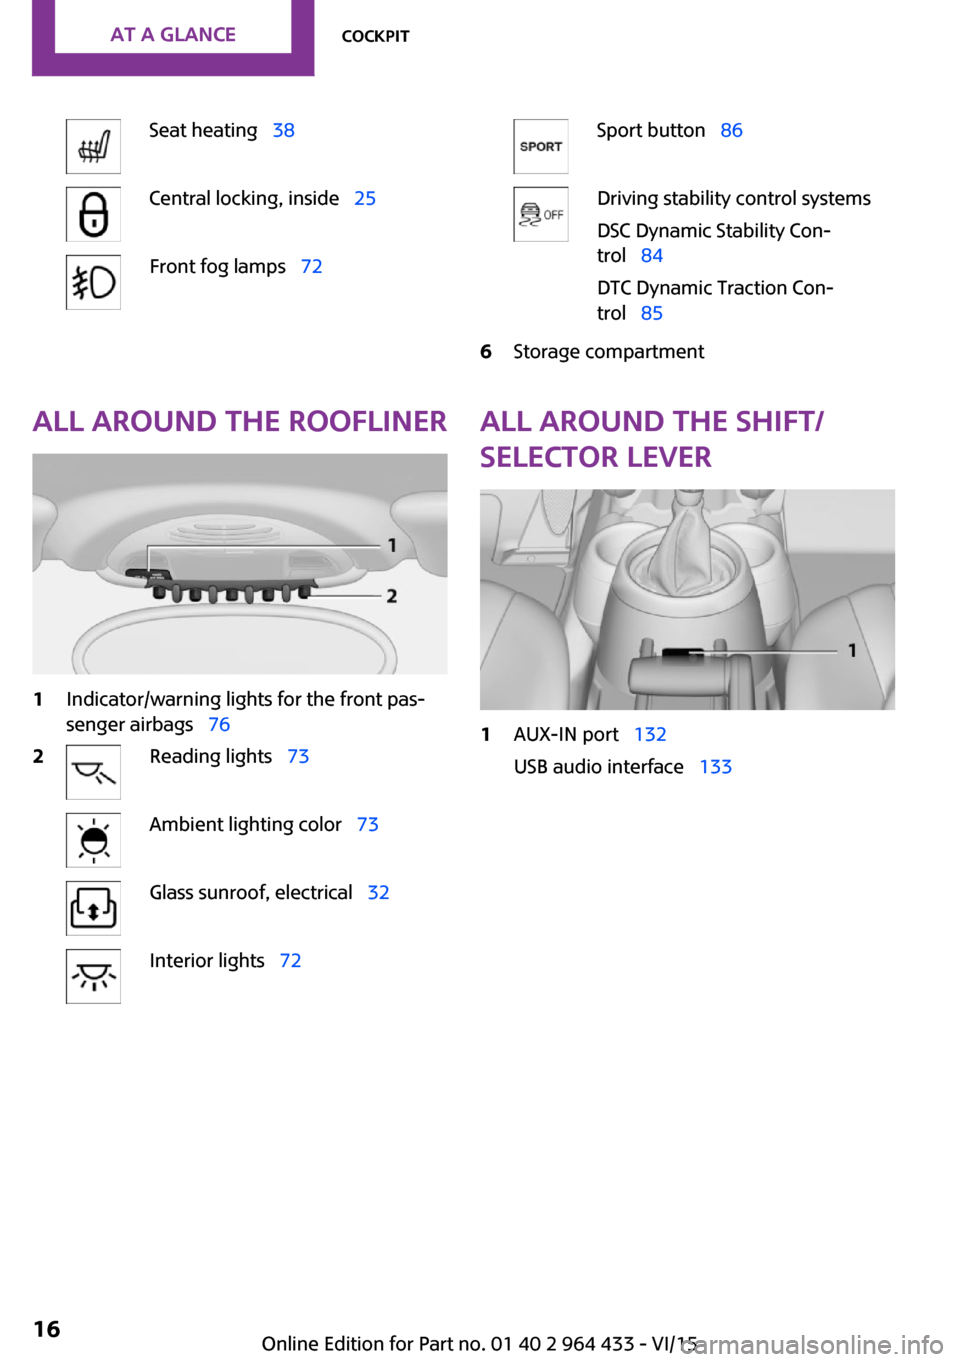
Seat heating 38Central locking, inside 25Front fog lamps 72Sport button 86Driving stability control systems
DSC Dynamic Stability Con‐
trol 84
DTC Dynamic Traction Con‐
trol 856Storage compartmentAll around the roofliner1Indicator/warning lights for the front pas‐
senger airbags 762Reading lights 73Ambient lighting color 73Glass sunroof, electrical 32Interior lights 72All around the shift/
selector lever1AUX-IN port 132
USB audio interface 133Seite 16AT A GLANCECockpit16
Online Edition for Part no. 01 40 2 964 433 - VI/15
Page 22 of 223
▷The welcome lamps, interior lamps, and
ambient lighting are switched on and off.▷The alarm system is armed or disarmed, re‐
fer to page 30.
Operating from the inside
Via the switch/button for the central locking
system, refer to page 25.
In an accident of the necessary severity, the
central locking system unlocks automatically.
The hazard warning system and interior lamps
come on.
Opening and closing:
from the outside
Using the remote control
General information WARNING
People or animals in the vehicle can lock
the doors from the inside and lock themselves
in. The vehicle can then not be opened from
the outside. There is risk of injuries. Take the
remote control along so that the vehicle can be
opened from the outside. ◀
Unlocking
Press the button. The vehicle is un‐
locked.
The welcome lamps and interior lamps are
switched on.
You can set how the vehicle is to be unlocked.
Settings are stored for the remote control cur‐
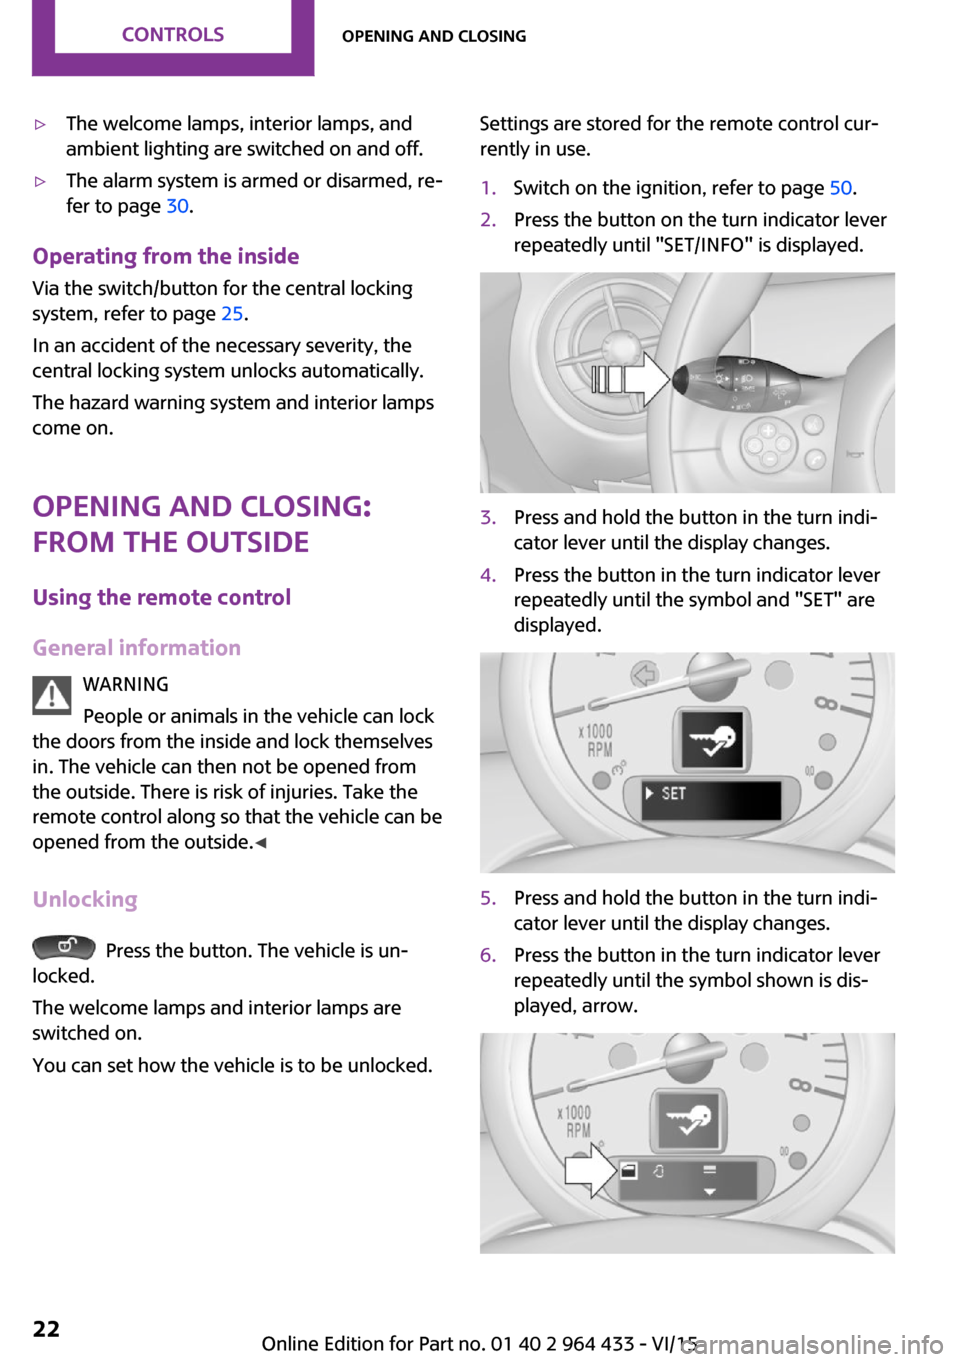
rently in use.1.Switch on the ignition, refer to page 50.2.Press the button on the turn indicator lever
repeatedly until "SET/INFO" is displayed.3.Press and hold the button in the turn indi‐
cator lever until the display changes.4.Press the button in the turn indicator lever
repeatedly until the symbol and "SET" are
displayed.5.Press and hold the button in the turn indi‐
cator lever until the display changes.6.Press the button in the turn indicator lever
repeatedly until the symbol shown is dis‐
played, arrow.Seite 22CONTROLSOpening and closing22
Online Edition for Part no. 01 40 2 964 433 - VI/15
Page 23 of 223
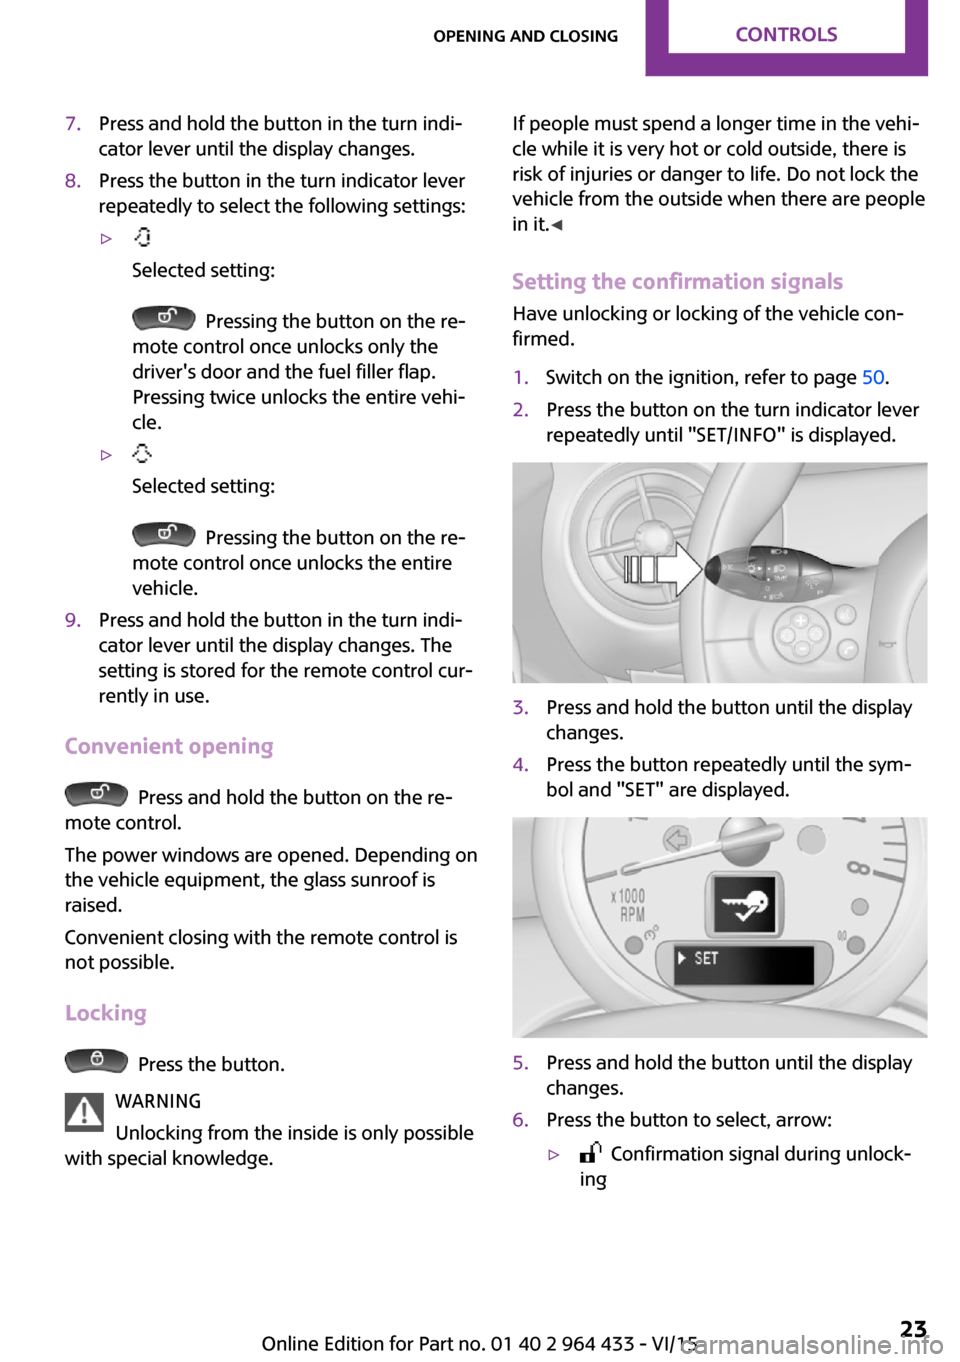
7.Press and hold the button in the turn indi‐
cator lever until the display changes.8.Press the button in the turn indicator lever
repeatedly to select the following settings:▷
Selected setting:
Pressing the button on the re‐
mote control once unlocks only the
driver's door and the fuel filler flap.
Pressing twice unlocks the entire vehi‐
cle.
▷
Selected setting:
Pressing the button on the re‐
mote control once unlocks the entire
vehicle.
9.Press and hold the button in the turn indi‐
cator lever until the display changes. The
setting is stored for the remote control cur‐
rently in use.
Convenient opening
Press and hold the button on the re‐
mote control.
The power windows are opened. Depending on
the vehicle equipment, the glass sunroof is
raised.
Convenient closing with the remote control is
not possible.
Locking
Press the button.
WARNING
Unlocking from the inside is only possible
with special knowledge.
If people must spend a longer time in the vehi‐
cle while it is very hot or cold outside, there is
risk of injuries or danger to life. Do not lock the
vehicle from the outside when there are people
in it. ◀
Setting the confirmation signals Have unlocking or locking of the vehicle con‐
firmed.1.Switch on the ignition, refer to page 50.2.Press the button on the turn indicator lever
repeatedly until "SET/INFO" is displayed.3.Press and hold the button until the display
changes.4.Press the button repeatedly until the sym‐
bol and "SET" are displayed.5.Press and hold the button until the display
changes.6.Press the button to select, arrow:▷ Confirmation signal during unlock‐
ingSeite 23Opening and closingCONTROLS23
Online Edition for Part no. 01 40 2 964 433 - VI/15
Page 24 of 223
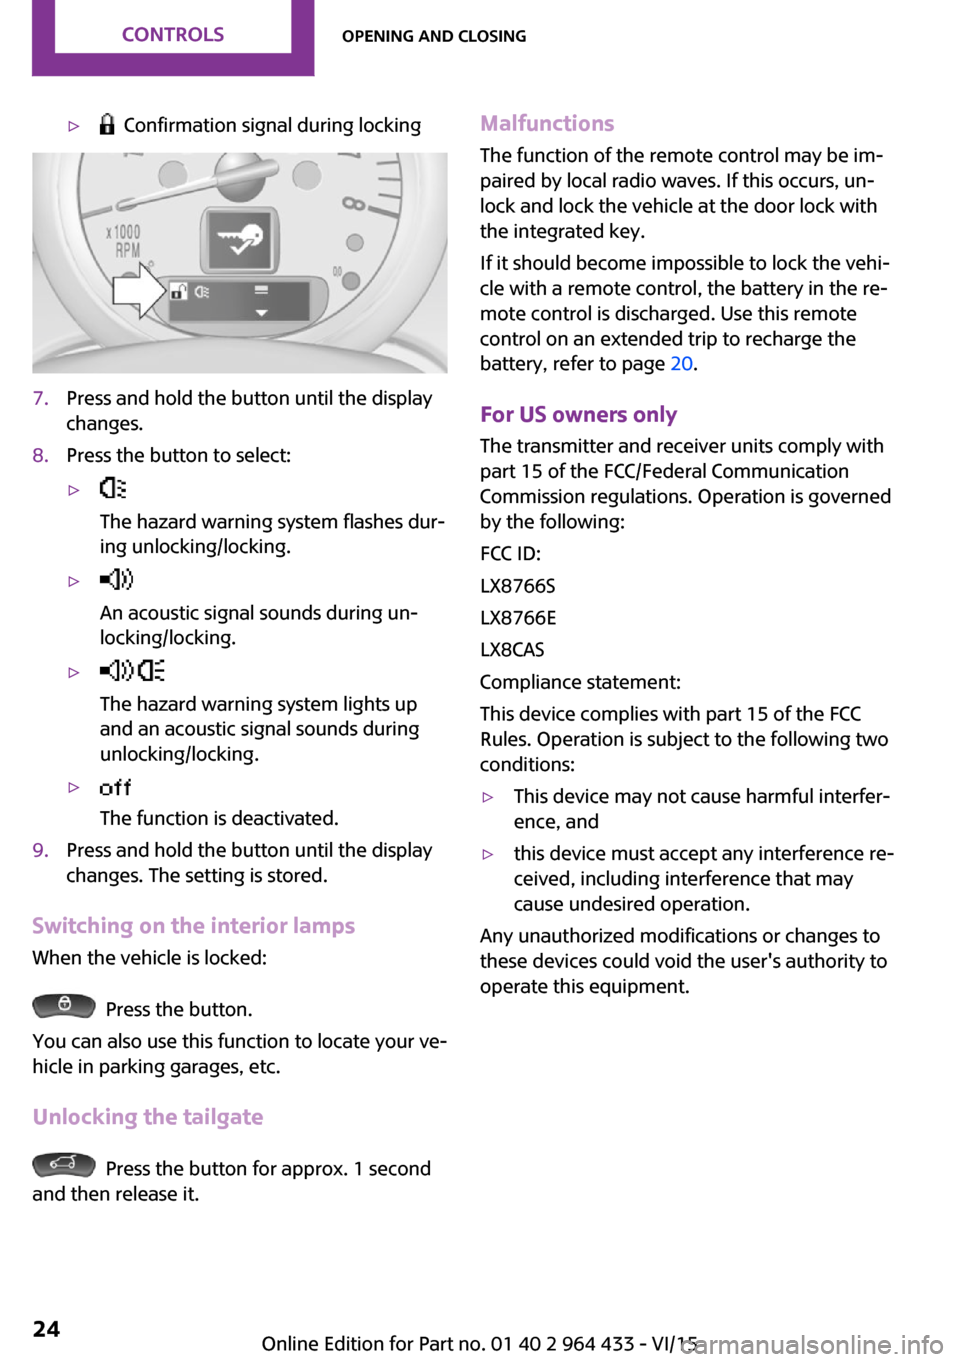
▷ Confirmation signal during locking7.Press and hold the button until the display
changes.8.Press the button to select:▷
The hazard warning system flashes dur‐
ing unlocking/locking.▷
An acoustic signal sounds during un‐
locking/locking.▷
The hazard warning system lights up
and an acoustic signal sounds during
unlocking/locking.▷
The function is deactivated.9.Press and hold the button until the display
changes. The setting is stored.
Switching on the interior lamps
When the vehicle is locked:
Press the button.
You can also use this function to locate your ve‐
hicle in parking garages, etc.
Unlocking the tailgate
Press the button for approx. 1 second
and then release it.
Malfunctions
The function of the remote control may be im‐
paired by local radio waves. If this occurs, un‐ lock and lock the vehicle at the door lock with
the integrated key.
If it should become impossible to lock the vehi‐
cle with a remote control, the battery in the re‐
mote control is discharged. Use this remote control on an extended trip to recharge the
battery, refer to page 20.
For US owners only The transmitter and receiver units comply with
part 15 of the FCC/Federal Communication
Commission regulations. Operation is governed
by the following:
FCC ID:
LX8766S
LX8766E
LX8CAS
Compliance statement:
This device complies with part 15 of the FCC
Rules. Operation is subject to the following two
conditions:▷This device may not cause harmful interfer‐
ence, and▷this device must accept any interference re‐
ceived, including interference that may
cause undesired operation.
Any unauthorized modifications or changes to
these devices could void the user's authority to
operate this equipment.
Seite 24CONTROLSOpening and closing24
Online Edition for Part no. 01 40 2 964 433 - VI/15
Page 25 of 223
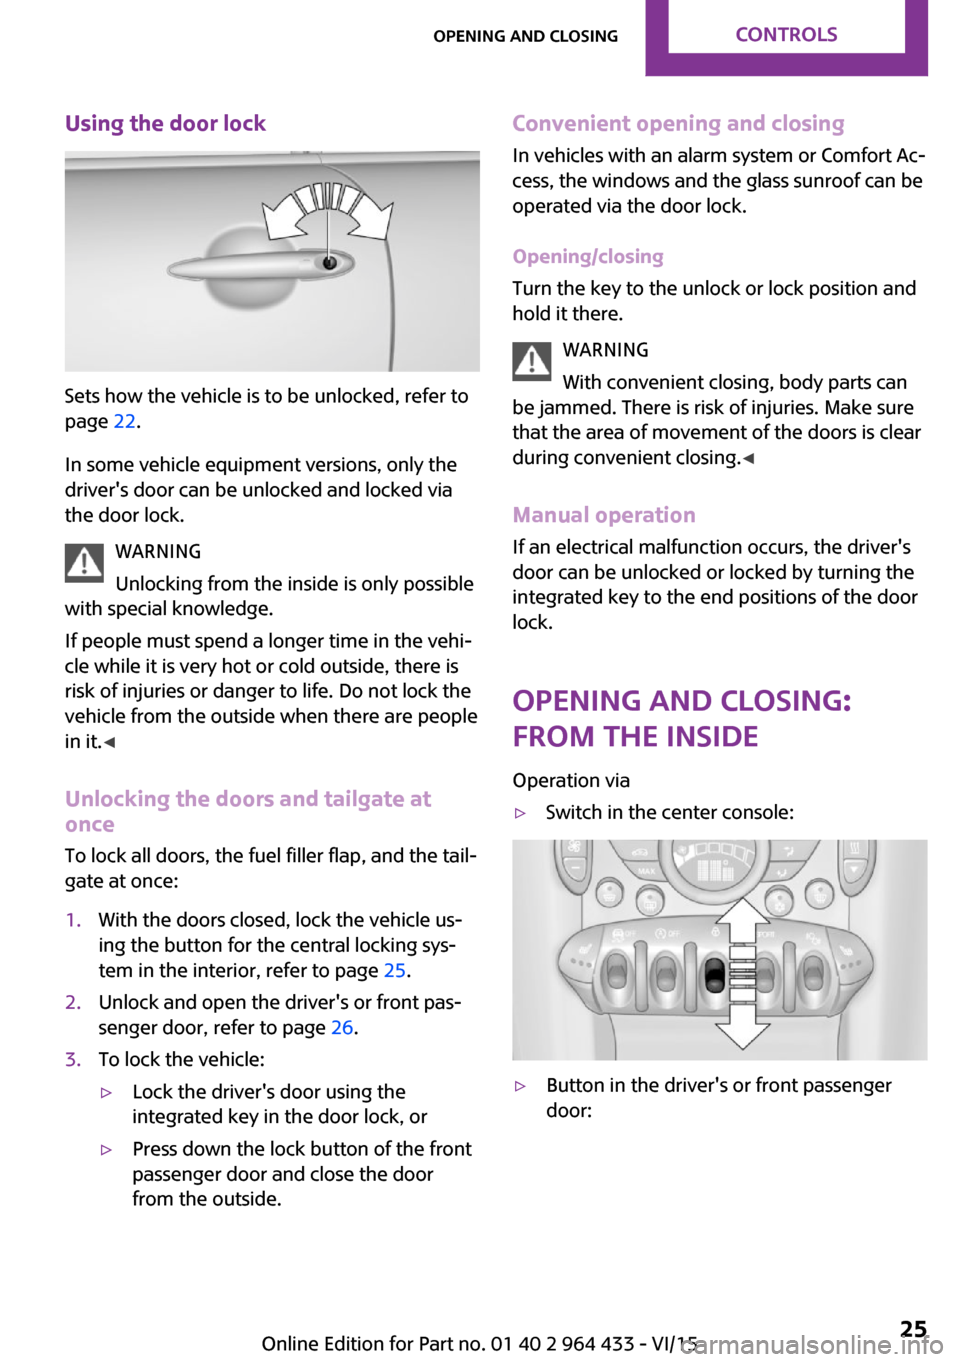
Using the door lock
Sets how the vehicle is to be unlocked, refer to
page 22.
In some vehicle equipment versions, only the
driver's door can be unlocked and locked via
the door lock.
WARNING
Unlocking from the inside is only possible
with special knowledge.
If people must spend a longer time in the vehi‐
cle while it is very hot or cold outside, there is
risk of injuries or danger to life. Do not lock the
vehicle from the outside when there are people
in it. ◀
Unlocking the doors and tailgate at
once
To lock all doors, the fuel filler flap, and the tail‐
gate at once:
1.With the doors closed, lock the vehicle us‐
ing the button for the central locking sys‐
tem in the interior, refer to page 25.2.Unlock and open the driver's or front pas‐
senger door, refer to page 26.3.To lock the vehicle:▷Lock the driver's door using the
integrated key in the door lock, or▷Press down the lock button of the front
passenger door and close the door
from the outside.Convenient opening and closing
In vehicles with an alarm system or Comfort Ac‐
cess, the windows and the glass sunroof can be
operated via the door lock.
Opening/closing
Turn the key to the unlock or lock position and
hold it there.
WARNING
With convenient closing, body parts can
be jammed. There is risk of injuries. Make sure
that the area of movement of the doors is clear
during convenient closing. ◀
Manual operation If an electrical malfunction occurs, the driver's
door can be unlocked or locked by turning the
integrated key to the end positions of the door
lock.
Opening and closing:
from the inside
Operation via▷Switch in the center console:▷Button in the driver's or front passenger
door:Seite 25Opening and closingCONTROLS25
Online Edition for Part no. 01 40 2 964 433 - VI/15
Page 28 of 223
Press the button on the remote control
for approx. 1 second and release. The tailgate is
unlocked.
Closing WARNING
Body parts can be jammed when operat‐
ing the tailgate. There is risk of injuries. Make
sure that the area of movement of the tailgate
is clear during opening and closing. ◀
Make sure that the cargo cover rests on the
rubber buffers of the securing straps when clos‐
ing the tailgate.
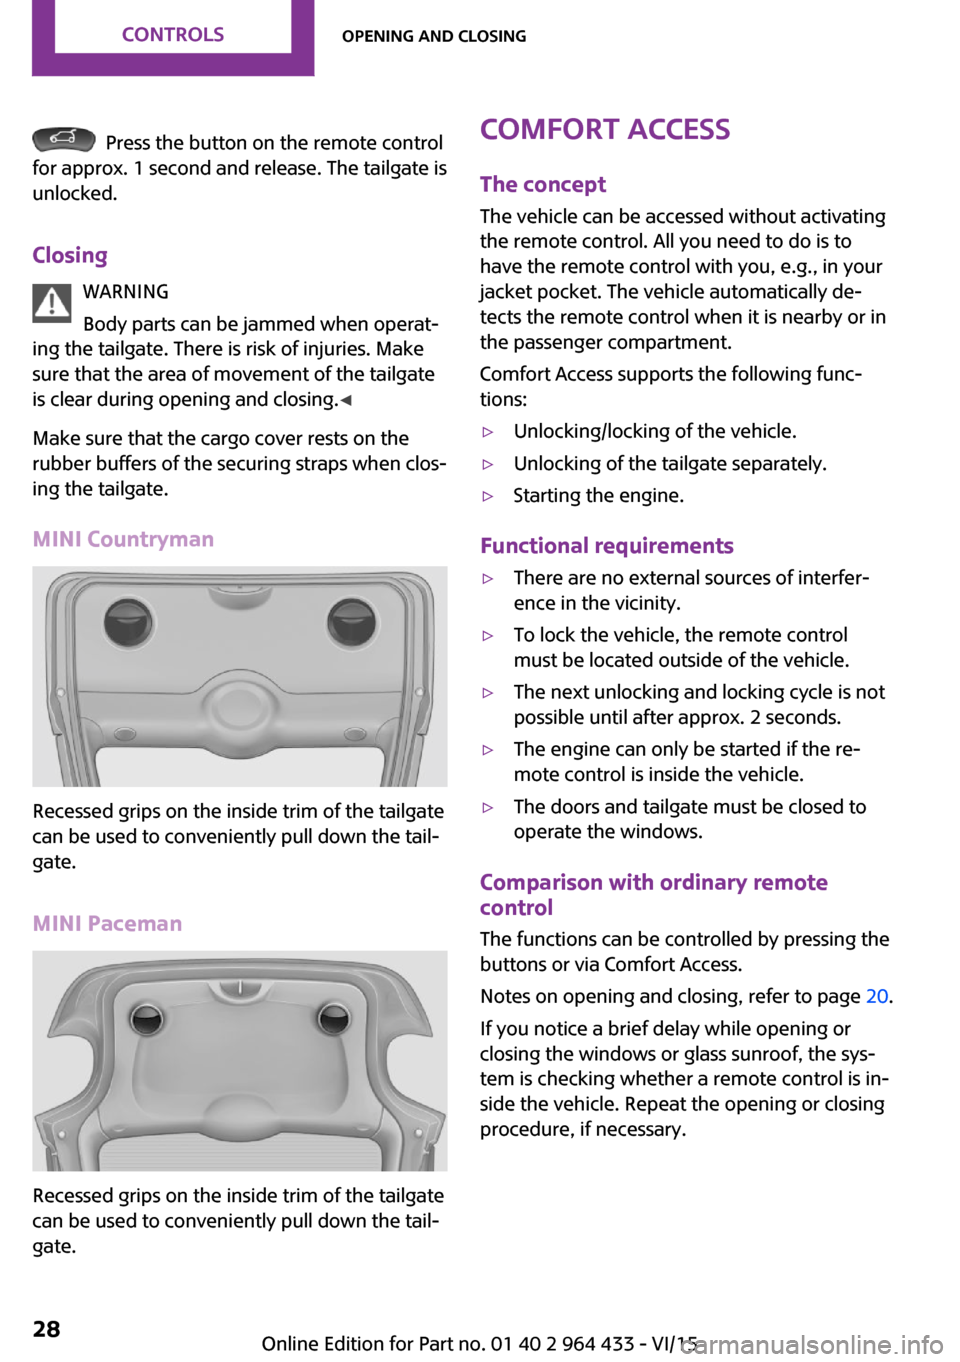
MINI Countryman
Recessed grips on the inside trim of the tailgate
can be used to conveniently pull down the tail‐
gate.
MINI Paceman
Recessed grips on the inside trim of the tailgate
can be used to conveniently pull down the tail‐
gate.
Comfort Access
The concept
The vehicle can be accessed without activating
the remote control. All you need to do is to have the remote control with you, e.g., in your
jacket pocket. The vehicle automatically de‐
tects the remote control when it is nearby or in
the passenger compartment.
Comfort Access supports the following func‐
tions:▷Unlocking/locking of the vehicle.▷Unlocking of the tailgate separately.▷Starting the engine.
Functional requirements
▷There are no external sources of interfer‐
ence in the vicinity.▷To lock the vehicle, the remote control
must be located outside of the vehicle.▷The next unlocking and locking cycle is not
possible until after approx. 2 seconds.▷The engine can only be started if the re‐
mote control is inside the vehicle.▷The doors and tailgate must be closed to
operate the windows.
Comparison with ordinary remote
control
The functions can be controlled by pressing the
buttons or via Comfort Access.
Notes on opening and closing, refer to page 20.
If you notice a brief delay while opening or
closing the windows or glass sunroof, the sys‐
tem is checking whether a remote control is in‐
side the vehicle. Repeat the opening or closing
procedure, if necessary.
Seite 28CONTROLSOpening and closing28
Online Edition for Part no. 01 40 2 964 433 - VI/15