child restraint MINI Roadster 2014 Owner's Manual (Mini Connected)
[x] Cancel search | Manufacturer: MINI, Model Year: 2014, Model line: Roadster, Model: MINI Roadster 2014Pages: 288, PDF Size: 6.72 MB
Page 60 of 288
Transporting children safelyVehicle equipment
This chapter describes all series equipment as
well as country-specific and special equipment
offered for this model series.Therefore, it also
describes equipment that may not be found in
your vehicle, for instance due to the selected
special equipment or the country version. This
also applies to safety-related functions and sys‐
tems.
The right place for chil‐
dren
Notes Children in the vehicle
Do not leave children unattended in the
vehicle; otherwise, they could endanger them‐
selves and other persons, e.g., by opening the
doors. ◀
MINI Convertible: children should
always be in the rear
Accident research shows that the safest place
for children is on the rear seat.
Transporting children in the rear
Transport children younger than 13 years
of age or shorter than 5 ft/150 cm in the rear
only, using child restraint fixing systems suita‐
ble for the age, weight, and height of the child;
otherwise, there is an increased risk of injury in
an accident.
Children 13 years of age or older must wear a
safety belt as soon as a suitable child restraint
fixing system can no longer be used, due to
their age, weight and size. ◀Installing child seats
Only install child seats in the rear when
the rear seat backrest is folded all the way back
and engaged; otherwise, there is an increased
risk of injury in an accident. ◀
Children on the front passenger seat
Front passenger airbags Should it be necessary to use a child restraint
fixing system on the front passenger seat,
make sure that the front and side airbags on
the front passenger side are deactivated, refer
to page 91.
Deactivating the front passenger airbags
If a child restraint fixing system is used in
the front passenger seat, the front passenger
airbags must be deactivated; otherwise, there
is an increased risk of injury to the child when
the airbags are triggered, even with a child re‐
straint fixing system. ◀
Installing child re‐
straint fixing systems
Notes Manufacturer's information for child re‐
straint fixing systems
To select, mount and use child restraint fixing
systems, observe the information provided by
the system manufacturer; otherwise, the pro‐
tective effect can be impaired. ◀
On the front passenger seat
Deactivating the airbags After installing a child restraint fixing system on
the front passenger seat, ensure that the frontSeite 60ControlsTransporting children safely60
Online Edition for Part no. 01 40 2 911 498 - VI/13
Page 61 of 288
and side airbags on the front passenger side
are deactivated.
Deactivating the front passenger airbags
If a child restraint fixing system is used in
the front passenger seat, the front passenger
airbags must be deactivated; otherwise, there
is an increased risk of injury to the child when
the airbags are triggered, even with a child re‐
straint fixing system. ◀
Seat position and height
Before installing a child restraint fixing system,
move the front passenger seat as far back as
possible and adjust its height to the highest po‐
sition to obtain the best possible position for
the belt and to offer optimal protection in the
event of an accident.
Do not change this seat position once it has
been set.
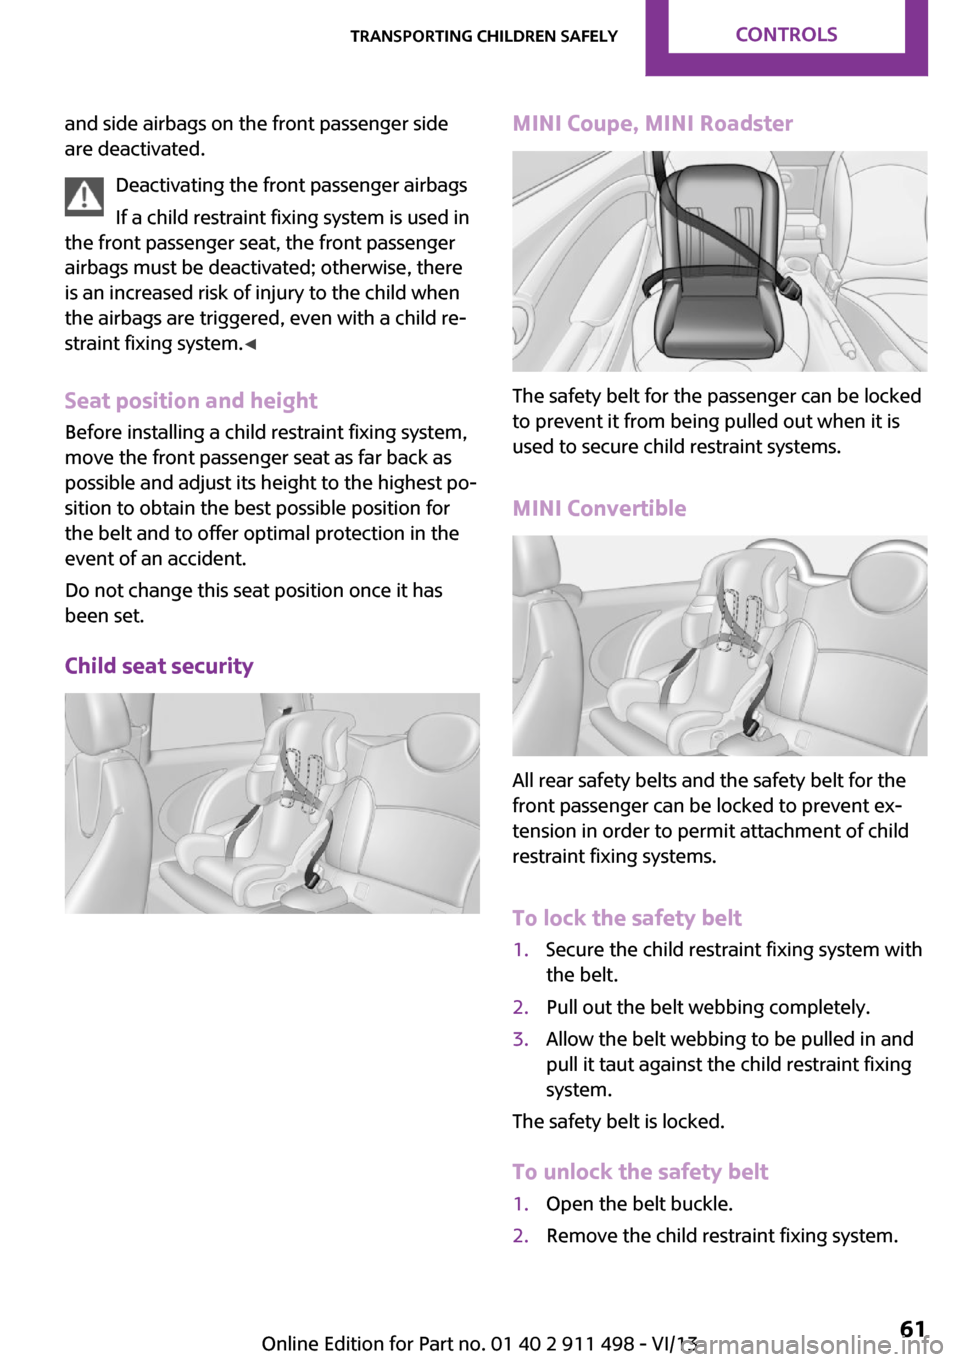
Child seat securityMINI Coupe, MINI Roadster
The safety belt for the passenger can be locked
to prevent it from being pulled out when it is
used to secure child restraint systems.
MINI Convertible
All rear safety belts and the safety belt for the
front passenger can be locked to prevent ex‐
tension in order to permit attachment of child
restraint fixing systems.
To lock the safety belt
1.Secure the child restraint fixing system with
the belt.2.Pull out the belt webbing completely.3.Allow the belt webbing to be pulled in and
pull it taut against the child restraint fixing
system.
The safety belt is locked.
To unlock the safety belt
1.Open the belt buckle.2.Remove the child restraint fixing system.Seite 61Transporting children safelyControls61
Online Edition for Part no. 01 40 2 911 498 - VI/13
Page 62 of 288
3.Allow the belt webbing to be pulled in com‐
pletely.
Guide the safety belt to the holder on the
headliner.
MINI Convertible: LATCH
child restraint fixing
system
LATCH: Lower Anchors and Tethers for Children.
Notes Manufacturer's information for LATCH
child restraint fixing systems
To mount and use the LATCH child restraint fix‐
ing systems, observe the operating and safety
information from the system manufacturer;
otherwise, the level of protection may be re‐
duced. ◀
Mounts for the lower LATCH anchors
The lower anchors may be used to attach the
CRS to the vehicle seat up to a combined child
and CRS weight of 65 lb/30 kg when the child is
restrained by the internal harnesses.
Correctly engage the lower LATCH an‐
chors
Make sure that the lower LATCH anchors have
properly engaged and that the child restraint
fixing system is resting snugly against the back‐
rest; otherwise, the degree of protection of‐
fered may be reduced. ◀
Before installing the child seat, pull the belt out
of the area for the child restraint fixing system.
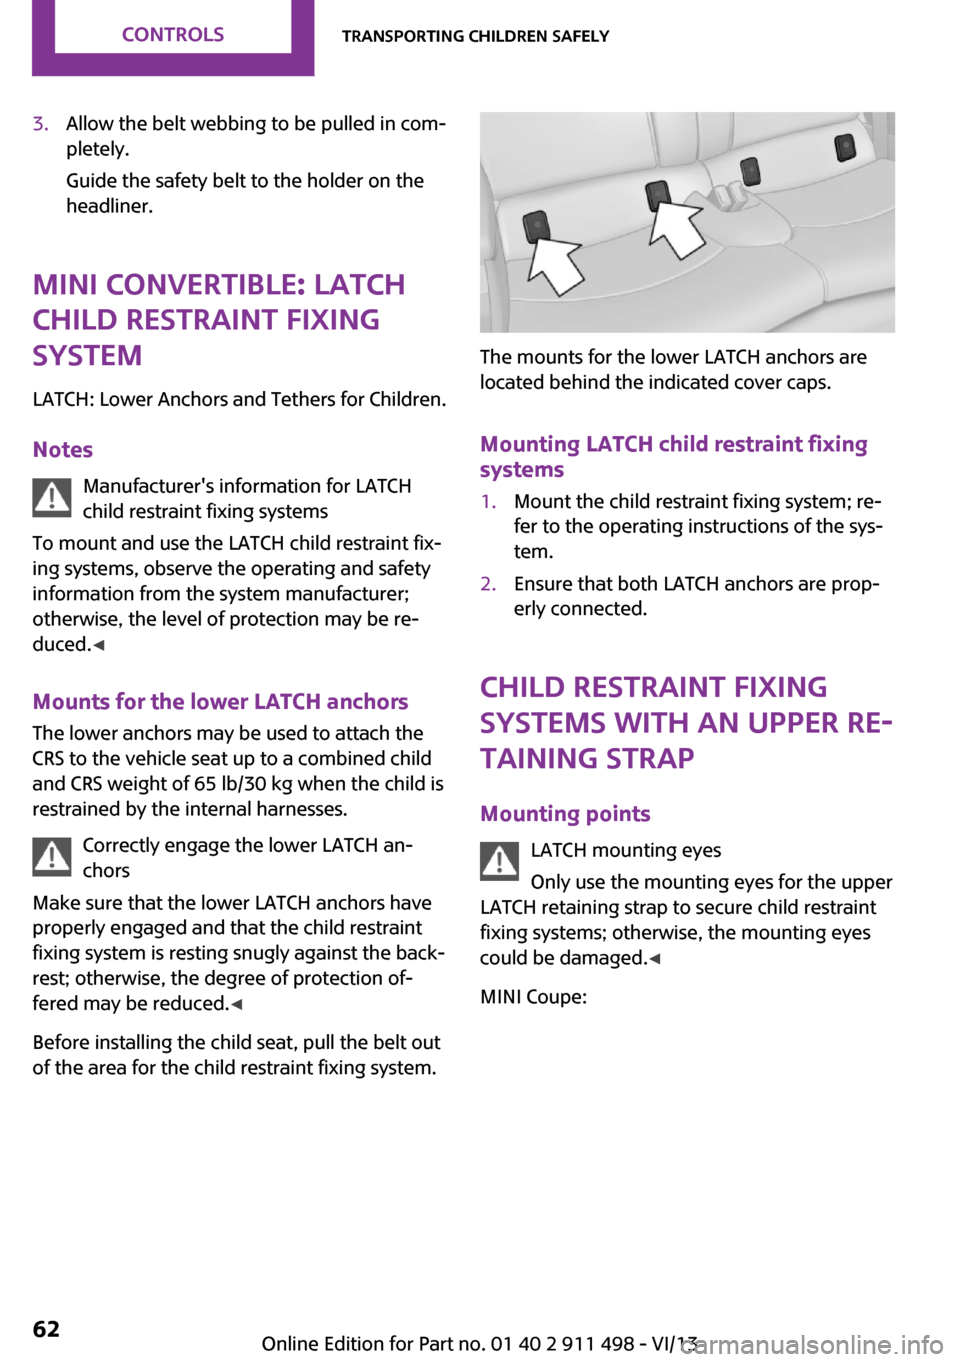
The mounts for the lower LATCH anchors are
located behind the indicated cover caps.
Mounting LATCH child restraint fixing
systems
1.Mount the child restraint fixing system; re‐
fer to the operating instructions of the sys‐
tem.2.Ensure that both LATCH anchors are prop‐
erly connected.
Child restraint fixing
systems with an upper re‐
taining strap
Mounting points LATCH mounting eyes
Only use the mounting eyes for the upper
LATCH retaining strap to secure child restraint
fixing systems; otherwise, the mounting eyes
could be damaged. ◀
MINI Coupe:
Seite 62ControlsTransporting children safely62
Online Edition for Part no. 01 40 2 911 498 - VI/13
Page 63 of 288
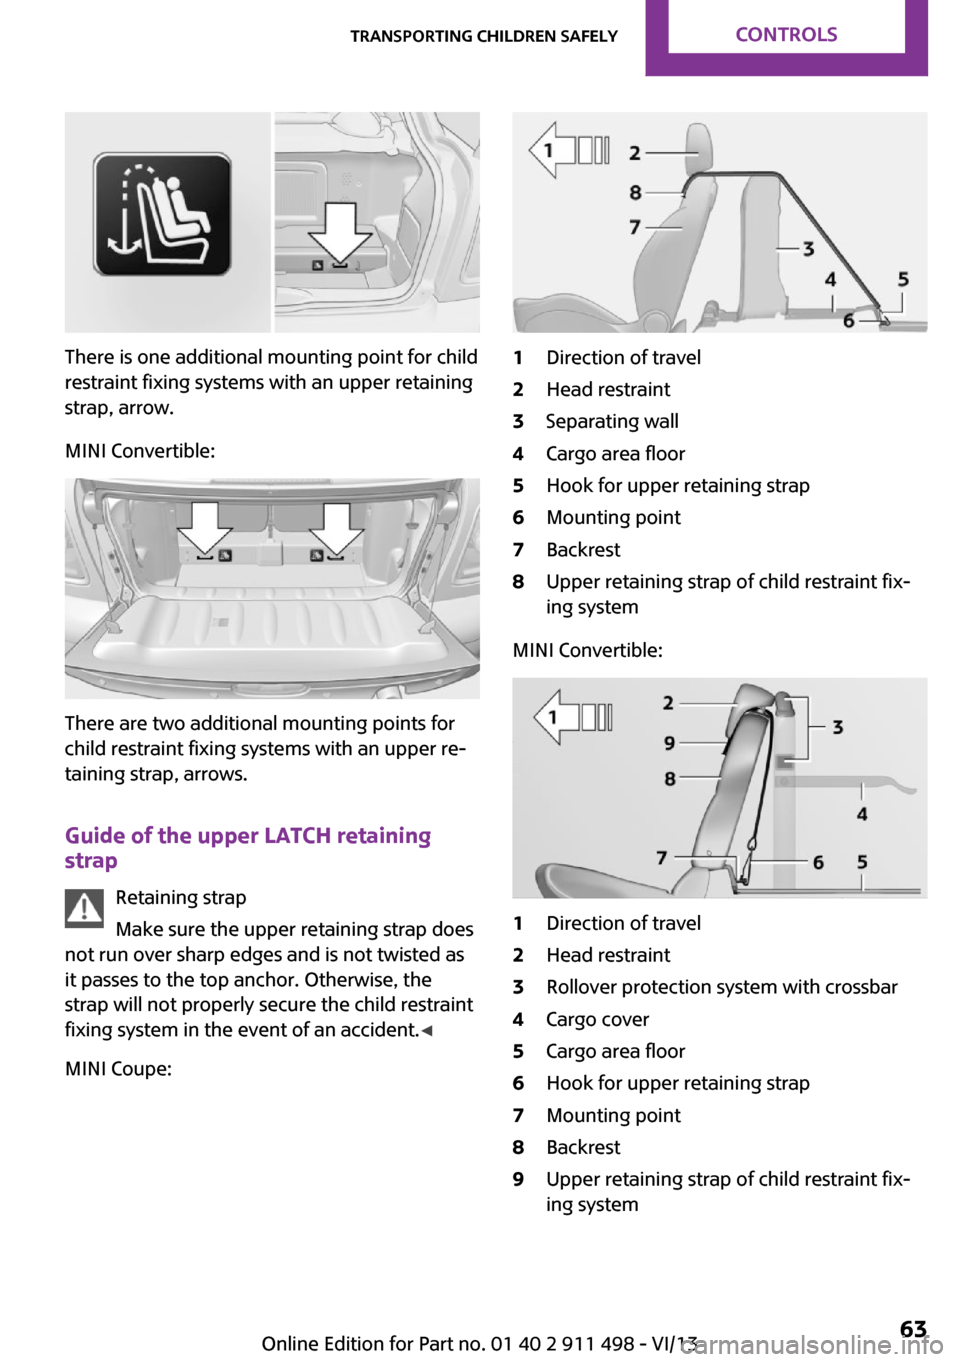
There is one additional mounting point for child
restraint fixing systems with an upper retaining
strap, arrow.
MINI Convertible:
There are two additional mounting points for
child restraint fixing systems with an upper re‐
taining strap, arrows.
Guide of the upper LATCH retaining
strap
Retaining strap
Make sure the upper retaining strap does
not run over sharp edges and is not twisted as
it passes to the top anchor. Otherwise, the
strap will not properly secure the child restraint
fixing system in the event of an accident. ◀
MINI Coupe:
1Direction of travel2Head restraint3Separating wall4Cargo area floor5Hook for upper retaining strap6Mounting point7Backrest8Upper retaining strap of child restraint fix‐
ing system
MINI Convertible:
1Direction of travel2Head restraint3Rollover protection system with crossbar4Cargo cover5Cargo area floor6Hook for upper retaining strap7Mounting point8Backrest9Upper retaining strap of child restraint fix‐
ing systemSeite 63Transporting children safelyControls63
Online Edition for Part no. 01 40 2 911 498 - VI/13
Page 64 of 288
Attaching the upper retaining strap to
the mounting point
MINI Coupe1.Remove the front cargo cover, refer to
page 115.2.Slide the head restraint upward.3.Guide the upper retaining strap between
the supports of the head restraint.4.Attach the upper retaining strap to the
mounting point with the hook.5.Slide the head restraint into the bottom po‐
sition.6.Pull the upper retaining strap taut.
MINI Convertible
Ensure that the upper retaining strap 9 is
passed between backrest 8 and rollover protec‐
tion system with crossbar 3; otherwise, it will be
unable to properly restrain the child restraint
fixing system.
1.Slide the head restraint upward.2.Unlock the backrest and fold it forward
slightly, refer to page 117.3.Guide the upper retaining strap between
the supports of the head restraint.4.Attach the upper retaining strap to the
mounting point with the hook.5.Fold back the backrest and lock it. Slide the
head restraint down as far as possible.6.Pull the upper retaining strap taut.Seite 64ControlsTransporting children safely64
Online Edition for Part no. 01 40 2 911 498 - VI/13
Page 91 of 288
▷Never modify either the individual compo‐
nents or the wiring in the airbag system.
This also applies to steering wheel covers,
the dashboard, the seats, the roof pillars
and the sides of the headliner. ◀
Even when all instructions are followed closely,
injury from contact with the airbags cannot be
ruled out in certain situations.
The ignition and inflation noise may lead to
short-term and, in most cases, temporary hear‐
ing impairment in sensitive individuals.
In the case of a malfunction, deactivation
and after triggering of the airbags
Do not touch the individual components imme‐
diately after the system has been triggered;
otherwise, there is the danger of burns.
Only have the airbags checked, repaired or dis‐
mantled and the airbag generator scrapped by
your service center or a workshop that has the
necessary authorization for handling explo‐
sives.
Non-professional attempts to service the sys‐
tem could lead to failure in an emergency or
undesired triggering of the airbag, either of
which could result in injury. ◀
Warning notices and information about the air‐
bags can also be found on the sun visors.
Automatic deactivation of the front
passenger airbags
The occupation of the seat is detected by eval‐
uating the impression on the occupied seat sur‐
face of the front passenger seat.
The front and side airbags on the front passen‐
ger side are activated or deactivated accord‐
ingly by the system.
The indicator lamp above the interior rearview
mirror, refer to page 92, shows the current
status of the front passenger airbags, deacti‐
vated or activated.
Leave feet in the footwell
Make sure that the front passenger keeps
his or her feet in the footwell; otherwise, the
front passenger airbags may not function prop‐
erly. ◀
Child restraint fixing system in the front
passenger seat
Before transporting a child on the front passen‐
ger seat, read the safety and operating instruc‐
tions under Transporting children safely, refer
to page 60.◀
Malfunction of the automatic deactivation system
When transporting older children and adults,
the front passenger airbags may be deactivated
in certain sitting positions. In this case, the indi‐
cator lamp for the front passenger airbags
lights up.
In this case, change the sitting position so that
the front passenger airbags are activated and
the indicator lamp goes out.
If it is not possible to activate the airbags, have
the person sit in the rear.
To make sure that occupation of the seat cush‐
ion can be detected correctly:▷Do not attach seat covers, seat cushion
padding, ball mats, or other items to the
front passenger seat unless they are specifi‐
cally recommended by the manufacturer of
your MINI.▷Do not place electronic devices on the pas‐
senger seat if a child restraint fixing system
is mounted on the seat.▷Do not place objects under the seat that
could press against the seat from below.Seite 91SafetyControls91
Online Edition for Part no. 01 40 2 911 498 - VI/13
Page 92 of 288
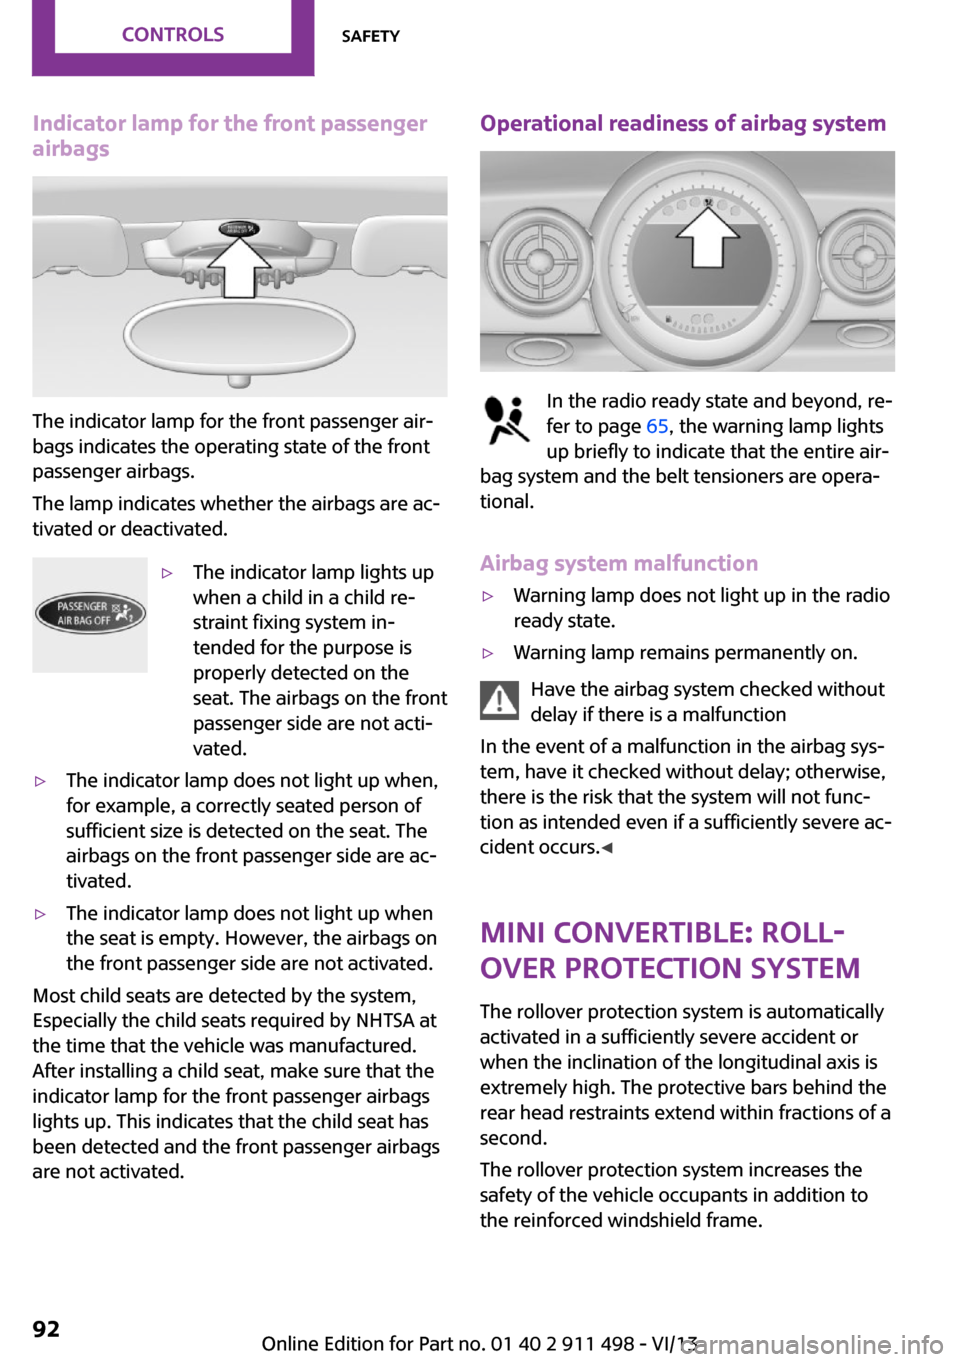
Indicator lamp for the front passenger
airbags
The indicator lamp for the front passenger air‐
bags indicates the operating state of the front
passenger airbags.
The lamp indicates whether the airbags are ac‐
tivated or deactivated.
▷The indicator lamp lights up
when a child in a child re‐
straint fixing system in‐
tended for the purpose is
properly detected on the
seat. The airbags on the front
passenger side are not acti‐
vated.▷The indicator lamp does not light up when,
for example, a correctly seated person of
sufficient size is detected on the seat. The
airbags on the front passenger side are ac‐
tivated.▷The indicator lamp does not light up when
the seat is empty. However, the airbags on
the front passenger side are not activated.
Most child seats are detected by the system,
Especially the child seats required by NHTSA at
the time that the vehicle was manufactured.
After installing a child seat, make sure that the
indicator lamp for the front passenger airbags
lights up. This indicates that the child seat has
been detected and the front passenger airbags
are not activated.
Operational readiness of airbag system
In the radio ready state and beyond, re‐
fer to page 65, the warning lamp lights
up briefly to indicate that the entire air‐
bag system and the belt tensioners are opera‐
tional.
Airbag system malfunction
▷Warning lamp does not light up in the radio
ready state.▷Warning lamp remains permanently on.
Have the airbag system checked without
delay if there is a malfunction
In the event of a malfunction in the airbag sys‐
tem, have it checked without delay; otherwise,
there is the risk that the system will not func‐
tion as intended even if a sufficiently severe ac‐
cident occurs. ◀
MINI Convertible: roll‐
over protection system
The rollover protection system is automatically
activated in a sufficiently severe accident or
when the inclination of the longitudinal axis is
extremely high. The protective bars behind the
rear head restraints extend within fractions of a
second.
The rollover protection system increases the
safety of the vehicle occupants in addition to
the reinforced windshield frame.
Seite 92ControlsSafety92
Online Edition for Part no. 01 40 2 911 498 - VI/13
Page 277 of 288
Bluetooth connection, activat‐ing/deactivating 183, 193
Bluetooth hands-free sys‐ tem 182
Brake assistant 101
Brake discs, breaking in 124
Brake fluid, refer to Service re‐ quirements 81
Brake force distribution, elec‐ tronic 101
Brake pads, breaking in 124
Brakes– Handbrake 67
Brakes, MINI maintenance
system 241
Brakes, service require‐ ments 81
Brake system, MINI mainte‐ nance system 241
Braking, notes 126
Breakdown assistance, Road‐ side Assistance 254
Breaking in 124
Brightness on the Control Dis‐ play 80
Button for starting the engine, refer to Start/Stop button 65
C
Calendar 208
California Proposition 65 Warning 7
Car battery, refer to Vehicle battery 252
Car care products 260
Care, displays 263
Care, vehicle 260
Cargo area
– Comfort Access 40– Emergency activation, refer
to Unlocking manually 38– Emergency unlocking 39– Opening from the out‐
side 37
Cargo area lamp, refer to Inte‐
rior lamps 88
Cargo area tailgate, refer to
Tailgate 37
Car horn, refer to Horn 14
Carpet, care 262
Car phone, refer to Tele‐ phone 182, 192
Car wash 259
CBC, Cornering Brake Con‐ trol 101
CBS Condition Based Serv‐ ice 241
CD 168
CD/DVD drives, care 263
CD player 168
Center console, refer to Around the center con‐
sole 18
Central locking– Comfort Access 39– From the inside 37– From the outside 34
Central locking system
– Concept 33– From the outside 33
Central screen, see Control
Display 20
Changes, technical, refer to Safety 7
Changing wheels/tires 231
Check Control 82
Children, transporting 60
Child restraint fixing system LATCH 62
Child restraint fixing sys‐ tems 60
Child restraint fixing systems, mounting 60
Child seat, mounting 60
Child seats, refer to Transport‐ ing children safely 60
Chrome parts, care 262
Circulation of air, refer to Re‐ circulated air
mode 109, 111
Cleaning, displays 263
Cleaning, refer to Care 259
Climate 108
Climate mode– Ventilation 113
Clock 74
Clock
– 12h/24h format 79– Setting the time and date 79
Closing
– From the inside 37– From the outside 34
Clutch, breaking in 124
Cockpit 14
Cold start, refer to Starting the engine 66
Combination instrument, refer to Displays 16
Combination switch, refer to Turn signal/high beams/
headlamp flasher 68
Combination switch, refer to Washer/wiper system 68
Comfort Access
– In the car wash 41– Replacing the battery 41
Comfort area, refer to Around
the center console 18
Compact wheel, inflation pres‐ sure 226
Compartment for remote con‐ trol, refer to Ignition lock 65
Computer 75
Computer, displaying informa‐ tion 75
Condition Based Service CBS 241
Confirmation signals for vehi‐ cle locking/unlocking 35
Connecting, mobile phone, re‐ fer to Pairing the mobile
phone 182, 193
Consumption, refer to Aver‐ age fuel consumption 76
Contacts 189, 205
Control Display 20
Control Display, care 263
Control Display, settings 80
Controls and displays 14
Seite 277Everything from A to ZReference277
Online Edition for Part no. 01 40 2 911 498 - VI/13
Page 281 of 288
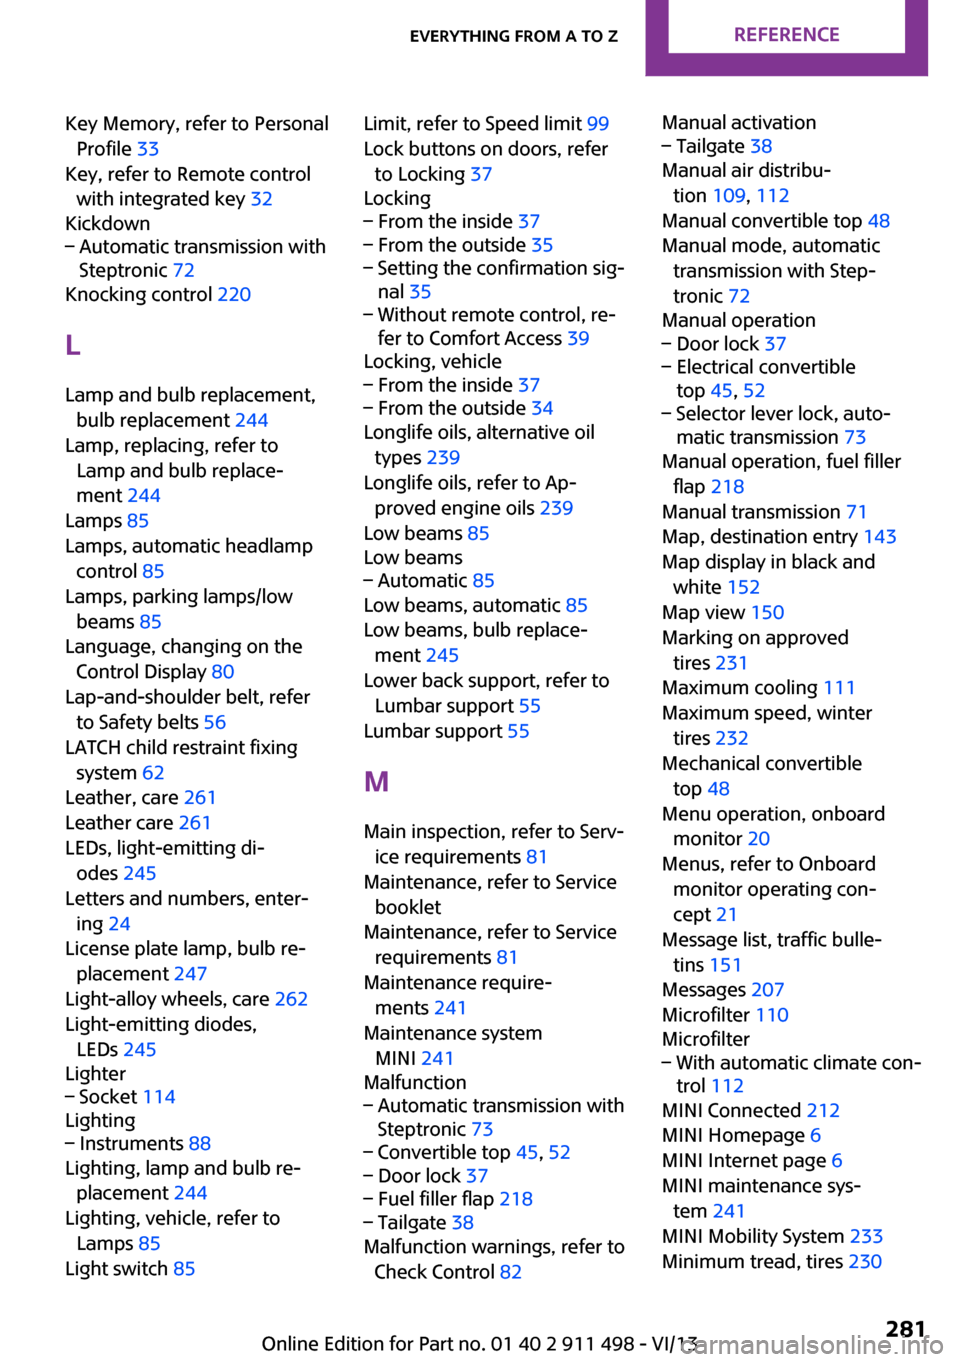
Key Memory, refer to PersonalProfile 33
Key, refer to Remote control with integrated key 32
Kickdown– Automatic transmission with
Steptronic 72
Knocking control 220
L Lamp and bulb replacement, bulb replacement 244
Lamp, replacing, refer to Lamp and bulb replace‐
ment 244
Lamps 85
Lamps, automatic headlamp control 85
Lamps, parking lamps/low beams 85
Language, changing on the Control Display 80
Lap-and-shoulder belt, refer to Safety belts 56
LATCH child restraint fixing system 62
Leather, care 261
Leather care 261
LEDs, light-emitting di‐ odes 245
Letters and numbers, enter‐ ing 24
License plate lamp, bulb re‐ placement 247
Light-alloy wheels, care 262
Light-emitting diodes, LEDs 245
Lighter
– Socket 114
Lighting
– Instruments 88
Lighting, lamp and bulb re‐
placement 244
Lighting, vehicle, refer to Lamps 85
Light switch 85
Limit, refer to Speed limit 99
Lock buttons on doors, refer to Locking 37
Locking– From the inside 37– From the outside 35– Setting the confirmation sig‐
nal 35– Without remote control, re‐
fer to Comfort Access 39
Locking, vehicle
– From the inside 37– From the outside 34
Longlife oils, alternative oil
types 239
Longlife oils, refer to Ap‐ proved engine oils 239
Low beams 85
Low beams
– Automatic 85
Low beams, automatic 85
Low beams, bulb replace‐ ment 245
Lower back support, refer to
Lumbar support 55
Lumbar support 55
M
Main inspection, refer to Serv‐ ice requirements 81
Maintenance, refer to Service booklet
Maintenance, refer to Service requirements 81
Maintenance require‐ ments 241
Maintenance system MINI 241
Malfunction
– Automatic transmission with
Steptronic 73– Convertible top 45, 52– Door lock 37– Fuel filler flap 218– Tailgate 38
Malfunction warnings, refer to
Check Control 82
Manual activation– Tailgate 38
Manual air distribu‐
tion 109, 112
Manual convertible top 48
Manual mode, automatic transmission with Step‐
tronic 72
Manual operation
– Door lock 37– Electrical convertible
top 45, 52– Selector lever lock, auto‐
matic transmission 73
Manual operation, fuel filler
flap 218
Manual transmission 71
Map, destination entry 143
Map display in black and white 152
Map view 150
Marking on approved tires 231
Maximum cooling 111
Maximum speed, winter tires 232
Mechanical convertible top 48
Menu operation, onboard monitor 20
Menus, refer to Onboard monitor operating con‐
cept 21
Message list, traffic bulle‐ tins 151
Messages 207
Microfilter 110
Microfilter
– With automatic climate con‐
trol 112
MINI Connected 212
MINI Homepage 6
MINI Internet page 6
MINI maintenance sys‐ tem 241
MINI Mobility System 233
Minimum tread, tires 230
Seite 281Everything from A to ZReference281
Online Edition for Part no. 01 40 2 911 498 - VI/13
Page 282 of 288
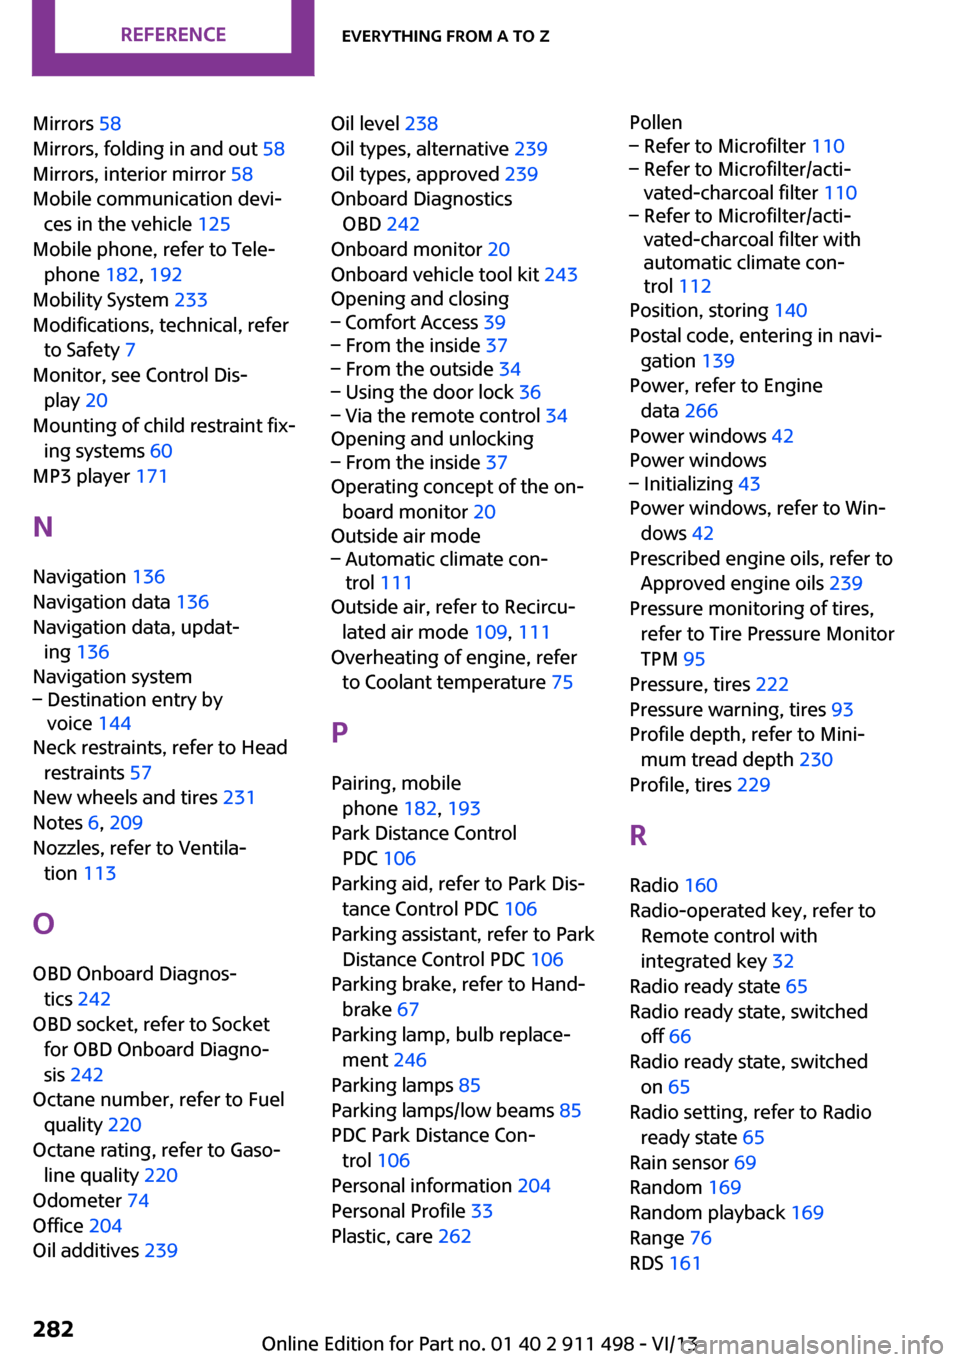
Mirrors 58
Mirrors, folding in and out 58
Mirrors, interior mirror 58
Mobile communication devi‐ ces in the vehicle 125
Mobile phone, refer to Tele‐ phone 182, 192
Mobility System 233
Modifications, technical, refer to Safety 7
Monitor, see Control Dis‐ play 20
Mounting of child restraint fix‐ ing systems 60
MP3 player 171
N
Navigation 136
Navigation data 136
Navigation data, updat‐ ing 136
Navigation system– Destination entry by
voice 144
Neck restraints, refer to Head
restraints 57
New wheels and tires 231
Notes 6, 209
Nozzles, refer to Ventila‐ tion 113
O
OBD Onboard Diagnos‐ tics 242
OBD socket, refer to Socket for OBD Onboard Diagno‐
sis 242
Octane number, refer to Fuel quality 220
Octane rating, refer to Gaso‐ line quality 220
Odometer 74
Office 204
Oil additives 239
Oil level 238
Oil types, alternative 239
Oil types, approved 239
Onboard Diagnostics OBD 242
Onboard monitor 20
Onboard vehicle tool kit 243
Opening and closing– Comfort Access 39– From the inside 37– From the outside 34– Using the door lock 36– Via the remote control 34
Opening and unlocking
– From the inside 37
Operating concept of the on‐
board monitor 20
Outside air mode
– Automatic climate con‐
trol 111
Outside air, refer to Recircu‐
lated air mode 109, 111
Overheating of engine, refer to Coolant temperature 75
P Pairing, mobile phone 182, 193
Park Distance Control PDC 106
Parking aid, refer to Park Dis‐ tance Control PDC 106
Parking assistant, refer to Park Distance Control PDC 106
Parking brake, refer to Hand‐ brake 67
Parking lamp, bulb replace‐ ment 246
Parking lamps 85
Parking lamps/low beams 85
PDC Park Distance Con‐ trol 106
Personal information 204
Personal Profile 33
Plastic, care 262
Pollen– Refer to Microfilter 110– Refer to Microfilter/acti‐
vated-charcoal filter 110– Refer to Microfilter/acti‐
vated-charcoal filter with
automatic climate con‐
trol 112
Position, storing 140
Postal code, entering in navi‐ gation 139
Power, refer to Engine data 266
Power windows 42
Power windows
– Initializing 43
Power windows, refer to Win‐
dows 42
Prescribed engine oils, refer to Approved engine oils 239
Pressure monitoring of tires, refer to Tire Pressure Monitor
TPM 95
Pressure, tires 222
Pressure warning, tires 93
Profile depth, refer to Mini‐ mum tread depth 230
Profile, tires 229
R
Radio 160
Radio-operated key, refer to Remote control with
integrated key 32
Radio ready state 65
Radio ready state, switched off 66
Radio ready state, switched on 65
Radio setting, refer to Radio ready state 65
Rain sensor 69
Random 169
Random playback 169
Range 76
RDS 161
Seite 282ReferenceEverything from A to Z282
Online Edition for Part no. 01 40 2 911 498 - VI/13