clock MITSUBISHI ASX 2012 (in English) User Guide
[x] Cancel search | Manufacturer: MITSUBISHI, Model Year: 2012, Model line: ASX, Model: MITSUBISHI ASX 2012Pages: 378, PDF Size: 18.2 MB
Page 225 of 378
To tune the radio
E00709100624
Automatic tuning
After
pressing the SEEK button, a receivable sta-
tion will be automatically selected and reception of
the station will begin.
Manual tuning
The frequency changes every time the TUNE
switch is turned. Turn the switch to select the de-
sired radio broadcasting station.
To enter frequencies into the memory E00716101144
Manual setting
You
can assign to the memory select buttons a max-
imum of 18 stations in the FM band (6 FM1, 6
FM2 and 6 FM3 stations) and 6 stations each in the
MW and LW band. (Stations already assigned to
the memory select buttons are replaced by any new-
ly assigned stations.) Follow the steps described below.
1. Press
the SEEK button, or turn the TUNE
switch to tune to the frequency you wish to
keep in the memory. 2. Press
one of the memory select buttons until
it beeps.
The sound will be momentarily interrupted
while the frequency is being entered into the
memory. The number of the button matching
the entry in the memory as well as the fre-
quency is displayed.
3. The preset memory setting is retrieved by pressing the button and then releasing it with-
in 1 second.
NOTE l Disconnecting the battery terminal erases all
the radio frequencies stored in the memory.
Automatic setting
With the method, all manually set stations in the
band currently selected for reception are replaced
with stations in the same band that are automatical-
ly selected in order of signal strength. The radio au-
tomatically selects 6 stations in the FM band (FM3
station only) and 6 stations each in the MW and
LW band.
Follow the steps described below. 1. With the radio mode selected, hold down theAM/FM button for 2 seconds or longer. The
6 stations with the best signal strength will au-
tomatically be assigned to the memory select
buttons, with the lowest-frequency station be-
ing assigned to the lowest-number button.
2. When you subsequently press a memory se- lect button to select a channel number, the ra-
dio will begin receiving the station assigned
to that number. NOTE
l If you press the AM/FM button for 2 seconds
or
longer while tuning in the FM1 or FM2
band, the radio will automatically switch to
the FM3 band, where the automatic seeking/
stroring will be activated.
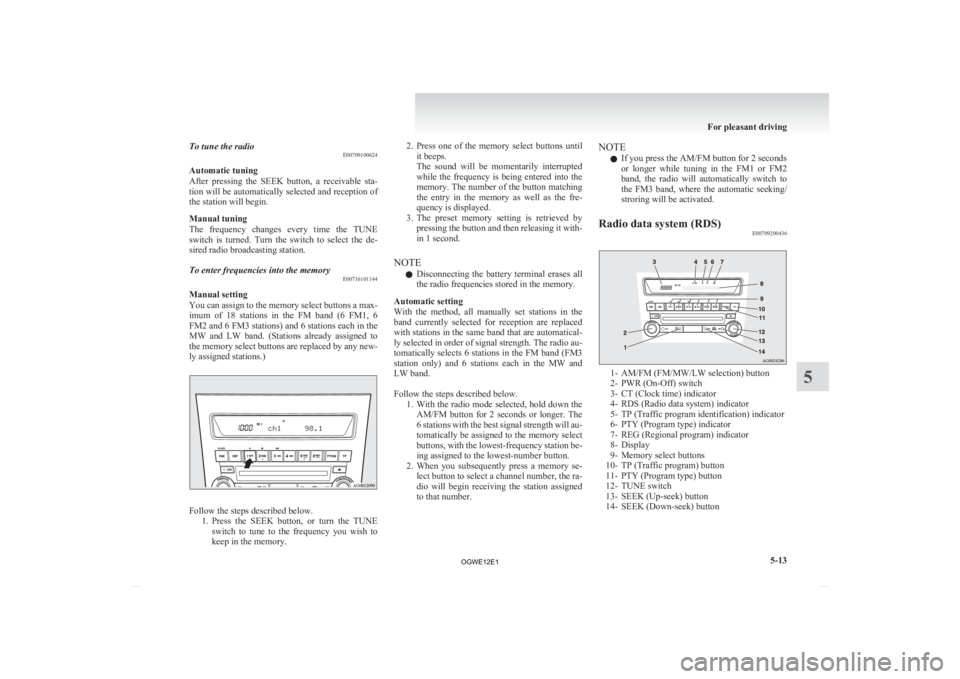
Radio data system (RDS) E00709200436 1- AM/FM (FM/MW/LW selection) button
2-
PWR (On-Off) switch
3- CT (Clock time) indicator
4- RDS (Radio data system) indicator
5- TP (Traffic program identification) indicator
6- PTY (Program type) indicator
7- REG (Regional program) indicator
8- Display
9- Memory select buttons
10- TP (Traffic program) button
11- PTY (Program type) button
12- TUNE switch
13- SEEK (Up-seek) button
14- SEEK (Down-seek) button For pleasant driving
5-13 5
OGWE12E1
Page 226 of 378
RDS uses PI (program identification) signal and
AF
(alternative frequency) list transmitted in addi-
tion to the normal FM broadcasting programs, and
picks up the FM stations that are transmitting the
same program from the AF list and automatically
tunes to the station with the strongest signal intensi-
ty.
Therefore, you can continue listening to one pro-
gram in, for example, a long distance driving with-
out retuning to the other station transmitting the
same program when you are leaving the service
area of the currently receiving station.
The RDS radio also features the limited reception
of the program types, the break-in reception of the
traffic announcement to the EON (enhanced other
network) and emergency broadcast, and the limited/
unlimited reception of the regional programs.
AF (Alternative Frequencies) function E00720900162
The AF function finds a station broadcasting the
same
program and selects the station with the stron-
gest signal of AF lists.
The AF function is turned on at all times unless
you manually switch it off.
The AF function can be turned ON and OFF.
Refer to “Function setup mode” on page 5-16.
CT (Clock Time) function E00721000072
The clock can be set automatically by using the sig-
nal
from the local RDS stations. Refer to “Digital
clock” on page 5-39.
REG (Regional) function E00721100116
REG function limits to receive the stations broad-
casting regional programs. Regional programming and regional networks are
organized
differently depending on the country or
area (they may be changed according to the hour,
state, or broadcast area), so if you don’t want to re-
ceive the regional programs automatically, you can
set up REG ON not to receive regional programs.
The REG function can be turned ON and OFF.
Refer to “Function setup mode” on page 5-16.
PI (Program Identification) search function E00721200250
When travelling long distance and the recalled pre-
set
station is weak, the radio searches another fre-
quency broadcasting the same programming with
the same PI code in AF list.
If there are no frequencies broadcasting the same
programming, the radio searches a frequency broad-
casting the regional programming. The radio suc-
ceeds in searching the regional programming, then
the display shows the REG indicator.
If the radio does not succeed in searching the re-
gional programming, the radio returns to the recal-
led preset station.
The PI function can be turned ON and OFF.
Refer to “Function setup mode” on page 5-16.
NOTE
l While searching, the audio system is muted.
The display shows “WAIT” or “SEARCH”.
PTY (Program type) E00721300323
RDS broadcasts are classified according to pro-
gram
type (PTY) as follows. Use the TUNE switch
to select your desired PTY.
1. NEWS 2. AFFAIRS (Current affairs)
3.
INFO (Information)
4. SPORT
5. EDUCATE (Education)
6. DRAMA
7. CULTURE
8. SCIENCE
9. VARIED
10. POP M (Pop music)
11. ROCK M (Rock music)
12. EASY M (Easy music)
13. LIGHT M (Light classics)
14. CLASSICS
15. OTHER M (Other music)
16. WEATHER (Weather information)
17. FINANCE
18. CHILDREN
19. SOCIAL
20. RELIGION
21. PHONE IN
22. TRAVEL
23. LEISURE
24. JAZZ
25. COUNTRY
26. NATION M (National music)
27. OLDIES
28. FOLK M (Folk music)
29. DOCUMENT
To search for a broadcast of desired program type: 1. Press the PTY button.
2. Press the TUNE switch or press a memory se-lect button to select your desired PTY.
3. Two seconds after a desired PTY has been se- lected, the radio will begin to search for a
broadcast of your selected PTY. During
search, the selected PTY on the display blinks. For pleasant driving
5-14
5
OGWE12E1
Page 232 of 378
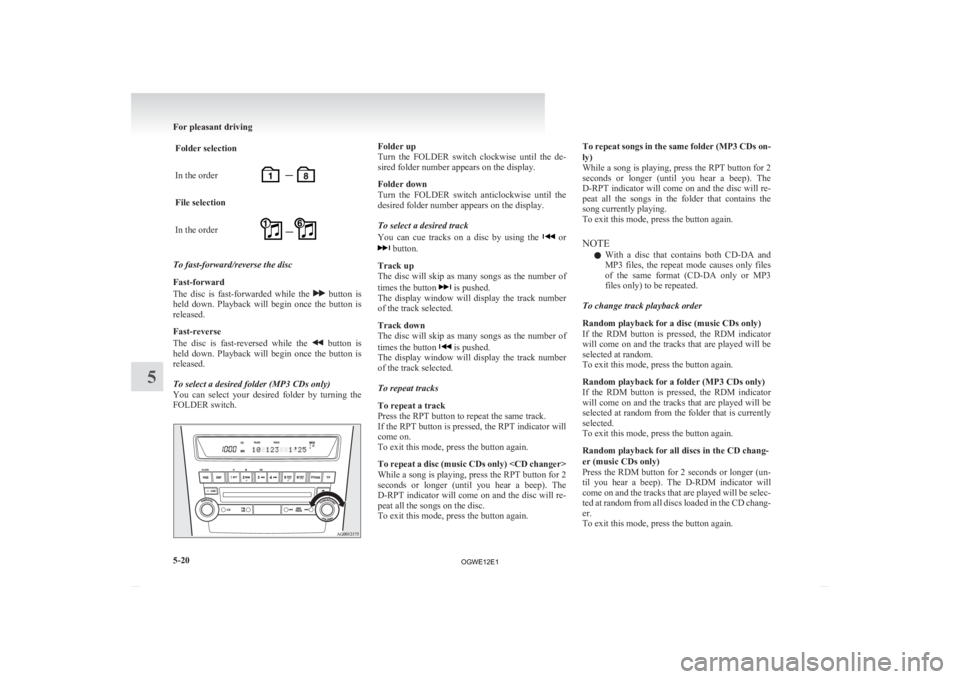
Folder selection
In the order
File selection
In the order
To fast-forward/reverse the disc
Fast-forward
The
disc is fast-forwarded while the button is
held
down. Playback will begin once the button is
released.
Fast-reverse
The disc is fast-reversed while the button is
held
down. Playback will begin once the button is
released.
To select a desired folder (MP3 CDs only)
You can select your desired folder by turning the
FOLDER switch. Folder up
Turn
the FOLDER switch clockwise until the de-
sired folder number appears on the display.
Folder down
Turn the FOLDER switch anticlockwise until the
desired folder number appears on the display.
To select a desired track
You can cue tracks on a disc by using the or
button.
Track up
The
disc will skip as many songs as the number of
times the button is pushed.
The
display window will display the track number
of the track selected.
Track down
The disc will skip as many songs as the number of
times the button is pushed.
The
display window will display the track number
of the track selected.
To repeat tracks
To repeat a track
Press the RPT button to repeat the same track.
If the RPT button is pressed, the RPT indicator will
come on.
To exit this mode, press the button again.
To repeat a disc (music CDs only)
While a song is playing, press the RPT button for 2
seconds or longer (until you hear a beep). The
D-RPT indicator will come on and the disc will re-
peat all the songs on the disc.
To exit this mode, press the button again. To repeat songs in the same folder (MP3 CDs on-
ly)
While
a song is playing, press the RPT button for 2
seconds or longer (until you hear a beep). The
D-RPT indicator will come on and the disc will re-
peat all the songs in the folder that contains the
song currently playing.
To exit this mode, press the button again.
NOTE
l With a disc that contains both CD-DA and
MP3 files, the repeat mode causes only files
of the same format (CD-DA only or MP3
files only) to be repeated.
To change track playback order
Random playback for a disc (music CDs only)
If the RDM button is pressed, the RDM indicator
will come on and the tracks that are played will be
selected at random.
To exit this mode, press the button again.
Random playback for a folder (MP3 CDs only)
If the RDM button is pressed, the RDM indicator
will come on and the tracks that are played will be
selected at random from the folder that is currently
selected.
To exit this mode, press the button again.
Random playback for all discs in the CD chang-
er (music CDs only)
Press the RDM button for 2 seconds or longer (un-
til you hear a beep). The D-RDM indicator will
come on and the tracks that are played will be selec-
ted at random from all discs loaded in the CD chang-
er.
To exit this mode, press the button again. For pleasant driving
5-20
5
OGWE12E1
Page 251 of 378
Notes on CD-Rs/RWs
E00725100055
l You
may have trouble playing back some
CD-R/RW discs recorded on CD recorders
(CD-R/RW drives), either due to their record-
ing characteristics or dirt, fingerprints,
scratches, etc. on the disc surface.
l CD-R/RW discs are less resistant to high tem-
peratures and high humidity than ordinary mu-
sic CDs and can therefore be damaged and
rendered unplayable if left inside your vehi-
cle for a long time.
l Depending on the combination of the writing
software, the CD recorder (CD-R/RW drive),
and the disc used to create a CD-R/RW, the
disc might not play successfully.
l This player cannot play the CD-R/RW discs
if the session is not closed.
l This player cannot play CD-R/RW discs
which contain other than CD-DA or MP3 da-
ta (Video CD, etc.).
l Be sure to observe the handling instructions
for the CD-R/RW disc. WARNING
l Operating
the CD player in a manner oth-
er than specifically instructed herein may
result in hazardous radiation exposure.
Do not remove the cover and attempt to
repair the CD player by yourself. There
are no user serviceable parts inside. If the
CD player is not working correctly, it is
recommended that you have it inspected. Antenna
E00710500543
To remove
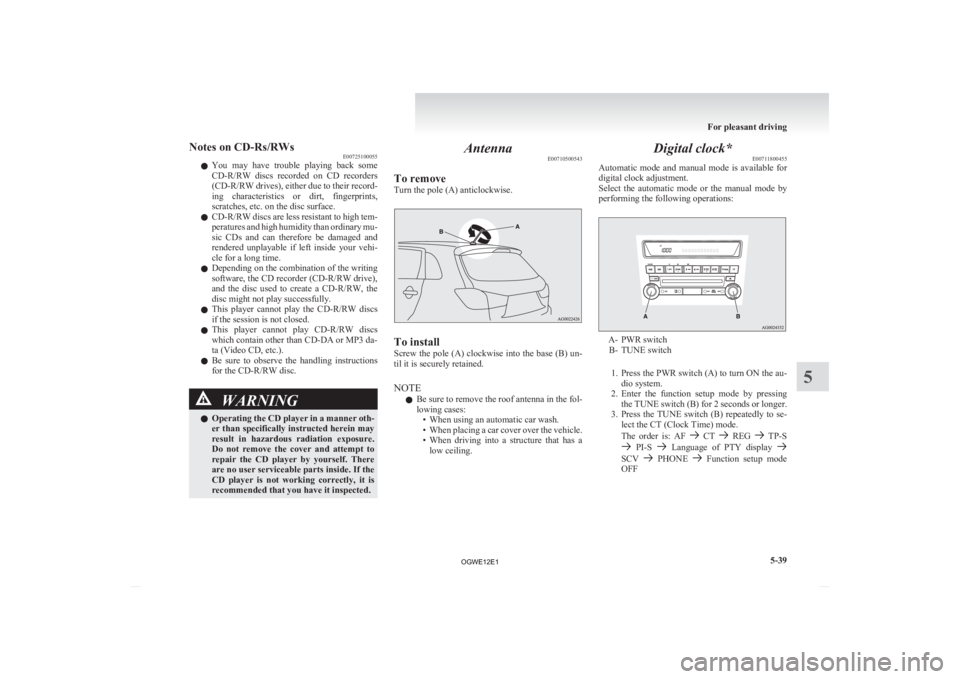
Turn the pole (A) anticlockwise. To install
Screw
the pole (A) clockwise into the base (B) un-
til it is securely retained.
NOTE
l Be sure to remove the roof antenna in the fol-
lowing cases:
• When using an automatic car wash.
• When placing a car cover over the vehicle.
• When driving into a structure that has alow ceiling. Digital clock*
E00711800455
Automatic
mode and manual mode is available for
digital clock adjustment.
Select the automatic mode or the manual mode by
performing the following operations: A- PWR switch
B-
TUNE switch
1. Press the PWR switch (A) to turn ON the au- dio system.
2. Enter the function setup mode by pressing the TUNE switch (B) for 2 seconds or longer.
3. Press the TUNE switch (B) repeatedly to se- lect the CT (Clock Time) mode.
The order is: AF CT REG TP-S
PI-S Language of PTY display
SCV PHONE Function setup mode
OFF For pleasant driving
5-39 5
OGWE12E1
Page 252 of 378
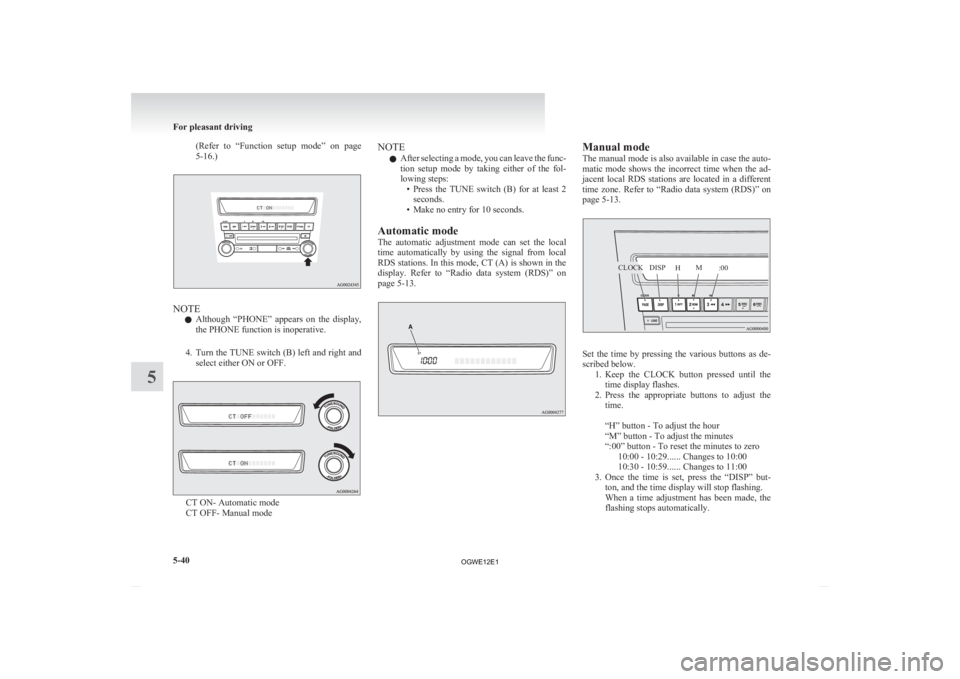
(Refer to “Function setup mode” on page
5-16.) NOTE
l Although
“PHONE” appears on the display,
the PHONE function is inoperative.
4. Turn the TUNE switch (B) left and right and select either ON or OFF. CT ON- Automatic mode
CT OFF- Manual mode NOTE
l After
selecting a mode, you can leave the func-
tion setup mode by taking either of the fol-
lowing steps: • Press the TUNE switch (B) for at least 2seconds.
• Make no entry for 10 seconds.
Automatic mode
The automatic adjustment mode can set the local
time automatically by using the signal from local
RDS stations. In this mode, CT (A) is shown in the
display. Refer to “Radio data system (RDS)” on
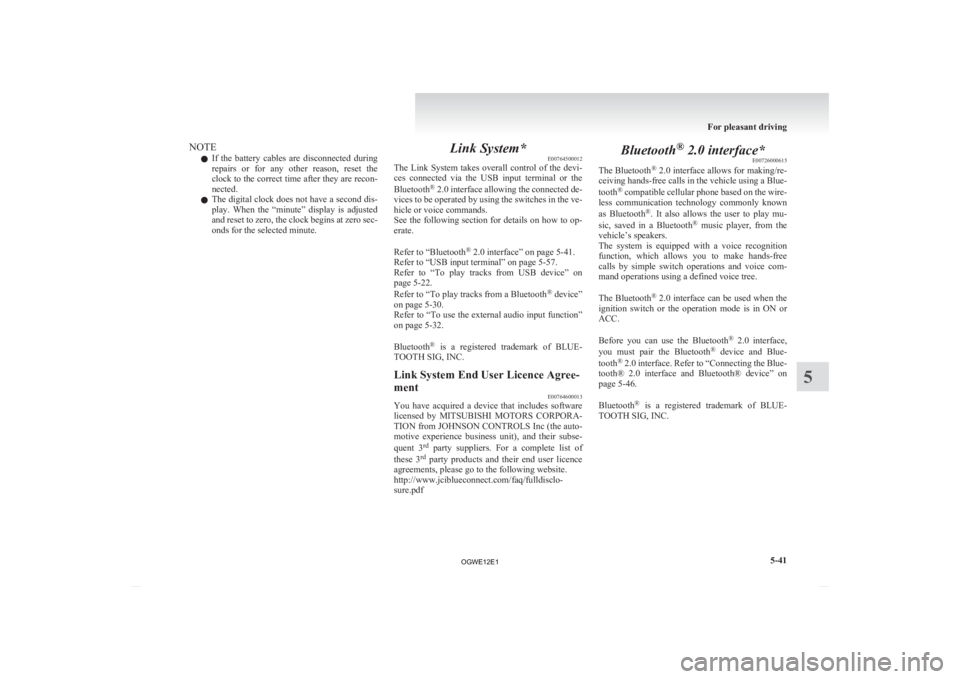
page 5-13. Manual mode
The
manual mode is also available in case the auto-
matic mode shows the incorrect time when the ad-
jacent local RDS stations are located in a different
time zone. Refer to “Radio data system (RDS)” on
page 5-13. Set the time by pressing the various buttons as de-
scribed below.
1. Keep
the CLOCK button pressed until the
time display flashes.
2. Press the appropriate buttons to adjust the time.
“H” button - To adjust the hour
“M” button - To adjust the minutes
“:00” button - To reset the minutes to zero 10:00 - 10:29...... Changes to 10:00
10:30 - 10:59...... Changes to 11:00
3. Once the time is set, press the “DISP” but- ton, and the time display will stop flashing.
When a time adjustment has been made, the
flashing stops automatically. For pleasant driving
5-40
5 CLOCKDISP
HM
:00
OGWE12E1
Page 253 of 378
NOTE
l If
the battery cables are disconnected during
repairs or for any other reason, reset the
clock to the correct time after they are recon-
nected.
l The digital clock does not have a second dis-
play. When the “minute” display is adjusted
and reset to zero, the clock begins at zero sec-
onds for the selected minute. Link System*
E00764500012
The
Link System takes overall control of the devi-
ces connected via the USB input terminal or the
Bluetooth ®
2.0 interface allowing the connected de-
vices to be operated by using the switches in the ve-
hicle or voice commands.
See the following section for details on how to op-
erate.
Refer to “Bluetooth ®
2.0 interface” on page 5-41.
Refer to “USB input terminal” on page 5-57.
Refer to “To play tracks from USB device” on
page 5-22.
Refer to “To play tracks from a Bluetooth ®
device”
on page 5-30.
Refer to “To use the external audio input function”
on page 5-32.
Bluetooth ®
is a registered trademark of BLUE-
TOOTH SIG, INC.
Link System End User Licence Agree-
ment E00764600013
You have acquired a device that includes software
licensed
by MITSUBISHI MOTORS CORPORA-
TION from JOHNSON CONTROLS Inc (the auto-
motive experience business unit), and their subse-
quent 3 rd
party suppliers. For a complete list of
these 3 rd
party products and their end user licence
agreements, please go to the following website.
http://www.jciblueconnect.com/faq/fulldisclo-
sure.pdf Bluetooth
®
2.0 interface*
E00726000615
The Bluetooth ®
2.0 interface allows for making/re-
ceiving hands-free calls in the vehicle using a Blue-
tooth ®
compatible cellular phone based on the wire-
less communication technology commonly known
as Bluetooth ®
. It also allows the user to play mu-
sic, saved in a Bluetooth ®
music player, from the
vehicle’s speakers.
The system is equipped with a voice recognition
function, which allows you to make hands-free
calls by simple switch operations and voice com-
mand operations using a defined voice tree.
The Bluetooth ®
2.0 interface can be used when the
ignition switch or the operation mode is in ON or
ACC.
Before you can use the Bluetooth ®
2.0 interface,
you must pair the Bluetooth ®
device and Blue-
tooth ®
2.0 interface. Refer to “Connecting the Blue-
tooth® 2.0 interface and Bluetooth® device” on
page 5-46.
Bluetooth ®
is a registered trademark of BLUE-
TOOTH SIG, INC. For pleasant driving
5-41 5
OGWE12E1
Page 290 of 378
NOTE
l In
cold conditions (when the ambient temper-
ature is 0 °C or lower), thickening of the tyre
sealant can make the tyre sealant hard to
squeeze out of the bottle. Warm the bottle in-
side the vehicle.
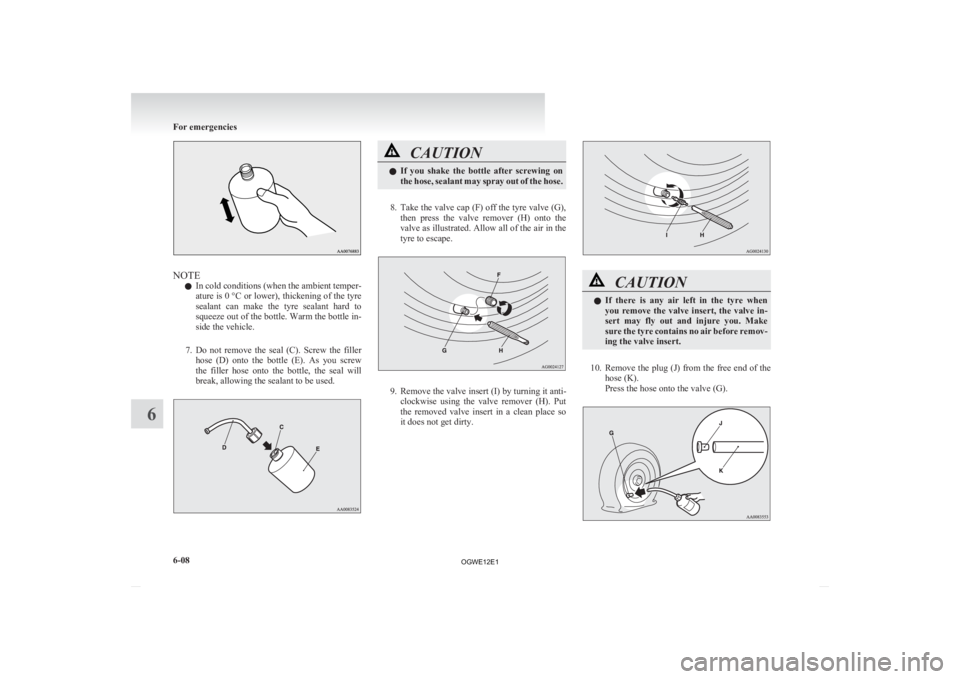
7. Do not remove the seal (C). Screw the filler hose (D) onto the bottle (E). As you screw
the filler hose onto the bottle, the seal will
break, allowing the sealant to be used. CAUTION
l
If
you shake the bottle after screwing on
the hose, sealant may spray out of the hose.
8. Take
the valve cap (F) off the tyre valve (G), then press the valve remover (H) onto the
valve as illustrated. Allow all of the air in the
tyre to escape. 9. Remove the valve insert (I) by turning it anti-
clockwise
using the valve remover (H). Put
the removed valve insert in a clean place so
it does not get dirty. CAUTION
l
If
there is any air left in the tyre when
you remove the valve insert, the valve in-
sert may fly out and injure you. Make
sure the tyre contains no air before remov-
ing the valve insert.
10. Remove
the plug (J) from the free end of the
hose (K).
Press the hose onto the valve (G). For emergencies
6-08
6
OGWE12E1
Page 295 of 378
CAUTION
l
The temporary spare wheel is for tempo-
rary use only and should be removed as
soon as the original wheel can be re-
paired or replaced.
l The vehicle must not be driven at speeds
in excess of 80 km/h (50 mph) while using
the temporary spare wheel.
l The T155/90D16 or T125/90D16 size
spare wheel is not as good as a standard
wheel in controllability and stability.
When the temporary spare wheel is used,
avoid quick starts, sudden braking and
sharp steering.
The tyre size of the 215/65R16 size tempo-
rary spare tyre is different from that of
the standard tyre. When the temporary
spare tyre is used, avoid quick starts, sud-
den braking and sharp steering.
l The temporary spare wheel is specifically
designed for your vehicle and it should
not be used on any other vehicle.
When you purchase a 215/65R16 size
spare wheel, be sure to purchase the type
designed specially for your vehicle from
your MITSUBISHI MOTORS Author-
ized Service Point. CAUTION
l
Do not use tyre chains with your tempora-
ry spare wheel. Because of the smaller
tyre size, a tyre chain will not fit proper-
ly. This could cause damage to the wheel
and result in loss of the chain.
If a front tyre becomes flat when using
tyre chains, first replace a rear wheel
with the temporary spare wheel and then
use the removed rear wheel to replace the
flat front wheel so that you can continue
to use the chains. CAUTION
l
Upon
installation of the T155/90D16 or
T125/90D16 size spare wheel, the ground
clearance is reduced as the tyre is smaller
in diameter than the standard tyre.
When passing over the projections on the
road, take care not to damage the vehi-
cle’s undercarriage. CAUTION
l
Do
not install more than one temporary
spare wheel at the same time.
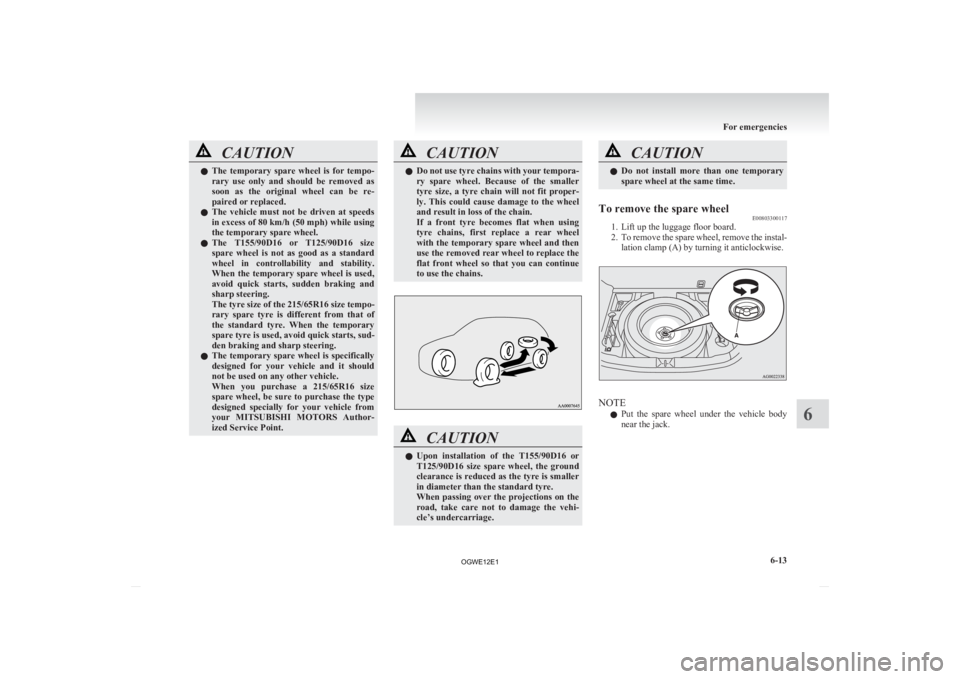
To remove the spare wheel E00803300117
1. Lift up the luggage floor board.
2. To
remove the spare wheel, remove the instal-
lation clamp (A) by turning it anticlockwise. NOTE
l Put
the spare wheel under the vehicle body
near the jack. For emergencies
6-13 6
OGWE12E1
Page 297 of 378
WARNING
l Stop jacking up the vehicle as soon as the
tyre is raised off the ground. It is danger-
ous to raise the vehicle any higher.
l Do not get under your vehicle while using
the jack.
l Do not bump the raised vehicle or leave it
sitting on the jack for a long time. Both
are very dangerous.
l Do not use a jack except the one that
came with your vehicle.
l The jack should not be used for any pur-
pose other than to change a tyre.
l No one should be in your vehicle when us-
ing the jack.
l Do not start or run the engine while your
vehicle is on the jack.
l Do not turn the raised wheel. The tyres
still on the ground could turn and make
your vehicle fall off the jack.
5. Remove
the wheel nuts with the wheel nut wrench, then take the wheel off. CAUTION
l
Handle
the wheel carefully when chang-
ing the tyre, to avoid scratching the wheel
surface.
6. Clean
out any mud, etc. on the hub surface (F), hub bolts (G) or in the installation holes
(H) in the wheel, and then mount the spare
tyre. WARNING
l Be
sure to position the tyres the correct
way when putting them on the vehicle.
The valves should be on the outer side of
the vehicle. If the valve (I) cannot be seen,
the tyre has been mounted the wrong way
around.
If tyres are mounted the wrong way
around it could have a negative effect on
the vehicle and cause an accident. 7. Turn
the wheel nuts clockwise by hand to in-
itially tighten them.
[Vehicle with the tapered nuts]
Initially tighten the wheel nuts until the ta-
pered part (A) of the nuts lightly touches the
wheel hole seats (B) enough to keep the tyre
from wobbling. [Vehicle with the flange nuts]
•
Aluminium wheelInitially tighten the wheel nuts until
the wheel nut flange area (C) touches For emergencies
6-15 6
OGWE12E1
Page 298 of 378
the wheel enough to keep the tyre
from wobbling.
• Steel wheel
Initially tighten the wheel nuts until
the tapered area (A) of the nuts lightly
touches the wheel hole seat area (B)
enough to keep the tyre from wobbling. CAUTION
l
Never
apply oil to either the wheel bolts
or the nuts, or they will tighten too much.
NOTE l Flange
nuts can be temporarily used on the
steel wheel, but return to the original wheel
and tyre as soon as possible.
l If all 4 aluminium wheels are changed to
steel wheels, e.g. when fitting winter tyres,
use tapered nuts.
8. Lower the vehicle slowly by rotating the wheel nut wrench anticlockwise until the
tyre touches the ground. 9. Tighten
the nuts in the order shown in the il-
lustration until each nut has been tightened
to the torque listed here.
Tightening torque 88 to 108 Nm (Achieved
by applying force of 350 to 420 N
at end of wheel nut wrench supplied with ve-
hicle) CAUTION
l
Never
use your foot or a pipe extension
for extra force in the wheel nut wrench.
If you do so, you will tighten the nut too
much.
10. If the vehicle has a wheel cover, install it. Refer to “Wheel covers” on page
6-17.
11. Lower and remove the jack, then store the jack, flat tyre, and chocks. Have your dam-
aged tyre repaired as soon as possible.
12. Check your tyre inflation pressure at the next gasstation. For emergencies
6-16
6
OGWE12E1