Engine MITSUBISHI ASX 2014 (in English) Owner's Guide
[x] Cancel search | Manufacturer: MITSUBISHI, Model Year: 2014, Model line: ASX, Model: MITSUBISHI ASX 2014Pages: 418, PDF Size: 14.02 MB
Page 42 of 418
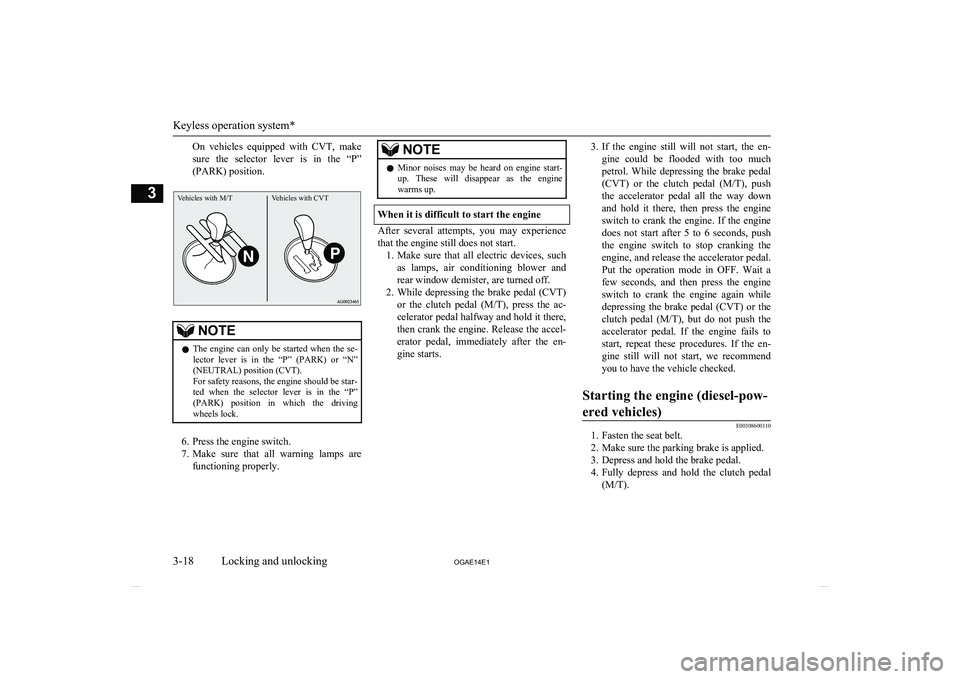
On vehicles equipped with CVT, make
sure the selector lever is in the “P”
(PARK) position.Vehicles with M/TVehicles with CVT
NOTEl The engine can only be started when the se-
lector lever is in the “P” (PARK) or “N” (NEUTRAL) position (CVT).
For safety reasons, the engine should be star-
ted when the selector lever is in the “P” (PARK) position in which the driving
wheels lock.
6. Press the engine switch.
7. Make sure that all warning lamps are
functioning properly.
NOTEl Minor noises may be heard on engine start-
up. These will disappear as the engine
warms up.
When it is difficult to start the engine
After several attempts, you may experience
that the engine still does not start. 1. Make sure that all electric devices, such
as lamps, air conditioning blower and
rear window demister, are turned off.
2. While depressing the brake pedal ( CVT)
or the clutch pedal ( M/T), press the ac-
celerator pedal halfway and hold it there, then crank the engine. Release the accel-erator pedal, immediately after the en-
gine starts.
3. If the engine still will not start, the en-
gine could be flooded with too much
petrol. While depressing the brake pedal (CVT ) or the clutch pedal ( M/T), push
the accelerator pedal all the way down and hold it there, then press the engine
switch to crank the engine. If the engine does not start after 5 to 6 seconds, push
the engine switch to stop cranking the
engine, and release the accelerator pedal. Put the operation mode in OFF. Wait a
few seconds, and then press the engine
switch to crank the engine again while
depressing the brake pedal ( CVT) or the
clutch pedal ( M/T), but do not push the
accelerator pedal. If the engine fails to
start, repeat these procedures. If the en-
gine still will not start, we recommend
you to have the vehicle checked.Starting the engine (diesel-pow-
ered vehicles)
E00308600110
1. Fasten the seat belt.
2. Make sure the parking brake is applied.
3. Depress and hold the brake pedal.
4. Fully depress and hold the clutch pedal
(M/T).
Keyless operation system*
3-18 OGAE14E1Locking and unlocking3
Page 43 of 418
NOTElOn vehicles with the Auto Stop & Go
(AS&G) system, the starter will not operate
unless the clutch pedal is fully depressed
(Clutch interlock).
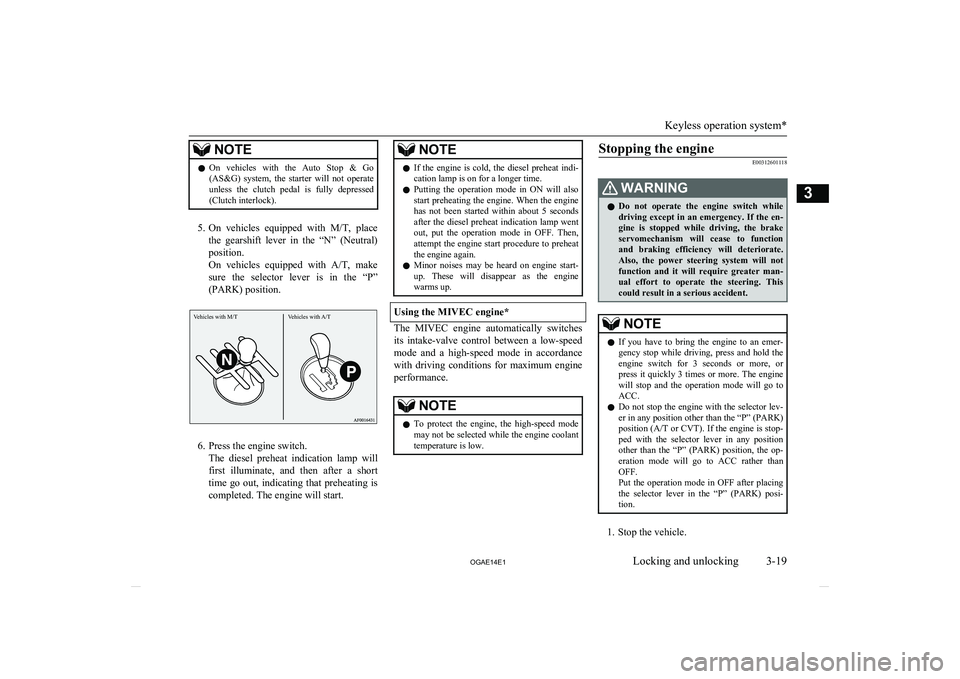
5. On vehicles equipped with M/T, place
the gearshift lever in the “N” (Neutral) position.
On vehicles equipped with A/T, make
sure the selector lever is in the “P”
(PARK) position.
6. Press the engine switch. The diesel preheat indication lamp willfirst illuminate, and then after a short
time go out, indicating that preheating is completed. The engine will start.
NOTEl If the engine is cold, the diesel preheat indi-
cation lamp is on for a longer time.
l Putting the operation mode in ON will also
start preheating the engine. When the engine
has not been started within about 5 seconds after the diesel preheat indication lamp went
out, put the operation mode in OFF. Then, attempt the engine start procedure to preheatthe engine again.
l Minor noises may be heard on engine start-
up. These will disappear as the engine
warms up.
Using the MIVEC engine*
The MIVEC engine automatically switches
its intake-valve control between a low-speed mode and a high-speed mode in accordancewith driving conditions for maximum engine
performance.
NOTEl To protect the engine, the high-speed mode
may not be selected while the engine coolanttemperature is low.Stopping the engine
E00312601118WARNINGl Do not operate the engine switch while
driving except in an emergency. If the en-
gine is stopped while driving, the brake servomechanism will cease to function
and braking efficiency will deteriorate. Also, the power steering system will notfunction and it will require greater man-
ual effort to operate the steering. This
could result in a serious accident.NOTEl If you have to bring the engine to an emer-
gency stop while driving, press and hold the engine switch for 3 seconds or more, or
press it quickly 3 times or more. The engine will stop and the operation mode will go to ACC.
l Do not stop the engine with the selector lev-
er in any position other than the “P” (PARK) position (A/T or CVT ). If the engine is stop-
ped with the selector lever in any position
other than the “P” (PARK) position, the op- eration mode will go to ACC rather thanOFF.
Put the operation mode in OFF after placing the selector lever in the “P” (PARK) posi-
tion.
1. Stop the vehicle.
Keyless operation system*
3-19
OGAE14E1Locking and unlocking3 Vehicles with M/T Vehicles with A/T
Page 44 of 418
2.Fully engage the parking brake while de-
pressing the brake pedal.
3. On vehicles with M/T, press the engine
switch to stop the engine, move the gear-
shift lever to the 1 st
(on an uphill) or “R”
(Reverse) (on a downhill) position.
On vehicles with A/T or CVT , move the
selector lever to the “P” (PARK) posi- tion, press the engine switch to stop the
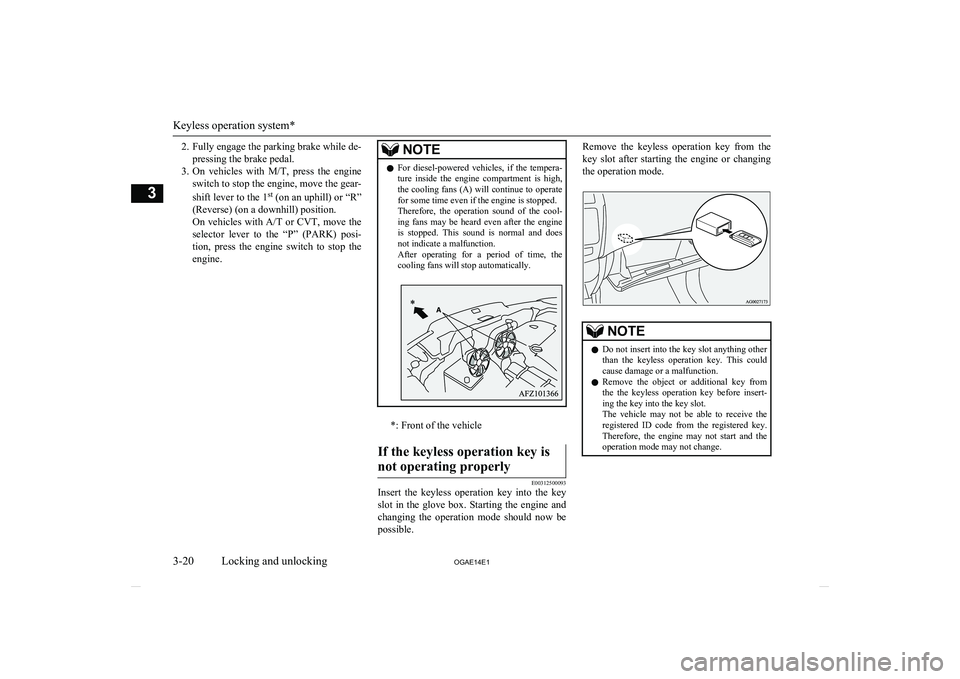
engine.NOTEl For diesel-powered vehicles, if the tempera-
ture inside the engine compartment is high,
the cooling fans (A) will continue to operate for some time even if the engine is stopped.
Therefore, the operation sound of the cool-
ing fans may be heard even after the engine is stopped. This sound is normal and does
not indicate a malfunction.
After operating for a period of time, the cooling fans will stop automatically.
*: Front of the vehicle
If the keyless operation key is
not operating properly
E00312500093
Insert the keyless operation key into the key
slot in the glove box. Starting the engine and changing the operation mode should now be possible.
Remove the keyless operation key from the
key slot after starting the engine or changing the operation mode.NOTEl Do not insert into the key slot anything other
than the keyless operation key. This couldcause damage or a malfunction.
l Remove the object or additional key from
the the keyless operation key before insert-ing the key into the key slot.
The vehicle may not be able to receive the
registered ID code from the registered key.
Therefore, the engine may not start and the
operation mode may not change.
Keyless operation system*
3-20 OGAE14E1Locking and unlocking3
Page 50 of 418
To lock without using the key
Front passenger’s door, Reardoor
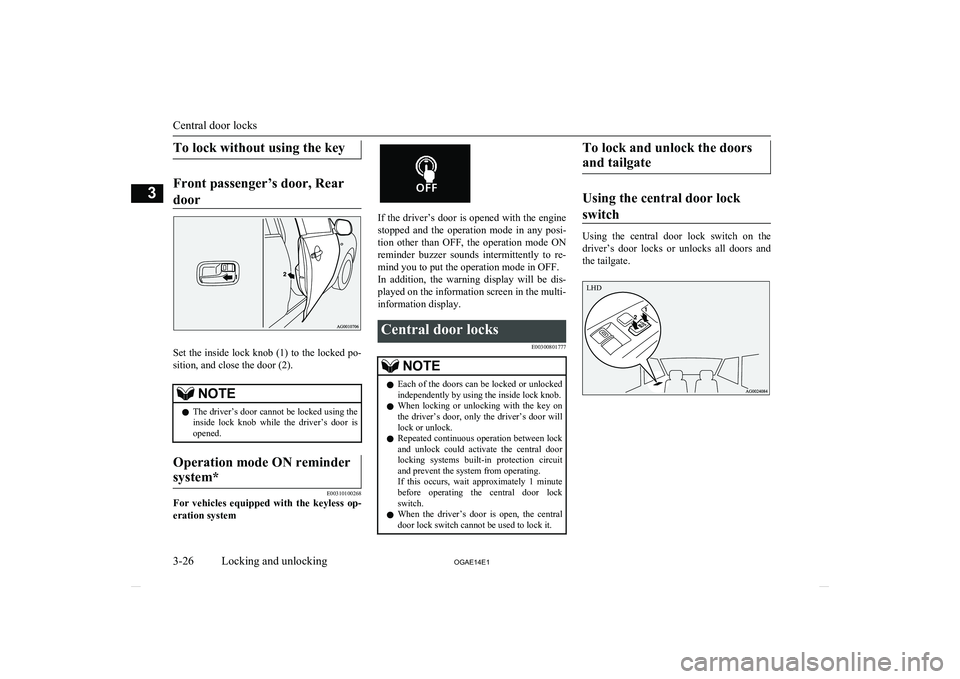
Set the inside lock knob (1) to the locked po- sition, and close the door (2).
NOTEl The driver’s door cannot be locked using the
inside lock knob while the driver’s door is
opened.Operation mode ON reminder
system*
E00310100268
For vehicles equipped with the keyless op-
eration system
If the driver’s door is opened with the engine stopped and the operation mode in any posi-
tion other than OFF, the operation mode ON reminder buzzer sounds intermittently to re-
mind you to put the operation mode in OFF.
In addition, the warning display will be dis- played on the information screen in the multi-information display.
Central door locks
E00300801777NOTElEach of the doors can be locked or unlocked
independently by using the inside lock knob.
l When locking or unlocking with the key on
the driver’s door, only the driver’s door will
lock or unlock.
l Repeated continuous operation between lock
and unlock could activate the central door
locking systems built-in protection circuit
and prevent the system from operating.
If this occurs, wait approximately 1 minute before operating the central door lock
switch.
l When the driver’s door is open, the central
door lock switch cannot be used to lock it.To lock and unlock the doors
and tailgate
Using the central door lock
switch
Using the central door lock switch on the
driver’s door locks or unlocks all doors and the tailgate.
Central door locks
3-26 OGAE14E1Locking and unlocking3 LHD
Page 51 of 418
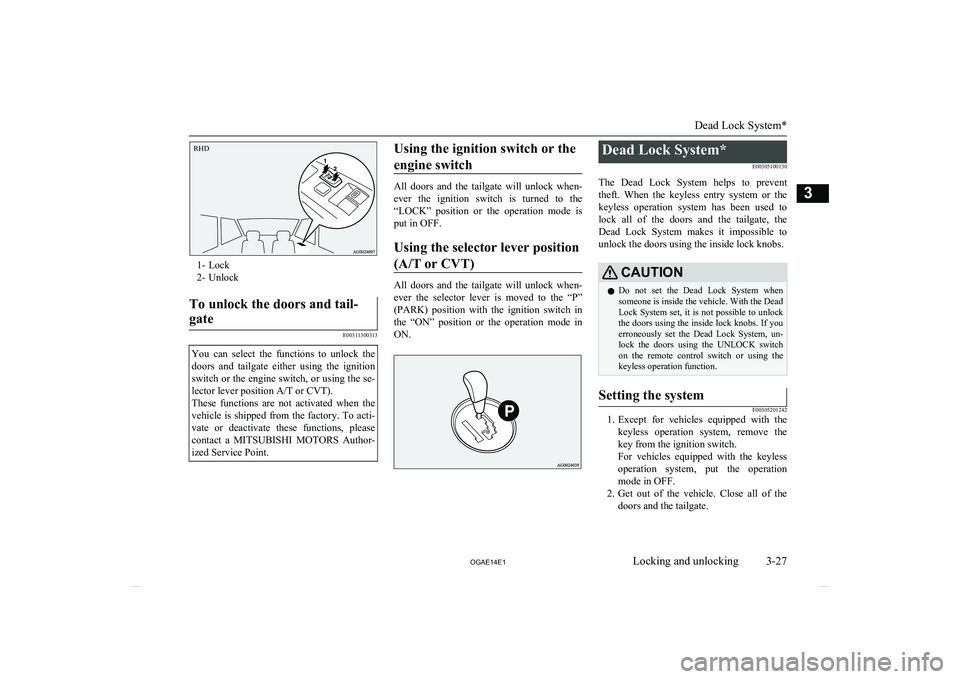
1- Lock
2- Unlock
To unlock the doors and tail-
gate
E00311300313
You can select the functions to unlock the doors and tailgate either using the ignition
switch or the engine switch, or using the se- lector lever position A/T or CVT).
These functions are not activated when the vehicle is shipped from the factory. To acti-
vate or deactivate these functions, please contact a MITSUBISHI MOTORS Author-
ized Service Point.Using the ignition switch or the
engine switch
All doors and the tailgate will unlock when-
ever the ignition switch is turned to the
“LOCK” position or the operation mode is put in OFF.
Using the selector lever position
(A/T or CVT)
All doors and the tailgate will unlock when-
ever the selector lever is moved to the “P” (PARK) position with the ignition switch inthe “ON” position or the operation mode in
ON.
Dead Lock System*
E00305100130
The Dead Lock System helps to prevent theft. When the keyless entry system or the
keyless operation system has been used to lock all of the doors and the tailgate, the
Dead Lock System makes it impossible to unlock the doors using the inside lock knobs.CAUTIONl Do not set the Dead Lock System when
someone is inside the vehicle. With the Dead
Lock System set, it is not possible to unlock the doors using the inside lock knobs. If you
erroneously set the Dead Lock System, un-
lock the doors using the UNLOCK switch on the remote control switch or using the
keyless operation function.Setting the system
E00305201242
1. Except for vehicles equipped with the
keyless operation system, remove the
key from the ignition switch.
For vehicles equipped with the keyless operation system, put the operation
mode in OFF.
2. Get out of the vehicle. Close all of the
doors and the tailgate.
Dead Lock System*
3-27
OGAE14E1Locking and unlocking3RHD
Page 64 of 418
Passenger’s switches
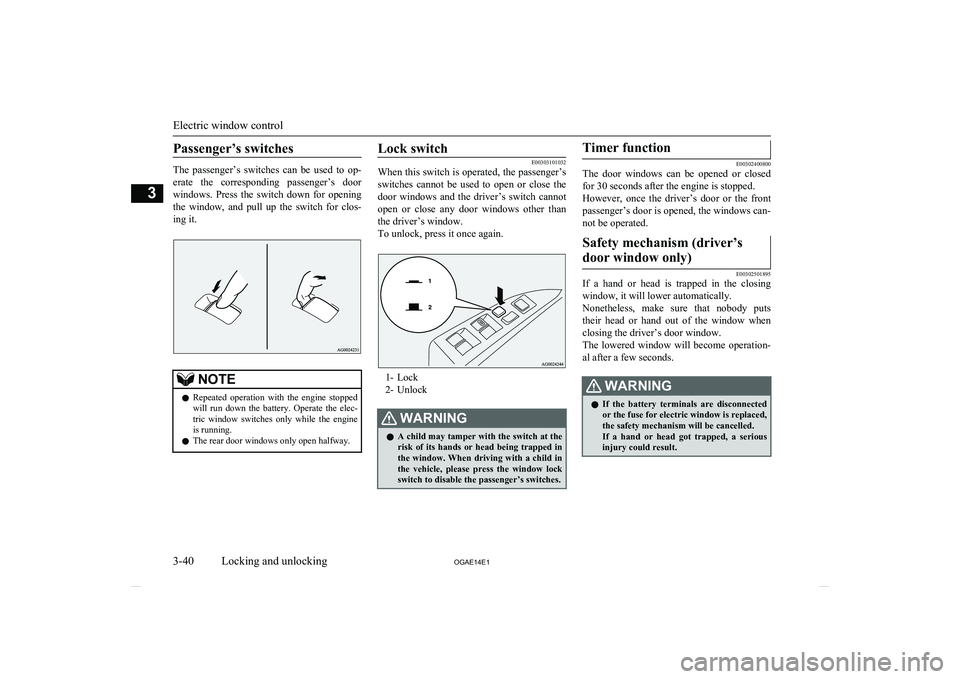
The passenger’s switches can be used to op-
erate the corresponding passenger’s door
windows. Press the switch down for opening the window, and pull up the switch for clos-
ing it.
NOTEl Repeated operation with the engine stopped
will run down the battery. Operate the elec-
tric window switches only while the engine is running.
l The rear door windows only open halfway.Lock switch
E00303101032
When this switch is operated, the passenger’s
switches cannot be used to open or close the door windows and the driver’s switch cannot
open or close any door windows other than
the driver’s window.
To unlock, press it once again.
1- Lock
2- Unlock
WARNINGl A child may tamper with the switch at the
risk of its hands or head being trapped in the window. When driving with a child in
the vehicle, please press the window lock switch to disable the passenger’s switches.Timer function
E00302400800
The door windows can be opened or closed
for 30 seconds after the engine is stopped.
However, once the driver’s door or the front passenger’s door is opened, the windows can-
not be operated.
Safety mechanism (driver’s
door window only)
E00302501895
If a hand or head is trapped in the closing
window, it will lower automatically.
Nonetheless, make sure that nobody puts
their head or hand out of the window when closing the driver’s door window.
The lowered window will become operation-
al after a few seconds.
WARNINGl If the battery terminals are disconnected
or the fuse for electric window is replaced,
the safety mechanism will be cancelled. If a hand or head got trapped, a serious injury could result.
Electric window control
3-40 OGAE14E1Locking and unlocking3
Page 65 of 418
CAUTIONlThe safety mechanism is cancelled just be-
fore the window is fully closed. This allows the window to close completely. Therefore be especially careful that no fingers are trap-
ped in the window.
l The safety mechanism is deactivated while
the switch is pulled up. Therefore be espe-
cially careful that fingers are not trapped in the door window opening.NOTEl The safety mechanism can be activated if the
driving conditions or other circumstancescause the driver’s door window to be subjec- ted to a physical shock similar to that caused
by a trapped hand or head.
l If the battery terminals are disconnected or
the fuse for electric window is replaced, the
safety mechanism will be cancelled and the door window will not automatically open/ close completely.
If the window is open, repeatedly raise the
driver’s door window switch until the win-
dow has been fully closed.
Following this, release the switch, raise the switch once again and hold it in this condi- tion for at least 1 second, then release it.
You should now be able to operate the driv- er’s door window in the normal fashion.Sunshade*
E00302800279WARNINGlNever leave a child (or other person who
might not be capable of safe operation of the sunshade switch) in the vehicle alone.
l Before operating the sunshade, make sure
that nothing can be trapped (head, hand,
finger, etc.).
l Do not bring your head, hand, finger, etc.
near the opening edge of the sunshade re-
ceptacle while the vehicle is in motion.
It may cause injury to your head, hand, finger, etc. in the event of sudden braking.CAUTIONl Do not place heavy luggage on the panoram-
ic glass roof. Doing so could damage the glass roof.
l Do not hang heavy luggage from, allow a
person to hang onto, or apply any other strong force to the opening of the sunshade receptacle or the parts between the ceiling
and the sunshade opening on either side. Do- ing so could damage the sunshade.NOTEl Release the switch as soon as the sunshade
reaches the fully open or fully closed posi-
tion.NOTEl If the sunshade does not operate when the
sunshade switch is operated, release the
switch and check whether something is trap- ped by the sunshade. If nothing is trapped,
we recommend you to have the sunshade checked.
l Operating the sunshade repeatedly with the
engine stationary will run down the battery.
Operate the sunshade while the engine is running.
l Close the sunshade when parking the vehicle
for a long time. Parking in the hot sun with
the sunshade open will make the vehicle in-
side extremely hot.
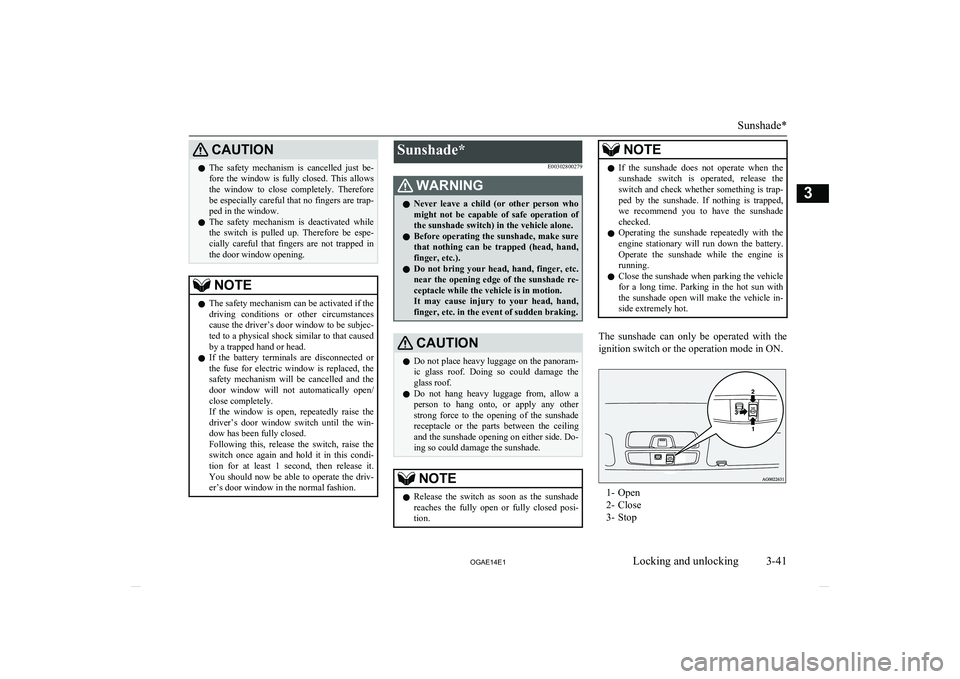
The sunshade can only be operated with the
ignition switch or the operation mode in ON.
1- Open
2- Close
3- Stop
Sunshade*
3-41
OGAE14E1Locking and unlocking3
Page 70 of 418
Power type
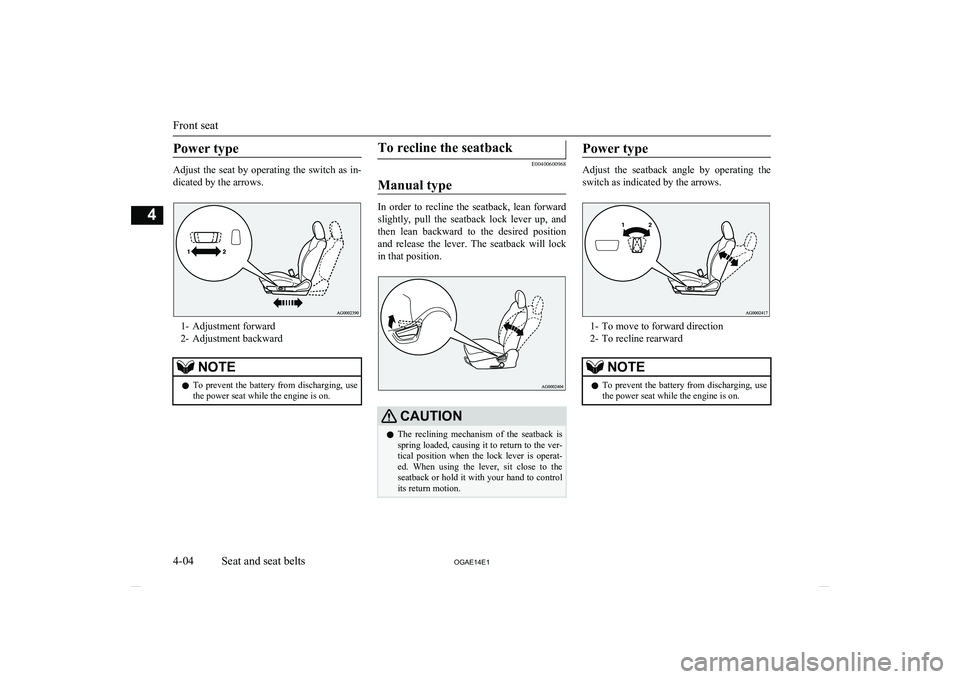
Adjust the seat by operating the switch as in-
dicated by the arrows.
1- Adjustment forward
2- Adjustment backward
NOTEl To prevent the battery from discharging, use
the power seat while the engine is on.To recline the seatback
E00400600968
Manual type
In order to recline the seatback, lean forward slightly, pull the seatback lock lever up, and
then lean backward to the desired position
and release the lever. The seatback will lock in that position.
CAUTIONl The reclining mechanism of the seatback is
spring loaded, causing it to return to the ver- tical position when the lock lever is operat- ed. When using the lever, sit close to the
seatback or hold it with your hand to control its return motion.Power type
Adjust the seatback angle by operating the
switch as indicated by the arrows.
1- To move to forward direction
2- To recline rearward
NOTEl To prevent the battery from discharging, use
the power seat while the engine is on.
Front seat
4-04 OGAE14E1Seat and seat belts4
Page 71 of 418
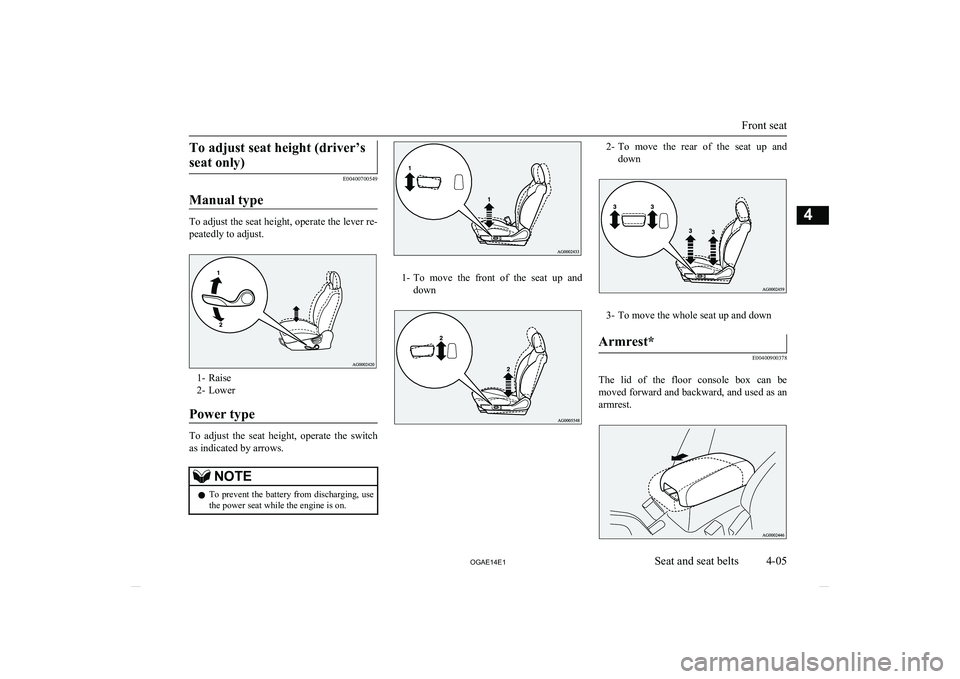
To adjust seat height (driver’sseat only)
E00400700549
Manual type
To adjust the seat height, operate the lever re-
peatedly to adjust.
1- Raise
2- Lower
Power type
To adjust the seat height, operate the switch
as indicated by arrows.
NOTEl To prevent the battery from discharging, use
the power seat while the engine is on.
1- To move the front of the seat up and
down
2- To move the rear of the seat up and
down
3- To move the whole seat up and down
Armrest*
E00400900378
The lid of the floor console box can be moved forward and backward, and used as an
armrest.
Front seat
4-05
OGAE14E1Seat and seat belts4
Page 106 of 418
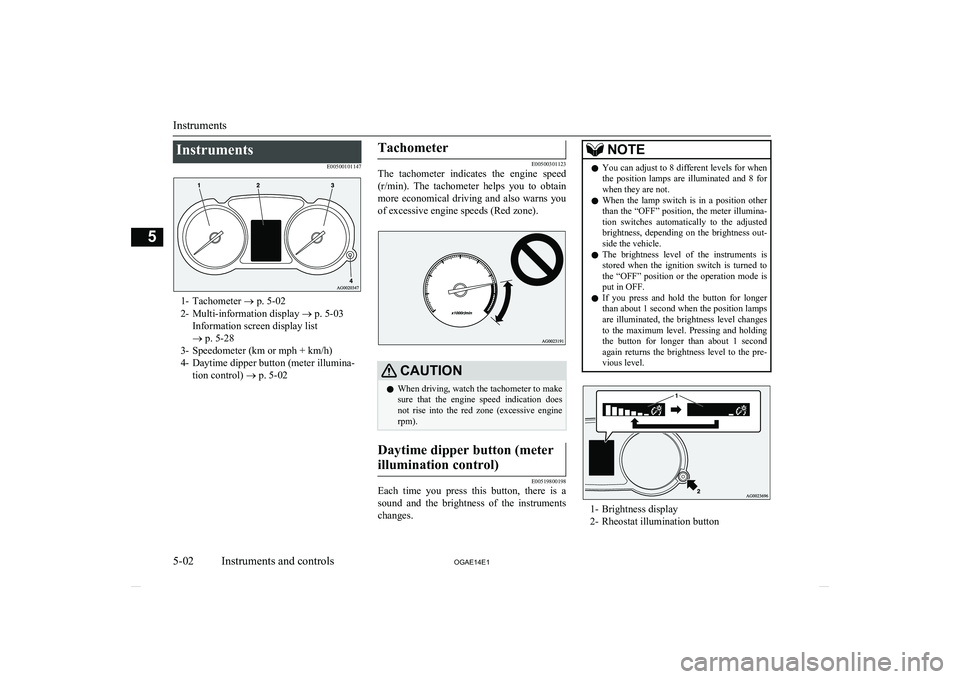
InstrumentsE00500101147
1- Tachometer ® p. 5-02
2- Multi-information display ® p. 5-03
Information screen display list
® p. 5-28
3- Speedometer (km or mph + km/h)
4- Daytime dipper button (meter illumina- tion control) ® p. 5-02
Tachometer
E00500301123
The tachometer indicates the engine speed
(r/min). The tachometer helps you to obtain
more economical driving and also warns you
of excessive engine speeds (Red zone).
CAUTIONl When driving, watch the tachometer to make
sure that the engine speed indication does not rise into the red zone (excessive enginerpm).Daytime dipper button (meter
illumination control)
E00519800198
Each time you press this button, there is a sound and the brightness of the instruments
changes.
NOTEl You can adjust to 8 different levels for when
the position lamps are illuminated and 8 for
when they are not.
l When the lamp switch is in a position other
than the “OFF” position, the meter illumina-
tion switches automatically to the adjusted brightness, depending on the brightness out- side the vehicle.
l The brightness level of the instruments is
stored when the ignition switch is turned to
the “OFF” position or the operation mode is put in OFF.
l If you press and hold the button for longer
than about 1 second when the position lamps are illuminated, the brightness level changesto the maximum level. Pressing and holding
the button for longer than about 1 second again returns the brightness level to the pre-
vious level.
1- Brightness display
2- Rheostat illumination button
Instruments
5-02 OGAE14E1Instruments and controls5