relay MITSUBISHI ASX 2014 Owner's Manual (in English)
[x] Cancel search | Manufacturer: MITSUBISHI, Model Year: 2014, Model line: ASX, Model: MITSUBISHI ASX 2014Pages: 418, PDF Size: 14.02 MB
Page 375 of 418

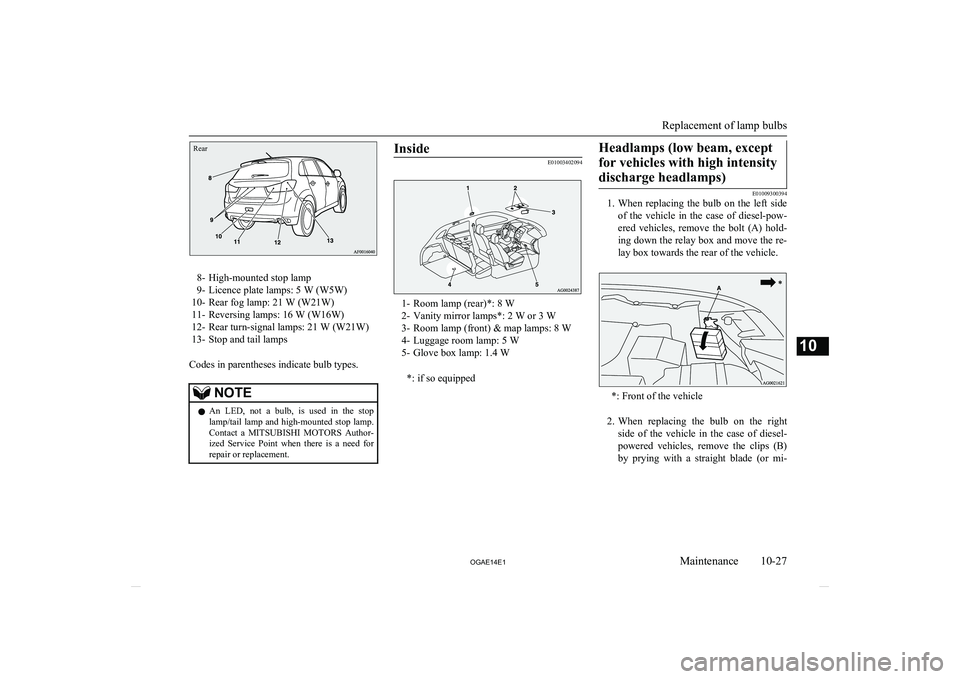
Rear
8- High-mounted stop lamp
9- Licence plate lamps: 5 W (W5W)
10- Rear fog lamp: 21 W (W21W)
11- Reversing lamps: 16 W (W16W)
12- Rear turn-signal lamps: 21 W (W21W) 13- Stop and tail lamps
Codes in parentheses indicate bulb types.
NOTEl An LED, not a bulb, is used in the stop
lamp/tail lamp and high-mounted stop lamp.
Contact a MITSUBISHI MOTORS Author-
ized Service Point when there is a need for
repair or replacement.Inside
E01003402094
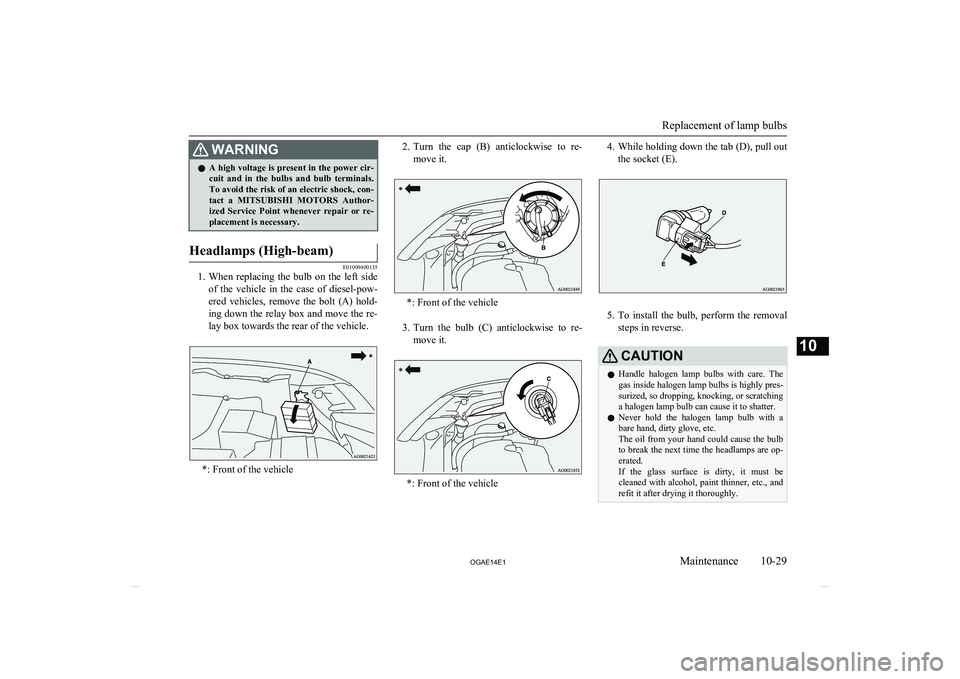
1- Room lamp (rear)*: 8 W
2- Vanity mirror lamps*: 2 W or 3 W
3- Room lamp (front) & map lamps: 8 W
4- Luggage room lamp: 5 W
5- Glove box lamp: 1.4 W
*: if so equipped
Headlamps (low beam, exceptfor vehicles with high intensitydischarge headlamps)
E01009300394
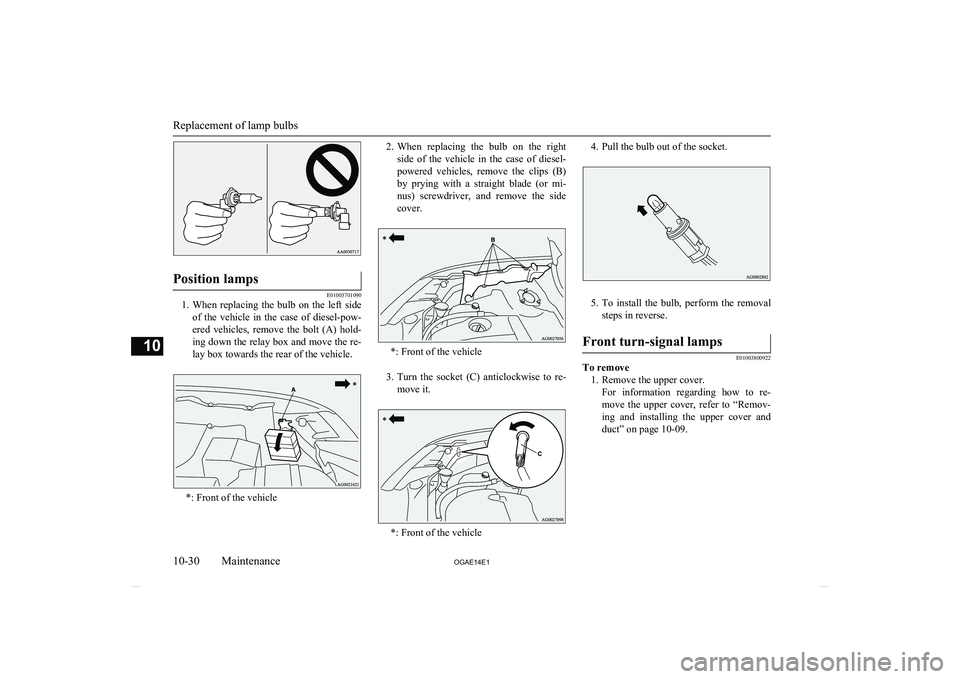
1. When replacing the bulb on the left side
of the vehicle in the case of diesel-pow- ered vehicles, remove the bolt (A) hold-
ing down the relay box and move the re- lay box towards the rear of the vehicle.
*: Front of the vehicle
2. When replacing the bulb on the right
side of the vehicle in the case of diesel-
powered vehicles, remove the clips (B)
by prying with a straight blade (or mi-
Replacement of lamp bulbs
10-27
OGAE14E1Maintenance10
Page 377 of 418

WARNINGlA high voltage is present in the power cir-
cuit and in the bulbs and bulb terminals.To avoid the risk of an electric shock, con-
tact a MITSUBISHI MOTORS Author-
ized Service Point whenever repair or re- placement is necessary.Headlamps (High-beam)
E01009400135
1. When replacing the bulb on the left side
of the vehicle in the case of diesel-pow-
ered vehicles, remove the bolt (A) hold-
ing down the relay box and move the re- lay box towards the rear of the vehicle.
*: Front of the vehicle
2. Turn the cap (B) anticlockwise to re-
move it.
*: Front of the vehicle
3. Turn the bulb (C) anticlockwise to re-
move it.
*: Front of the vehicle
4. While holding down the tab (D), pull out
the socket (E).
5. To install the bulb, perform the removal
steps in reverse.
CAUTIONl Handle halogen lamp bulbs with care. The
gas inside halogen lamp bulbs is highly pres- surized, so dropping, knocking, or scratching
a halogen lamp bulb can cause it to shatter.
l Never hold the halogen lamp bulb with a
bare hand, dirty glove, etc.
The oil from your hand could cause the bulb to break the next time the headlamps are op-
erated.
If the glass surface is dirty, it must be cleaned with alcohol, paint thinner, etc., and
refit it after drying it thoroughly.
Replacement of lamp bulbs
10-29
OGAE14E1Maintenance10
Page 378 of 418

Position lamps
E01003701090
1.When replacing the bulb on the left side
of the vehicle in the case of diesel-pow-
ered vehicles, remove the bolt (A) hold-
ing down the relay box and move the re- lay box towards the rear of the vehicle.
*: Front of the vehicle
2. When replacing the bulb on the right
side of the vehicle in the case of diesel-
powered vehicles, remove the clips (B)
by prying with a straight blade (or mi- nus) screwdriver, and remove the side
cover.
*: Front of the vehicle
3. Turn the socket (C) anticlockwise to re-
move it.
*: Front of the vehicle
4. Pull the bulb out of the socket.
5. To install the bulb, perform the removal
steps in reverse.
Front turn-signal lamps
E01003800922
To remove 1. Remove the upper cover. For information regarding how to re-move the upper cover, refer to “Remov-
ing and installing the upper cover and duct” on page 10-09.
Replacement of lamp bulbs
10-30 OGAE14E1Maintenance10