ECO mode MITSUBISHI ASX 2017 (in English) Owner's Guide
[x] Cancel search | Manufacturer: MITSUBISHI, Model Year: 2017, Model line: ASX, Model: MITSUBISHI ASX 2017Pages: 458, PDF Size: 22.98 MB
Page 59 of 458
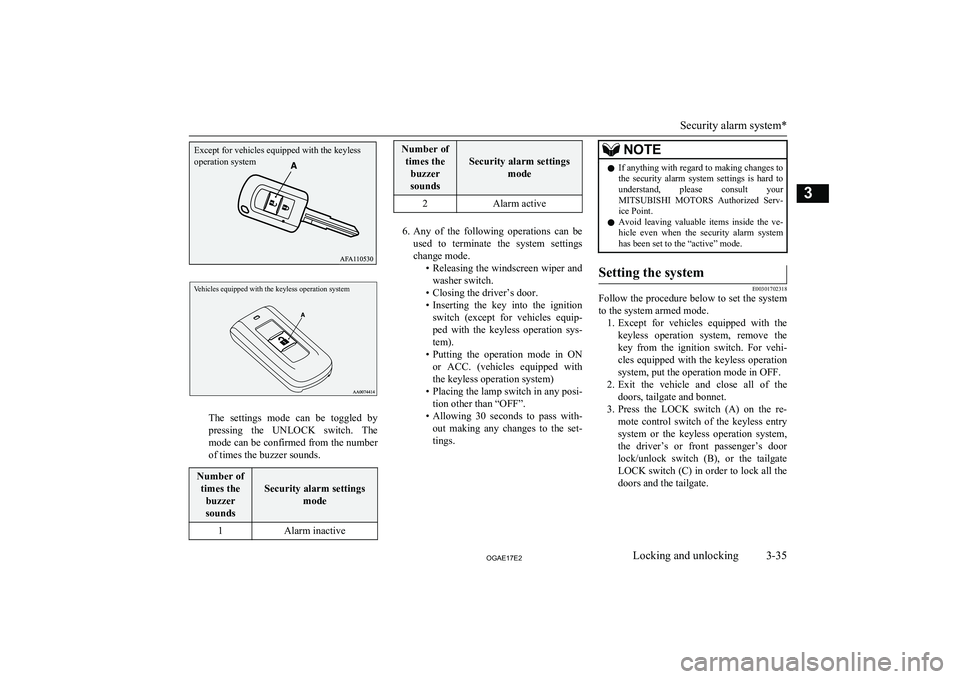
Vehicles equipped with the keyless operation system
The settings mode can be toggled by
pressing the UNLOCK switch. The mode can be confirmed from the numberof times the buzzer sounds.
Number of
times the buzzer
sounds
Security alarm settings mode
1Alarm inactiveNumber oftimes the buzzer
sounds
Security alarm settings mode
2Alarm active
6.Any of the following operations can be
used to terminate the system settings change mode. •Releasing the windscreen wiper and
washer switch.
• Closing the driver’s door.
• Inserting the key into the ignition
switch (except for vehicles equip-
ped with the keyless operation sys- tem).
• Putting the operation mode in ON
or ACC. (vehicles equipped with the keyless operation system)
• Placing the lamp switch in any posi-
tion other than “OFF”.
• Allowing 30 seconds to pass with-
out making any changes to the set-
tings.
NOTEl If anything with regard to making changes to
the security alarm system settings is hard to understand, please consult yourMITSUBISHI MOTORS Authorized Serv-
ice Point.
l Avoid leaving valuable items inside the ve-
hicle even when the security alarm system
has been set to the “active” mode.Setting the system
E00301702318
Follow the procedure below to set the system
to the system armed mode. 1. Except for vehicles equipped with the
keyless operation system, remove the key from the ignition switch. For vehi-
cles equipped with the keyless operation
system, put the operation mode in OFF.
2. Exit the vehicle and close all of the
doors, tailgate and bonnet.
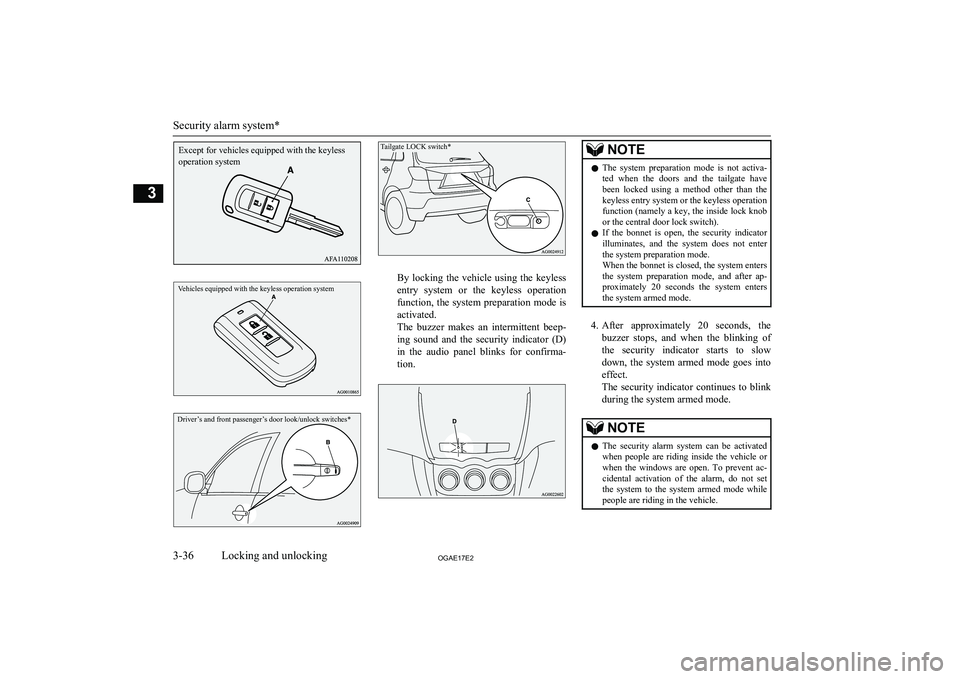
3. Press the LOCK switch (A) on the re-
mote control switch of the keyless entry
system or the keyless operation system, the driver’s or front passenger’s door
lock/unlock switch (B), or the tailgate LOCK switch (C) in order to lock all the doors and the tailgate.
Security alarm system*
3-35OGAE17E2Locking and unlocking3Except for vehicles equipped with the keyless operation system
Page 60 of 458
Vehicles equipped with the keyless operation systemDriver’s and front passenger’s door look/unlock switches*Tailgate LOCK switch*
By locking the vehicle using the keylessentry system or the keyless operation
function, the system preparation mode is activated.
The buzzer makes an intermittent beep-
ing sound and the security indicator (D) in the audio panel blinks for confirma-
tion.
NOTEl The system preparation mode is not activa-
ted when the doors and the tailgate havebeen locked using a method other than the
keyless entry system or the keyless operation
function (namely a key, the inside lock knob or the central door lock switch).
l If the bonnet is open, the security indicator
illuminates, and the system does not enter the system preparation mode.
When the bonnet is closed, the system enters the system preparation mode, and after ap- proximately 20 seconds the system enters
the system armed mode.
4. After approximately 20 seconds, the
buzzer stops, and when the blinking of the security indicator starts to slow
down, the system armed mode goes into effect.
The security indicator continues to blink
during the system armed mode.
NOTEl The security alarm system can be activated
when people are riding inside the vehicle or when the windows are open. To prevent ac-cidental activation of the alarm, do not set
the system to the system armed mode while people are riding in the vehicle.
Security alarm system*
3-36OGAE17E2Locking and unlocking3Except for vehicles equipped with the keyless operation system
Page 61 of 458
NOTElAvoid leaving valuable items inside the ve-
hicle even when the security alarm system
has been set to the “active” mode.To deactivate the vehicle incli-
nation detection function and the interior intrusion detectionfunction
E00312101487
The vehicle inclination detection function and the interior intrusion detection function
can be deactivated when parking in automa-
ted car parks, when leaving pets in the vehi- cle or when leaving the vehicle with the win-
dows slightly open. 1. Except for vehicles equipped with the
keyless operation system, remove the
key from the ignition switch. For vehi- cles equipped with the keyless operation
system, put the operation mode in OFF.
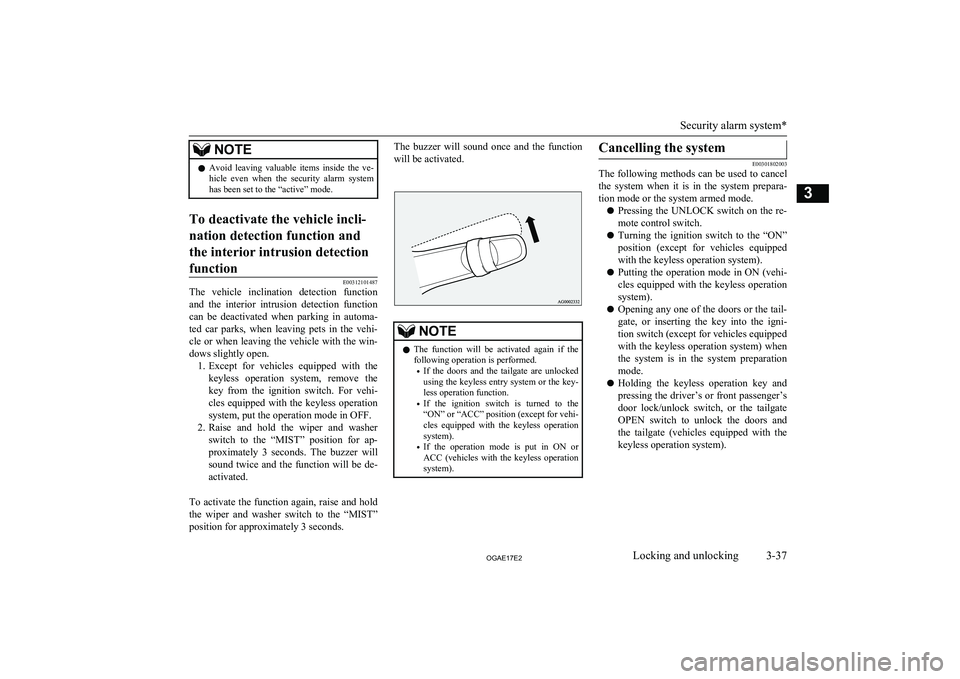
2. Raise and hold the wiper and washer
switch to the “MIST” position for ap- proximately 3 seconds. The buzzer will
sound twice and the function will be de-
activated.
To activate the function again, raise and hold
the wiper and washer switch to the “MIST” position for approximately 3 seconds.
The buzzer will sound once and the function
will be activated.
NOTEl The function will be activated again if the
following operation is performed.
• If the doors and the tailgate are unlocked
using the keyless entry system or the key-
less operation function.
• If the ignition switch is turned to the
“ON” or “ACC” position (except for vehi-
cles equipped with the keyless operation system).
• If the operation mode is put in ON or
ACC (vehicles with the keyless operation system).Cancelling the system
E00301802003
The following methods can be used to cancel
the system when it is in the system prepara- tion mode or the system armed mode.
l Pressing the UNLOCK switch on the re-
mote control switch.
l Turning the ignition switch to the “ON”
position (except for vehicles equipped
with the keyless operation system).
l Putting the operation mode in ON (vehi-
cles equipped with the keyless operation
system).
l Opening any one of the doors or the tail-
gate, or inserting the key into the igni-
tion switch (except for vehicles equipped
with the keyless operation system) when the system is in the system preparation
mode.
l Holding the keyless operation key and
pressing the driver’s or front passenger’s door lock/unlock switch, or the tailgateOPEN switch to unlock the doors and
the tailgate (vehicles equipped with the
keyless operation system).
Security alarm system*
3-37OGAE17E2Locking and unlocking3
Page 62 of 458
NOTElIf the bonnet is opened during the system
preparation mode, the system preparationcondition is suspended.
The system returns to the system preparation mode when the bonnet is closed.
l If the battery terminals are disconnected
while the system is in the system preparation mode, the memory will be erased.
l It is possible to register up to 8 remote con-
trol switches for the keyless entry system and 4 remote control switches for the key-
less operation system.
As long as they are registered, any of the re-
mote control switches, other than the one used to activate the system, can be used to cancel the system.
If you want to register additional remote control switches, please contact aMITSUBISHI MOTORS Authorized Serv-
ice Point.
l The activation distance for the keyless entry
system is approximately 4 m.
If it is not possible to lock or unlock the ve-
hicle by pressing the switch at the correct
distance or the security alarm system cannot be set or cancelled using the switch, the bat-
tery may need to be replaced.
For further information, please consult a
MITSUBISHI MOTORS Authorized Serv-
ice Point.
If you replace the battery yourself, refer to “Procedure for replacing the remote control
switch battery” on pages 3-06, 3-24.NOTEl If the UNLOCK switch on the remote con-
trol switch, or the driver’s or front passen-ger’s door lock/unlock switch is pressed and no door or the tailgate is opened within 30 seconds, the doors and the tailgate will auto- matically relock. In this case as well, the
system preparation mode will go into effect.
l The time between pressing the UNLOCK
switch on the remote control switch, or thedriver’s or front passenger’s door lock/
unlock switch and automatic locking can be adjusted. Please consult a MITSUBISHI
MOTORS Authorized Service Point.Alarm activation
E00301902310
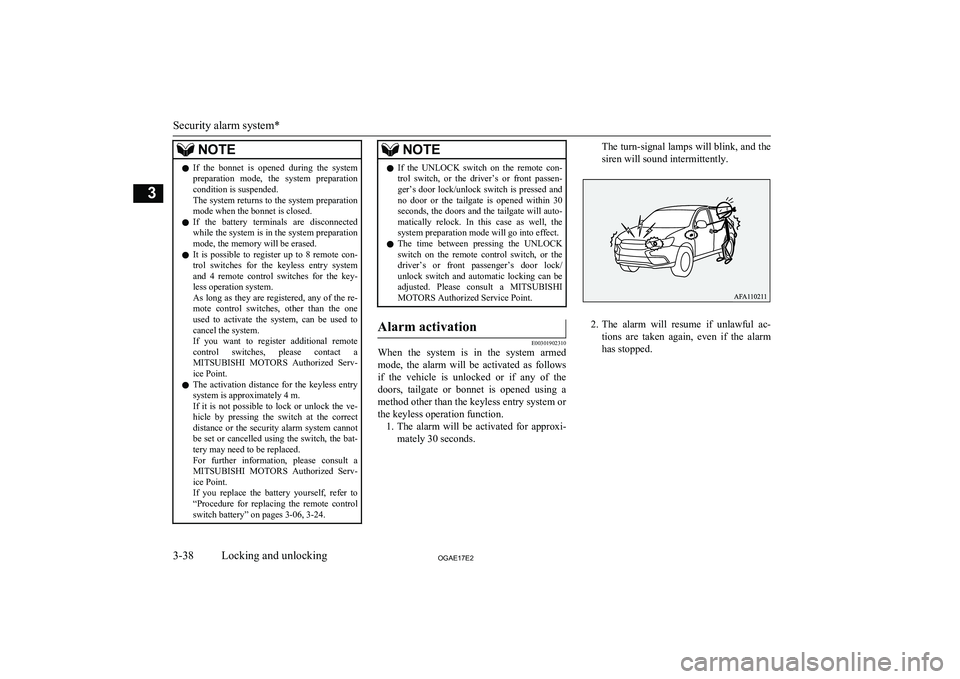
When the system is in the system armed
mode, the alarm will be activated as follows
if the vehicle is unlocked or if any of the doors, tailgate or bonnet is opened using a
method other than the keyless entry system or the keyless operation function. 1. The alarm will be activated for approxi-
mately 30 seconds.
The turn-signal lamps will blink, and the siren will sound intermittently.
2. The alarm will resume if unlawful ac-
tions are taken again, even if the alarm has stopped.
Security alarm system*
3-38OGAE17E2Locking and unlocking3
Page 66 of 458
NOTElClose the sunshade when parking the vehicle
for a long time. Parking in the hot sun with
the sunshade open will make the vehicle in-
side extremely hot.
The sunshade can only be operated with the
ignition switch or the operation mode in ON.
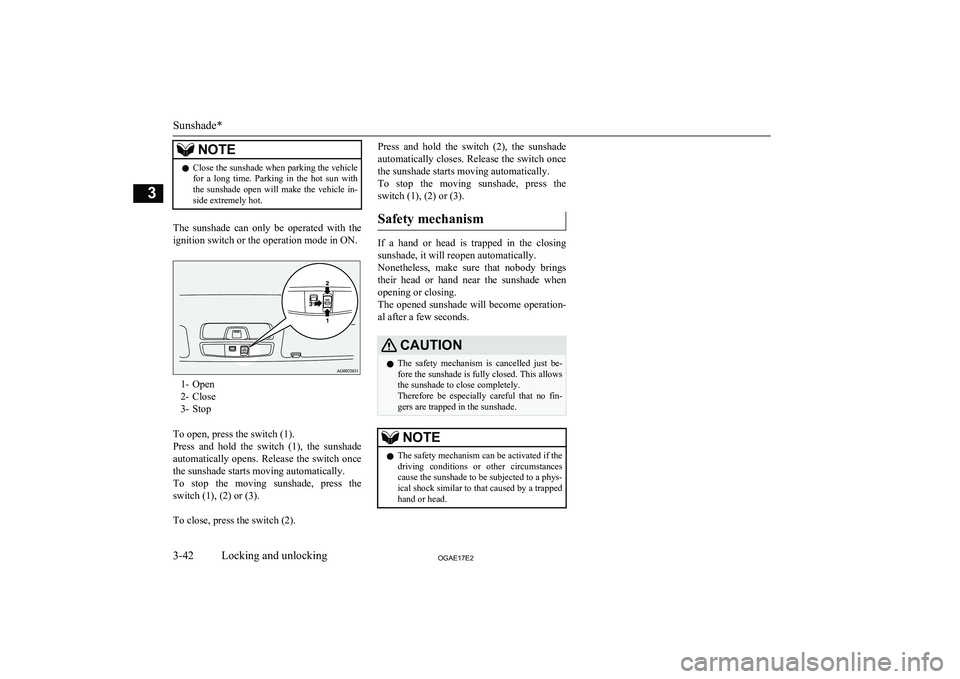
1- Open
2- Close
3- Stop
To open, press the switch (1).
Press and hold the switch (1), the sunshade automatically opens. Release the switch once
the sunshade starts moving automatically.
To stop the moving sunshade, press the
switch (1), (2) or (3).
To close, press the switch (2).
Press and hold the switch (2), the sunshade
automatically closes. Release the switch once
the sunshade starts moving automatically.
To stop the moving sunshade, press the
switch (1), (2) or (3).
Safety mechanism
If a hand or head is trapped in the closingsunshade, it will reopen automatically.
Nonetheless, make sure that nobody brings
their head or hand near the sunshade when opening or closing.
The opened sunshade will become operation-
al after a few seconds.
CAUTIONl The safety mechanism is cancelled just be-
fore the sunshade is fully closed. This allows the sunshade to close completely.
Therefore be especially careful that no fin-
gers are trapped in the sunshade.NOTEl The safety mechanism can be activated if the
driving conditions or other circumstancescause the sunshade to be subjected to a phys-
ical shock similar to that caused by a trapped
hand or head.
Sunshade*
3-42OGAE17E2Locking and unlocking3
Page 72 of 458
Heated seats*
E00401102397
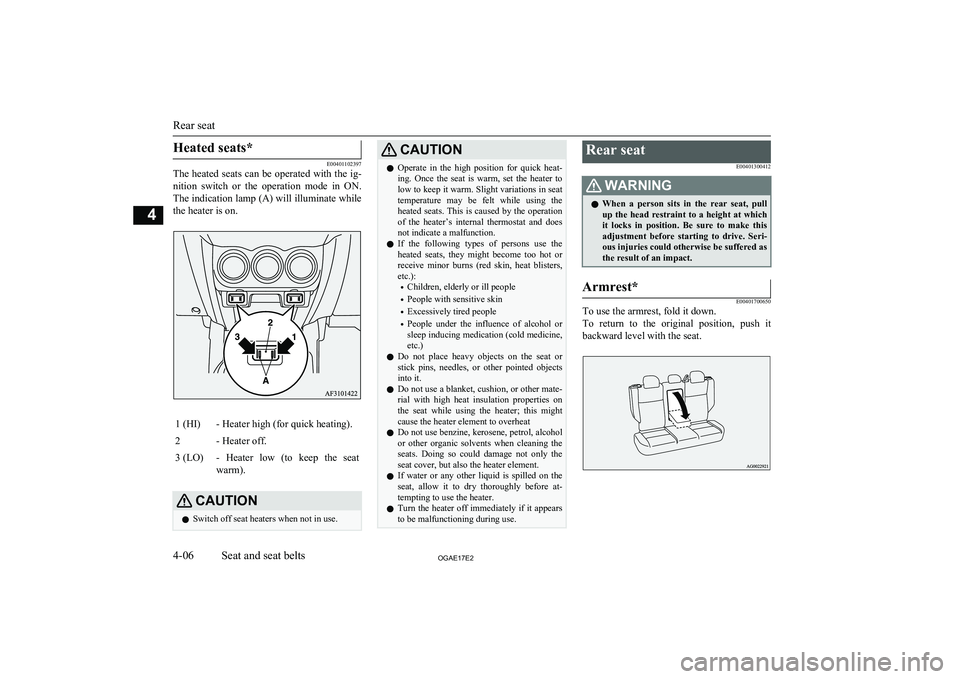
The heated seats can be operated with the ig-
nition switch or the operation mode in ON.
The indication lamp (A) will illuminate while the heater is on.
1 (HI)- Heater high (for quick heating).2- Heater off.3 (LO)- Heater low (to keep the seat
warm).CAUTIONl Switch off seat heaters when not in use.CAUTIONlOperate in the high position for quick heat-
ing. Once the seat is warm, set the heater to low to keep it warm. Slight variations in seat
temperature may be felt while using the heated seats. This is caused by the operation
of the heater’s internal thermostat and does not indicate a malfunction.
l If the following types of persons use the
heated seats, they might become too hot or receive minor burns (red skin, heat blisters,
etc.):
• Children, elderly or ill people
• People with sensitive skin
• Excessively tired people
• People under the influence of alcohol or
sleep inducing medication (cold medicine, etc.)
l Do not place heavy objects on the seat or
stick pins, needles, or other pointed objects into it.
l Do not use a blanket, cushion, or other mate-
rial with high heat insulation properties on the seat while using the heater; this might
cause the heater element to overheat
l Do not use benzine, kerosene, petrol, alcohol
or other organic solvents when cleaning the seats. Doing so could damage not only the seat cover, but also the heater element.
l If water or any other liquid is spilled on the
seat, allow it to dry thoroughly before at-tempting to use the heater.
l Turn the heater off immediately if it appears
to be malfunctioning during use.Rear seat
E00401300412WARNINGlWhen a person sits in the rear seat, pull
up the head restraint to a height at which
it locks in position. Be sure to make this adjustment before starting to drive. Seri- ous injuries could otherwise be suffered as
the result of an impact.Armrest*
E00401700650
To use the armrest, fold it down.
To return to the original position, push it
backward level with the seat.
Rear seat
4-06OGAE17E2Seat and seat belts4
Page 77 of 458
NOTElIf the seat belt (A) or ring (B) becomes dirty,
the belt may not retract smoothly. If the seatbelt and ring are dirty, clean them with a
mild soap or detergent solution.Driver’s seat belt warning
lamp and display
E00409800833
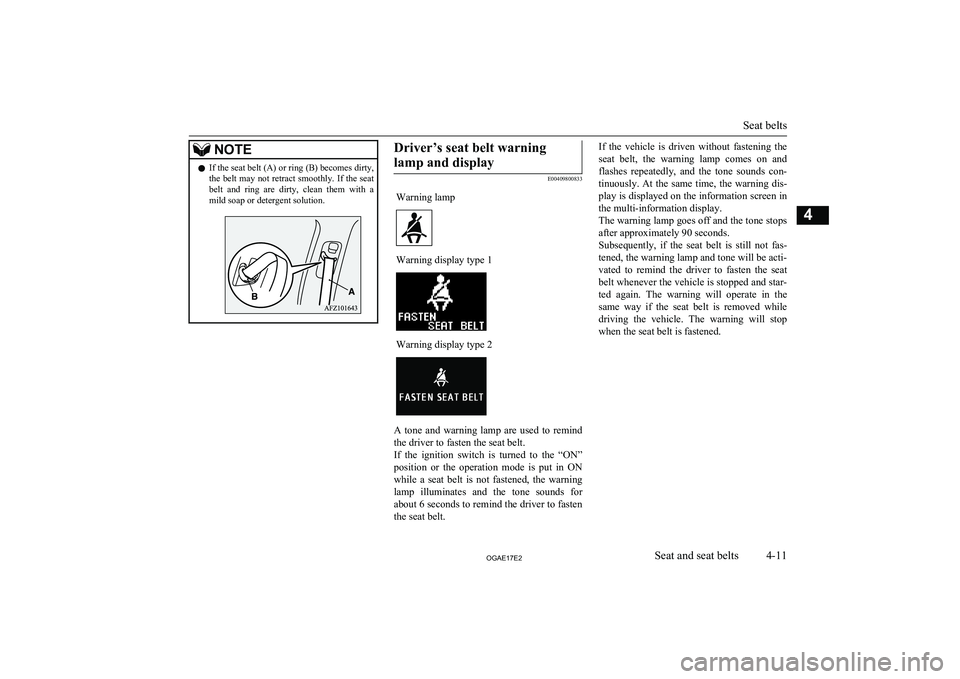
Warning lampWarning display type 1Warning display type 2
A tone and warning lamp are used to remind
the driver to fasten the seat belt.
If the ignition switch is turned to the “ON” position or the operation mode is put in ON
while a seat belt is not fastened, the warning lamp illuminates and the tone sounds for about 6 seconds to remind the driver to fasten
the seat belt.
If the vehicle is driven without fastening the
seat belt, the warning lamp comes on and
flashes repeatedly, and the tone sounds con-
tinuously. At the same time, the warning dis-
play is displayed on the information screen in the multi-information display.
The warning lamp goes off and the tone stops after approximately 90 seconds.
Subsequently, if the seat belt is still not fas-
tened, the warning lamp and tone will be acti-
vated to remind the driver to fasten the seat belt whenever the vehicle is stopped and star-ted again. The warning will operate in the
same way if the seat belt is removed while driving the vehicle. The warning will stop
when the seat belt is fastened.
Seat belts
4-11OGAE17E2Seat and seat belts4
Page 94 of 458
Front passenger’s airbag OFFindication lamp*
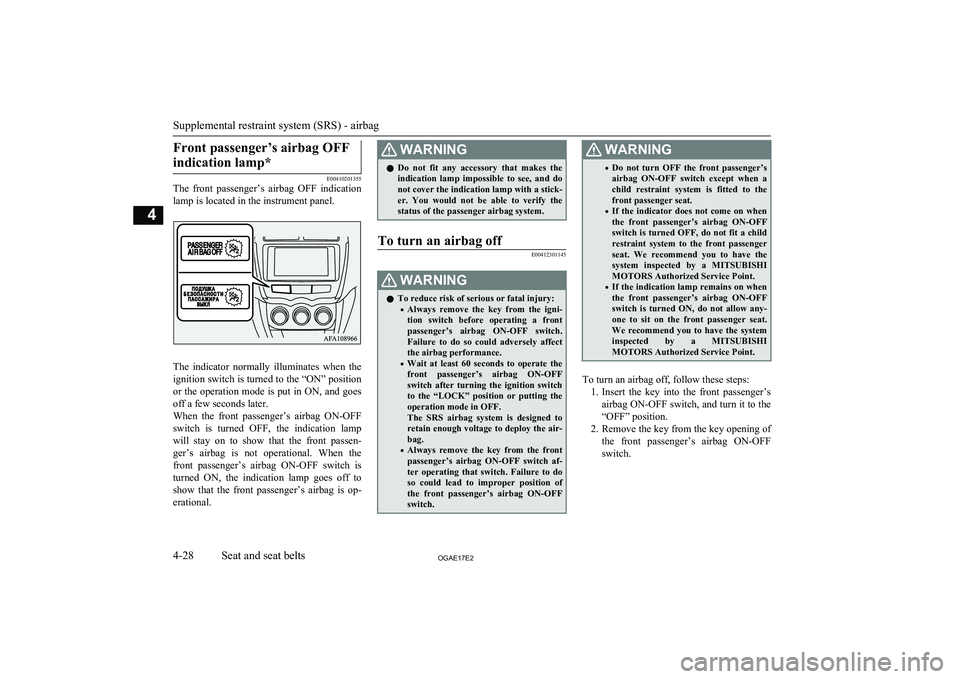
E00410201355
The front passenger’s airbag OFF indication
lamp is located in the instrument panel.
The indicator normally illuminates when the
ignition switch is turned to the “ON” position
or the operation mode is put in ON, and goes off a few seconds later.
When the front passenger’s airbag ON-OFF switch is turned OFF, the indication lamp
will stay on to show that the front passen-
ger’s airbag is not operational. When the
front passenger’s airbag ON-OFF switch is
turned ON, the indication lamp goes off to show that the front passenger’s airbag is op-
erational.
WARNINGl Do not fit any accessory that makes the
indication lamp impossible to see, and do
not cover the indication lamp with a stick- er. You would not be able to verify thestatus of the passenger airbag system.To turn an airbag off
E00412301145WARNINGl To reduce risk of serious or fatal injury:
• Always remove the key from the igni-
tion switch before operating a front
passenger’s airbag ON-OFF switch. Failure to do so could adversely affect
the airbag performance.
• Wait at least 60 seconds to operate the
front passenger’s airbag ON-OFF switch after turning the ignition switch
to the “LOCK” position or putting the
operation mode in OFF.
The SRS airbag system is designed to retain enough voltage to deploy the air-
bag.
• Always remove the key from the front
passenger’s airbag ON-OFF switch af-ter operating that switch. Failure to do
so could lead to improper position of the front passenger’s airbag ON-OFF switch.WARNING• Do not turn OFF the front passenger’s
airbag ON-OFF switch except when a child restraint system is fitted to the
front passenger seat.
• If the indicator does not come on when
the front passenger’s airbag ON-OFF switch is turned OFF, do not fit a childrestraint system to the front passenger
seat. We recommend you to have the system inspected by a MITSUBISHI
MOTORS Authorized Service Point.
• If the indication lamp remains on when
the front passenger’s airbag ON-OFF switch is turned ON, do not allow any-
one to sit on the front passenger seat. We recommend you to have the systeminspected by a MITSUBISHI
MOTORS Authorized Service Point.
To turn an airbag off, follow these steps:
1. Insert the key into the front passenger’s
airbag ON-OFF switch, and turn it to the “OFF” position.
2. Remove the key from the key opening of
the front passenger’s airbag ON-OFF switch.
Supplemental restraint system (SRS) - airbag
4-28OGAE17E2Seat and seat belts4
Page 102 of 458
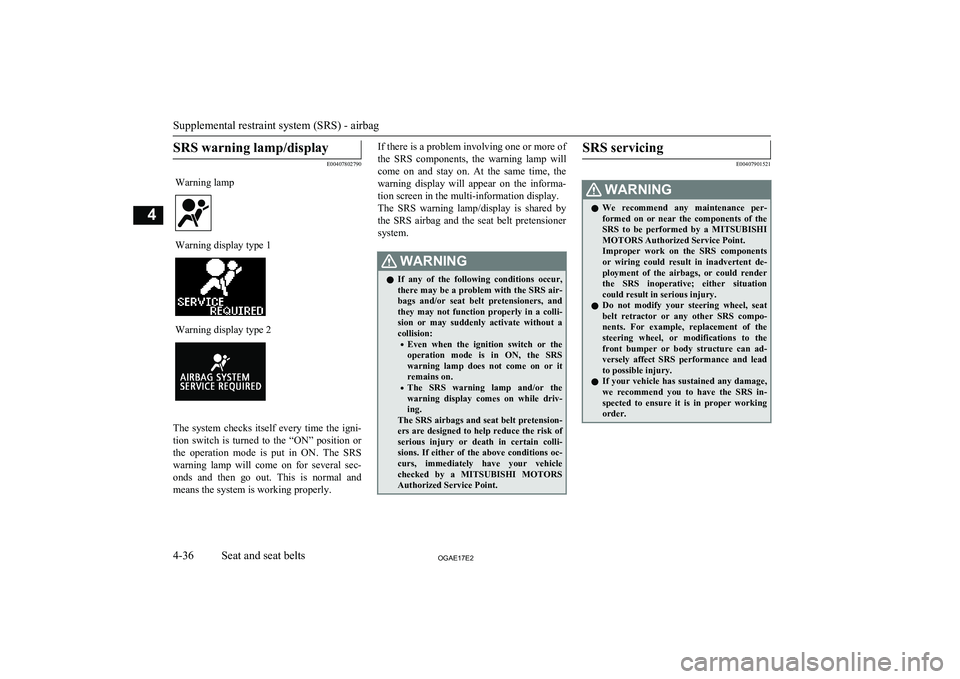
SRS warning lamp/display
E00407802790
Warning lampWarning display type 1Warning display type 2
The system checks itself every time the igni-
tion switch is turned to the “ON” position or the operation mode is put in ON. The SRSwarning lamp will come on for several sec-
onds and then go out. This is normal and
means the system is working properly.
If there is a problem involving one or more of
the SRS components, the warning lamp will come on and stay on. At the same time, thewarning display will appear on the informa-
tion screen in the multi-information display.
The SRS warning lamp/display is shared by
the SRS airbag and the seat belt pretensioner system.WARNINGl If any of the following conditions occur,
there may be a problem with the SRS air- bags and/or seat belt pretensioners, and they may not function properly in a colli-
sion or may suddenly activate without a
collision:
• Even when the ignition switch or the
operation mode is in ON, the SRS
warning lamp does not come on or it
remains on.
• The SRS warning lamp and/or the
warning display comes on while driv-ing.
The SRS airbags and seat belt pretension-
ers are designed to help reduce the risk of serious injury or death in certain colli-sions. If either of the above conditions oc-
curs, immediately have your vehicle
checked by a MITSUBISHI MOTORS
Authorized Service Point.SRS servicing
E00407901521
WARNINGl We recommend any maintenance per-
formed on or near the components of the
SRS to be performed by a MITSUBISHI
MOTORS Authorized Service Point.
Improper work on the SRS components or wiring could result in inadvertent de-
ployment of the airbags, or could render
the SRS inoperative; either situation could result in serious injury.
l Do not modify your steering wheel, seat
belt retractor or any other SRS compo-
nents. For example, replacement of the
steering wheel, or modifications to the
front bumper or body structure can ad- versely affect SRS performance and lead
to possible injury.
l If your vehicle has sustained any damage,
we recommend you to have the SRS in- spected to ensure it is in proper workingorder.
Supplemental restraint system (SRS) - airbag
4-36OGAE17E2Seat and seat belts4
Page 106 of 458
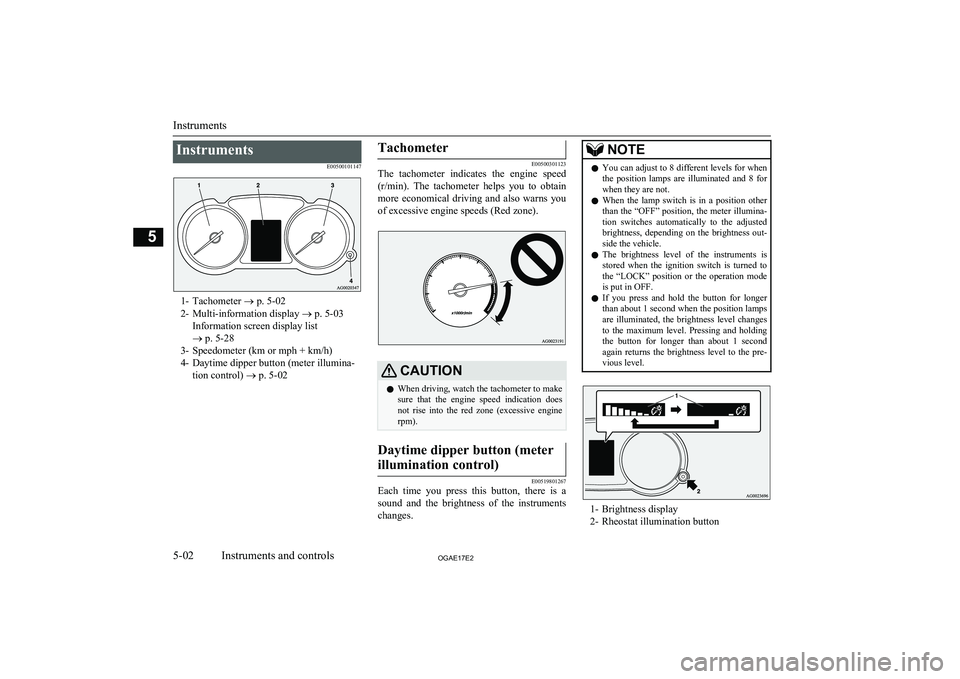
InstrumentsE00500101147
1- Tachometer ® p. 5-02
2- Multi-information display ® p. 5-03
Information screen display list
® p. 5-28
3- Speedometer (km or mph + km/h)
4- Daytime dipper button (meter illumina- tion control) ® p. 5-02
Tachometer
E00500301123
The tachometer indicates the engine speed
(r/min). The tachometer helps you to obtain
more economical driving and also warns you
of excessive engine speeds (Red zone).
CAUTIONl When driving, watch the tachometer to make
sure that the engine speed indication does not rise into the red zone (excessive enginerpm).Daytime dipper button (meter
illumination control)
E00519801267
Each time you press this button, there is a sound and the brightness of the instruments
changes.
NOTEl You can adjust to 8 different levels for when
the position lamps are illuminated and 8 for
when they are not.
l When the lamp switch is in a position other
than the “OFF” position, the meter illumina-
tion switches automatically to the adjusted brightness, depending on the brightness out- side the vehicle.
l The brightness level of the instruments is
stored when the ignition switch is turned to
the “LOCK” position or the operation mode is put in OFF.
l If you press and hold the button for longer
than about 1 second when the position lamps are illuminated, the brightness level changesto the maximum level. Pressing and holding
the button for longer than about 1 second again returns the brightness level to the pre-
vious level.
1- Brightness display
2- Rheostat illumination button
Instruments
5-02OGAE17E2Instruments and controls5