check engine MITSUBISHI COLT 2008 Owner's Manual (in English)
[x] Cancel search | Manufacturer: MITSUBISHI, Model Year: 2008, Model line: COLT, Model: MITSUBISHI COLT 2008Pages: 450, PDF Size: 14.57 MB
Page 22 of 450
2 General information
Fuel selection
E00200101274
NOTE●Petrol-powered vehicles have a knock control system,
which allows you to use unleaded petrol 90 RON as an
emergency measure if unleaded petrol 95 RON or higher
is not available. In such cases, you don’t need to adjust the
engine.
If unleaded petrol 90 RON is used, the engine perform-
ance level will be reduced. ●
Repeatedly driving short distances at low speeds can
cause deposits to form in the fuel system and engine,
resulting in poor starting and poor acceleration. If these
problems occur, you are advised to add a detergent addi-
tive to the gasoline when you re fuel the vehicle. The addi-
tive will remove the deposits, thereby returning the engine
to a normal condition. Be sure to use a genuine
MITSUBISHI FUEL SYSTEM CLEANER. Using an
unsuitable additive could cause the engine to malfunction.
For details, please contact your MITSUBISHI MOTORS
Authorized Service Point.
● Poor quality petrol can cause problems such as hard start-
ing, stalling, engine noise and hesitation. If your experi-
ence these problems, try another brand and/or grade of
petrol.
If the check engine warning lamp flashes, have the system
checked as soon as possible at a MITSUBISHI MOTORS
Authorized Service Point.
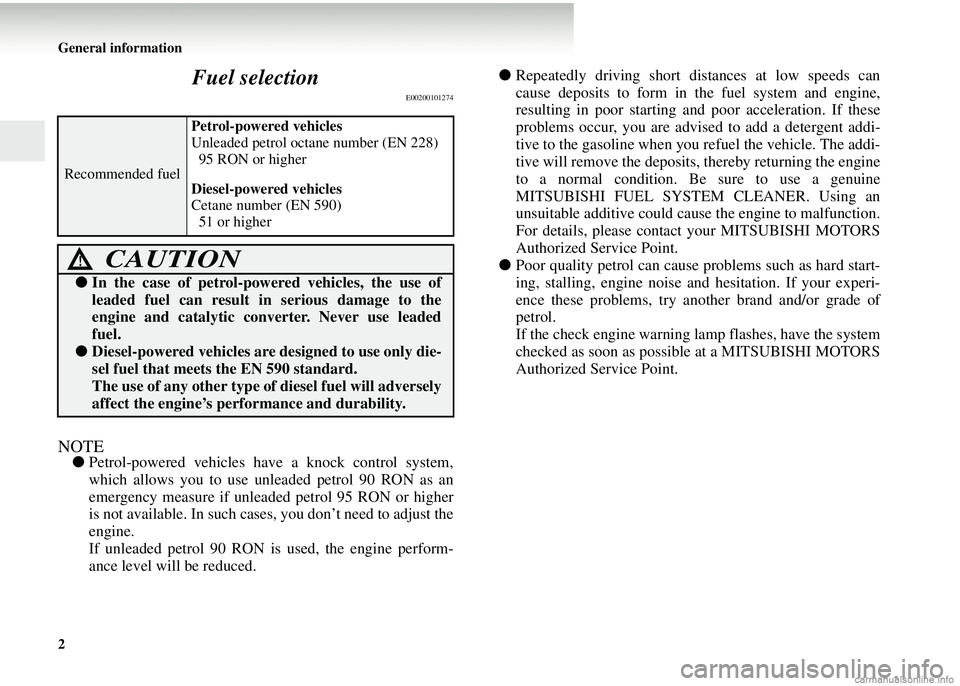
Recommended fuel Petrol-powered vehicles
Unleaded petrol octane number (EN 228)
95 RON or higher
Diesel-powered vehicles
Cetane number (EN 590)
51 or higher
CAUTION!
●
In the case of petrol-pow ered vehicles, the use of
leaded fuel can result in serious damage to the
engine and catalytic converter. Never use leaded
fuel.
● Diesel-powered vehicles are designed to use only die-
sel fuel that meets the EN 590 standard.
The use of any other type of diesel fuel will adversely
affect the engine’s performance and durability.
Page 127 of 450
Instruments and controls3-7
3
Indicator and warning lamps
E00501501324
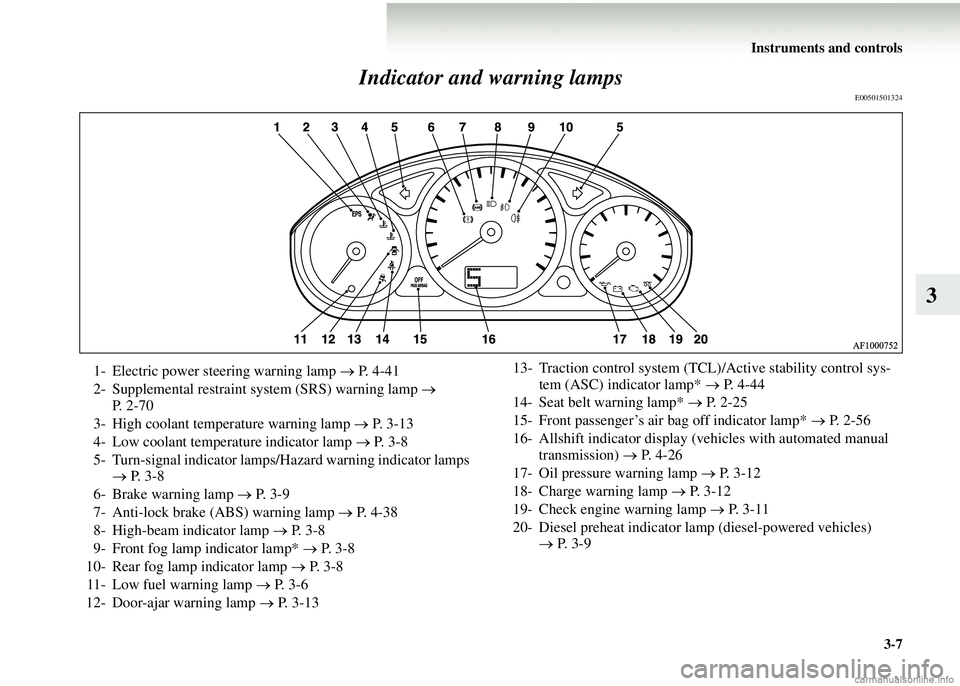
1- Electric power steering warning lamp
→ P. 4-41
2- Supplemental restraint system (SRS) warning lamp →
P. 2 - 7 0
3- High coolant temperature warning lamp → P. 3-13
4- Low coolant temperature indicator lamp → P. 3-8
5- Turn-signal indicator lamps/Hazard warning indicator lamps → P. 3-8
6- Brake warning lamp → P. 3-9
7- Anti-lock brake (ABS) warning lamp → P. 4-38
8- High-beam indicator lamp → P. 3-8
9- Front fog lamp indicator lamp* → P. 3-8
10- Rear fog lamp indicator lamp → P. 3-8
11- Low fuel warning lamp → P. 3-6
12- Door-ajar warning lamp → P. 3-13 13- Traction control system (TCL)/Active stability control sys-
tem (ASC) indicator lamp* → P. 4-44
14- Seat belt warning lamp* → P. 2 - 2 5
15- Front passenger’s air bag off indicator lamp* → P. 2-56
16- Allshift indicator display (vehicles with automated manual transmission) → P. 4-26
17- Oil pressure warning lamp → P. 3-12
18- Charge warning lamp → P. 3-12
19- Check engine warning lamp → P. 3 - 1 1
20- Diesel preheat indicator lamp (diesel-powered vehicles) → P. 3-9
Page 130 of 450
3-10 Instruments and controls
3
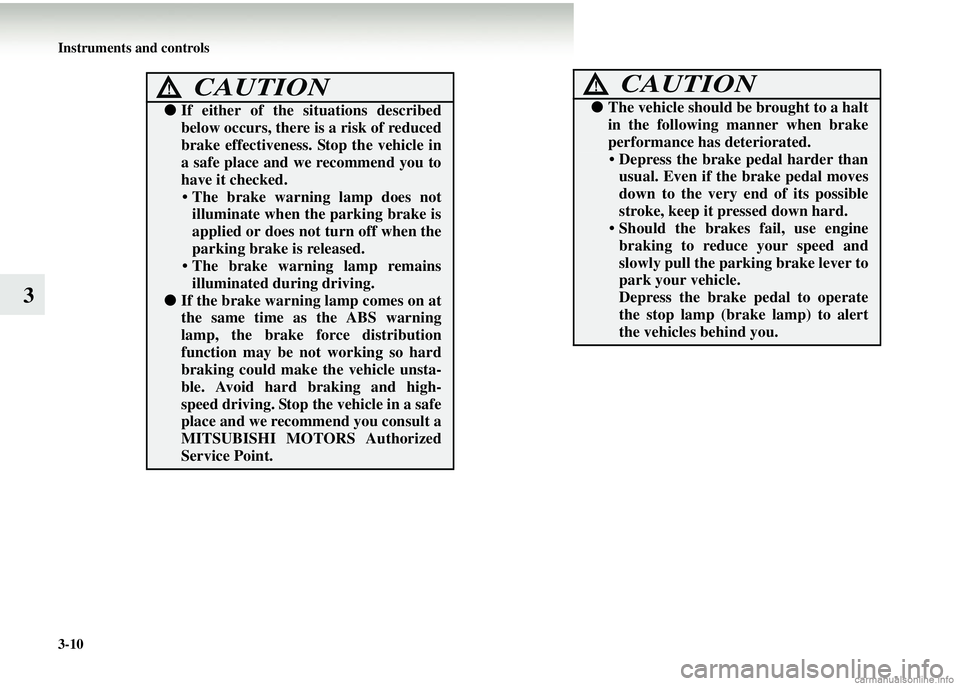
CAUTION!
●If either of the si tuations described
below occurs, there is a risk of reduced
brake effectiveness. Stop the vehicle in
a safe place and we recommend you to
have it checked.
• The brake warning lamp does not illuminate when the parking brake is
applied or does not turn off when the
parking brake is released.
• The brake warning lamp remains
illuminated during driving.
● If the brake warnin g lamp comes on at
the same time as the ABS warning
lamp, the brake force distribution
function may be not working so hard
braking could make the vehicle unsta-
ble. Avoid hard braking and high-
speed driving. Stop the vehicle in a safe
place and we recommend you consult a
MITSUBISHI MOTORS Authorized
Service Point.
● The vehicle should be brought to a halt
in the following manner when brake
performance has deteriorated.
• Depress the brake pedal harder than
usual. Even if the brake pedal moves
down to the very end of its possible
stroke, keep it pressed down hard.
• Should the brakes fail, use engine
braking to reduce your speed and
slowly pull the parking brake lever to
park your vehicle.
Depress the brake pedal to operate
the stop lamp (brake lamp) to alert
the vehicles behind you.
CAUTION!
Page 131 of 450
Instruments and controls3-11
3
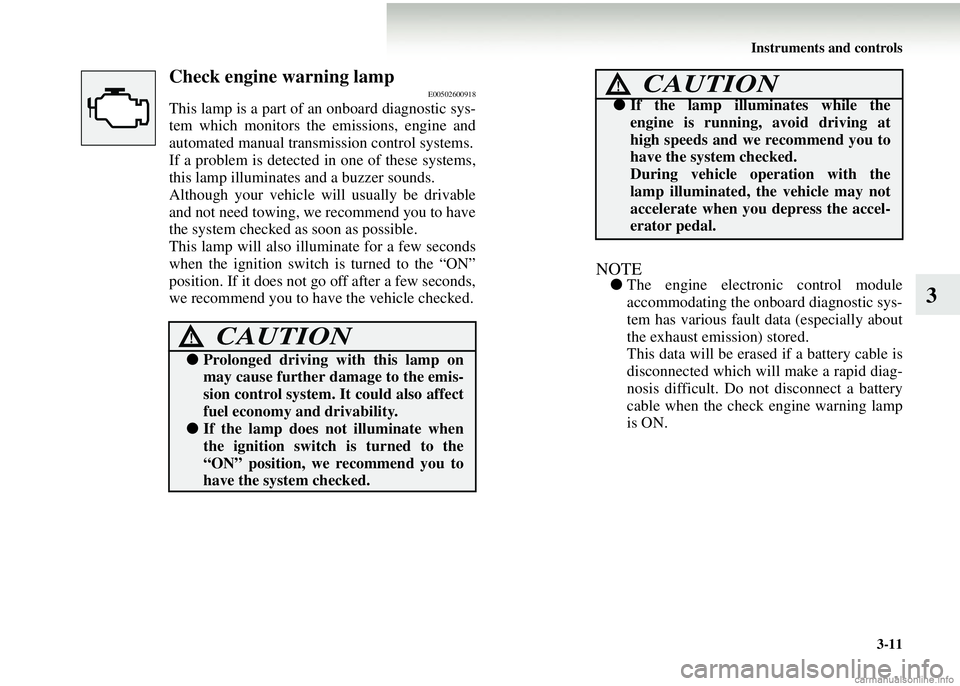
Check engine warning lampE00502600918
This lamp is a part of an onboard diagnostic sys-
tem which monitors the emissions, engine and
automated manual transmission control systems.
If a problem is detected in one of these systems,
this lamp illuminates and a buzzer sounds.
Although your vehicle will usually be drivable
and not need towing, we recommend you to have
the system checked as soon as possible.
This lamp will also illuminate for a few seconds
when the ignition switch is turned to the “ON”
position. If it does not go off after a few seconds,
we recommend you to have the vehicle checked.
NOTE● The engine electr onic control module
accommodating the onboard diagnostic sys-
tem has various fault data (especially about
the exhaust emission) stored.
This data will be erased if a battery cable is
disconnected which will make a rapid diag-
nosis difficult. Do not disconnect a battery
cable when the check engine warning lamp
is ON.
CAUTION!
● Prolonged driving with this lamp on
may cause further damage to the emis-
sion control system. It could also affect
fuel economy and drivability.
● If the lamp does not illuminate when
the ignition switch is turned to the
“ON” position, we recommend you to
have the system checked.
●If the lamp illuminates while the
engine is running, avoid driving at
high speeds and we recommend you to
have the system checked.
During vehicle operation with the
lamp illuminated, the vehicle may not
accelerate when you depress the accel-
erator pedal.
CAUTION!
Page 132 of 450
3-12 Instruments and controls
3
Charge warning lampE00502700036
This lamp illuminates when the ignition switch
is turned to the “ON” position, and the lamp goes
off after the engine has started.
In the event of a fault in the charging system, the
warning lamp comes on and a buzzer sounds.
Oil pressure warning lampE00502800053
This lamp illuminates when the ignition switch
is turned to the “ON” position, and the lamp goes
off after the engine has started. If it illuminates
and a buzzer sounds while the engine is running,
the oil pressure is too low.
If the warning lamp illuminates while the engine
is running, turn the engine off and have it
inspected.
NOTE● The oil pressure warning lamp should not
be treated as an indi cation of the engine’s
oil level. The oil level must be checked
using the dipstick.
CAUTION!
● If the warning lamp illuminates and a
buzzer sounds while the engine is run-
ning, there is a problem in the charg-
ing system. In this case, immediately
park your vehicle in a safe place and
we recommend you to have it checked.
CAUTION!
●If this lamp illum inates when the
engine oil level is not low, have it
inspected.
● This warning lamp does not indicate
the amount of oil in the crankcase.
This must be determined by checking
the oil level on the dipstick, while the
engine is switched off.
● If you continue driving with low engine
oil level or with this warning lamp illu-
minated, engine seizure may occur.
Page 133 of 450
Instruments and controls3-13
3
High coolant temperature warning
lamp
E00503000023
This lamp illuminates and a buzzer sounds if the
coolant temperature beco mes excessively high.
NOTE●The high coolant temperature warning lamp
may illuminate when the vehicle has been
driven at high speeds or on hilly roads. This
flashing does not necessarily indicate a
problem. It should stop if you keep the
engine running for a while or continue driv-
ing the vehicle.
Door-ajar warning lampE00503300215
This lamp illuminates when a door or the tailgate
is either open or incompletely closed.
A buzzer sounds if the vehicle speed exceeds
5 km/h with a door or the tailgate ajar.
CAUTION!
●If the lamp illuminates during vehicle
operation, it indicate s that the engine is
possibly overheating . Continued driv-
ing could make the engine fail. Imme-
diately stop the vehi cle in a safe place
and take appropriate action. (Refer to
“Engine overheating” on page 6-6.)CAUTION!
● Before moving your vehicle, check that
the warning lamp is OFF.
Page 151 of 450
Instruments and controls3-31
3
Combination headlamp
s and dipper switch
E00506000923
Headlamps
NOTE●Do not leave the headlamps and other lamps on for a long
time while the engine is stationary (not running). A run-
down battery could result.
● When it rains, or when the vehicle has been washed, the
inside of the lens sometime s becomes foggy. This is the
same phenomenon as when window glass mists up on a
humid day, and does not indicate a functional problem.
When the lamp is switched on, the heat will remove the
fog. However, if water gathers inside the lamp, we recom-
mend you to have it checked.
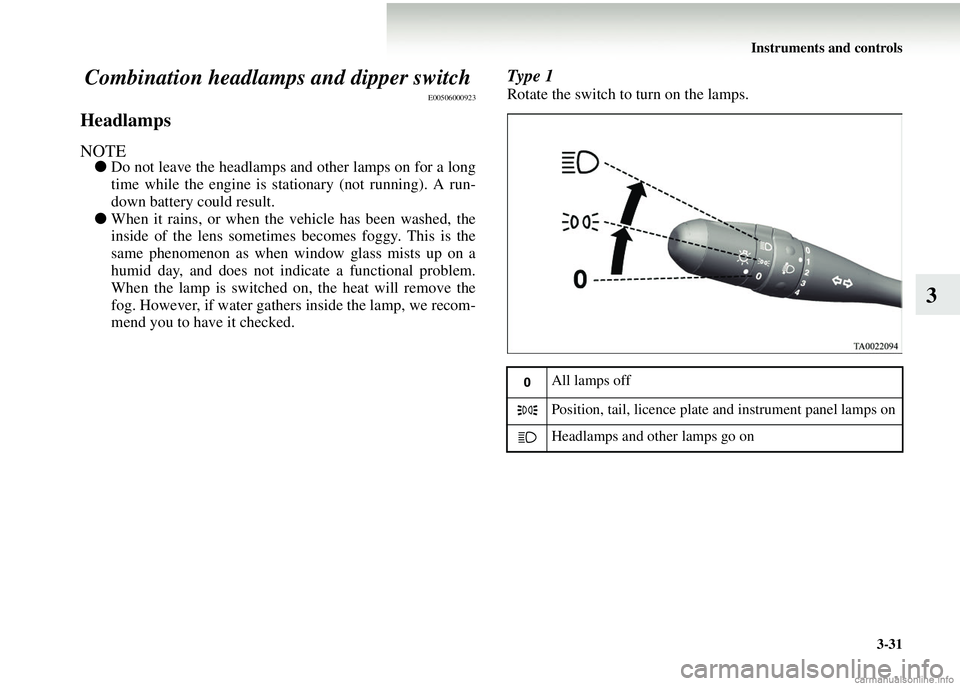
Type 1
Rotate the switch to turn on the lamps.
All lamps off
Position, tail, licence plate and instrument panel lamps on
Headlamps and other lamps go on
Page 152 of 450
3-32 Instruments and controls
3
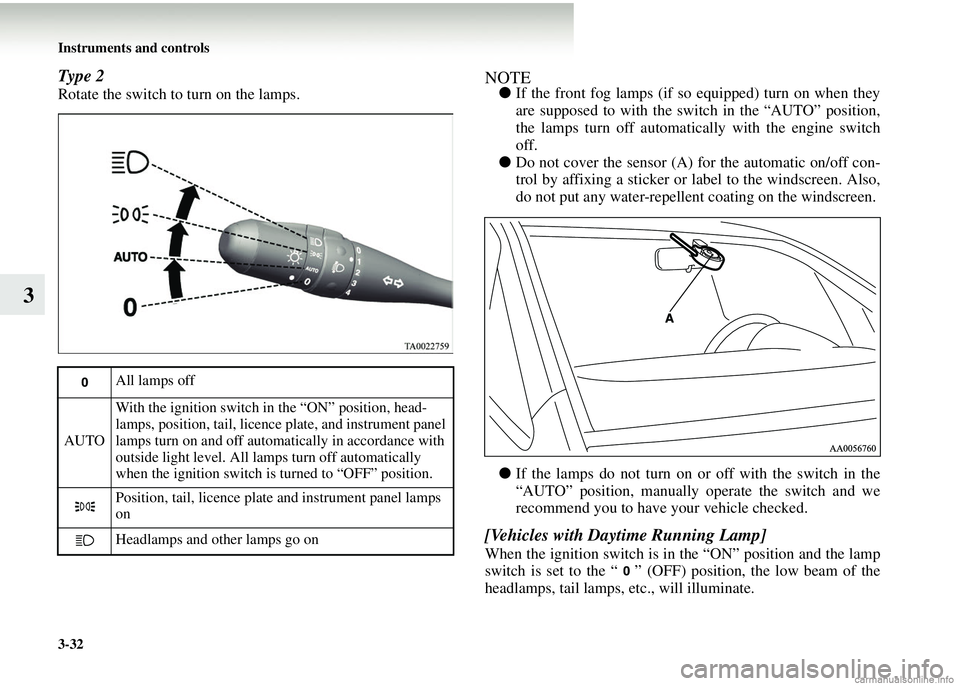
Type 2
Rotate the switch to turn on the lamps.
NOTE●If the front fog lamps (if so equipped) turn on when they
are supposed to with the switch in the “AUTO” position,
the lamps turn off automatically with the engine switch
off.
● Do not cover the sensor (A) for the automatic on/off con-
trol by affixing a sticker or label to the windscreen. Also,
do not put any water-repellent coating on the windscreen.
● If the lamps do not turn on or off with the switch in the
“AUTO” position, manually operate the switch and we
recommend you to have your vehicle checked.
[Vehicles with Daytime Running Lamp]
When the ignition switch is in the “ON” position and the lamp
switch is set to the “ ” (OFF) position, the low beam of the
headlamps, tail lamps, etc., will illuminate.
All lamps off
AUTO With the ignition switch in the “ON” position, head-
lamps, position, tail, licence plate, and instrument panel
lamps turn on and off automatically in accordance with
outside light level. All lamps turn off automatically
when the ignition switch is turned to “OFF” position.
Position, tail, licence plate and instrument panel lamps
on
Headlamps and other lamps go on
Page 168 of 450
4-2 Starting and driving
4Economical driving
E00600100763
For economical driving, there ar
e some technical requirements
that have to be met. The prerequisite for low fuel consumption
is a properly adjusted engine. In order to achieve longer life of
the vehicle and the most economical operation, we recommend
that you to have the vehicle checked at regular intervals in
accordance with the service standards.
Fuel economy and generation of exhaust gas and noise are
greatly influenced by personal driving habits as well as the par-
ticular operating conditions. The following points should be
observed in order to minimize w ear of brakes, tyres and engine
as well as to reduce environmental pollution.
Starting
Avoid rapid acceleration and sudden starts; such operation will
result in higher fuel consumption.
Shifting
Shift only at an appropriate speed and engine speed. Always
use the highest gear possible.
City traffic
Frequent starting and stopping increases the average fuel con-
sumption. Use roads with smooth traffic flow whenever possi-
ble. When driving on congested roads, avoid use of a low gear
at high engine speeds.
Idling
The vehicle consumes fuel even when idling. Avoid extended
idling whenever possible.
Speed
The higher the vehicle speed, the more fuel is consumed. Avoid
driving at full speed. Even a slight release of the accelerator
pedal will save a significant amount of fuel.
Tyre inflation pressure
Check the tyre inflation pressure s at regular intervals. Low tyre
inflation pressure increases ro ad resistance and fuel consump-
tion. In addition, low tyre pres sures adversely affect tyre wear
and driving stability.
Load
Do not drive with unnecessary articles in the luggage compart-
ment. Especially during city dr iving, where frequent starting
and stopping is necessary, the increased weight of the vehicle
will greatly affect fuel consum ption. Avoid driving with unnec-
essary luggage, etc., on the ro of; the increased air resistance
will increase fuel consumption.
Cold engine starting
Starting a cold engine consumes more fuel.
Unnecessary fuel consumption is also caused by keeping a hot
engine running. After the engine has started, commence driv-
ing as soon as possible.
Air conditioning*
The use of the air conditioning will increase fuel consumption.
Page 184 of 450
4-18 Starting and driving
4
6. Turn the ignition key to the “ON” position and make cer-tain that all warning lamps are functioning properly before
starting the engine.
7. Turn the ignition key to the “START” position without depressing the accelerator pedal, and release it when the
engine starts.
NOTE● A ticking noise may be heard after starting the engine.
This is not an abnormal condition. The noise will disap-
pear after a short time of engine running.
If the ticking noise continues after the engine has warmed
up, we recommend that you have your vehicle checked.
● If the engine won’t start, depress the accelerator pedal
fully while cranking the engi ne. Once the engine starts,
release the accelerator pedal. Vehicles with automated manual transmission
1. Insert the ignition key and fasten the seat belt.
2. Make sure the parking brake is applied.
3. Depress and hold the brake pedal.
4. Turn the ignition key to the “ON” position and make cer- tain that all warning lamps are functioning properly.
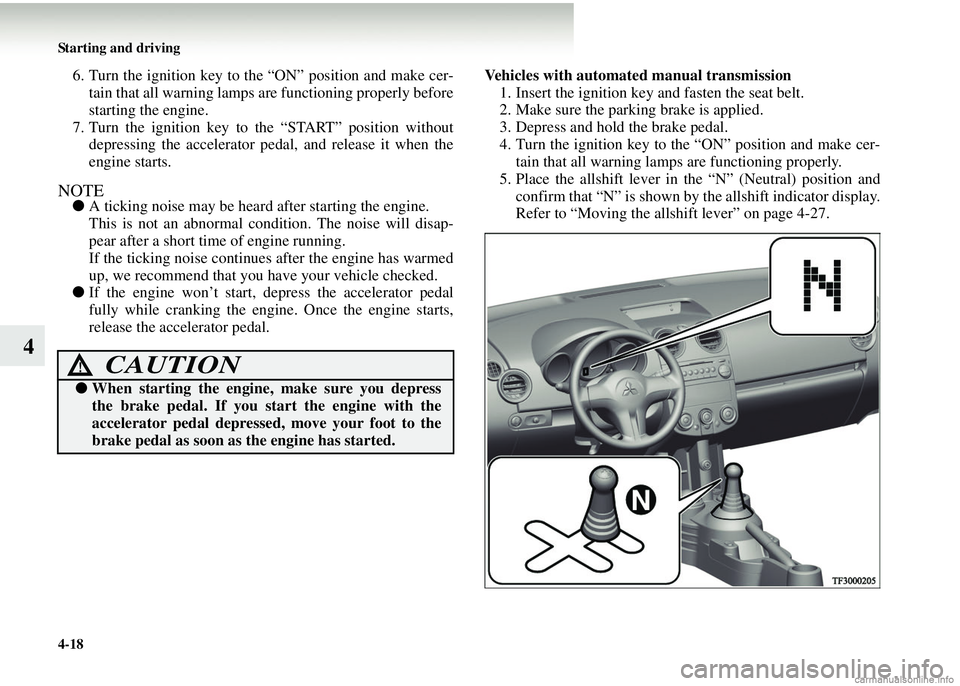
5. Place the allshift lever in the “N” (Neutral) position and confirm that “N” is shown by the allshift indicator display.
Refer to “Moving the allshift lever” on page 4-27.
CAUTION!
● When starting the engine, make sure you depress
the brake pedal. If you st art the engine with the
accelerator pedal depressed, move your foot to the
brake pedal as soon as the engine has started.