headlamp MITSUBISHI COLT 2011 Owner's Manual (in English)
[x] Cancel search | Manufacturer: MITSUBISHI, Model Year: 2011, Model line: COLT, Model: MITSUBISHI COLT 2011Pages: 274, PDF Size: 17.88 MB
Page 4 of 274
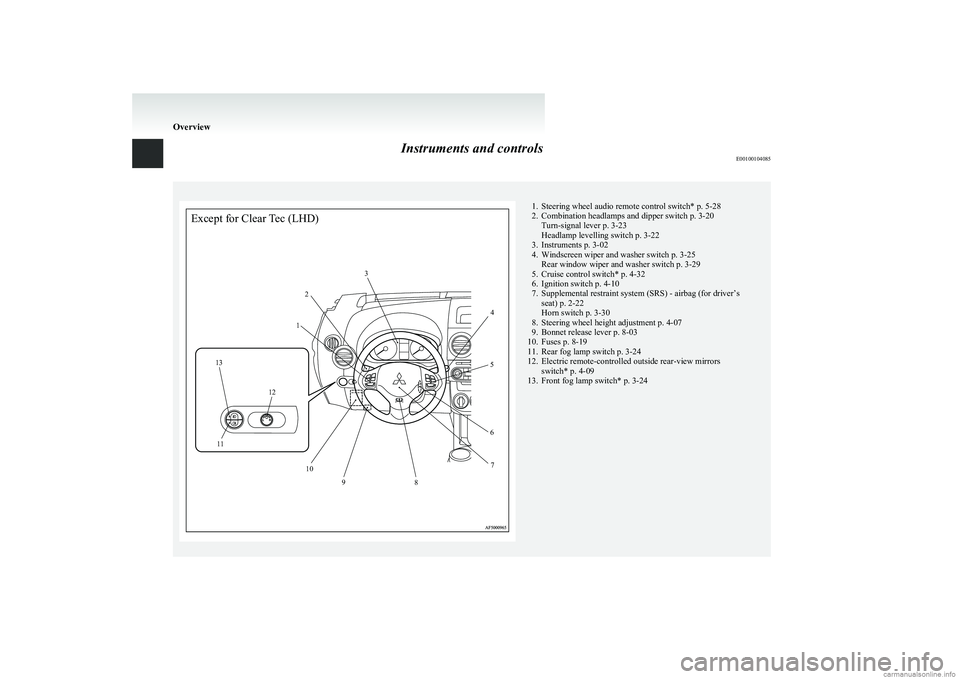
Instruments and controlsE00100104085
Except for Clear Tec (LHD)123456789101213111. Steering wheel audio remote control switch* p. 5-28
2. Combination headlamps and dipper switch p. 3-20 Turn-signal lever p. 3-23
Headlamp levelling switch p. 3-22
3. Instruments p. 3-02
4. Windscreen wiper and washer switch p. 3-25 Rear window wiper and washer switch p. 3-29
5. Cruise control switch* p. 4-32
6. Ignition switch p. 4-10
7. Supplemental restraint system (SRS) - airbag (for driver’s seat) p. 2-22
Horn switch p. 3-30
8. Steering wheel height adjustment p. 4-07
9. Bonnet release lever p. 8-03
10. Fuses p. 8-19
11. Rear fog lamp switch p. 3-24
12. Electric remote-controlled outside rear-view mirrors switch* p. 4-09
13. Front fog lamp switch* p. 3-24
Overview
Page 5 of 274
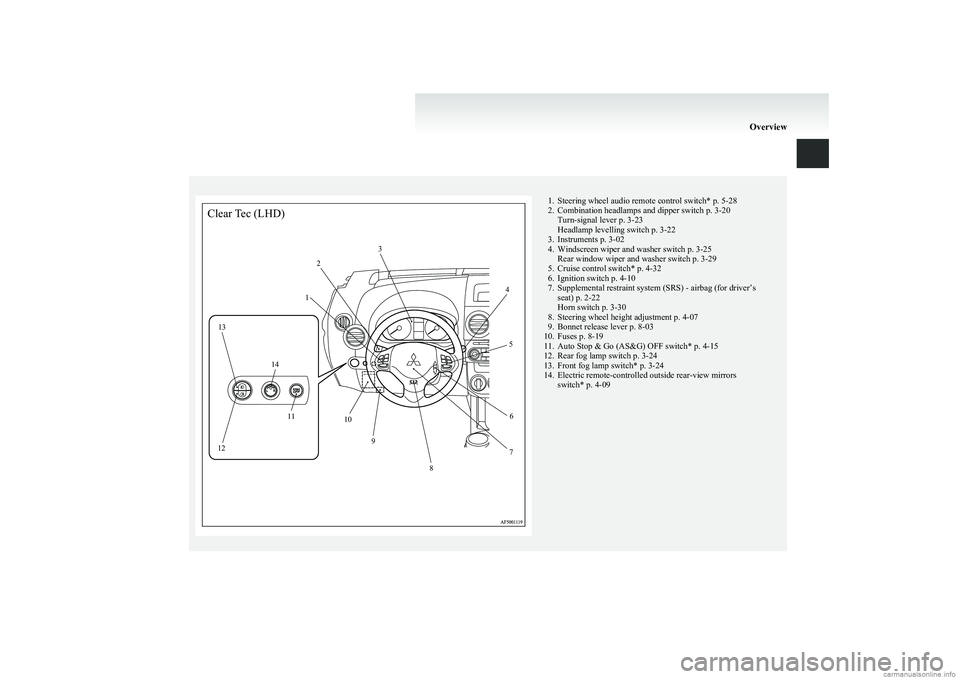
1. Steering wheel audio remote control switch* p. 5-28
2. Combination headlamps and dipper switch p. 3-20 Turn-signal lever p. 3-23
Headlamp levelling switch p. 3-22
3. Instruments p. 3-02
4. Windscreen wiper and washer switch p. 3-25 Rear window wiper and washer switch p. 3-29
5. Cruise control switch* p. 4-32
6. Ignition switch p. 4-10
7. Supplemental restraint system (SRS) - airbag (for driver’s seat) p. 2-22
Horn switch p. 3-30
8. Steering wheel height adjustment p. 4-07
9. Bonnet release lever p. 8-03
10. Fuses p. 8-19
11. Auto Stop & Go (AS&G) OFF switch* p. 4-15
12. Rear fog lamp switch p. 3-24
13. Front fog lamp switch* p. 3-24
14. Electric remote-controlled outside rear-view mirrors switch* p. 4-09
OverviewClear Tec (LHD)12
3
4
5
6
7
8
9
10
11
12 13
14
Page 6 of 274
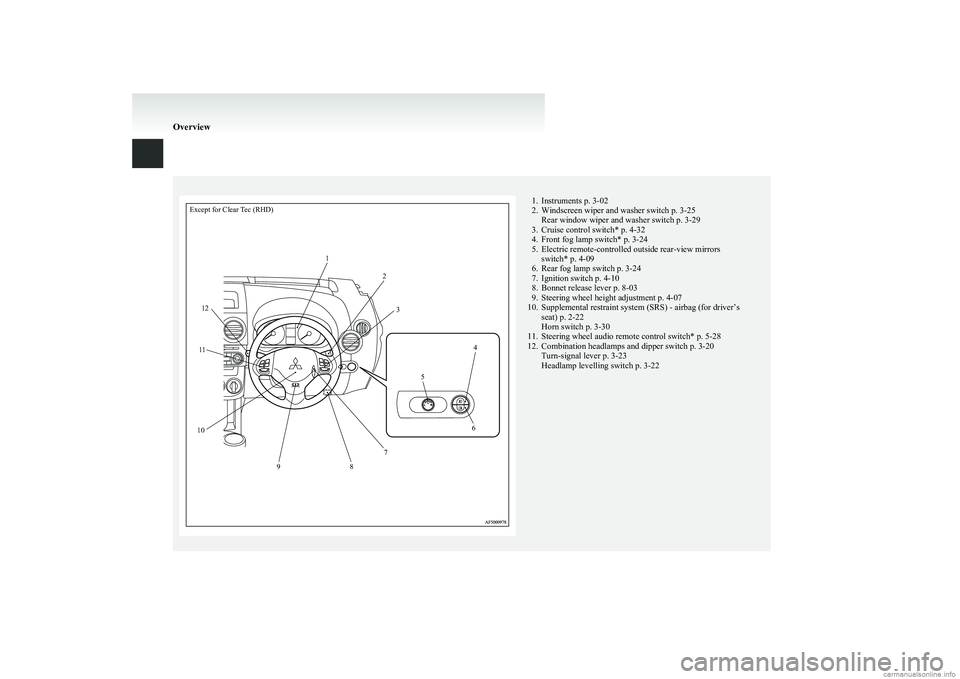
Except for Clear Tec (RHD)1235467891011121. Instruments p. 3-02
2. Windscreen wiper and washer switch p. 3-25 Rear window wiper and washer switch p. 3-29
3. Cruise control switch* p. 4-32
4. Front fog lamp switch* p. 3-24
5. Electric remote-controlled outside rear-view mirrors switch* p. 4-09
6. Rear fog lamp switch p. 3-24
7. Ignition switch p. 4-10
8. Bonnet release lever p. 8-03
9. Steering wheel height adjustment p. 4-07
10. Supplemental restraint system (SRS) - airbag (for driver’s seat) p. 2-22
Horn switch p. 3-30
11. Steering wheel audio remote control switch* p. 5-28
12. Combination headlamps and dipper switch p. 3-20 Turn-signal lever p. 3-23
Headlamp levelling switch p. 3-22
Overview
Page 7 of 274
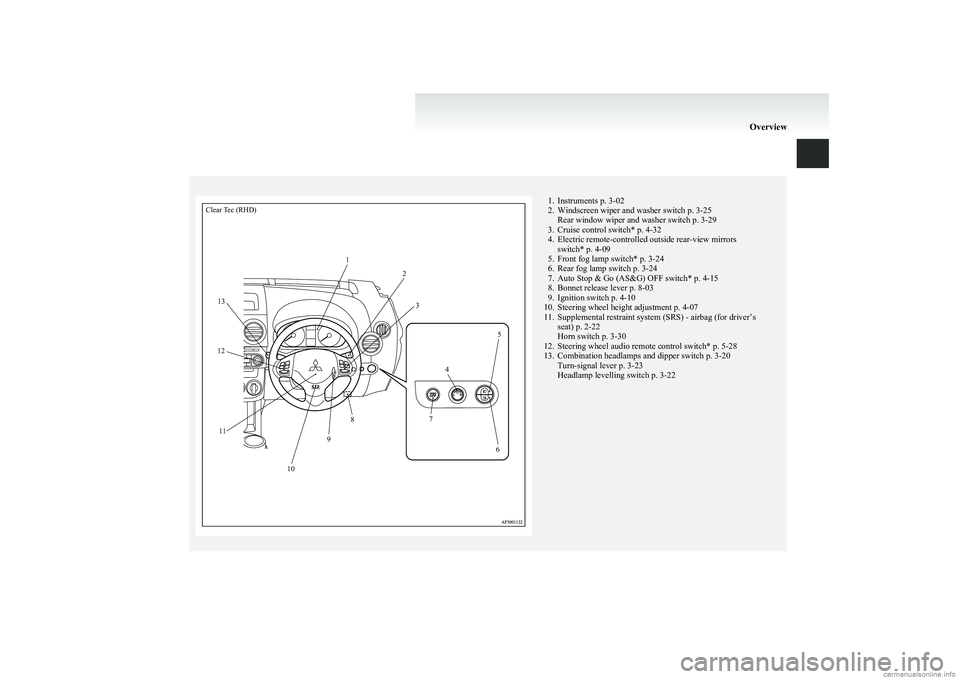
Clear Tec (RHD)123456789101112131. Instruments p. 3-02
2. Windscreen wiper and washer switch p. 3-25 Rear window wiper and washer switch p. 3-29
3. Cruise control switch* p. 4-32
4. Electric remote-controlled outside rear-view mirrors switch* p. 4-09
5. Front fog lamp switch* p. 3-24
6. Rear fog lamp switch p. 3-24
7. Auto Stop & Go (AS&G) OFF switch* p. 4-15
8. Bonnet release lever p. 8-03
9. Ignition switch p. 4-10
10. Steering wheel height adjustment p. 4-07
11. Supplemental restraint system (SRS) - airbag (for driver’s seat) p. 2-22
Horn switch p. 3-30
12. Steering wheel audio remote control switch* p. 5-28
13. Combination headlamps and dipper switch p. 3-20 Turn-signal lever p. 3-23
Headlamp levelling switch p. 3-22
Overview
Page 18 of 274
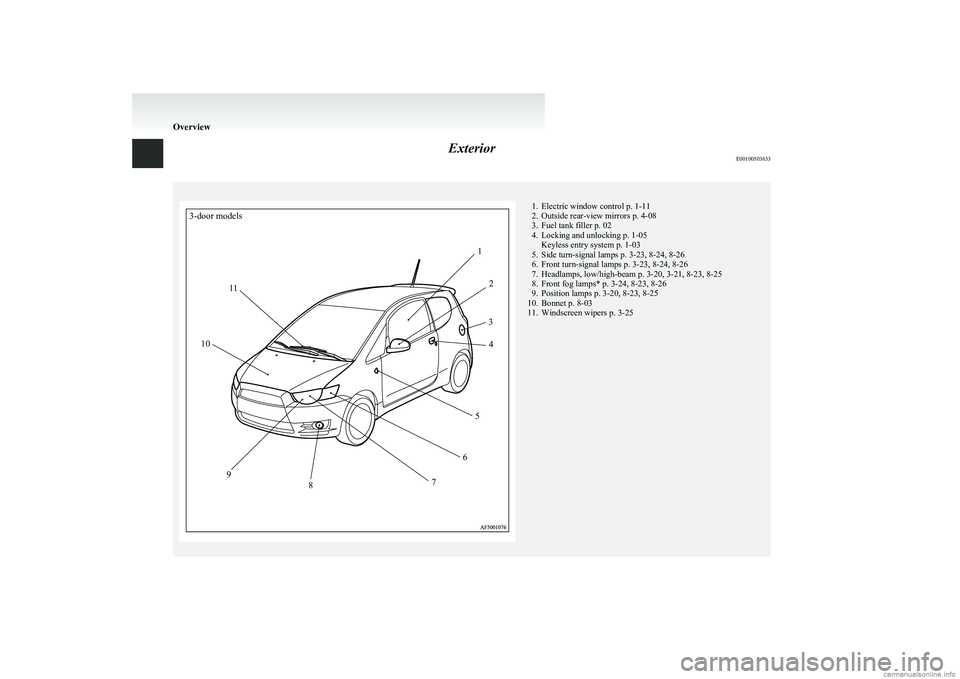
ExteriorE00100503633
3-door models12345678910111. Electric window control p. 1-11
2. Outside rear-view mirrors p. 4-08
3. Fuel tank filler p. 02
4. Locking and unlocking p. 1-05 Keyless entry system p. 1-03
5. Side turn-signal lamps p. 3-23, 8-24, 8-26
6. Front turn-signal lamps p. 3-23, 8-24, 8-26
7. Headlamps, low/high-beam p. 3-20, 3-21, 8-23, 8-25
8. Front fog lamps* p. 3-24, 8-23, 8-26
9. Position lamps p. 3-20, 8-23, 8-25
10. Bonnet p. 8-03
11. Windscreen wipers p. 3-25
Overview
Page 20 of 274
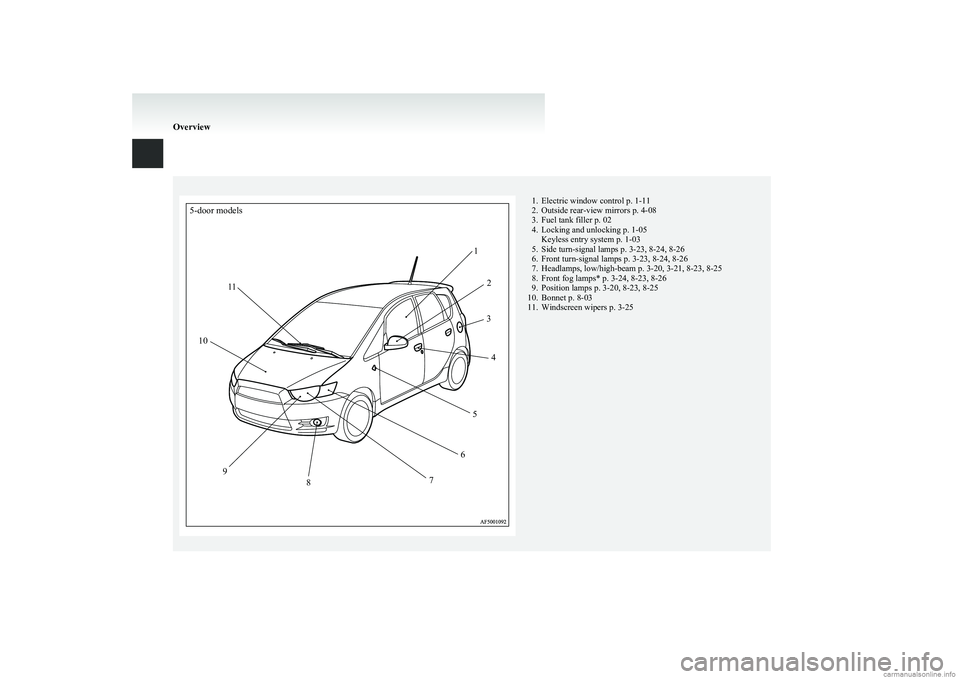
5-door models12345678910111. Electric window control p. 1-11
2. Outside rear-view mirrors p. 4-08
3. Fuel tank filler p. 02
4. Locking and unlocking p. 1-05 Keyless entry system p. 1-03
5. Side turn-signal lamps p. 3-23, 8-24, 8-26
6. Front turn-signal lamps p. 3-23, 8-24, 8-26
7. Headlamps, low/high-beam p. 3-20, 3-21, 8-23, 8-25
8. Front fog lamps* p. 3-24, 8-23, 8-26
9. Position lamps p. 3-20, 8-23, 8-25
10. Bonnet p. 8-03
11. Windscreen wipers p. 3-25
Overview
Page 75 of 274
Instruments................................................................................... 3-02
Multi-information display.............................................................3-04
Indication and warning lamps.......................................................3-16
Indication lamps ........................................................................... 3-17
Warning lamps .............................................................................. 3-17
Combination headlamps and dipper switch ..................................3-20
Headlamp levelling switch ........................................................... 3-22
Turn-signal lever...........................................................................3-23
Hazard warning flasher switch ..................................................... 3-23
Front fog lamp switch* ................................................................. 3-24
Rear fog lamp switch .................................................................... 3-24
Wiper and washer switch .............................................................. 3-25
Rear window demister switch.......................................................3-29
Horn switch...................................................................................3-30Instruments and controls3
Page 94 of 274
CAUTIONlBefore moving your vehicle,
check that the warning lamp is
OFF.Combination headlamps and
dipper switch E00506000923
Headlamps
NOTE l Do not leave the headlamps and other lamps
on for a long time while the engine is station-
ary (not running). A rundown battery could
result.
l When it rains, or when the vehicle has been
washed, the inside of the lens sometimes be-
comes foggy. This is the same phenomenon
as when window glass mists up on a humid
day, and does not indicate a functional prob-
lem. When the lamp is switched on, the heat
will remove the fog. However, if water gath-
ers inside the lamp, we recommend you to
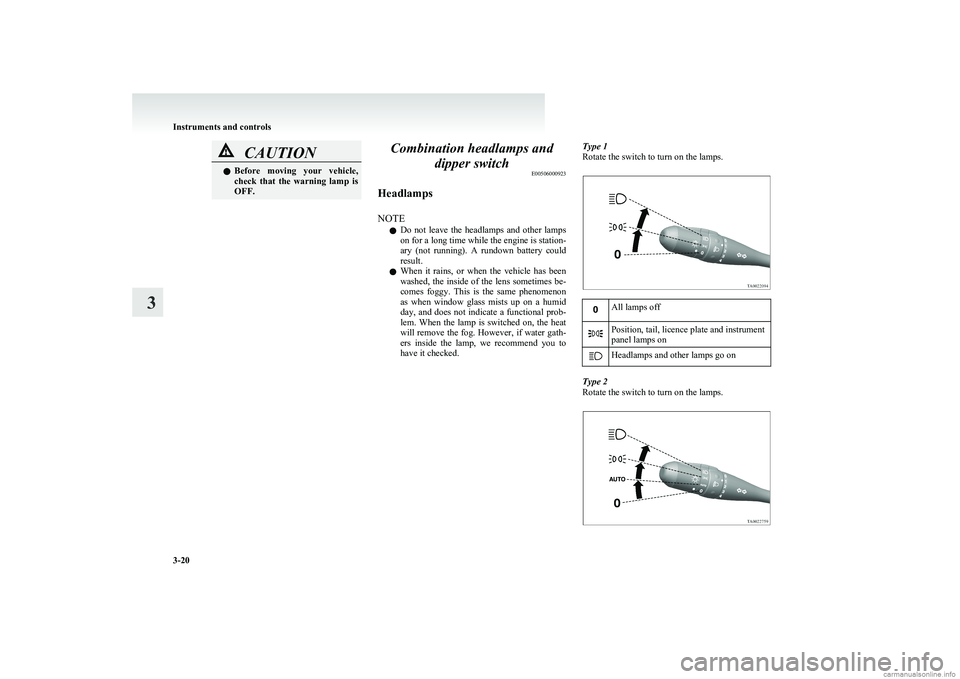
have it checked.Type 1
Rotate the switch to turn on the lamps.All lamps offPosition, tail, licence plate and instrument
panel lamps onHeadlamps and other lamps go on
Type 2
Rotate the switch to turn on the lamps.
Instruments and controls
3-20
3
Page 95 of 274
All lamps off
AUTO
With the ignition switch in the
“ON” position, headlamps, posi-
tion, tail, licence plate, and in-
strument panel lamps turn on
and off automatically in accord-
ance with outside light level.
All lamps turn off automatically
when the ignition switch is
turned to “OFF” position.Position, tail, licence plate and
instrument panel lamps onHeadlamps and other lamps go
on
NOTE
l If the front fog lamps (if so equipped) turn
on when they are supposed to with the
switch in the “AUTO” position, the lamps
turn off automatically with the engine switch
off.
l Do not cover the sensor (A) for the automat-
ic on/off control by affixing a sticker or label
to the windscreen. Also, do not put any water-
repellent coating on the windscreen.
l If the lamps do not turn on or off with the
switch in the “AUTO” position, manually op-
erate the switch and we recommend you to
have your vehicle checked.
[Vehicles with Daytime Running Lamp]
When the ignition switch is in the “ON” position
and the lamp switch is set to the “
” (OFF) posi-
tion, the low beam of the headlamps, tail lamps,
etc., will illuminate.
Lamp monitor buzzer E00506100067
If the driver’s door is opened when the ignition key
is in the “LOCK” or “ACC” position or removed
from the ignition switch while the lamps are on, a
buzzer will sound to remind the driver to turn off
the lamps. Turn off the lamp switch to stop the buz-
zer.
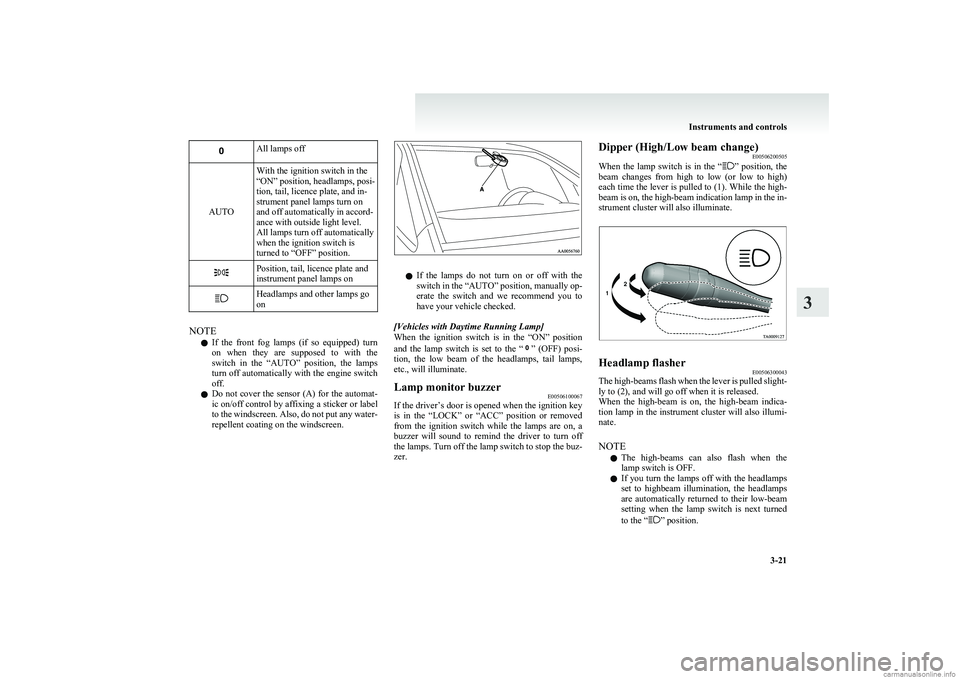
Dipper (High/Low beam change) E00506200505
When the lamp switch is in the “
” position, the
beam changes from high to low (or low to high)
each time the lever is pulled to (1). While the high-
beam is on, the high-beam indication lamp in the in-
strument cluster will also illuminate.
Headlamp flasher E00506300043
The high-beams flash when the lever is pulled slight-
ly to (2), and will go off when it is released.
When the high-beam is on, the high-beam indica-
tion lamp in the instrument cluster will also illumi-
nate.
NOTE l The high-beams can also flash when the
lamp switch is OFF.
l If you turn the lamps off with the headlamps
set to highbeam illumination, the headlamps
are automatically returned to their low-beam
setting when the lamp switch is next turned
to the “
” position.
Instruments and controls
3-21
3 ������
������
������
������
������
������
������
������
Page 96 of 274
Coming home lightE00529000366
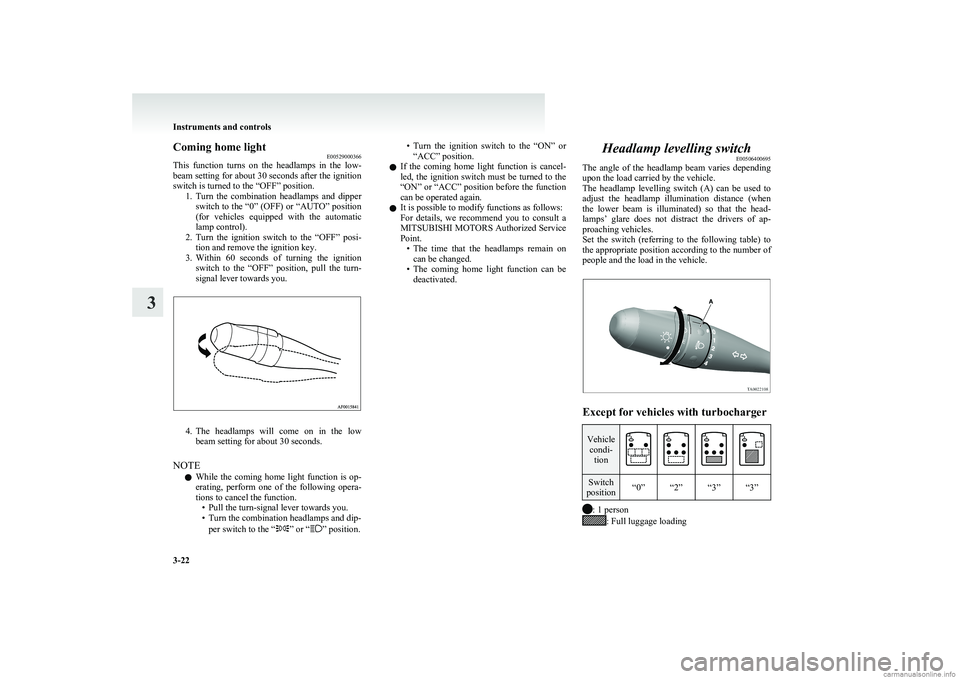
This function turns on the headlamps in the low-
beam setting for about 30 seconds after the ignition
switch is turned to the “OFF” position. 1.Turn the combination headlamps and dipper
switch to the “0” (OFF) or “AUTO” position
(for vehicles equipped with the automatic
lamp control).
2. Turn the ignition switch to the “OFF” posi-
tion and remove the ignition key.
3. Within 60 seconds of turning the ignition
switch to the “OFF” position, pull the turn-
signal lever towards you.
4. The headlamps will come on in the low
beam setting for about 30 seconds.
NOTE l While the coming home light function is op-
erating, perform one of the following opera-
tions to cancel the function. • Pull the turn-signal lever towards you.
• Turn the combination headlamps and dip-
per switch to the “
” or “” position.
•Turn the ignition switch to the “ON” or
“ACC” position.
l If the coming home light function is cancel-
led, the ignition switch must be turned to the
“ON” or “ACC” position before the function
can be operated again.
l It is possible to modify functions as follows:
For details, we recommend you to consult a
MITSUBISHI MOTORS Authorized Service
Point. •The time that the headlamps remain on
can be changed.
• The coming home light function can be
deactivated.Headlamp levelling switch E00506400695
The angle of the headlamp beam varies depending
upon the load carried by the vehicle.
The headlamp levelling switch (A) can be used to
adjust the headlamp illumination distance (when
the lower beam is illuminated) so that the head-
lamps’ glare does not distract the drivers of ap-
proaching vehicles.
Set the switch (referring to the following table) to
the appropriate position according to the number of
people and the load in the vehicle.
Except for vehicles with turbocharger
Vehicle condi- tionSwitch
position“0”“2”“3”“3”
: 1 person: Full luggage loading
Instruments and controls
3-22
3