Brake light switch MITSUBISHI ECLIPSE CROSS 2019 (in English) Owner's Guide
[x] Cancel search | Manufacturer: MITSUBISHI, Model Year: 2019, Model line: ECLIPSE CROSS, Model: MITSUBISHI ECLIPSE CROSS 2019Pages: 423, PDF Size: 75.41 MB
Page 269 of 423
Combination headlights and dimmer switch 5-186 Features and controls
5
N00522501922
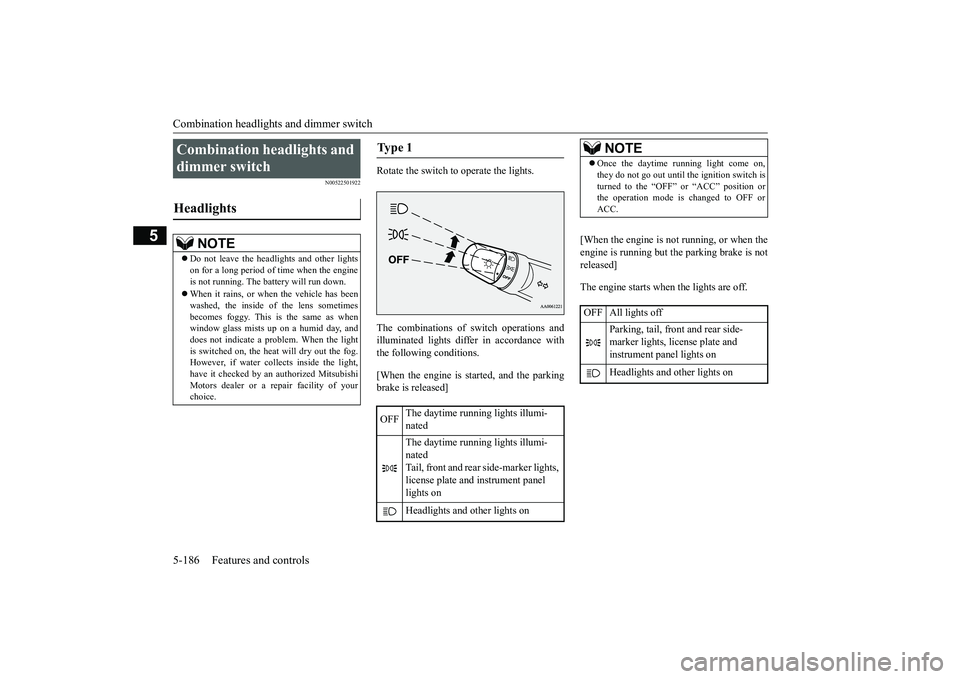
Rotate the switch to operate the lights. The combinations of switch operations and illuminated lights differ in accordance with the following conditions. [When the engine is started, and the parking brake is released]
[When the engine is not running, or when the engine is running but the parking brake is notreleased] The engine starts when the lights are off.
Combination headlights and dimmer switch Headlights
NOTE
Do not leave the headlights and other lights on for a long period of time when the engine is not running. The battery will run down. When it rains, or when the vehicle has been washed, the inside of the lens sometimes becomes foggy. This is the same as whenwindow glass mists up on a humid day, and does not indicate a problem. When the light is switched on, the heat will dry out the fog.However, if water collects inside the light, have it checked by an authorized Mitsubishi Motors dealer or a repair facility of yourchoice.
Ty p e 1 OFF
The daytime running lights illumi- nated The daytime running lights illumi- nated Tail, front and rear side-marker lights, license plate and instrument panel lights on Headlights and other lights on
NOTE
Once the daytime running light come on, they do not go out until the ignition switch is turned to the “OFF” or “ACC” position or the operation mode is changed to OFF or ACC.
OFF All lights off
Parking, tail, front and rear side- marker lights, license plate and instrument panel lights on Headlights and other lights on
BK0266800US.book
186 ページ 2018年6月27日 水曜日 午後5時6分
Page 270 of 423
Combination headlights and dimmer switch
Features and controls 5-187
5
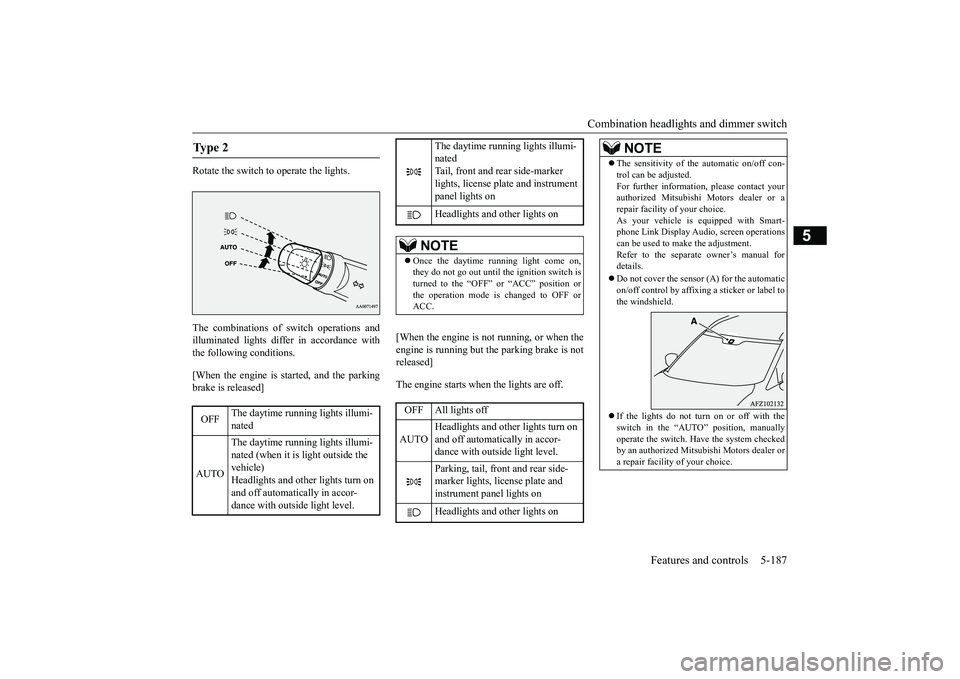
Rotate the switch to operate the lights. The combinations of switch operations and illuminated lights differ in accordance with the following conditions. [When the engine is started, and the parking brake is released]
[When the engine is not running, or when the engine is running but the parking brake is not released] The engine starts when the lights are off.
Ty p e 2 OFF
The daytime running lights illumi- nated
AUTO
The daytime running lights illumi- nated (when it is light outside the vehicle) Headlights and other lights turn on and off automatically in accor- dance with outside light level.
The daytime running lights illumi-nated Tail, front and rear side-marker lights, license plate and instrument panel lights on Headlights and other lights on
NOTE
Once the daytime running light come on, they do not go out until the ignition switch is turned to the “OFF” or “ACC” position or the operation mode is changed to OFF orACC.OFF All lights off AUTO
Headlights and other lights turn on and off automatically in accor- dance with outside light level. Parking, tail, front and rear side- marker lights, license plate and instrument panel lights on Headlights and other lights on
NOTE
The sensitivity of the automatic on/off con- trol can be adjusted. For further information, please contact your authorized Mitsubishi Motors dealer or a repair facility of your choice.As your vehicle is equipped with Smart- phone Link Display Audio, screen operations can be used to make the adjustment.Refer to the separate owner’s manual for details. Do not cover the sensor (A) for the automatic on/off control by affixing a sticker or label to the windshield. If the lights do not turn on or off with the switch in the “AUTO” position, manually operate the switch. Have the system checkedby an authorized Mitsubishi Motors dealer or a repair facility of your choice.
BK0266800US.book
187 ページ 2018年6月27日 水曜日 午後5時6分
Page 309 of 423
Vehicle preparation before driving 6-4 Driving safety
6
N00629001842
For a safer and more enjoyable trip, always check for the following: Before starting the vehicle, make certain that you and all passengers are seated and wearing their seat belts properly (with children in the rear seat, in appropriaterestraints), and that all the doors and the liftgate are locked. Move the driver’s seat as far backward as possible, while keeping good visibility, and good control of the steering wheel, brakes, accelerator, and controls. Checkthe instrument panel indicators and multi- information display for any possible prob- lem. Similarly, the front passenger seat should also be moved as far back as possible. Make sure that infants and small children are properly restrained in accordance with all laws and regulations.
Check these by selecting the defroster mode, and set the blower switch on high. You shouldbe able to feel the air blowing against the windshield. Refer to “Defrosting or defogging (wind-shield, door windows)” on page 7-13, 7-22. Check all the tires for heavy tread wear or uneven wear patterns. Look for stones, nails,glass, or other objects stuck in the tread. Look for any tread cuts or sidewall cracks. Check the wheel nuts for tightness, and the tires(including spare tire) for proper pressure. Replace your tires before they are heavily worn out.As your vehicle is equipped with a tire pres- sure monitoring system, there is a risk of damage to the tire inflation pressure sensorswhen the tire is replaced on the rim. Tire replacement should, only, be performed by an authorized Mitsubishi Motors dealer. Have someone watch while you turn all the exterior lights on and off. Also check the turn
signal indicators and high-beam indicators on the instrument panel. Check the ground under the vehicle after parking overnight, for fuel, water, oil, or other leaks. Make sure all the fluid levels are correct. Also, if you can smell fuel, you needto find out why immediately and have itfixed.
N00629201147
Even this vehicle’s safety equipment, andyour safest driving, cannot guarantee that you can avoid an accident or injury. However, if you give extra attention to the followingareas, you can better protect yourself and your passengers: Drive defensively. Be aware of traffic, road and weather conditions. Leave plentyof stopping distance between your vehicle and the vehicle ahead. Before changing lanes, check your mir- rors, blind spots, and use your turn signal light. While driving, watch the behavior of other drivers, bicyclists, and pedestrians.
Vehicle preparation before driving Seat belts and seats
Defrosters Tires Lights
Fluid leaks Safe driving techniques
BK0266800US.bo
ok 4 ページ 2018年6月27日 水曜日 午後5時6分
Page 350 of 423
Jump-starting the engine For emergencies 8-3
8
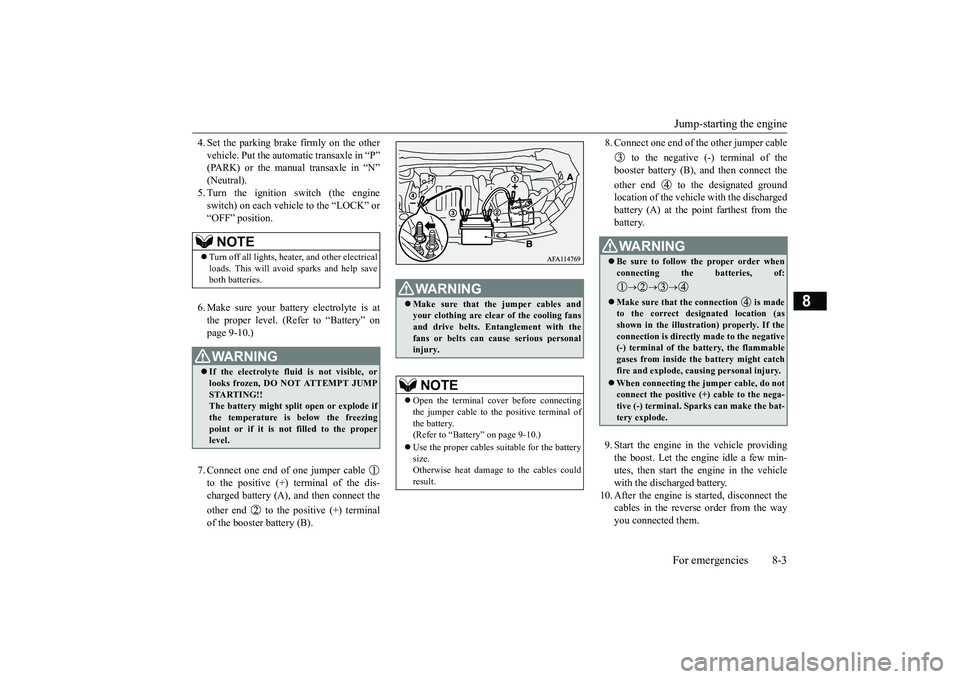
4. Set the parking brake firmly on the other vehicle. Put the automatic transaxle in “P” (PARK) or the manual transaxle in “N” (Neutral).5. Turn the ignition switch (the engine switch) on each vehicle to the “LOCK” or “OFF” position. 6. Make sure your battery electrolyte is at the proper level. (Refer to “Battery” on page 9-10.) 7. Connect one end of one jumper cable to the positive (+) terminal of the dis- charged battery (A), and then connect the other end to the positive (+) terminal of the booster battery (B).
8. Connect one end of the other jumper cable
to the negative (-) terminal of the booster battery (B), and then connect the other end to the designated ground location of the vehicle with the discharged battery (A) at the point farthest from thebattery. 9. Start the engine in the vehicle providing the boost. Let the engine idle a few min- utes, then start the engine in the vehicle with the discharged battery.
10. After the engine is started, disconnect the
cables in the reverse order from the way you connected them.
NOTE
Turn off all lights, heater, and other electrical loads. This will avoid sparks and help save both batteries.WA R N I N G If the electrolyte fluid is not visible, or looks frozen, DO NOT ATTEMPT JUMP STARTING!! The battery might split open or explode ifthe temperature is below the freezing point or if it is not filled to the proper level.
WA R N I N G Make sure that the jumper cables and your clothing are clear of the cooling fans and drive belts. Entanglement with the fans or belts can cause serious personalinjury.NOTE
Open the terminal cover before connecting the jumper cable to the positive terminal ofthe battery. (Refer to “Battery” on page 9-10.) Use the proper cables suitable for the battery size. Otherwise heat damage to the cables couldresult.
WA R N I N G Be sure to follow the proper order when connecting the batteries, of:
Make sure that the connection is made to the correct designated location (as shown in the illustration) properly. If the connection is directly made to the negative(-) terminal of the battery, the flammable gases from inside the battery might catch fire and explode, causing personal injury. When connecting the jumper cable, do not connect the positive (+) cable to the nega-tive (-) terminal. Sparks can make the bat- tery explode.
BK0266800US.bo
ok 3 ページ 2018年6月27日 水曜日 午後5時6分
Page 353 of 423
How to change a tire 8-6 For emergencies
8
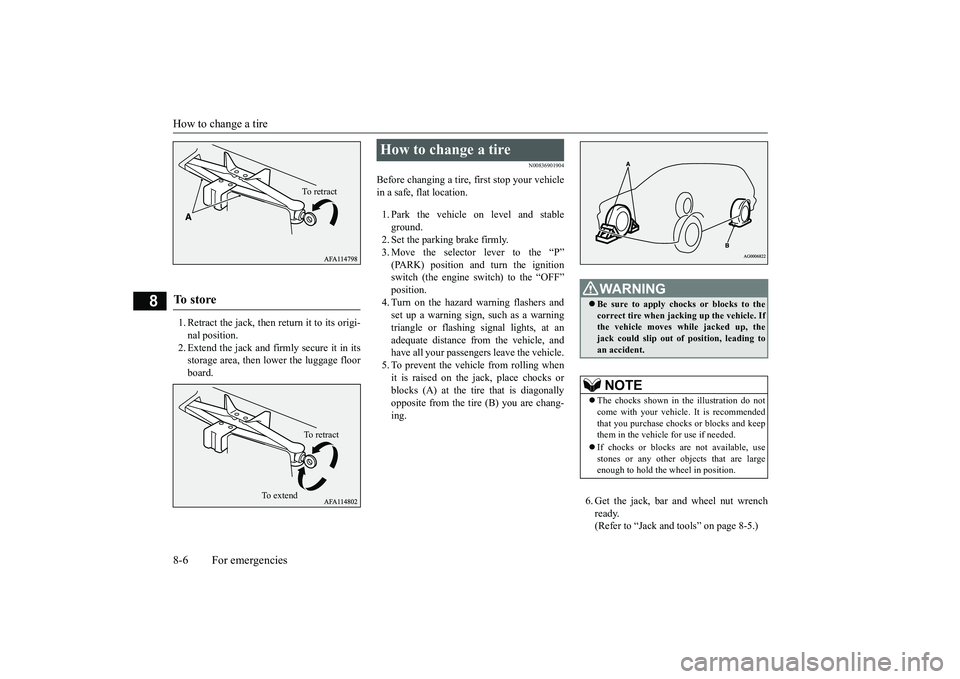
1. Retract the jack, then return it to its origi- nal position.2. Extend the jack and firmly secure it in its storage area, then lo
wer the luggage floor
board.
N00836901904
Before changing a tire, first stop your vehiclein a safe, flat location. 1. Park the vehicle on level and stable ground. 2. Set the parking brake firmly. 3. Move the selector lever to the “P”(PARK) position and turn the ignitionswitch (the engine switch) to the “OFF” position. 4. Turn on the hazard warning flashers andset up a warning sign, such as a warning triangle or flashing signal lights, at an adequate distance from the vehicle, andhave all your passengers leave the vehicle. 5. To prevent the vehicle from rolling when it is raised on the jack, place chocks orblocks (A) at the tire that is diagonally opposite from the tire (B) you are chang- ing.
6. Get the jack, bar and wheel nut wrench ready. (Refer to “Jack and tools” on page 8-5.)
To s t o r e
To r e t r a c tTo r e t r a c t
To e x t e n d
How to change a tire
WA R N I N G Be sure to apply chocks or blocks to the correct tire when jacking up the vehicle. If the vehicle moves while jacked up, thejack could slip out of position, leading to an accident.NOTE
The chocks shown in the illustration do not come with your vehicle. It is recommended that you purchase chocks or blocks and keep them in the vehicle for use if needed. If chocks or blocks are not available, use stones or any other objects that are largeenough to hold the wheel in position.
BK0266800US.bo
ok 6 ページ 2018年6月27日 水曜日 午後5時6分
Page 385 of 423
Fuses 9-24 Vehicle care and maintenance
9
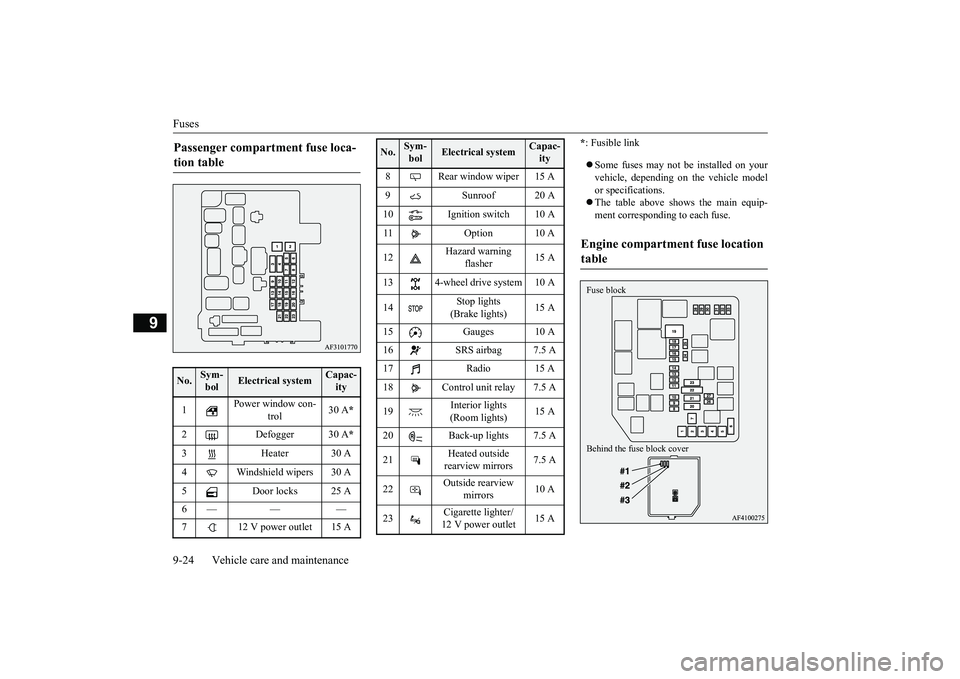
* : Fusible link Some fuses may not be installed on your vehicle, depending on the vehicle model or specifications. The table above shows the main equip- ment corresponding to each fuse.
Passenger compartment fuse loca- tion table No.
Sym- bol
Electrical system
Capac-ity
1
Power window con-
trol
30 A
*
2 Defogger 30 A
*
3 Heater 30 A 4 Windshield wipers 30 A 5 Door locks 25 A 6— — — 7 12 V power outlet 15 A
8 Rear window wiper 15 A 9 Sunroof 20 A 10 Ignition switch 10 A 11 Option 10 A 12
Hazard warning
flasher
15 A
13 4-wheel drive system 10 A14
Stop lights (Brake lights)
15 A
15 Gauges 10 A 16 SRS airbag 7.5 A 17 Radio 15 A 18 Control unit relay 7.5 A 19
Interior lights (Room lights)
15 A
20 Back-up lights 7.5 A21
Heated outside rearview mirrors
7.5 A
22
Outside rearview
mirrors
10 A
23
Cigarette lighter/ 12 V power outlet
15 A
No.
Sym- bol
Electrical system
Capac-ity
Engine compartment fuse location table Behind the fuse block cover Fuse block
BK0266800US.bo
ok 24 ページ 2018年6月27日 水曜日 午後5時6分
Page 417 of 423
Alphabetical index 12-2
12
Convenient hook
...............
...............
5-221
Coolant (engine)
..........................
9-7
, 11-7
Cruise control
....................
.................
5-82
D
Daytime running lights
Bulb location and capacity
...............
9-28
Replacement
.................
.................
9-30
Defogger (rear window)
....................
5-202
Defrosting or defogging (windshield, door windows)
.................
7-9
, 7-13
, 7-18
, 7-22
Dimensions
...................
.....................
11-4
Dimmer (high/low beam change)
.......
5-189
Disc brake pads
.................
.................
9-21
Dome light (front)/Reading lights
.......
5-213
Bulb location and capacity
...............
9-29
Dome light (rear)
...............
...............
5-214
Bulb location and capacity
...............
9-29
Doors
Lock
......................
........................
5-31
Power door locks
............................
5-33
Drink holders
....................
...............
5-217
Driving during cold weather
..................
6-5
Driving precaution
................
................
6-2
Driving, alcohol and drugs
.....................
6-2
Dual-zone automatic climate control air conditioning
....................
.................
7-15
E
ECO mode switch
.............................
5-196
Electric parking brake
..........................
5-46
Electric power steering system (EPS)
....
5-79
Electric rear window defogger switch
..5-202
Electronic immobilizer (Anti-theft starting system)
.....................
................
5-4
, 5-26
Emission-control system maintenance
...
9-20
Engine
Compartment
..................
.................
9-5
Coolant
...................
................
9-7
, 11-7
Hood
.......................
........................
9-3
Malfunction indicator light
.............
5-180
Oil and oil filter
.......................
9-5
, 11-7
Overheating
....................
.................
8-4
Serial number
.................
................
11-2
Specification
...................
................
11-6
Engine hood
....................
....................
9-3
Engine switch
.....................
................
5-17
Exhaust system
...................
................
9-22
F
Floor console box
..............................
5-217
Floor mat
.........................
....................
6-3
Fluid
Brake fluid
..............................
9-9
, 11-7
Continuously variable transmission (CVT)
fluid
....................
.................
9-8
, 11-7
Engine coolant
........................
9-7
, 11-7
Engine oil
...............................
9-5
, 11-7
Rear axle oil
............................
9-9
, 11-7
Transfer oil
.............................
9-9
, 11-7
Washer fluid
...........................
9-9
, 11-7
Fluid capacities and lubricants
.............
11-7
Forward Collision Mitigation system (FCM)
.
5-99 Free-hand advanced security transmitter (F.A.S.T.-key)
.................
.................
5-12
Front fog lights
Bulb location and capacity
...............
9-28
Indicators
..................
...................
5-178
Replacement
.................
.................
9-32
Switch
......................
...................
5-196
Front seat adjustment
............................
4-3
Front side-marker lights
Bulb location and capacity
...............
9-28
Replacement
.................
.................
9-30
Front turn signal light
Bulb location and capacity
...............
9-28
Replacement
.................
.................
9-31
Fuel
Filling the fuel tank
...........................
3-3
Fuel economy
...................
................
6-2
Fuel hoses
.....................
.................
9-21
Fuel selection
...................
................
3-2
Tank capacity
................
.................
11-7
Fuel Pump Shut-off System
.................
8-13
BK0266800US.bo
ok 2 ページ 2018年6月27日 水曜日 午後5時6分