MITSUBISHI ENDEAVOR 2004 Service User Guide
ENDEAVOR 2004
MITSUBISHI
MITSUBISHI
https://www.carmanualsonline.info/img/19/57105/w960_57105-0.png
MITSUBISHI ENDEAVOR 2004 Service User Guide
Page 1399 of 3870
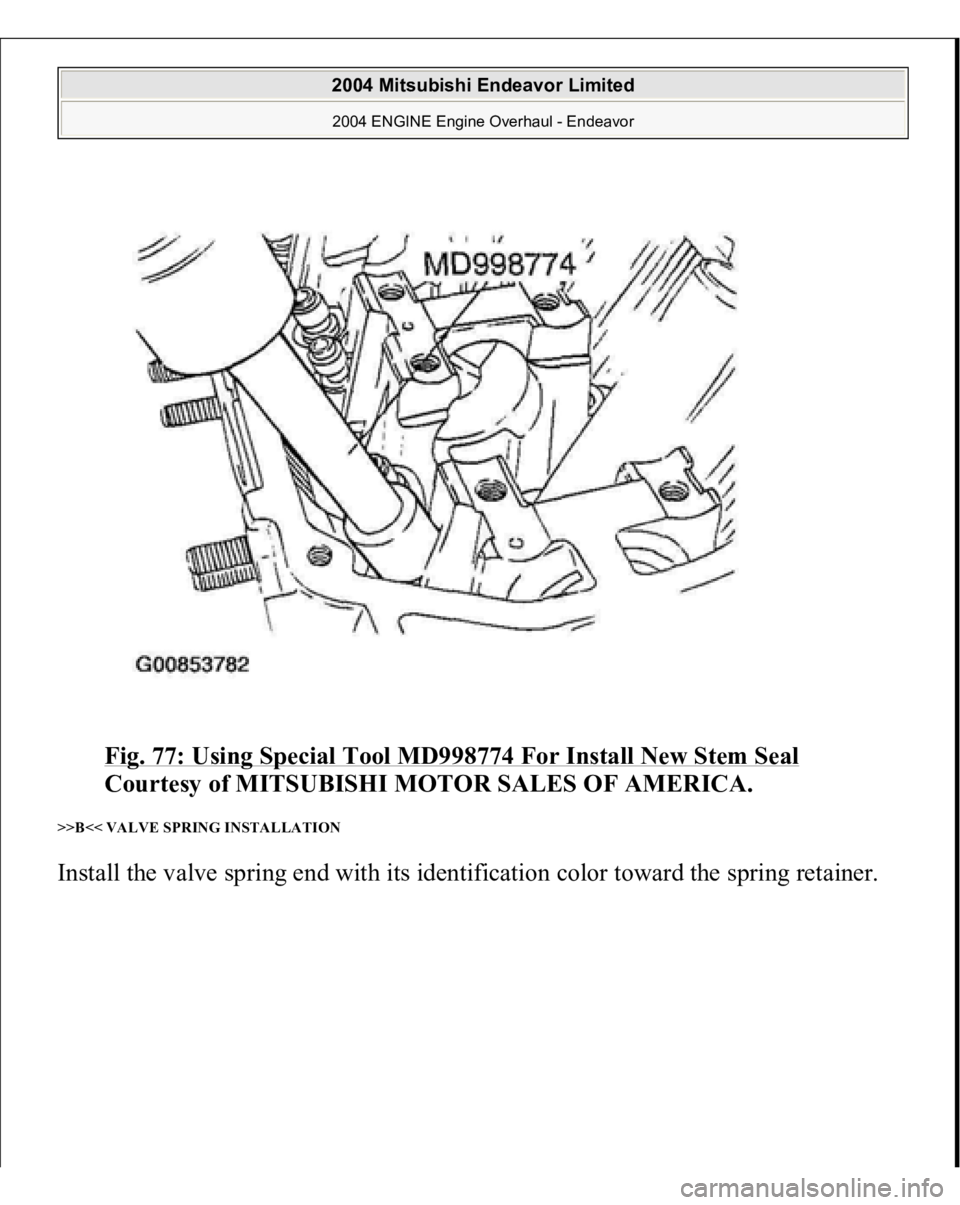
Fig. 77: Using Special Tool MD998774 For Install New Stem Seal
Courtesy of MITSUBISHI MOTOR SALES OF AMERICA.
>>B<< VALVE SPRING INSTALLATION Install the valve s
prin
g end with its identification color toward the s
prin
g retainer.
2004 Mitsubishi Endeavor Limited 2004 ENGINE Engine Overhaul - Endeavor
Page 1414 of 3870
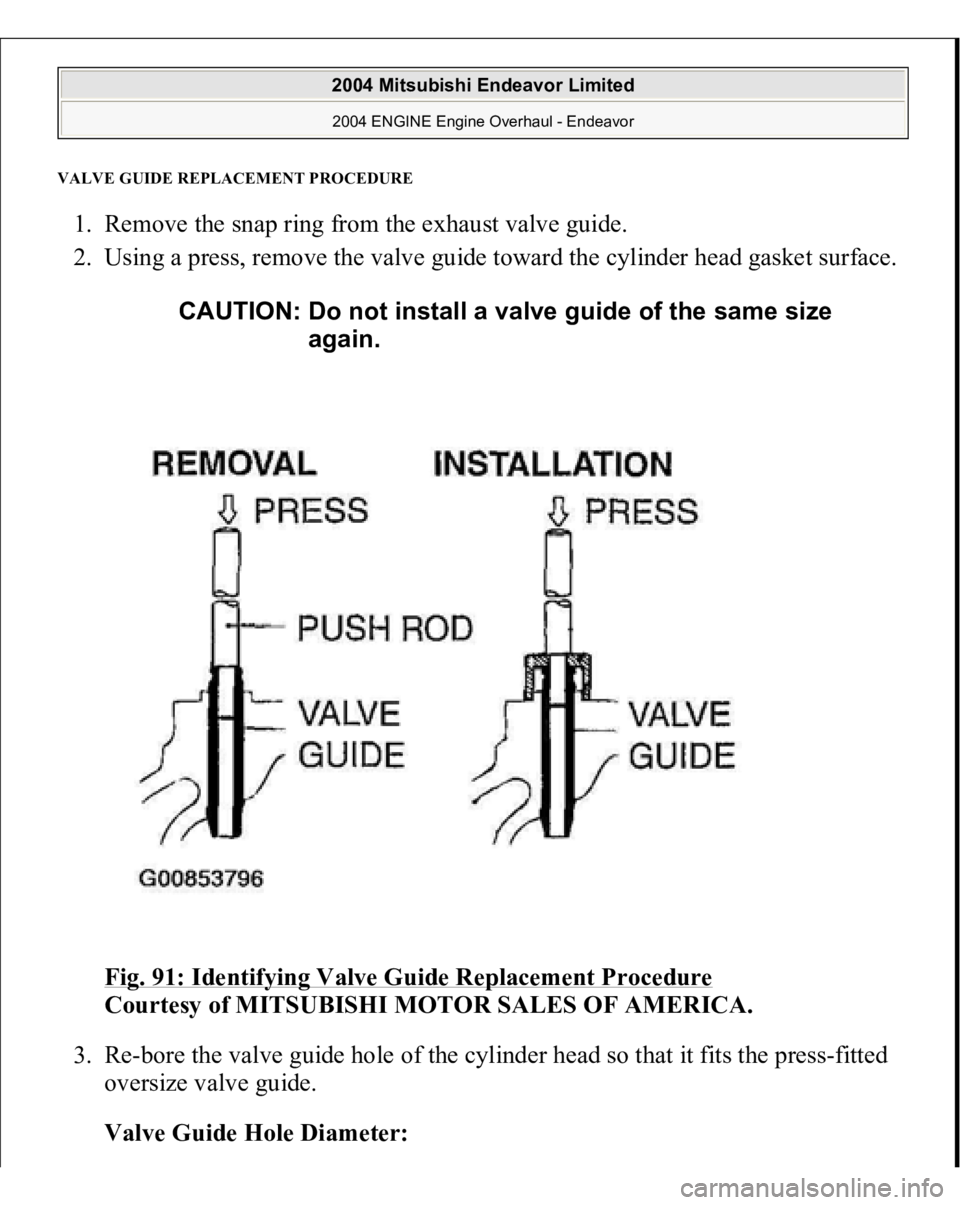
VALVE GUIDE REPLACEMENT PROCEDURE1. Remove the snap ring from the exhaust valve guide.
2. Using a press, remove the valve guide toward the cylinder head gasket surface.
Fig. 91: Identifying Valve Guide Replacement Procedure
Courtesy of MITSUBISHI MOTOR SALES OF AMERICA.
3. Re-bore the valve guide hole of the cylinder head so that it fits the press-fitted
oversize valve guide.
Valve Guide Hole Diameter:
CAUTION: Do not install a valve guide of the same size
again.
2004 Mitsubishi Endeavor Limited 2004 ENGINE Engine Overhaul - Endeavor
Page 1474 of 3870
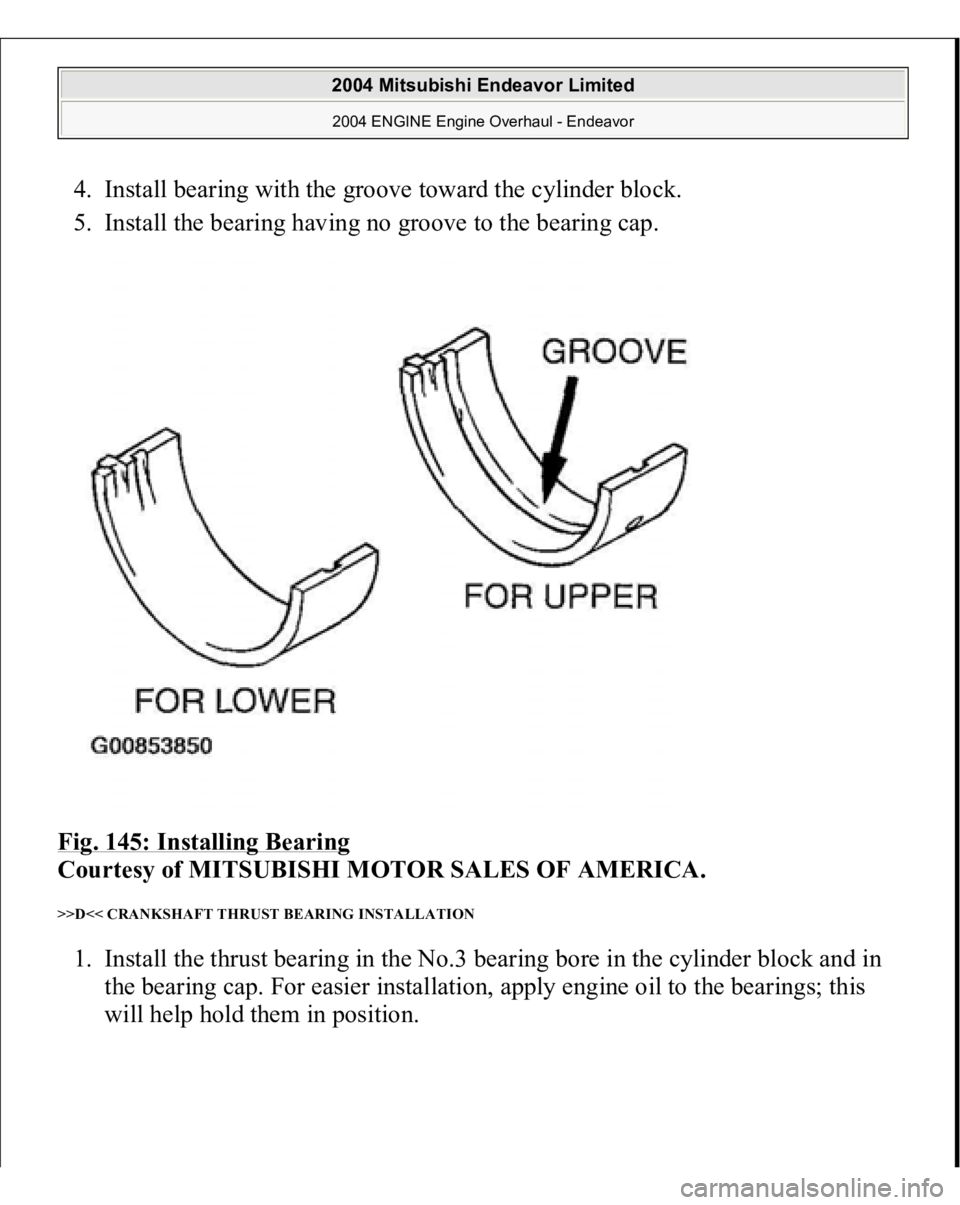
4. Install bearing with the groove toward the cylinder block.
5. Install the bearing having no groove to the bearing cap.
Fig. 145: Installing Bearing
Courtesy of MITSUBISHI MOTOR SALES OF AMERICA.
>>D<< CRANKSHAFT THRUST BEARING INSTALLATION 1. Install the thrust bearing in the No.3 bearing bore in the cylinder block and in
the bearing cap. For easier installation, apply engine oil to the bearings; this
will hel
p hold them in
position.
2004 Mitsubishi Endeavor Limited 2004 ENGINE Engine Overhaul - Endeavor
Page 1475 of 3870
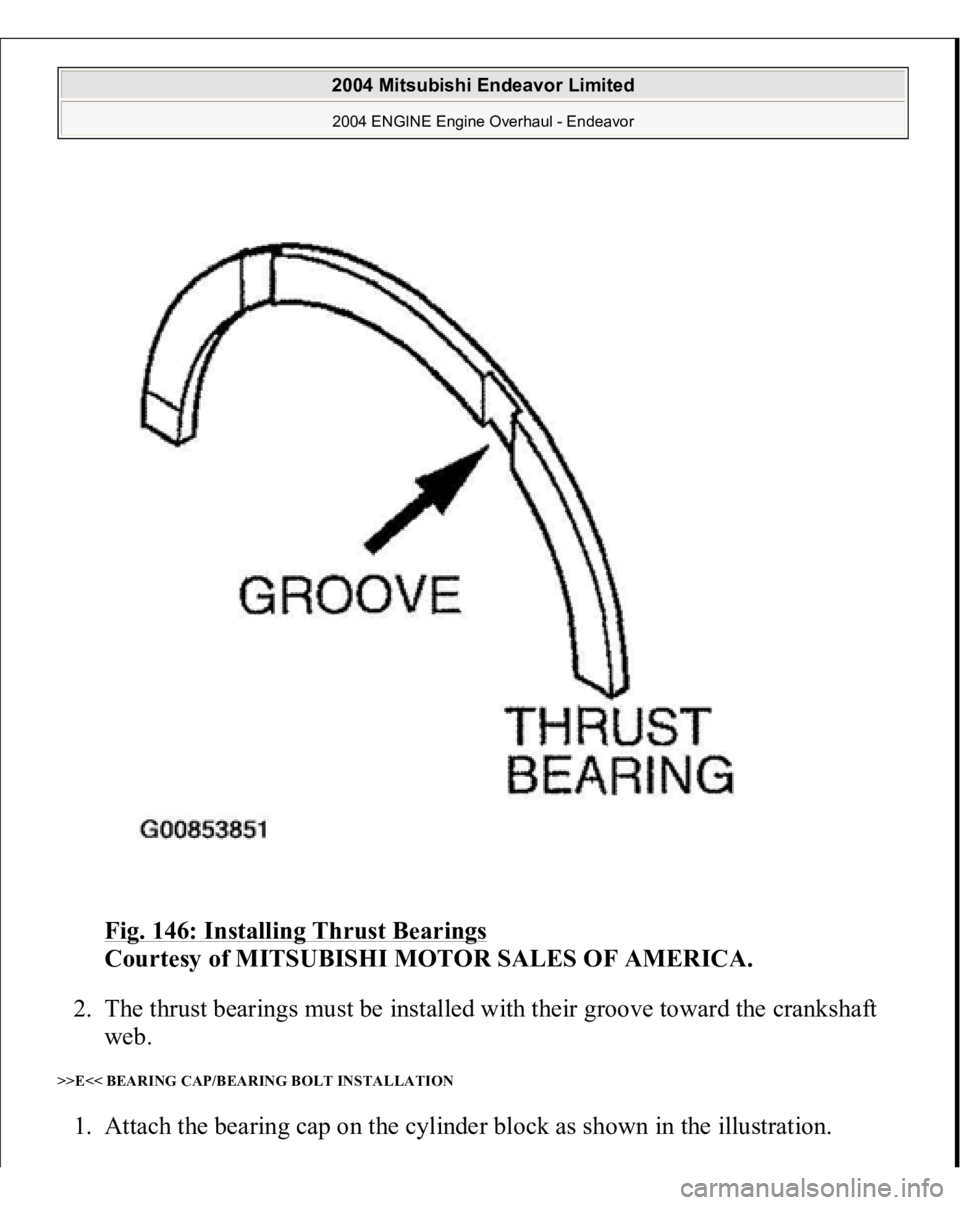
Fig. 146: Installing Thrust Bearings
Courtesy of MITSUBISHI MOTOR SALES OF AMERICA.
2. The thrust bearings must be installed with their groove toward the crankshaft
web.
>>E<< BEARING CAP/BEARING BOLT INSTALLATION 1. Attach the bearing cap on the cylinder block as shown in the illustration.
2004 Mitsubishi Endeavor Limited 2004 ENGINE Engine Overhaul - Endeavor
Page 1526 of 3870
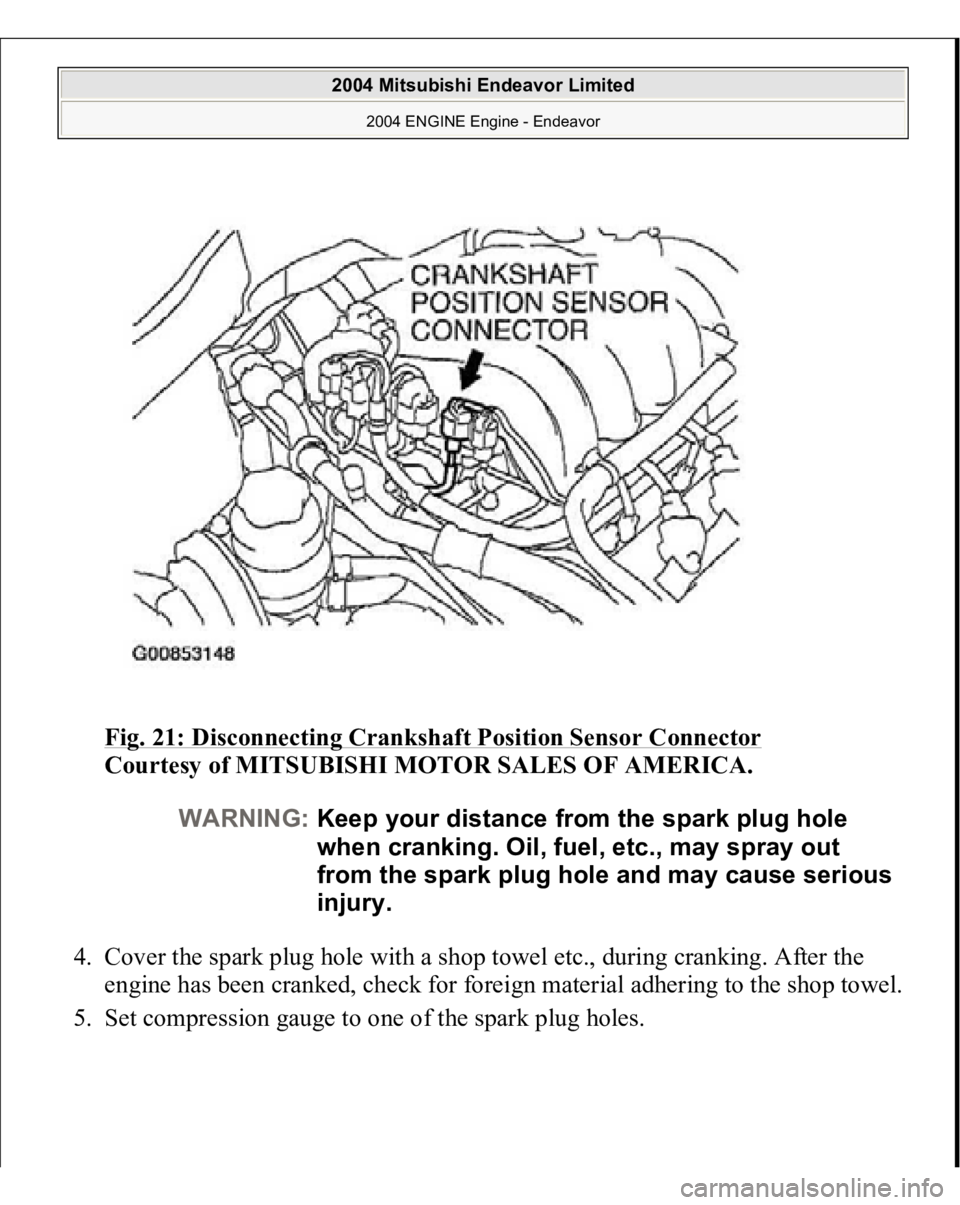
Fig. 21: Disconnecting Crankshaft Position Sensor Connector
Courtesy of MITSUBISHI MOTOR SALES OF AMERICA.
4. Cover the spark plug hole with a shop towel etc., during cranking. After the
engine has been cranked, check for foreign material adhering to the shop towel.
5. Set compression gauge to one of the spark plug holes.
WARNING:Keep your distance from the spark plug hole
when cranking. Oil, fuel, etc., may spray out
from the spark plug hole and may cause serious
injury.
2004 Mitsubishi Endeavor Limited
2004 ENGINE Engine - Endeavor
Page 1545 of 3870
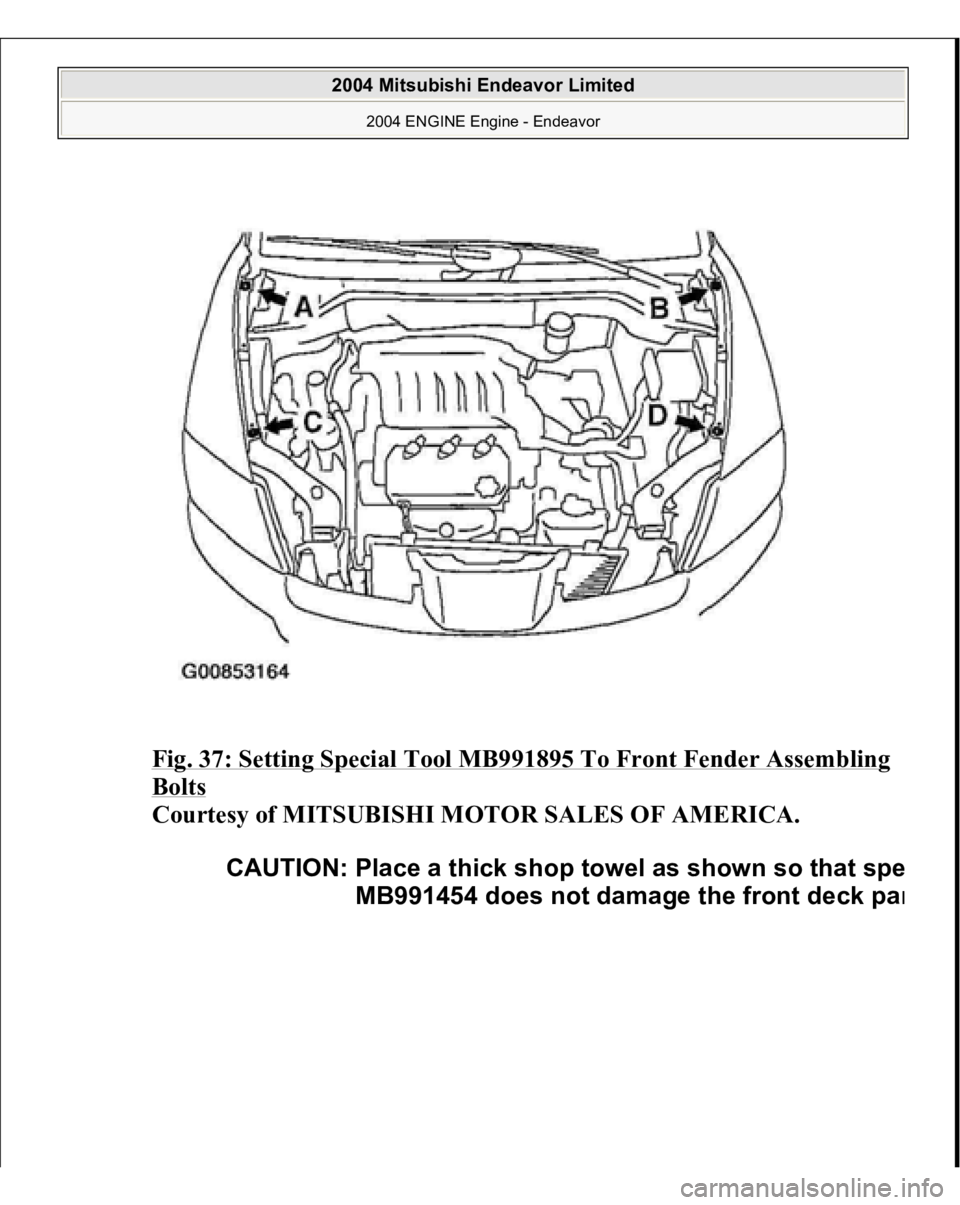
Fig. 37: Setting Special Tool MB991895 To Front Fender Assembling Bolts
Courtesy of MITSUBISHI MOTOR SALES OF AMERICA. CAUTION: Place a thick shop towel as shown so that sp
e
MB991454 does not dama
ge the front deck pa
n
2004 Mitsubishi Endeavor Limited
2004 ENGINE Engine - Endeavor
Page 1549 of 3870
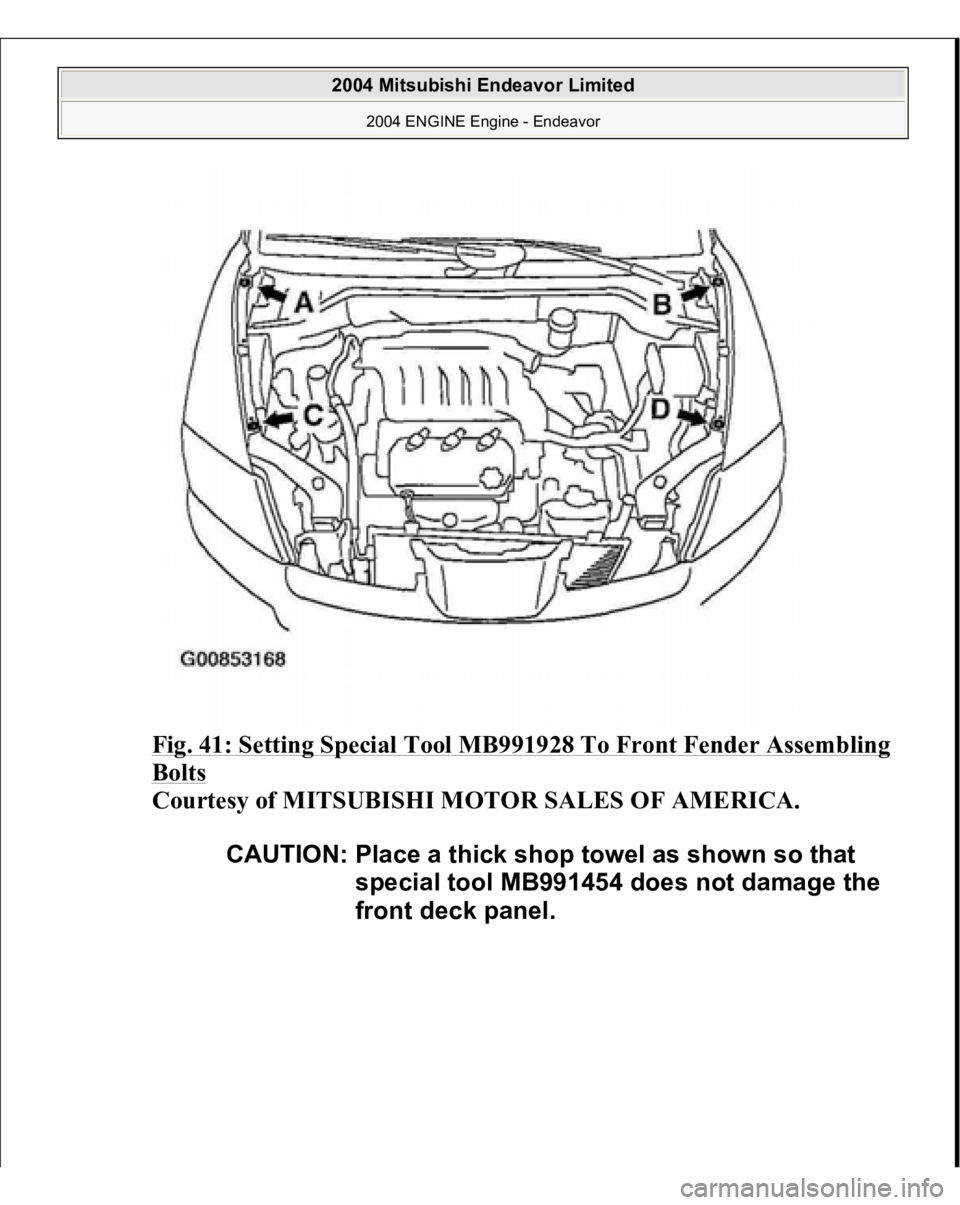
Fig. 41: Setting Special Tool MB991928 To Front Fender Assembling Bolts
Courtesy of MITSUBISHI MOTOR SALES OF AMERICA. CAUTION: Place a thick shop towel as shown so that
special tool MB991454 does not damage the
front deck panel.
2004 Mitsubishi Endeavor Limited
2004 ENGINE Engine - Endeavor
Page 1554 of 3870
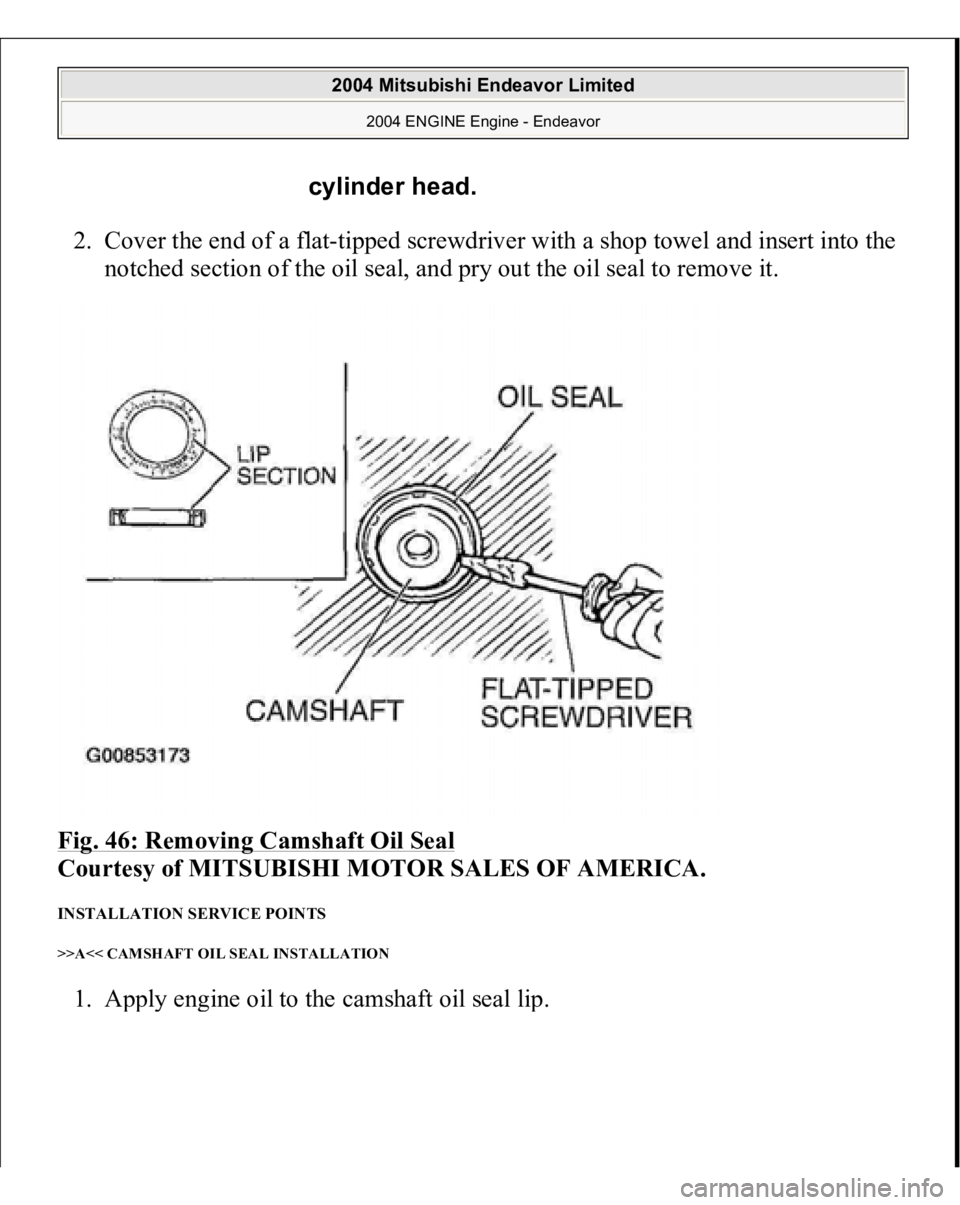
2. Cover the end of a flat-tipped screwdriver with a shop towel and insert into the
notched section of the oil seal, and pry out the oil seal to remove it.
Fig. 46: Removing Camshaft Oil Seal
Courtesy of MITSUBISHI MOTOR SALES OF AMERICA.
INSTALLATION SERVICE POINTS >>A<< CAMSHAFT OIL SEAL INSTALLATION 1. A
pply en
gine oil to the camshaft oil seal li
p.
cylinder head.
2004 Mitsubishi Endeavor Limited
2004 ENGINE Engine - Endeavor
Page 1565 of 3870
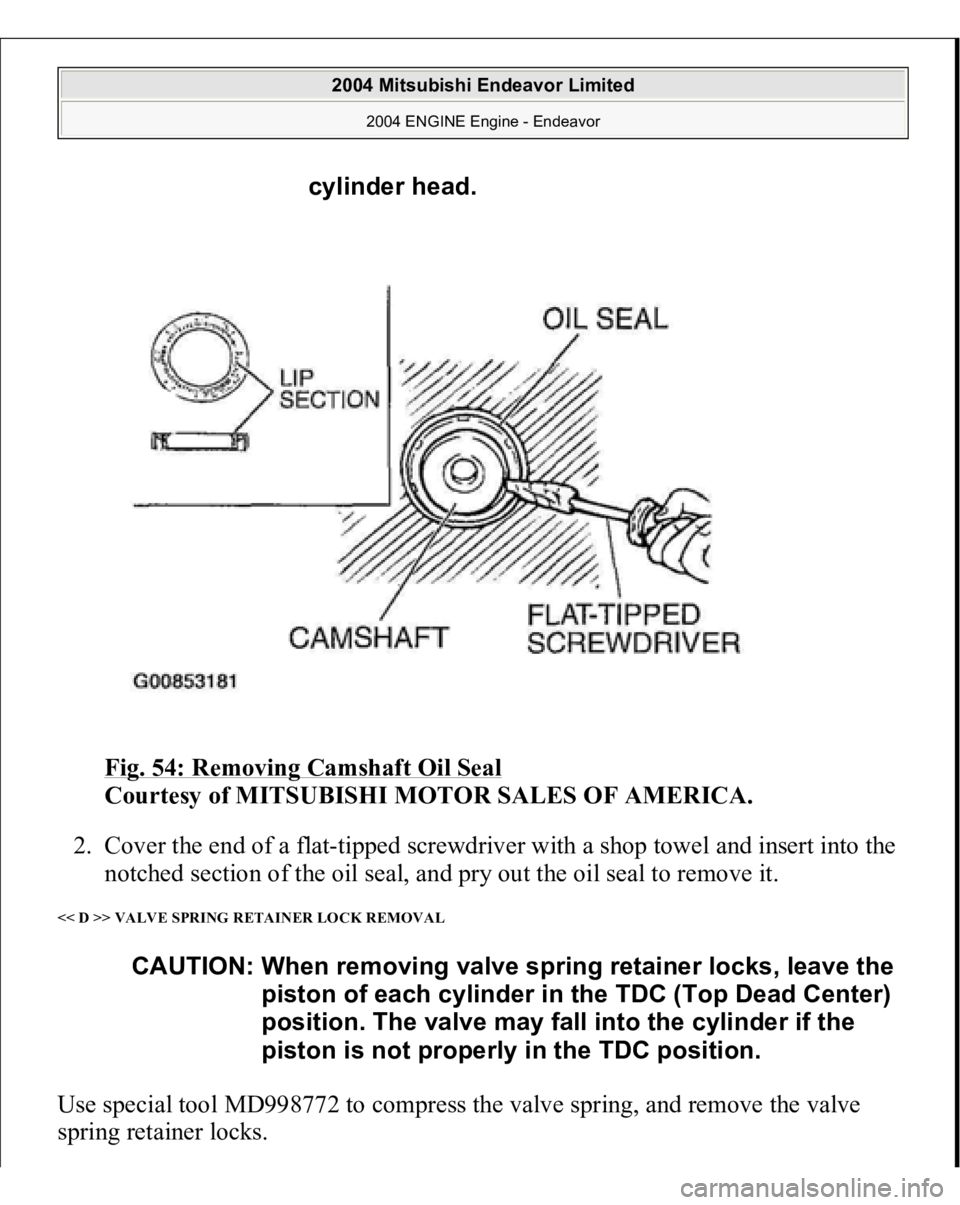
Fig. 54: Removing Camshaft Oil Seal
Courtesy of MITSUBISHI MOTOR SALES OF AMERICA.
2. Cover the end of a flat-tipped screwdriver with a shop towel and insert into the
notched section of the oil seal, and pry out the oil seal to remove it.
<< D >> VALVE SPRING RETAINER LOCK REMOVAL Use special tool MD998772 to compress the valve spring, and remove the valve
sprin
g retainer locks.
cylinder head.
CAUTION: When removing valve spring retainer locks, leave the
piston of each cylinder in the TDC (Top Dead Center)
position. The valve may fall into the cylinder if the
piston is not properly in the TDC position.
2004 Mitsubishi Endeavor Limited
2004 ENGINE Engine - Endeavor
Page 1869 of 3870
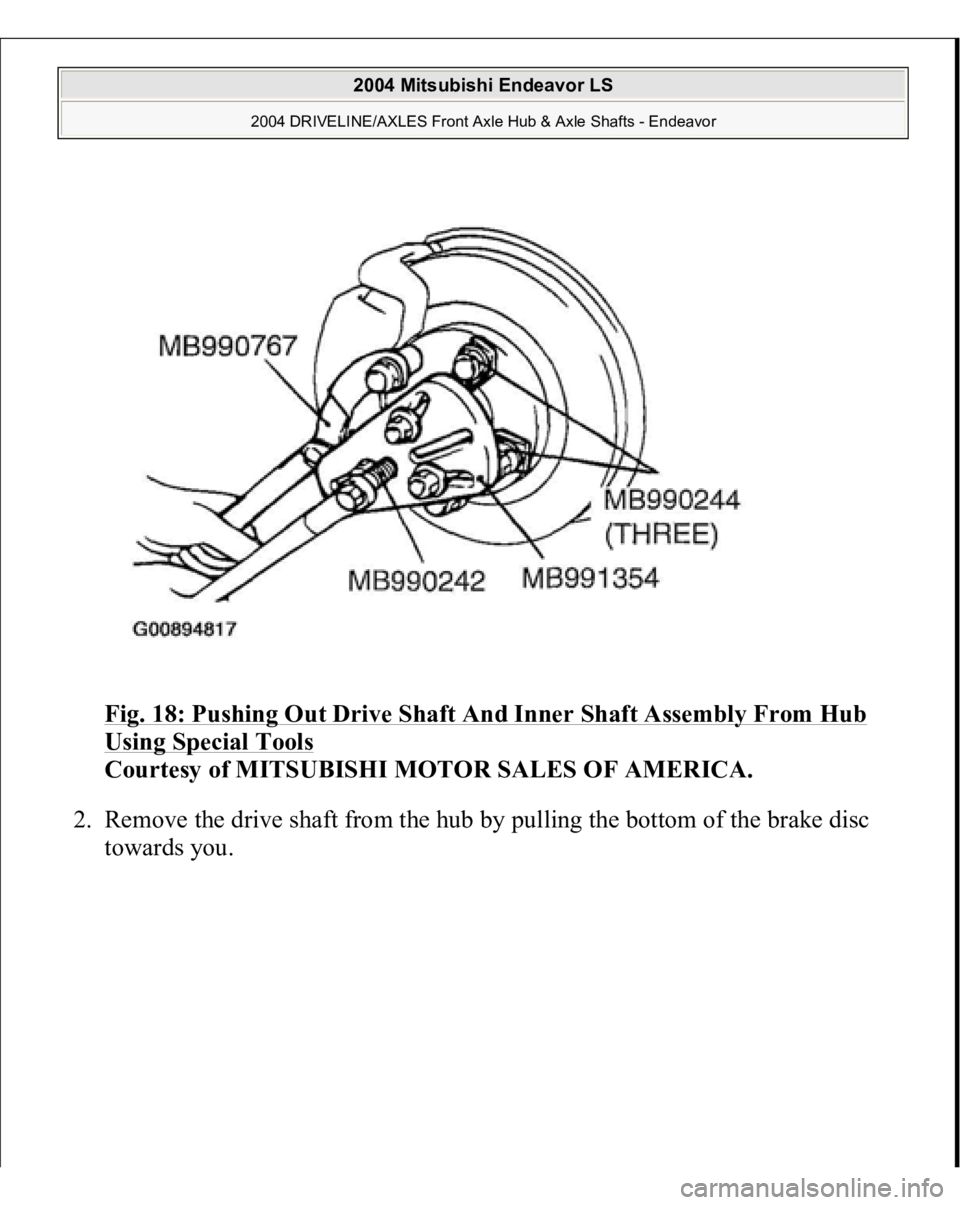
Fig. 18: Pushing Out Drive Shaft And Inner Shaft Assembly From Hub Using Special Tools
Courtesy of MITSUBISHI MOTOR SALES OF AMERICA.
2. Remove the drive shaft from the hub by pulling the bottom of the brake disc
towards
you.
2004 Mitsubishi Endeavor LS
2004 DRIVELINE/AXLES Front Axle Hub & Axle Shafts - Endeavor