parking brake MITSUBISHI GRANDIS 2010 Owner's Manual (in English)
[x] Cancel search | Manufacturer: MITSUBISHI, Model Year: 2010, Model line: GRANDIS, Model: MITSUBISHI GRANDIS 2010Pages: 273, PDF Size: 21.01 MB
Page 5 of 273
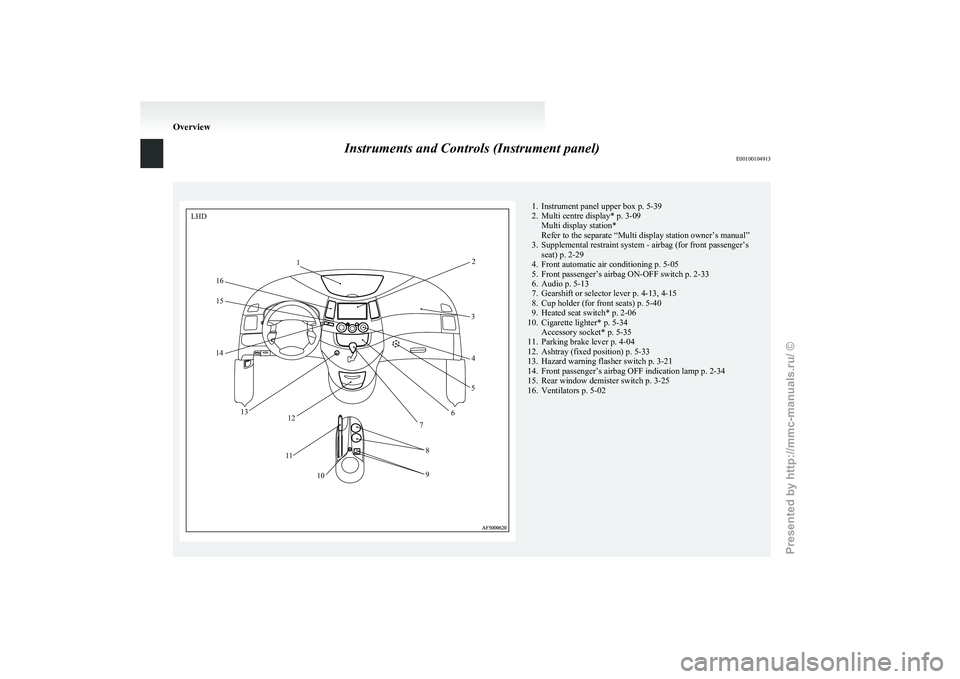
Instruments and Controls (Instrument panel)
E001001049131. Instrument panel upper box p. 5-39
2.
Multi centre display* p. 3-09Multi display station*
Refer to the separate “Multi display station owner’s manual”
3. Supplemental restraint system - airbag (for front passenger’s seat) p. 2-29
4. Front automatic air conditioning p. 5-05
5. Front passenger’s airbag ON-OFF switch p. 2-33
6. Audio p. 5-13
7. Gearshift or selector lever p. 4-13, 4-15
8. Cup holder (for front seats) p. 5-40
9. Heated seat switch* p. 2-06
10. Cigarette lighter* p. 5-34 Accessory socket* p. 5-35
11. Parking brake lever p. 4-04
12. Ashtray (fixed position) p. 5-33
13. Hazard warning flasher switch p. 3-21
14. Front passenger’s airbag OFF indication lamp p. 2-34
15. Rear window demister switch p. 3-25
16. Ventilators p. 5-02 OverviewLHD
1 2
3 4
5
6
7
8
9
10
1
1
12
13
14
15
16
Presented by http://mmc-manuals.ru/ \251
Page 6 of 273
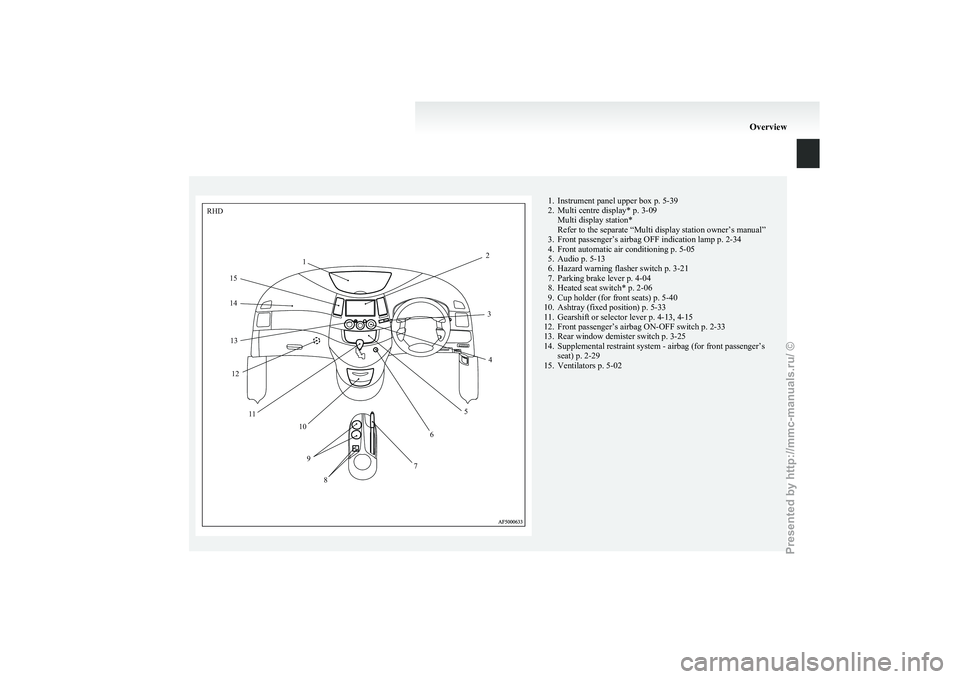
1. Instrument panel upper box p. 5-39
2.
Multi centre display* p. 3-09Multi display station*
Refer to the separate “Multi display station owner’s manual”
3. Front passenger’s airbag OFF indication lamp p. 2-34
4. Front automatic air conditioning p. 5-05
5. Audio p. 5-13
6. Hazard warning flasher switch p. 3-21
7. Parking brake lever p. 4-04
8. Heated seat switch* p. 2-06
9. Cup holder (for front seats) p. 5-40
10. Ashtray (fixed position) p. 5-33
11. Gearshift or selector lever p. 4-13, 4-15
12. Front passenger’s airbag ON-OFF switch p. 2-33
13. Rear window demister switch p. 3-25
14. Supplemental restraint system - airbag (for front passenger’s seat) p. 2-29
15. Ventilators p. 5-02 OverviewRHD
1 2
34
5
6
7
8
9
10
1
1
12
13
14
15
Presented by http://mmc-manuals.ru/ \251
Page 83 of 273
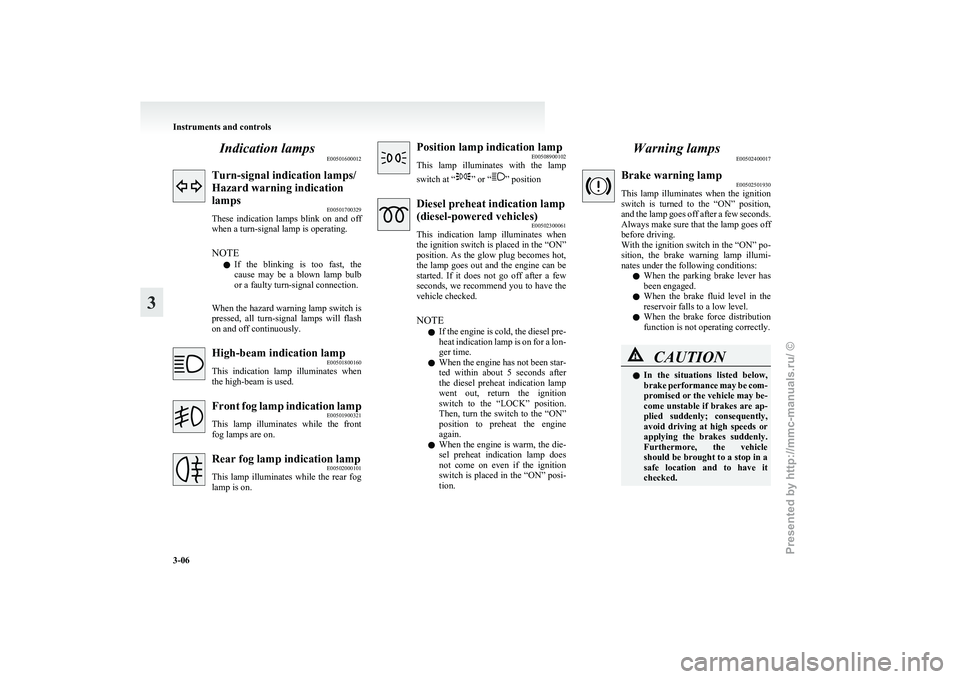
Indication lamps
E00501600012Turn-signal indication lamps/
Hazard warning indication
lamps
E00501700329
These
indication lamps blink on and off
when a turn-signal lamp is operating.
NOTE
l If the blinking is too fast, the
cause may be a blown lamp bulb
or a faulty turn-signal connection.
When the hazard warning lamp switch is
pressed, all turn-signal lamps will flash
on and off continuously. High-beam indication lamp
E00501800160
This
indication lamp illuminates when
the high-beam is used. Front fog lamp indication lamp
E00501900321
This
lamp illuminates while the front
fog lamps are on. Rear fog lamp indication lamp
E00502000101
This
lamp illuminates while the rear fog
lamp is on. Position lamp indication lamp
E00508900102
This
lamp illuminates with the lamp
switch at “ ” or “ ” position
Diesel preheat indication lamp
(diesel-powered vehicles)
E00502300061
This
indication lamp illuminates when
the ignition switch is placed in the “ON”
position. As the glow plug becomes hot,
the lamp goes out and the engine can be
started. If it does not go off after a few
seconds, we recommend you to have the
vehicle checked.
NOTE
l If the engine is cold, the diesel pre-
heat indication lamp is on for a lon-
ger time.
l When the engine has not been star-
ted within about 5 seconds after
the diesel preheat indication lamp
went out, return the ignition
switch to the “LOCK” position.
Then, turn the switch to the “ON”
position to preheat the engine
again.
l When the engine is warm, the die-
sel preheat indication lamp does
not come on even if the ignition
switch is placed in the “ON” posi-
tion. Warning lamps
E00502400017 Brake warning lamp
E00502501930
This
lamp illuminates when the ignition
switch is turned to the “ON” position,
and the lamp goes off after a few seconds.
Always make sure that the lamp goes off
before driving.
With the ignition switch in the “ON” po-
sition, the brake warning lamp illumi-
nates under the following conditions:
l When the parking brake lever has
been engaged.
l When the brake fluid level in the
reservoir falls to a low level.
l When the brake force distribution
function is not operating correctly. CAUTION
l
In
the situations listed below,
brake performance may be com-
promised or the vehicle may be-
come unstable if brakes are ap-
plied suddenly; consequently,
avoid driving at high speeds or
applying the brakes suddenly.
Furthermore, the vehicle
should be brought to a stop in a
safe location and to have it
checked. Instruments and controls
3-06
3
Presented by http://mmc-manuals.ru/ \251
Page 84 of 273
CAUTION
• The brake warning lamp
does not illuminate when
the parking brake is applied
or does not turn off when
the parking brake is re-
leased.
• The ABS warning lamp and brake warning lamp illumi-
nate at the same time.
For details, refer to “ABS
warning lamp” on page
4-21.
• The brake warning lamp re- mains illuminated during
driving.
l The vehicle should be brought
to a halt in the following man-
ner when brake performance
has deteriorated.
• Depress the brake pedalharder than usual.
Even if the brake pedal
moves down to the very end
of its possible stroke, keep it
pressed down hard.
• Should the brakes fail, use engine braking to reduce
your speed and carefully
pull the parking brake lever
to park your vehicle.
Depress the brake pedal to
operate the stop lamp
(brake lamp) to alert the ve-
hicles behind you. Check engine warning lamp
(petrol-powered vehicles)
E00502601351
This
lamp is a part of an onboard diag-
nostic system which monitors the emis-
sions, engine and automatic transmission
control systems.
If a problem is detected in one of these
systems, this lamp illuminates.
Although your vehicle will usually be
drivable and not need towing, we recom-
mend you to have the system checked as
soon as possible.
This lamp will also illuminate for a few
seconds when the ignition key is turned
to the “ON” position. If it does not go
off after a few seconds, we recommend
you to have the vehicle checked. CAUTION
l
Prolonged
driving with this
lamp on may cause further dam-
age to the emission control sys-
tem. It could also affect fuel
economy and drivability.
l If the lamp does not illuminate
when the ignition key is turned
to the “ON” position, we recom-
mend you to have the system
checked. CAUTION
l
If
the lamp illuminates while
the engine is running, avoid
driving at high speeds and we
recommend you to have the sys-
tem checked.
During vehicle operation with
the lamp illuminated, the vehi-
cle may not accelerate when
you depress the accelerator ped-
al.
When the vehicle is stationary
with the lamp illuminated, you
must depress the brake pedal
more firmly than usual since
the engine idling speed is high-
er than usual and the vehicle
with an A/T has a stronger ten-
dency to creep forward.
NOTE l The
engine electronic control mod-
ule accommodating the onboard di-
agnostic system has various fault
data (especially about the exhaust
emission) stored.
This data will be erased if a bat-
tery cable is disconnected which
will make a rapid diagnosis diffi-
cult. Do not disconnect a battery
cable when the check engine warn-
ing lamp is ON. Instruments and controls
3-07 3
Presented by http://mmc-manuals.ru/ \251
Page 104 of 273
Economical driving.......................................................................4-02
Driving, alcohol and drugs
........................................................... 4-02
Safe driving techniques ................................................................ 4-03
Running-in recommendations
.......................................................4-03
Parking brake................................................................................ 4-04
Parking.......................................................................................... 4-05
Steering wheel height adjustment .................................................4-06
Inside rear-view mirror ................................................................. 4-06
Outside rear-view mirrors ............................................................. 4-07
Ignition switch .............................................................................. 4-08
Steering wheel lock ...................................................................... 4-10
Starting..........................................................................................4-10
Diesel particulate filter (DPF)* .................................................... 4-12
Manual transmission* ................................................................... 4-13
Automatic transmission INVECS-II Sports Mode 4A/T (Intelligent & Innovative Vehicle Electronic Control
System II)*............................................................................... 4-15
Braking......................................................................................... 4-20
Anti-lock brake system (ABS) ..................................................... 4-21
Power steering system.................................................................. 4-23
Active stability control (ASC)* .................................................... 4-23
Auto-speed (cruise) control* ........................................................ 4-25
Corner sensor system*.................................................................. 4-29
Cargo loads................................................................................... 4-32
Trailer towing ............................................................................... 4-34Starting and driving
4
Presented by http://mmc-manuals.ru/ \251
Page 107 of 273
6 M/T
Shift point Speed limit
1
st
gear 25 km/h (16 mph)2
nd
gear 40 km/h (25 mph) 3
rd
gear 65 km/h (40 mph) 4
th
gear 90 km/h (56 mph) 5
th
gear 115 km/h (71 mph) 6
th
gear 130 km/h (81 mph)Vehicles with A/T
Shift point Speed limit
1
st
gear 25 km/h (16 mph)2
nd
gear 75 km/h (46 mph) 3
rd
gear 115 km/h (71 mph) 4
th
gear 165 km/h (102 mph) Parking brake
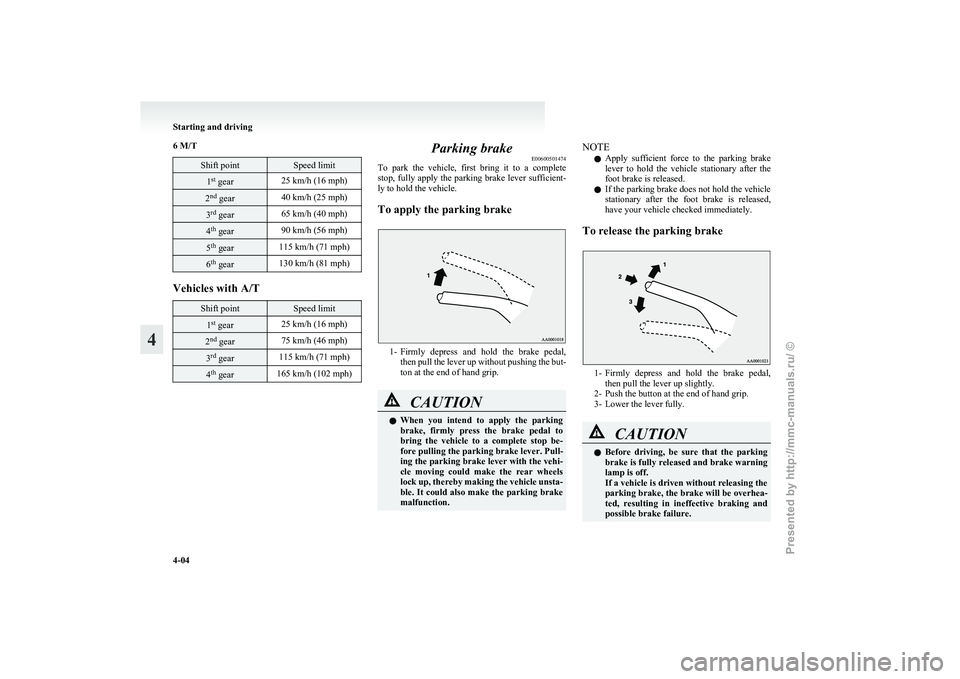
E00600501474
To
park the vehicle, first bring it to a complete
stop, fully apply the parking brake lever sufficient-
ly to hold the vehicle.
To apply the parking brake 1- Firmly
depress and hold the brake pedal,
then pull the lever up without pushing the but-
ton at the end of hand grip. CAUTION
l
When
you intend to apply the parking
brake, firmly press the brake pedal to
bring the vehicle to a complete stop be-
fore pulling the parking brake lever. Pull-
ing the parking brake lever with the vehi-
cle moving could make the rear wheels
lock up, thereby making the vehicle unsta-
ble. It could also make the parking brake
malfunction. NOTE
l Apply
sufficient force to the parking brake
lever to hold the vehicle stationary after the
foot brake is released.
l If the parking brake does not hold the vehicle
stationary after the foot brake is released,
have your vehicle checked immediately.
To release the parking brake 1- Firmly
depress and hold the brake pedal,
then pull the lever up slightly.
2- Push the button at the end of hand grip.
3- Lower the lever fully. CAUTION
l
Before
driving, be sure that the parking
brake is fully released and brake warning
lamp is off.
If a vehicle is driven without releasing the
parking brake, the brake will be overhea-
ted, resulting in ineffective braking and
possible brake failure. Starting and driving
4-04
4
Presented by http://mmc-manuals.ru/ \251
Page 108 of 273
CAUTION
l
If the brake warning lamp does not extin-
guish when the parking brake is fully re-
leased, the brake system may be abnormal.
Have your vehicle checked immediately.
For details, refer to “Brake warning
lamp” on page 3-06. Parking
E00600601433
Parking on a hill
To
prevent the vehicle from rolling, follow these
procedures:
Parking on a downhill slope
Turn the front wheels towards the kerb and move
the vehicle forward until the kerb side wheel gently
touches the kerb.
Apply the parking brake and place the gearshift lev-
er into the “R” (Reverse) position (with M/T) or
the selector lever into the “P” (PARK) position
(with A/T).
If necessary, apply chocks to wheels.
Parking on an uphill slope
Turn the front wheels away from the kerb and
move the vehicle back until the kerb side wheel gen-
tly touches the kerb.
Apply the parking brake and place the gearshift lev-
er into the 1 st
position (with M/T) or the selector lev-
er into the “P” (PARK) position (with A/T).
If necessary, apply chocks to wheels.
NOTE
l If your vehicle is equipped with A/T, be sure
to apply the parking brake before moving the
selector lever to the “P” (PARK) position. If
you move the selector lever to the “P”
(PARK) position before applying the parking
brake, it may be difficult to disengage the se-
lector lever from the “P” (PARK) position
when next you drive the vehicle, requiring ap-
plication of a strong force to the selector lev-
er to move from the “P” (PARK) position. Parking with the engine running
Never
leave the engine running while you take a
short sleep/rest. Also, never leave the engine run-
ning in a closed or poorly ventilated place. WARNING
l Leaving
the engine running risks injury
or death from accidentally moving the
gearshift lever (M/T) or selector lever
(A/T) or the accumulation of toxic ex-
haust fumes on the passenger compart-
ment.
Where you park
Your
front bumper can be damaged if you scrape it
over kerbs or parking stop blocks. Be careful when
travelling up or down steep slopes where your bump-
er can scrape the road. WARNING
l Do
not park your vehicle in areas where
combustible materials such as dry grass
or leaves can come in contact with a hot
exhaust, since a fire could occur.
When leaving the vehicle
Always
remove the key from the ignition switch
and lock all doors and the tailgate when leaving the
vehicle unattended.
Always try to park your vehicle in a well lit area. Starting and driving
4-05 4
Presented by http://mmc-manuals.ru/ \251
Page 113 of 273
Steering wheel lock
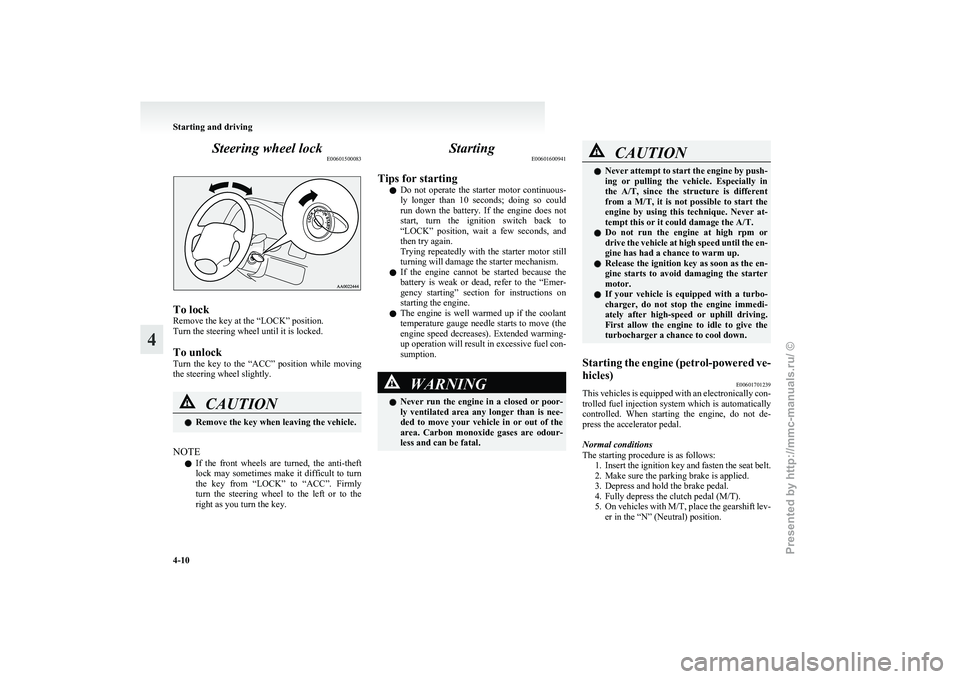
E00601500083To lock
Remove the key at the “LOCK” position.
Turn the steering wheel until it is locked.
To unlock
Turn
the key to the “ACC” position while moving
the steering wheel slightly. CAUTION
l
Remove the key when leaving the vehicle.
NOTE l If
the front wheels are turned, the anti-theft
lock may sometimes make it difficult to turn
the key from “LOCK” to “ACC”. Firmly
turn the steering wheel to the left or to the
right as you turn the key. Starting
E00601600941
Tips for starting l Do
not operate the starter motor continuous-
ly longer than 10 seconds; doing so could
run down the battery. If the engine does not
start, turn the ignition switch back to
“LOCK” position, wait a few seconds, and
then try again.
Trying repeatedly with the starter motor still
turning will damage the starter mechanism.
l If the engine cannot be started because the
battery is weak or dead, refer to the “Emer-
gency starting” section for instructions on
starting the engine.
l The engine is well warmed up if the coolant
temperature gauge needle starts to move (the
engine speed decreases). Extended warming-
up operation will result in excessive fuel con-
sumption. WARNING
l Never
run the engine in a closed or poor-
ly ventilated area any longer than is nee-
ded to move your vehicle in or out of the
area. Carbon monoxide gases are odour-
less and can be fatal. CAUTION
l
Never
attempt to start the engine by push-
ing or pulling the vehicle. Especially in
the A/T, since the structure is different
from a M/T, it is not possible to start the
engine by using this technique. Never at-
tempt this or it could damage the A/T.
l Do not run the engine at high rpm or
drive the vehicle at high speed until the en-
gine has had a chance to warm up.
l Release the ignition key as soon as the en-
gine starts to avoid damaging the starter
motor.
l If your vehicle is equipped with a turbo-
charger, do not stop the engine immedi-
ately after high-speed or uphill driving.
First allow the engine to idle to give the
turbocharger a chance to cool down.
Starting the engine (petrol-powered ve-
hicles) E00601701239
This vehicles is equipped with an electronically con-
trolled
fuel injection system which is automatically
controlled. When starting the engine, do not de-
press the accelerator pedal.
Normal conditions
The starting procedure is as follows: 1. Insert the ignition key and fasten the seat belt.
2. Make sure the parking brake is applied.
3. Depress and hold the brake pedal.
4. Fully depress the clutch pedal (M/T).
5. On vehicles with M/T, place the gearshift lev-er in the “N” (Neutral) position. Starting and driving
4-10
4
Presented by http://mmc-manuals.ru/ \251
Page 114 of 273
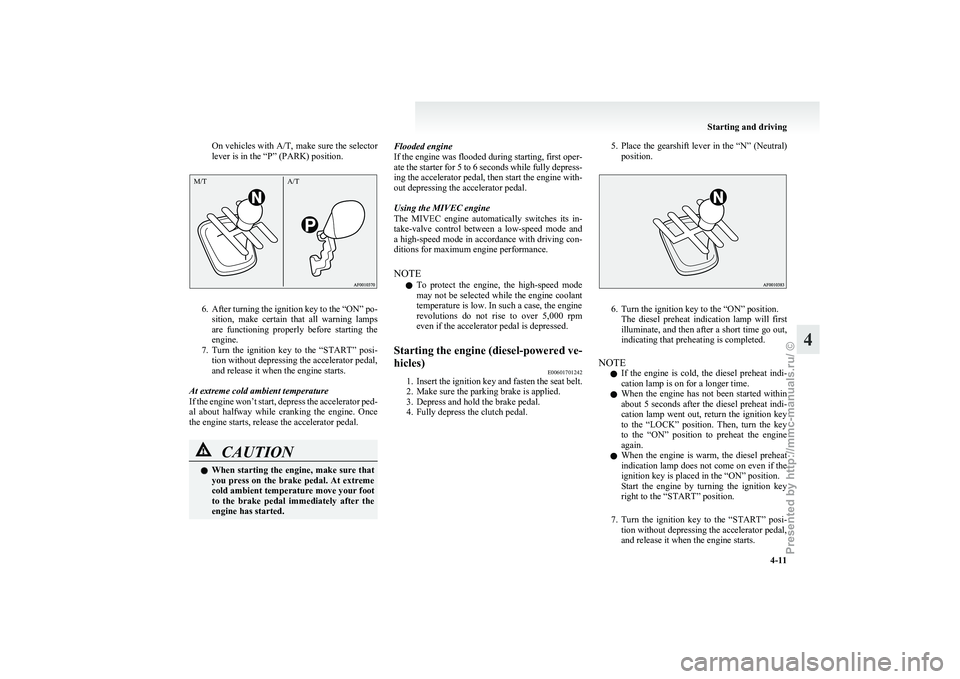
On vehicles with A/T,
make sure the selector
lever is in the “P” (PARK) position. 6. After
turning the ignition key to the “ON” po-
sition, make certain that all warning lamps
are functioning properly before starting the
engine.
7. Turn the ignition key to the “START” posi- tion without depressing the accelerator pedal,
and release it when the engine starts.
At extreme cold ambient temperature
If the engine won’t start, depress the accelerator ped-
al about halfway while cranking the engine. Once
the engine starts, release the accelerator pedal. CAUTION
l
When
starting the engine, make sure that
you press on the brake pedal. At extreme
cold ambient temperature move your foot
to the brake pedal immediately after the
engine has started. Flooded engine
If
the engine was flooded during starting, first oper-
ate the starter for 5 to 6 seconds while fully depress-
ing the accelerator pedal, then start the engine with-
out depressing the accelerator pedal.
Using the MIVEC engine
The MIVEC engine automatically switches its in-
take-valve control between a low-speed mode and
a high-speed mode in accordance with driving con-
ditions for maximum engine performance.
NOTE
l To protect the engine, the high-speed mode
may not be selected while the engine coolant
temperature is low. In such a case, the engine
revolutions do not rise to over 5,000 rpm
even if the accelerator pedal is depressed.
Starting the engine (diesel-powered ve-
hicles) E00601701242
1. Insert
the ignition key and fasten the seat belt.
2. Make sure the parking brake is applied.
3. Depress and hold the brake pedal.
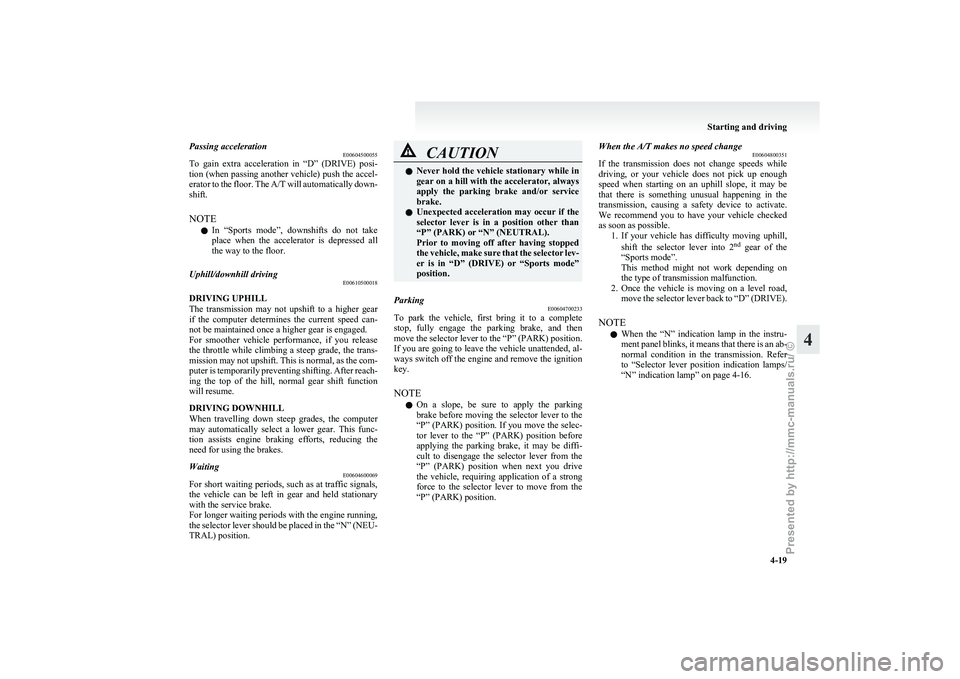
4. Fully depress the clutch pedal. 5. Place
the gearshift lever in the “N” (Neutral)
position. 6. Turn the ignition key to the “ON” position.
The
diesel preheat indication lamp will first
illuminate, and then after a short time go out,
indicating that preheating is completed.
NOTE l If the engine is cold, the diesel preheat indi-
cation lamp is on for a longer time.
l When the engine has not been started within
about 5 seconds after the diesel preheat indi-
cation lamp went out, return the ignition key
to the “LOCK” position. Then, turn the key
to the “ON” position to preheat the engine
again.
l When the engine is warm, the diesel preheat
indication lamp does not come on even if the
ignition key is placed in the “ON” position.
Start the engine by turning the ignition key
right to the “START” position.
7. Turn the ignition key to the “START” posi- tion without depressing the accelerator pedal,
and release it when the engine starts. Starting and driving
4-11 4M/T
A/T
Presented by http://mmc-manuals.ru/ \251
Page 122 of 273
Passing acceleration
E00604500055
To
gain extra acceleration in “D” (DRIVE) posi-
tion (when passing another vehicle) push the accel-
erator to the floor. The A/T will automatically down-
shift.
NOTE
l In “Sports mode”, downshifts do not take
place when the accelerator is depressed all
the way to the floor.
Uphill/downhill driving E00610500018
DRIVING UPHILL
The
transmission may not upshift to a higher gear
if the computer determines the current speed can-
not be maintained once a higher gear is engaged.
For smoother vehicle performance, if you release
the throttle while climbing a steep grade, the trans-
mission may not upshift. This is normal, as the com-
puter is temporarily preventing shifting. After reach-
ing the top of the hill, normal gear shift function
will resume.
DRIVING DOWNHILL
When travelling down steep grades, the computer
may automatically select a lower gear. This func-
tion assists engine braking efforts, reducing the
need for using the brakes.
Waiting E00604600069
For short waiting periods, such as at traffic signals,
the
vehicle can be left in gear and held stationary
with the service brake.
For longer waiting periods with the engine running,
the selector lever should be placed in the “N” (NEU-
TRAL) position. CAUTION
l
Never
hold the vehicle stationary while in
gear on a hill with the accelerator, always
apply the parking brake and/or service
brake.
l Unexpected acceleration may occur if the
selector lever is in a position other than
“P” (PARK) or “N” (NEUTRAL).
Prior to moving off after having stopped
the vehicle, make sure that the selector lev-
er is in “D” (DRIVE) or “Sports mode”
position.
Parking E00604700233
To park the vehicle, first bring it to a complete
stop,
fully engage the parking brake, and then
move the selector lever to the “P” (PARK) position.
If you are going to leave the vehicle unattended, al-
ways switch off the engine and remove the ignition
key.
NOTE
l On a slope, be sure to apply the parking
brake before moving the selector lever to the
“P” (PARK) position. If you move the selec-
tor lever to the “P” (PARK) position before
applying the parking brake, it may be diffi-
cult to disengage the selector lever from the
“P” (PARK) position when next you drive
the vehicle, requiring application of a strong
force to the selector lever to move from the
“P” (PARK) position. When the A/T makes no speed change
E00604800351
If
the transmission does not change speeds while
driving, or your vehicle does not pick up enough
speed when starting on an uphill slope, it may be
that there is something unusual happening in the
transmission, causing a safety device to activate.
We recommend you to have your vehicle checked
as soon as possible. 1. If your vehicle has difficulty moving uphill,
shift the selector lever into 2 nd
gear of the
“Sports mode”.
This method might not work depending on
the type of transmission malfunction.
2. Once the vehicle is moving on a level road, move the selector lever back to “D” (DRIVE).
NOTE l When the “N” indication lamp in the instru-
ment panel blinks, it means that there is an ab-
normal condition in the transmission. Refer
to “Selector lever position indication lamps/
“N” indication lamp” on page 4-16. Starting and driving
4-19 4
Presented by http://mmc-manuals.ru/ \251