reset MITSUBISHI GRANDIS 2010 Owner's Manual (in English)
[x] Cancel search | Manufacturer: MITSUBISHI, Model Year: 2010, Model line: GRANDIS, Model: MITSUBISHI GRANDIS 2010Pages: 273, PDF Size: 21.01 MB
Page 79 of 273
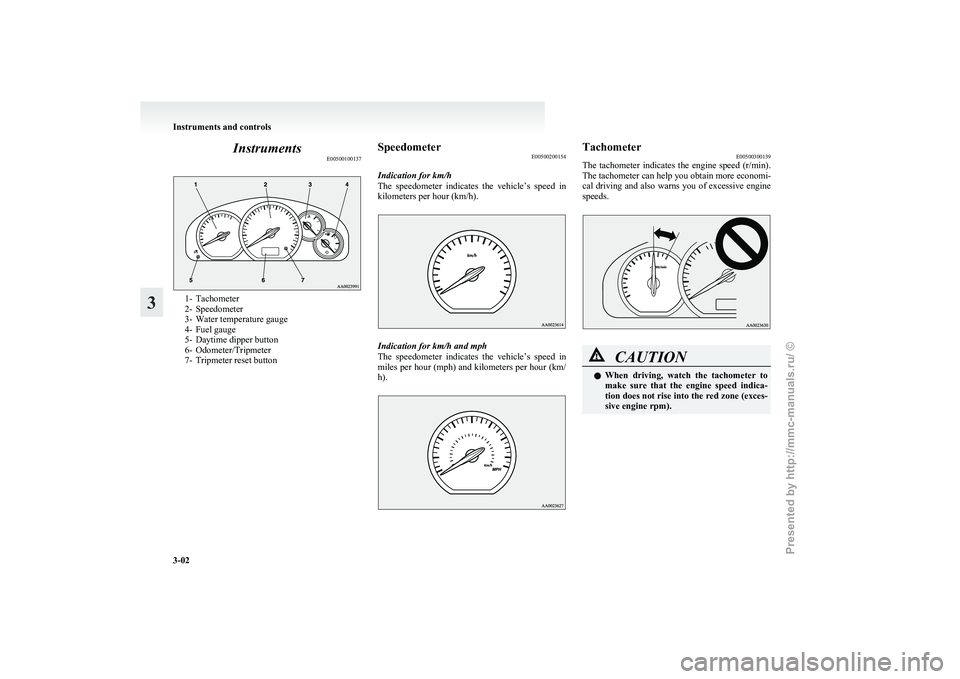
Instruments
E005001001371- Tachometer
2-
Speedometer
3- Water temperature gauge
4- Fuel gauge
5- Daytime dipper button
6- Odometer/Tripmeter
7- Tripmeter reset button Speedometer
E00500200154
Indication for km/h
The
speedometer indicates the vehicle’s speed in
kilometers per hour (km/h). Indication for km/h and mph
The
speedometer indicates the vehicle’s speed in
miles per hour (mph) and kilometers per hour (km/
h). Tachometer
E00500300139
The
tachometer indicates the engine speed (r/min).
The tachometer can help you obtain more economi-
cal driving and also warns you of excessive engine
speeds. CAUTION
l
When
driving, watch the tachometer to
make sure that the engine speed indica-
tion does not rise into the red zone (exces-
sive engine rpm). Instruments and controls
3-02
3
Presented by http://mmc-manuals.ru/ \251
Page 80 of 273
Odometer/Tripmeter
E00500600897
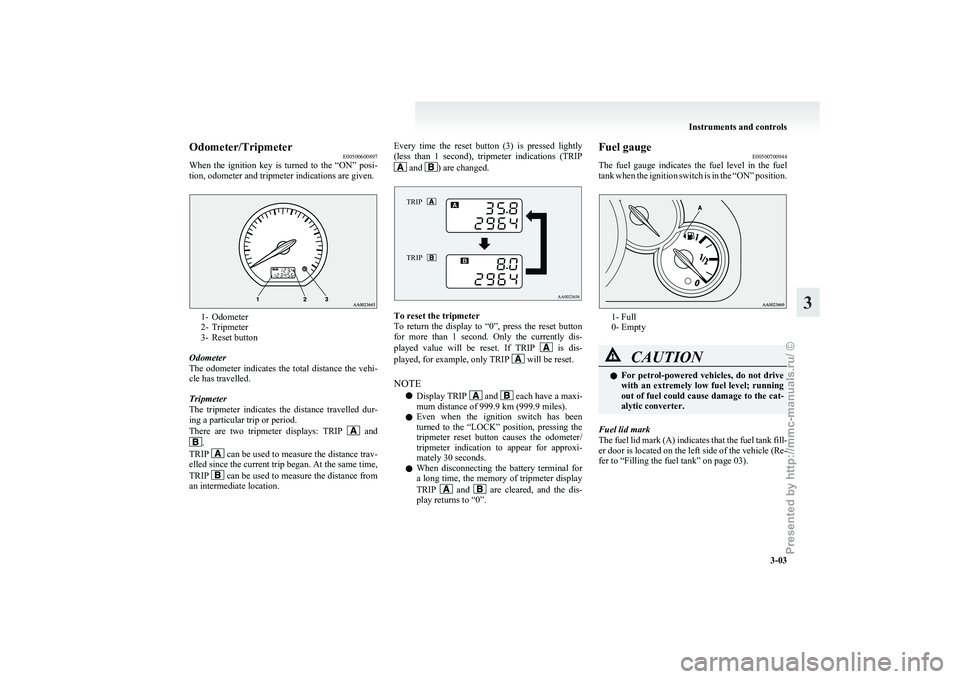
When
the ignition key is turned to the “ON” posi-
tion, odometer and tripmeter indications are given. 1- Odometer
2-
Tripmeter
3- Reset button
Odometer
The odometer indicates the total distance the vehi-
cle has travelled.
Tripmeter
The tripmeter indicates the distance travelled dur-
ing a particular trip or period.
There are two tripmeter displays: TRIP and
.
TRIP can be used to measure the distance trav-
elled
since the current trip began. At the same time,
TRIP can be used to measure the distance from
an intermediate location. Every time the reset button (3) is pressed lightly
(less
than 1 second), tripmeter indications (TRIP and ) are changed.
TRIP
TRIP To reset the tripmeter
To
return the display to “0”, press the reset button
for more than 1 second. Only the currently dis-
played value will be reset. If TRIP is dis-
played, for example, only TRIP will be reset.
NOTE l Display TRIP and each have a maxi-
mum distance of 999.9 km (999.9 miles).
l Even
when the ignition switch has been
turned to the “LOCK” position, pressing the
tripmeter reset button causes the odometer/
tripmeter indication to appear for approxi-
mately 30 seconds.
l When disconnecting the battery terminal for
a long time, the memory of tripmeter display
TRIP and are cleared, and the dis-
play returns to “0”. Fuel gauge
E00500700944
The
fuel gauge indicates the fuel level in the fuel
tank when the ignition switch is in the “ON” position. 1- Full
0- Empty
CAUTION
l
For
petrol-powered vehicles, do not drive
with an extremely low fuel level; running
out of fuel could cause damage to the cat-
alytic converter.
Fuel lid mark
The
fuel lid mark (A) indicates that the fuel tank fill-
er door is located on the left side of the vehicle (Re-
fer to “Filling the fuel tank” on page 03). Instruments and controls
3-03 3
Presented by http://mmc-manuals.ru/ \251
Page 89 of 273
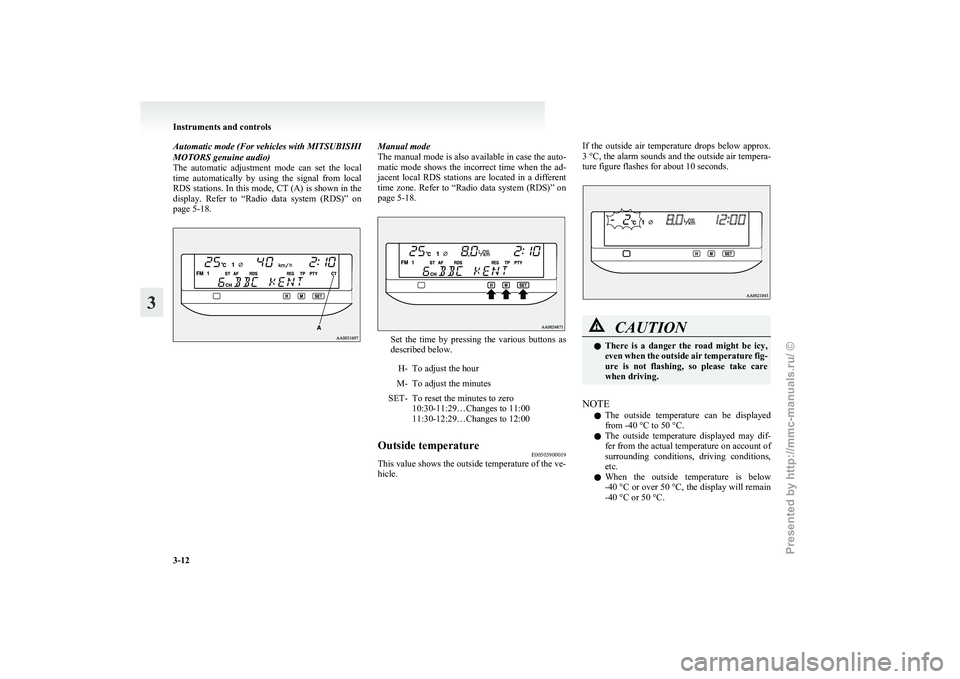
Automatic mode (For vehicles with MITSUBISHI
MOTORS genuine audio)
The
automatic adjustment mode can set the local
time automatically by using the signal from local
RDS stations. In this mode, CT (A) is shown in the
display. Refer to “Radio data system (RDS)” on
page 5-18. Manual mode
The
manual mode is also available in case the auto-
matic mode shows the incorrect time when the ad-
jacent local RDS stations are located in a different
time zone. Refer to “Radio data system (RDS)” on
page 5-18. Set the time by pressing the various buttons as
described below.
H- To adjust the hour
M- To adjust the minutes
SET- To reset the minutes to zero 10:30-11:29…Changes to 11:00
11:30-12:29…Changes to 12:00
Outside temperature E00503900019
This value shows the outside temperature of the ve-
hicle. If the outside air temperature drops below approx.
3 °C,
the alarm sounds and the outside air tempera-
ture figure flashes for about 10 seconds. CAUTION
l
There
is a danger the road might be icy,
even when the outside air temperature fig-
ure is not flashing, so please take care
when driving.
NOTE l The
outside temperature can be displayed
from -40 °C to 50 °C.
l The outside temperature displayed may dif-
fer from the actual temperature on account of
surrounding conditions, driving conditions,
etc.
l When the outside temperature is below
-40 °C or over 50 °C, the display will remain
-40 °C or 50 °C. Instruments and controls
3-12
3
Presented by http://mmc-manuals.ru/ \251
Page 90 of 273
Driving information
E00509000067
For vehicles with MITSUBISHI MOTORS genu-
ine audio
The
momentary fuel consumption, average fuel con-
sumption, driving range and average speed can be
displayed.
When the ignition switch is turned to the “ON” po-
sition, the display shows the 4 items sequentially
and returns to the original display that is shown be-
fore the ignition switch was last turned to the
“OFF” position.
NOTE
l If the “DISP” button is pressed while the dis-
play is scrolling through the sequence men-
tioned above, the display stops scrolling and
shows the item that was shown before the ig-
nition switch was last turned to the “OFF” po-
sition.
Except for vehicles with MITSUBISHI MOTORS
genuine audio
Only the momentary fuel consumption can be dis-
played. Refer to “Momentary fuel consumption”
on page 3-13.
Change of driving information (For vehicles with
MITSUBISHI MOTORS
genuine audio)E00509100068
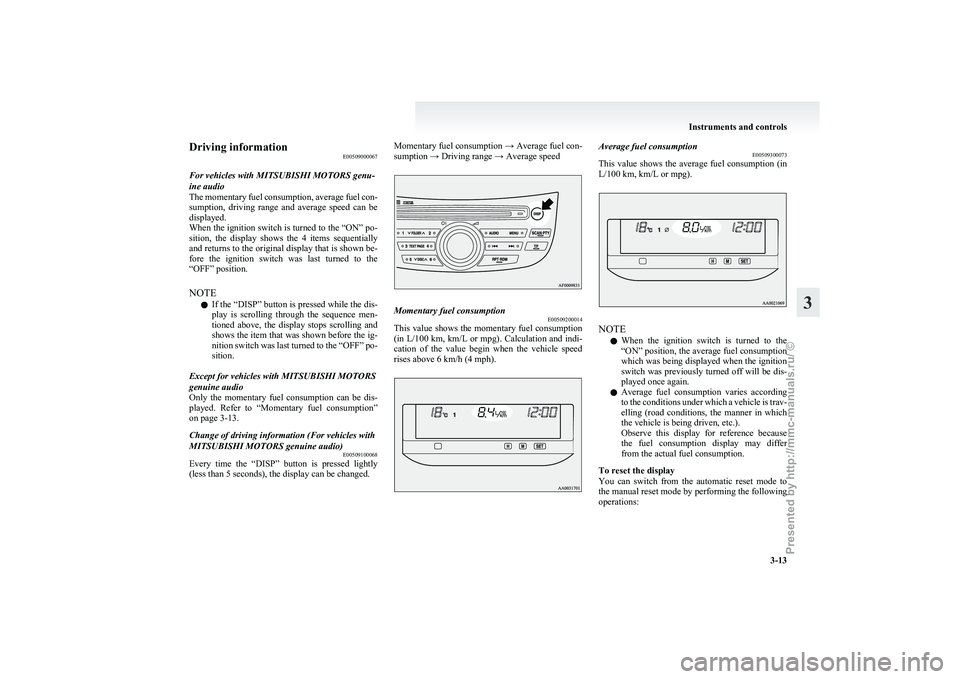
Every time the “DISP” button is pressed lightly
(less than 5 seconds), the display can be changed. Momentary fuel consumption → Average fuel con-
sumption → Driving range → Average speed
Momentary fuel consumption
E00509200014
This value shows the momentary fuel consumption
(in
L/100 km, km/L or mpg). Calculation and indi-
cation of the value begin when the vehicle speed
rises above 6 km/h (4 mph). Average fuel consumption
E00509300073
This
value shows the average fuel consumption (in
L/100 km, km/L or mpg). NOTE
l When
the ignition switch is turned to the
“ON” position, the average fuel consumption
which was being displayed when the ignition
switch was previously turned off will be dis-
played once again.
l Average fuel consumption varies according
to the conditions under which a vehicle is trav-
elling (road conditions, the manner in which
the vehicle is being driven, etc.).
Observe this display for reference because
the fuel consumption display may differ
from the actual fuel consumption.
To reset the display
You can switch from the automatic reset mode to
the manual reset mode by performing the following
operations: Instruments and controls
3-13 3
Presented by http://mmc-manuals.ru/ \251
Page 91 of 273
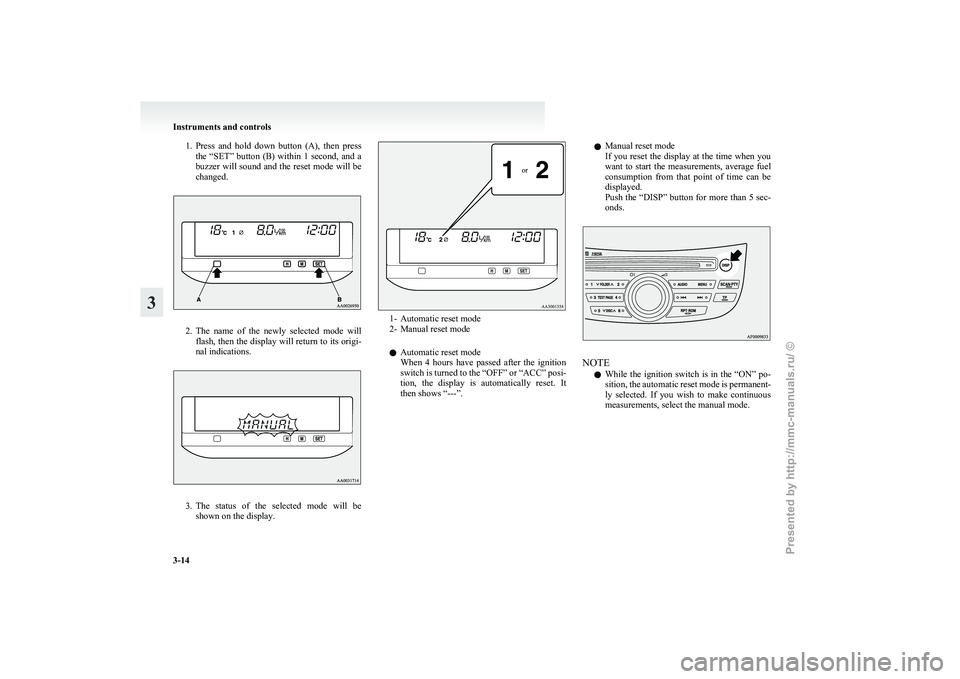
1. Press and hold down button (A), then press
the “SET” button (B) within 1 second, and a
buzzer will sound and the reset mode will be
changed. 2. The
name of the newly selected mode will
flash, then the display will return to its origi-
nal indications. 3. The
status of the selected mode will be
shown on the display.
or 1- Automatic reset mode
2-
Manual reset mode
l Automatic reset mode
When 4 hours have passed after the ignition
switch is turned to the “OFF” or “ACC” posi-
tion, the display is automatically reset. It
then shows “---”. l
Manual reset mode
If
you reset the display at the time when you
want to start the measurements, average fuel
consumption from that point of time can be
displayed.
Push the “DISP” button for more than 5 sec-
onds. NOTE
l While
the ignition switch is in the “ON” po-
sition, the automatic reset mode is permanent-
ly selected. If you wish to make continuous
measurements, select the manual mode. Instruments and controls
3-14
3
Presented by http://mmc-manuals.ru/ \251
Page 92 of 273
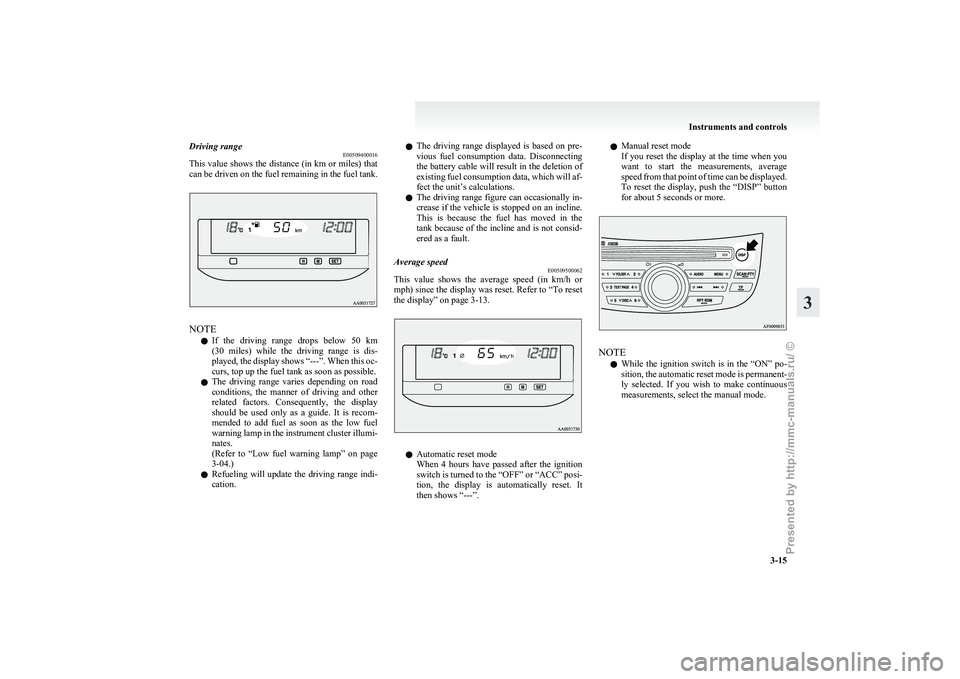
Driving range
E00509400016
This
value shows the distance (in km or miles) that
can be driven on the fuel remaining in the fuel tank. NOTE
l If
the driving range drops below 50 km
(30 miles) while the driving range is dis-
played, the display shows “---”. When this oc-
curs, top up the fuel tank as soon as possible.
l The driving range varies depending on road
conditions, the manner of driving and other
related factors. Consequently, the display
should be used only as a guide. It is recom-
mended to add fuel as soon as the low fuel
warning lamp in the instrument cluster illumi-
nates.
(Refer to “Low fuel warning lamp” on page
3-04.)
l Refueling will update the driving range indi-
cation. l
The
driving range displayed is based on pre-
vious fuel consumption data. Disconnecting
the battery cable will result in the deletion of
existing fuel consumption data, which will af-
fect the unit’s calculations.
l The driving range figure can occasionally in-
crease if the vehicle is stopped on an incline.
This is because the fuel has moved in the
tank because of the incline and is not consid-
ered as a fault.
Average speed E00509500062
This value shows the average speed (in km/h or
mph) since the display was reset. Refer to
“To reset
the display” on page 3-13. l
Automatic reset mode
When
4 hours have passed after the ignition
switch is turned to the “OFF” or “ACC” posi-
tion, the display is automatically reset. It
then shows “---”. l
Manual reset mode
If
you reset the display at the time when you
want to start the measurements, average
speed from that point of time can be displayed.
To reset the display, push the “DISP” button
for about 5 seconds or more. NOTE
l While
the ignition switch is in the “ON” po-
sition, the automatic reset mode is permanent-
ly selected. If you wish to make continuous
measurements, select the manual mode. Instruments and controls
3-15 3
Presented by http://mmc-manuals.ru/ \251
Page 129 of 273
CAUTION
l
For vehicles with M/T, if you shift to “N”
(Neutral) position in auto-speed control
mode without pressing the clutch first,
the engine will run too fast and might be
damaged.
NOTE l Auto-speed
control may not be able to keep
your speed on uphills or downhills.
l Your speed may decrease on a steep uphill.
You must use the accelerator pedal if you
want to stay at your set speed.
l Your speed may increase to more than the
set speed on a steep downhill. You must use
the brake to control your speed. If your speed
increases too much, turn off the autospeed
control. (Refer to “To deactivate” on page
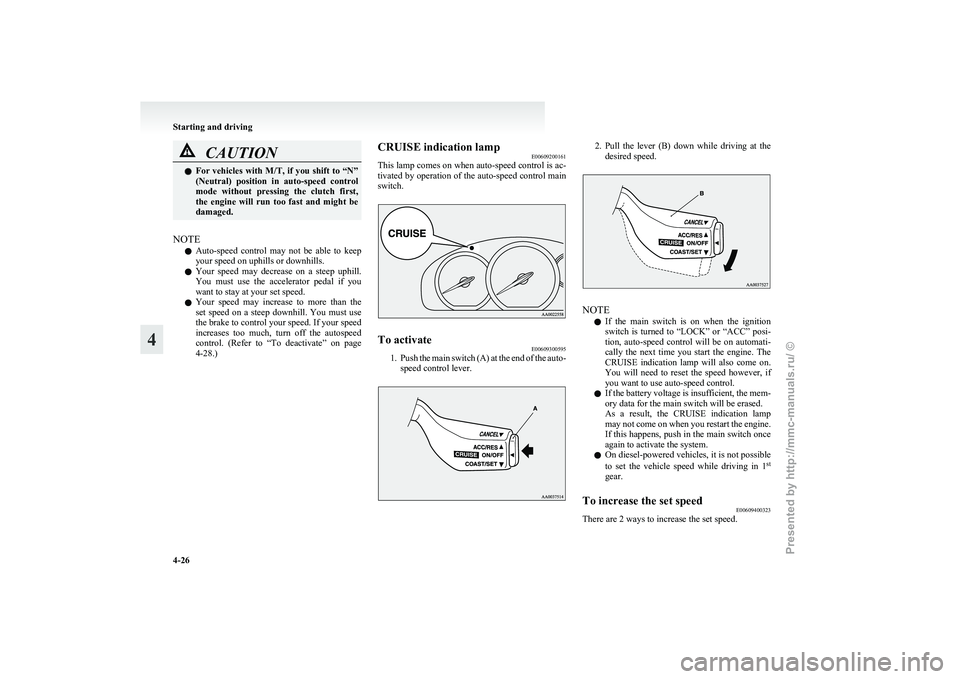
4-28.) CRUISE indication lamp
E00609200161
This
lamp comes on when auto-speed control is ac-
tivated by operation of the auto-speed control main
switch. To activate
E00609300595
1. Push
the main switch (A) at the end of the auto-
speed control lever. 2. Pull
the lever (B) down while driving at the
desired speed. NOTE
l If
the main switch is on when the ignition
switch is turned to “LOCK” or “ACC” posi-
tion, auto-speed control will be on automati-
cally the next time you start the engine. The
CRUISE indication lamp will also come on.
You will need to reset the speed however, if
you want to use auto-speed control.
l If the battery voltage is insufficient, the mem-
ory data for the main switch will be erased.
As a result, the CRUISE indication lamp
may not come on when you restart the engine.
If this happens, push in the main switch once
again to activate the system.
l On diesel-powered vehicles, it is not possible
to set the vehicle speed while driving in 1 st
gear.
To increase the set speed E00609400323
There are 2 ways to increase the set speed. Starting and driving
4-26
4
Presented by http://mmc-manuals.ru/ \251
Page 155 of 273
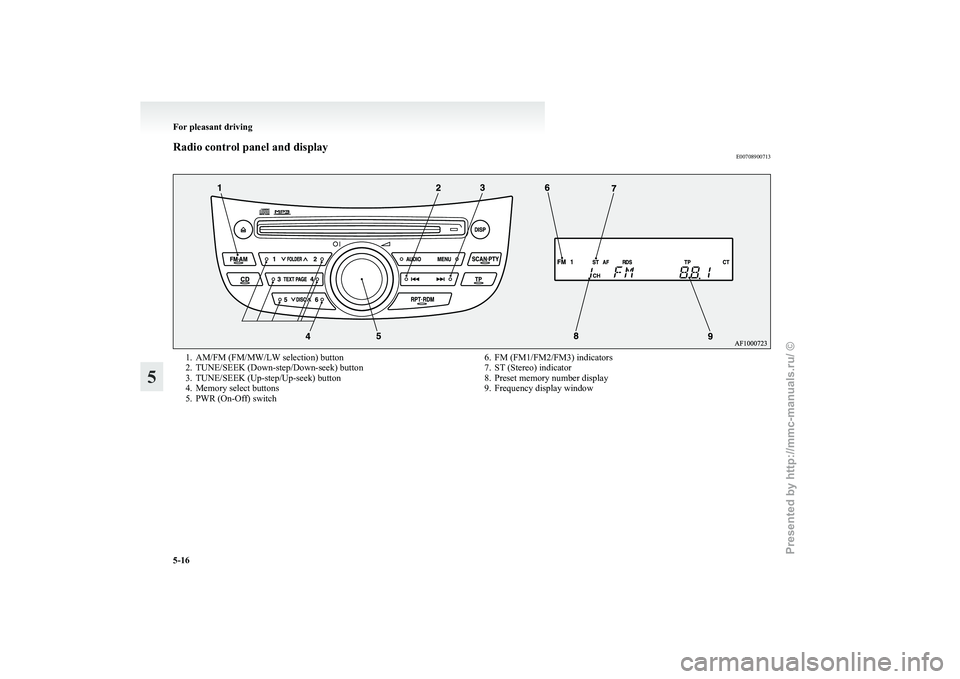
Radio control panel and display
E007089007131. AM/FM (FM/MW/LW selection) button
2.
TUNE/SEEK (Down-step/Down-seek) button
3. TUNE/SEEK (Up-step/Up-seek) button
4. Memory select buttons
5. PWR (On-Off) switch 6. FM (FM1/FM2/FM3) indicators
7.
ST (Stereo) indicator
8. Preset memory number display
9. Frequency display window For pleasant driving
5-16
5
Presented by http://mmc-manuals.ru/ \251
Page 156 of 273
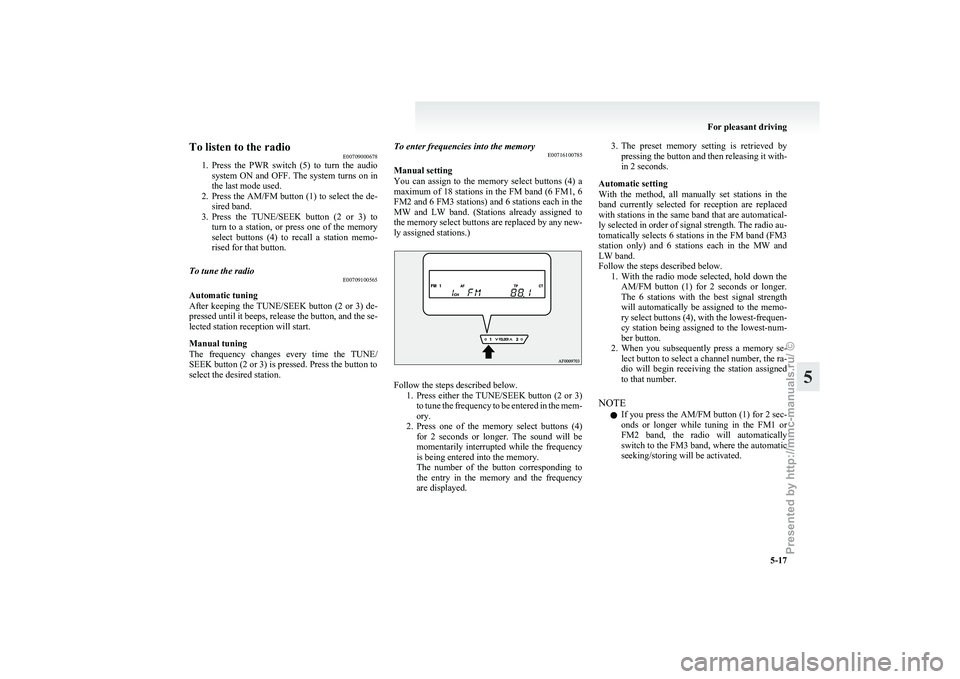
To listen to the radio
E00709000678
1. Press
the PWR switch (5) to turn the audio
system ON and OFF. The system turns on in
the last mode used.
2. Press the AM/FM button (1) to select the de- sired band.
3. Press the TUNE/SEEK button (2 or 3) to turn to a station, or press one of the memory
select buttons (4) to recall a station memo-
rised for that button.
To tune the radio E00709100565
Automatic tuning
After
keeping the TUNE/SEEK button (2 or 3) de-
pressed until it beeps, release the button, and the se-
lected station reception will start.
Manual tuning
The frequency changes every time the TUNE/
SEEK button (2 or 3) is pressed. Press the button to
select the desired station. To enter frequencies into the memory
E00716100785
Manual setting
You
can assign to the memory select buttons (4) a
maximum of 18 stations in the FM band (6 FM1, 6
FM2 and 6 FM3 stations) and 6 stations each in the
MW and LW band. (Stations already assigned to
the memory select buttons are replaced by any new-
ly assigned stations.) Follow the steps described below.
1. Press
either the TUNE/SEEK button (2 or 3)
to tune the frequency to be entered in the mem-
ory.
2. Press one of the memory select buttons (4) for 2 seconds or longer. The sound will be
momentarily interrupted while the frequency
is being entered into the memory.
The number of the button corresponding to
the entry in the memory and the frequency
are displayed. 3. The
preset memory setting is retrieved by
pressing the button and then releasing it with-
in 2 seconds.
Automatic setting
With the method, all manually set stations in the
band currently selected for reception are replaced
with stations in the same band that are automatical-
ly selected in order of signal strength. The radio au-
tomatically selects 6 stations in the FM band (FM3
station only) and 6 stations each in the MW and
LW band.
Follow the steps described below. 1. With the radio mode selected, hold down theAM/FM button (1) for 2 seconds or longer.
The 6 stations with the best signal strength
will automatically be assigned to the memo-
ry select buttons (4), with the lowest-frequen-
cy station being assigned to the lowest-num-
ber button.
2. When you subsequently press a memory se- lect button to select a channel number, the ra-
dio will begin receiving the station assigned
to that number.
NOTE l If you press the AM/FM button (1) for 2 sec-
onds or longer while tuning in the FM1 or
FM2 band, the radio will automatically
switch to the FM3 band, where the automatic
seeking/storing will be activated. For pleasant driving
5-17 5
Presented by http://mmc-manuals.ru/ \251
Page 158 of 273
AF (Alternative Frequencies) function
E00720900016
The
AF function finds a station broadcasting the
same program and selects the station with the stron-
gest signal of AF lists.
The AF function is turned on (with the AF indica-
tor (9) shown on the display) at all times unless
you manually switch it off.
The AF function can be turned ON and OFF.
Refer to “Function setup mode” on page 5-21.
CT (Clock Time) function E00721000014
The clock can be set automatically by using the sig-
nal
from the local RDS stations. Refer to “Digital
clock” on page 3-10.
REG (Regional) function E00721100015
REG function limits to receive the stations broad-
casting regional programs.
Regional
programming and regional networks are
organized differently depending on the country or
area (they may be changed according to the hour,
state, or broadcast area), so if you don’t want to re-
ceive the regional programs automatically, you can
set up REG ON not to receive regional programs.
The REG function can be turned ON and OFF.
Refer to “Function setup mode” on page 5-21.
PI (Program Identification) search function E00721200016
When travelling long distance and the recalled pre-
set
station is weak, the radio searches another fre-
quency broadcasting the same programming with
the same PI code in AF list. If there are no frequencies broadcasting the same
programming,
the radio searches a frequency broad-
casting the regional programming. The radio suc-
ceeds in searching the regional programming, then
the display shows the REG indicator (11).
If the radio does not succeed in searching the re-
gional programming, the radio returns to the recal-
led preset station.
PTY (Program type) E00721300192
RDS broadcasts are classified according to pro-
gram
type (PTY) as follows. Use the TUNE/SEEK
button (5 or 6) to select your desired PTY. 1. NEWS
2. AFFAIRS (Current affairs)
3. INFO (Information)
4. SPORT
5. EDUCATE (Education)
6. DRAMA
7. CULTURE
8. SCIENCE
9. VARIED
10. POP M (Pop music)
11. ROCK M (Rock music)
12. EASY M (Easy music)
13. LIGHT M (Light classics)
14. CLASSICS
15. OTHER M (Other music)
16. WEATHER (Weather information)
17. FINANCE
18. CHILDREN
19. SOCIAL
20. RELIGION
21. PHONE IN
22. TRAVEL
23. LEISURE
24. JAZZ
25. COUNTRY
26. NATION M (National music) 27. OLDIES
28.
FOLK M (Folk music)
29. DOCUMENT
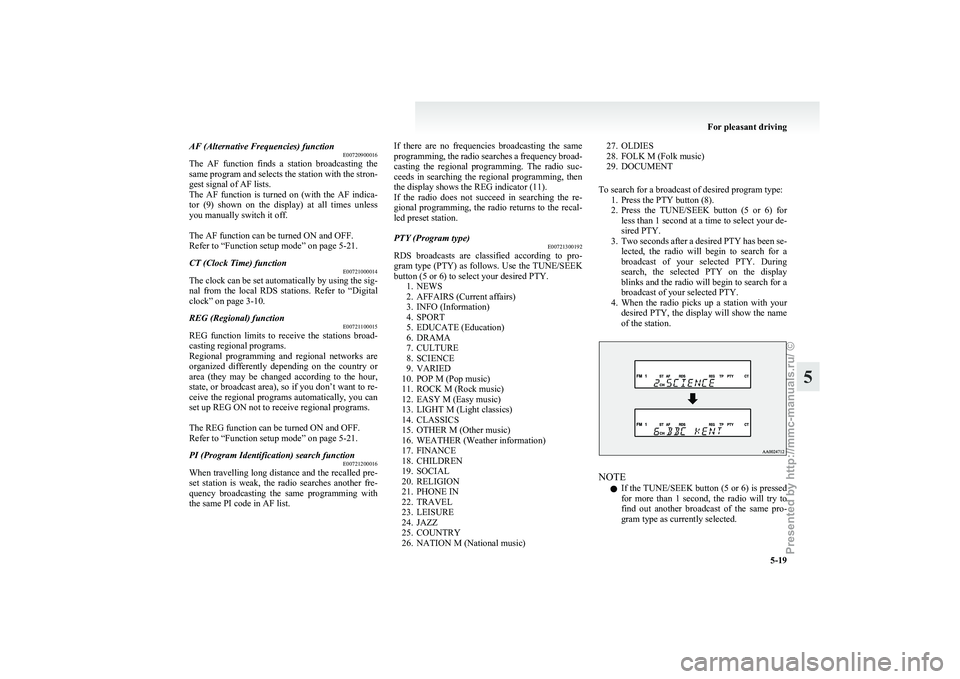
To search for a broadcast of desired program type: 1. Press the PTY button (8).
2. Press the TUNE/SEEK button (5 or 6) forless than 1 second at a time to select your de-
sired PTY.
3. Two seconds after a desired PTY has been se- lected, the radio will begin to search for a
broadcast of your selected PTY. During
search, the selected PTY on the display
blinks and the radio will begin to search for a
broadcast of your selected PTY.
4. When the radio picks up a station with your desired PTY, the display will show the name
of the station. NOTE
l If
the TUNE/SEEK button (5 or 6) is pressed
for more than 1 second, the radio will try to
find out another broadcast of the same pro-
gram type as currently selected. For pleasant driving
5-19 5
Presented by http://mmc-manuals.ru/ \251