tow MITSUBISHI I-MIEV 2011 Owners Manual
[x] Cancel search | Manufacturer: MITSUBISHI, Model Year: 2011, Model line: I-MIEV, Model: MITSUBISHI I-MIEV 2011Pages: 193, PDF Size: 12.2 MB
Page 35 of 193
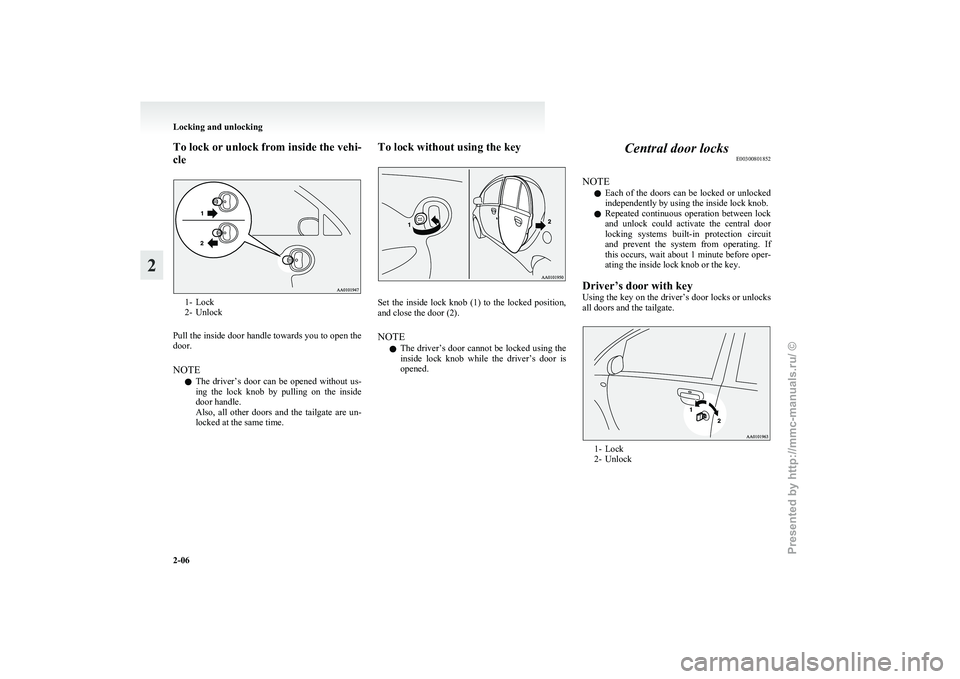
To lock or unlock from inside the vehi-
cle
1- Lock
2-
Unlock
Pull the inside door handle towards you to open the
door.
NOTE l The driver’s door can be opened without us-
ing the lock knob by pulling on the inside
door handle.
Also, all other doors and the tailgate are un-
locked at the same time. To lock without using the key
Set the inside lock knob (1) to the locked position,
and close the door (2).
NOTE
l The
driver’s door cannot be locked using the
inside lock knob while the driver’s door is
opened. Central door locks
E00300801852
NOTE l Each
of the doors can be locked or unlocked
independently by using the inside lock knob.
l Repeated continuous operation between lock
and unlock could activate the central door
locking systems built-in protection circuit
and prevent the system from operating. If
this occurs, wait about 1 minute before oper-
ating the inside lock knob or the key.
Driver’s door with key
Using the key on the driver’s door locks or unlocks
all doors and the tailgate. 1- Lock
2-
Unlock Locking and unlocking
2-06
2
Presented by http://mmc-manuals.ru/ \251
Page 45 of 193
Folding the seatbacks forward
E00401600330
Larger
objects can be loaded into the vehicle if a
seatback is folded forward. CAUTION
l
Do
not stack luggage in the vehicle higher
than the seatback height. Also, firmly se-
cure the luggage.
Serious accidents could result due to un-
restrained objects entering the passenger
compartment during sudden braking.
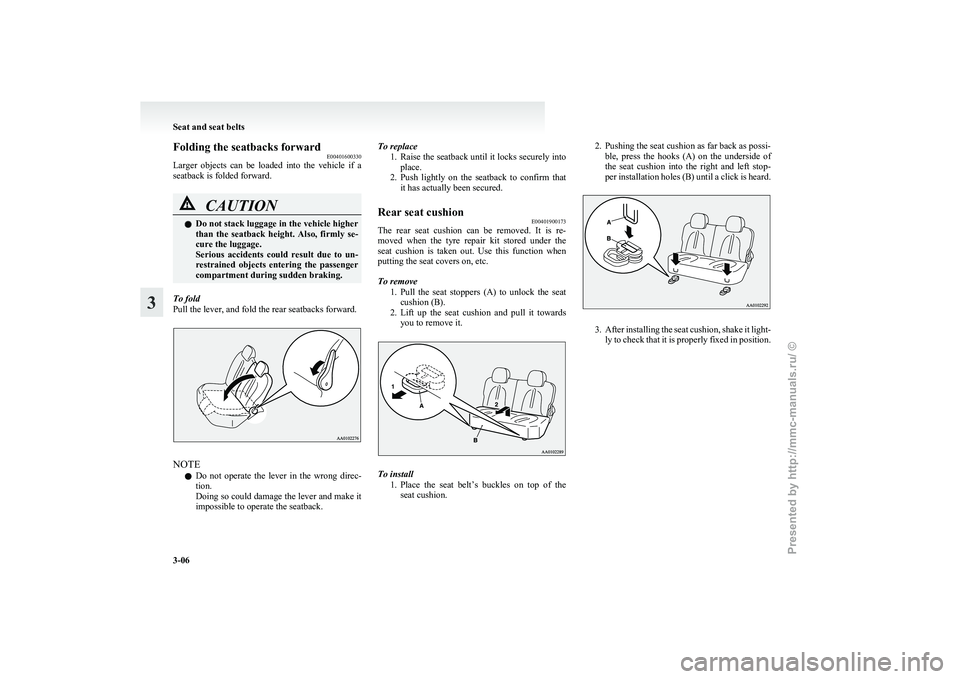
To fold
Pull the lever, and fold the rear seatbacks forward. NOTE
l Do
not operate the lever in the wrong direc-
tion.
Doing so could damage the lever and make it
impossible to operate the seatback. To replace
1. Raise
the seatback until it locks securely into
place.
2. Push lightly on the seatback to confirm that it has actually been secured.
Rear seat cushion E00401900173
The rear seat cushion can be removed. It is re-
moved
when the tyre repair kit stored under the
seat cushion is taken out. Use this function when
putting the seat covers on, etc.
To remove
1. Pull the seat stoppers (A) to unlock the seatcushion (B).
2. Lift up the seat cushion and pull it towards you to remove it. To install
1. Place
the seat belt’s buckles on top of the
seat cushion. 2. Pushing the seat cushion as far back as possi-
ble,
press the hooks (A) on the underside of
the seat cushion into the right and left stop-
per installation holes (B) until a click is heard. 3. After
installing the seat cushion, shake it light-
ly to check that it is properly fixed in position. Seat and seat belts
3-06
3
Presented by http://mmc-manuals.ru/ \251
Page 48 of 193
NOTE
l You
can check if the belt locks by pulling it
forward quickly.
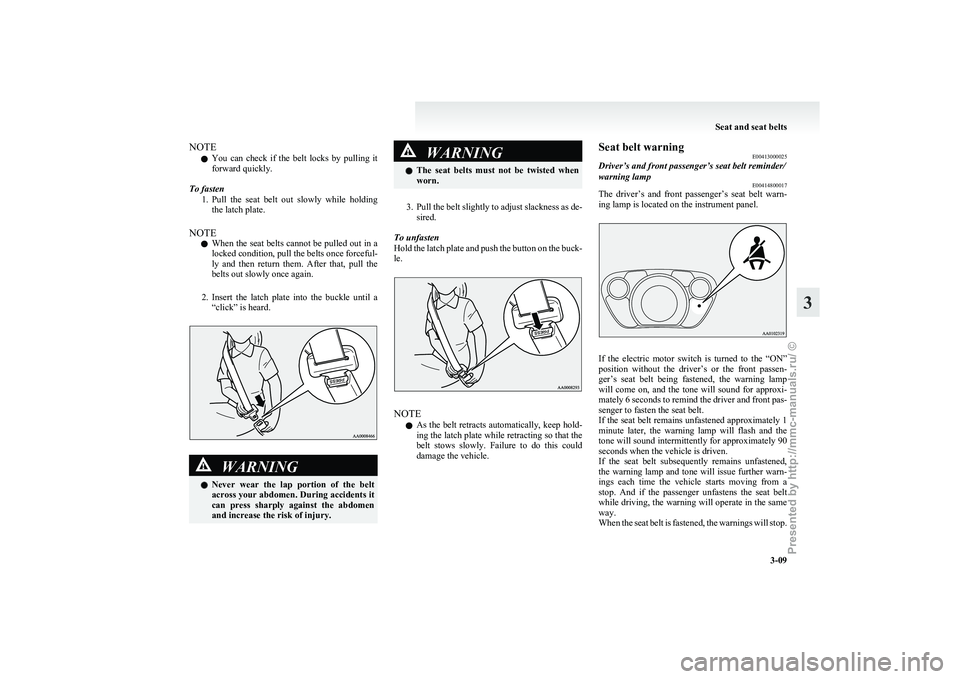
To fasten 1. Pull the seat belt out slowly while holdingthe latch plate.
NOTE l When the seat belts cannot be pulled out in a
locked condition, pull the belts once forceful-
ly and then return them. After that, pull the
belts out slowly once again.
2. Insert the latch plate into the buckle until a “click” is heard. WARNING
l Never
wear the lap portion of the belt
across your abdomen. During accidents it
can press sharply against the abdomen
and increase the risk of injury. WARNING
l The
seat belts must not be twisted when
worn.
3. Pull
the belt slightly to adjust slackness as de- sired.
To unfasten
Hold the latch plate and push the button on the buck-
le. NOTE
l As
the belt retracts automatically, keep hold-
ing the latch plate while retracting so that the
belt stows slowly. Failure to do this could
damage the vehicle. Seat belt warning
E00413000025
Driver’s and front passenger’s seat belt reminder/
warning lamp E00414800017
The driver’s and front passenger’s seat belt warn-
ing lamp is located on the instrument panel. If the electric motor switch is turned to the “ON”
position
without the driver’s or the front passen-
ger’s seat belt being fastened, the warning lamp
will come on, and the tone will sound for approxi-
mately 6 seconds to remind the driver and front pas-
senger to fasten the seat belt.
If the seat belt remains unfastened approximately 1
minute later, the warning lamp will flash and the
tone will sound intermittently for approximately 90
seconds when the vehicle is driven.
If the seat belt subsequently remains unfastened,
the warning lamp and tone will issue further warn-
ings each time the vehicle starts moving from a
stop. And if the passenger unfastens the seat belt
while driving, the warning will operate in the same
way.
When the seat belt is fastened, the warnings will stop. Seat and seat belts
3-09 3
Presented by http://mmc-manuals.ru/ \251
Page 86 of 193
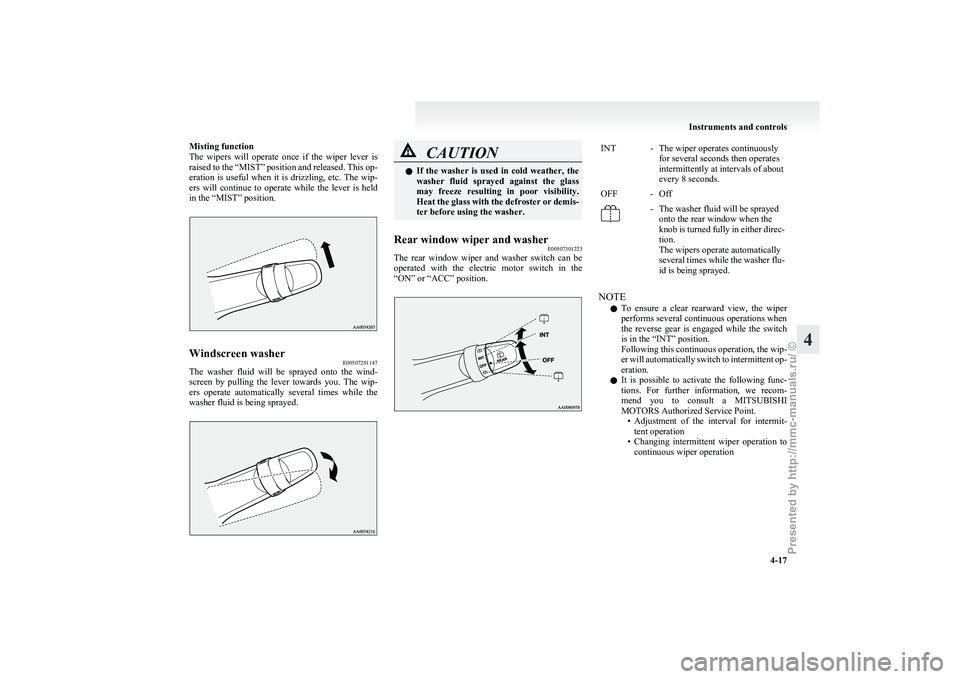
Misting function
The
wipers will operate once if the wiper lever is
raised to the “MIST” position and released. This op-
eration is useful when it is drizzling, etc. The wip-
ers will continue to operate while the lever is held
in the “MIST” position. Windscreen washer
E00507201147
The washer fluid will be sprayed onto the wind-
screen
by pulling the lever towards you. The wip-
ers operate automatically several times while the
washer fluid is being sprayed. CAUTION
l
If
the washer is used in cold weather, the
washer fluid sprayed against the glass
may freeze resulting in poor visibility.
Heat the glass with the defroster or demis-
ter before using the washer.
Rear window wiper and washer E00507301223
The rear window wiper and washer switch can be
operated
with the electric motor switch in the
“ON” or “ACC” position. INT - The wiper operates continuously
for several seconds then operates
intermittently at intervals of about
every 8 seconds.
OFF - Off - The washer fluid will be sprayed
onto the rear window when the
knob
is turned fully in either direc-
tion.
The wipers operate automatically
several times while the washer flu-
id is being sprayed.
NOTE l To
ensure a clear rearward view, the wiper
performs several continuous operations when
the reverse gear is engaged while the switch
is in the “INT” position.
Following this continuous operation, the wip-
er will automatically switch to intermittent op-
eration.
l It is possible to activate the following func-
tions. For further information, we recom-
mend you to consult a MITSUBISHI
MOTORS Authorized Service Point.
• Adjustment of the interval for intermit-tent operation
• Changing intermittent wiper operation to continuous wiper operation Instruments and controls
4-17 4
Presented by http://mmc-manuals.ru/ \251
Page 90 of 193
Economical driving.......................................................................5-02
Driving, alcohol and drugs
........................................................... 5-02
Safe driving techniques ................................................................ 5-03
Parking brake................................................................................ 5-03
Parking.......................................................................................... 5-04
Inside rear-view mirror ................................................................. 5-05
Outside rear-view mirrors ............................................................. 5-05
Electric motor switch .................................................................... 5-07
Steering wheel lock ...................................................................... 5-08
Starting the electric motor unit ..................................................... 5-08
Transmission................................................................................. 5-09
Driving the vehicle ....................................................................... 5-11
Inspection
and maintenance following rough road oper-
ation.......................................................................................... 5-12
Braking......................................................................................... 5-12
Brake assist system....................................................................... 5-13
Anti-lock brake system (ABS) ..................................................... 5-14
Electric power steering system (EPS) ..........................................5-15
Active stability control (ASC) ...................................................... 5-16
Cargo loads................................................................................... 5-19
Trailer towing ............................................................................... 5-20Starting and driving
5
Presented by http://mmc-manuals.ru/ \251
Page 93 of 193
NOTE
l Apply
sufficient force to the parking brake
lever to hold the vehicle stationary after the
foot brake is released.
l If the parking brake does not hold the vehicle
stationary after the foot brake is released,
have your vehicle checked immediately.
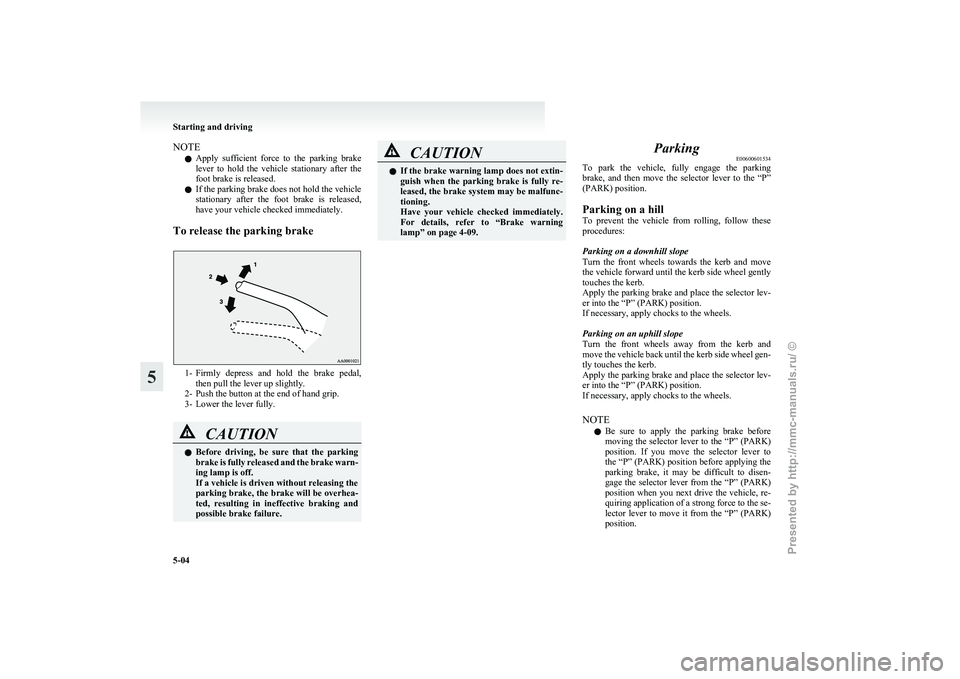
To release the parking brake 1- Firmly
depress and hold the brake pedal,
then pull the lever up slightly.
2- Push the button at the end of hand grip.
3- Lower the lever fully. CAUTION
l
Before
driving, be sure that the parking
brake is fully released and the brake warn-
ing lamp is off.
If a vehicle is driven without releasing the
parking brake, the brake will be overhea-
ted, resulting in ineffective braking and
possible brake failure. CAUTION
l
If
the brake warning lamp does not extin-
guish when the parking brake is fully re-
leased, the brake system may be malfunc-
tioning.
Have your vehicle checked immediately.
For details, refer to “Brake warning
lamp” on page 4-09. Parking
E00600601534
To
park the vehicle, fully engage the parking
brake, and then move the selector lever to the “P”
(PARK) position.
Parking on a hill
To prevent the vehicle from rolling, follow these
procedures:
Parking on a downhill slope
Turn the front wheels towards the kerb and move
the vehicle forward until the kerb side wheel gently
touches the kerb.
Apply the parking brake and place the selector lev-
er into the “P” (PARK) position.
If necessary, apply chocks to the wheels.
Parking on an uphill slope
Turn the front wheels away from the kerb and
move the vehicle back until the kerb side wheel gen-
tly touches the kerb.
Apply the parking brake and place the selector lev-
er into the “P” (PARK) position.
If necessary, apply chocks to the wheels.
NOTE
l Be sure to apply the parking brake before
moving the selector lever to the “P” (PARK)
position. If you move the selector lever to
the “P” (PARK) position before applying the
parking brake, it may be difficult to disen-
gage the selector lever from the “P” (PARK)
position when you next drive the vehicle, re-
quiring application of a strong force to the se-
lector lever to move it from the “P” (PARK)
position. Starting and driving
5-04
5
Presented by http://mmc-manuals.ru/ \251
Page 95 of 193
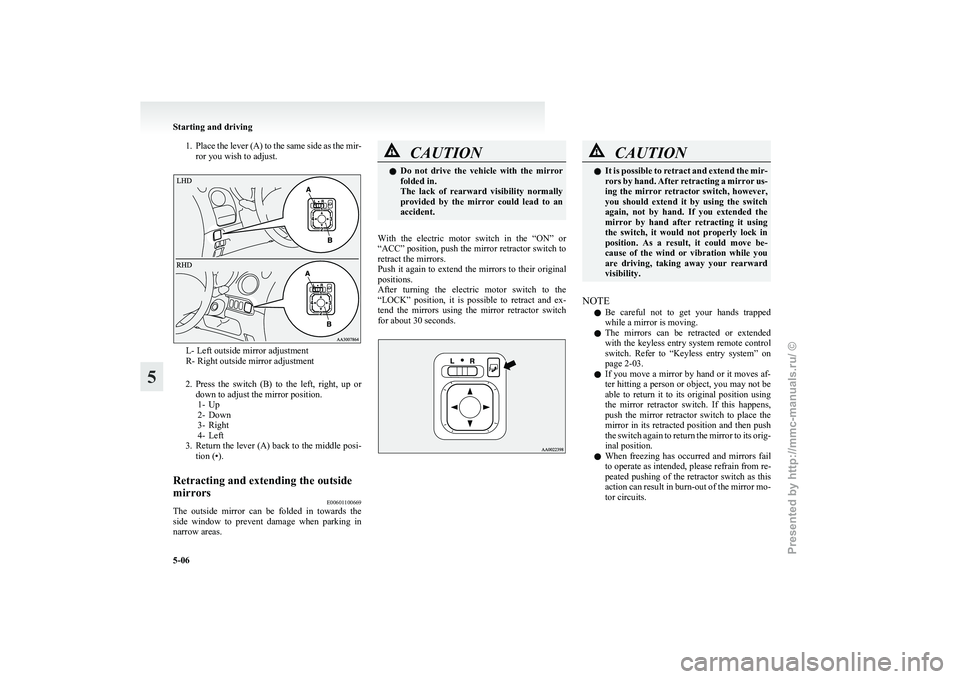
1. Place the lever (A) to the same side as the mir-
ror you wish to adjust. L- Left outside mirror adjustment
R- Right outside mirror adjustment
2. Press
the switch (B) to the left, right, up or
down to adjust the mirror position. 1- Up
2- Down
3- Right
4- Left
3. Return the lever (A) back to the middle posi- tion (•).
Retracting and extending the outside
mirrors E00601100669
The outside mirror can be folded in towards the
side
window to prevent damage when parking in
narrow areas. CAUTION
l
Do
not drive the vehicle with the mirror
folded in.
The lack of rearward visibility normally
provided by the mirror could lead to an
accident.
With the electric motor switch in the “ON” or
“ACC”
position, push the mirror retractor switch to
retract the mirrors.
Push it again to extend the mirrors to their original
positions.
After turning the electric motor switch to the
“LOCK” position, it is possible to retract and ex-
tend the mirrors using the mirror retractor switch
for about 30 seconds. CAUTION
l
It
is possible to retract and extend the mir-
rors by hand. After retracting a mirror us-
ing the mirror retractor switch, however,
you should extend it by using the switch
again, not by hand. If you extended the
mirror by hand after retracting it using
the switch, it would not properly lock in
position. As a result, it could move be-
cause of the wind or vibration while you
are driving, taking away your rearward
visibility.
NOTE l Be
careful not to get your hands trapped
while a mirror is moving.
l The mirrors can be retracted or extended
with the keyless entry system remote control
switch. Refer to “Keyless entry system” on
page 2-03.
l If you move a mirror by hand or it moves af-
ter hitting a person or object, you may not be
able to return it to its original position using
the mirror retractor switch. If this happens,
push the mirror retractor switch to place the
mirror in its retracted position and then push
the switch again to return the mirror to its orig-
inal position.
l When freezing has occurred and mirrors fail
to operate as intended, please refrain from re-
peated pushing of the retractor switch as this
action can result in burn-out of the mirror mo-
tor circuits. Starting and driving
5-06
5
Presented by http://mmc-manuals.ru/ \251
Page 107 of 193
NOTE
l When
moving out of mud, sand or fresh
snow, pressing the accelerator pedal may not
allow the electric motor speed to increase. In
such situations, temporarily turning off the
ASC with the “ASC OFF” switch will make
it easier to move out your vehicle.
l Using the “ASC OFF” switch turns off both
the stability control function and the traction
control function.
l If you continue to press the “ASC OFF”
switch after the ASC is turned off, the “mis-
taken operation protection function” will ac-
tivate and the ASC will turn back on.
ASC indication lamp or ASC OFF in-
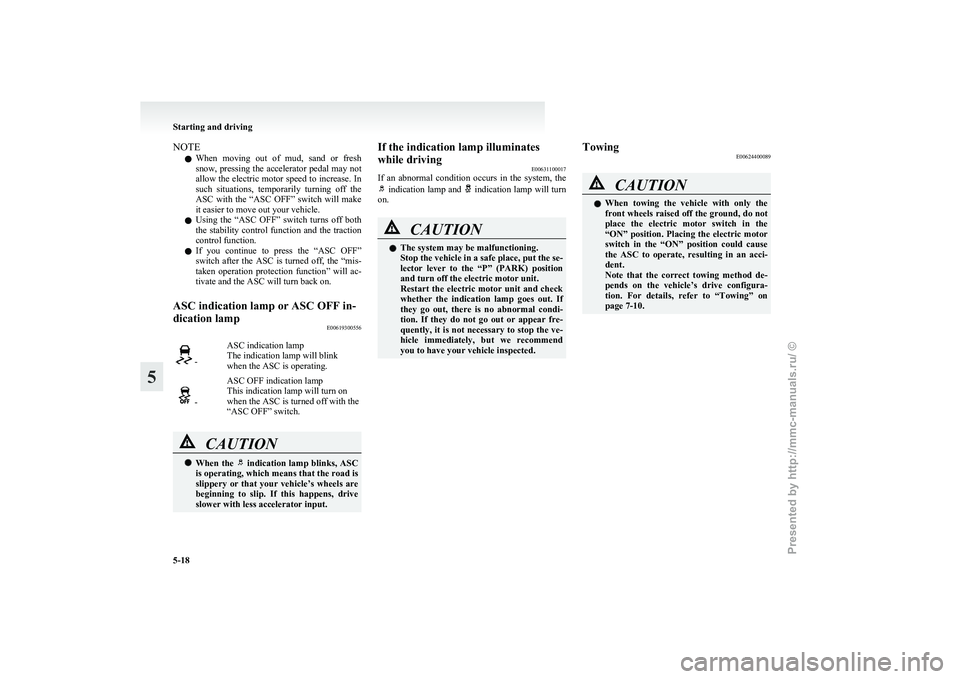
dication lamp E00619300556-
ASC indication lamp
The indication lamp will blink
when the ASC is operating. -
ASC OFF indication lamp
This indication lamp will turn on
when the ASC is turned off with the
“ASC OFF” switch. CAUTION
l
When
the indication lamp blinks, ASC
is
operating, which means that the road is
slippery or that your vehicle’s wheels are
beginning to slip. If this happens, drive
slower with less accelerator input. If the indication lamp illuminates
while driving
E00631100017
If
an abnormal condition occurs in the system, the indication lamp and indication lamp will turn
on. CAUTION
l
The system may be malfunctioning.
Stop
the vehicle in a safe place, put the se-
lector lever to the “P” (PARK) position
and turn off the electric motor unit.
Restart the electric motor unit and check
whether the indication lamp goes out. If
they go out, there is no abnormal condi-
tion. If they do not go out or appear fre-
quently, it is not necessary to stop the ve-
hicle immediately, but we recommend
you to have your vehicle inspected. Towing
E00624400089 CAUTION
l
When
towing the vehicle with only the
front wheels raised off the ground, do not
place the electric motor switch in the
“ON” position. Placing the electric motor
switch in the “ON” position could cause
the ASC to operate, resulting in an acci-
dent.
Note that the correct towing method de-
pends on the vehicle’s drive configura-
tion. For details, refer to “Towing” on
page 7-10. Starting and driving
5-18
5
Presented by http://mmc-manuals.ru/ \251
Page 109 of 193
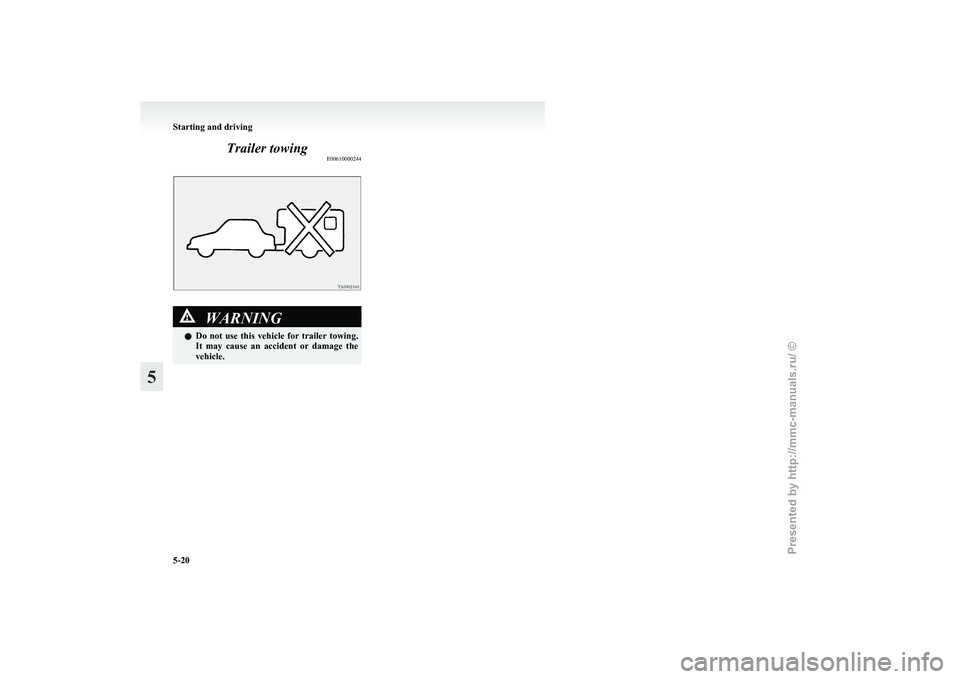
Trailer towing
E00610000244WARNING
l Do not use this vehicle for trailer towing.
It may cause an accident or damage the
vehicle. Starting and driving
5-20
5
Presented by http://mmc-manuals.ru/ \251
Page 117 of 193
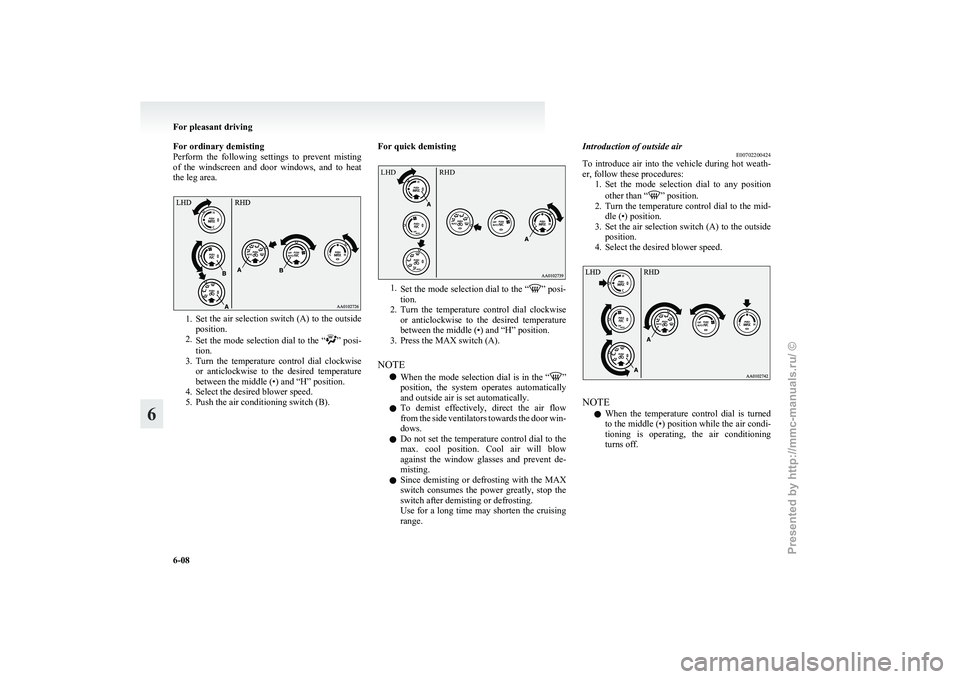
For ordinary demisting
Perform
the following settings to prevent misting
of the windscreen and door windows, and to heat
the leg area. 1. Set
the air selection switch (A) to the outside
position.
2. Set the mode selection dial to the “ ”
posi-
tion.
3. Turn the temperature control dial clockwise or anticlockwise to the desired temperature
between the middle (•) and “H” position.
4. Select the desired blower speed.
5. Push the air conditioning switch (B). For quick demisting 1.
Set
the mode selection dial to the “ ” posi-
tion.
2. Turn
the temperature control dial clockwise
or anticlockwise to the desired temperature
between the middle (•) and “H” position.
3. Press the MAX switch (A).
NOTE l When the mode selection dial is in the “ ”
position,
the system operates automatically
and outside air is set automatically.
l To demist effectively, direct the air flow
from the side ventilators towards the door win-
dows.
l Do not set the temperature control dial to the
max. cool position. Cool air will blow
against the window glasses and prevent de-
misting.
l Since demisting or defrosting with the MAX
switch consumes the power greatly, stop the
switch after demisting or defrosting.
Use for a long time may shorten the cruising
range. Introduction of outside air
E00702200424
To
introduce air into the vehicle during hot weath-
er, follow these procedures: 1. Set the mode selection dial to any position
other than “ ” position.
2. Turn
the temperature control dial to the mid-
dle (•) position.
3. Set the air selection switch (A) to the outside position.
4. Select the desired blower speed. NOTE
l When
the temperature control dial is turned
to the middle (•) position while the air condi-
tioning is operating, the air conditioning
turns off. For pleasant driving
6-08
6 LHD
RHD
Presented by http://mmc-manuals.ru/ \251