key MITSUBISHI iMiEV 2015 Owner's Manual (in English)
[x] Cancel search | Manufacturer: MITSUBISHI, Model Year: 2015, Model line: iMiEV, Model: MITSUBISHI iMiEV 2015Pages: 262, PDF Size: 26.84 MB
Page 8 of 262
Outside (Rear)
Overview 1-6
1
N00100602463
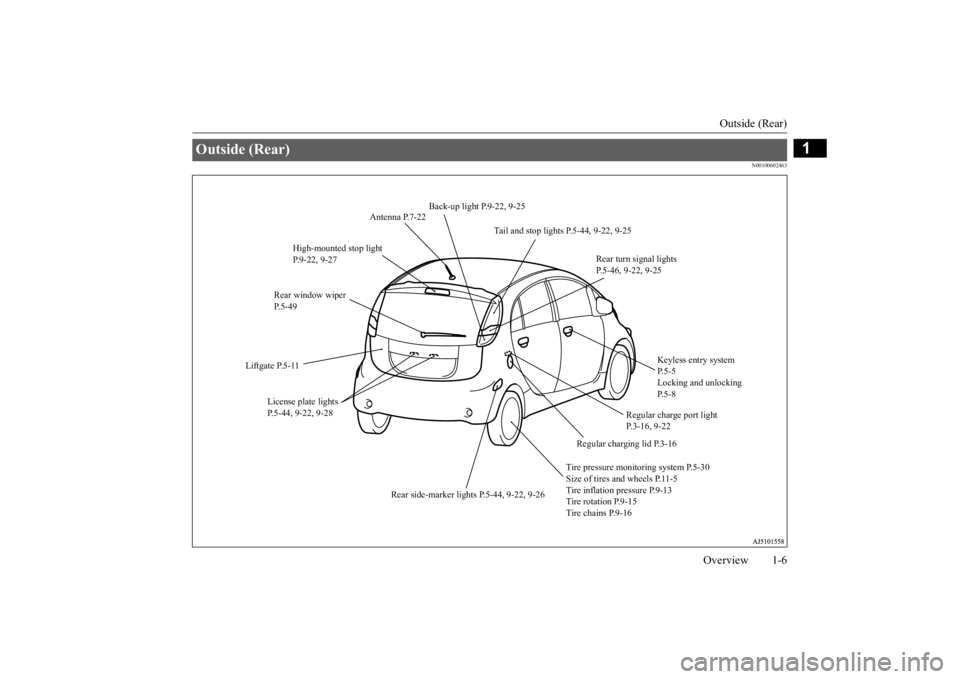
Outside (Rear)
Back-up light P.9-22, 9-25
Antenna P.7-22
Tail and stop lights P.5-44, 9-22, 9-25
High-mounted stop light P.9-22, 9-27
Rear turn signal lights P.5-46, 9-22, 9-25
Rear window wiper P.5-49
Keyless entry system P. 5 - 5Locking and unlocking P. 5 - 8
Liftgate P.5-11
License plate lights P.5-44, 9-22, 9-28
Regular charge port light P.3-16, 9-22
Regular charging lid P.3-16 Tire pressure monitoring system P.5-30 Size of tires and wheels P.11-5 Tire inflation pressure P.9-13 Tire rotation P.9-15Tire chains P.9-16
Rear side-marker lights P.5-44, 9-22, 9-26
BK0209800US.book 6 ページ 2014年1月14日 火曜日 午前9時26分
Page 13 of 262
If this problem occurs... 2-4 Quick index
2
N00200900854
If this problem occurs...
Problem
Do this
Ref. Page
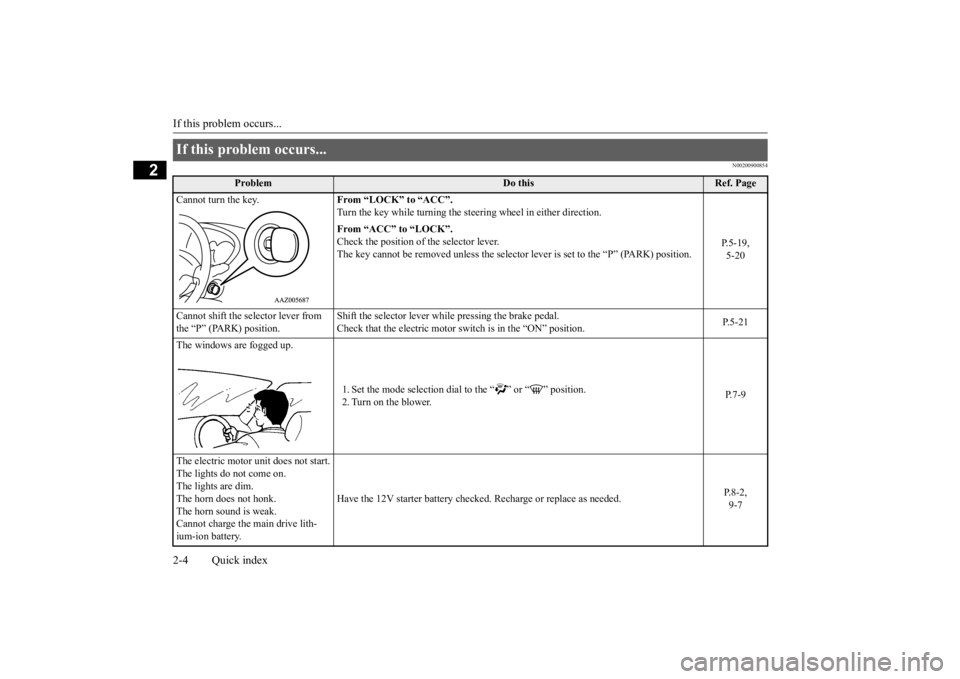
Cannot turn the key.
From “LOCK” to “ACC”. Turn the key while turning the st
eering wheel in either direction.
P.5-19, 5-20
From “ACC” to “LOCK”. Check the position of the selector lever. The key cannot be removed unless the selector
lever is set to the “P” (PARK) position.
Cannot shift the selector lever from the “P” (PARK) position.
Shift the selector lever wh
ile pressing the brake pedal.
Check that the electric motor switch is in the “ON” position.
P.5-21
The windows are fogged up.
1. Set the mode selection dial
to the “ ” or “ ” position.
2. Turn on the blower.
P.7-9
The electric motor unit does not start. The lights do not come on. The lights are dim. The horn does not honk. The horn sound is weak. Cannot charge the main drive lith-ium-ion battery.
Have the 12V starter battery checked.
Recharge or replace as needed.
P.8-2, 9-7
BK0209800US.book 4 ページ 2014年1月14日 火曜日 午前9時26分
Page 31 of 262
Regular charging (charging method with rated AC 120 V outlet) 3-16 General information/Charging
3
N01216200019
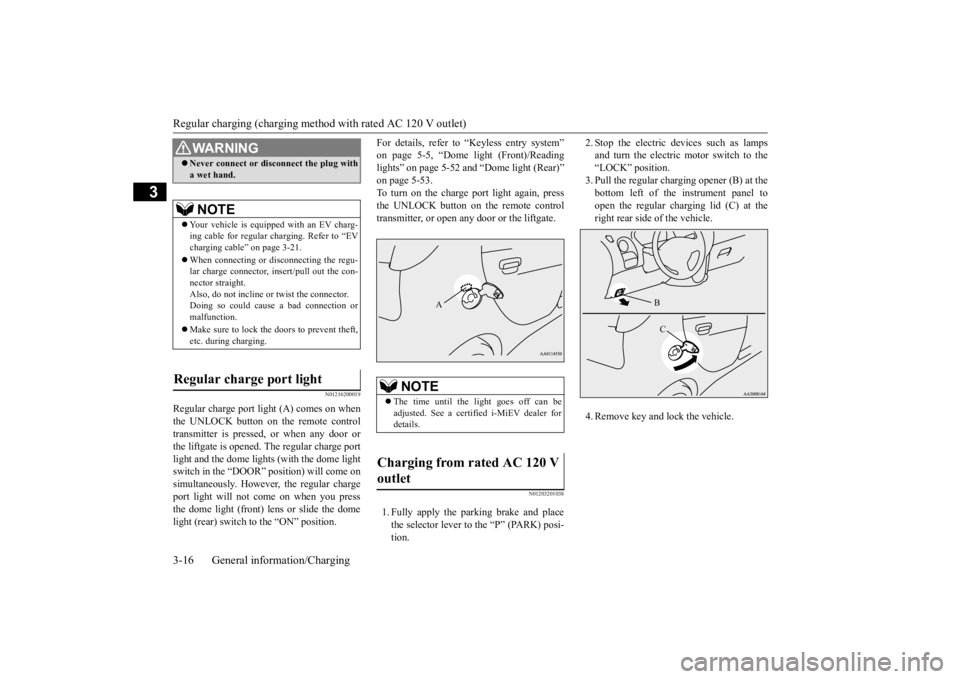
Regular charge port light (A) comes on when the UNLOCK button on the remote control transmitter is pressed, or when any door orthe liftgate is opened. The regular charge port light and the dome lights (with the dome light switch in the “DOOR” position) will come onsimultaneously. However, the regular charge port light will not co
me on when you press
the dome light (front) lens or slide the domelight (rear) switch to the “ON” position.
For details, refer to “Keyless entry system” on page 5-5, “Dome
light (Front)/Reading
lights” on page 5-52 a
nd “Dome light (Rear)”
on page 5-53. To turn on the charge port light again, pressthe UNLOCK button on the remote control transmitter, or open any
door or the liftgate.
N01203201038
1. Fully apply the parking brake and place the selector lever to the “P” (PARK) posi- tion.
2. Stop the electric devices such as lamps and turn the electric motor switch to the“LOCK” position. 3. Pull the regular charging opener (B) at the bottom left of the instrument panel toopen the regular charging lid (C) at the right rear side of the vehicle. 4. Remove key and lock the vehicle.
Never connect or disconnect the plug with a wet hand.NOTE
Your vehicle is equipped with an EV charg- ing cable for regular charging. Refer to “EV charging cable” on page 3-21. When connecting or disconnecting the regu- lar charge connector, in
sert/pull out the con-
nector straight. Also, do not incline or twist the connector. Doing so could cause a bad connection ormalfunction. Make sure to lock the doors to prevent theft, etc. during charging.
Regular charge port light
WA R N I N G
NOTE
The time until the light goes off can be adjusted. See a certified i-MiEV dealer fordetails.
Charging from rated AC 120 V outlet
A
B C
BK0209800US.book 16 ページ 2014年1月14日 火曜日 午前9時26分
Page 40 of 262
Quick charging (charging method with quick charger)
General information/Charging 3-25
3
Carefully read instru
ctions on “Precautions
during charging the main drive lithium-ionbattery” on page 3-14,
described in this sec-
tion and also instructions for a quick charger you uses, and follow them.
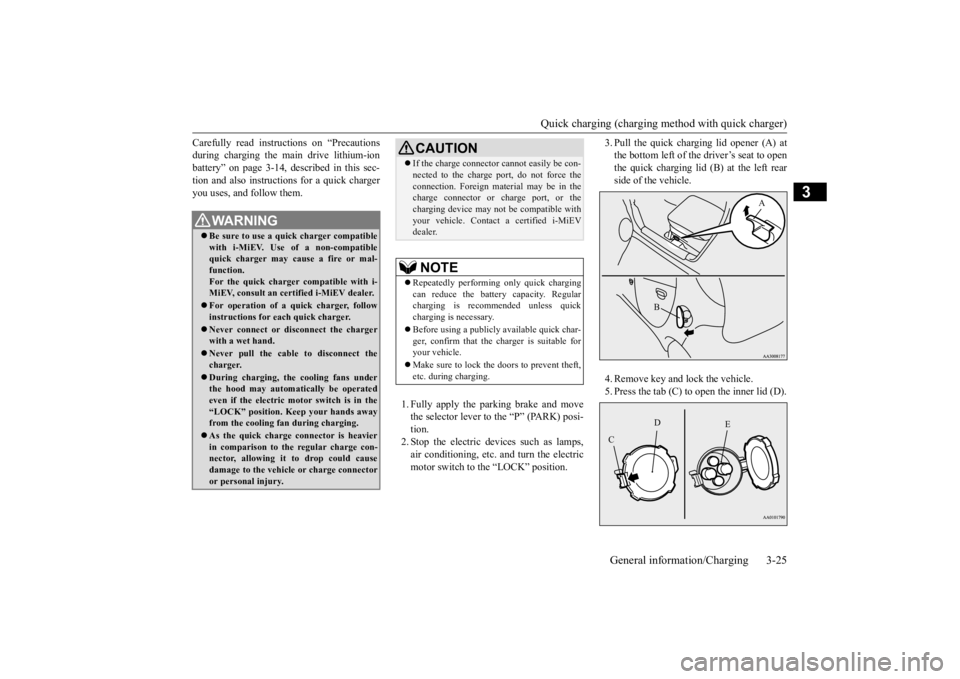
1. Fully apply the parking brake and move the selector lever to the “P” (PARK) posi-tion. 2. Stop the electric devices such as lamps, air conditioning, etc.
and turn the electric
motor switch to the “LOCK” position.
3. Pull the quick charging lid opener (A) at the bottom left of the driver’s seat to openthe quick charging lid (B) at the left rear side of the vehicle. 4. Remove key and lock the vehicle. 5. Press the tab (C) to open the inner lid (D).
WA R N I N G Be sure to use a qu
ick charger compatible
with i-MiEV. Use of a non-compatible quick charger may cause a fire or mal- function.For the quick charger compatible with i- MiEV, consult an certified i-MiEV dealer. For operation of a quick charger, follow instructions for each quick charger. Never connect or disc
onnect the charger
with a wet hand. Never pull the cable to disconnect the charger. During charging, the
cooling fans under
the hood may automa
tically be operated
even if the electric motor switch is in the“LOCK” position. Ke
ep your hands away
from the cooling fan during charging. As the quick charge connector is heavier in comparison to th
e regular charge con-
nector, allowing it to drop could causedamage to the vehicl
e or charge connector
or personal injury.
CAUTION If the charge connector cannot easily be con- nected to the charge port, do not force theconnection. Foreign mate
rial may be in the
charge connector or charge port, or the charging device may not
be compatible with
your vehicle. Contact a certified i-MiEVdealer.NOTE
Repeatedly performi
ng only quick charging
can reduce the batter
y capacity. Regular
charging is recommended unless quickcharging is necessary. Before using a publicly
available quick char-
ger, confirm that the charger is suitable for your vehicle. Make sure to lock the doors to prevent theft, etc. during charging.
A
B
E
D
C
BK0209800US.book 25 ページ 2014年1月14日 火曜日 午前9時26分
Page 45 of 262

High-Voltage components 3-30 General information/Charging
3
N01205700027
High voltage components and wiring cables are located as shown in the figure below.
N01205800031
A crash or impact significant enough to require an emergency response for conven- tional vehicles would
also require the same
response for electric vehicles. Also follow the instruct
ions described below
to avoid severe burns a
nd electrical shock that
may result in serious injury or death.
High-Voltage components
WA R N I N G The EV (Electric Vehicle) system uses high voltage up to DC 330 volt. The system canbe hot during and after starting and when the vehicle is shut off. Be careful of both the high voltage and
the high temperature.
Follow the warning labels that are attached to the vehicle. Never touch, disassemble, remove or replace high-voltage parts, exposed elec- trical components, cables or connectors.Failure to follow this instruction can result in severe burns
or electric shock
causing serious injury
or death. High-volt-
age cables are colore
d orange. Th
e vehicle
high voltage system has no user service- able parts. Take your
vehicle to a Certified
i-MiEV dealer for an
y necessary mainte-
nance. Always assume the hi
gh voltage battery
and associated compon
ents are energized
and fully charged.
1- Regular charge port 2- MCU 3- Main drive lithium-ion battery 4- Heater5- Air conditioner compressor 6- High voltage connector 7- Service plug8- Electric motor (Electric motor unit) 9- On board charger/DC-DC converter 10- Quick charge portIn case of a collision
WA R N I N G If your vehicle is dr
ivable, pull your vehi-
cle off the road to a safe, nearby locationand remain on the scene.Also, if possible, do
the follow
ing opera-
tions and stay out of the way of any oncoming traffic while awaiting thearrival of emergency responders.• Apply chocks to the wheels.• Move the selector
lever to the “P”
(PARK) position.• Apply the parking brake.• Open the windows,
doors and liftgate.
• Turn the electric motor switch to the “LOCK” position.• Turn on the hazard warning flashers.• Move the key away fr
om the vehicle to
prevent unintended start-up of the sys-tem by inadvertent contact with a switch or impact from the crash.
Never touch high-vol
tage wiring, connec-
tors, and other high-vol
tage parts, such as
the inverter unit and main drive lithium-ion battery. An electric shock may occur if exposed electric wires are visible when viewed from inside
or outside of your
vehicle. For their locations, see “High- voltage components” on page 3-30. If the vehicle receives a strong impact to the floor while driving, stop the vehicle in a safe place and check the floor.
BK0209800US.book 30 ページ 2014年1月14日 火曜日 午前9時26分
Page 89 of 262
Maintenance and inspection of seat belts 4-20 Seat and restraint systems
4
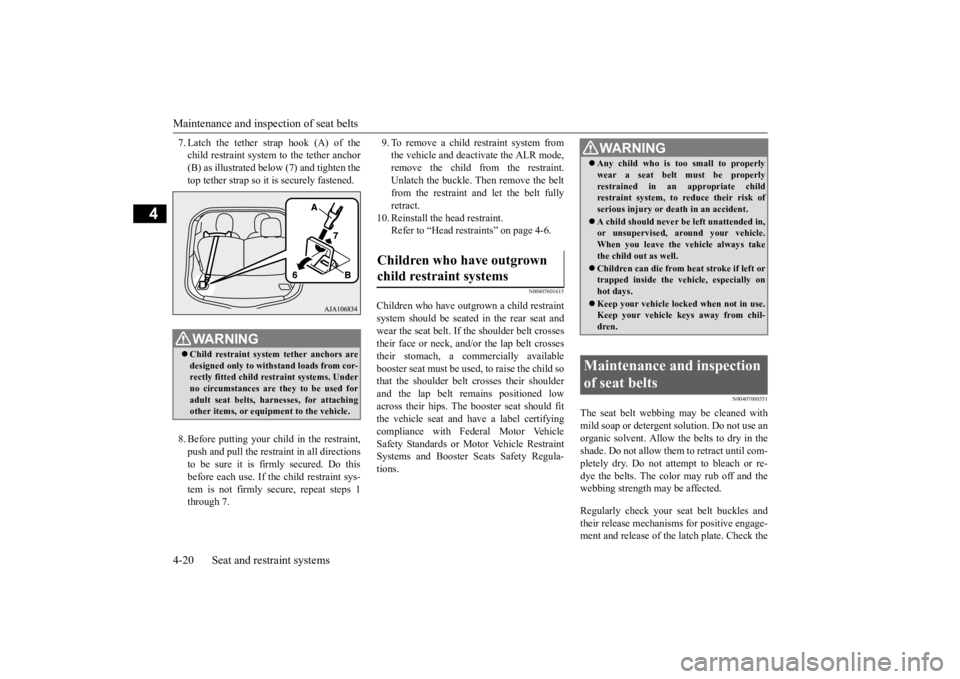
7. Latch the tether strap hook (A) of the child restraint system to the tether anchor(B) as illustrated below (7) and tighten the top tether strap so it is securely fastened. 8. Before putting your child in the restraint, push and pull the restraint in all directions to be sure it is firmly secured. Do thisbefore each use. If
the child restraint sys-
tem is not firmly se
cure, repeat steps 1
through 7.
9. To remove a child restraint system from the vehicle and deac
tivate the ALR mode,
remove the child from the restraint. Unlatch the buckle. Th
en remove the belt
from the restraint and let the belt fullyretract.
10. Reinstall the head restraint.
Refer to “Head restraints” on page 4-6.
N00407601615
Children who have outgrown a child restraint system should be seated in the rear seat and wear the seat belt. If the shoulder belt crossestheir face or neck, and/
or the lap belt crosses
their stomach, a commercially available booster seat must be used, to raise the child sothat the shoulder belt
crosses their shoulder
and the lap belt remains positioned low across their hips. The booster seat should fitthe vehicle seat and ha
ve a label certifying
compliance with Federal Motor Vehicle Safety Standards or Mo
tor Vehicle Restraint
Systems and Booster Seats Safety Regula- tions.
N00407000351
The seat belt webbing may be cleaned withmild soap or detergent solution. Do not use an organic solvent. Allow the belts to dry in theshade. Do not allow them to retract until com- pletely dry. Do not attempt to bleach or re- dye the belts. The color may rub off and thewebbing strength may be affected. Regularly check your seat belt buckles and their release mechanisms for positive engage- ment and release of the latch plate. Check the
WA R N I N G Child restraint system tether anchors are designed only to with
stand loads from cor-
rectly fitted child restraint systems. Underno circumstances are they to be used for adult seat belts, harnesses, for attaching other items, or equipment to the vehicle.
Children who have outgrown child restraint systems
WA R N I N G Any child who is too small to properly wear a seat belt
must be properly
restrained in an appropriate childrestraint system, to reduce their risk of serious injury or de
ath in an
accident.
A child should never be
left unattended in,
or unsupervised, around your vehicle. When you leave the
vehicle always take
the child out as well. Children can die from heat stroke if left or trapped inside the vehicle, especially on hot days. Keep your vehicle locked when not in use. Keep your vehicle keys away from chil- dren.
Maintenance and inspection of seat belts
BK0209800US.book 20 ページ 2014年1月14日 火曜日 午前9時26分
Page 106 of 262
5
Features and controlsBreak-in recommendations ..............................................................5-2 Keys .................................................................................................5-2 Electronic immobilizer (Anti-theft starting system) ........................5-2Keyless entry system .......................................................................5-5 Door locks ........................................................................................5-8 Power door locks ........
...........
...........
...........
...........
...........
.........
.....5-9
Child safety locks for rear door ..........
...........
.........
.........
.........
.....5-10
Liftgate ........................................................................................... 5-11 Theft-alarm system ........................................................................5-12Power window control ...................................................................5-14 Parking brake .................................................................................5-16 Inside rearview mirror ...................................................................5-16Outside rearview mirrors ...............................................................5-17 Electric motor switch .....................................................................5-18 Steering wheel lock ........................................................................5-20Starting the electric motor unit ......................................................5-20 Transmission ..................................................................................5-21 Acoustic vehicle alerting system (AVAS) ......................................5-23Service brake .................................................................................5-24 Brake assist system ........................................................................5-25 Anti-lock braking system ...............................................................5-25Electric power steering system (EPS) ............................................5-27 Active stability control (ASC) .......................................................5-28 Tire pressure monitoring system ....................................................5-30Instrument cluster ..........................................................................5-34 Indicator and warning light package ..............................................5-41 Indicators .......................................................................................5-42Warning lights ................................................................................5-42
Combination headlights and dimmer switch ................................. 5-44 Turn signal lever ............................................................................ 5-46 Hazard warning flasher switch ...................................................... 5-47Front fog light switch .................................................................... 5-47 Wiper and washer switch ............................................................... 5-48 Electric rear window defogger switch ....
...........
...........
...........
...... 5-50
Horn switch ................................................................................... 5-50 Sun visors ...................................................................................... 5-51 12 V power outlet .......................................................................... 5-51Interior lights ................................................................................. 5-52 Storage spaces ................................................................................ 5-54 Cup holder ..................................................................................... 5-55Assist grip ...................................................................................... 5-56
BK0209800US.book 1 ページ 2014年1月14日 火曜日 午前9時26分
Page 107 of 262
Break-in recommendations 5-2 Features and controls
5
N00508700343
Advanced automobile manufacturing tech- niques permit you to operate your new vehi- cle without requiring
a long break-in period
of low-speed driving. However, you can add to the future perfor- mance and economy of your vehicle byobserving the followi
ng precautions during
the first 300 miles (500 km). Drive your vehicle at moderate speeds during the break-in period. Do not overload the ve
hicle. Observe the
seating capacity (See “Cargo load precau-tions” on page 6-10). Do not use this vehi
cle for trailer towing.
N00508800618
Two keys are provided. The keys fit all locks. Keep one in a safe place as a spare key.
N00509101846
The electronic immobilize
r is designed to sig-
nificantly reduce the
possibility of vehicle
theft. The purpose of the system is to immo-bilize the vehicle if
an invalid start is
attempted. A valid st
art attempt can only be
achieved (subject to ce
rtain conditions), using
a key “registered” to the immobilizer system. All of the keys provided with your new vehi- cle have been program
med to the vehicle’s
electronics.
Break-in recommendations Keys
NOTE
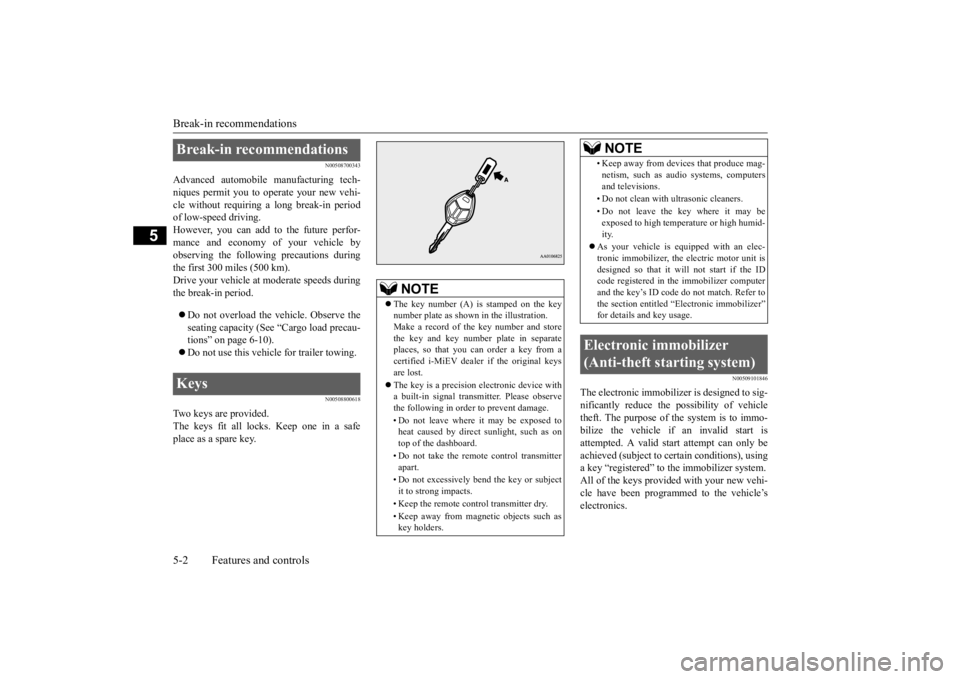
The key number (A) is stamped on the key number plate as shown
in the illustration.
Make a record of th
e key number and store
the key and key number plate in separate places, so that you can order a key from acertified i-MiEV dealer if the original keys are lost. The key is a precision
electronic device with
a built-in signal transm
itter. Please observe
the following in order to prevent damage. • Do not leave where it may be exposed to heat caused by direct sunlight, such as ontop of the dashboard. • Do not take the remote
control transmitter
apart. • Do not excessively bend the key or subject it to strong impacts. • Keep the remote control transmitter dry.• Keep away from magne
tic objects such as
key holders.
• Keep away from devi
ces that produce mag-
netism, such as audio systems, computersand televisions. • Do not clean with
ultrasonic cleaners.
• Do not leave the key where it may be exposed to high temperature or high humid- ity.
As your vehicle is equipped with an elec- tronic immobilizer, the electric motor unit isdesigned so that it wi
ll not start if the ID
code registered in the immobilizer computer and the key’s ID code
do not match. Refer to
the section entitled “E
lectronic immobilizer”
for details and key usage.
Electronic immobilizer (Anti-theft starting system)
NOTE
BK0209800US.book 2 ページ 2014年1月14日 火曜日 午前9時26分
Page 108 of 262
Electronic immobilizer (Ant
i-theft starting system)
Features and controls 5-3
5
Only keys that have been programmed to the vehicle electronics can be used to start the vehicle. If you lose a key, you can order a key from a certified i-MiEV dealer by referring to the key number. To prevent vehicle theft, the ID code for thevehicle keys must be changed. Take your vehicle and al
l remaining keys to a
certified i-MiEV dealer
to have your ID code
changed. To add a key, you need to register the ID code to the vehicle. Registering the ID code can be done by a cer- tified i-MiEV dealer.
Or it can be done by
yourself (except for vehi
cles sold in Canada).
To register the ID code yourself, follow the “Customer key programming” procedurebelow.
NOTE
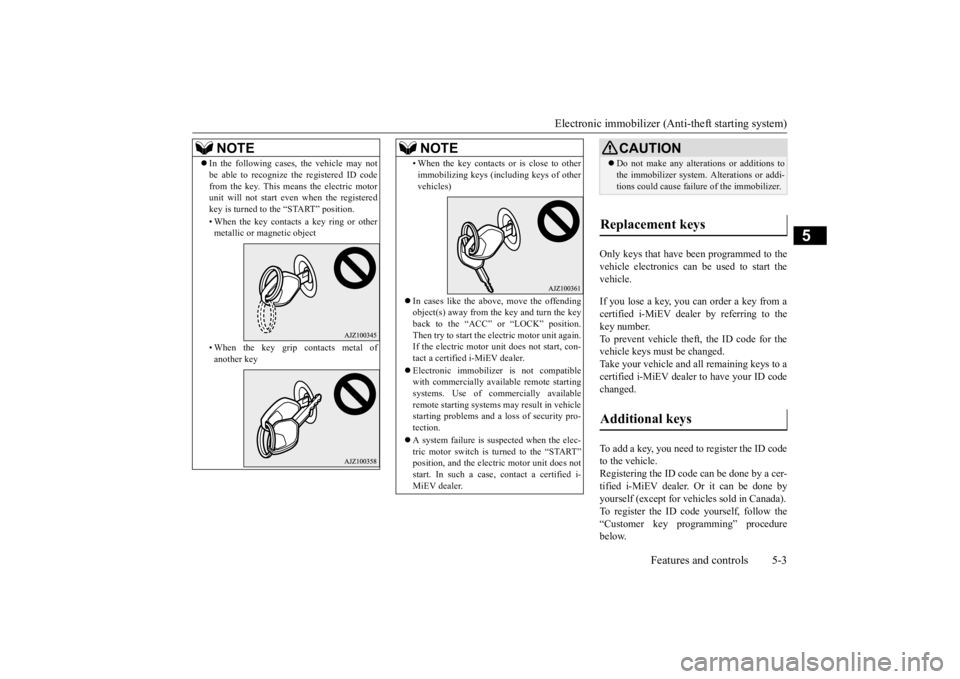
In the following cases, the vehicle may not be able to recognize
the registered ID code
from the key. This means the electric motorunit will not start even when the registered key is turned to the “START” position. • When the key contacts
a key ring or other
metallic or magnetic object • When the key grip
contacts metal of
another key
• When the key contacts
or is close to other
immobilizing keys (inc
luding keys of other
vehicles)
In cases like the above, move the offending object(s) away from the key and turn the key back to the “ACC” or “LOCK” position.Then try to start the electric motor unit again. If the electric motor unit does not start, con- tact a certified i-MiEV dealer. Electronic immobilize
r is not compatible
with commercially available remote startingsystems. Use of commercially available remote starting systems may result in vehicle starting problems
and a loss of security pro-
tection. A system failure is suspected when the elec- tric motor switch is turned to the “START” position, and the elec
tric motor unit does not
start. In such a case, contact a certified i-MiEV dealer.NOTE
CAUTION Do not make any altera
tions or additions to
the immobilizer system.
Alterations or addi-
tions could cause failur
e of the immobilizer.
Replacement keys Additional keys
BK0209800US.book 3 ページ 2014年1月14日 火曜日 午前9時26分
Page 109 of 262
Electronic immobilizer (Anti-theft starting system) 5-4 Features and controls
5
If you choose to have a certified i-MiEV dealer register the ID
code, take your vehicle
and any remaining keys
to a certified i-MiEV
dealer.
N00562200113
You can program new keys to the system ifyou have two valid (alr
eady registered) keys
and blank (not regist
ered) immobilizer key
(specially cut for your ve
hicle at a certified i-
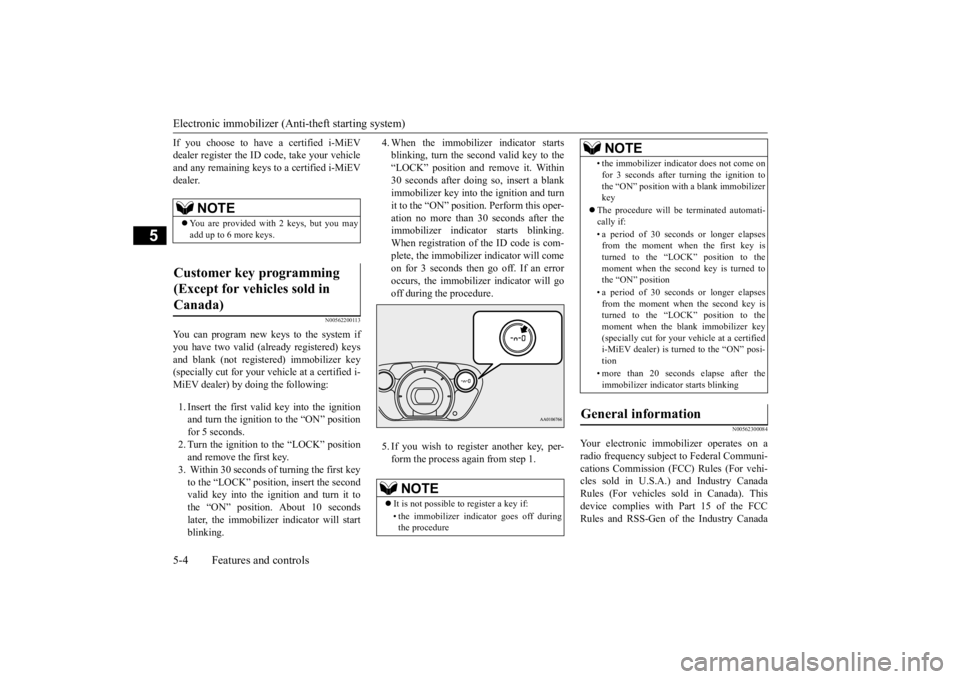
MiEV dealer) by doing the following: 1. Insert the first valid key into the ignition and turn the ignition to the “ON” positionfor 5 seconds. 2. Turn the ignition to the “LOCK” position and remove the first key.3. Within 30 seconds of turning the first key to the “LOCK” position, insert the second valid key into the ignition and turn it tothe “ON” position. About 10 seconds later, the immobilizer indicator will start blinking.
4. When the immobilizer indicator starts blinking, turn the second valid key to the“LOCK” position and remove it. Within 30 seconds after doing so, insert a blank immobilizer key into the ignition and turnit to the “ON” position. Perform this oper- ation no more than 30 seconds after the immobilizer indicato
r starts blinking.
When registration of the ID code is com- plete, the immobilizer indicator will come on for 3 seconds then go off. If an error occurs, the immobilizer indicator will go off during the procedure. 5. If you wish to register another key, per- form the process again from step 1.
N00562300084
Your electronic imm
obilizer operates on a
radio frequency subject
to Federal Communi-
cations Commission (FCC) Rules (For vehi- cles sold in U.S.A.) and Industry CanadaRules (For vehicles so
ld in Canada). This
device complies with
Part 15 of the FCC
Rules and RSS-Gen of the Industry Canada
NOTE
You are provided with
2 keys, but you may
add up to 6 more keys.
Customer key programming (Except for vehicles sold in Canada)
NOTE
It is not possible to register a key if: • the immobilizer indi
cator goes off during
the procedure
• the immobilizer indica
tor does not come on
for 3 seconds after turning the ignition tothe “ON” position with
a blank immobilizer
key
The procedure will be terminated automati- cally if: • a period of 30 seconds or longer elapses from the moment when the first key is turned to the “LOCK” position to the moment when the second key is turned tothe “ON” position • a period of 30 seconds or longer elapses from the moment when the second key is turned to the “LOCK” position to the moment when the blank immobilizer key(specially cut for your
vehicle at a certified
i-MiEV dealer) is turned to the “ON” posi- tion • more than 20 seconds elapse after the immobilizer indicato
r starts blinking
General information
NOTE
BK0209800US.book 4 ページ 2014年1月14日 火曜日 午前9時26分