key battery MITSUBISHI iMiEV 2015 Owner's Manual (in English)
[x] Cancel search | Manufacturer: MITSUBISHI, Model Year: 2015, Model line: iMiEV, Model: MITSUBISHI iMiEV 2015Pages: 262, PDF Size: 26.84 MB
Page 13 of 262
If this problem occurs... 2-4 Quick index
2
N00200900854
If this problem occurs...
Problem
Do this
Ref. Page
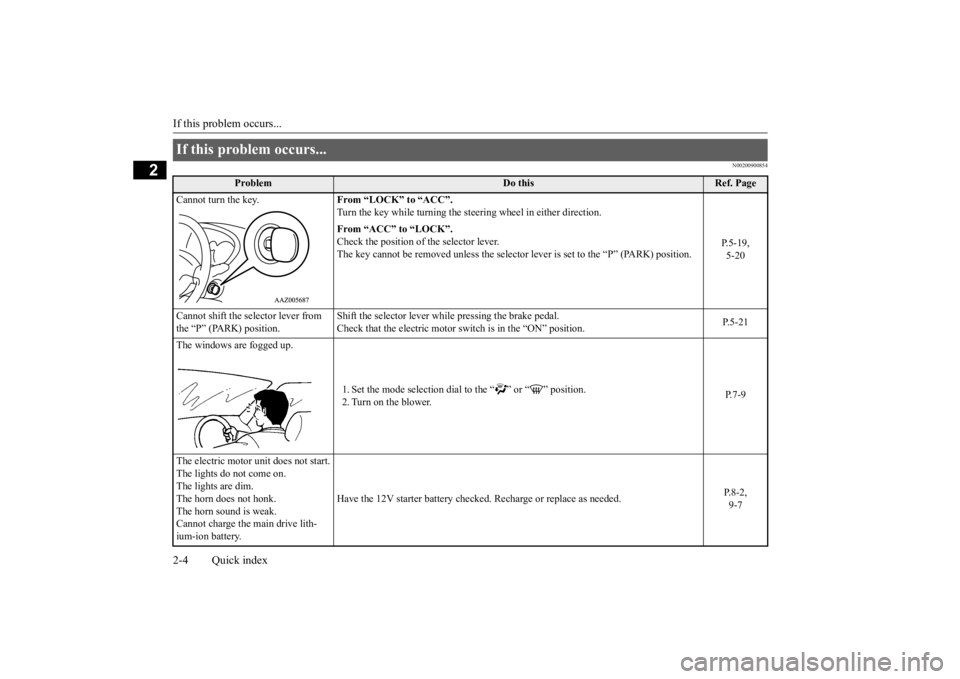
Cannot turn the key.
From “LOCK” to “ACC”. Turn the key while turning the st
eering wheel in either direction.
P.5-19, 5-20
From “ACC” to “LOCK”. Check the position of the selector lever. The key cannot be removed unless the selector
lever is set to the “P” (PARK) position.
Cannot shift the selector lever from the “P” (PARK) position.
Shift the selector lever wh
ile pressing the brake pedal.
Check that the electric motor switch is in the “ON” position.
P.5-21
The windows are fogged up.
1. Set the mode selection dial
to the “ ” or “ ” position.
2. Turn on the blower.
P.7-9
The electric motor unit does not start. The lights do not come on. The lights are dim. The horn does not honk. The horn sound is weak. Cannot charge the main drive lith-ium-ion battery.
Have the 12V starter battery checked.
Recharge or replace as needed.
P.8-2, 9-7
BK0209800US.book 4 ページ 2014年1月14日 火曜日 午前9時26分
Page 40 of 262
Quick charging (charging method with quick charger)
General information/Charging 3-25
3
Carefully read instru
ctions on “Precautions
during charging the main drive lithium-ionbattery” on page 3-14,
described in this sec-
tion and also instructions for a quick charger you uses, and follow them.
1. Fully apply the parking brake and move the selector lever to the “P” (PARK) posi-tion. 2. Stop the electric devices such as lamps, air conditioning, etc.
and turn the electric
motor switch to the “LOCK” position.
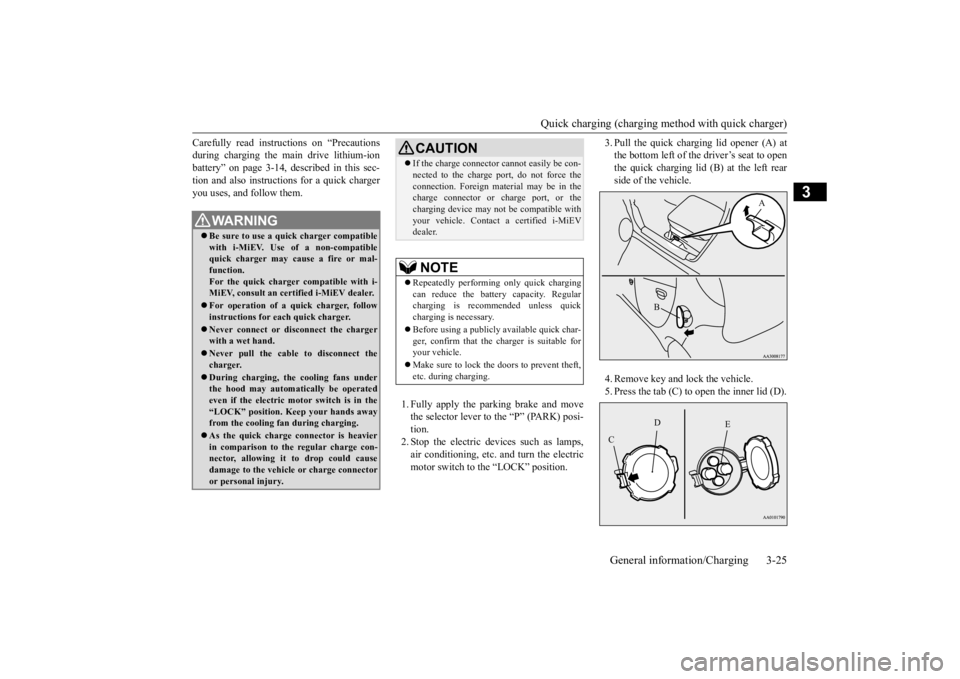
3. Pull the quick charging lid opener (A) at the bottom left of the driver’s seat to openthe quick charging lid (B) at the left rear side of the vehicle. 4. Remove key and lock the vehicle. 5. Press the tab (C) to open the inner lid (D).
WA R N I N G Be sure to use a qu
ick charger compatible
with i-MiEV. Use of a non-compatible quick charger may cause a fire or mal- function.For the quick charger compatible with i- MiEV, consult an certified i-MiEV dealer. For operation of a quick charger, follow instructions for each quick charger. Never connect or disc
onnect the charger
with a wet hand. Never pull the cable to disconnect the charger. During charging, the
cooling fans under
the hood may automa
tically be operated
even if the electric motor switch is in the“LOCK” position. Ke
ep your hands away
from the cooling fan during charging. As the quick charge connector is heavier in comparison to th
e regular charge con-
nector, allowing it to drop could causedamage to the vehicl
e or charge connector
or personal injury.
CAUTION If the charge connector cannot easily be con- nected to the charge port, do not force theconnection. Foreign mate
rial may be in the
charge connector or charge port, or the charging device may not
be compatible with
your vehicle. Contact a certified i-MiEVdealer.NOTE
 Repeatedly performi
ng only quick charging
can reduce the batter
y capacity. Regular
charging is recommended unless quickcharging is necessary.  Before using a publicly
available quick char-
ger, confirm that the charger is suitable for your vehicle.  Make sure to lock the doors to prevent theft, etc. during charging.
A
B
E
D
C
BK0209800US.book 25 ページ 2014年1月14日 火曜日 午前9時26分
Page 45 of 262

High-Voltage components 3-30 General information/Charging
3
N01205700027
High voltage components and wiring cables are located as shown in the figure below.
N01205800031
A crash or impact significant enough to require an emergency response for conven- tional vehicles would
also require the same
response for electric vehicles. Also follow the instruct
ions described below
to avoid severe burns a
nd electrical shock that
may result in serious injury or death.
High-Voltage components
WA R N I N G The EV (Electric Vehicle) system uses high voltage up to DC 330 volt. The system canbe hot during and after starting and when the vehicle is shut off. Be careful of both the high voltage and
the high temperature.
Follow the warning labels that are attached to the vehicle. Never touch, disassemble, remove or replace high-voltage parts, exposed elec- trical components, cables or connectors.Failure to follow this instruction can result in severe burns
or electric shock
causing serious injury
or death. High-volt-
age cables are colore
d orange. Th
e vehicle
high voltage system has no user service- able parts. Take your
vehicle to a Certified
i-MiEV dealer for an
y necessary mainte-
nance. Always assume the hi
gh voltage battery
and associated compon
ents are energized
and fully charged.
1- Regular charge port 2- MCU 3- Main drive lithium-ion battery 4- Heater5- Air conditioner compressor 6- High voltage connector 7- Service plug8- Electric motor (Electric motor unit) 9- On board charger/DC-DC converter 10- Quick charge portIn case of a collision
WA R N I N G If your vehicle is dr
ivable, pull your vehi-
cle off the road to a safe, nearby locationand remain on the scene.Also, if possible, do
the follow
ing opera-
tions and stay out of the way of any oncoming traffic while awaiting thearrival of emergency responders.• Apply chocks to the wheels.• Move the selector
lever to the “P”
(PARK) position.• Apply the parking brake.• Open the windows,
doors and liftgate.
• Turn the electric motor switch to the “LOCK” position.• Turn on the hazard warning flashers.• Move the key away fr
om the vehicle to
prevent unintended start-up of the sys-tem by inadvertent contact with a switch or impact from the crash.
 Never touch high-vol
tage wiring, connec-
tors, and other high-vol
tage parts, such as
the inverter unit and main drive lithium-ion battery. An electric shock may occur if exposed electric wires are visible when viewed from inside
or outside of your
vehicle. For their locations, see “High- voltage components” on page 3-30. If the vehicle receives a strong impact to the floor while driving, stop the vehicle in a safe place and check the floor.
BK0209800US.book 30 ページ 2014年1月14日 火曜日 午前9時26分
Page 112 of 262
Keyless entry system
Features and controls 5-7
5
If you choose to have a certified i-MiEV dealer register the ID
code, take your vehicle
and all remaining keys to a certified i-MiEV dealer.
N00546100101
Your keyless entry system operates on a radiofrequency subject to
Federal Communica-
tions Commission (FCC)
Rules (For vehicles
sold in U.S.A.) and Industry Canada Rules (For vehicles sold in Canada). This device complies with Part 15 of the FCC Rules andRSS-Gen of the Industry Canada Rules. Operation is subject to the following two con- ditions.  This device may not
cause harmful inter-
ference.  This device must ac
cept any interference
received, including interference that maycause undesired operation.
N00544100110
1. Before replacing the
battery, remove static
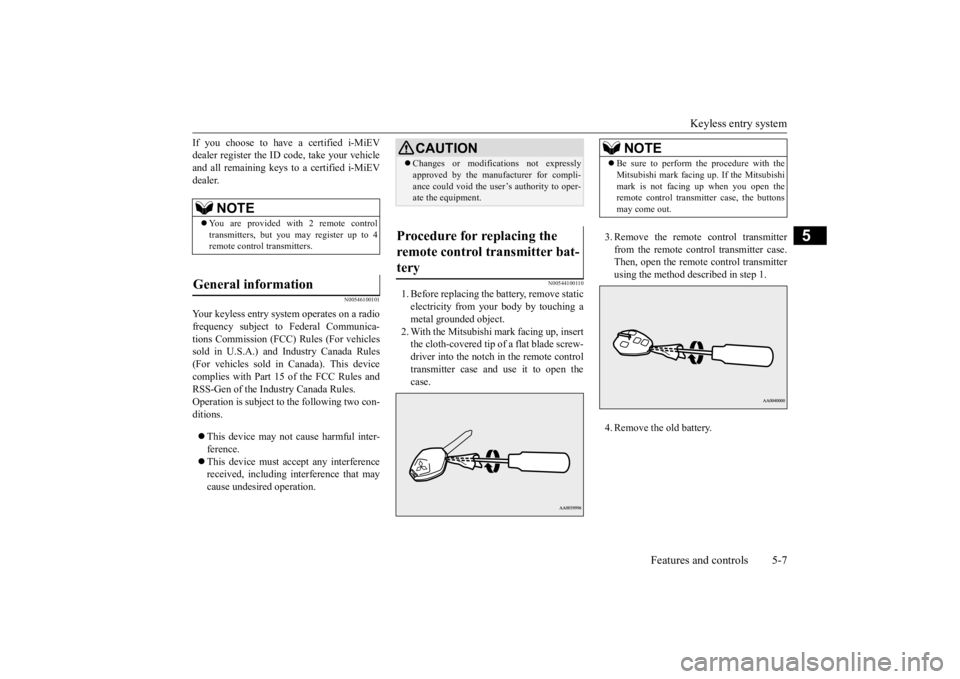
electricity from your body by touching ametal grounded object. 2. With the Mitsubishi mark facing up, insert the cloth-covered tip of
a flat blade screw-
driver into the notch in the remote control transmitter case and
use it to open the
case.
3. Remove the remote control transmitter from the remote control transmitter case. Then, open the remote control transmitterusing the method described in step 1. 4. Remove the old battery.
NOTE
 You are provided with 2 remote control transmitters, but you may register up to 4 remote control transmitters.
General information
CAUTION Changes or modifica
tions not expressly
approved by the manufacturer for compli-ance could void the user’s authority to oper-ate the equipment.
Procedure for replacing the remote control transmitter bat- tery
NOTE
 Be sure to perform the procedure with the Mitsubishi mark facing up. If the Mitsubishimark is not facing up when you open theremote control transmitter case, the buttons may come out.
BK0209800US.book 7 ページ 2014年1月14日 火曜日 午前9時26分
Page 113 of 262
Door locks 5-8 Features and controls
5
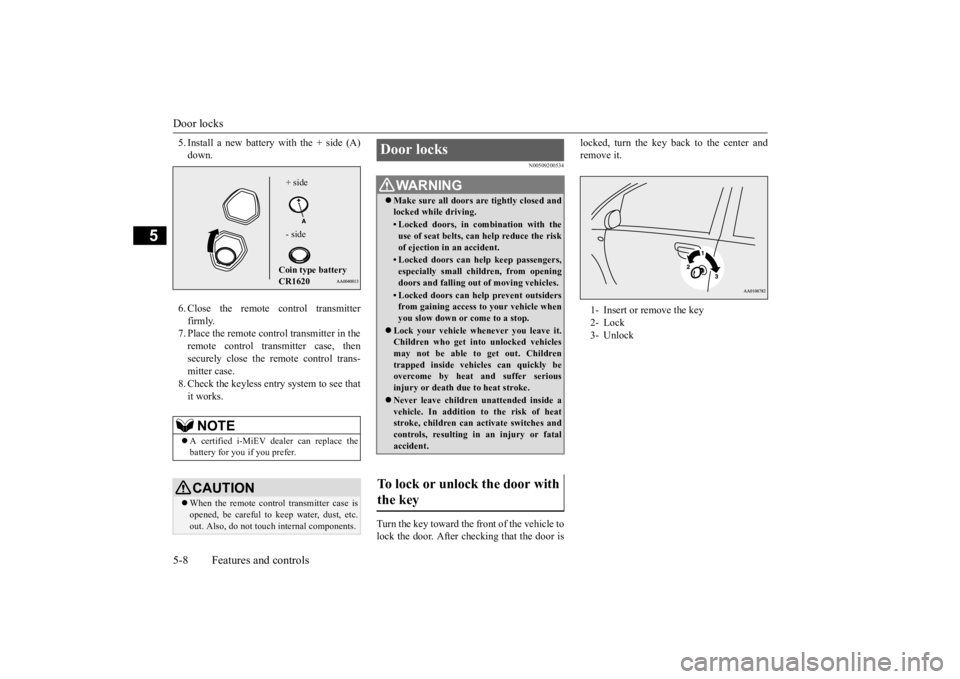
5. Install a new battery with the + side (A) down. 6. Close the remote control transmitter firmly. 7. Place the remote control transmitter in theremote control transmitter case, then securely close the remote control trans- mitter case.8. Check the keyless entry system to see that it works.
N00509200534
Turn the key toward the front of the vehicle to lock the door. After checking that the door is
locked, turn the key back to the center and remove it.
NOTE
 A certified i-MiEV dealer can replace the battery for you if you prefer. CAUTION When the remote control transmitter case is opened, be careful to
keep water, dust, etc.
out. Also, do not touch
internal components.+ side - side Coin type battery CR1620
Door locks
WA R N I N GMake sure all doors are tightly closed and locked while driving.• Locked doors, in co
mbination with the
use of seat belts, can help reduce the riskof ejection in
an accident.
• Locked doors can help keep passengers, especially small children, from opening doors and falling out
of moving vehicles.
• Locked doors can help
prevent outsiders
from gaining access to your vehicle when you slow down or come to a stop.
 Lock your vehicle when
ever you leave it.
Children who get into
unlocked vehicles
may not be able to get out. Children trapped inside vehicles can quickly be overcome by heat
and suffer serious
injury or death due to heat stroke. Never leave children unattended inside a vehicle. In addition
to the risk of heat
stroke, children can activate switches and controls, resulting in an injury or fatalaccident.
To lock or unlock the door with the key
1- Insert or remove the key 2- Lock 3- Unlock
BK0209800US.book 8 ページ 2014年1月14日 火曜日 午前9時26分
Page 118 of 262
Theft-alarm system
Features and controls 5-13
5
3. The system has ente
red the armed stage
after about 20 seconds, when the theft-alarm indicator flashi
ng becomes slower.
The theft-alarm indicator continues to flash while the system is in the armedstage.
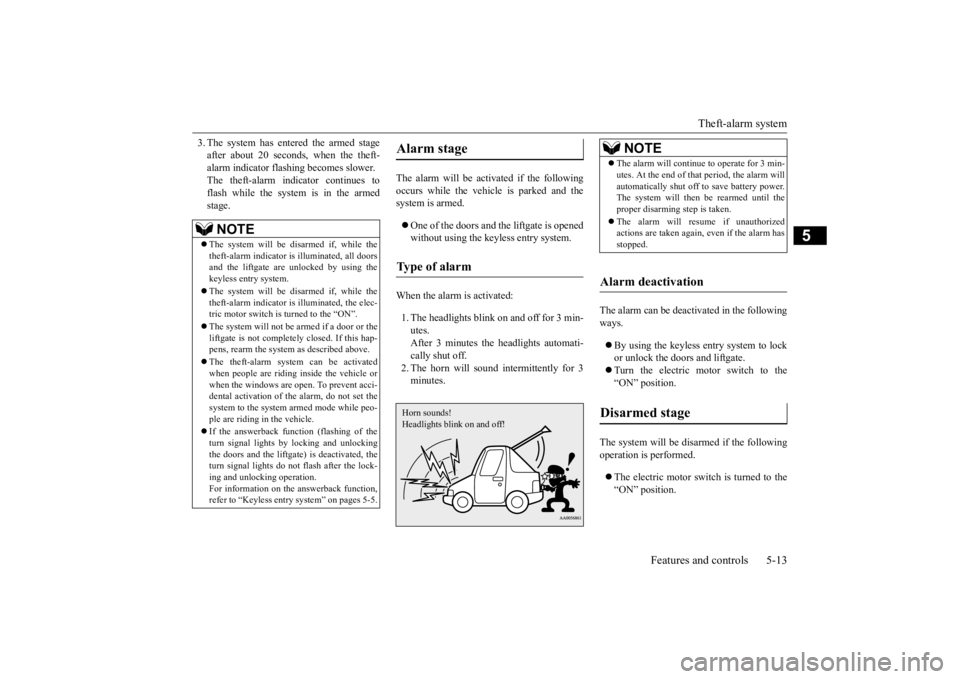
The alarm will be activated if the following occurs while the vehicle is parked and the system is armed.  One of the doors and the liftgate is opened without using the keyless entry system.
When the alarm is activated: 1. The headlights blink on and off for 3 min- utes. After 3 minutes the headlights automati-cally shut off. 2. The horn will sound intermittently for 3 minutes.
The alarm can be deacti
vated in the following
ways.  By using the keyless entry system to lock or unlock the doors and liftgate. Turn the electric motor switch to the “ON” position.
The system will be disarmed if the following operation is performed.  The electric motor switch is turned to the “ON” position.
NOTE
 The system will be disarmed if, while the theft-alarm indicator is
illuminated, all doors
and the liftgate are
unlocked by using the
keyless entry system.  The system will be disarmed if, while the theft-alarm indicator is illuminated, the elec-tric motor switch is turned to the “ON”.  The system will not be armed if a door or the liftgate is not completely closed. If this hap- pens, rearm the system
as described above.
 The theft-alarm system can be activated when people are riding inside the vehicle or when the windows are open. To prevent acci-dental activati
on of the alarm, do not set the
system to the system armed mode while peo- ple are riding in the vehicle.  If the answerback function (flashing of the turn signal lights by locking and unlockingthe doors and the liftgate
) is deactivated, the
turn signal lights do not flash after the lock- ing and unlocking operation.For information on the answerback function, refer to “Keyless entry system” on pages 5-5.
Alarm stage Type of alarm Horn sounds!Headlights blink on and off!
NOTE
 The alarm will continue to operate for 3 min- utes. At the end of that
period, the alarm will
automatically shut off
to save battery power.
The system will then
be rearmed until the
proper disarming step is taken.  The alarm will resu
me if unauthorized
actions are taken again, even if the alarm has stopped.
Alarm deactivation Disarmed stage
BK0209800US.book 13 ページ 2014年1月14日 火曜日 午前9時26分
Page 119 of 262
Power window control 5-14 Features and controls
5
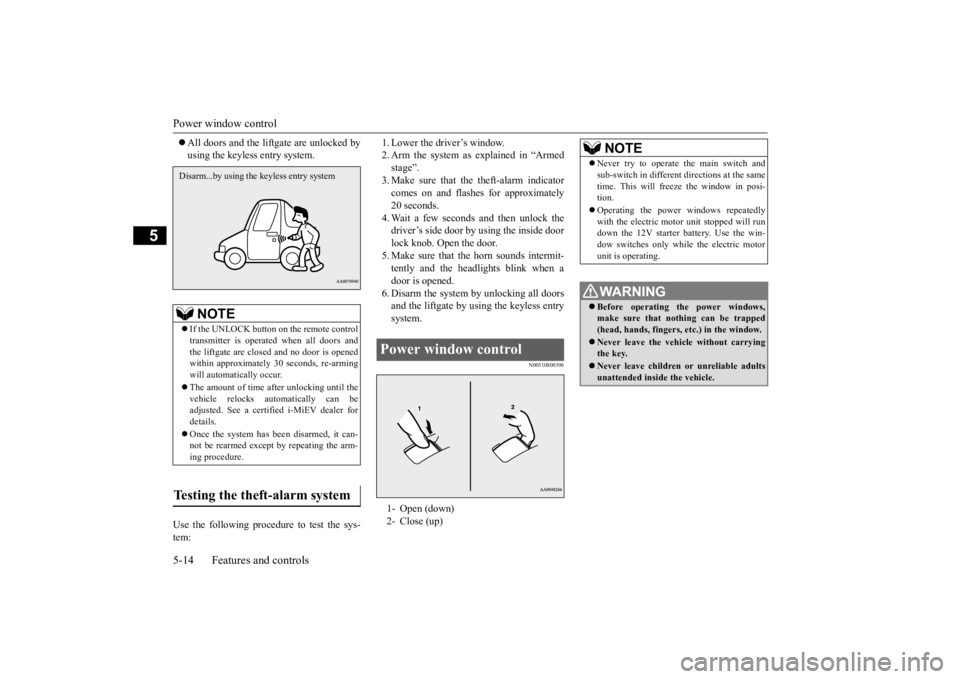
 All doors and the lift
gate are unlocked by
using the keyless entry system.
Use the following proce
dure to test the sys-
tem:
1. Lower the driver’s window. 2. Arm the system as explained in “Armedstage”. 3. Make sure that the theft-alarm indicator comes on and flashe
s for approximately
20 seconds. 4. Wait a few seconds and then unlock the driver’s side door by using the inside doorlock knob. Open the door. 5. Make sure that the horn sounds intermit- tently and the headlights blink when a door is opened. 6. Disarm the system by unlocking all doorsand the liftgate by using the keyless entry system.
N00510800396
NOTE
 If the UNLOCK button on the remote control transmitter is operated when all doors and the liftgate are closed and no door is opened within approximately 30 seconds, re-armingwill automatically occur.  The amount of time afte
r unlocking until the
vehicle relocks automatically can be adjusted. See a certified i-MiEV dealer for details.  Once the system has been disarmed, it can- not be rearmed except
by repeating the arm-
ing procedure.
Testing the theft-alarm system Disarm...by using the keyless entry system
Power window control 1- Open (down) 2- Close (up)
NOTE
 Never try to operate the main switch and sub-switch in different
directions at the same
time. This will free
ze the window in posi-
tion.  Operating the power windows repeatedly with the electr
ic motor unit stopped will run
down the 12V starter battery. Use the win- dow switches only while the electric motorunit is operating.WA R N I N G Before operating the power windows, make sure that nothing can be trapped (head, hands, fingers, etc.) in the window. Never leave the vehi
cle without carrying
the key. Never leave children
or unreliable adults
unattended inside the vehicle.
BK0209800US.book 14 ページ 2014年1月14日 火曜日 午前9時26分
Page 124 of 262
Electric motor switch
Features and controls 5-19
5
The steering wheel is locked. The key can be inserted and removed only when the switch is in this position. The ready indicator is
not illuminated, but the
audio system and other
electric devices can
be operated. The electric motor unit
is running, and all the
vehicle’s electrical de
vices can be operated.
The electric motor unit operates. After the electric motor unit has started, release the key and it will automatically return to the “ON”position.
N00573800021
After about 30 minutes
has elapsed with the
electric motor switch in the “ACC” position, the function automatically cuts out the powerfor the audio system and other electric devices that can be ope
rated with that posi-
tion.When the electric motor switch is turned from the “ACC” position, the power is sup- plied again to those devices.
N00571600025
When removing the key, first set the selector lever to the “P” (PARK) position, and then turn the key to the “LOCK” position andremove it.
LOCK ACC ON START
NOTE
 Your vehicle is equippe
d with an electronic
immobilizer. To start the electric motor unit,the ID code which the transponder inside thekey sends must match
the one registered to
the immobilizer computer. (Refer to “Electroni
c immobilizer” on page
5-2.)
ACC power auto-cutout func- tion
NOTE
 It is possible to modify functions as follows: • The ACC power auto
-cutout function can
be deactivated by a certified i-MiEV dealer.
To remove the key
CAUTION Do not remove the key from the electric motor switch while driving. The steering wheel will lock, caus
ing loss of control.
If the ready indicator is turned off while driving, the power br
ake booster will stop
functioning and braking efficiency will bereduced. Also, the power steering system will not function and it
will require greater
effort to manually steer the vehicle. Do not leave the key in
the “ON” position for
a long time when the electric motor unit isnot running. This will
cause the 12V starter
battery to run down.
BK0209800US.book 19 ページ 2014年1月14日 火曜日 午前9時26分
Page 128 of 262
Acoustic vehicle alerting system (AVAS)
Features and controls 5-23
5
N00514500359
N00515000087
For short waiting periods, such as at traffic signals the vehicle can be
left in selector lever
position and held stationary with the service brake. For longer waiting periods with the electricmotor unit running, plac
e the selector lever in
the “N” (NEUTRAL) position and apply the parking brake, while holding the vehicle sta-tionary with the service brake.
N00515100075
To park the vehicle, first bring it to a com-plete stop, fully engage the parking brake, and then move the selector lever to the “P” (PARK) position.
If you are going to leave the vehicle unat- tended, always switch
off the electric motor
unit and carry the key.
N00571900028
While driving at low speeds, such as in park-ing lots, the acoustic vehicle alerting system(AVAS) alerts people who may not hear your vehicle approaching. The system sounds when the vehicle speed isapproximately 22 mph
(35 km/h) or less.
The acoustic vehicle alerting system (AVAS) will operate under th
e following conditions:
 When the vehicle sp
eed is approximately
2 mph (3 km/h) or less and the brake pedal is not depressed.
WA R N I N G While driving on a slippery road, do not use the “B” position.
Abruptly releasing
the accelerator pedal can apply strongregenerative braking
causing the vehicle
to skid which could result in an accident.NOTE
 When the main drive lithium-ion battery level is full or nearly
full, or the main drive
lithium-ion battery temp
erature is too high or
too low, the regenerative braking force may be reduced and stronger effort may berequired to operate the brakes.
Operation of the transmission
CAUTION Before selecting a pos
ition with the electric
motor unit running and the vehicle station- ary, fully depress the brake pedal to prevent the vehicle from creeping.The vehicle will begin to move as soon as the transmission is engage
d, the brakes should
only be released when you are ready to driveaway. Depress the brake pedal
with the right foot at
all times. Using the left foot could cause driver move- ment delay in case of an emergency.
 Operating the accelerator pedal while the other foot is resting
on the brake pedal will
affect braking efficien
cy and may cause pre-
mature wear of brake pads.
Waiting
CAUTION Never hold the vehicle
stationary on a hill
with the accelerator. Always apply the park- ing brake and/or service brake.
Parking
CAUTION
NOTE
 On a slope, be sure to apply the parking brake before moving the selector lever to the“P” (PARK) position. If you move the selec- tor lever to the “P” (PARK) position before applying the parking brake, it may be diffi-cult to disengage the
selector lever from the
“P” (PARK) position when next you drive the vehicle, requiring a
pplication of a strong
force to the selector lever to move from the “P” (PARK) position.
Acoustic vehicle alerting system (AVAS)
BK0209800US.book 23 ページ 2014年1月14日 火曜日 午前9時26分
Page 152 of 262
Hazard warning flasher switch Features and controls 5-47
5
N00522700305
If you press the flasher switch, the front and rear turn signals will flash intermittently, and so will the hazard warn
ing lights. This is an
emergency warning syst
em and should not be
used when the vehicle is in motion, except for emergencies. If you need to leave your vehicle, the flasherswill keep working after the key is removed from the electric motor switch.
N00522801433
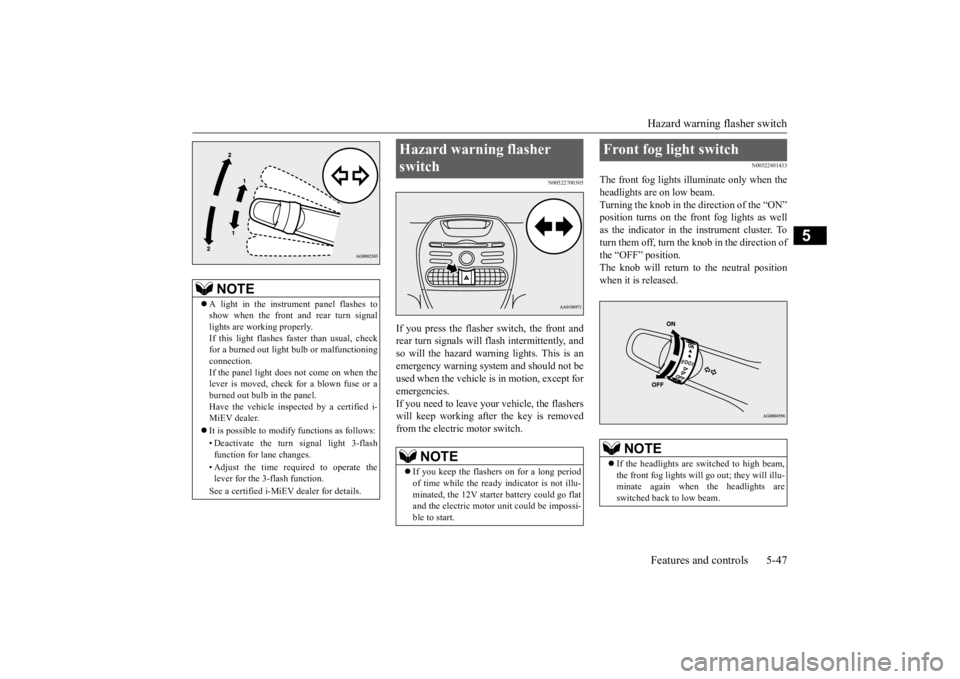
The front fog lights illuminate only when theheadlights are on low beam. Turning the knob in the direction of the “ON”position turns on the front fog lights as well as the indicator in the instrument cluster. To turn them off, turn the knob in the direction ofthe “OFF” position. The knob will return to the neutral position when it is released.
NOTE
 A light in the instrument panel flashes to show when the front and rear turn signallights are working properly. If this light flashes fa
ster than usual, check
for a burned out light bulb or malfunctioningconnection. If the panel light does not come on when the lever is moved, check for a blown fuse or aburned out bulb in the panel. Have the vehicle insp
ected by a certified i-
MiEV dealer.  It is possible to modify functions as follows: • Deactivate the turn signal light 3-flash function for lane changes. • Adjust the time required to operate the lever for the 3-flash function. See a certified i-MiEV dealer for details.
Hazard warning flasher switch
NOTE
 If you keep the flashers on for a long period of time while the ready
indicator is not illu-
minated, the 12V starte
r battery could go flat
and the electric motor unit could be impossi- ble to start.
Front fog light switch
NOTE
 If the headlights are sw
itched to high beam,
the front fog lights will go out; they will illu- minate again when the headlights areswitched back to low beam.
BK0209800US.book 47 ページ 2014年1月14日 火曜日 午前9時26分