stop start MITSUBISHI L200 2011 (in English) Owner's Guide
[x] Cancel search | Manufacturer: MITSUBISHI, Model Year: 2011, Model line: L200, Model: MITSUBISHI L200 2011Pages: 330, PDF Size: 22.34 MB
Page 170 of 330
CAUTIONlNever install a limited-slip differential,
which is not a MITSUBISHI MOTORS
genuine part, as the ABS may not func-
tion normally.
We recommend you to consult a
MITSUBISHI MOTORS Authorized
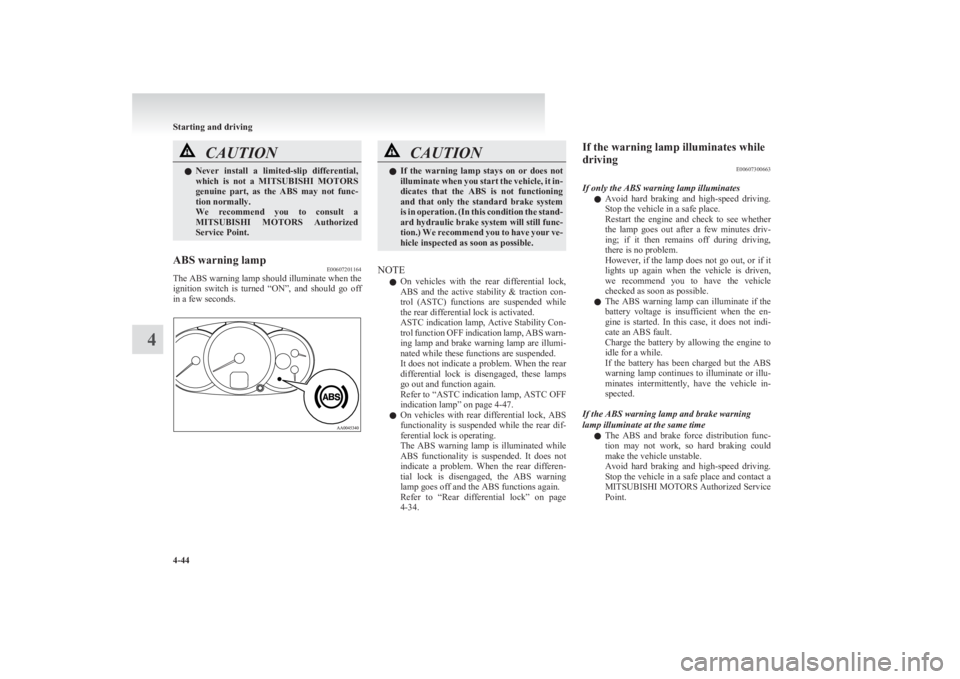
Service Point.ABS warning lamp E00607201164
The ABS warning lamp should illuminate when the
ignition switch is turned “ON”, and should go off
in a few seconds.
CAUTIONl If the warning lamp stays on or does not
illuminate when you start the vehicle, it in-
dicates that the ABS is not functioning
and that only the standard brake system
is in operation. (In this condition the stand-
ard hydraulic brake system will still func-
tion.) We recommend you to have your ve-
hicle inspected as soon as possible.
NOTE
l On vehicles with the rear differential lock,
ABS and the active stability & traction con-
trol (ASTC) functions are suspended while
the rear differential lock is activated.
ASTC indication lamp, Active Stability Con-
trol function OFF indication lamp, ABS warn-
ing lamp and brake warning lamp are illumi-
nated while these functions are suspended.
It does not indicate a problem. When the rear
differential lock is disengaged, these lamps
go out and function again.
Refer to “ ASTC indication lamp, ASTC OFF
indication lamp” on page 4-47.
l On vehicles with rear differential lock, ABS
functionality is suspended while the rear dif-
ferential lock is operating.
The ABS warning lamp is illuminated while
ABS functionality is suspended. It does not
indicate a problem. When the rear differen-
tial lock is disengaged, the ABS warning
lamp goes off and the ABS functions again.
Refer to “Rear differential lock” on page
4-34.
If the warning lamp illuminates while
driving E00607300663
If only the ABS warning lamp illuminates l Avoid hard braking and high-speed driving.
Stop the vehicle in a safe place.
Restart the engine and check to see whether
the lamp goes out after a few minutes driv-
ing; if it then remains off during driving,
there is no problem.
However, if the lamp does not go out, or if it
lights up again when the vehicle is driven,
we recommend you to have the vehicle
checked as soon as possible.
l The ABS warning lamp can illuminate if the
battery voltage is insufficient when the en-
gine is started. In this case, it does not indi-
cate an ABS fault.
Charge the battery by allowing the engine to
idle for a while.
If the battery has been charged but the ABS
warning lamp continues to illuminate or illu-
minates intermittently, have the vehicle in-
spected.
If the ABS warning lamp and brake warning
lamp illuminate at the same time
l The ABS and brake force distribution func-
tion may not work, so hard braking could
make the vehicle unstable.
Avoid hard braking and high-speed driving.
Stop the vehicle in a safe place and contact a
MITSUBISHI MOTORS Authorized Service
Point.
Starting and driving
4-44
4
Page 171 of 330
NOTEl Immediately after the vehicle starts moving
after engine start up, a whining sound of a mo-
tor will be heard from the engine compart-
ment. If the brake pedal is depressed at that
moment, you can feel the brake pedal pulsat-
ing.
This pulsation is due to the self-diagnosis op-
eration of the ABS and does not indicate a
malfunction.
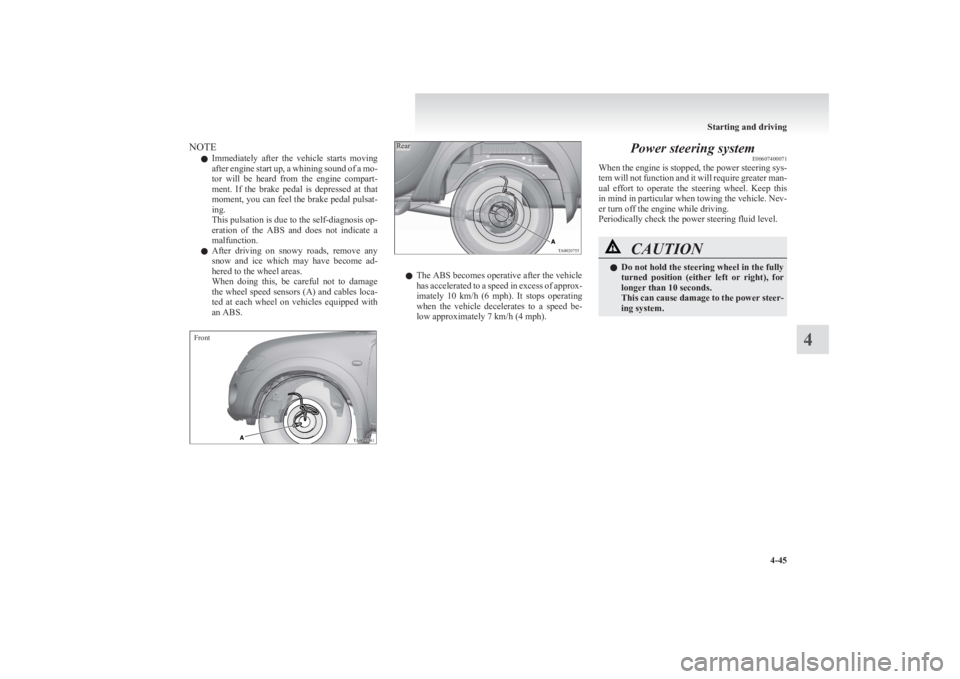
l After driving on snowy roads, remove any
snow and ice which may have become ad-
hered to the wheel areas.
When doing this, be careful not to damage
the wheel speed sensors (A) and cables loca-
ted at each wheel on vehicles equipped with
an ABS.FrontRear
l The ABS becomes operative after the vehicle
has accelerated to a speed in excess of approx-
imately 10 km/h (6 mph). It stops operating
when the vehicle decelerates to a speed be-
low approximately 7 km/h (4 mph).
Power steering system E00607400071
When the engine is stopped, the power steering sys-
tem will not function and it will require greater man-
ual effort to operate the steering wheel. Keep this
in mind in particular when towing the vehicle. Nev-
er turn off the engine while driving.
Periodically check the power steering fluid level.CAUTIONl Do not hold the steering wheel in the fully
turned position (either left or right), for
longer than 10 seconds.
This can cause damage to the power steer-
ing system.
Starting and driving
4-45
4
Page 173 of 330
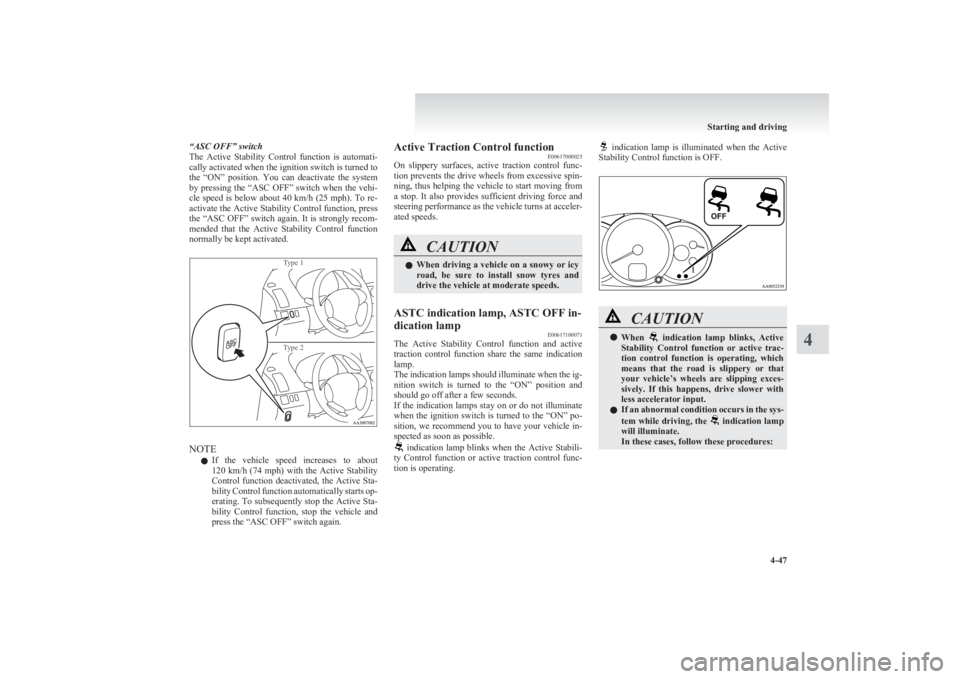
“ASC OFF” switch
The Active Stability Control function is automati-
cally activated when the ignition switch is turned to
the “ON” position. You can deactivate the system
by pressing the “ASC OFF” switch when the vehi-
cle speed is below about 40 km/h (25 mph). To re-
activate the Active Stability Control function, press
the “ASC OFF” switch again. It is strongly recom-
mended that the Active Stability Control function
normally be kept activated.Type 1Type 2
NOTE
l If the vehicle speed increases to about
120 km/h (74 mph) with the Active Stability
Control function deactivated, the Active Sta-
bility Control function automatically starts op-
erating. To subsequently stop the Active Sta-
bility Control function, stop the vehicle and
press the “ASC OFF” switch again.
Active Traction Control function E00617000025
On slippery surfaces, active traction control func-
tion prevents the drive wheels from excessive spin-
ning, thus helping the vehicle to start moving from
a stop. It also provides sufficient driving force and
steering performance as the vehicle turns at acceler-
ated speeds.CAUTIONl When driving a vehicle on a snowy or icy
road, be sure to install snow tyres and
drive the vehicle at moderate speeds.ASTC indication lamp, ASTC OFF in-
dication lamp E00617100071
The Active Stability Control function and active
traction control function share the same indication
lamp.
The indication lamps should illuminate when the ig-
nition switch is turned to the “ON” position and
should go off after a few seconds.
If the indication lamps stay on or do not illuminate
when the ignition switch is turned to the “ON” po-
sition, we recommend you to have your vehicle in-
spected as soon as possible.
indication lamp blinks when the Active Stabili-
ty Control function or active traction control func-
tion is operating.
indication lamp is illuminated when the Active
Stability Control function is OFF.CAUTIONl When indication lamp blinks, Active
Stability Control function or active trac-
tion control function is operating, which
means that the road is slippery or that
your vehicle’s wheels are slipping exces-
sively. If this happens, drive slower with
less accelerator input.
l If an abnormal condition occurs in the sys-
tem while driving, the
indication lamp
will illuminate.
In these cases, follow these procedures:
Starting and driving
4-47
4
Page 174 of 330
CAUTION•If the temperature in the braking sys-
tem continues to increase due to con-
tinuous brake control on a slippery
road surface, the
indication lamp
will illuminate, and operation of the
Active Stability Control function and
active traction control function will be
suspended to protect the brake sys-
tem. (Normal operation of the vehicle
will not be affected.) Park your vehi-
cle in a safe place. When the tempera-
ture in the braking system has come
down, the
indication lamp will go
off and the Active Stability Control
function and active traction control
function will start operating again.
• If the
indication lamp does not go
out even though the above procedure
is followed, there could be a problem
in the system.
Stop the engine and start the engine
again and check whether the
indi-
cation lamp goes out. If the indication
lamp goes out, there is no abnormal
condition.
If the
indication lamp illuminates
even after your vehicle is driven a
short distance after restarting the en-
gine, we recommend you to have your
vehicle checked as soon as possible.
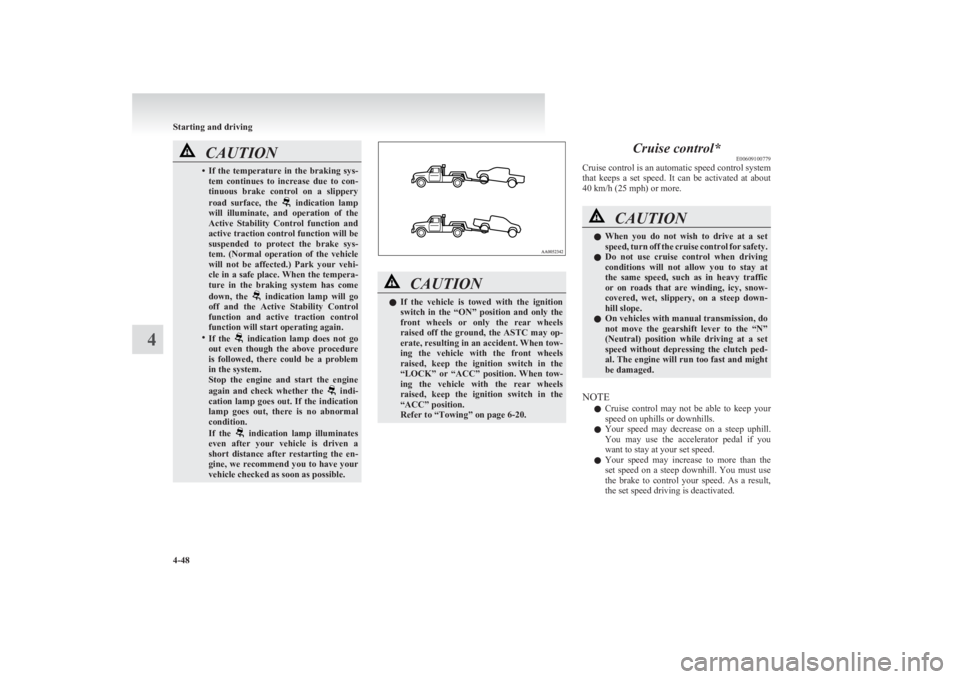
CAUTIONl If the vehicle is towed with the ignition
switch in the “ON” position and only the
front wheels or only the rear wheels
raised off the ground, the ASTC may op-
erate, resulting in an accident. When tow-
ing the vehicle with the front wheels
raised, keep the ignition switch in the
“LOCK” or “ACC” position. When tow-
ing the vehicle with the rear wheels
raised, keep the ignition switch in the
“ACC” position.
Refer to “Towing” on page 6-20.Cruise control* E00609100779
Cruise control is an automatic speed control system
that keeps a set speed. It can be activated at about
40 km/h (25 mph) or more.CAUTIONl When you do not wish to drive at a set
speed, turn off the cruise control for safety.
l Do not use cruise control when driving
conditions will not allow you to stay at
the same speed, such as in heavy traffic
or on roads that are winding, icy, snow-
covered, wet, slippery, on a steep down-
hill slope.
l On vehicles with manual transmission, do
not move the gearshift lever to the “N”
(Neutral) position while driving at a set
speed without depressing the clutch ped-
al. The engine will run too fast and might
be damaged.
NOTE
l Cruise control may not be able to keep your
speed on uphills or downhills.
l Your speed may decrease on a steep uphill.
You may use the accelerator pedal if you
want to stay at your set speed.
l Your speed may increase to more than the
set speed on a steep downhill. You must use
the brake to control your speed. As a result,
the set speed driving is deactivated.
Starting and driving
4-48
4
Page 206 of 330
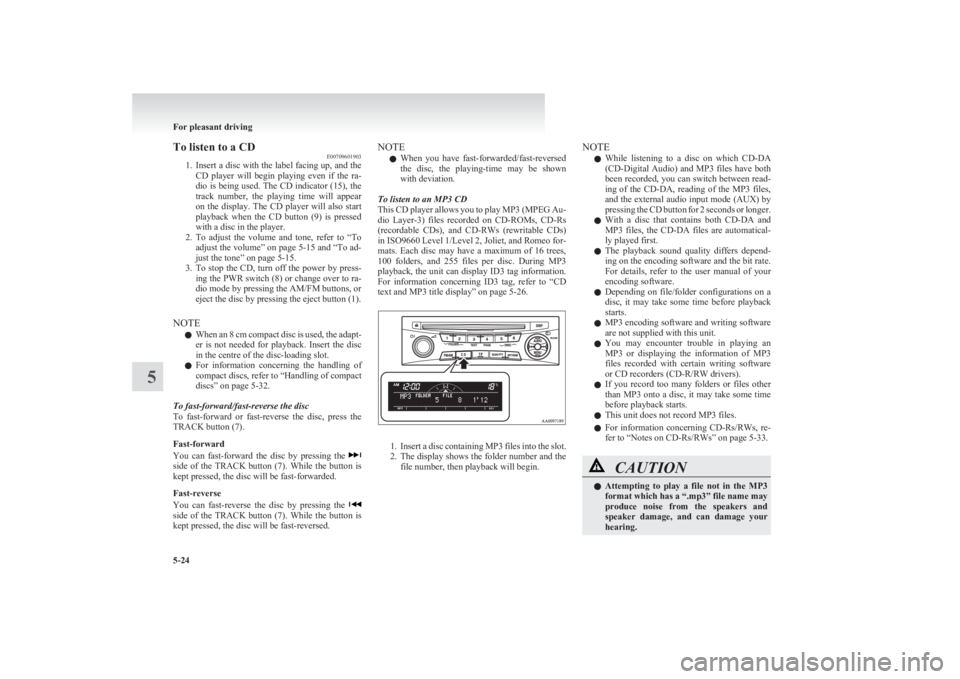
To listen to a CDE00709601903
1. Insert a disc with the label facing up, and the
CD player will begin playing even if the ra-
dio is being used. The CD indicator (15), the
track number, the playing time will appear
on the display. The CD player will also start
playback when the CD button (9) is pressed
with a disc in the player.
2. To adjust the volume and tone, refer to “To
adjust the volume” on page 5-15 and “To ad-
just the tone” on page 5-15.
3. To stop the CD, turn off the power by press-
ing the PWR switch (8) or change over to ra-
dio mode by pressing the AM/FM buttons, or
eject the disc by pressing the eject button (1).
NOTE l When an 8 cm compact disc is used, the adapt-
er is not needed for playback. Insert the disc
in the centre of the disc-loading slot.
l For information concerning the handling of
compact discs, refer to “Handling of compact
discs” on page 5-32.
To fast-forward/fast-reverse the disc
To fast-forward or fast-reverse the disc, press the
TRACK button (7).
Fast-forward
You can fast-forward the disc by pressing the
side of the TRACK button (7). While the button is
kept pressed, the disc will be fast-forwarded.
Fast-reverse
You can fast-reverse the disc by pressing the
side of the TRACK button (7). While the button is
kept pressed, the disc will be fast-reversed.
NOTE
l When you have fast-forwarded/fast-reversed
the disc, the playing-time may be shown
with deviation.
To listen to an MP3 CD
This CD player allows you to play MP3 (MPEG Au-
dio Layer-3) files recorded on CD-ROMs, CD-Rs
(recordable CDs), and CD-RWs (rewritable CDs)
in ISO9660 Level 1/Level 2, Joliet, and Romeo for-
mats. Each disc may have a maximum of 16 trees,
100 folders, and 255 files per disc. During MP3
playback, the unit can display ID3 tag information.
For information concerning ID3 tag, refer to “CD
text and MP3 title display” on page 5-26.
1. Insert a disc containing MP3 files into the slot.
2. The display shows the folder number and the
file number, then playback will begin.
NOTE
l While listening to a disc on which
CD-DA
(CD-Digital Audio) and MP3 files have both
been recorded, you can switch between read-
ing of the CD-DA, reading of the MP3 files,
and the external audio input mode (AUX) by
pressing the CD button for 2 seconds or longer.
l With a disc that contains both
CD-DA and
MP3 files, the CD-DA files are automatical-
ly played first.
l The playback sound quality differs depend-
ing on the encoding software and the bit rate.
For details, refer to the user manual of your
encoding software.
l Depending on file/folder configurations on a
disc, it may take some time before playback
starts.
l MP3 encoding software and writing software
are not supplied with this unit.
l You may encounter trouble in playing an
MP3 or displaying the information of MP3
files recorded with certain writing software
or CD recorders (CD-R/RW drivers).
l If you record too many folders or files other
than MP3 onto a disc, it may take some time
before playback starts.
l This unit does not record MP3 files.
l For information concerning CD-Rs/RWs, re-
fer to “Notes on CD-Rs/RWs” on page 5-33.CAUTIONl Attempting to play a file not in the MP3
format which has a “.mp3” file name may
produce noise from the speakers and
speaker damage, and can damage your
hearing.
For pleasant driving
5-24
5
Page 208 of 330
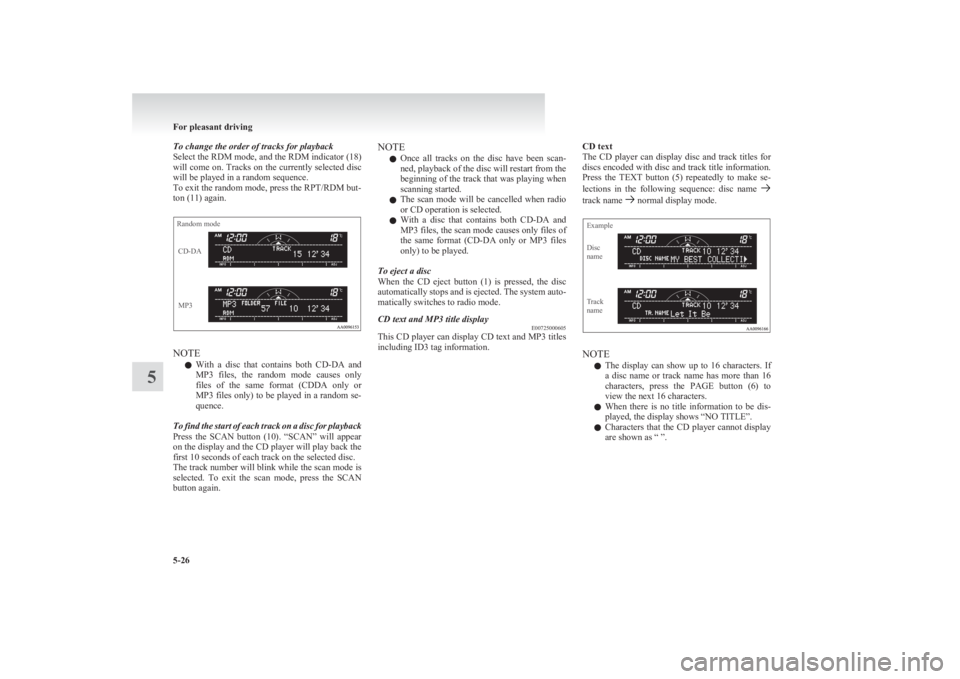
To change the order of tracks for playback
Select the RDM mode, and the RDM indicator (18)
will come on. Tracks on the currently selected disc
will be played in a random sequence.
To exit the random mode, press the RPT/RDM but-
ton (11) again.Random modeMP3CD-DA
NOTE
l With a disc that contains both
CD-DA and
MP3 files, the random mode causes only
files of the same format (CDDA only or
MP3 files only) to be played in a random se-
quence.
To find the start of each track on a disc for playback
Press the SCAN button (10). “SCAN” will appear
on the display and the CD player will play back the
first 10 seconds of each track on the selected disc.
The track number will blink while the scan mode is
selected. To exit the scan mode, press the SCAN
button again.
NOTE
l Once all tracks on the disc have been scan-
ned, playback of the disc will restart from the
beginning of the track that was playing when
scanning started.
l The scan mode will be cancelled when radio
or CD operation is selected.
l With a disc that contains both
CD-DA and
MP3 files, the scan mode causes only files of
the same format ( CD-DA only or MP3 files
only) to be played.
To eject a disc
When the CD eject button (1) is pressed, the disc
automatically stops and is ejected. The system auto-
matically switches to radio mode.CD text and MP3 title display E00725000605
This CD player can display CD text and MP3 titles
including ID3 tag information.
CD text
The CD player can display disc and track titles for
discs encoded with disc and track title information.
Press the TEXT button (5) repeatedly to make se-
lections in the following sequence: disc name
track name normal display mode.
ExampleDisc
nameTrack
name
NOTE
l The display can show up to 16 characters. If
a disc name or track name has more than 16
characters, press the PAGE button (6) to
view the next 16 characters.
l When there is no title information to be dis-
played, the display shows “NO TITLE”.
l Characters that the CD player cannot display
are shown as “ ”.
For pleasant driving
5-26
5
Page 214 of 330
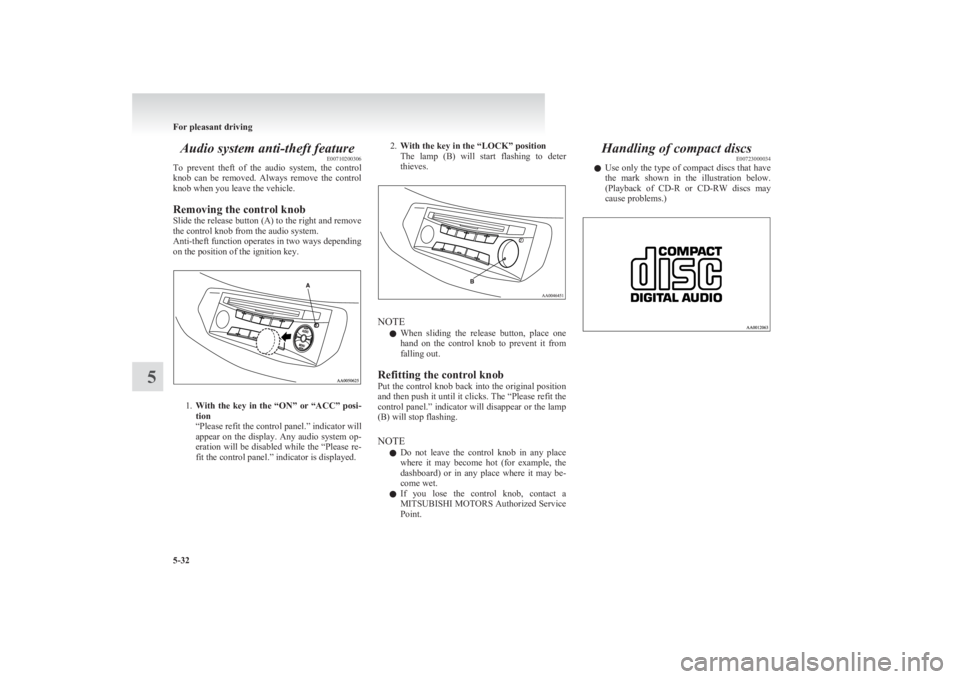
Audio system anti-theft featureE00710200306
To prevent theft of the audio system, the control
knob can be removed. Always remove the control
knob when you leave the vehicle.
Removing the control knob
Slide the release button (A) to the right and remove
the control knob from the audio system.
Anti-theft function operates in two ways depending
on the position of the ignition key.
1. With the key in the “ON” or “ACC” posi-
tion
“Please refit the control panel.” indicator will
appear on the display. Any audio system op-
eration will be disabled while the “Please re-
fit the control panel.” indicator is displayed.
2. With the key in the “LOCK” position
The lamp (B) will start flashing to deter
thieves.
NOTE
l When sliding the release button, place one
hand on the control knob to prevent it from
falling out.
Refitting the control knob
Put the control knob back into the original position
and then push it until it clicks. The “Please refit the
control panel.” indicator will disappear or the lamp
(B) will stop flashing.
NOTE l Do not leave the control knob in any place
where it may become hot (for example, the
dashboard) or in any place where it may be-
come wet.
l If you lose the control knob, contact a
MITSUBISHI MOTORS Authorized Service
Point.
Handling of compact discs E00723000034
l Use only the type of compact discs that have
the mark shown in the illustration below.
(Playback of CD-R or CD-RW discs may
cause problems.)
For pleasant driving
5-32
5
Page 215 of 330
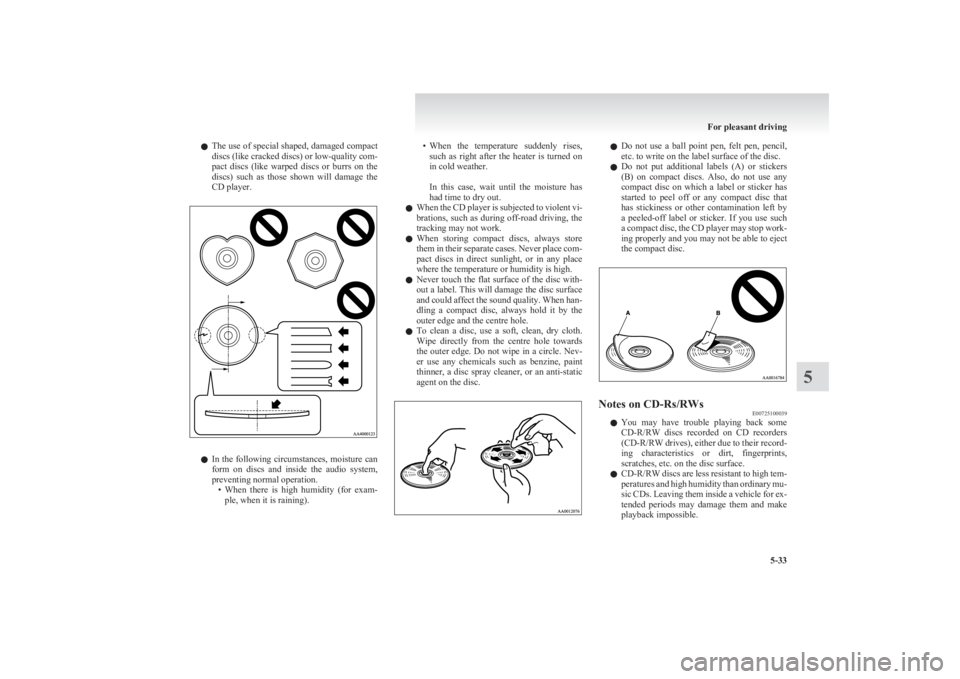
lThe use of special shaped, damaged compact
discs (like cracked discs) or low-quality com-
pact discs (like warped discs or burrs on the
discs) such as those shown will damage the
CD player.
l In the following circumstances, moisture can
form on discs and inside the audio system,
preventing normal operation. •When there is high humidity (for exam-
ple, when it is raining).
• When the temperature suddenly rises,
such as right after the heater is turned on
in cold weather.
In this case, wait until the moisture has
had time to dry out.
l When the CD player is subjected to violent vi-
brations, such as during off-road driving, the
tracking may not work.
l When storing compact discs, always store
them in their separate cases. Never place com-
pact discs in direct sunlight, or in any place
where the temperature or humidity is high.
l Never touch the flat surface of the disc with-
out a label. This will damage the disc surface
and could affect the sound quality. When han-
dling a compact disc, always hold it by the
outer edge and the centre hole.
l To clean a disc, use a soft, clean, dry cloth.
Wipe directly from the centre hole towards
the outer edge. Do not wipe in a circle. Nev-
er use any chemicals such as benzine, paint
thinner, a disc spray cleaner, or an anti-static
agent on the disc.l Do not use a ball point pen, felt pen, pencil,
etc. to write on the label surface of the disc.
l Do not put additional labels (A) or stickers
(B) on compact discs. Also, do not use any
compact disc on which a label or sticker has
started to peel off or any compact disc that
has stickiness or other contamination left by
a peeled-off label or sticker. If you use such
a compact disc, the CD player may stop work-
ing properly and you may not be able to eject
the compact disc.Notes on CD-Rs/RWs E00725100039
lYou may have trouble playing back some
CD-R/RW discs recorded on CD recorders
(CD-R/RW drives), either due to their record-
ing characteristics or dirt, fingerprints,
scratches, etc. on the disc surface.
l CD-R/RW
discs are less resistant to high tem-
peratures and high humidity than ordinary mu-
sic CDs. Leaving them inside a vehicle for ex-
tended periods may damage them and make
playback impossible.
For pleasant driving
5-33
5
Page 232 of 330
If the vehicle breaks downE00800101166
If the vehicle breaks down on the road, move it to
the shoulder and use the hazard warning flashers and/
or the warning triangle etc.
Refer to “Hazard warning flasher switch” on page
3-34.
If the engine stops/fails
Vehicle operation and control are affected if the en-
gine stops.
Before moving the vehicle to a safe area, be aware
of the following:
l The brake booster becomes inoperative and
the pedal effort will increase. Press down the
brake pedal harder than usual.
l Since the power steering pump is no longer
operative, the steering wheel feels heavy
when turning it.Emergency starting E00800502112
If the engine cannot be started because the battery
is weak or dead, the battery from another vehicle
can be used with jumper cables to start the engine.WARNINGl To start the engine using jumper cables
connected from another vehicle, perform
the correct procedures according to the in-
struction manual. Incorrect procedures
could result in a fire or explosion or dam-
age to the vehicles.
1. Get the vehicles close enough so the jumper
cables can reach, but be sure the vehicles
aren’t touching each other.
If they are, it could cause a ground connec-
tion you don’t want. The vehicle will not
start, and the bad grounding could damage
the electrical systems.
CAUTIONl Check the other vehicle. It must have a 12-
volt battery.
If the other system isn’t 12-volt, shorting
can damage both vehicles.
2. You could be injured if the vehicles move.
Set the parking brake firmly on each vehicle.
Put an automatic transmission in “P”
(PARK) or a manual transmission in “N”
(Neutral). Turn off the ignition switch.
WARNINGl Turn off the ignition on both vehicles be-
forehand.
Make sure that the cables or your clothes
cannot be caught by the fan or drive belt.
Personal injury could result.
NOTE
l Turn off all lamps, heater and other electrical
loads. This will avoid sparks and help save
both batteries.
3. Make sure battery electrolyte is at the proper
level.
Refer to “Battery” on page 8-09.
WARNINGl If electrolyte fluid is not visible, or ap-
pears to be frozen, Do Not Attempt Jump
Starting!
A battery might rupture or explode if the
temperature is below the freezing point
or if it is not filled to the proper level.
4. Connect one end of one jumper cable to the
positive (+) terminal of the discharged bat-
tery (A), and the other end to the positive (+)
terminal of the booster battery (B).
For emergencies
6-02
6
Page 234 of 330
CAUTIONlDo not attempt to start the engine by pull-
ing or pushing the vehicle.
It could damage your vehicle.
l Always wear protective eye goggles when
working near the battery.
l Keep the battery out of the reach of chil-
dren.
NOTE
l On vehicles with anti-lock brake system, if
the vehicle is put in motion without fully
charging the battery, it might cause the loss
of smooth engine operation and the antilock
brake warning lamp to illuminate.
Refer to “Anti-lock brake system (ABS)” on
page 4-43.
Engine overheating E00800601985
If the water temperature gauge indication remains
in the overheating zone for a long time, the engine
may be overheating. If this occurs, take the follow-
ing corrective measures: 1. Stop the vehicle in a safe place.
2. Check whether steam is coming from the en-
gine compartment.
[ If steam does not come from the engine com-
partment]
With the engine still running, raise the bon-
net to ventilate the engine compartment.
[If steam is coming from the engine compart-
ment]
Stop the engine, and when the steam stops,
raise the bonnet to ventilate the engine com-
partment. Restart the engine.WARNINGl Do not open the bonnet while steam is com-
ing from the engine compartment. It
could cause steam or hot water to spurt
out, causing burns. Hot water could spurt
out even when there is no steam coming
out, and some parts will be very hot. Be
very careful when opening the bonnet.
l Be careful of hot steam, which could be
blowing off the reserve tank cap.
l Do not attempt to remove the radiator
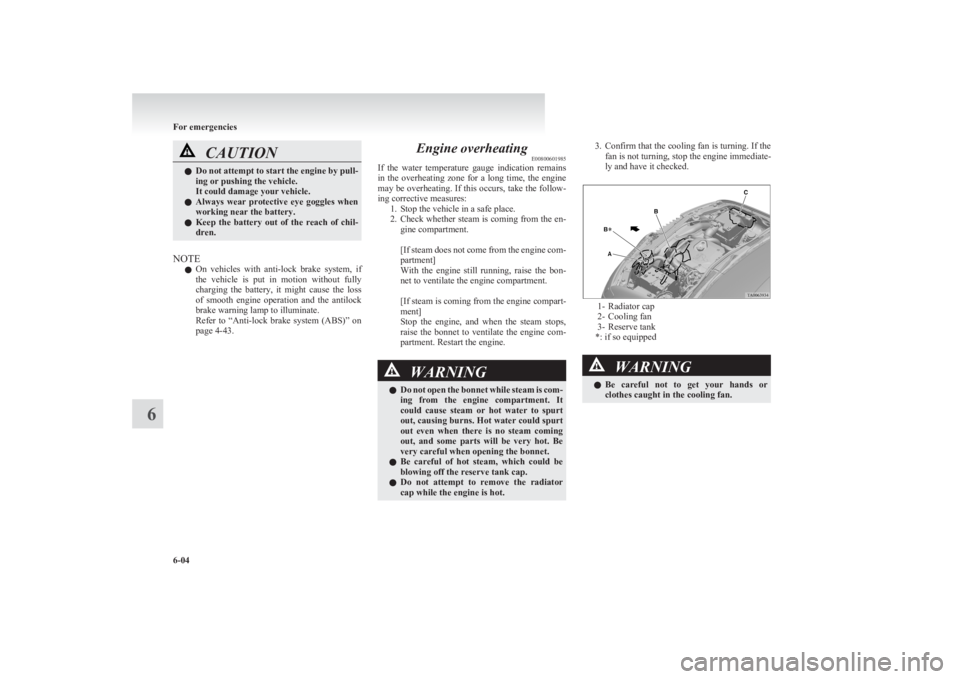
cap while the engine is hot.3. Confirm that the cooling fan is turning. If the
fan is not turning, stop the engine immediate-
ly and have it checked.
1- Radiator cap
2- Cooling fan
3- Reserve tank
*: if so equipped
WARNINGl Be careful not to get your hands or
clothes caught in the cooling fan.
For emergencies
6-04
6