start stop button MITSUBISHI L200 2011 Owner's Manual (in English)
[x] Cancel search | Manufacturer: MITSUBISHI, Model Year: 2011, Model line: L200, Model: MITSUBISHI L200 2011Pages: 330, PDF Size: 22.34 MB
Page 56 of 330
NOTEl You can check if the belt locks by pulling it
forward quickly.
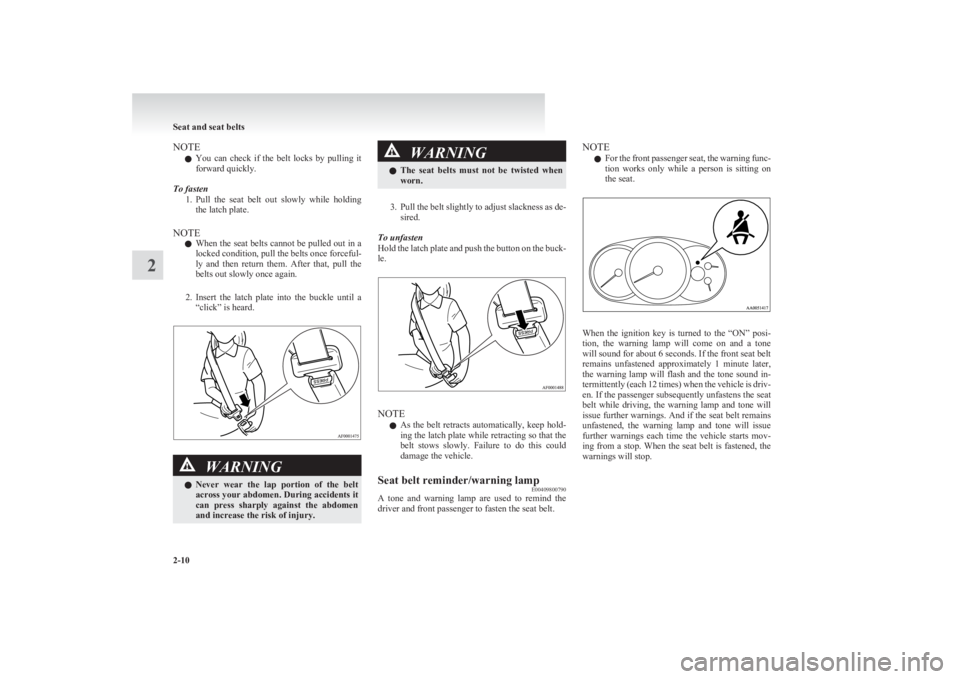
To fasten 1.Pull the seat belt out slowly while holding
the latch plate.
NOTE l When the seat belts cannot be pulled out in a
locked condition, pull the belts once forceful-
ly and then return them. After that, pull the
belts out slowly once again.
2. Insert the latch plate into the buckle until a
“click” is heard.WARNINGl Never wear the lap portion of the belt
across your abdomen. During accidents it
can press sharply against the abdomen
and increase the risk of injury.WARNINGl The seat belts must not be twisted when
worn.
3. Pull the belt slightly to adjust slackness as de-
sired.
To unfasten
Hold the latch plate and push the button on the buck-
le.
NOTE
l As the belt retracts automatically, keep hold-
ing the latch plate while retracting so that the
belt stows slowly. Failure to do this could
damage the vehicle.
Seat belt reminder/warning lamp E00409800790
A tone and warning lamp are used to remind the
driver and front passenger to fasten the seat belt.
NOTE
l For the front passenger seat, the warning func-
tion works only while a person is sitting on
the seat.
When the ignition key is turned to the “ON” posi-
tion, the warning lamp will come on and a tone
will sound for about 6 seconds. If the front seat belt
remains unfastened approximately 1 minute later,
the warning lamp will flash and the tone sound in-
termittently (each 12 times) when the vehicle is driv-
en. If the passenger subsequently unfastens the seat
belt while driving, the warning lamp and tone will
issue further warnings. And if the seat belt remains
unfastened, the warning lamp and tone will issue
further warnings each time the vehicle starts mov-
ing from a stop. When the seat belt is fastened, the
warnings will stop.
Seat and seat belts
2-10
2
Page 133 of 330
Parking brakeE00600501562
To park the vehicle, first bring it to a complete
stop, fully engage the parking brake, and then
move the gearshift lever to 1 st
(on an uphill) or Re-
verse (on a downhill) position for vehicles with man-
ual transmission or set the selector lever to “P”
(PARK) position on automatic transmission vehi-
cles.CAUTIONl Before driving, be sure that the parking
brake is fully released and brake warning
lamp is off.
If a vehicle is driven without releasing the
parking brake, the brake will be overhea-
ted, resulting in ineffective braking and
possible brake failure.
l When you intend to apply the parking
brake, firmly press the brake pedal to
bring the vehicle to a complete stop be-
fore pulling the parking brake lever. Pull-
ing the parking brake lever with the vehi-
cle moving could make the rear wheels
lock up, thereby making the vehicle unsta-
ble. It could also make the parking brake
malfunction.
l If the brake warning lamp does not extin-
guish when the parking brake is fully re-
leased, the brake system may be an abnor-
mal.
Have your vehicle checked immediately.
For details, refer to “Brake warning
lamp” on page 3-08.Type 1
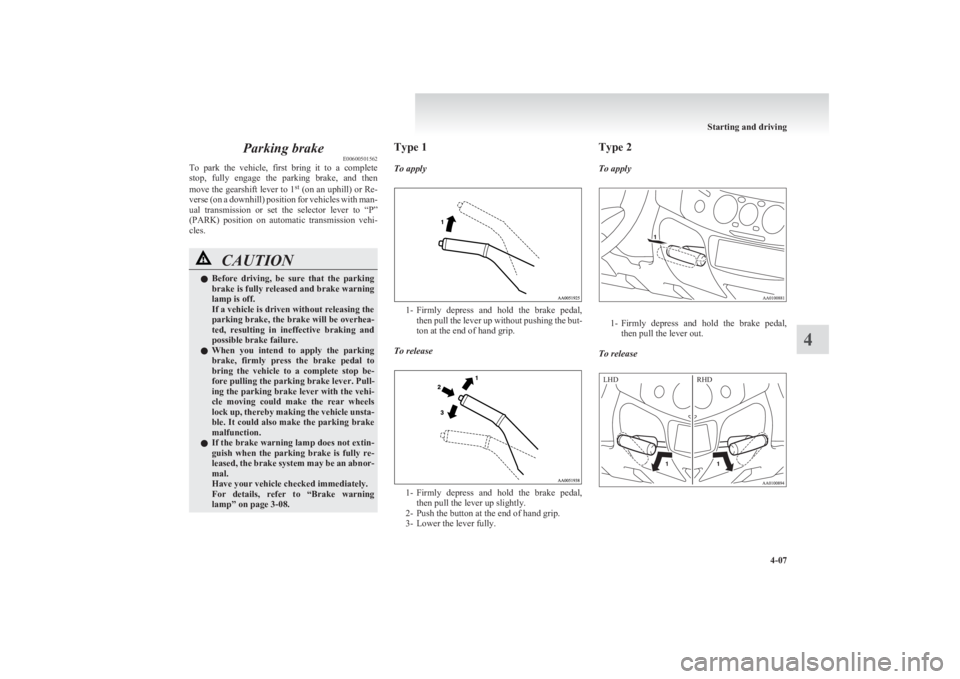
To apply
1- Firmly depress and hold the brake pedal,
then pull the lever up without pushing the but-
ton at the end of hand grip.
To release
1- Firmly depress and hold the brake pedal,
then pull the lever up slightly.
2- Push the button at the end of hand grip.
3- Lower the lever fully.
Type 2
To apply
1- Firmly depress and hold the brake pedal,
then pull the lever out.
To release
Starting and driving
4-07
4 LHD RHD
Page 206 of 330
To listen to a CDE00709601903
1. Insert a disc with the label facing up, and the
CD player will begin playing even if the ra-
dio is being used. The CD indicator (15), the
track number, the playing time will appear
on the display. The CD player will also start
playback when the CD button (9) is pressed
with a disc in the player.
2. To adjust the volume and tone, refer to “To
adjust the volume” on page 5-15 and “To ad-
just the tone” on page 5-15.
3. To stop the CD, turn off the power by press-
ing the PWR switch (8) or change over to ra-
dio mode by pressing the AM/FM buttons, or
eject the disc by pressing the eject button (1).
NOTE l When an 8 cm compact disc is used, the adapt-
er is not needed for playback. Insert the disc
in the centre of the disc-loading slot.
l For information concerning the handling of
compact discs, refer to “Handling of compact
discs” on page 5-32.
To fast-forward/fast-reverse the disc
To fast-forward or fast-reverse the disc, press the
TRACK button (7).
Fast-forward
You can fast-forward the disc by pressing the
side of the TRACK button (7). While the button is
kept pressed, the disc will be fast-forwarded.
Fast-reverse
You can fast-reverse the disc by pressing the
side of the TRACK button (7). While the button is
kept pressed, the disc will be fast-reversed.
NOTE
l When you have fast-forwarded/fast-reversed
the disc, the playing-time may be shown
with deviation.
To listen to an MP3 CD
This CD player allows you to play MP3 (MPEG Au-
dio Layer-3) files recorded on CD-ROMs, CD-Rs
(recordable CDs), and CD-RWs (rewritable CDs)
in ISO9660 Level 1/Level 2, Joliet, and Romeo for-
mats. Each disc may have a maximum of 16 trees,
100 folders, and 255 files per disc. During MP3
playback, the unit can display ID3 tag information.
For information concerning ID3 tag, refer to “CD
text and MP3 title display” on page 5-26.
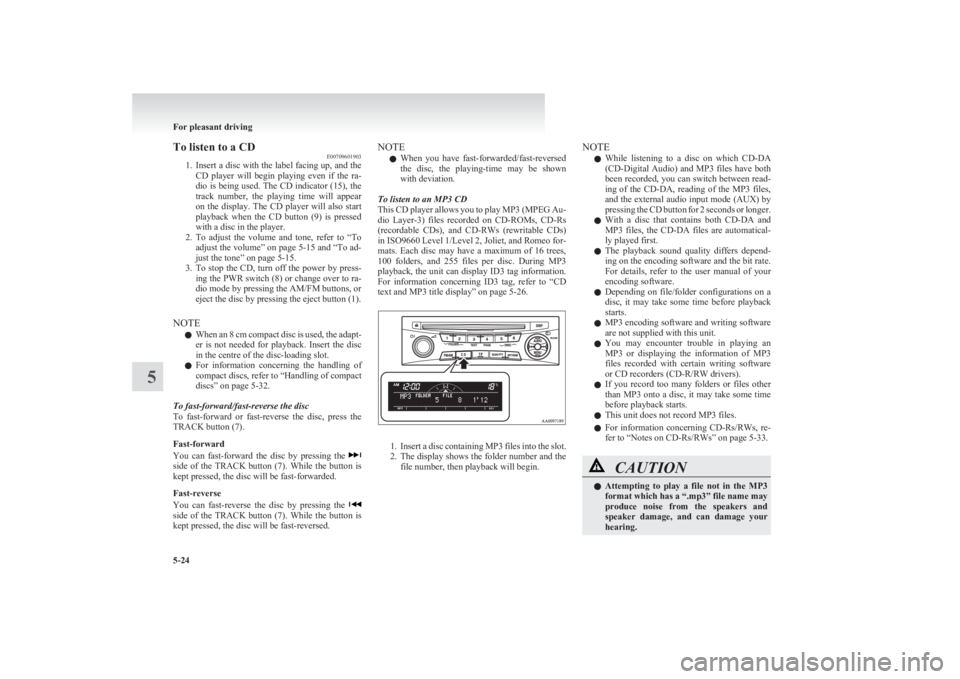
1. Insert a disc containing MP3 files into the slot.
2. The display shows the folder number and the
file number, then playback will begin.
NOTE
l While listening to a disc on which
CD-DA
(CD-Digital Audio) and MP3 files have both
been recorded, you can switch between read-
ing of the CD-DA, reading of the MP3 files,
and the external audio input mode (AUX) by
pressing the CD button for 2 seconds or longer.
l With a disc that contains both
CD-DA and
MP3 files, the CD-DA files are automatical-
ly played first.
l The playback sound quality differs depend-
ing on the encoding software and the bit rate.
For details, refer to the user manual of your
encoding software.
l Depending on file/folder configurations on a
disc, it may take some time before playback
starts.
l MP3 encoding software and writing software
are not supplied with this unit.
l You may encounter trouble in playing an
MP3 or displaying the information of MP3
files recorded with certain writing software
or CD recorders (CD-R/RW drivers).
l If you record too many folders or files other
than MP3 onto a disc, it may take some time
before playback starts.
l This unit does not record MP3 files.
l For information concerning CD-Rs/RWs, re-
fer to “Notes on CD-Rs/RWs” on page 5-33.CAUTIONl Attempting to play a file not in the MP3
format which has a “.mp3” file name may
produce noise from the speakers and
speaker damage, and can damage your
hearing.
For pleasant driving
5-24
5
Page 208 of 330
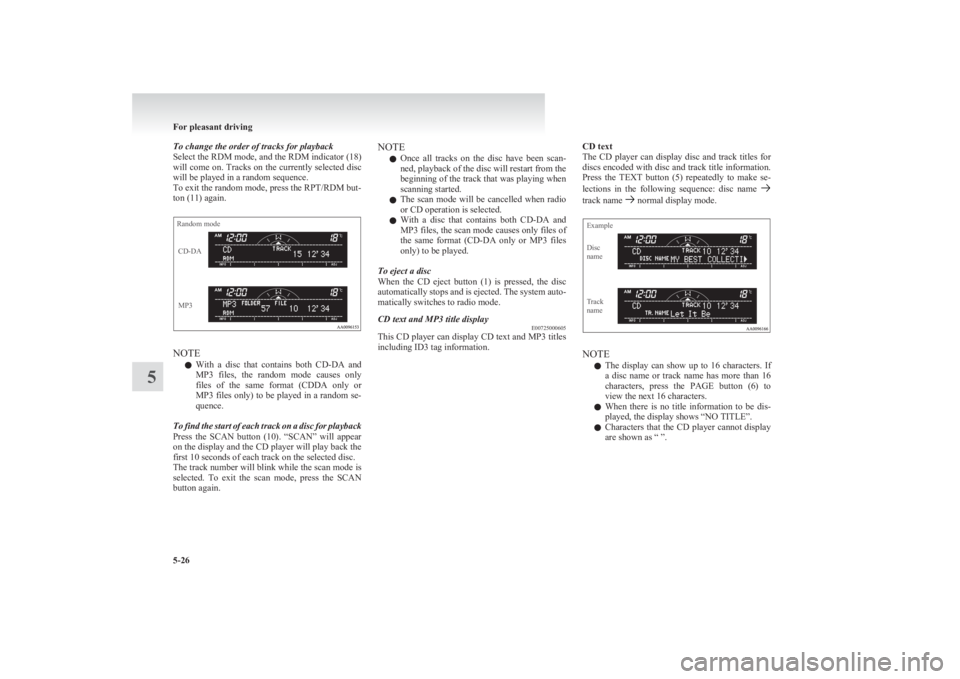
To change the order of tracks for playback
Select the RDM mode, and the RDM indicator (18)
will come on. Tracks on the currently selected disc
will be played in a random sequence.
To exit the random mode, press the RPT/RDM but-
ton (11) again.Random modeMP3CD-DA
NOTE
l With a disc that contains both
CD-DA and
MP3 files, the random mode causes only
files of the same format (CDDA only or
MP3 files only) to be played in a random se-
quence.
To find the start of each track on a disc for playback
Press the SCAN button (10). “SCAN” will appear
on the display and the CD player will play back the
first 10 seconds of each track on the selected disc.
The track number will blink while the scan mode is
selected. To exit the scan mode, press the SCAN
button again.
NOTE
l Once all tracks on the disc have been scan-
ned, playback of the disc will restart from the
beginning of the track that was playing when
scanning started.
l The scan mode will be cancelled when radio
or CD operation is selected.
l With a disc that contains both
CD-DA and
MP3 files, the scan mode causes only files of
the same format ( CD-DA only or MP3 files
only) to be played.
To eject a disc
When the CD eject button (1) is pressed, the disc
automatically stops and is ejected. The system auto-
matically switches to radio mode.CD text and MP3 title display E00725000605
This CD player can display CD text and MP3 titles
including ID3 tag information.
CD text
The CD player can display disc and track titles for
discs encoded with disc and track title information.
Press the TEXT button (5) repeatedly to make se-
lections in the following sequence: disc name
track name normal display mode.
ExampleDisc
nameTrack
name
NOTE
l The display can show up to 16 characters. If
a disc name or track name has more than 16
characters, press the PAGE button (6) to
view the next 16 characters.
l When there is no title information to be dis-
played, the display shows “NO TITLE”.
l Characters that the CD player cannot display
are shown as “ ”.
For pleasant driving
5-26
5
Page 214 of 330
Audio system anti-theft featureE00710200306
To prevent theft of the audio system, the control
knob can be removed. Always remove the control
knob when you leave the vehicle.
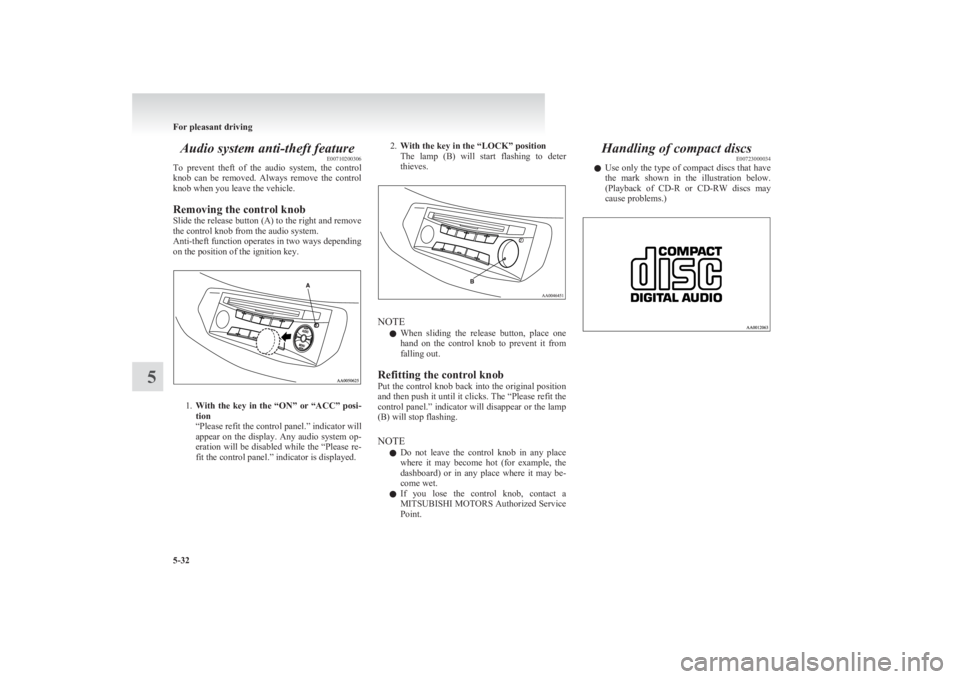
Removing the control knob
Slide the release button (A) to the right and remove
the control knob from the audio system.
Anti-theft function operates in two ways depending
on the position of the ignition key.
1. With the key in the “ON” or “ACC” posi-
tion
“Please refit the control panel.” indicator will
appear on the display. Any audio system op-
eration will be disabled while the “Please re-
fit the control panel.” indicator is displayed.
2. With the key in the “LOCK” position
The lamp (B) will start flashing to deter
thieves.
NOTE
l When sliding the release button, place one
hand on the control knob to prevent it from
falling out.
Refitting the control knob
Put the control knob back into the original position
and then push it until it clicks. The “Please refit the
control panel.” indicator will disappear or the lamp
(B) will stop flashing.
NOTE l Do not leave the control knob in any place
where it may become hot (for example, the
dashboard) or in any place where it may be-
come wet.
l If you lose the control knob, contact a
MITSUBISHI MOTORS Authorized Service
Point.
Handling of compact discs E00723000034
l Use only the type of compact discs that have
the mark shown in the illustration below.
(Playback of CD-R or CD-RW discs may
cause problems.)
For pleasant driving
5-32
5