key MITSUBISHI LANCER RALLIART 2014 8.G Display Audio Manual
[x] Cancel search | Manufacturer: MITSUBISHI, Model Year: 2014, Model line: LANCER RALLIART, Model: MITSUBISHI LANCER RALLIART 2014 8.GPages: 88, PDF Size: 11.63 MB
Page 41 of 88
Listen to CDs 41
AVDISC
DISC
Listen to CDs
This explains how to listen to audio CDs
(CD-DA/CD-TEXT).
Insert a disc in this product to automatically
start playback.
→“Inserting the Disc”(P15)
NOTE
• Operate with an audio CD loaded into this product.
1Press the MENU key.
The top menu is displayed.
2Touch CD .
The audio CD playback information
screen is displayed.
3Touch and select a
track.
▼
The selected track is played back.
ADVICE
• You can fast forward or rewind the track being played by touching and holding
.
Display a List
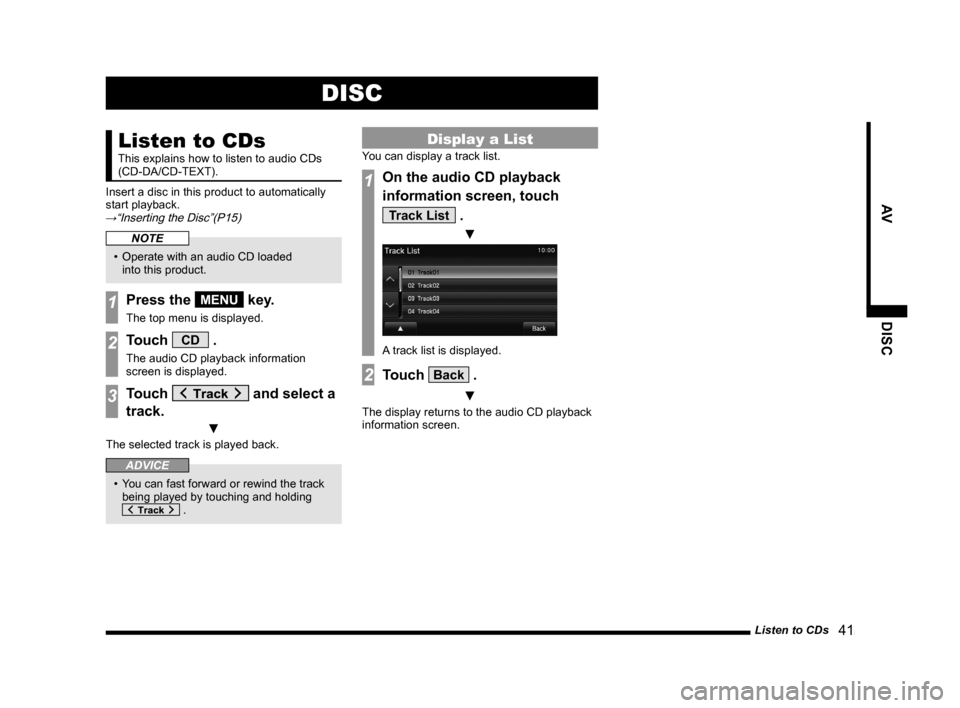
You can display a track list.
1On the audio CD playback
information screen, touch
Track List .
▼
A track list is displayed.
2Touch Back .
▼
The display returns to the audio CD playback
information screen.
13MY_AVC(NAS).indb 412013/02/14 10:57:42
Page 44 of 88
44 Listen to Audio Files on a Disc
Listen to Audio Files
on a Disc
This explains how to listen to audio files on
a disc.
Insert a disc in this product to automatically
start playback.
→“Inserting the Disc” (P15)
NOTE
• Operate with an audio file disc loaded into this product.
1Press the MENU key.
The top menu is displayed.
2Touch CD .
The audio file playback information screen
is displayed.
3Touch
and select a folder.
4Touch and select a
track.
▼
The selected track is played back.
ADVICE
• You can fast forward or rewind the track being played by touching and holding
.
Display a List
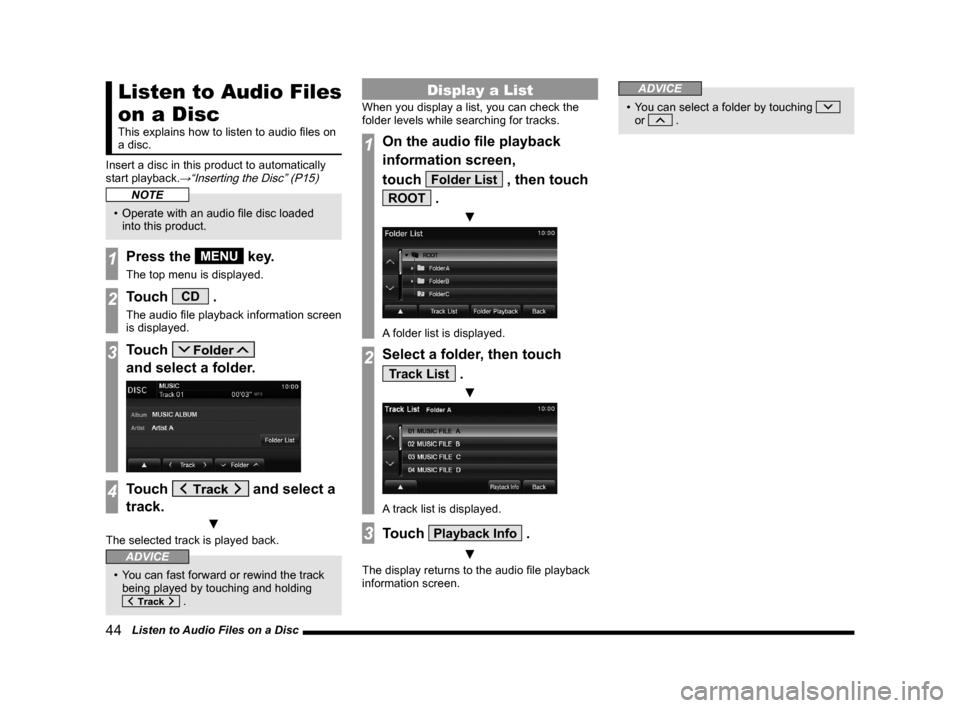
When you display a list, you can check the
folder levels while searching for tracks.
1On the audio file playback
information screen,
touch
Folder List , then touch
ROOT .
▼
A folder list is displayed.
2Select a folder, then touch
Track List .
▼
A track list is displayed.
3Touch Playback Info .
▼
The display returns to the audio file playback
information screen.
ADVICE
• You can select a folder by touching
or .
13MY_AVC(NAS).indb 442013/02/14 10:57:44
Page 48 of 88
48 Listen to Mixed Discs
Listen to Mixed
Discs
This explains how to listen to a disc on
which both an audio CD (CD-DA/CD-
TEXT) and audio files (MP3/WMA/AAC) are
recorded.
Insert a disc in this product to automatically
start playback.
→“Inserting the Disc”(P15)
NOTE
• Operate with a mixed disc loaded into this product.
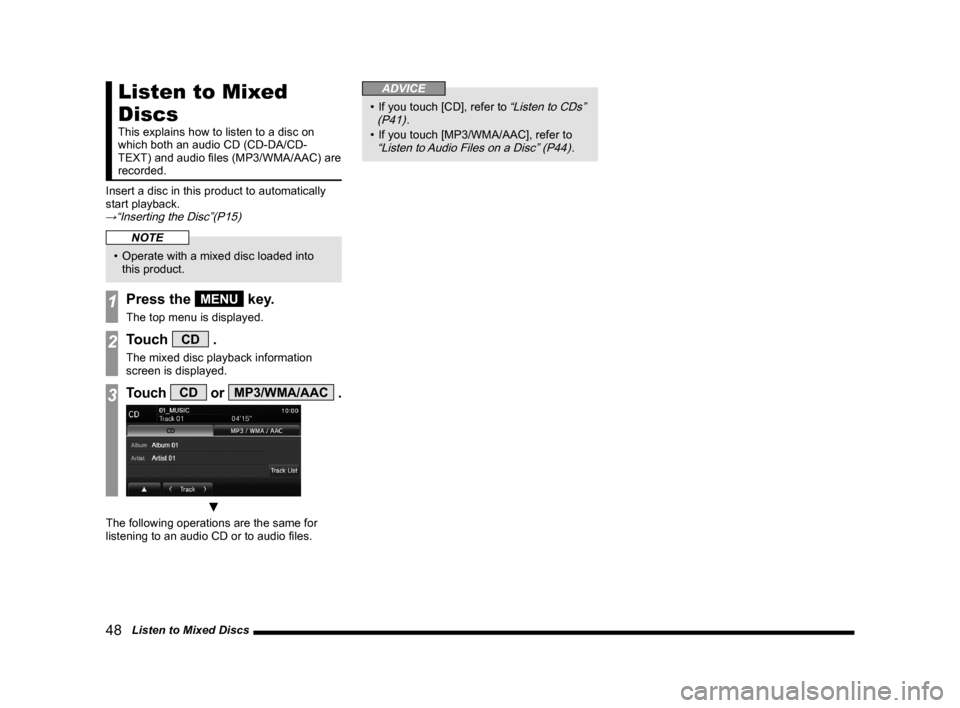
1Press the MENU key.
The top menu is displayed.
2Touch CD .
The mixed disc playback information
screen is displayed.
3Touch CD or MP3/WMA/AAC .
▼
The following operations are the same for
listening to an audio CD or to audio files.
ADVICE
• If you touch [CD], refer to “Listen to CDs”
(P41).
• If you touch [MP3/WMA/AAC], refer to
“Listen to Audio Files on a Disc” (P44).
13MY_AVC(NAS).indb 482013/02/14 10:57:47
Page 52 of 88
52 Use an iPod
Play iPod
1Press the MENU key.
The top menu is displayed.
2Touch iPod .
The iPod playback information screen is
displayed.
3Touch and select a
track.
▼
The selected track is played back.
ADVICE
• You can fast forward or rewind the track being played by touching and holding
.
Watch iPod Videos
NOTE
• This function cannot be used on an iPod/iPhone that does not have a video
playback function.
• This function cannot be used with
Equipment by type (vehicles with a Bluetooth ®
2.0 interface).
• A cable is required for iPod video
playback.
• For the sake of safety, iPod videos can only be played with the vehicle stopped
and the parking brake engaged.
1Press the MENU key.
The top menu is displayed.
2Touch iPod .
The iPod playback information screen is
displayed.
3Touch iPod Menu , and then
Video .
4Touch “category”.
5Touch the “track” to play back.
▼
The selected video track is played back.
Video Playback Information
Screen
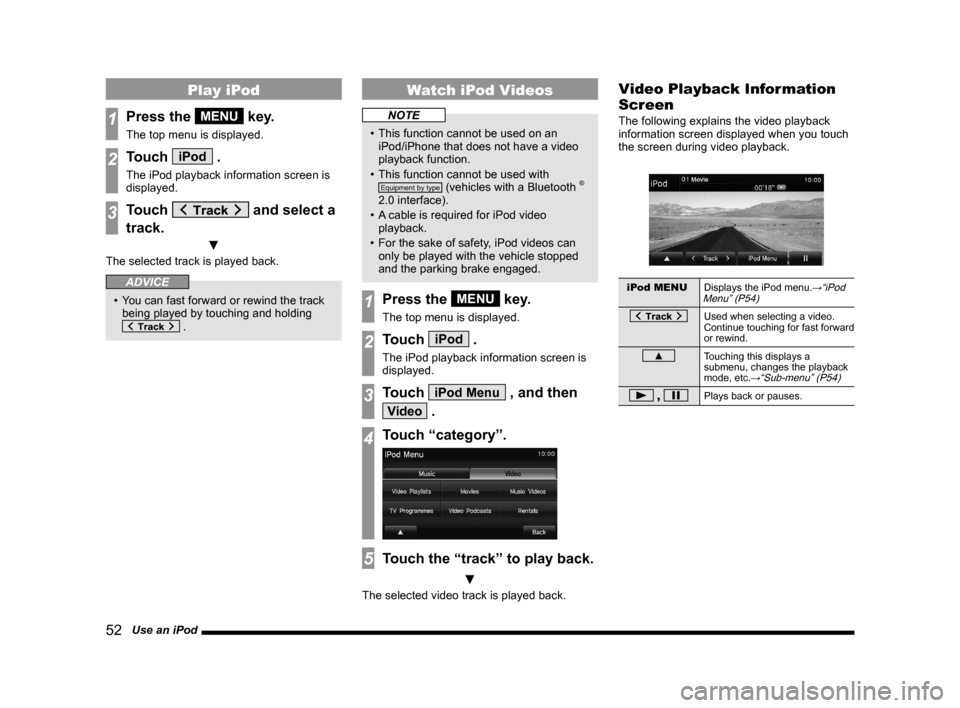
The following explains the video playback
information screen displayed when you touch
the screen during video playback.
iPod MENU Displays the iPod menu.→“iPod
Menu” (P54)
Used when selecting a video.
Continue touching for fast forward
or rewind.
▲ Touching this displays a
submenu, changes the playback
mode, etc.
→“Sub-menu” (P54)
, Plays back or pauses.
13MY_AVC(NAS).indb 522013/02/14 10:57:50
Page 57 of 88
Listen to Audio Files on a USB Device 57
AViPod/USB
Listen to Audio Files
on a USB Device
By connecting commercially-available
USB devices such as USB memory to this
product, you can play back audio files on
these through the product.
CAUTION
• Never hold an USB device in your hand
and operate it while driving, as this is
dangerous.
• Do not leave the USB device unattended in the vehicle.
• Do not use hard discs, card readers, or memory readers, as damage may occur
to these or to the data contained therein.
If these are erroneously connected,
then turn the engine ignition “OFF”, then
remove.
• No guarantee is made as regards damage to the USB device, nor regarding
loss or damage to data contained therein.
• Depending on how devices are handled, audio files can be damaged or lost,
therefore it is recommended that data be
backed up.
NOTE
• Please refer to your vehicle's user manual regarding details such as types of
USB devices that can be connected and
USB input ports.
NOTE
• Please refer to your vehicle's user manual regarding details of types of files
that can be played back in
Equipment by type
(vehicles with a Bluetooth ® 2.0 interface).
• Please refer to your vehicle's user manual regarding how to connect USB
devices.
• Depending on the type of USB device, usage may not be possible, or functions
that can be used may be restricted.
• The recommended file system for USB memory is FAT32.
• The maximum supported capacity for USB memory is 32GB.
• Operate the USB device containing recorded audio files while connected to
this product.
• When connecting a USB device, use any commercially-available connection cable.
Failure to use a connection cable when
connecting may place undue load on, or
damage the USB connector.
• Set up the device in order that no unsafe actions, such as plugging in the
connection cable are taken while driving.
• When inserting and removing the USB device, for safety's sake first stop the
vehicle.
• Do not insert non-audio devices into the USB port. Damage to the device or
equipment may result.
• Depending on the status of the USB device, it may take some time until the
device is recognized, or playback starts.
NOTE
• Depending on USB devices, buttons on the product will not operate while the
USB device is connected.
• Data containing copyright information may not play back.
• USB device specifications and settings may mean that connection is not
possible, or result in differences in
operation or display.
• Depending on audio data in the USB device, track information may not be
displayed correctly.
• Depending on the status of the vehicle and device, the iPod/iPhone may not play
back after starting the engine.
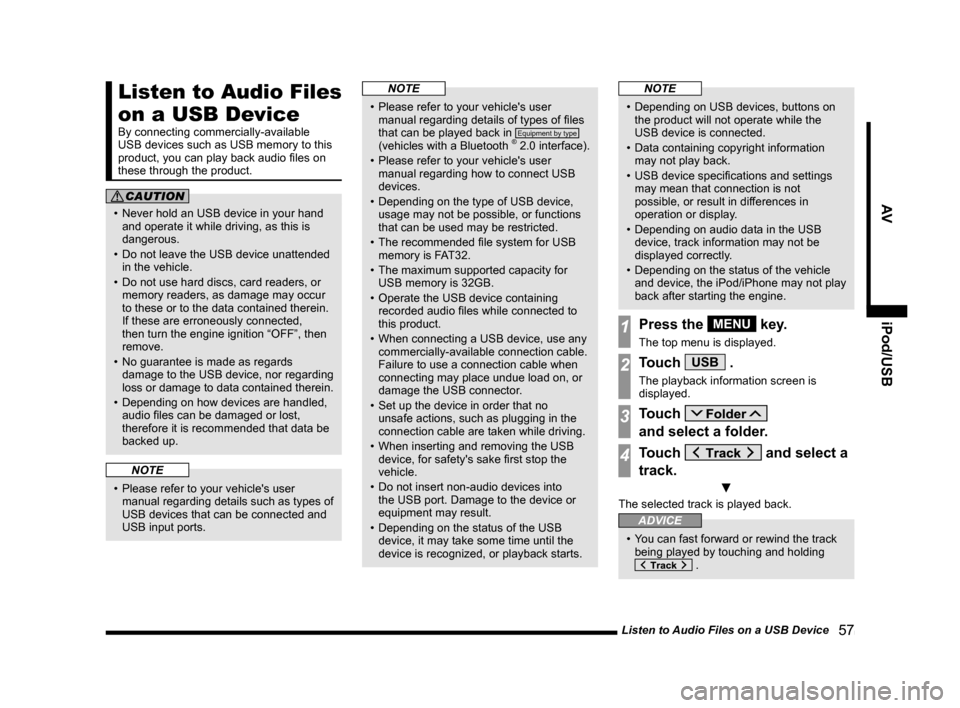
1Press the MENU key.
The top menu is displayed.
2Touch USB .
The playback information screen is
displayed.
3Touch
and select a folder.
4Touch and select a
track.
▼
The selected track is played back.
ADVICE
• You can fast forward or rewind the track being played by touching and holding
.
13MY_AVC(NAS).indb 572013/02/14 10:57:53
Page 62 of 88
62 Use Bluetooth Audio
External Input Devices
Equipment by type
(Vehicles with a Bluetooth® 2.0 interface).
Use Bluetooth Audio
This product can play back tracks on
commercially-available Bluetooth-capable
audio devices.
CAUTION
• Never hold a Bluetooth-capable audio
device in your hand and operate it while
driving, as this is dangerous.
• Do not leave the Bluetooth audio device unattended in the vehicle.
• Depending on how devices are handled, audio files can be damaged or lost,
therefore it is recommended that data be
backed up.
NOTE
• Depending on the type of Bluetooth-capable audio devices, usage may not be
possible, or functions that can be used
may be restricted.
• Updating your software sometimes changes the functions that can be used
when connected with this product.
• When a Bluetooth-capable audio device is connected to this product,
the mobile phone function cannot be
used.
NOTE
• Confirm together with the user manuals for the commercially-available Bluetooth-
capable audio devices.
• Depending on the type of Bluetooth- capable audio devices, volume levels
may differ. There is the danger of
loud volumes, so prior to use, it is
recommended that you turn the volume
down.
→“Adjust Volume” (P14)
• Depending on the status of the Bluetooth audio device, it may take some time until
the device is recognized, or playback
starts.
• Bluetooth audio device specifications and settings may mean that connection
is not possible, or result in differences in
operation or display.
• Depending on audio data in the Bluetooth
audio device, track information may not
be displayed correctly.
• Depending on the status of the vehicle and device, the iPod/iPhone may not play
back after starting the engine.
• Data containing copyright information may not play back.
• It is recommended that the Bluetooth audio device equalizer settings be set to
flat.
• The first time you listen to Bluetooth audio, you must make the connection
settings.
(P62)
Connect a Bluetooth-capable
Audio Device
This product and the Bluetooth-capable audio
device uses the Bluetooth function to connect.
For details on how to connect, refer to
“Bluetooth Setting” (P81).
Operation methods below describe situations
once a connection has been completed.
NOTE
• If the iPod/iPhone is connected via Bluetooth as a Bluetooth-capable audio
device, do not connect the iPod/iPhone
using an iPod cable. Connection using
both methods will result in erroneous
operation.
Listen to a Bluetooth-capable
Audio Device
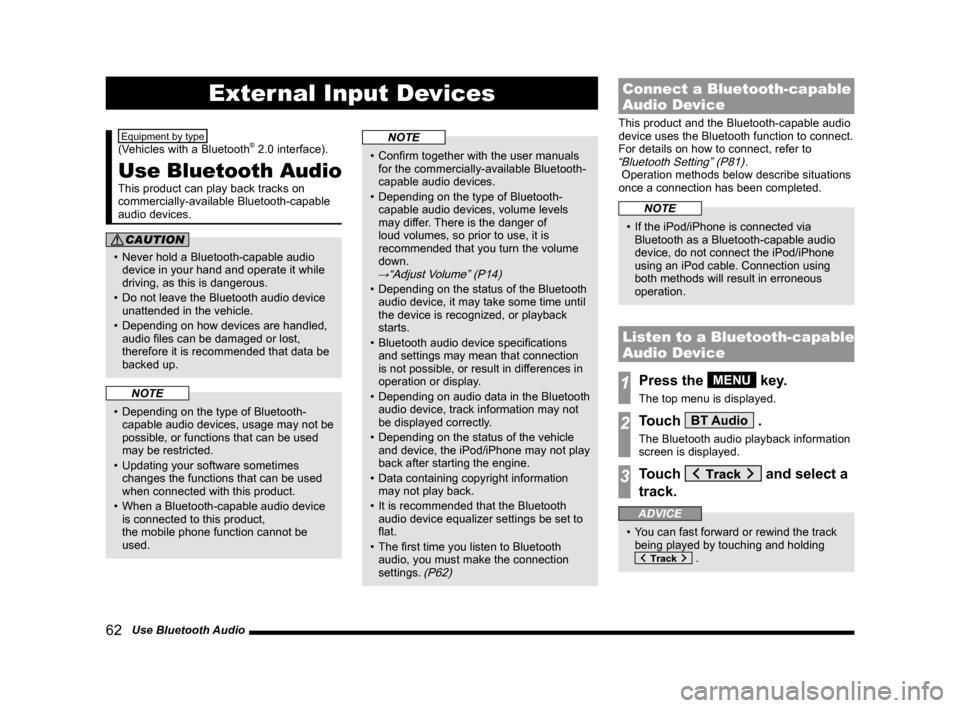
1Press the MENU key.
The top menu is displayed.
2Touch BT Audio .
The Bluetooth audio playback information
screen is displayed.
3Touch and select a
track.
ADVICE
• You can fast forward or rewind the track being played by touching and holding
.
13MY_AVC(NAS).indb 622013/02/14 10:57:57
Page 65 of 88
Use AUX 65
AVExternal Input Devices
Equipment by type
Use AUX
By connecting external input cables and
AUX devices to this product, you can play
back tracks on these devices through the
product.
CAUTION
• Connect an audio device with external
sound input mode cancelled, or with the
sound turned down.
• Even when no device is connected, the product will switch to AUX, therefore take
care with volume levels when no device
is connected.
• Video from AUX devices cannot be
viewed.
• If this is used with the engine stopped, it may run down the battery and make it
impossible to start the engine.
NOTE
• Depending on the audio device to be connected, background noise may be
emitted.
• For power, use the battery power source included in the audio device. Using the
connected audio device while charging
through the cigarette lighter socket in the
vehicle may lead to background noise
being emitted through the speakers.
• If no audio devices are connected, then do not select the external sound input
mode. If external sound input mode is
selected while no audio devices are
connected, then sound may be emitted
through the speakers.
• Please refer to your vehicle's user manual regarding how to connect AUX
devices.
Displaying
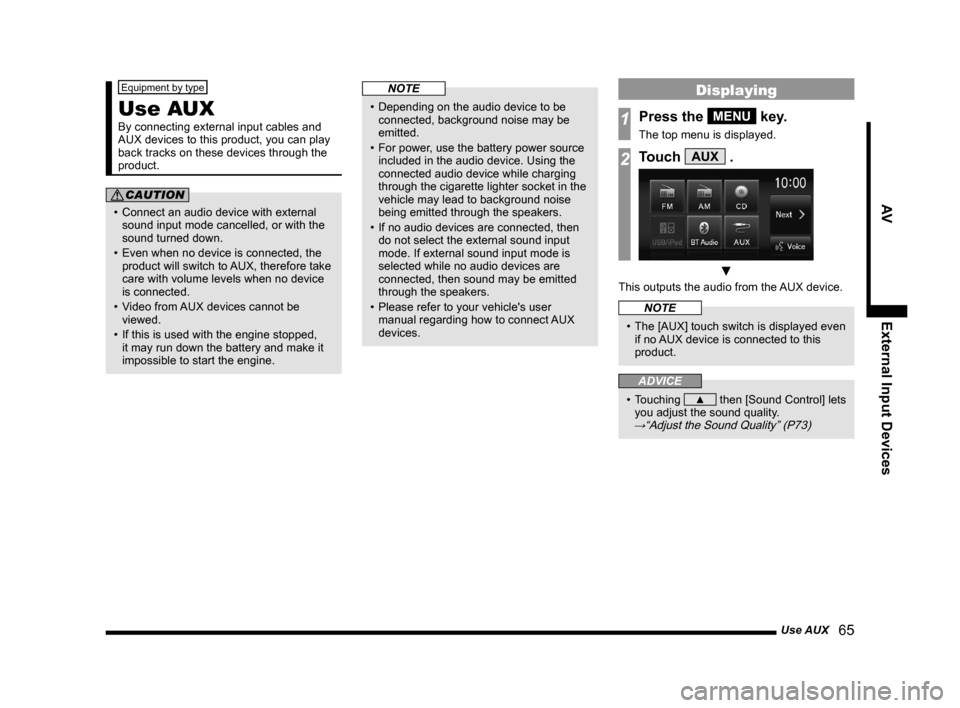
1Press the MENU key.
The top menu is displayed.
2Touch AUX .
▼
This outputs the audio from the AUX device.
NOTE
• The [AUX] touch switch is displayed even if no AUX device is connected to this
product.
ADVICE
• Touching ▲ then [Sound Control] lets
you adjust the sound quality.
→“Adjust the Sound Quality” (P73)
13MY_AVC(NAS).indb 652013/02/14 10:57:59
Page 67 of 88
Mobile Phone 67
INFO/SETTINGSINFO
Display the Phonebook
There is the vehicle phonebook registered in
this product and the mobile phonebook that
can receive the data in your mobile phone.
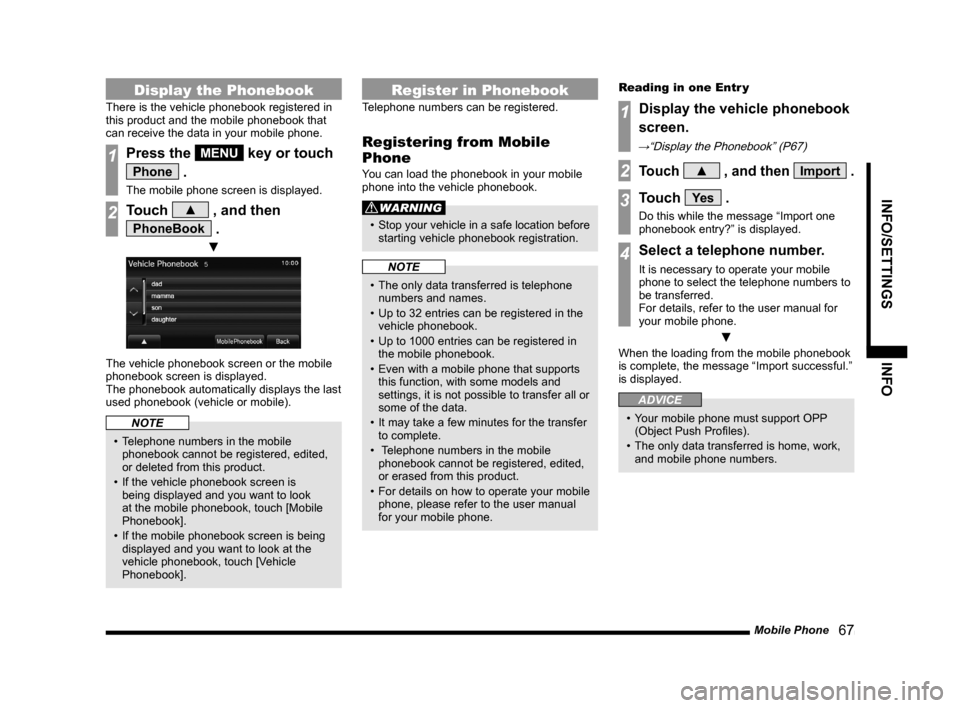
1Press the MENU key or touch
Phone .
The mobile phone screen is displayed.
2Touch ▲ , and then
PhoneBook .
▼
The vehicle phonebook screen or the mobile
phonebook screen is displayed.
The phonebook automatically displays the last
used phonebook (vehicle or mobile).
NOTE
• Telephone numbers in the mobile
phonebook cannot be registered, edited,
or deleted from this product.
• If the vehicle phonebook screen is being displayed and you want to look
at the mobile phonebook, touch [Mobile
Phonebook].
• If the mobile phonebook screen is being displayed and you want to look at the
vehicle phonebook, touch [Vehicle
Phonebook].
Register in Phonebook
Telephone numbers can be registered.
Registering from Mobile
Phone
You can load the phonebook in your mobile
phone into the vehicle phonebook.
WARNING
• Stop your vehicle in a safe location before
starting vehicle phonebook registration.
NOTE
• The only data transferred is telephone numbers and names.
• Up to 32 entries can be registered in the vehicle phonebook.
• Up to 1000 entries can be registered in the mobile phonebook.
• Even with a mobile phone that supports this function, with some models and
settings, it is not possible to transfer all or
some of the data.
• It may take a few minutes for the transfer to complete.
• Telephone numbers in the mobile
phonebook cannot be registered, edited,
or erased from this product.
• For details on how to operate your mobile
phone, please refer to the user manual
for your mobile phone. Reading in one Entr y
1Display the vehicle phonebook
screen.
→“Display the Phonebook” (P67)
2Touch ▲ , and then Import .
3Touch Ye s .
Do this while the message “Import one
phonebook entry?” is displayed.
4Select a telephone number.
It is necessary to operate your mobile
phone to select the telephone numbers to
be transferred.
For details, refer to the user manual for
your mobile phone.
▼
When the loading from the mobile phonebook
is complete, the message “Import successful.”
is displayed.
ADVICE
• Your mobile phone must support OPP
(Object Push Profiles).
• The only data transferred is home, work, and mobile phone numbers.
13MY_AVC(NAS).indb 672013/02/14 10:58:00
Page 69 of 88
Mobile Phone 69
INFO/SETTINGSINFO
Deleting a Phonebook
You can delete a phonebook that has been
registered.
WARNING
• Stop your vehicle in a safe location
before deleting vehicle phonebook.
Deleting Only One Entr y
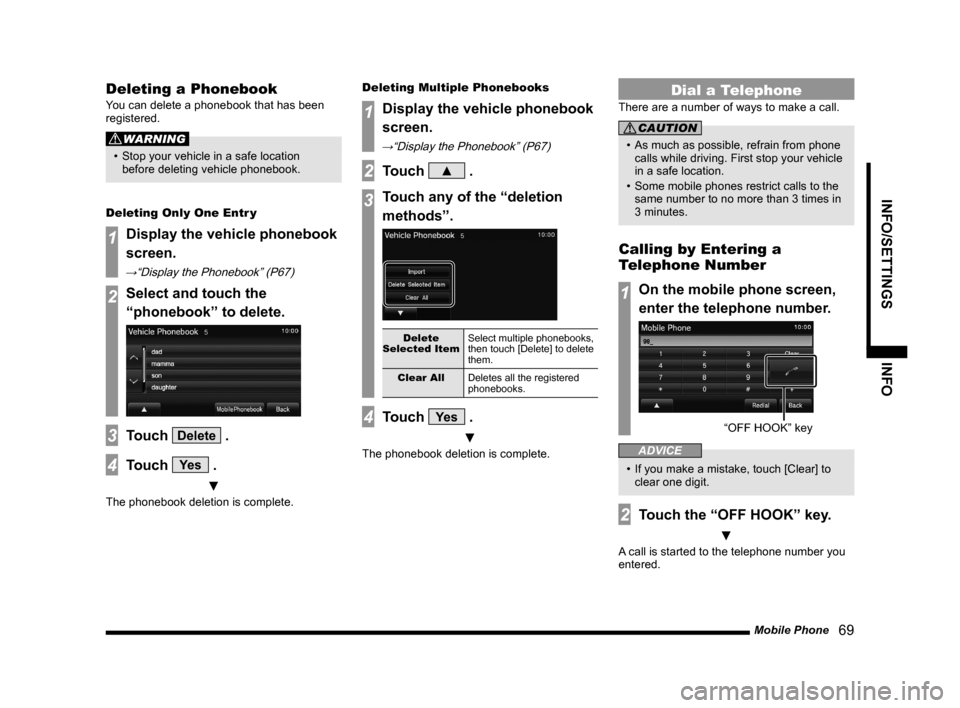
1Display the vehicle phonebook
screen.
→“Display the Phonebook” (P67)
2Select and touch the
“phonebook” to delete.
3Touch Delete .
4Touch Ye s .
▼
The phonebook deletion is complete. Deleting Multiple Phonebooks
1Display the vehicle phonebook
screen.
→“Display the Phonebook” (P67)
2Touch ▲ .
3Touch any of the “deletion
methods”.
Delete
Selected Item Select multiple phonebooks,
then touch [Delete] to delete
them.
Clear All Deletes all the registered
phonebooks.
4Touch Ye s .
▼
The phonebook deletion is complete.
Dial a Telephone
There are a number of ways to make a call.
CAUTION
• As much as possible, refrain from phone
calls while driving. First stop your vehicle
in a safe location.
• Some mobile phones restrict calls to the same number to no more than 3 times in
3 minutes.
Calling by Entering a
Telephone Number
1On the mobile phone screen,
enter the telephone number.
“OFF HOOK” ke y
ADVICE
• If you make a mistake, touch [Clear] to
clear one digit.
2Touch the “OFF HOOK” key.
▼
A call is started to the telephone number you
entered.
13MY_AVC(NAS).indb 692013/02/14 10:58:01
Page 71 of 88
Mobile Phone 71
INFO/SETTINGSINFO
Answering an Incoming Call
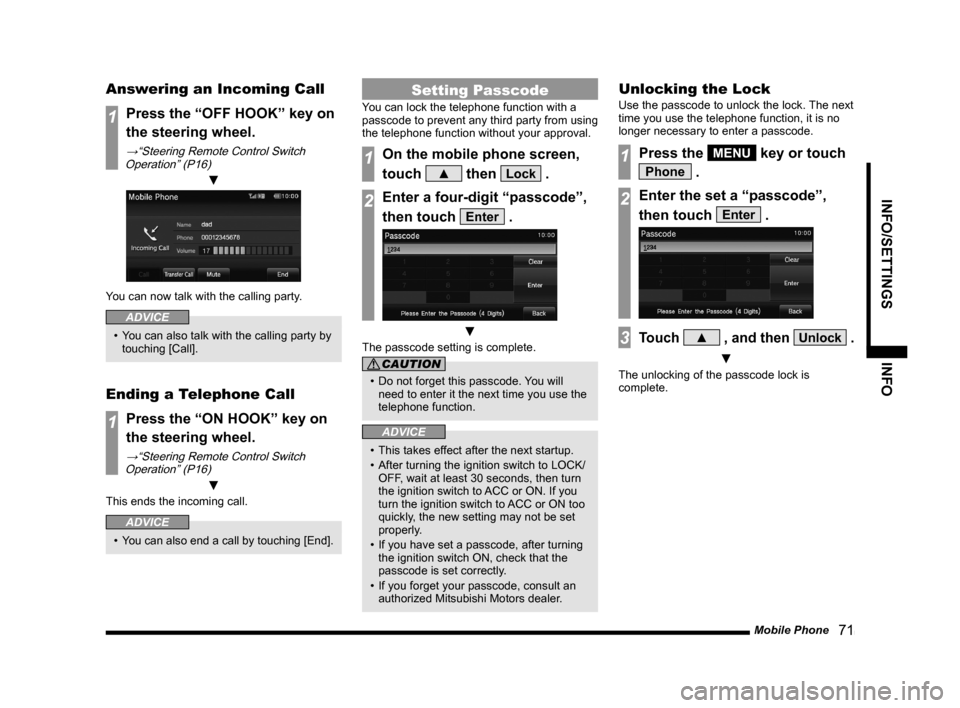
1Press the “OFF HOOK” key on
the steering wheel.
→“Steering Remote Control Switch
Operation” (P16)
▼
You can now talk with the calling party.
ADVICE
• You can also talk with the calling party by touching [Call].
Ending a Telephone Call
1Press the “ON HOOK” key on
the steering wheel.
→“Steering Remote Control Switch Operation” (P16)
▼
This ends the incoming call.
ADVICE
• You can also end a call by touching [End].
Setting Passcode
You can lock the telephone function with a
passcode to prevent any third party from using
the telephone function without your approval.
1On the mobile phone screen,
touch
▲ then Lock .
2Enter a four-digit “passcode”,
then touch
Enter .
▼
The passcode setting is complete.
CAUTION
• Do not forget this passcode. You will
need to enter it the next time you use the
telephone function.
ADVICE
• This takes effect after the next startup.
• After turning the ignition switch to LOCK/ OFF, wait at least 30 seconds, then turn
the ignition switch to ACC or ON. If you
turn the ignition switch to ACC or ON too
quickly, the new setting may not be set
properly.
• If you have set a passcode, after turning the ignition switch ON, check that the
passcode is set correctly.
• If you forget your passcode, consult an authorized Mitsubishi Motors dealer.
Unlocking the Lock
Use the passcode to unlock the lock. The next
time you use the telephone function, it is no
longer necessary to enter a passcode.
1Press the MENU key or touch
Phone .
2Enter the set a “passcode”,
then touch
Enter .
3Touch ▲ , and then Unlock .
▼
The unlocking of the passcode lock is
complete.
13MY_AVC(NAS).indb 712013/02/14 10:58:03