fluid MITSUBISHI LANCER RALLIART 2014 8.G Owner's Manual
[x] Cancel search | Manufacturer: MITSUBISHI, Model Year: 2014, Model line: LANCER RALLIART, Model: MITSUBISHI LANCER RALLIART 2014 8.GPages: 434, PDF Size: 57.5 MB
Page 226 of 434
Wiper and washer switch
Features and controls 5-159
5
N00569700016
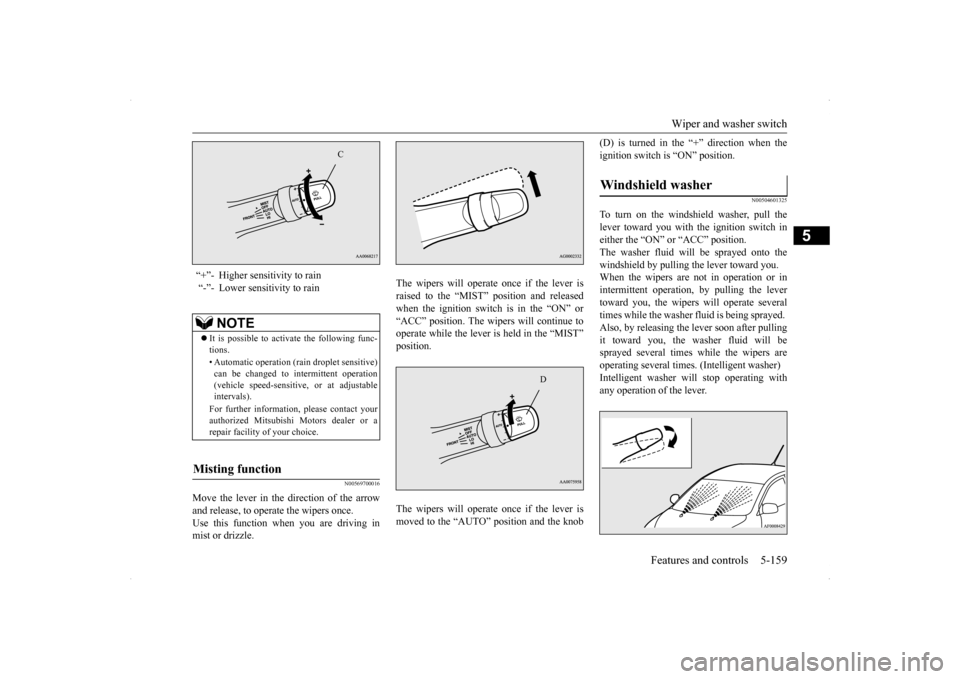
Move the lever in the direction of the arrow and release, to operate the wipers once. Use this function when you are driving inmist or drizzle.
The wipers will operate once if the lever is raised to the “MIST” position and released when the ignition switch is in the “ON” or“ACC” position. The wipers will continue to operate while the lever is held in the “MIST” position. The wipers will operate once if the lever is moved to the “AUTO” position and the knob
(D) is turned in the “+” direction when the ignition switch is “ON” position.
N00504601325
To turn on the windshield washer, pull thelever toward you with the ignition switch in either the “ON” or “ACC” position. The washer fluid will be sprayed onto thewindshield by pulling the lever toward you. When the wipers are not in operation or in intermittent operation, by pulling the lever toward you, the wipers will operate severaltimes while the washer fluid is being sprayed. Also, by releasing the lever soon after pulling it toward you, the washer fluid will besprayed several times while the wipers are operating several times. (Intelligent washer) Intelligent washer will stop operating withany operation of the lever.
“+”- Higher sensitivity to rain “-”- Lower sensitivity to rain
NOTE
It is possible to activate the following func- tions. • Automatic operation (rain droplet sensitive) can be changed to intermittent operation (vehicle speed-sensitive, or at adjustableintervals). For further information, please contact your authorized Mitsubishi Motors dealer or a repair facility of your choice.
Misting function
C
D
Windshield washer
Page 227 of 434
Electric rear window defogger switch 5-160 Features and controls
5
N00523500209
N00523700315
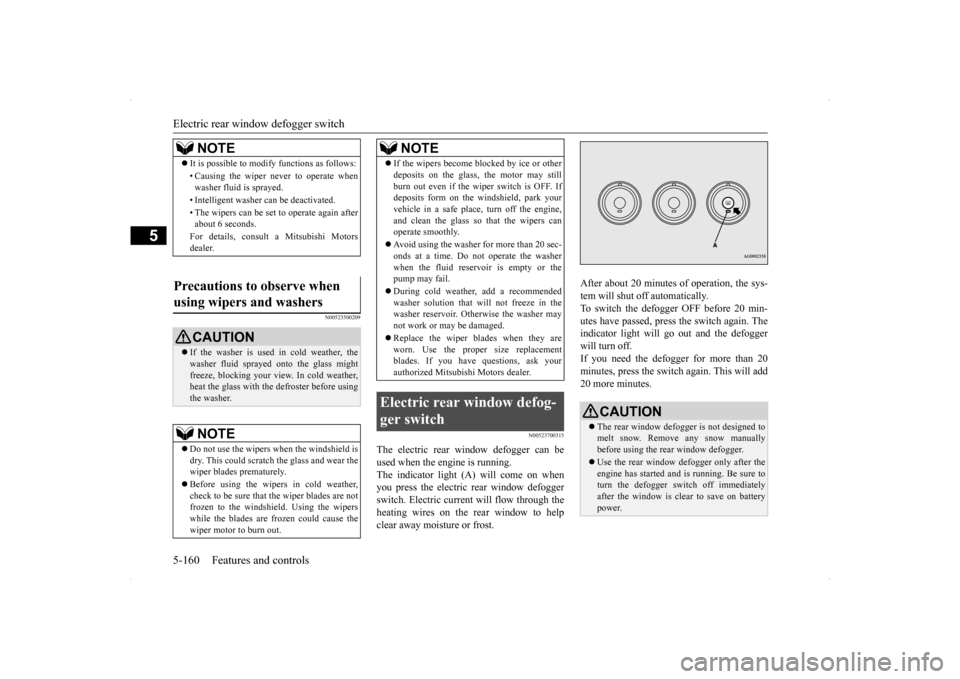
The electric rear window defogger can be used when the engine is running. The indicator light (A) will come on when you press the electric rear window defoggerswitch. Electric current will flow through the heating wires on the rear window to help clear away moisture or frost.
After about 20 minutes of operation, the sys- tem will shut off automatically. To switch the defogger OFF before 20 min-utes have passed, press the switch again. The indicator light will go out and the defogger will turn off. If you need the defogger for more than 20minutes, press the switch again. This will add 20 more minutes.
NOTE
It is possible to modify functions as follows: • Causing the wiper never to operate when washer fluid is sprayed. • Intelligent washer can be deactivated. • The wipers can be set to operate again after about 6 seconds. For details, consult a Mitsubishi Motors dealer.
Precautions to observe when using wipers and washers
CAUTION If the washer is used in cold weather, the washer fluid sprayed onto the glass might freeze, blocking your view. In cold weather,heat the glass with the defroster before using the washer.NOTE
Do not use the wipers when the windshield is dry. This could scratch the glass and wear the wiper blades prematurely. Before using the wipers in cold weather, check to be sure that the wiper blades are notfrozen to the windshield. Using the wipers while the blades are frozen could cause the wiper motor to burn out.
If the wipers become blocked by ice or other deposits on the glass, the motor may still burn out even if the wiper switch is OFF. If deposits form on the windshield, park your vehicle in a safe place, turn off the engine,and clean the glass so that the wipers can operate smoothly. Avoid using the washer for more than 20 sec- onds at a time. Do not operate the washer when the fluid reservoir is empty or thepump may fail. During cold weather, add a recommended washer solution that will not freeze in the washer reservoir. Otherwise the washer may not work or may be damaged. Replace the wiper blades when they are worn. Use the proper size replacementblades. If you have questions, ask your authorized Mitsubishi Motors dealer.
Electric rear window defog- ger switch
NOTE
CAUTION The rear window defogger is not designed to melt snow. Remove any snow manuallybefore using the rear window defogger. Use the rear window defogger only after the engine has started and is running. Be sure to turn the defogger switch off immediately after the window is clear to save on batterypower.
Page 265 of 434
Safe driving techniques 6-4 Driving safety
6
Replace your tires before they are heavily worn out. As your vehicle is equipped with a tire pres- sure monitoring system, there is a risk ofdamage to the tire inflation pressure sensors when the tire is replaced on the rim. Tire replacement should, therefore, be performedonly by an authorized Mitsubishi Motors dealer. Have someone watch while you turn all the exterior lights on and off. Also check the turn signal indicators and high-beam indicators on the instrument panel. Check the ground under the vehicle after parking overnight, for fuel, water, oil, orother leaks. Make sure all the fluid levels are correct. Also, if you can smell fuel, you need to find out why immediately and have itfixed.
N00629200111
Even this vehicle’s safety equipment, andyour safest driving, cannot guarantee that you
can avoid an accident or injury. However, if you give extra attention to the following areas, you can better protect yourself and your passengers: Drive defensively. Be aware of traffic, road and weather conditions. Leave plenty of stopping distance between your vehicle and the vehicle ahead. Before changing lanes, check your mir- rors and use your turn signal light. While driving, watch the behavior of other drivers, bicyclists, and pedestrians. Always obey applicable laws and regula- tions. Be a polite and alert driver. Always leave room for unexpected events, such assudden braking. If you plan to drive in another country, obey their vehicle registration laws andmake sure you will be able to get the right fuel.
N00629400429
Check the battery, including terminals and cables. During extremely cold weather,the battery will not be as strong. Also, the battery power level may drop because more power is used for cold starting anddriving. Before driving the vehicle, check to see if the engine runs at the proper speed and ifthe headlights are as bright as normally.Charge or replace the battery if necessary. During extreme cold weather, it is possi- ble that a very low battery could freeze. Warm the engine sufficiently. After start- ing the engine, allow a short warm-up time to distribute oil
to all cylinders and
turbocharger. Then drive your vehicleslowly.
Lights Fluid leaks Safe driving techniques
Driving during cold weather
WA R N I N G The battery gives off explosive hydrogen gas. Any spark or flame can cause the bat-tery to explode, which could cause serious injury or death. Always wear protective clothes and a facemask when working with your battery, or let a skilled mechanic do it.
Page 344 of 434
Jump-starting the engine For emergencies 8-3
8
4. Make sure your battery electrolyte is at the proper level. (Refer to “Checking bat- tery electrolyte level” on page 9-15.) 5. For vehicles equipped with turbocharger, remove the air duct and then the battery upper cover.(Refer to “Removing and installing the battery upper cover” on page 9-14.)
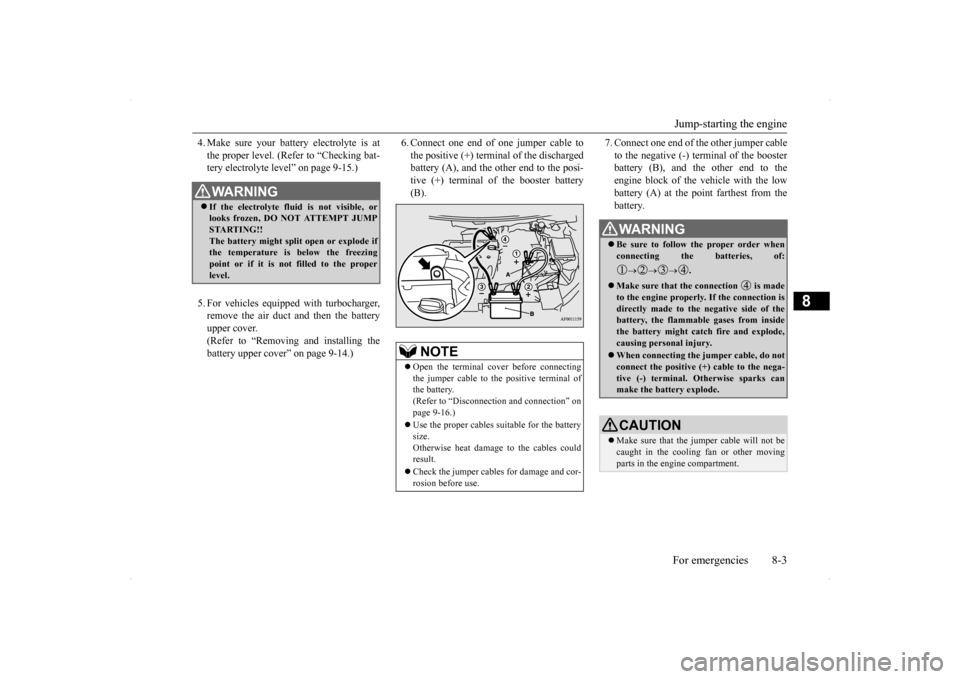
6. Connect one end of one jumper cable to the positive (+) terminal of the discharged battery (A), and the other end to the posi- tive (+) terminal of the booster battery(B).
7. Connect one end of the other jumper cable to the negative (-) terminal of the booster battery (B), and the other end to the engine block of the vehicle with the lowbattery (A) at the point farthest from the battery.
WA R N I N G If the electrolyte fluid is not visible, or looks frozen, DO NOT ATTEMPT JUMP STARTING!! The battery might split open or explode if the temperature is below the freezing point or if it is not filled to the properlevel.
NOTE
Open the terminal cover before connecting the jumper cable to the positive terminal of the battery. (Refer to “Disconnection and connection” on page 9-16.) Use the proper cables suitable for the battery size. Otherwise heat damage to the cables couldresult. Check the jumper cables for damage and cor- rosion before use.
WA R N I N G Be sure to follow the proper order when connecting the batteries, of:
.
Make sure that the connection is made to the engine properly. If the connection isdirectly made to the negative side of the battery, the flammable gases from inside the battery might catch fire and explode, causing personal injury. When connecting the jumper cable, do not connect the positive (+) cable to the nega- tive (-) terminal. Otherwise sparks canmake the battery explode.CAUTION Make sure that the jumper cable will not be caught in the cooling fan or other movingparts in the engine compartment.
Page 356 of 434
Operation under adverse driving conditions
For emergencies 8-15
8
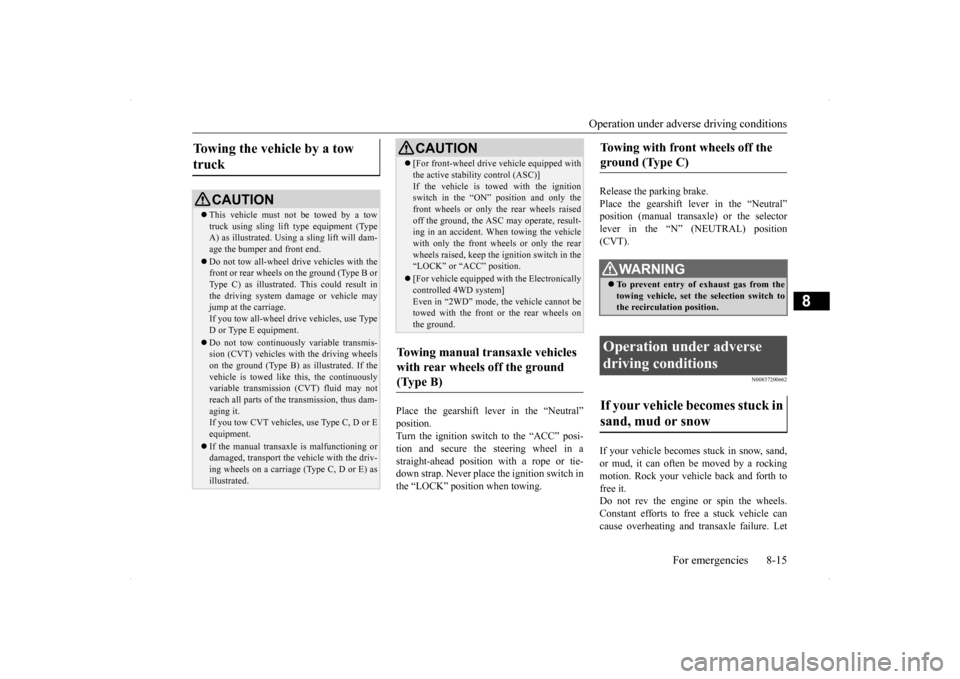
Place the gearshift lever in the “Neutral” position. Turn the ignition switch to the “ACC” posi-tion and secure the steering wheel in a straight-ahead position with a rope or tie- down strap. Never place the ignition switch inthe “LOCK” position when towing.
Release the parking brake. Place the gearshift lever in the “Neutral” position (manual transaxle) or the selectorlever in the “N” (NEUTRAL) position (CVT).
N00837200662
If your vehicle becomes stuck in snow, sand, or mud, it can often be moved by a rockingmotion. Rock your vehicle back and forth to free it. Do not rev the engine or spin the wheels.Constant efforts to free a stuck vehicle can cause overheating and transaxle failure. Let
Towing the vehicle by a tow truck
CAUTION This vehicle must not be towed by a tow truck using sling lift type equipment (TypeA) as illustrated. Using a sling lift will dam- age the bumper and front end. Do not tow all-wheel dr
ive vehicles with the
front or rear wheels on the ground (Type B or Type C) as illustrated. This could result inthe driving system damage or vehicle may jump at the carriage. If you tow all-wheel drive vehicles, use TypeD or Type E equipment. Do not tow continuously variable transmis- sion (CVT) vehicles with the driving wheels on the ground (Type B) as illustrated. If the vehicle is towed like this, the continuouslyvariable transmission (CVT) fluid may not reach all parts of the transmission, thus dam- aging it.If you tow CVT vehicles, use Type C, D or E equipment. If the manual transaxle is malfunctioning or damaged, transport the vehicle with the driv- ing wheels on a carriage (Type C, D or E) as illustrated.
[For front-wheel drive vehicle equipped with the active stability control (ASC)] If the vehicle is towed with the ignition switch in the “ON” position and only the front wheels or only the rear wheels raisedoff the ground, the ASC may operate, result- ing in an accident. When towing the vehicle with only the front wheels or only the rearwheels raised, keep the ignition switch in the “LOCK” or “ACC” position. [For vehicle equipped with the Electronically controlled 4WD system] Even in “2WD” mode, the vehicle cannot betowed with the front or the rear wheels on the ground.
Towing manual transaxle vehicles with rear wheels off the ground (Type B)
CAUTION
Towing with front wheels off the ground (Type C)
WA R N I N G To prevent entry of exhaust gas from the towing vehicle, set the selection switch to the recirculation position.
Operation under adverse driving conditions If your vehicle becomes stuck in sand, mud or snow
Page 360 of 434
9
Vehicle care and maintenanceService precautions ..........
.................................................................9-2
Catalytic converter .
.................................................
..........................9-2
Engine hood ...............................
.......................................................9-3
View of the engine co
mpartment ......................................................9-5
Engine oil and oil filt
er ...........................................
..........................9-6
Engine coolant .................
.................................................................9-8
Air cleaner filter.....
.................................................
..........................9-9
Manual transaxle oil (if so
equipped) ............................................. 9-11
Continuously variable transmission
(CVT) fluid (if so equipped) . 9-11
Twin Clutch Sportronic shift trans
mission (Twin Clutch SST) fluid (if
so equipped) ...........................
..................................................... 9-11
Transfer oil (All-wheel dr
ive models) ............................................9-12
Rear axle oil (All-wheel dr
ive models) .........................................9-12
AWC control fluid (if so
equipped) ................................................9-12
Washer fluid .....................
...............................................................9-12
Brake fluid/Clutch fluid (if
so equipped)........................................9-13
Power steering fluid (if so equipped)..............................................9-14 Battery........................................
.....................................................9-14
Tires ...........................................
.....................................................9-17
Clutch pedal free play (if so equipped)...........................................9-24 Brake pedal free play
..............................................
........................9-24
Parking brake lever stroke ..............................................................9-24Parking brake break-in
...........................................
........................9-25
Wiper blades ..............................
.....................................................9-25
Emission-control system maintenance ...........................................9-25 General maintenance
..............................................
........................9-26
For cold and snowy weat
her ..........................................................9-28
Fusible links .....................
...............................................................9-28
Fuses ...................................................
............................................ 9-28
Replacement of light bul
bs ....................................
......................... 9-33
Vehicle care precautions
........................................
......................... 9-48
Cleaning the inside of you
r vehicle ................................................ 9-48
Cleaning the outside of your
vehicle .............................................. 9-49
Page 364 of 434
View of the engine compartment
Vehicle care and maintenance 9-5
9
Unlatch the prop from the engine hood and put it back in its retainer. Slowly lower the engine hood about 8 inches (20 cm), then let it drop from its own weight.
N00937600667
To close
CAUTION Be careful not to trap your hands or fingers when closing the engine hood. Make sure the engine hood is firmly closed before driving. If you drive without the engine hood com-pletely closed, it could open up while driv- ing.NOTE
If this does not close the engine hood prop- erly, drop it again from a slightly higher position.
Do not push down strongly on the engine hood. Depending on how strongly or where you push down, you could create a dent in the vehicle body. For vehicles equipped with the theft-alarm system, if you drive with the engine hood left open, warning display is displayed on theinformation screen in the multi-information display.Type 1 Type 2
NOTE
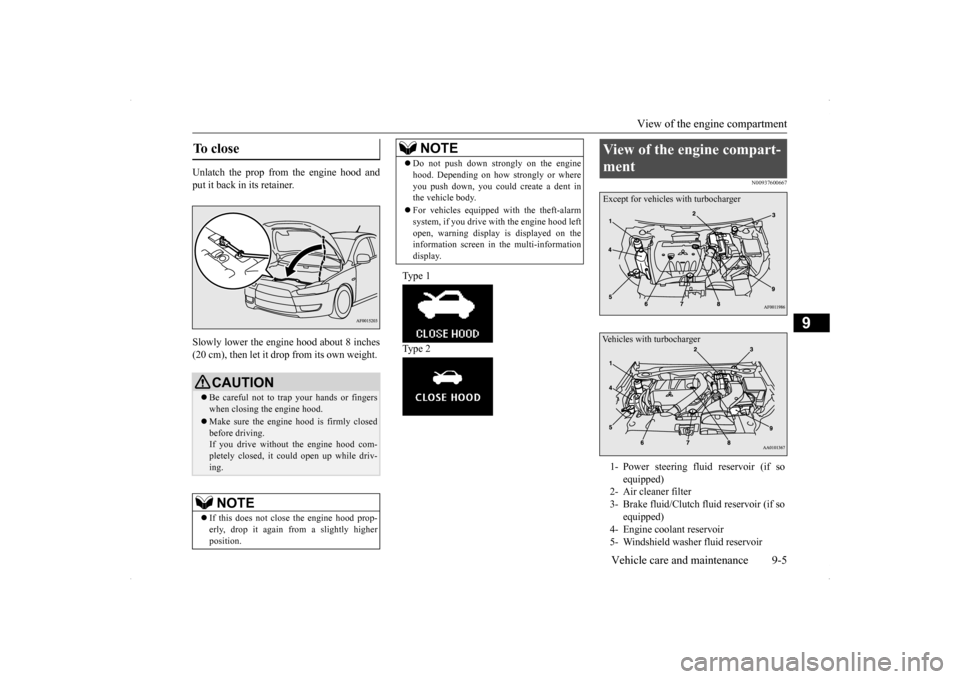
View of the engine compart- ment 1- Power steering fluid reservoir (if so
equipped)
2- Air cleaner filter 3- Brake fluid/Clutch fluid reservoir (if so
equipped)
4- Engine coolant reservoir 5- Windshield washer fluid reservoirExcept for vehicles with turbochargerVehicles with turbocharger
Page 370 of 434
Manual transaxle oil (if so equipped) Vehicle care and maintenance 9-11
9
5. Put the duct back on in its original posi- tion.
N00938200165
Whenever the manual transaxle oil level ischecked, add oil to maintain the proper level, if necessary. Refill or change the oil according to the table.
N00938100063
The continuously variable transmission(CVT) should be maintained and serviced by an authorized Mitsubishi Motors dealer or a repair facility of your choice to obtain thebest performance and longest life. It is impor- tant that the transmissi
on fluid is kept at the
correct level. Use only “Mitsubishi Motors Genuine CVTF-J4” transmission fluid to ensure opti-mum transmission performance.
Mitsubishi Motors Corporation does not rec- ommend the addition of any fluid additives tothe transmission.
N00938300036
The Twin Clutch Sportronic shift transmis-sion (Twin Clutch SST) should be maintained and serviced by an authorized Mitsubishi Motors dealer or a repair facility of yourchoice to obtain the best performance and longest life. It is impor
tant that the transmis-
sion fluid is kept at the correct level. Use only Mitsubishi Motors Genuine SSTF-I to ensure optimum transmission performance.
NOTE
Except for vehicles with turbocharger, make sure that the connector is properly recon- nected.
Manual transaxle oil
(if so
equipped)Vehicles with turbocharger
Oil type
Lubricant
Mitsubishi Motors Genuine NEW MULTI GEAR OIL API
Classification GL-3
Viscosity range
SAE 75W-80
Continuously variable transmission (CVT) fluid
(if
so equipped)Fluid type
Special additives
Twin Clutch Sportronic shift transmission (Twin Clutch SST) fluid
(if so equipped)
Fluid type
CAUTION Using the improper transmission fluid may damage the transaxle.
Page 371 of 434
Transfer oil (All-wheel drive models) 9-12 Vehicle care and maintenance
9
Mitsubishi Motors Corporation does not rec- ommend the addition of any fluid additives tothe transmission.
N00938400239
Whenever the transfer oil level is checked,add oil as necessary to maintain the properlevel. Fill or change the oil according to the table.
N00915200227
Whenever the oil level is checked, add oil as necessary to maintain the proper level. Fill or change oil according to the table.
N00915300026
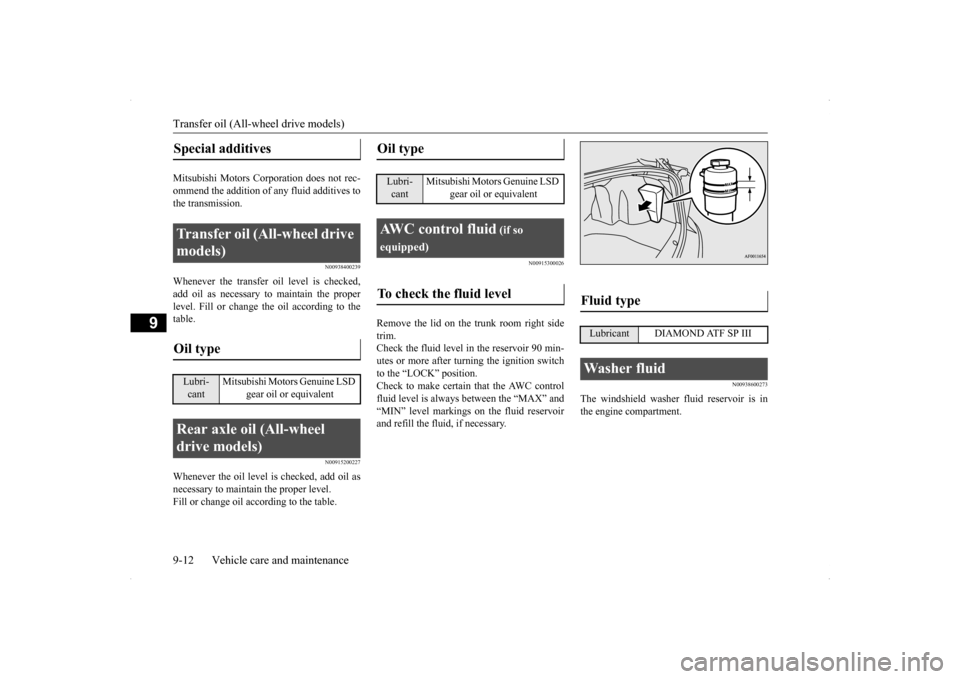
Remove the lid on the trunk room right sidetrim. Check the fluid level in the reservoir 90 min-utes or more after turning the ignition switch to the “LOCK” position. Check to make certain that the AWC controlfluid level is always between the “MAX” and “MIN” level markings on the fluid reservoir and refill the fluid, if necessary.
N00938600273
The windshield washer fluid reservoir is inthe engine compartment.
Special additives
Transfer oil (All-wheel drive models) Oil type Lubri- cant
Mitsubishi Motors Genuine LSD
gear oil or equivalent
Rear axle oil (All-wheel drive models)
Oil type Lubri- cant
Mitsubishi Motors Genuine LSD
gear oil or equivalent
AWC control fluid
(if so
equipped)To check the fluid level
Fluid type
Lubricant DIAMOND ATF SP IIIWasher fluid
Page 372 of 434
Brake fluid/Clutch fluid (if so equipped) Vehicle care and maintenance 9-13
9
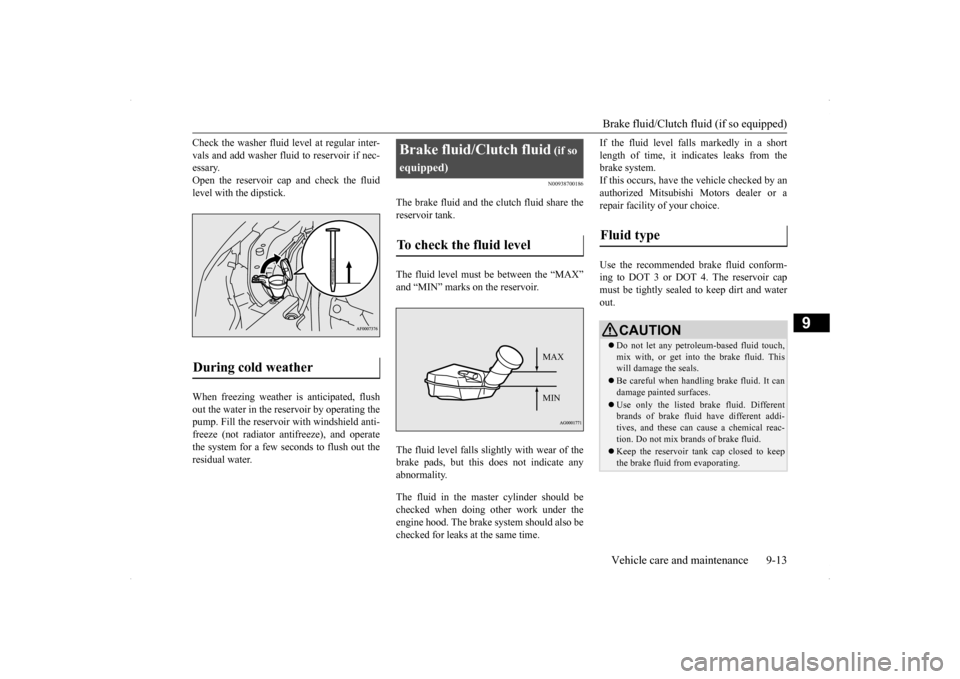
Check the washer fluid level at regular inter- vals and add washer fluid to reservoir if nec- essary. Open the reservoir cap and check the fluidlevel with the dipstick. When freezing weather is anticipated, flush out the water in the reservoir by operating thepump. Fill the reservoir with windshield anti- freeze (not radiator antifreeze), and operate the system for a few seconds to flush out theresidual water.
N00938700186
The brake fluid and the clutch fluid share thereservoir tank. The fluid level must be between the “MAX” and “MIN” marks on the reservoir. The fluid level falls slightly with wear of the brake pads, but this does not indicate any abnormality. The fluid in the master cylinder should be checked when doing other work under the engine hood. The brake
system should also be
checked for leaks at the same time.
If the fluid level falls markedly in a short length of time, it indicates leaks from the brake system. If this occurs, have the vehicle checked by anauthorized Mitsubishi Motors dealer or a repair facility of your choice. Use the recommended brake fluid conform- ing to DOT 3 or DOT 4. The reservoir cap must be tightly sealed to keep dirt and water out.
During cold weather
Brake fluid/Clutch fluid
(if so
equipped)To check the fluid level
MAX MIN
Fluid type
CAUTION Do not let any petroleum-based fluid touch, mix with, or get into
the brake fluid. This
will damage the seals. Be careful when handling brake fluid. It can damage painted surfaces. Use only the listed brake fluid. Different brands of brake fluid have different addi-tives, and these can cause a chemical reac- tion. Do not mix bra
nds of brake fluid.
Keep the reservoir tank cap closed to keep the brake fluid from evaporating.