display MITSUBISHI MIRAGE 2015 6.G Owner's Manual
[x] Cancel search | Manufacturer: MITSUBISHI, Model Year: 2015, Model line: MIRAGE, Model: MITSUBISHI MIRAGE 2015 6.GPages: 300, PDF Size: 43.44 MB
Page 130 of 300
Multi-information display
Features and controls 5-69
5
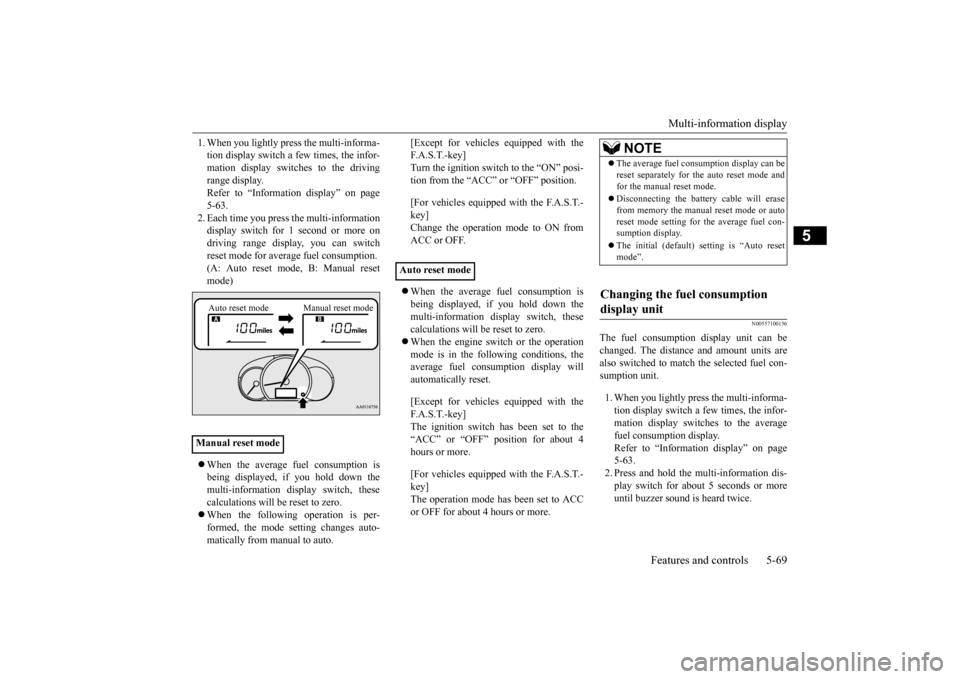
1. When you lightly press the multi-informa- tion display switch a few times, the infor-mation display switches to the driving range display. Refer to “Information display” on page5-63. 2. Each time you press the multi-information display switch for 1 second or more ondriving range disp
lay, you can switch
reset mode for average fuel consumption. (A: Auto reset mode, B: Manual reset mode) When the average fuel consumption is being displayed, if you hold down themulti-information display switch, these calculations will be reset to zero. When the following operation is per- formed, the mode setting changes auto- matically from manual to auto.
[Except for vehicles
equipped with the
F. A . S . T. - k e y ]Turn the ignition switch to the “ON” posi- tion from the “ACC” or “OFF” position. [For vehicles equipped with the F.A.S.T.- key]Change the operation mode to ON from ACC or OFF. When the average fuel consumption is being displayed, if you hold down the multi-information display switch, these calculations will
be reset to zero.
When the engine switch or the operation mode is in the following conditions, the average fuel consumption display willautomatically reset. [Except for vehicles
equipped with the
F. A . S . T. - k e y ] The ignition switch has been set to the“ACC” or “OFF” position for about 4 hours or more. [For vehicles equipped with the F.A.S.T.- key]The operation mode has been set to ACC or OFF for about 4 hours or more.
N00557100156
The fuel consumpti
on display unit can be
changed. The distance and amount units are also switched to match the selected fuel con-sumption unit. 1. When you lightly press the multi-informa- tion display switch a few times, the infor- mation display switches to the averagefuel consumption display. Refer to “Information display” on page 5-63.2. Press and hold the mu
lti-information dis-
play switch for about 5 seconds or more until buzzer sound is heard twice.
Manual reset mode
Auto reset mode Manual reset mode
Auto reset mode
NOTE
The average fuel cons
umption display can be
reset separately for the auto reset mode andfor the manual reset mode. Disconnecting the batter
y cable wi
ll erase
from memory the manual reset mode or autoreset mode setting for the average fuel con- sumption display. The initial (default) setting is “Auto reset mode”.
Changing the fuel consumption display unit
BK0212400US.book 69 ページ 2014年4月1日 火曜日 午後2時21分
Page 131 of 300
Indicator and warning light package 5-70 Features and controls
5
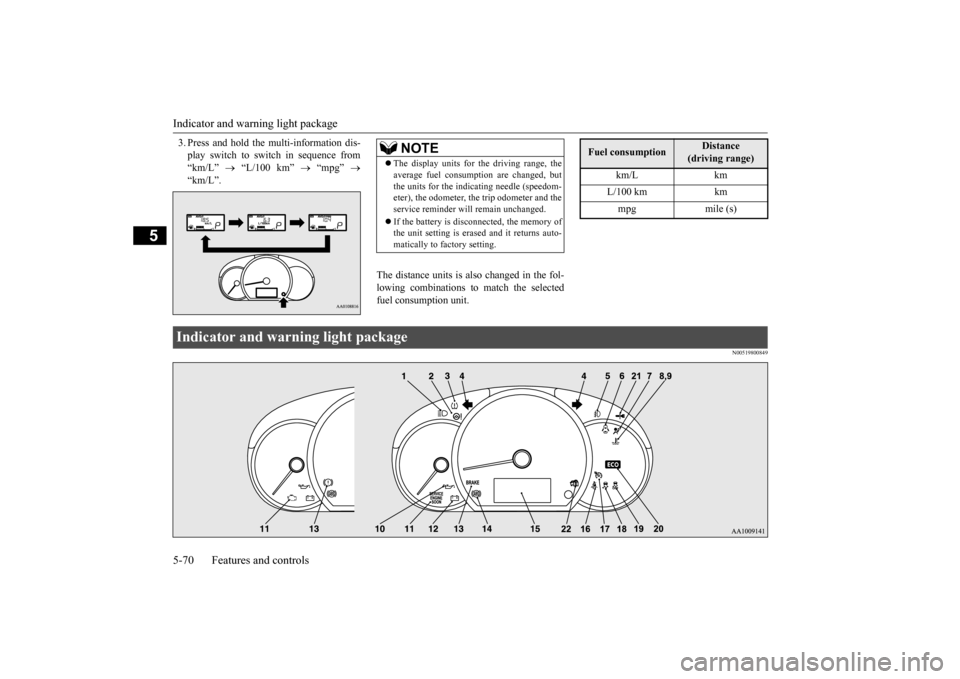
3. Press and hold the multi-information dis- play switch to swit
ch in sequence from
“km/L”
“L/100 km”
“mpg”
“km/L”.
The distance units is also changed in the fol- lowing combinations to match the selectedfuel consumption unit.
N00519800849
NOTE
The display units for the driving range, the average fuel consumption are changed, butthe units for the indica
ting needle (speedom-
eter), the odometer, the trip odometer and the service reminder will
remain unchanged.
If the battery is disconnected, the memory of the unit setting is erased and it returns auto- matically to factory setting.
Fuel consumption
Distance
(driving range)
km/L km L/100 km km mpg mile (s)
Indicator and warning light package BK0212400US.book 70 ページ 2014年4月1日 火曜日 午後2時21分
Page 132 of 300
Indicators
Features and controls 5-71
5
N00519900127 N00520000216
The arrows will flash in time with the corre- sponding exterior turn signals when the turn signal lever is used. Both arrows will flash when the hazard warn- ing flasher swit
ch is pressed.
N00520100086
A blue light comes on when the headlights are on high beam.
N00520200175
This indicator comes on while the front foglights are on.
N00575600010
This indicator comes on in green while the coolant temperature is low.
N00568800036
This indicator comes on while fuel-efficient driving is achieved.
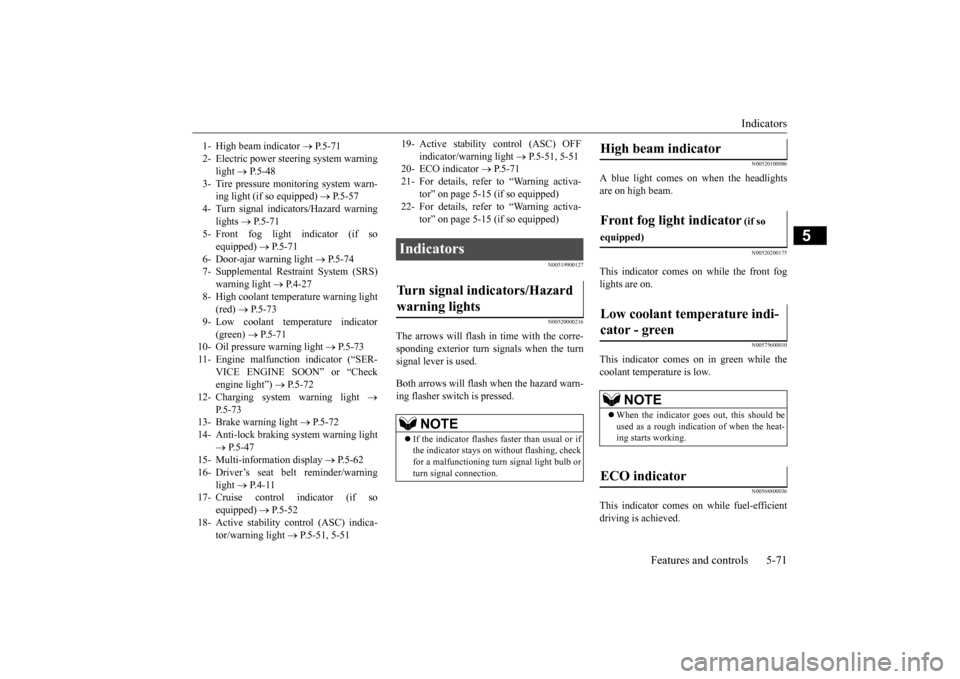
1- High beam indicator
P. 5 - 7 1
2- Electric power stee
ring system warning
light
P. 5 - 4 8
3- Tire pressure moni
toring system warn-
ing light (if so equipped)
P.5-57
4- Turn signal indicators/Hazard warning
lights
P.5-71
5- Front fog light indicator (if so
equipped)
P.5-71
6- Door-ajar warning light
P.5-74
7- Supplemental Restraint System (SRS)
warning light
P.4-27
8- High coolant temperature warning light
(red)
P.5-73
9- Low coolant temp
erature indicator
(green)
P. 5 - 7 1
10- Oil pressure warning light
P.5-73
11- Engine malfuncti
on indicator (“SER-
VICE ENGINE SOON” or “Checkengine light”)
P.5-72
12- Charging system warning light
P.5-73
13- Brake warning light
P.5-72
14- Anti-lock braking system warning light
P.5-47
15- Multi-information display
P. 5 - 6 2
16- Driver’s seat belt reminder/warning
light
P. 4 - 1 1
17- Cruise control indicator (if so
equipped)
P.5-52
18- Active stability control (ASC) indica-
tor/warning light
P.5-51, 5-51
19- Active stability control (ASC) OFF
indicator/warning light
P.5-51, 5-51
20- ECO indicator
P.5-71
21- For details, refer
to “Warning activa-
tor” on page 5-15 (if so equipped)
22- For details, refer
to “Warning activa-
tor” on page 5-15 (if so equipped)
Indicators Turn signal indicators/Hazard warning lights
NOTE
If the indicator flashes faster than usual or if the indicator stays on wi
thout flashing, check
for a malfunctioning turn signal light bulb orturn signal connection.
High beam indicator Front fog light indicator
(if so
equipped)Low coolant temperature indi- cator - green
NOTE
When the indicator goes out, this should be used as a rough indication of when the heat- ing starts working.
ECO indicator
BK0212400US.book 71 ページ 2014年4月1日 火曜日 午後2時21分
Page 144 of 300
Bluetooth® 2.0 interface (if so equipped)
Features and controls 5-83
5
N00564000072
Press this button to increase the volume.
Press this button to decrease the volume. Press this button to ch
ange to voice recog-
nition mode.While the system is in voice recognition mode, “Listening” w
ill appear on the
audio display. If you press the button briefly while in voice recogniti
on mode, it will interrupt
prompting and allow voice command input. Pressing the button lo
nger will deactivate
the voice recognition mode. Pressing this button briefly during a call will enable voice
recognition and allow
voice command input. Press this button when an incoming call is received to answer the telephone. When another call is received during a call, press this button to put the first caller on hold and talk to the new caller.
• In such circumstance
s, you can press the
button briefly to switch between callers.You will switch to the first caller and the other caller will
be put on hold.
• To establish a three-way call in such situ-ations, press the SPEECH button to enter voice recognition mode and then say “Join calls.”
Press this button when an incoming call is received to refuse the call. Press this button during a call to end the current call. When another call is on hold, you willswitch to that call. If this button is pressed in the voice recog- nition mode, the voice recognition modewill be de
activated.
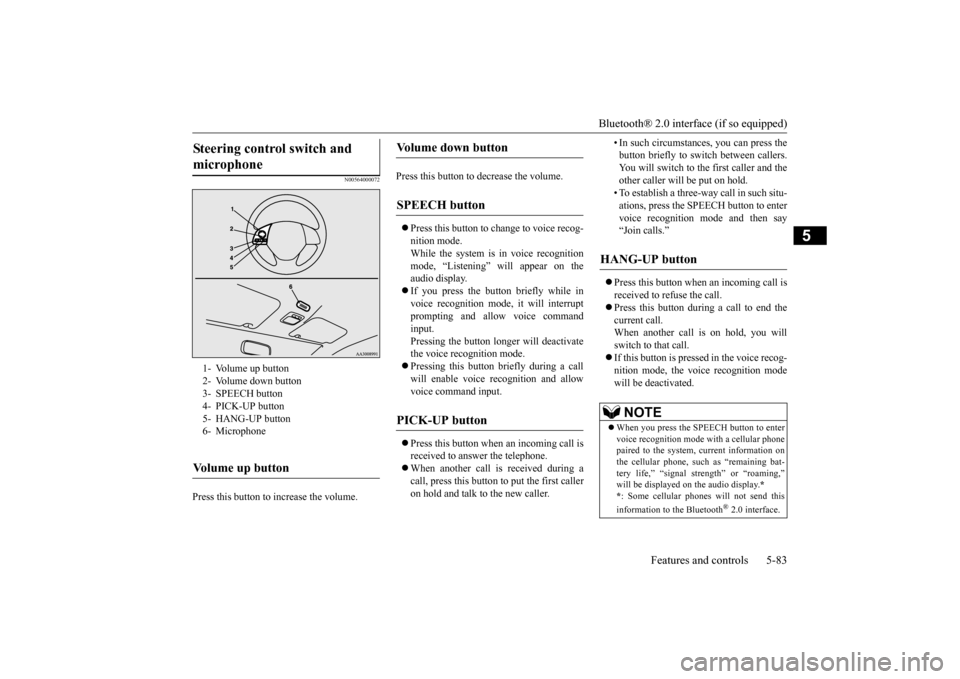
Steering control switch and microphone
1- Volume up button 2- Volume down button 3- SPEECH button4- PICK-UP button 5- HANG-UP button 6- MicrophoneVolume up button
Volume down button
SPEECH button
PICK-UP button
HANG-UP button
NOTE
When you press the SPEECH button to enter voice recognition mode
with a cellular phone
paired to the system, current information on the cellular phone, such as “remaining bat-tery life,” “signal st
rength” or “roaming,”
will be displayed on the audio display.
*
* : Some cellular phones
will not send this
information to the Bluetooth
® 2.0 interface.
BK0212400US.book 83 ページ 2014年4月1日 火曜日 午後2時21分
Page 174 of 300
Vehicle preparatio
n before driving
Driving safety 6-3
6
N00629000702
For a safer and more enjoyable trip, always check for the following: Before starting the vehicle, make certain that you and all passengers are seated andwearing their seat
belts properly (with
children in the rear seat, in appropriate restraints), and that
all the doors and the
liftgate are locked.
Move the driver’s seat as far backward as possible, while keeping good visibility,and good control of the steering wheel, brakes, accelerator, and controls. Check the instrument panel indicators and multi-information display for any possible prob- lem. Similarly, the front
passenger seat should
also be moved as fa
r back as possible.
Make sure that infants and small children are properly restrained in accordance with all laws and regulations.
Check these by selectin
g the defroster mode,
and set the blower switch on high. You should be able to feel the air blowing against thewindshield. Refer to “Defrosti
ng or defogging (wind-
shield, door windows)” on page 7-10, 7-16. Check all the tires for heavy tread wear or uneven wear patterns. Look for stones, nails,glass, or other objects
stuck in the tread. Look
for any tread cuts or
sidewall cracks. Check
the wheel nuts for tightness, and the tires(including spare tire) for proper pressure.
WA R N I N G If a floor mat is the
wrong size or is not
properly installed, it can interfere with theoperation of the pedals. Interference withthe pedals can cause unintended accelera- tion and/or increase
d stopping distances
resulting in a cras
h and injury. Always
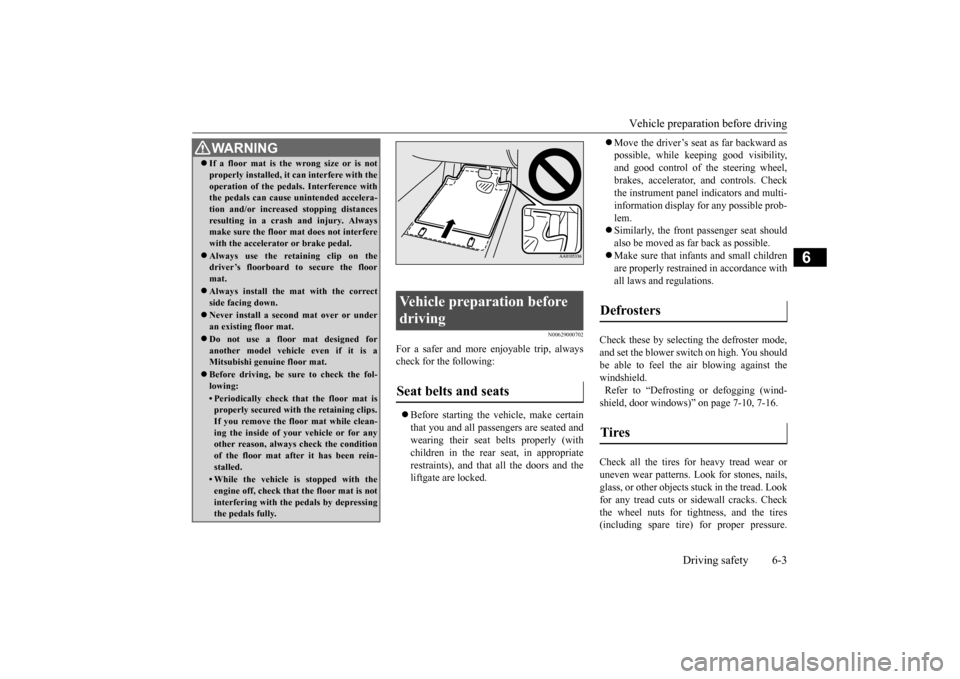
make sure the floor mat does not interfere with the accelerator or brake pedal. Always use the retaining clip on the driver’s floorboard to secure the floor mat. Always install the mat with the correct side facing down. Never install a second mat over or under an existing floor mat. Do not use a floor mat designed for another model vehicle even if it is aMitsubishi genu
ine floor mat.
Before driving, be sure to check the fol- lowing:• Periodically check that the floor mat isproperly secured with the retaining clips. If you remove the fl
oor mat while clean-
ing the inside of you
r vehicle or for any
other reason, always
check the condition
of the floor mat afte
r it has been rein-
stalled.• While the vehicle is stopped with theengine off, check that
the floor mat is not
interfering with the pedals by depressing the pedals fully.
Vehicle preparation before driving Seat belts and seats
Defrosters Tires
BK0212400US.book 3 ページ 2014年4月1日 火曜日 午後2時21分
Page 192 of 300
Automatic air conditioning (if so equipped)
Comfort controls 7-11
7
N00731500301
The air conditioning can only be used
while the engine is running.
N00711801624
Automatic air conditioning
(if so equipped)
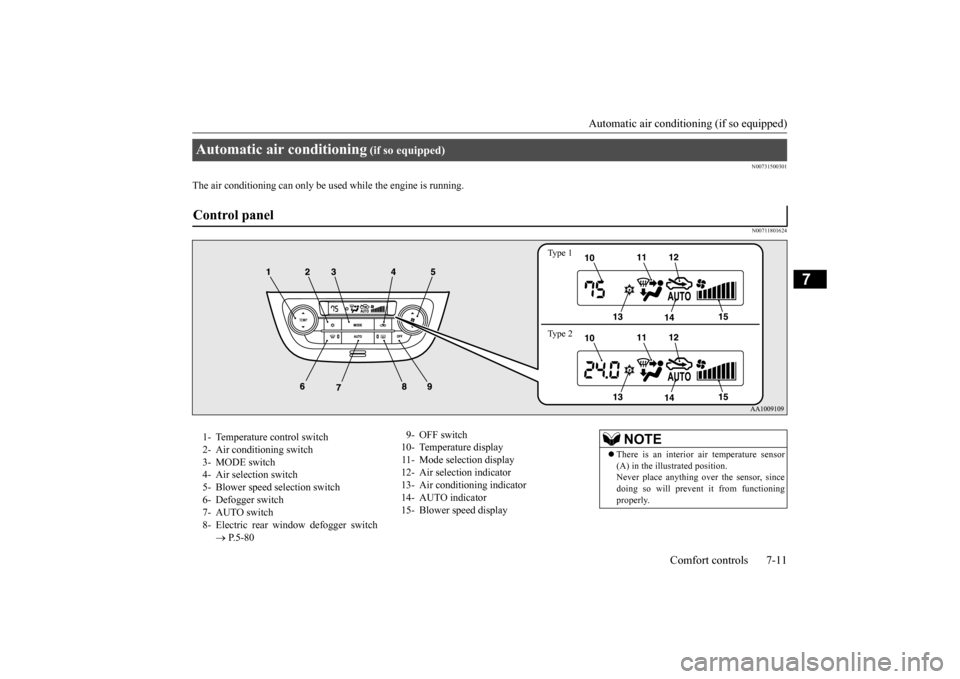
Control panel
Ty p e 1 Ty p e 2
1- Temperature control switch 2- Air conditioning switch 3- MODE switch4- Air selection switch 5- Blower speed
selection switch
6- Defogger switch7- AUTO switch 8- Electric rear window defogger switch
P.5-80
9- OFF switch 10- Temperature display 11- Mode selection display 12- Air selection indicator13- Air conditioning indicator 14- AUTO indicator 15- Blower speed display
NOTE
There is an interior air temperature sensor (A) in the illustrated position. Never place anything ove
r the sensor, since
doing so will prevent
it from functioning
properly.
BK0212400US.book 11 ページ 2014年4月1日 火曜日 午後2時21分
Page 193 of 300
Automatic air conditioning (if so equipped) 7-12 Comfort controls
7
N00736900179
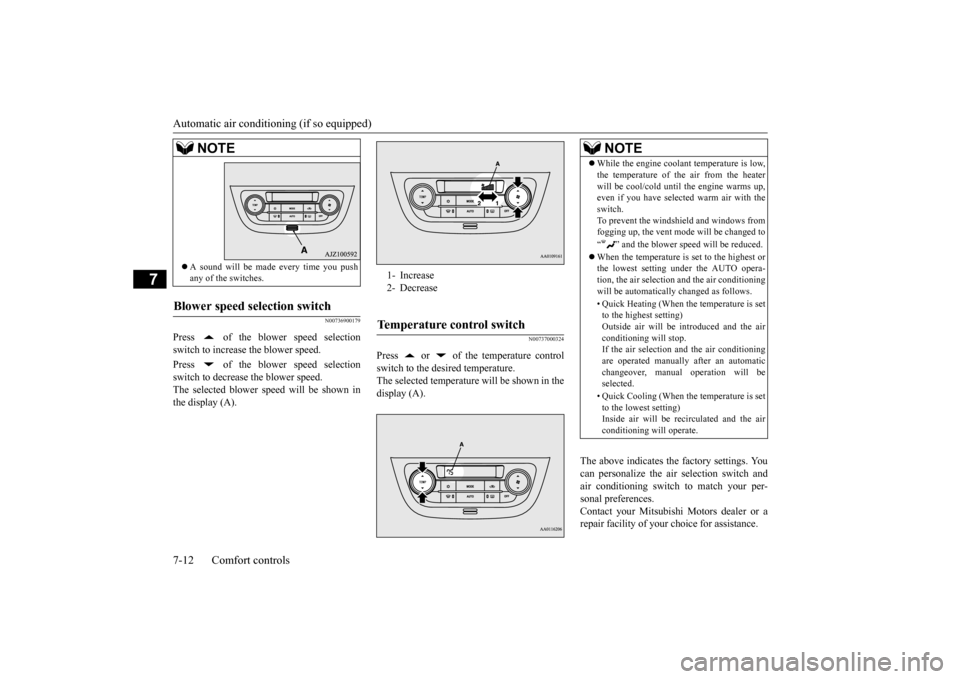
Press of the blower speed selection switch to increase the blower speed. Press of the blower speed selection switch to decrease the blower speed.The selected blower sp
eed will be shown in
the display (A).
N00737000324
Press or of the temperature controlswitch to the desired temperature. The selected temperature will be shown in thedisplay (A).
The above indicates the
factory settings. You
can personalize the air
selection switch and
air conditioning switch to match your per- sonal preferences. Contact your Mitsubishi Motors dealer or arepair facility of your choice for assistance.
A sound will be made every time you push any of the switches.
Blower speed selection switch
NOTE
1- Increase 2- DecreaseTemperature control switch
NOTE
While the engine coolant temperature is low, the temperature of the air from the heaterwill be cool/cold until
the engine warms up,
even if you have selected warm air with the switch. To prevent the windshield and windows fromfogging up, the vent mode will be changed to “ ” and the blower sp
eed will be reduced.
When the temperature is set to the highest or the lowest setting under the AUTO opera- tion, the air selection
and the air conditioning
will be automatically changed as follows. • Quick Heating (When th
e temperature is set
to the highest setting) Outside air will be introduced and the air conditioning will stop.If the air selection
and the air conditioning
are operated ma
nually after an automatic
changeover, manual
operation will be
selected. • Quick Cooling (When th
e temperature is set
to the lowest setting) Inside air will be recirculated and the air conditioning wi
ll operate.
BK0212400US.book 12 ページ 2014年4月1日 火曜日 午後2時21分
Page 194 of 300
Automatic air conditioning (if so equipped)
Comfort controls 7-13
7
Refer to “Personalizi
ng the air conditioning
switch (Changing the function setting)” onpage7-15. Refer to “Personalizing the air selection (Changing the function setting)” onpage7-14.
N00737100208
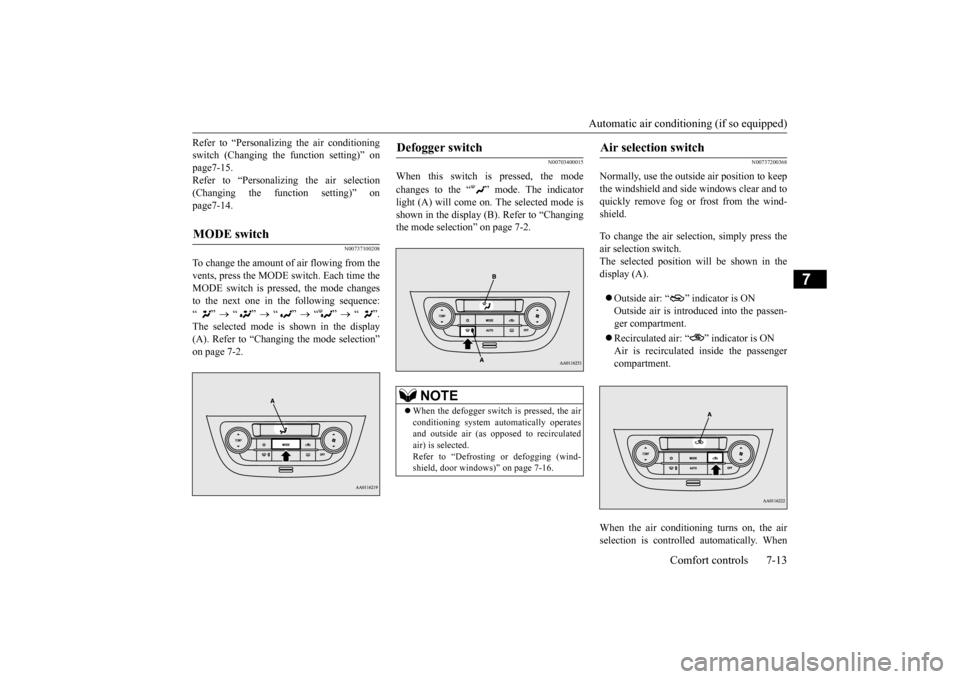
To change the amount of air flowing from the vents, press the MODE switch. Each time the MODE switch is pressed, the mode changesto the next one in the following sequence: “”
“”
“”
“”
“”.
The selected mode is shown in the display (A). Refer to “Changing the mode selection” on page 7-2.
N00703400015
When this switch is pressed, the mode changes to the “ ” mode. The indicator light (A) will come on. The selected mode is shown in the display (B). Refer to “Changingthe mode selection” on page 7-2.
N00737200368
Normally, use the outside
air position to keep
the windshield and side
windows clear and to
quickly remove fog or frost from the wind-shield. To change the air selection, simply press the air selection switch. The selected position will be shown in thedisplay (A). Outside air: “ ” indicator is ON Outside air is introduced into the passen- ger compartment. Recirculated air: “ ” indicator is ON Air is recirculated
inside the passenger
compartment.
When the air conditioning turns on, the air selection is controlled automatically. When
MODE switch
Defogger switch
NOTE
When the defogger switch is pressed, the air conditioning system au
tomatically operates
and outside air (as oppos
ed to recirculated
air) is selected.Refer to “Defrostin
g or defogging (wind-
shield, door windows)” on page 7-16.
Air selection switch
BK0212400US.book 13 ページ 2014年4月1日 火曜日 午後2時21分
Page 195 of 300
Automatic air conditioning (if so equipped) 7-14 Comfort controls
7
the air conditioning turns
off, the air selection
automatically goes back to the outside airposition. If high cooling performanc
e is desired, or if
the outside air is dusty
or contaminated in
some way, use the
recirculat
ion position.
Switch to the outside
air position every now
and then to keep the windows from foggingup.
N00760000089
You can change the following functions to match your preference. Enable automatic air control: When the AUTO switch is pressed, the airselection switch will also be automatically controlled.
Disable automatic air control: Even when the AUTO switch is pressed,the air selection switch will not be auto- matically controlled. Changing the settings Press the air selecti
on switch for about 10
seconds or longer. When the setting has changed, the system will beep and the “ ” indicator will flash. • When the setting has changed from enabled to disabled,the system will beep three times and the indicator will flash three times. • When the setting has changed from dis-abled to enabled, the system will beep two times and the indicator will flash three times.
N00737300343
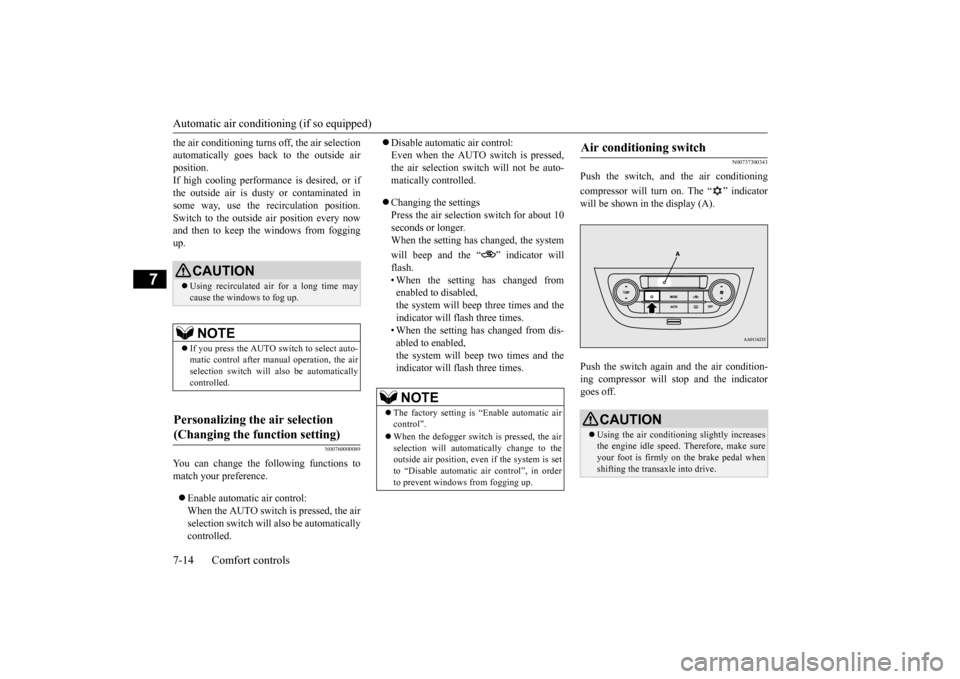
Push the switch, and the air conditioning compressor will turn on. The “ ” indicator will be shown in the display (A). Push the switch again and the air condition- ing compressor will stop and the indicatorgoes off.
CAUTION Using recirculated air for a long time may cause the windows to fog up.NOTE
If you press the AUTO swit
ch to select auto-
matic control after manual operation, the air selection switch will also be automatically controlled.
Personalizing the air selection (Changing the function setting)
NOTE
The factory setting is
“Enable automatic air
control”. When the defogger switch is pressed, the air selection will automatically change to the outside air position, even if the system is setto “Disable automatic air control”, in order to prevent windows from fogging up.
Air conditioning switch
CAUTION Using the air conditioni
ng slightly increases
the engine idle
speed. Therefore, make sure
your foot is firmly on the brake pedal when shifting the transaxle into drive.
BK0212400US.book 14 ページ 2014年4月1日 火曜日 午後2時21分
Page 196 of 300
Automatic air conditioning (if so equipped)
Comfort controls 7-15
7
N00759800090
You can change the following functions to match your preference. Enable automatic ai
r conditioning control:
When the AUTO switch is pressed, or when the temperature control switch has been set to the minimum temperature, the air conditioning switch
is automatically
controlled. Disable automatic air conditioning con- trol: The air conditioning switch is not auto- matically controlled, unless the air condi-tioning switch is used. Changing the settings Press the air conditi
oning switch for about
10 seconds or longer.When the setting has changed, the system will beep and the “ ” indicator will flash. • When the setting has changed fromenabled to disabled, the system will beep three times and the indicator will flash three times.• When the setting has changed from dis- abled to enabled,
the system will beep two times and the indicator will flash three times.
N00703500016
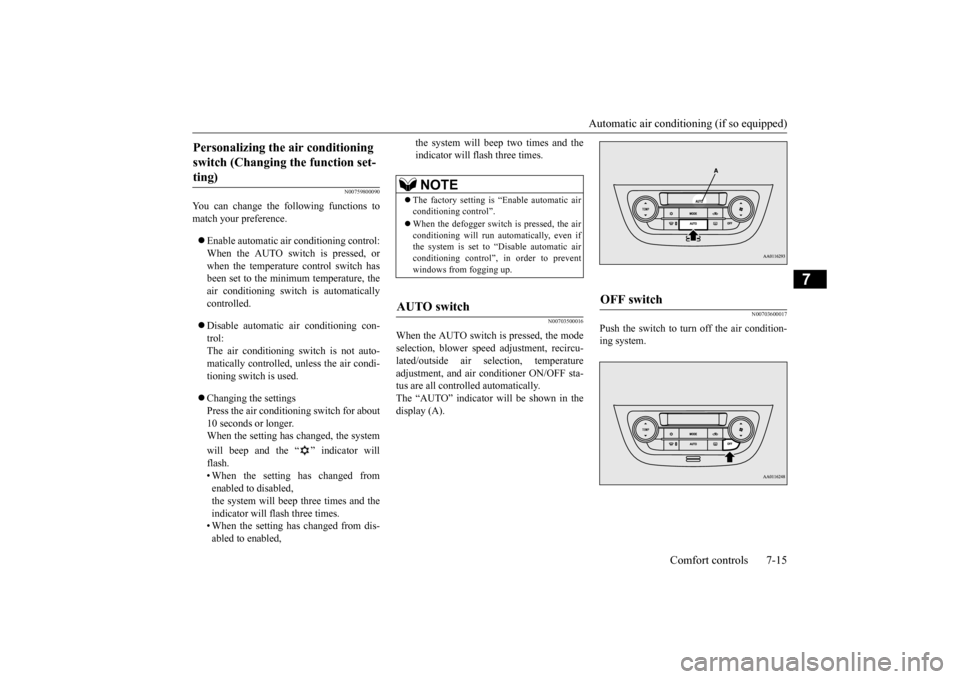
When the AUTO switch is pressed, the modeselection, blower spee
d adjustment, recircu-
lated/outside air selection, temperature adjustment, and air conditioner ON/OFF sta-tus are all controlled automatically. The “AUTO” indicator
will be shown in the
display (A).
N00703600017
Push the switch to turn off the air condition-ing system.
Personalizing the air conditioning switch (Changing the function set-ting)
NOTE
The factory setting is “Enable automatic air conditioning control”. When the defogger switch is pressed, the air conditioning will run au
tomatically, even if
the system is set to “Disable automatic air conditioning control”, in order to preventwindows from fogging up.
AUTO switch
OFF switch
BK0212400US.book 15 ページ 2014年4月1日 火曜日 午後2時21分