lights MITSUBISHI MIRAGE G4 2018 (in English) User Guide
[x] Cancel search | Manufacturer: MITSUBISHI, Model Year: 2018, Model line: MIRAGE G4, Model: MITSUBISHI MIRAGE G4 2018Pages: 263, PDF Size: 37.9 MB
Page 74 of 263
Free-hand Advanced Securi
ty Transmitter (F.A.S.T.-key) (if so equipped)
Features and controls 5-11
5
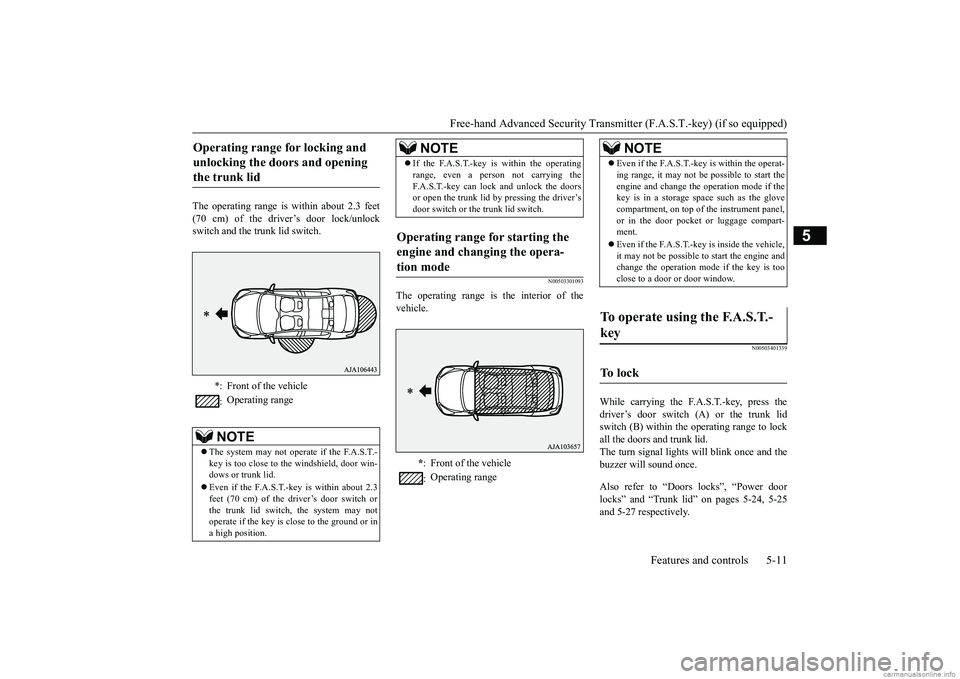
The operating range is
within about 2.3 feet
(70 cm) of the driver’s door lock/unlockswitch and the trunk lid switch.
N00503301093
The operating range is the interior of thevehicle.
N00503401339
While carrying the F.A.S.T.-key, press thedriver’s door switch (A) or the trunk lidswitch (B) within the operating range to lock all the doors and trunk lid. The turn signal lights will blink once and thebuzzer will sound once. Also refer to “Doors locks”, “Power door locks” and “Trunk lid” on pages 5-24, 5-25 and 5-27 respectively.
Operating range for locking and unlocking the doors and opening the trunk lid
*: Front of the vehicle : Operating rangeNOTE
The system may not operate if the F.A.S.T.- key is too close to th
e windshield, door win-
dows or trunk lid. Even if the F.A.S.T.-key is within about 2.3 feet (70 cm) of the driver’s door switch orthe trunk lid switch, the system may not operate if the key is close to the ground or in a high position.
If the F.A.S.T.-key is within the operating range, even a person not carrying theF.A.S.T.-key can lock and unlock the doorsor open the trunk lid by pressing the driver’s door switch or the trunk lid switch.
Operating range for starting the engine and changing the opera-tion mode
* : Front of the vehicle : Operating rangeNOTE
NOTE
Even if the F.A.S.T.-key is within the operat- ing range, it may not be possible to start theengine and change the
operation mode if the
key is in a storage space such as the glove compartment, on top of the instrument panel, or in the door pocket or luggage compart-ment. Even if the F.A.S.T.-key is inside the vehicle, it may not be possible to start the engine and change the operation mode if the key is too close to a door or door window.
To operate using the F.A.S.T.- key
To l o c k
BK0249600US.book 11 ページ 2017年4月20日 木曜日 午後1時36分
Page 75 of 263
Free-hand Advanced
Security Transmitter (F.A.S
.T.-key) (if so equipped)
5-12 Features and controls
5
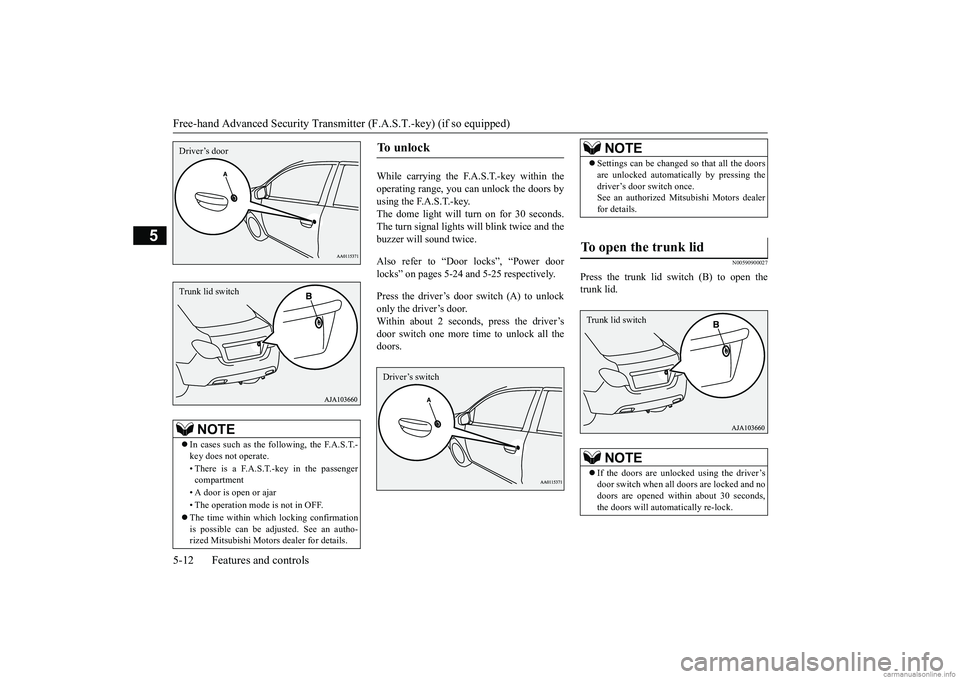
While carrying the F.A.S.T.-key within the operating range, you can unlock the doors by using the F.A.S.T.-key.The dome light will turn on for 30 seconds. The turn signal lights will blink twice and the buzzer will
sound twice.
Also refer to “Door locks”, “Power door locks” on pages 5-24 and 5-25 respectively. Press the driver’s door switch (A) to unlock only the driver’s door.Within about 2 seconds, press the driver’s door switch one more time to unlock all the doors.
N00590900027
Press the trunk lid switch (B) to open thetrunk lid.
NOTE
In cases such as the following, the F.A.S.T.- key does not operate. • There is a F.A.S.T.-key in the passenger compartment • A door is open or ajar • The operation mode
is not in OFF.
The time within which locking confirmation is possible can be adjusted. See an autho- rized Mitsubishi Motors
dealer for details.
Driver’s doorTrunk lid switch
To u n l o c k
Driver’s switch
NOTE
Settings can be changed so that all the doors are unlocked automati
cally by pressing the
driver’s door switch once.See an authorized Mi
tsubishi Motors dealer
for details.
To open the trunk lid
NOTE
If the doors are unlocked using the driver’s door switch when all
doors are locked and no
doors are opened within about 30 seconds,the doors will automatically re-lock.Trunk lid switch
BK0249600US.book 12 ページ 2017年4月20日 木曜日 午後1時36分
Page 76 of 263
Free-hand Advanced Securi
ty Transmitter (F.A.S.T.-key) (if so equipped)
Features and controls 5-13
5
N00513500088
To prevent vehicle theft, no F.A.S.T.-keys other than those regist
ered in advance can be
used to start the engi
ne. (Electronic immobi-
lizer function)
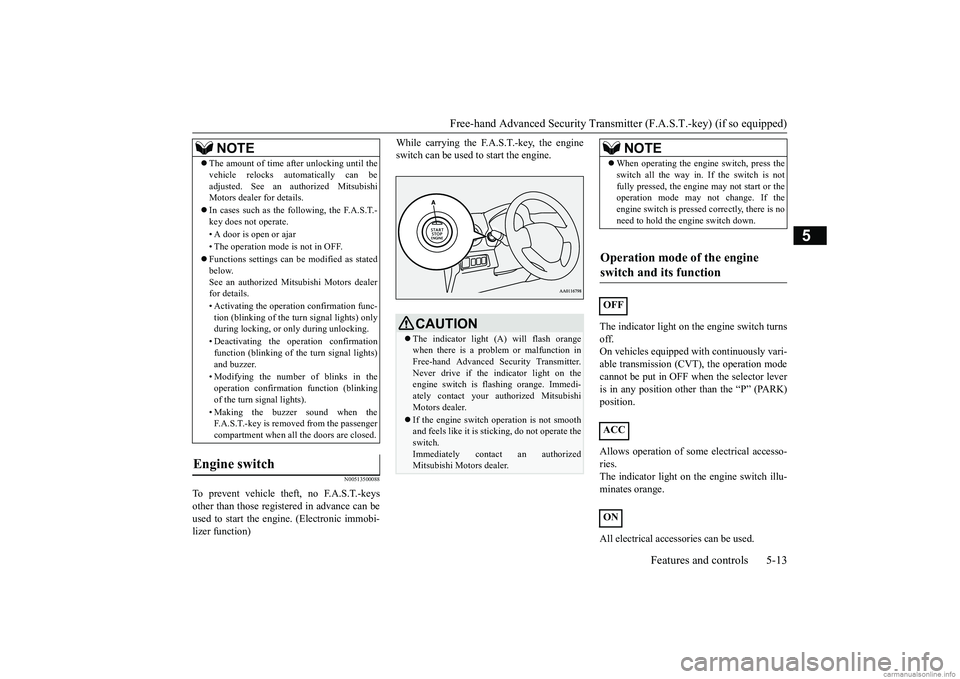
While carrying the F.A.S.T.-key, the engine switch can be used
to start the engine.
The indicator light on the engine switch turns off.On vehicles equipped w
ith continuously vari-
able transmission (CVT), the operation mode cannot be put in OFF when the selector leveris in any position other than the “P” (PARK) position. Allows operation of some
electrical accesso-
ries.The indicator light on th
e engine switch illu-
minates orange. All electrical accessories can be used.
The amount of time after unlocking until the vehicle relocks automatically can beadjusted. See an authorized MitsubishiMotors dealer for details. In cases such as the following, the F.A.S.T.- key does not operate. • A door is open or ajar• The operation mode is not in OFF. Functions settings can
be modified as stated
below. See an authorized Mitsubishi Motors dealerfor details. • Activating the operation confirmation func- tion (blinking of the turn signal lights) only during locking, or only during unlocking. • Deactivating the operation confirmation function (blinking of the turn signal lights) and buzzer. • Modifying the number of blinks in the operation confirmati
on function (blinking
of the turn signal lights). • Making the buzzer sound when the F.A.S.T.-key is removed from the passenger compartment when all
the doors are closed.
Engine switch
NOTE
CAUTIONThe indicator light (A) will flash orange when there is a problem or malfunction in Free-hand Advanced Se
curity Transmitter.
Never drive if the i
ndicator light on the
engine switch is fl
ashing orange. Immedi-
ately contact your authorized MitsubishiMotors dealer. If the engine switch
operation is not smooth
and feels like it is stic
king, do not operate the
switch. Immediately contac
t an authorized
Mitsubishi Motors dealer.
NOTE
When operating the engi
ne switch, press the
switch all the way in. If the switch is notfully pressed, the engine may not start or theoperation mode may
not change. If the
engine switch is presse
d correctly, there is no
need to hold the e
ngine switch down.
Operation mode of the engine switch and its function
OFF ACC ON
BK0249600US.book 13 ページ 2017年4月20日 木曜日 午後1時36分
Page 80 of 263
Free-hand Advanced Securi
ty Transmitter (F.A.S.T.-key) (if so equipped)
Features and controls 5-17
5
1. Make sure all occupants are properly seated with seat belts fastened.2. Make sure the parking brake is applied. 3. Press and hold the brake pedal down firmly with your right foot. 4. Press and hold the clut
ch pedal all the way
down (manual transaxle). 5. On vehicles equipped with manual trans- axle, place the gearshift lever in the “N” (Neutral) position.On vehicles equippe
d with continuously
variable transmission (CVT), make sure the selector lever is in the “P” (PARK)position.
6. Press the engine switch. 7. Confirm that all warning lights and warn-ing displays are functioning properly.
After several attempts
, you may experience
that the engine still does not start. 1. Make sure that all electric devices, such as lights, air conditi
oning blower and rear
window defogger, are turned off.
2. While depressing the brake pedal {contin- uously variable transmission (CVT)} orthe clutch pedal (manual transaxle), press the accelerator peda
l halfway and hold it
there, then crank the engine. Release theaccelerator pedal, immediately after the engine starts. 3. If the engine still wi
ll not start, the engine
could be flooded with too much gasoline. While depressing the brake pedal (CVT) or the clutch pedal (manual transaxle), push the accelerator pedal all the way down and hold it there, then press theengine switch to crank the engine. If the engine does not start after 5 to 6 seconds, push the engine switch to stop crankingthe engine, and release the accelerator pedal. Put the operation mode in OFF. Wait a few seconds, and then press theengine switch to cr
ank the engine again
while depressing the brake pedal (CVT) or the clutch pedal (manual transaxle), butdo not push the accelerator pedal. If the engine fails to start, repeat these proce- dures. If the engine sti
ll will not start, con-
tact your local Mitsubishi Motors dealer or a repair facility of your choice for assistance.
Startability of conti
nuously variable trans-
mission (CVT) vehicles with an ambient temperature of -4 °F (-20 °C) or lower
NOTE
After the engine has not started for a while, the brake pedal effort needed to start the engine may become grea
ter. If this occurs,
depress the brake pedal more firmly than usual.NOTE
For vehicles equipped with a manual trans- axle, the engine will not start unless the clutch pedal is fully depressed (Clutch inter- lock). This is a safety feature.
NOTE
On vehicles equippe
d with continuously
variable transmission (C
VT), the engine can
only be started when th
e selector lever is in
the “P” (PARK) or “N” (NEUTRAL) posi- tion. For safety reasons, the engine should bestarted when the selector lever is in the “P” (PARK) position in which the driving wheels lock.NOTE
Minor noises may be he
ard on engine start-
up. These will disappear
as the engine warms
up.
When the engine is hard to start
BK0249600US.book 17 ページ 2017年4月20日 木曜日 午後1時36分
Page 84 of 263
Free-hand Advanced Securi
ty Transmitter (F.A.S.T.-key) (if so equipped)
Features and controls 5-21
5
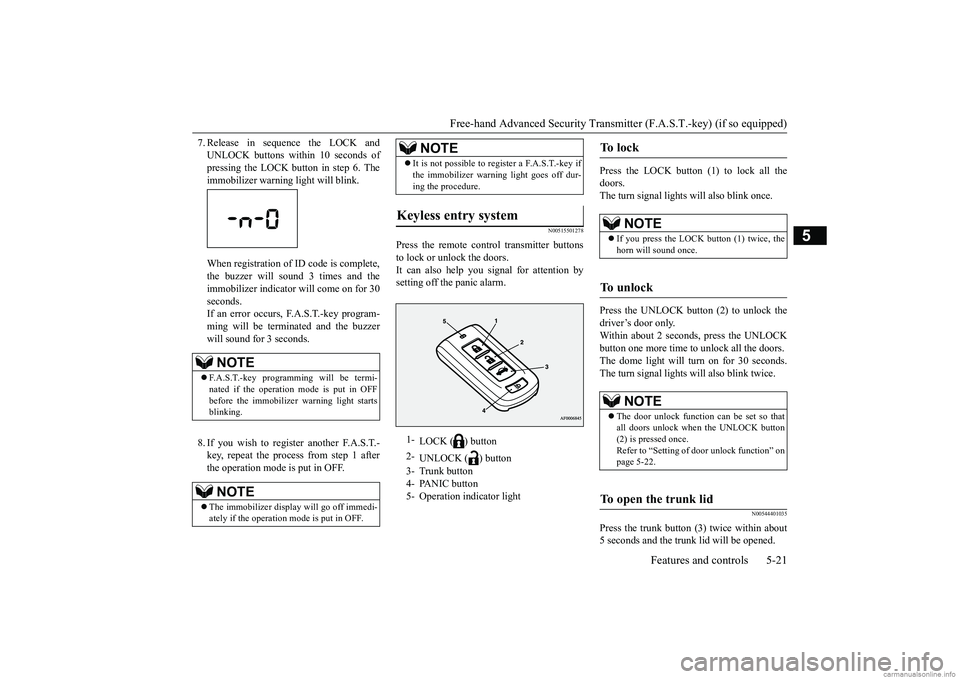
7. Release in sequence the LOCK and UNLOCK buttons within 10 seconds ofpressing the LOCK button in step 6. The immobilizer warni
ng light will blink.
When registration of ID code is complete, the buzzer will s
ound 3 times and the
immobilizer indicator will come on for 30 seconds. If an error occurs, F.A.S.T.-key program-ming will be terminated and the buzzer will sound for 3 seconds. 8. If you wish to register another F.A.S.T.- key, repeat the proc
ess from step 1 after
the operation mode is put in OFF.
N00515501278
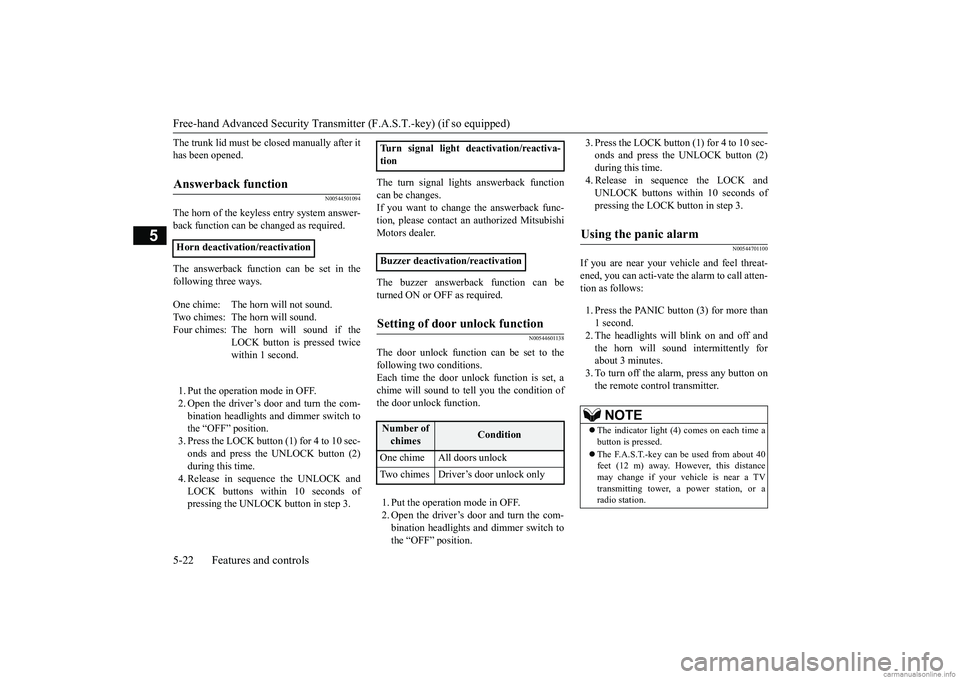
Press the remote control transmitter buttons to lock or unlock the doors. It can also help you signal for attention by setting off the panic alarm.
Press the LOCK button (1) to lock all the doors. The turn signal lights
will also blink once.
Press the UNLOCK button (2) to unlock the driver’s door only. Within about 2 seconds, press the UNLOCKbutton one more time to
unlock all the doors.
The dome light will turn on for 30 seconds. The turn signal lights will also blink twice.
N00544401035
Press the trunk button (3) twice within about5 seconds and the trunk
lid will be opened.
NOTE
F.A.S.T.-key programming will be termi- nated if the operation mode is put in OFF before the immobilizer warning light starts blinking.NOTE
The immobilizer displa
y will go off immedi-
ately if the operation mode is put in OFF.
It is not possible to register a F.A.S.T.-key if the immobilizer warning light goes off dur-ing the procedure.
Keyless entry system
1-
LOCK ( ) button
2-
UNLOCK ( ) button
3- Trunk button 4- PANIC button 5- Operation indicator light
NOTE
To l o c k
NOTE
If you press the LOCK button (1) twice, the horn will sound once.
To u n l o c k
NOTE
The door unlock function can be set so that all doors unlock when the UNLOCK button (2) is pressed once.Refer to “Setting of
door unlock function” on
page 5-22.
To open the trunk lid
BK0249600US.book 21 ページ 2017年4月20日 木曜日 午後1時36分
Page 85 of 263
Free-hand Advanced
Security Transmitter (F.A.S
.T.-key) (if so equipped)
5-22 Features and controls
5
The trunk lid must be cl
osed manually after it
has been opened.
N00544501094
The horn of the keyless entry system answer-back function can be changed as required. The answerback function can be set in the following three ways. 1. Put the operation mode in OFF. 2. Open the driver’s door and turn the com- bination headlights and dimmer switch to the “OFF” position.3. Press the LOCK button (1) for 4 to 10 sec- onds and press the UNLOCK button (2) during this time.4. Release in sequence the UNLOCK and LOCK buttons within 10 seconds of pressing the UNLOCK button in step 3.
The turn signal lights answerback function can be changes. If you want to change the answerback func- tion, please contact an
authorized Mitsubishi
Motors dealer. The buzzer answerback function can be turned ON or OFF as required.
N00544601138
The door unlock function can be set to thefollowing two conditions.Each time the door unloc
k function is set, a
chime will sound to tell you the condition of the door unlock function. 1. Put the operation mode in OFF. 2. Open the driver’s door and turn the com- bination headlights and dimmer switch tothe “OFF” position.
3. Press the LOCK button (1) for 4 to 10 sec- onds and press the UNLOCK button (2)during this time. 4. Release in sequence the LOCK and UNLOCK buttons within 10 seconds ofpressing the LOCK button in step 3.
N00544701100
If you are near your vehicle and feel threat- ened, you can acti-vate the alarm to call atten- tion as follows: 1. Press the PANIC button (3) for more than 1 second. 2. The headlights will blink on and off and the horn will sound intermittently forabout 3 minutes. 3. To turn off the alarm, press any button on the remote control transmitter.
Answerback function
Horn deactivation/reactivation One chime: The horn will not sound. Two chimes: The horn will sound.Four chimes: The hor
n will sound if the
LOCK button is pressed twice within 1 second.
Turn signal light deactivation/reactiva-tion Buzzer deactivation/reactivationSetting of door unlock function
Number of chimes
Condition
One chime All doors unlock Two chimes Driver’s door unlock only
Using the panic alarm
NOTE
The indicator light (4) comes on each time a button is pressed. The F.A.S.T.-key can be used from about 40 feet (12 m) away. However, this distance may change if your vehicle is near a TVtransmitting tower, a power station, or a radio station.
BK0249600US.book 22 ページ 2017年4月20日 木曜日 午後1時36分
Page 97 of 263
Inside rearview mirror 5-34 Features and controls
5
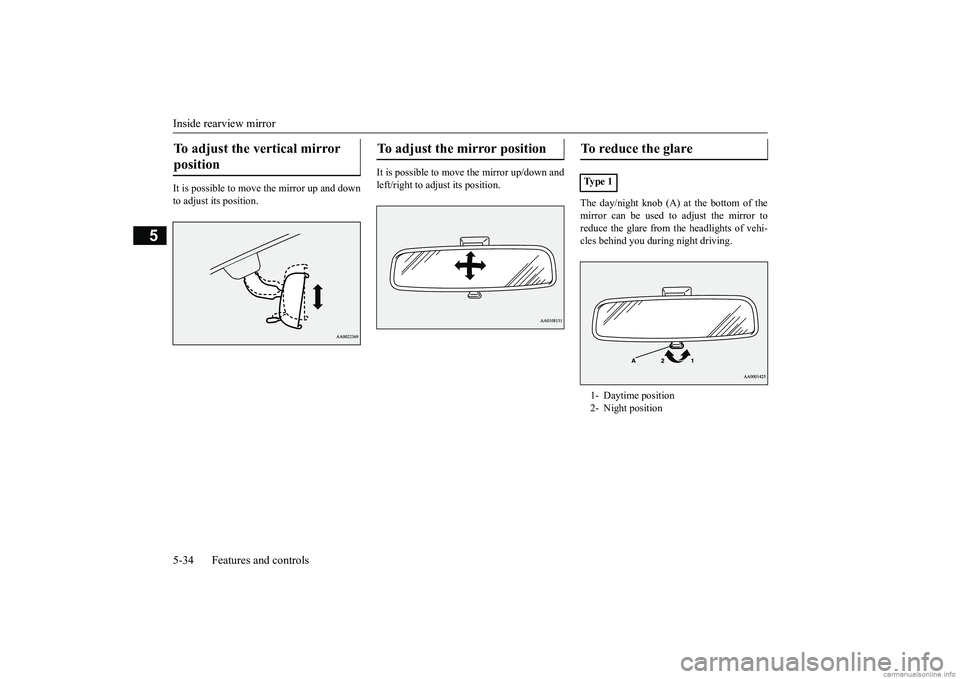
It is possible to move the mirror up and down to adjust its position.
It is possible to move the mirror up/down and left/right to adjust its position.
The day/night knob (A) at the bottom of the mirror can be used to adjust the mirror to reduce the glare from the headlights of vehi- cles behind you during night driving.
To adjust the vertical mirror position
To adjust the mirror position
To reduce the glare Ty p e 1 1- Daytime position 2- Night position
BK0249600US.book 34 ページ 2017年4月20日 木曜日 午後1時36分
Page 98 of 263

Outside rearview mirrors
Features and controls 5-35
5
When the headlights of the vehicles behind you are very bright, the reflection factor ofthe rearview mirror is automatically changed to reduce the glare. Normally, use the automatic mode. When the ignition switch is turn
ed to the “ON” position
or the operation mode is put in ON, the greenindicator (1) illuminat
es and the reflection
factor of the mirror is
automatically changed.
N00512200206
Adjust the outside rearview mirrors only after making any seat adjustme
nts so as to have a
clear view to the rear of the vehicle.
N00549100144
The outside rearview mi
rrors can be adjusted
when the ignition switch or the operation mode is in ON or ACC.Move the lever (A) to the same side as the mirror you wish to adjust. Press the switch (B) to adjust the mirror posi- tion.
Ty p e 2
NOTE
Do not hang items on,
or spray glass cleaner
on the sensors (2), as
reduced sensitivity
could result.
If you want to stop automatic mode, press the switch (3) and the indicator (1) will gooff.To return to automatic mode, press the switch again. Or turn the ignition switch to the “ON” position or put the operation modein ON, after turning the ignition switch to the “LOCK” position or
putting the operation
mode in OFF.
Outside rearview mirrors
WA R N I N G Do not attempt to adjust the outside rear- view mirrors while driving. This can bedangerous. Be sure to adjust the mirrors before driv- ing. Your passenger’s side mirror is convex. The objects you see in
the mirror will look
smaller and farthe
r away than they
appear in a regular flat mirror. Do not use this mirror to estimate the dis- tance of vehicles
following you when
changing lanes.NOTE
To adjust the mirror position L- Left outside mirror adjustment R- Right outside mirror adjustment 1- Up 2- Down 3- Right 4- Left
BK0249600US.book 35 ページ 2017年4月20日 木曜日 午後1時36分
Page 101 of 263
Starting the engine 5-38 Features and controls
5
This model is equipped with an electronically controlled fuel injection system. This is a sys-tem that automatically controls fuel injection. There is usually no need to depress the accel- erator pedal when starting the engine.The starter should not be run for more than 15 seconds at a time. To prevent battery drain, wait a few secondsbetween attempts to restart the engine. 1. Make sure all occupants are properly seated with seat belts fastened.
2. Insert the ignition key. 3. Make sure the parking brake is applied.4. Press and hold the brake pedal down firmly with your right foot. 5. Press and hold the clut
ch pedal all the way
down (manual transaxle). 6. On vehicles equipped with manual trans- axle, place the gearshift lever in the “N” (Neutral) position.On vehicles equippe
d with continuously
variable transmission (CVT), make sure the selector lever is in the “P” (PARK)position.
7. Turn the ignition switch to the “ON” posi- tion and make certain that all warninglights are functioning properly before starting the engine. 8. Turn the ignition switch to the “START”position without pre
ssing the accelerator
pedal. Release the key when the engine starts.
After several attempts
, you may experience
that the engine still does not start. 1. Make sure that all electric devices, such as lights, air conditi
oning blower and rear
window defogger, are turned off. 2. While depressing the brake pedal {contin- uously variable transmission (CVT)} orthe clutch pedal (manual transaxle), press the accelerator peda
l halfway and hold it
there, then crank th
e engine. Release the
accelerator pedal, immediately after the engine starts.
WA R N I N G Never run the engine in
a closed or poorly
ventilated area any lo
nger than is needed
to move your vehicle
out of the area. Car-
bon monoxide gas, wh
ich is odorless and
extremely poisonous, could build up and cause serious injury or death.CAUTION Do not push-start the vehicle.Do not run the engine at high rpms or drive at high speeds until
the engine has had a
chance to warm up. Release the ignition sw
itch as soon as the
engine starts. Otherwis
e, the starter motor
will be damaged.
Starting the engine
NOTE
On vehicles equipped
with manual transaxle,
the starter will not ope
rate unless the clutch
pedal is fully depresse
d (Clutch interlock).
NOTE
On vehicles equipped with CVT, the starter will not operate unless th
e selector lever is in
the “P” (PARK) or “N” (NEUTRAL) posi-tion.For safety reasons, start the engine in the “P” (PARK) position so that the wheels are locked.
NOTE
Minor noises may be he
ard on engine start-
up. These will disappear
as the engine warms
up.
When the engine is hard to start
BK0249600US.book 38 ページ 2017年4月20日 木曜日 午後1時36分
Page 108 of 263
Continuously variable transmission (CVT) (if so equipped)
Features and controls 5-45
5
N00560801095
To gain extra acceleration in “D” (DRIVE) position (when passing an
other vehicle) push
the accelerator to the floor. The CVT will automatically downshift.
For short waiting periods, such as at traffic lights, the vehicle can be
left in selector lever
position and held stati
onary with the service
brake. For longer waiting periods with the engine running, place th
e selector lever in the “N”
(NEUTRAL) position and apply the parking brake, while holding th
e vehicle stationary
with the service brake. Prior to moving off after having stopped the vehicle, make sure that the selector lever is in“D” (DRIVE) position. To park the vehicle, fi
rst bring it to a com-
plete stop, fully engage the parking brake,
Operation of the CVT
CAUTION Before selecting a pos
ition with the engine
running and the vehicl
e stationary, firmly
depress the brake pedal to prevent the vehi- cle from creeping. The vehicle will begin to move as soon as theCVT is engaged, especi
ally when the engine
speed or idle speed is
high, or with the air
conditioning operating.Do not release the brak
e pedal until you are
ready to drive away. Depress the brake pedal
with the right foot at
all times. Using the left foot could cause driver move-ment delay in case of an emergency. To prevent sudden acce
leration, never run
the engine at high rpms when shifting from the “P” (PARK) or “N” (NEUTRAL). Operating the accelerator pedal while the other foot is resting
on the brake pedal will
affect braking efficiency and may cause pre-mature wear of brake pads.
Use the selector lever in the correct shift position in accordance
with driving condi-
tions.Never coast downhill backward in the driv- ing shift position “D” (DRIVE), “Ds” (DOWNSHIFT & SPORTY DRIVING), “L”(LOW) or coast forward in the “R” (REVERSE) position. Engine stopping and in
creased brake pedal
and steering effort could
lead to an accident.
Do not rev the engine
with the brake pedal
pressed when the vehicle is stationary. This can damage the CVT. Also, when you depress
the accelera
tor pedal
while holding down the brake pedal with the selector lever in th
e “D” (DRIVE) position,
the engine revolutions
may not rise as high
as when performing the same operation with the selector lever in the “N” (NEUTRAL) position.
Passing acceleration
CAUTION
Waiting
CAUTION To avoid transmission overheating, never try to keep your vehicle stationary on a hill by using the accelerator
pedal. Always apply
the parking brake and/or service brake. Do not rev the engine unnecessarily while the vehicle is stationary. Unexpected acceler-ation may occur if the se
lector lever is in a
position other than “P” (PARK) or “N” (NEUTRAL).
Parking
BK0249600US.book 45 ページ 2017年4月20日 木曜日 午後1時36分